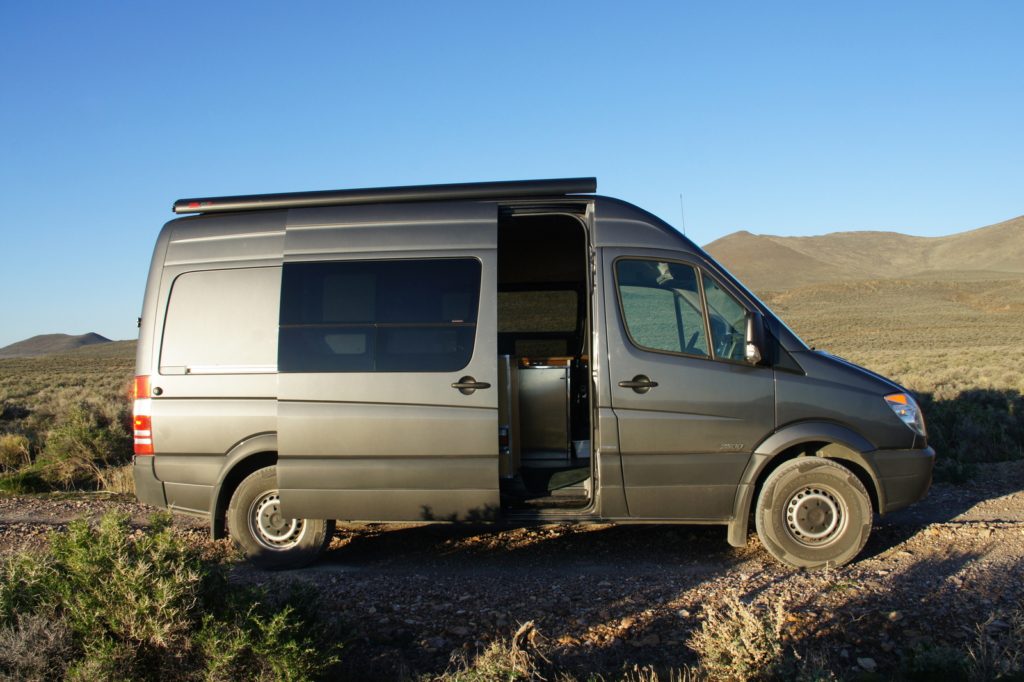
Looking back, I can’t believe we used our van for a year without a door stop for the sliding passenger door. It’s one of my favorite tweaks for the van! Most of the Sprinters or other camper vans don’t have this as a stock feature unless you ordered it new. Ours didn’t, and we decided it was worth looking into, especially with one of our cabinets blocking half the door space.
If you don’t have a door stop installed at the factory, it’s a couple hundred bucks +$120/hr for a shop to do it OR a giant pain to retrofit. I opted for the fun of a DIY version.
Design and how it works
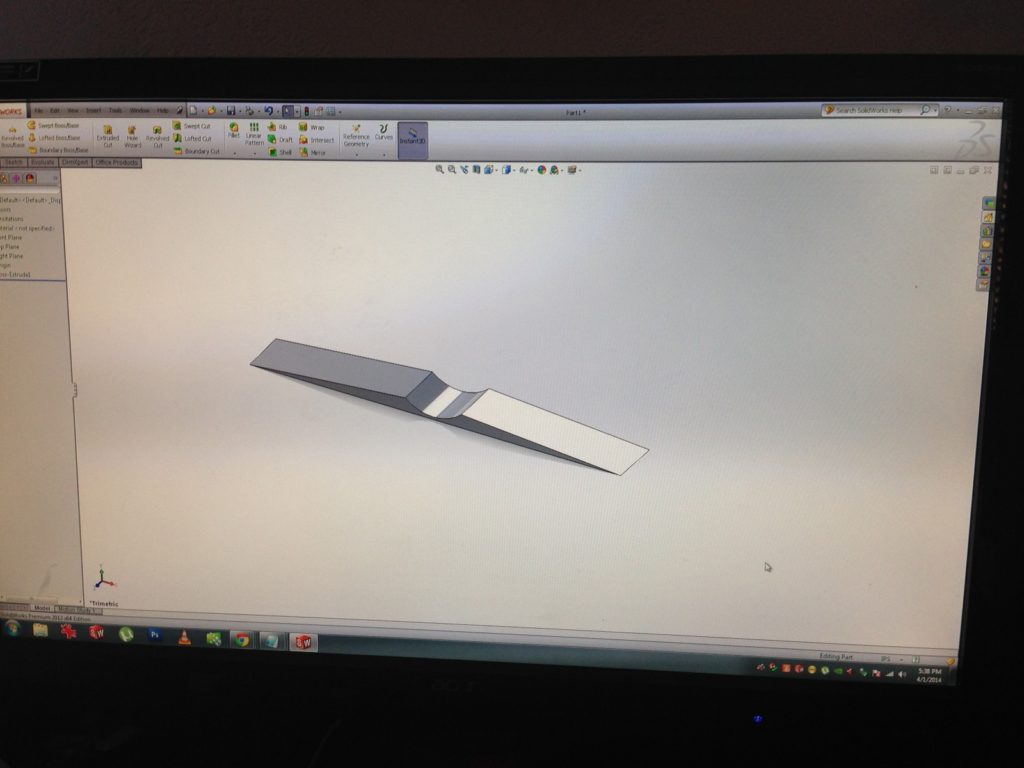
My rad brother-in-law Jesse and I designed a two-sided ramp with a divot for the passenger slider wheel in it using a CNC machine. I used old engineering skills from bygone days to sketch out a design and then we used CAD to model the door stop in Solidworks, a 3D design program.
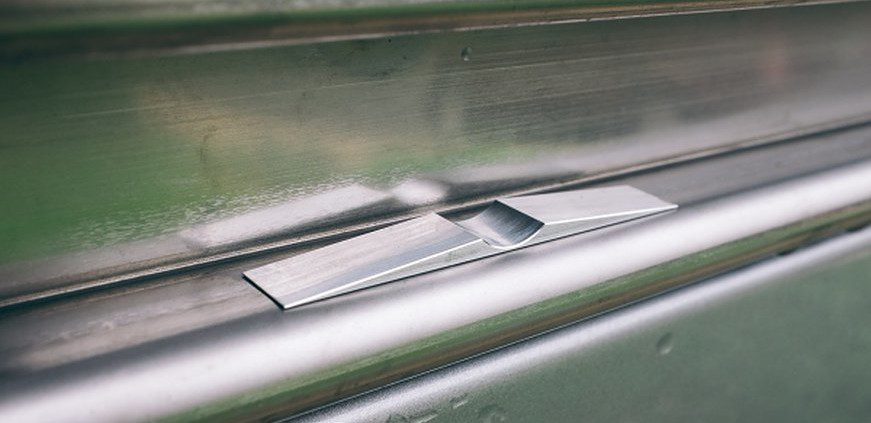
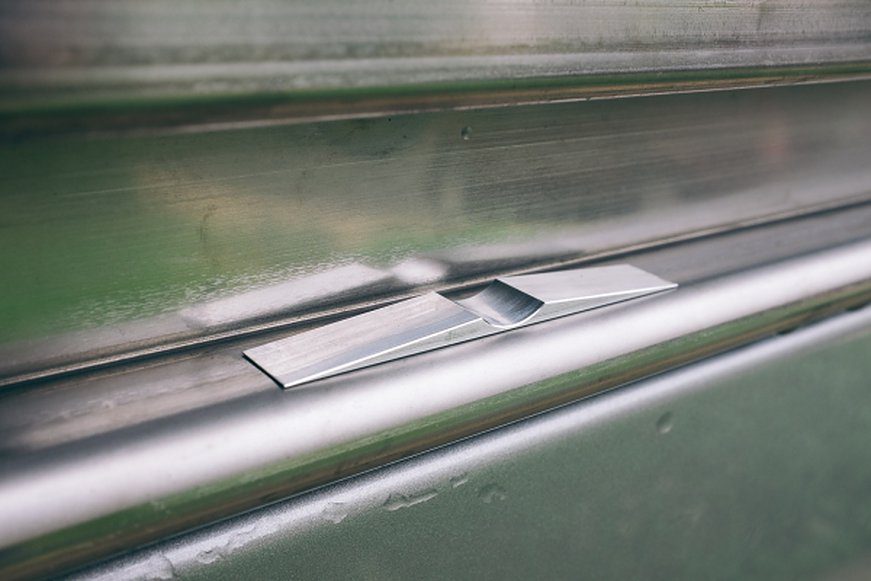
This ramp rests right in the main track that the passenger door wheel slides over and works great! The divot is sized to fit the wheel of the passenger door. The door stop is just 3″ long, 1/4″ wide and 1/10″ tall, and attaches with JB Weld. When installed, it provides a perfect way to hold the door in place, even when you’re parked at an angle.
Plus, you get to choose where you want to install it – anywhere on the sliding surface of the passenger slider track, so it should work with a RAM Promaster, Ford Transit, or any van with a metal sliding surface that the door rolls on.
Being able to hold the door only 1/3 open keeps things more private, makes it so the door doesn’t slide all the way shut or open, and keeps wind gusts out while letting a breeze in. A small, easy fix that we love.By the way, dig these kinds of posts? Sign up for the free Traipsing About newsletter for van talk and outdoor adventures.
The door stop installed on the van rail slide. (Photo from LivingtheVantasy.com.)
How to buy one
Dozens of people have contacted me via email to buy one, but it’s not something I’m interested in. Not to worry: Jesse put up a simple order page here, plus wrote an installation manual. He ships the stops with JB Weld, so it shouldn’t take more than 5-10 minutes to install one. People on the Sprinter forum dig it, and we’ve even had unsolicited feedback from people like Jason at LivingtheVantasy.com, who recently wrote an entire post about it (excerpt below):
As soon as I finished reading Dakota’s post, I ordered one on the spot and I cannot believe I owned my Sprinter for so many years without it. Not only was the product excellent, the service that Jesse provided was wonderful and the installation manual/kit he provides is extremely easy to follow. That was about a year and a half ago and I have consciously appreciated the brilliance of this simple doorstop every day.
Hope you enjoy this quick and easy DIY solution! Just a little karma back into the Sprinter world that helped me out so much when I was designing and building our van.
Some shots of the design and manufacturing process
Designing the door stop in Solidworks.
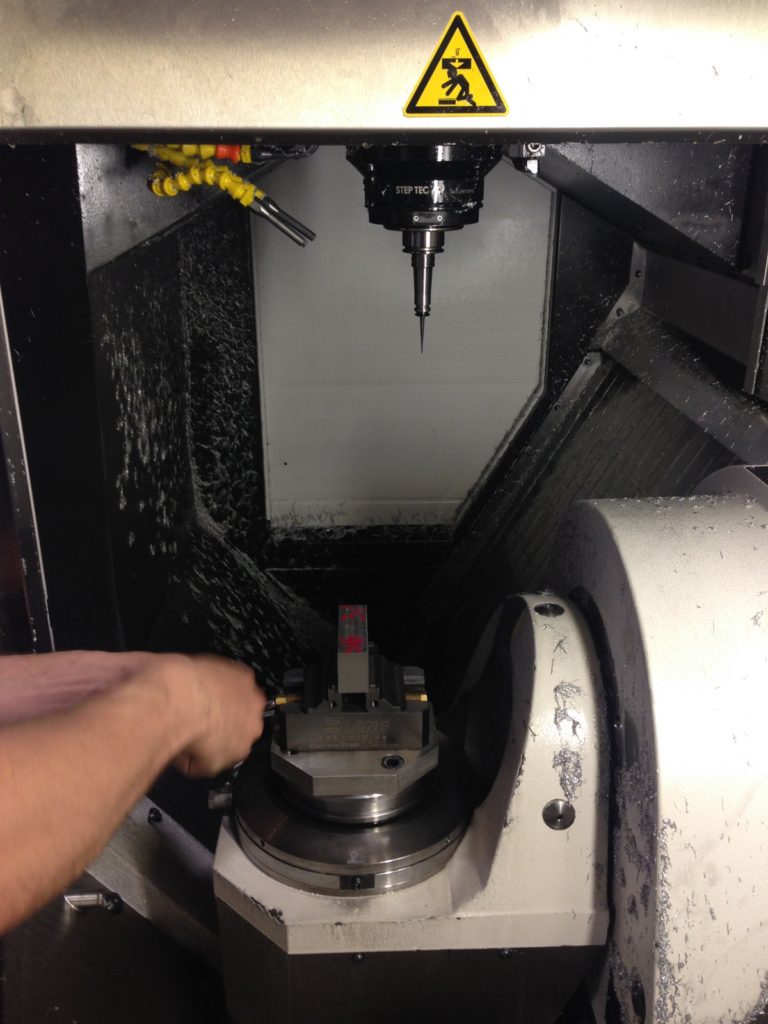
Setting up the part in the CNC machine.
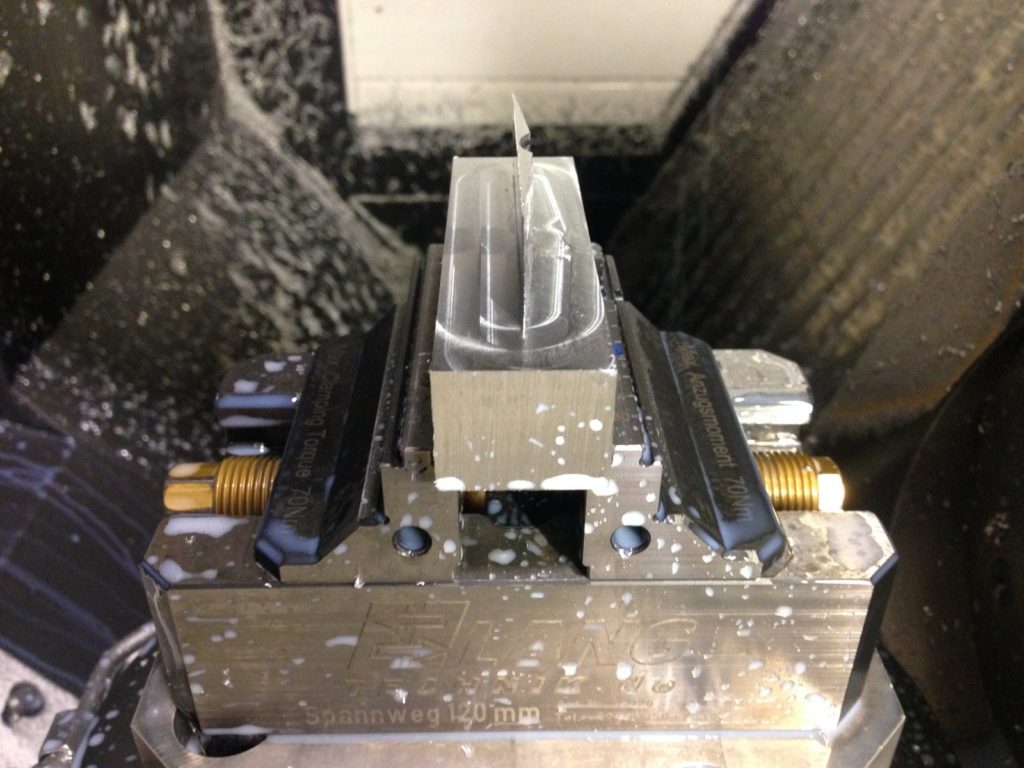
Finished door stop in the CNC jig.
https://www.traipsingabout.com/wp-content/uploads/2014/04/Sprinter-van-door-stop.jpg581871Dakotahttps://www.traipsingabout.com/wp-content/uploads/2018/03/Traipsing-About-logo-white-background-450x156.pngDakota2014-04-28 10:33:302021-11-10 20:55:38Door Stop for Passenger Slider on Sprinter Camper Van
Surprise, let’s go pedal our bikes for a few days! Bike touring along the SoCal coast from the Los Angeles area to San Diego was a last-minute plan I threw together for Chelsea’s birthday. Some people whisk their wives away for a weekend in Vegas, but you know that’s not the way we roll. Planning consisted of buying Amtrak tickets the day before departure and booking a few places on Airbnb spaced evenly along the way. Lacking camping gear, credit card touring was the name of the game.
All aboard on the Surfliner! Heading north from San Diego. Thanks to the hurried conductor who took this shot.
Executing a short touring trip is surprisingly easy. Stuff a couple changes of clothing and some food in panniers, load up your bike and head out the door. The hard part (for me) is relaxing into a slower pace, rather than my usual hammering away as hard as I can. After all, touring is about seeing and experiencing a place at a slower speed, not blazing through in a full downhill tuck. I’m coming around to this, and hauling 30-50 pounds of gear, water and food diminishes the thrill of sprinting on a bike anyway. Standing up to race on a baby-elephant-of-a-bike lacks the thrill and responsiveness of cranking uphill on a 16 pound carbon ride!
For me, touring distills the varied emotions of travel into potent vials. Standing above an ocean cliff, you sniff a shot of salty air, pelican dives, sunshine and waves. Zipping along a car-free path mainlines freedom and the reward of pumping legs and heart. And the most mediocre of meals is a sultan’s decadent feast after four hours of hard cycling hauling loaded panniers. The smell of car exhaust mixes in, but at the end of the day, kicking back with tired legs with your feet in the sand, the positive memories abound. It’s a hard-earned respite, and that makes all the difference. Plus, there is something so rewarding about pedaling your way from city to city as you meander toward a distant target.
Pausing to watch surfers near San Clemente.
It’s not for everyone. I met a guy named Ramon while out mountain biking amid the red rocks of Sedona and he asked me, “No offense, but what’s fun about road biking, especially touring?” An insightful question. At this point in my life, I certainly prefer twisting singletrack to a workout on a road bike given the choice. Then again, variety keeps things spicy! Still, there is plenty that sounds terrible to many people about touring: traffic, incredibly hard physical work, getting stuck in the elements, navigating the logistics of route finding and where to stay, staying on top of fueling your cranking engine, pressing on through tired legs and a snarling stomach when all you want to do is stop pedaling a bike.
Our tour started with a bike ride to Amtrak train station in San Diego, which we rode to the stop in Anaheim right next to Angels Stadium. I realized this was my first ride on a train in the US, which is odd considering I spent six days straight on the Trans-Siberian across Russia/Mongolia and hours on them elsewhere. Each train has reservations for only a few passengers with bikes, so if you do this, make sure to check! I wasn’t impressed with the bike rack system on the train, but at least there is something there. The clickety-clack of the train rumbling north was melodic, a concerto highlighted with frequent views of the waves and sand of the Pacific Ocean. They don’t call it the Surf Liner for nothing!
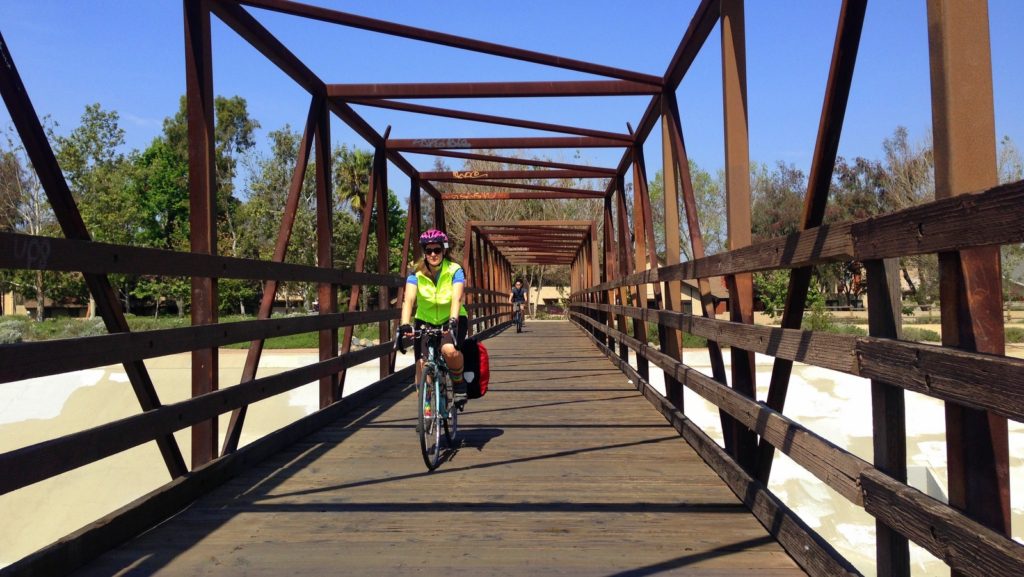
Crossing the Santa Ana River on the bike trail.
From the halo of Angels Stadium, we jumped right on the Santa Ana River Trail, yet another of the awesome car-free, no-street-crossing paved paths along a river in Los Angeles just like the one we took for our L.A. bike tour. From there, our route simply followed the Pacific Coast Highway south all the way to San Diego, about 110 miles to the south. Lots of pausing at view points or beaches, if only to grab a handful of snacks or to drink in a compelling vista.
Heading into Torrey Pines.
Snippets of the journey, little memories lodged in my mind, include:
Spinning along the bike path in Newport Beach through dozens of people on cruiser bikes with surf boards, tourists scurrying across and others sitting on their decks enjoying views of the water.
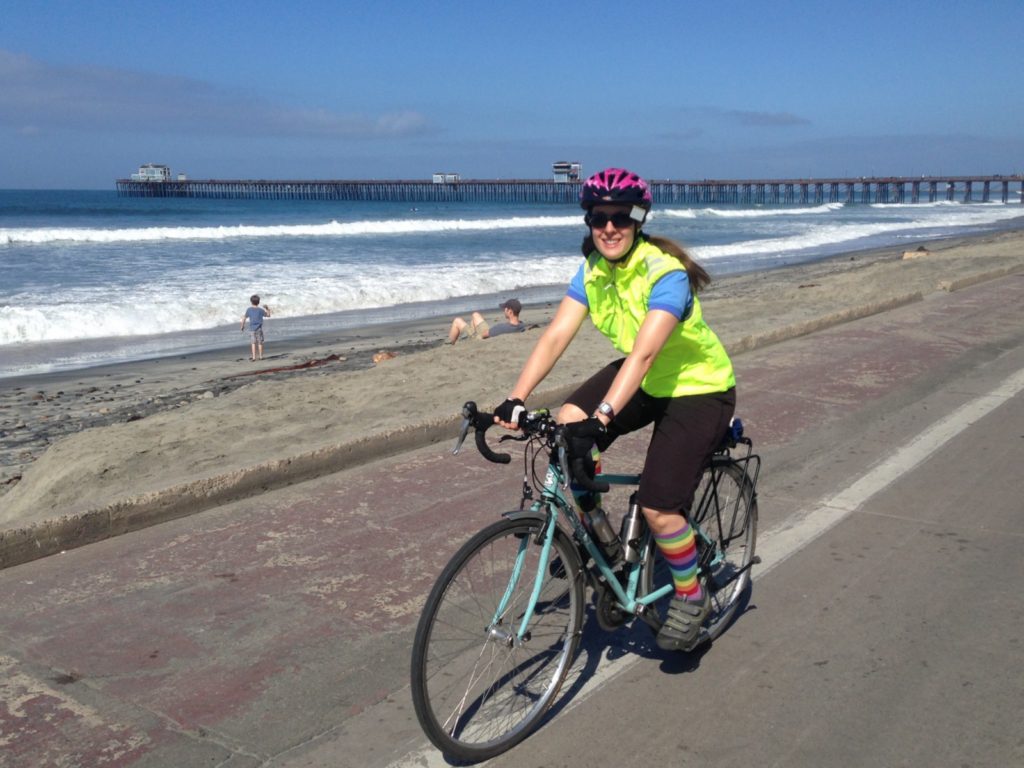
Riding the beach path near San Clemente.
Lounging in a hot tub during an earthquake, ripples of water cascading from side to side as concerned residents stuck their heads out the doors. (All good, not a big one.)
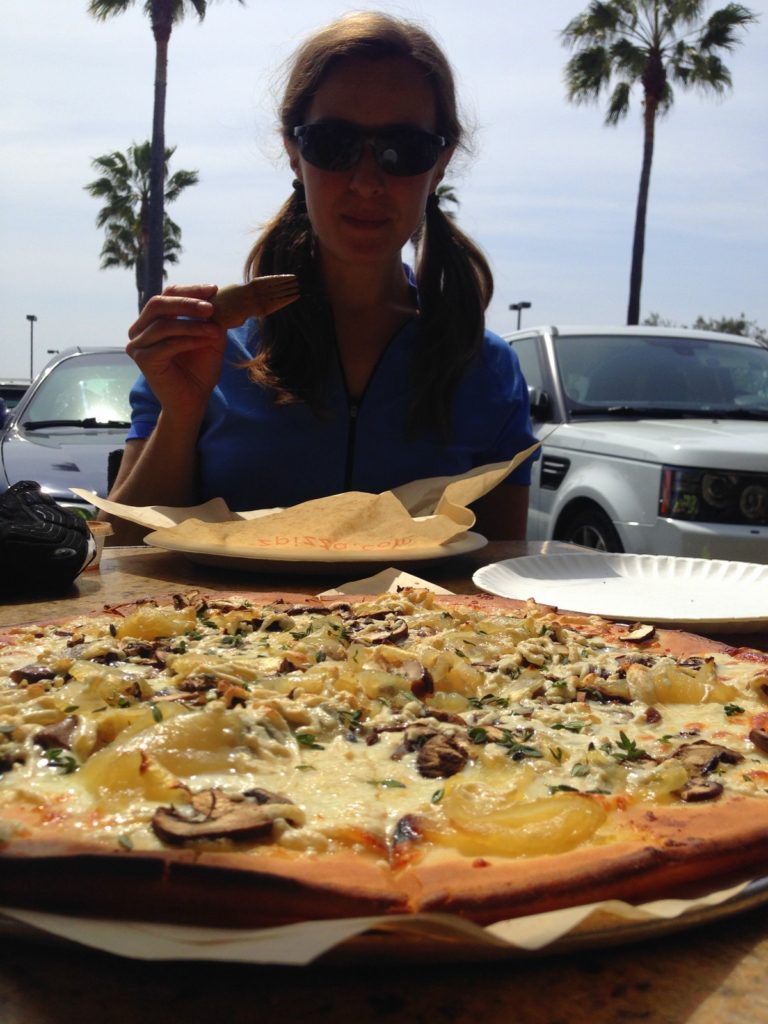
Eating delicious vegan mushroom and onion fare at Z-Pizza after hard hours of hills along the coast. We were in a shopping complex with a parking lot stacked full of Mercedes, Land Rovers and a couple Maserati’s, with shops where dresses cost more than my bike and people oozed wealth from their pores. Yet a well-dressed dude says, “That looks like fun!” and tells his friend he wants to bike tour sometime.
Mmmm, pizza.
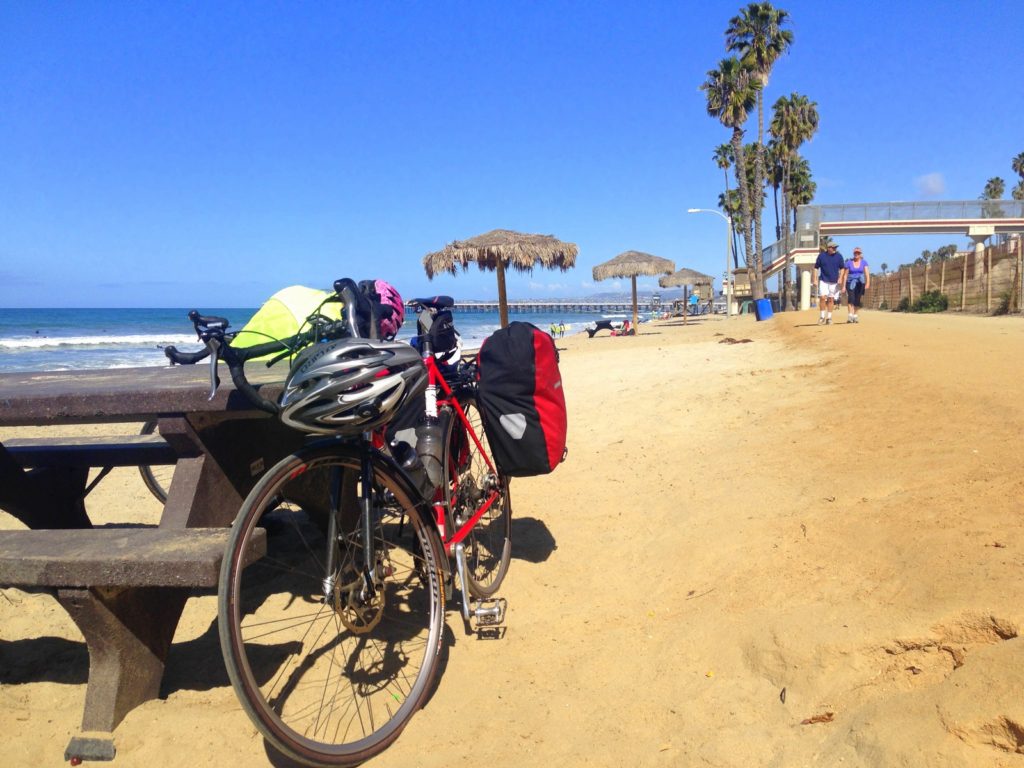
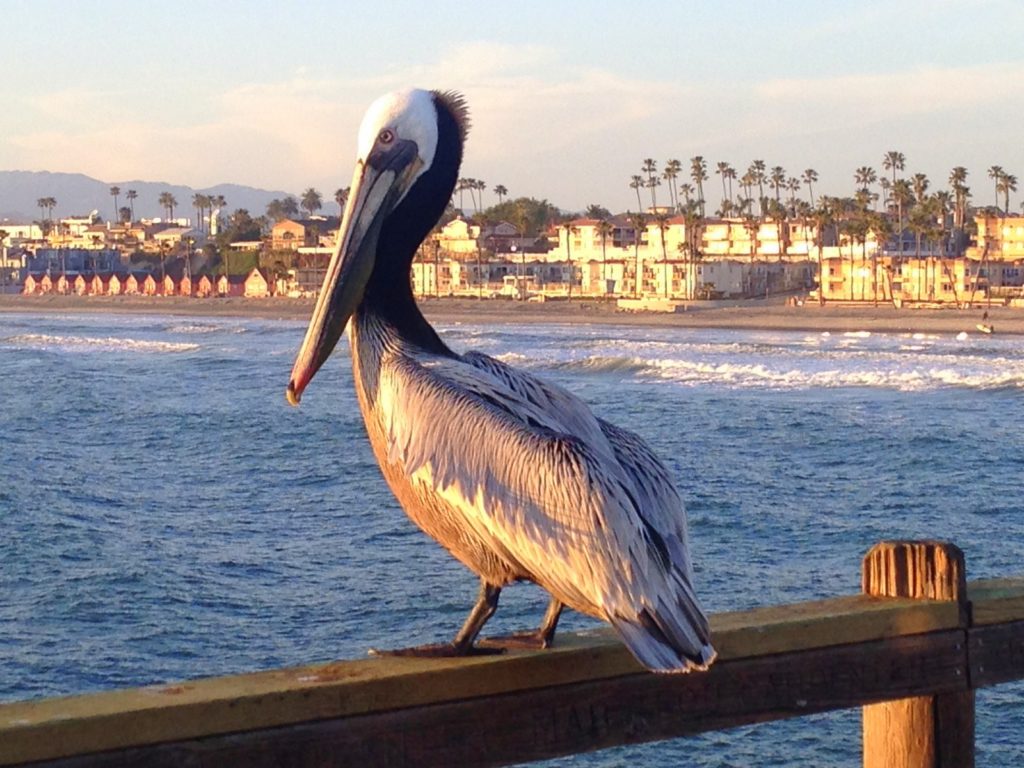
Munching hummus and pita at the Oceanside beach at the end of a day, then walking the long, crowded pier at sunset holding hands and watching other tourists, surfers and pelicans.
Sunset walk on the pier in Oceanside.
Stuck in a crush of traffic in Laguna Beach with no bike lane and nowhere to hide except the sidewalk. My wiser half finds a nice side street to ride on while I battle cars for a few blocks before joining her. Sometimes, the direct route submits you to all types of pain a little detour fixes nicely. We’ve found that riding up a giant climb is well worth it instead of riding on a flat, highly-trafficked route.
Staying in a hotel under renovation where one half of the building (directly across from our room) was stripped down to bare studs and HVAC ductwork hung from the ceiling in the lobby. Funny that Hotels.com didn’t mention this… (Our room was wonderful and about ⅓ what we would have paid otherwise.)
Descending a twisty sidewalk from bluff view down down down to a harbor as the sun hovered low.
Burning legs heading up the steep two-mile climb of Torrey Pines north of San Diego, and then another three big ascents to bring us home.
ID checks by baby-faced soldiers at the military base we rode through for a solid hour, cascading views of the ocean along the way.
You don’t see this sign very often. (Crossing through the military base.)
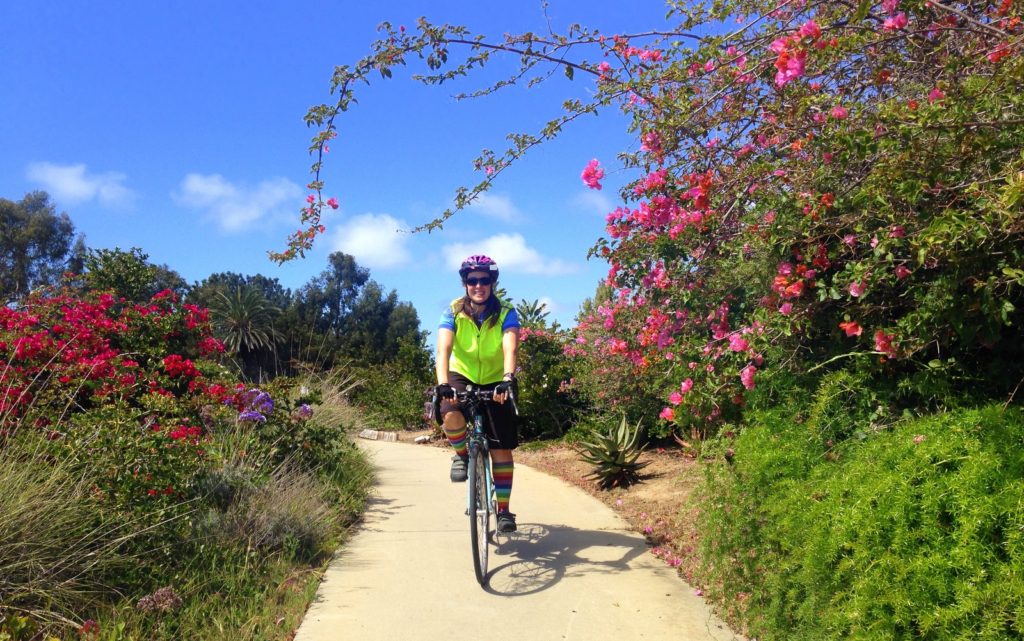
Riding a flowery path through a neighborhood, spring scents in the air.
All in all, this ~100 mile ride was a great way to ring in Chelsea’s birthday and another successful tour! We are both itching to try something longer, and with our backpacking gear recently flown south by Chelsea’s parents and added to the mix of equipment in the van, we are scoping out fun potential trips in Utah and Colorado when not rampaging on mountain bikes or hiking in slot canyons.
Checking the view at lovely Torrey Pines before a tough climb into San Diego.
Perhaps the neatest thing about touring is that ANYONE can do it. I’ve seen 10-speeds from the 80s loaded up touring 1,500 miles on the coast, and mountain bikes towing trailers, and everything in between. All you have to do is pedal. I don’t at all consider myself an experienced bike tourer, but have loved all trips we’ve taken. My Lemond Poprad cyclocross bike doesn’t have enough climbing gears and the rims aren’t designed for hauling weight, but I just get out there and give it a shot and my impatient, love-to-go-fast mentality falls into a zone where I cruise at a lower speed and enjoy it.
You can tour too! Grab a bike, do a little online research, and hit the road. Hopefully we’ll see you out there.
Spin on,
Dakota
Sunset beach walk the day before Chelsea’s birthday.
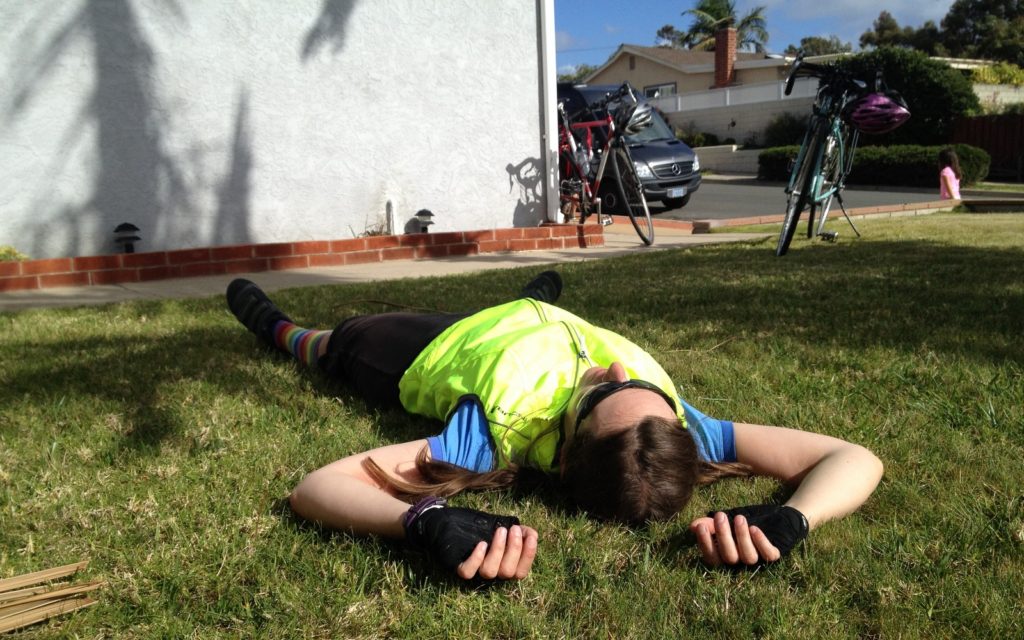
Chelsea taking a load off after a long day of hills. Home again, or at least back at the van!
https://www.traipsingabout.com/wp-content/uploads/2014/04/IMG_3801.jpg6411024Dakotahttps://www.traipsingabout.com/wp-content/uploads/2018/03/Traipsing-About-logo-white-background-450x156.pngDakota2014-04-22 11:34:002014-06-27 08:15:05Spinning South - Bike Touring from Anaheim to San Diego
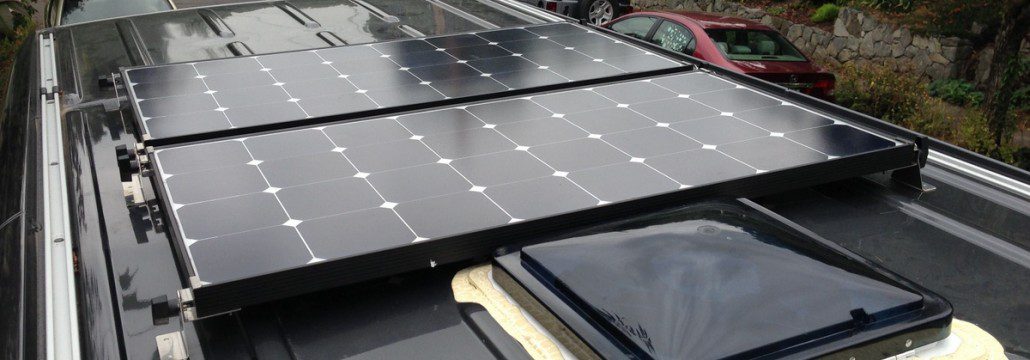
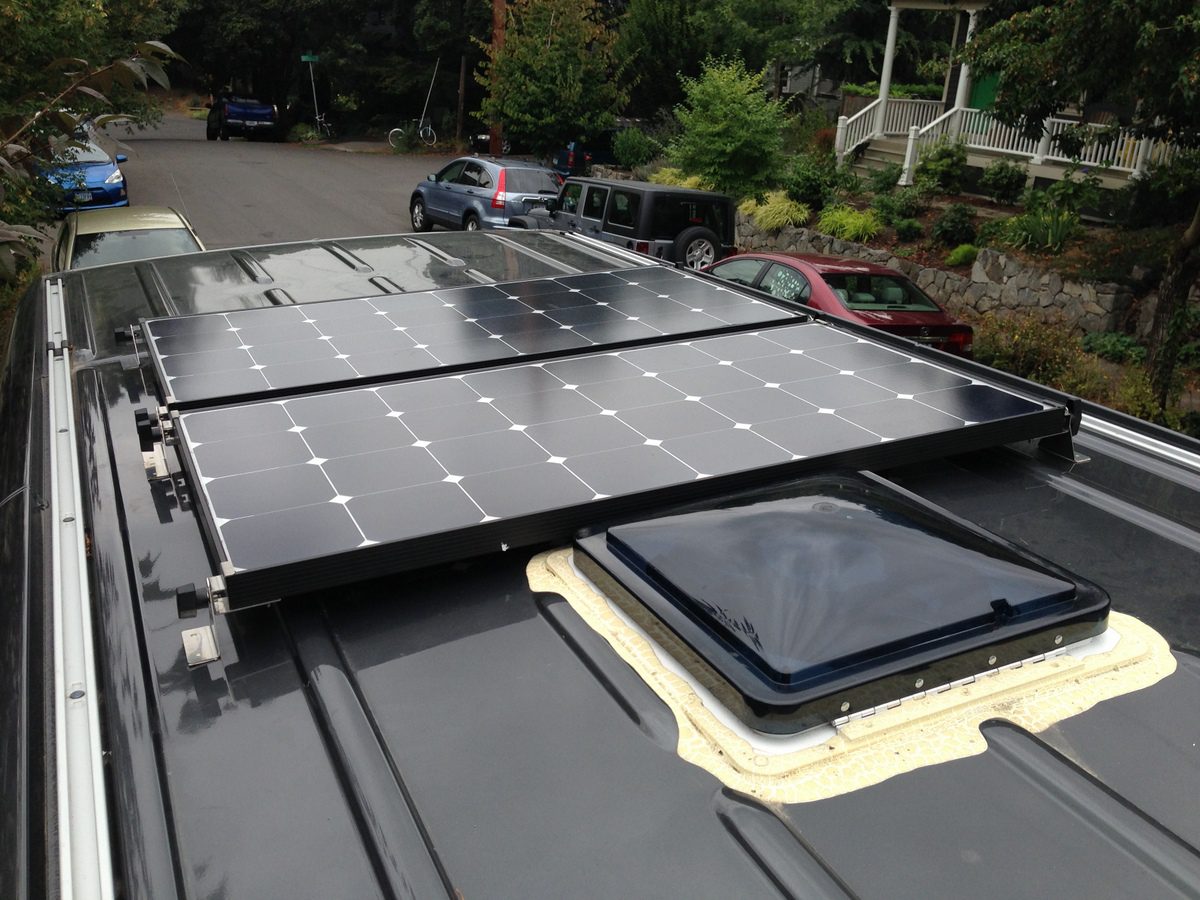
Panels in their final location on top of our Sprinter.
Solar power for our Sprinter camper van was a top priority from day one. After a few years of free energy charging our batteries and running our fridge and laptops, I can hands-down say it was one of our best additions to the van. I highly recommend it.
There is something magical about solar power. Put a few photovoltaic panels on your roof, run some wires to your inverter and battery and POOF, electricity to run your electric shaver. And that solar power frees us up to set out across the land in a van with nothing except the fuel in our gas tank, untethered to explore with the comforts of home.
My senior project in college was designing a solar panel and battery system for an off-the-grid house. Luckily, I forgot most of that knowledge and got to experience the learning process over again! To save you some time, here is how I went about it.
Where Should I Buy My Solar Panel Kit, And How Big a System Do I Need?
Probably the most important thing to consider when setting up your solar, battery and inverter system is how big the power draw on your system will be. Are you installing a fridge? Microwave? Electric heater? It is easy to determine how to size things by looking at:
The maximum voltage draw from your van’s juice-sucking components. Unless you’re planning to stick with 12V power, you’ll need an inverter big enough to handle your biggest total voltage pull. Our max is ~1500W, so we got a 2000W inverter that has worked great. If you have the space, I say go big or go home. “Oh, I’ll never use more than 350 watts. We are minimalists,” you say? Mmmm hmmm. Famous last words.
The estimated amperage draw on your system and how long you’ll be running each appliance. This will help you figure out battery system sizing.
(Note: I’m not going to talk about wire gauge size or things like that in this post since it is so system specific.)
Sizing our system was easy. We don’t have many big loads that we run frequently except two big short-use items (Vitamix and hot water boiler at 1,500 Watts each).
LED lights, laptops, fridge, Fantastic Fan roof vent, the Espar heater fan, heating pad for bed (used briefly at night on cold nights instead of Espar), and our stereo system are the big power draws. That totals about 8-15 amps, which means we don’t drain the batteries all that fast. (With a 200 Amp-Hour system, we can theoretically run everything for 13 hours, minus the hot water boiler and Vitamix.)
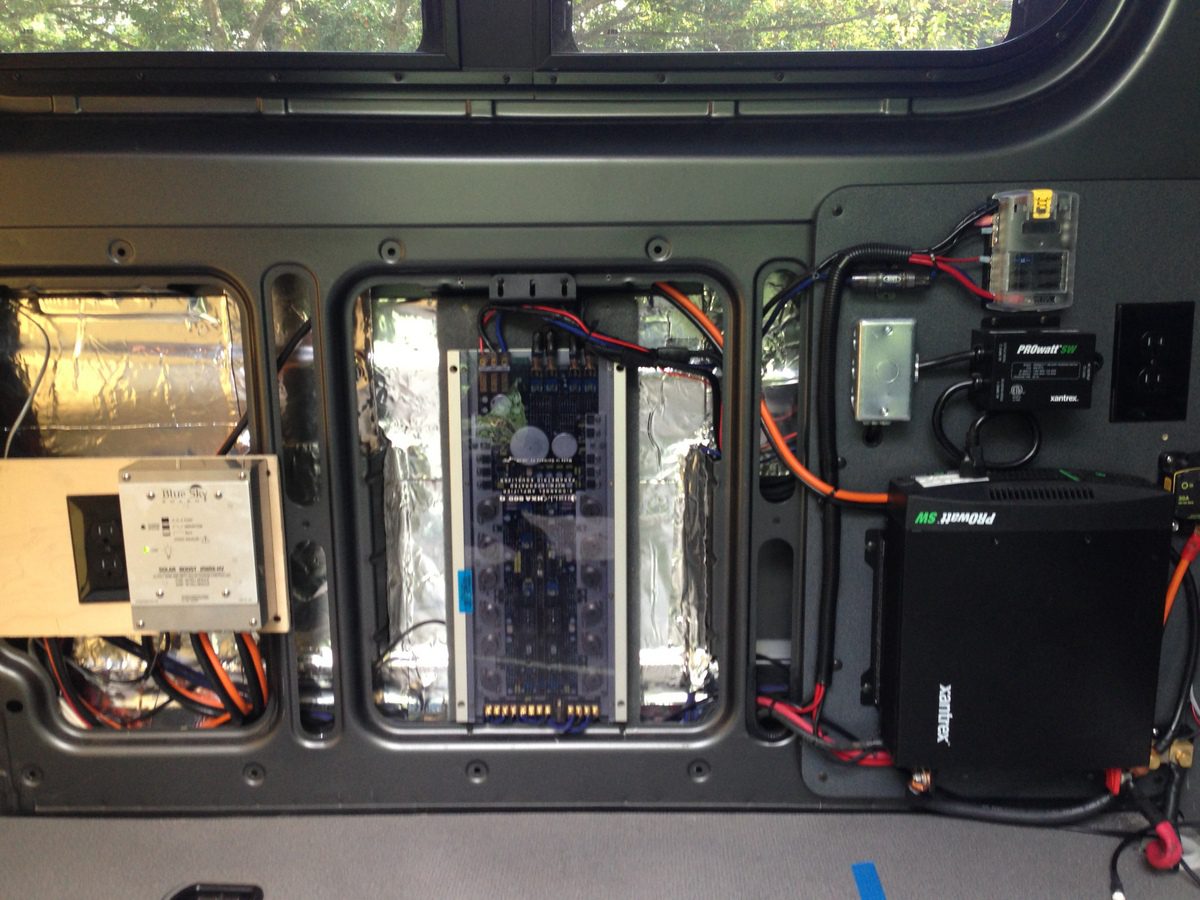
Lots of wiring! Left to right: Blue Sky MPPT (final installation was inside wall after interior paneling went up), stereo amp (also recessed into wall), and the 2000W inverter/battery wiring.
I sized our system so that the solar panel system would put about 10-12 amps/hour into the system during the day in full sun at maximum power point, and then we have the electrical system rigged up to charge with excess current from the van alternator while we’re driving. This works great and we’re usually topped out with electricity unless we are not driving for awhile AND there isn’t any sunlight.
Note: we also have shore power in the form of a 15 amp cord to plug in… that we’ve used twice. I’d skip this if I did it again.
By the way, dig these kinds of posts? Sign up for the free 2x/month Traipsing About newsletter for van tales, plus and creative challenges like drawing and piano.
Should I Buy Individual Pieces or an Entire Solar Panel Kit?
Costs have dropped dramatically on solar components. We paid $1500 for our 200W kit in 2013; now you can get the same system from Renogy for $500! It’s fantastic how cheap solar is these days.
Many shops also do solar installs, but the cost is painful. I say give it a shot yourself with one of the kits and save $1000+.
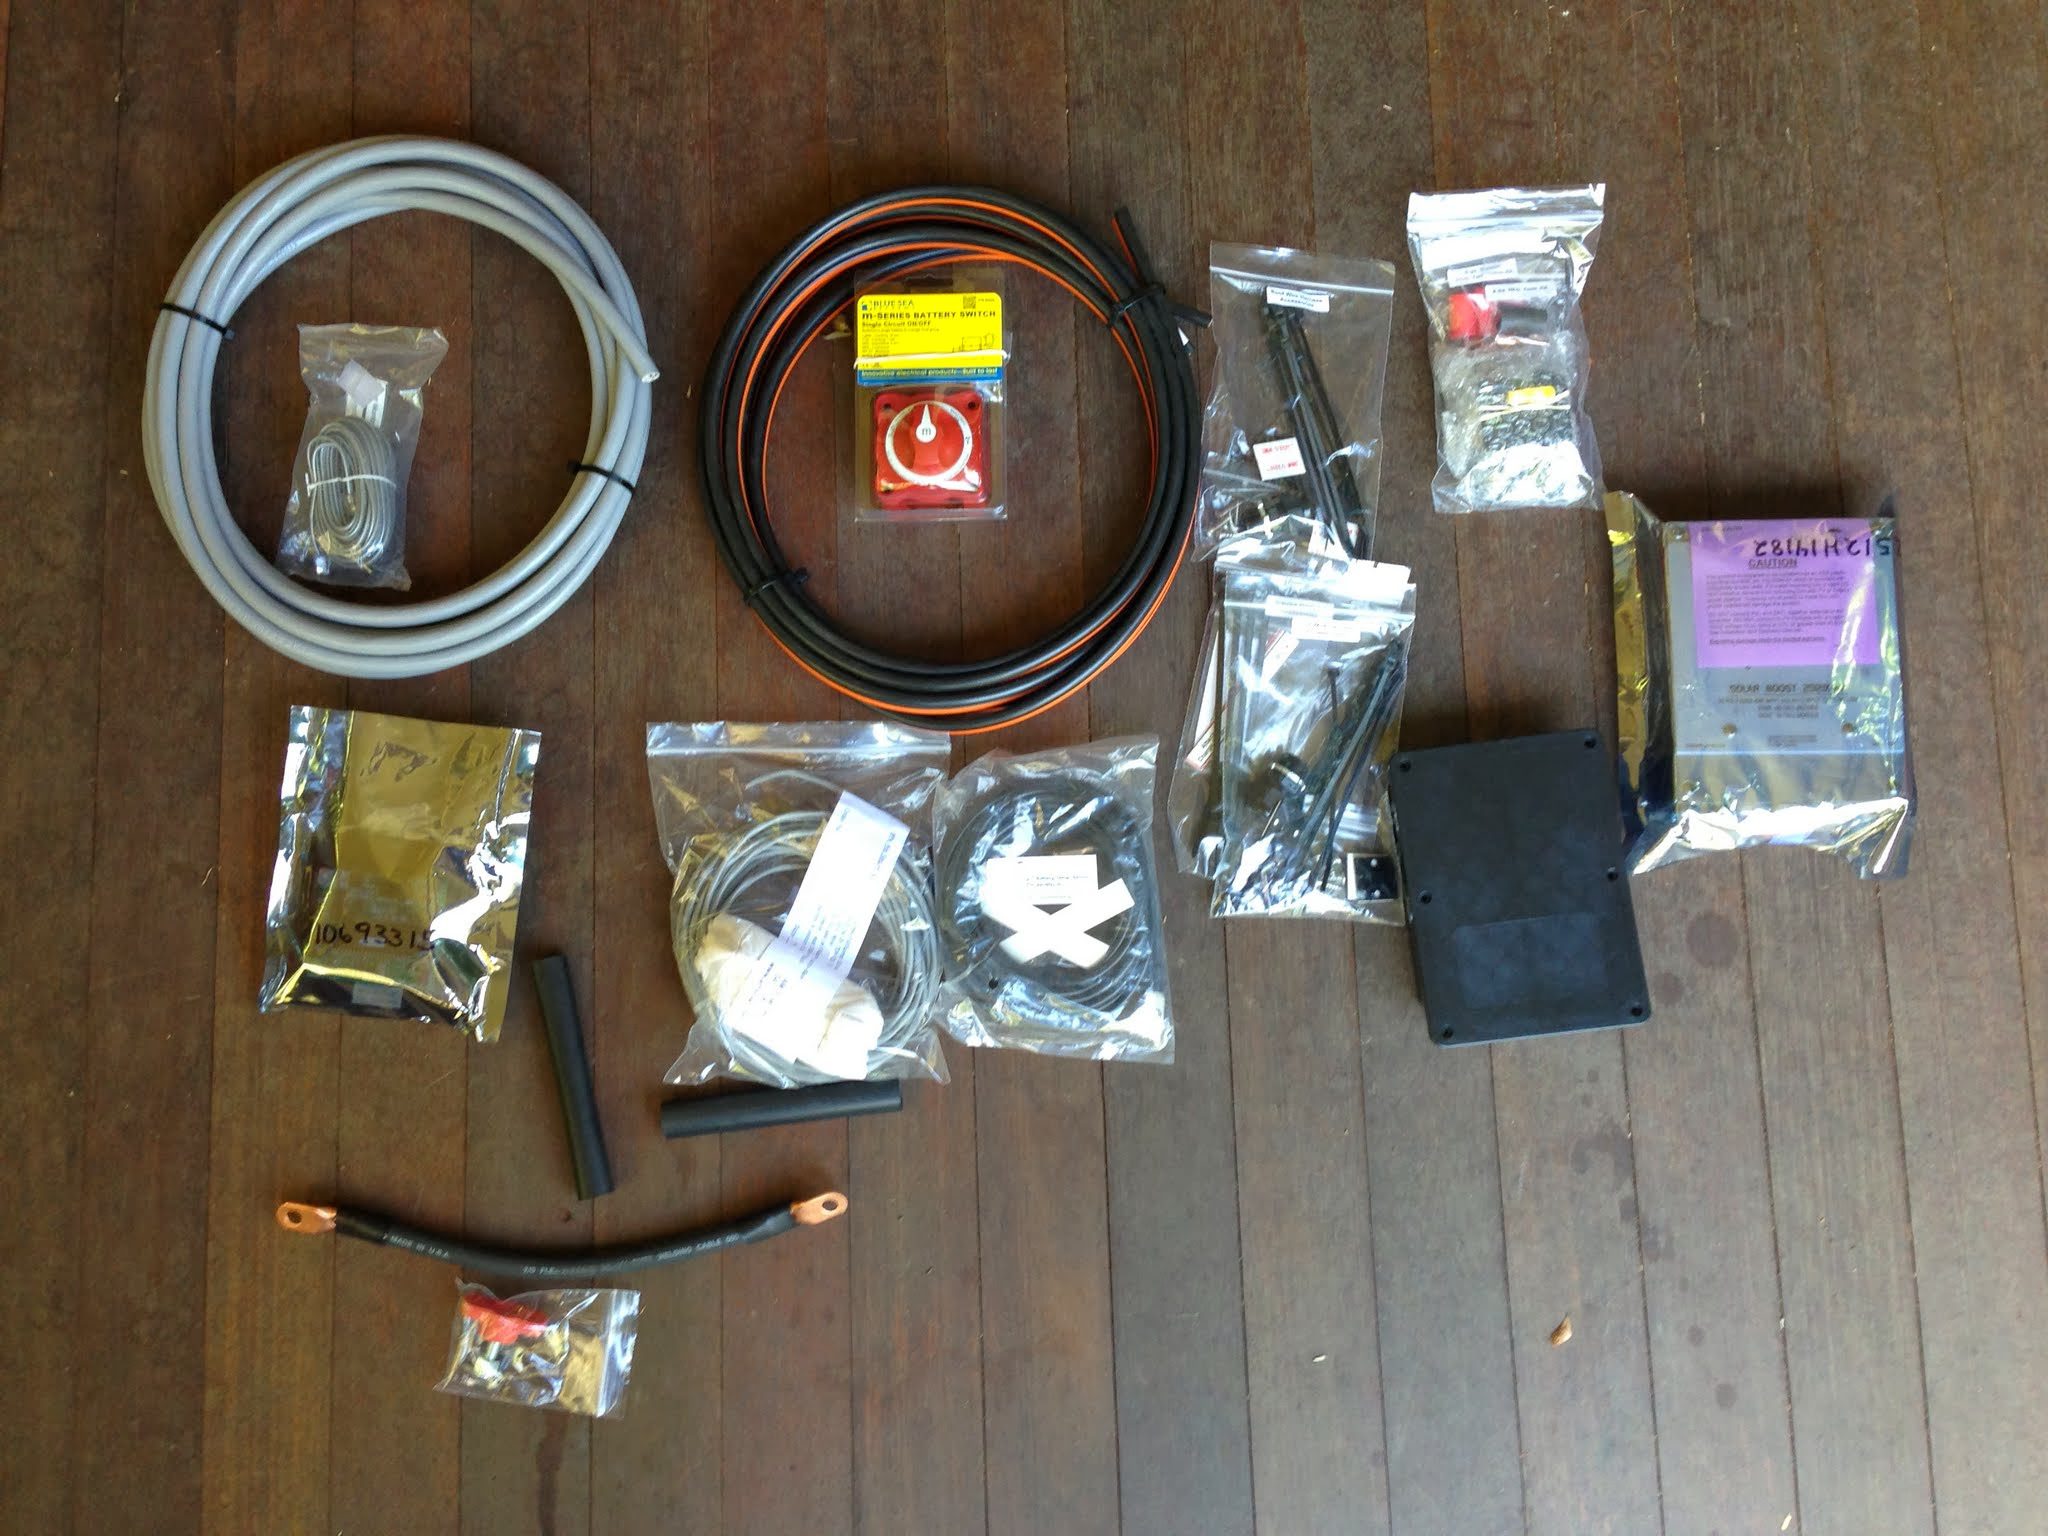
Below is the list of major components. All can be found on Amazon (links provided), though I’d just buy a kit to make it easy.
Example of Panels: Renogy 100W panels (two of them, easy to add more if needed)
Charge Controller: Blue Sky Solar Boost 2512IX-HV
Meter: IPN Pro Remote (this is the monitoring/control system for the solar setup)
All our stuff showed up at our door in a big box and I got right down to being overwhelmed. When you do it, breathe deeply – it isn’t that bad and I bet you’ll find it to be a satisfying project by the time you’re done.
It took me about 10 hours total to do the install. After a solid weekend of effort, you’ll be sitting pretty.
Wires, wires, everywhere.
Nine Steps to Glory! (Or Wait, Where the Heck Does All This Stuff Go?)
Here are the basic steps I followed for our install. I’m sure everyone will do it slightly differently, but this worked well for me and there aren’t many things I would do differently.
Assemble your tools! I recommend a rachet/wrench set, heat gun, hole saw (~1.25”), cordless drill and bits, caulk gun and caulk, utility knife, wire cutters and crimpers, and some way to get on top of your van (ladder, tall friend, or sky hooks).
Get the panels ready for installation on the van. Attach all the mounting brackets and feet and pre-wire crimps and other attachment so you don’t have to do it on the roof of your vehicle.
Put the panels on top of the van. I recommend having someone help you, or you can do it off the top of a tippy ladder by yourself and provide entertainment for the neighborhood as you wobble about trying not to kill yourself.
Move the panels 67 times to figure out the best place to put them. Think HARD about where you’ll route wires inside the van. Make sure you consider proximity to your roof rails if you are planning to install an awning, or location relative to a Rocket Box if you are getting one of those. I suspect mounting a panel at the very front is totally fine, but I didn’t want the force from the wind off the windshield so I mounted them behind our roof vent instead, and could have put two more panels back there.
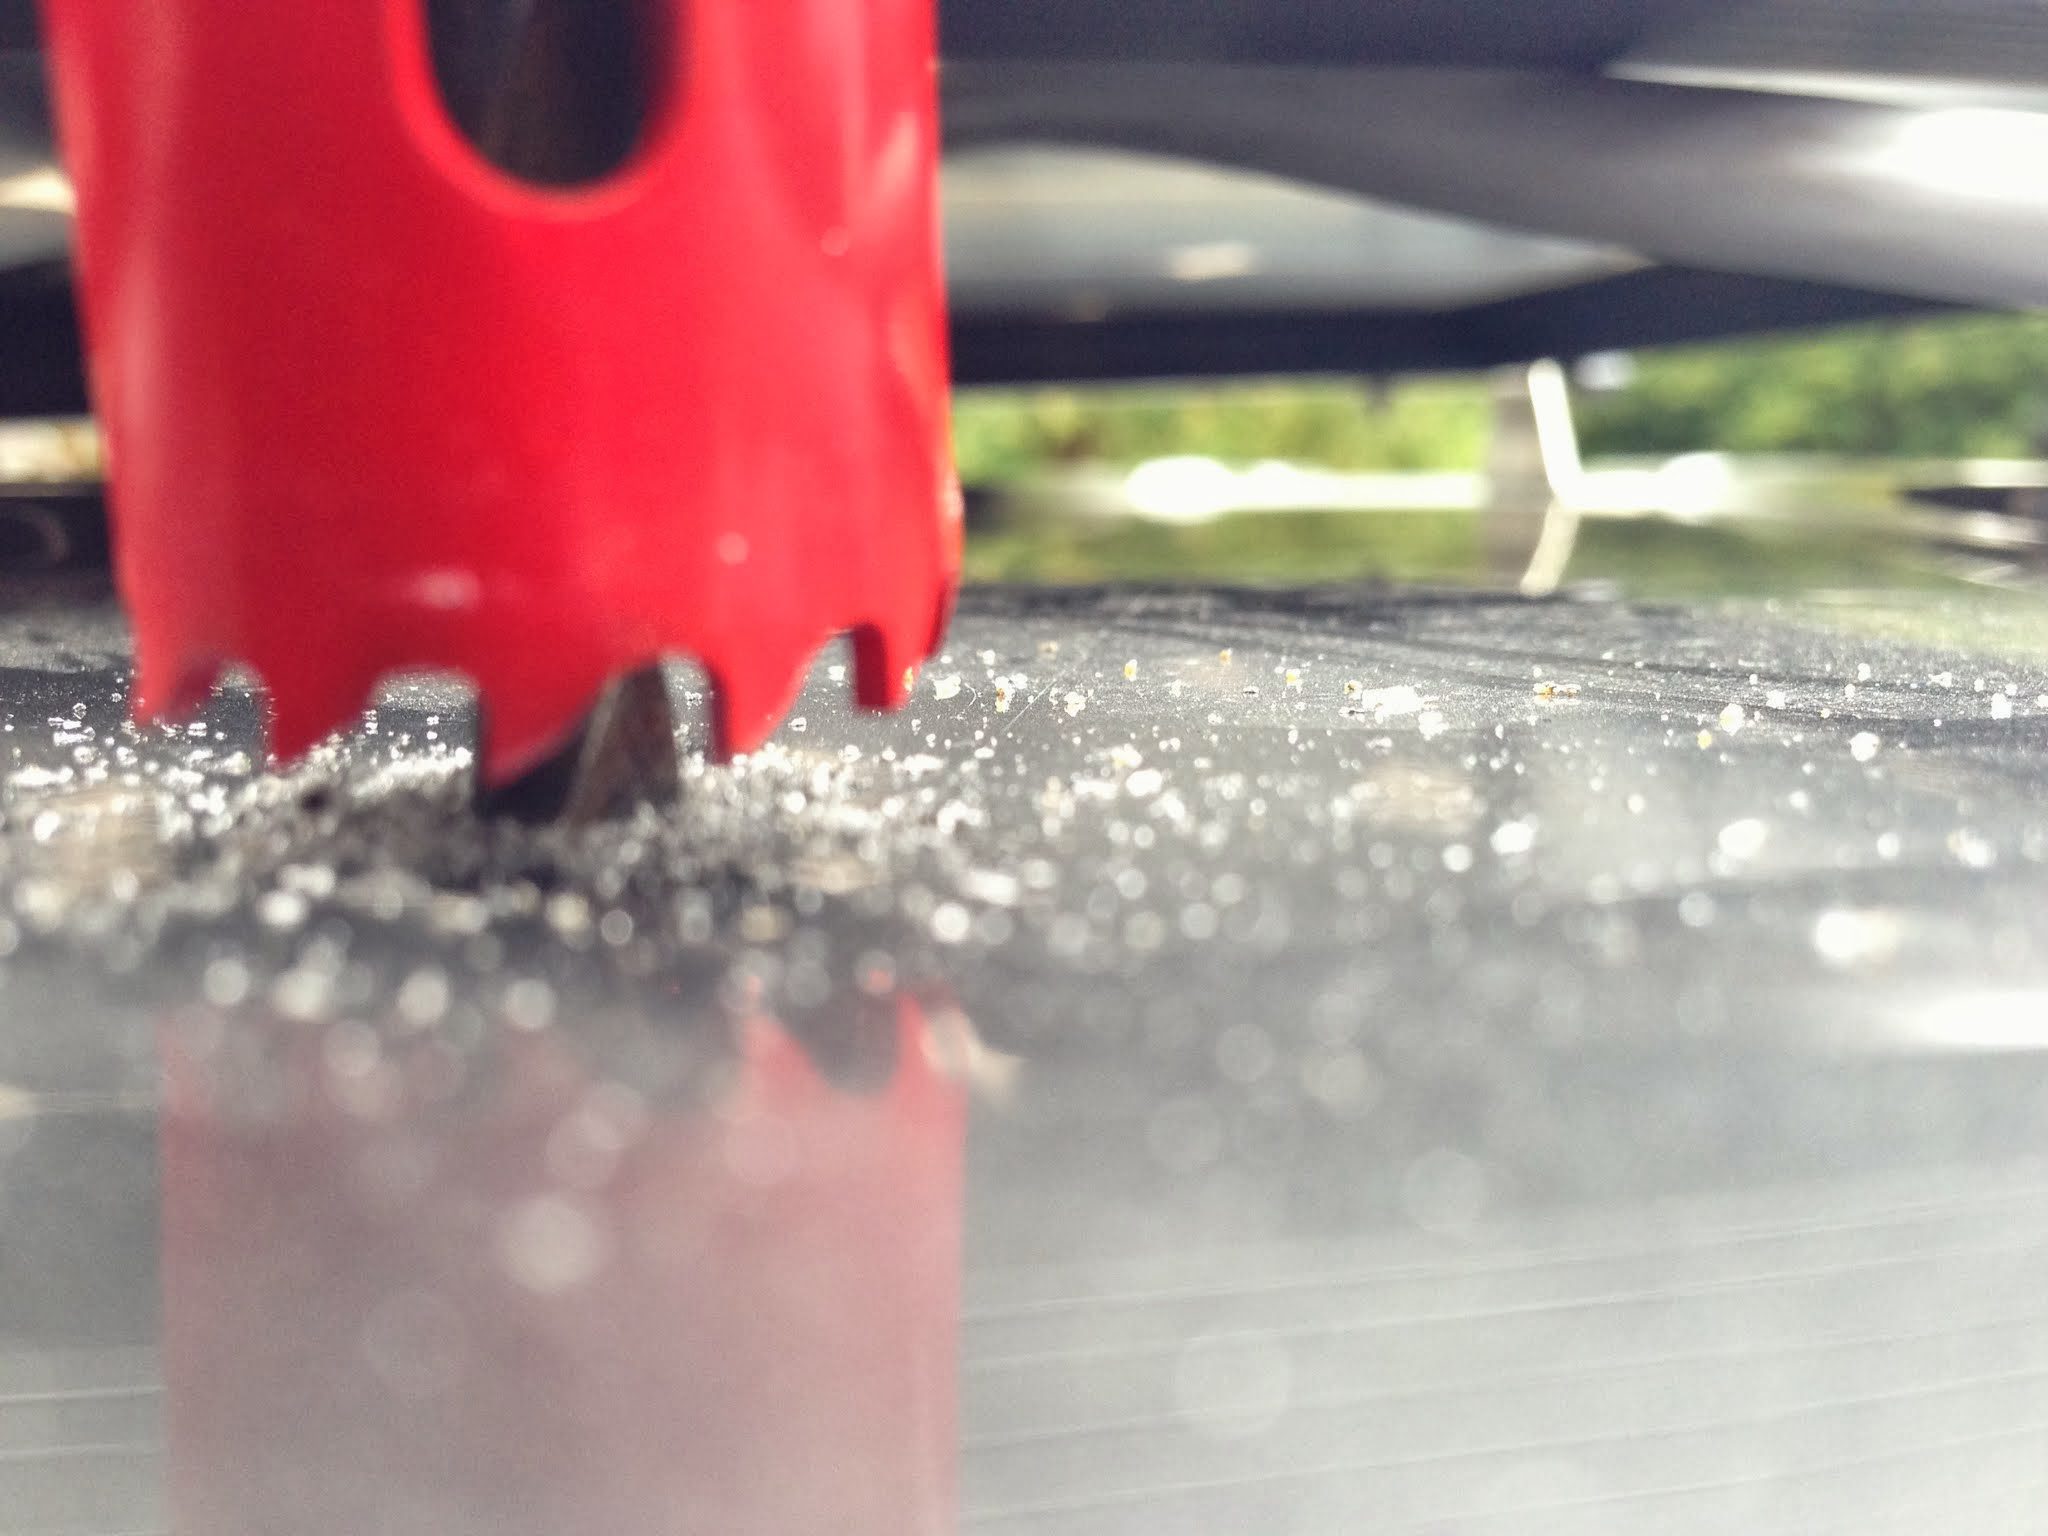
Drill the Boss-Size hole to route the panel wiring inside. I used a tap hole followed by a 1.25” metal hole saw. Nothing like tapping an inch-plus hole in the top of your new van to make measure twice, cut once sink in. Make sure you paint the edge of the hole with some kind of sealant to prevent rust.
Hole saw ready to roll. I used an 1/8″ tap hole first so it wouldn’t wander and scratch the top of the van.
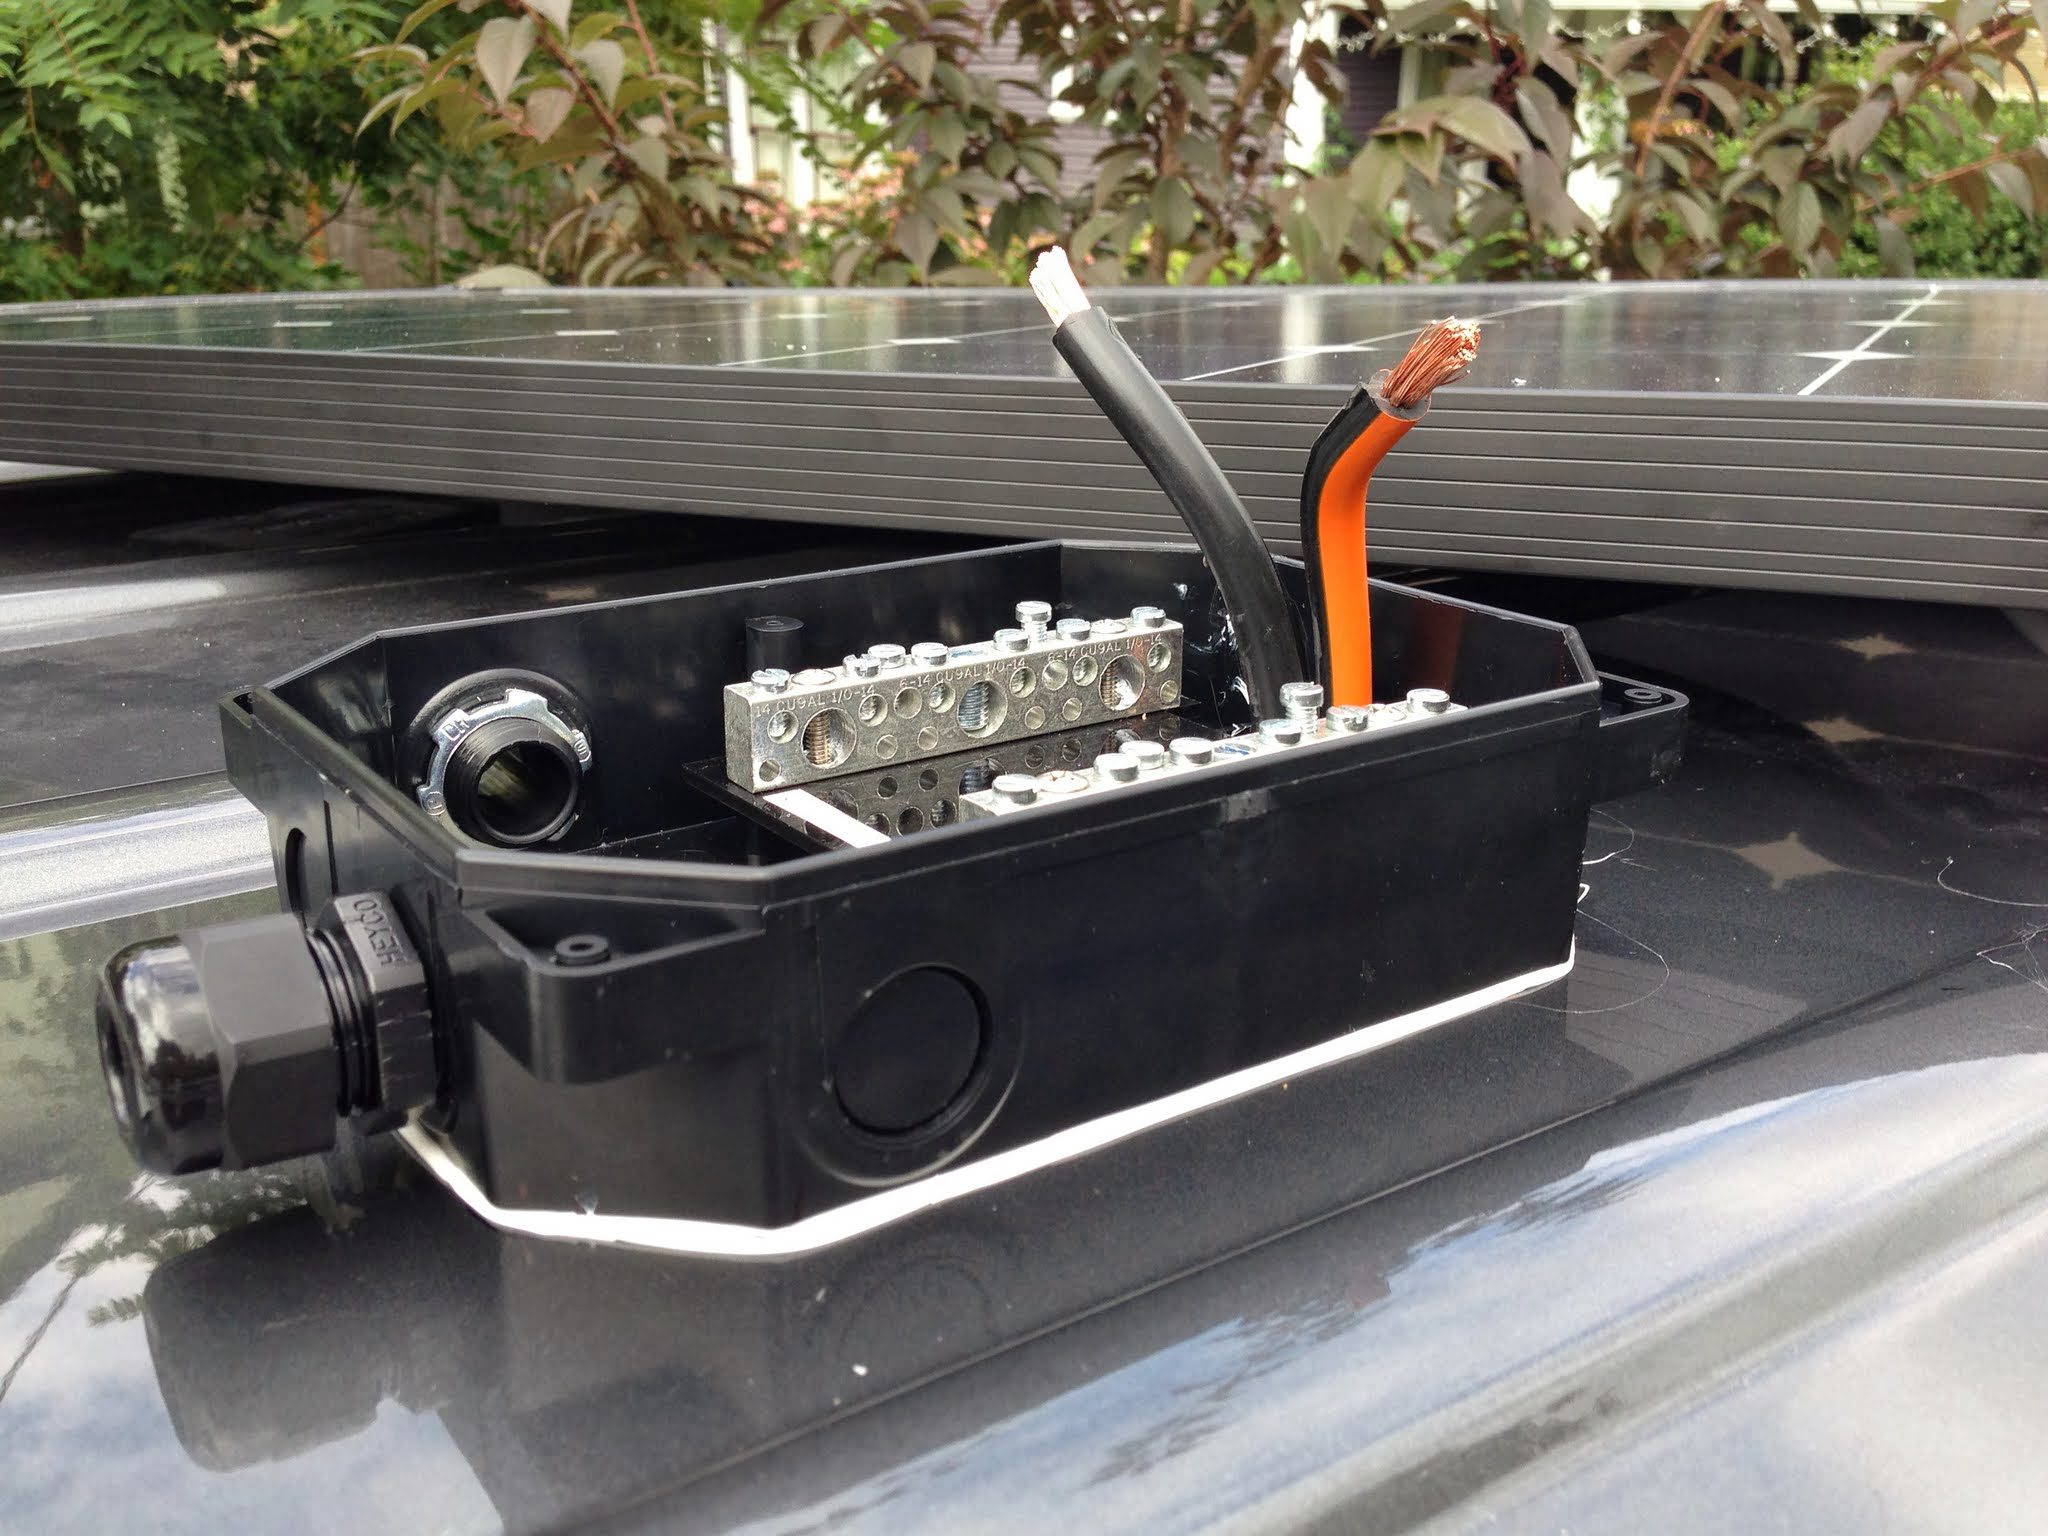
If you have multiple panels like we did, you’ll need to somehow combine the wires from each panel before routing them through the giant hole you just drilled in your roof. I used a combiner box that came with the kit and mounted it under one of the panels. It is screwed down and sealed with lots of caulk. No leaking so far!
Bringing together wires from each panel into the combiner box. The wires then all route to the interior via the orange/black pair at the top.
Combiner box mounted. Notice the sealant around the perimeter of the unit to seal it to the top of the van.
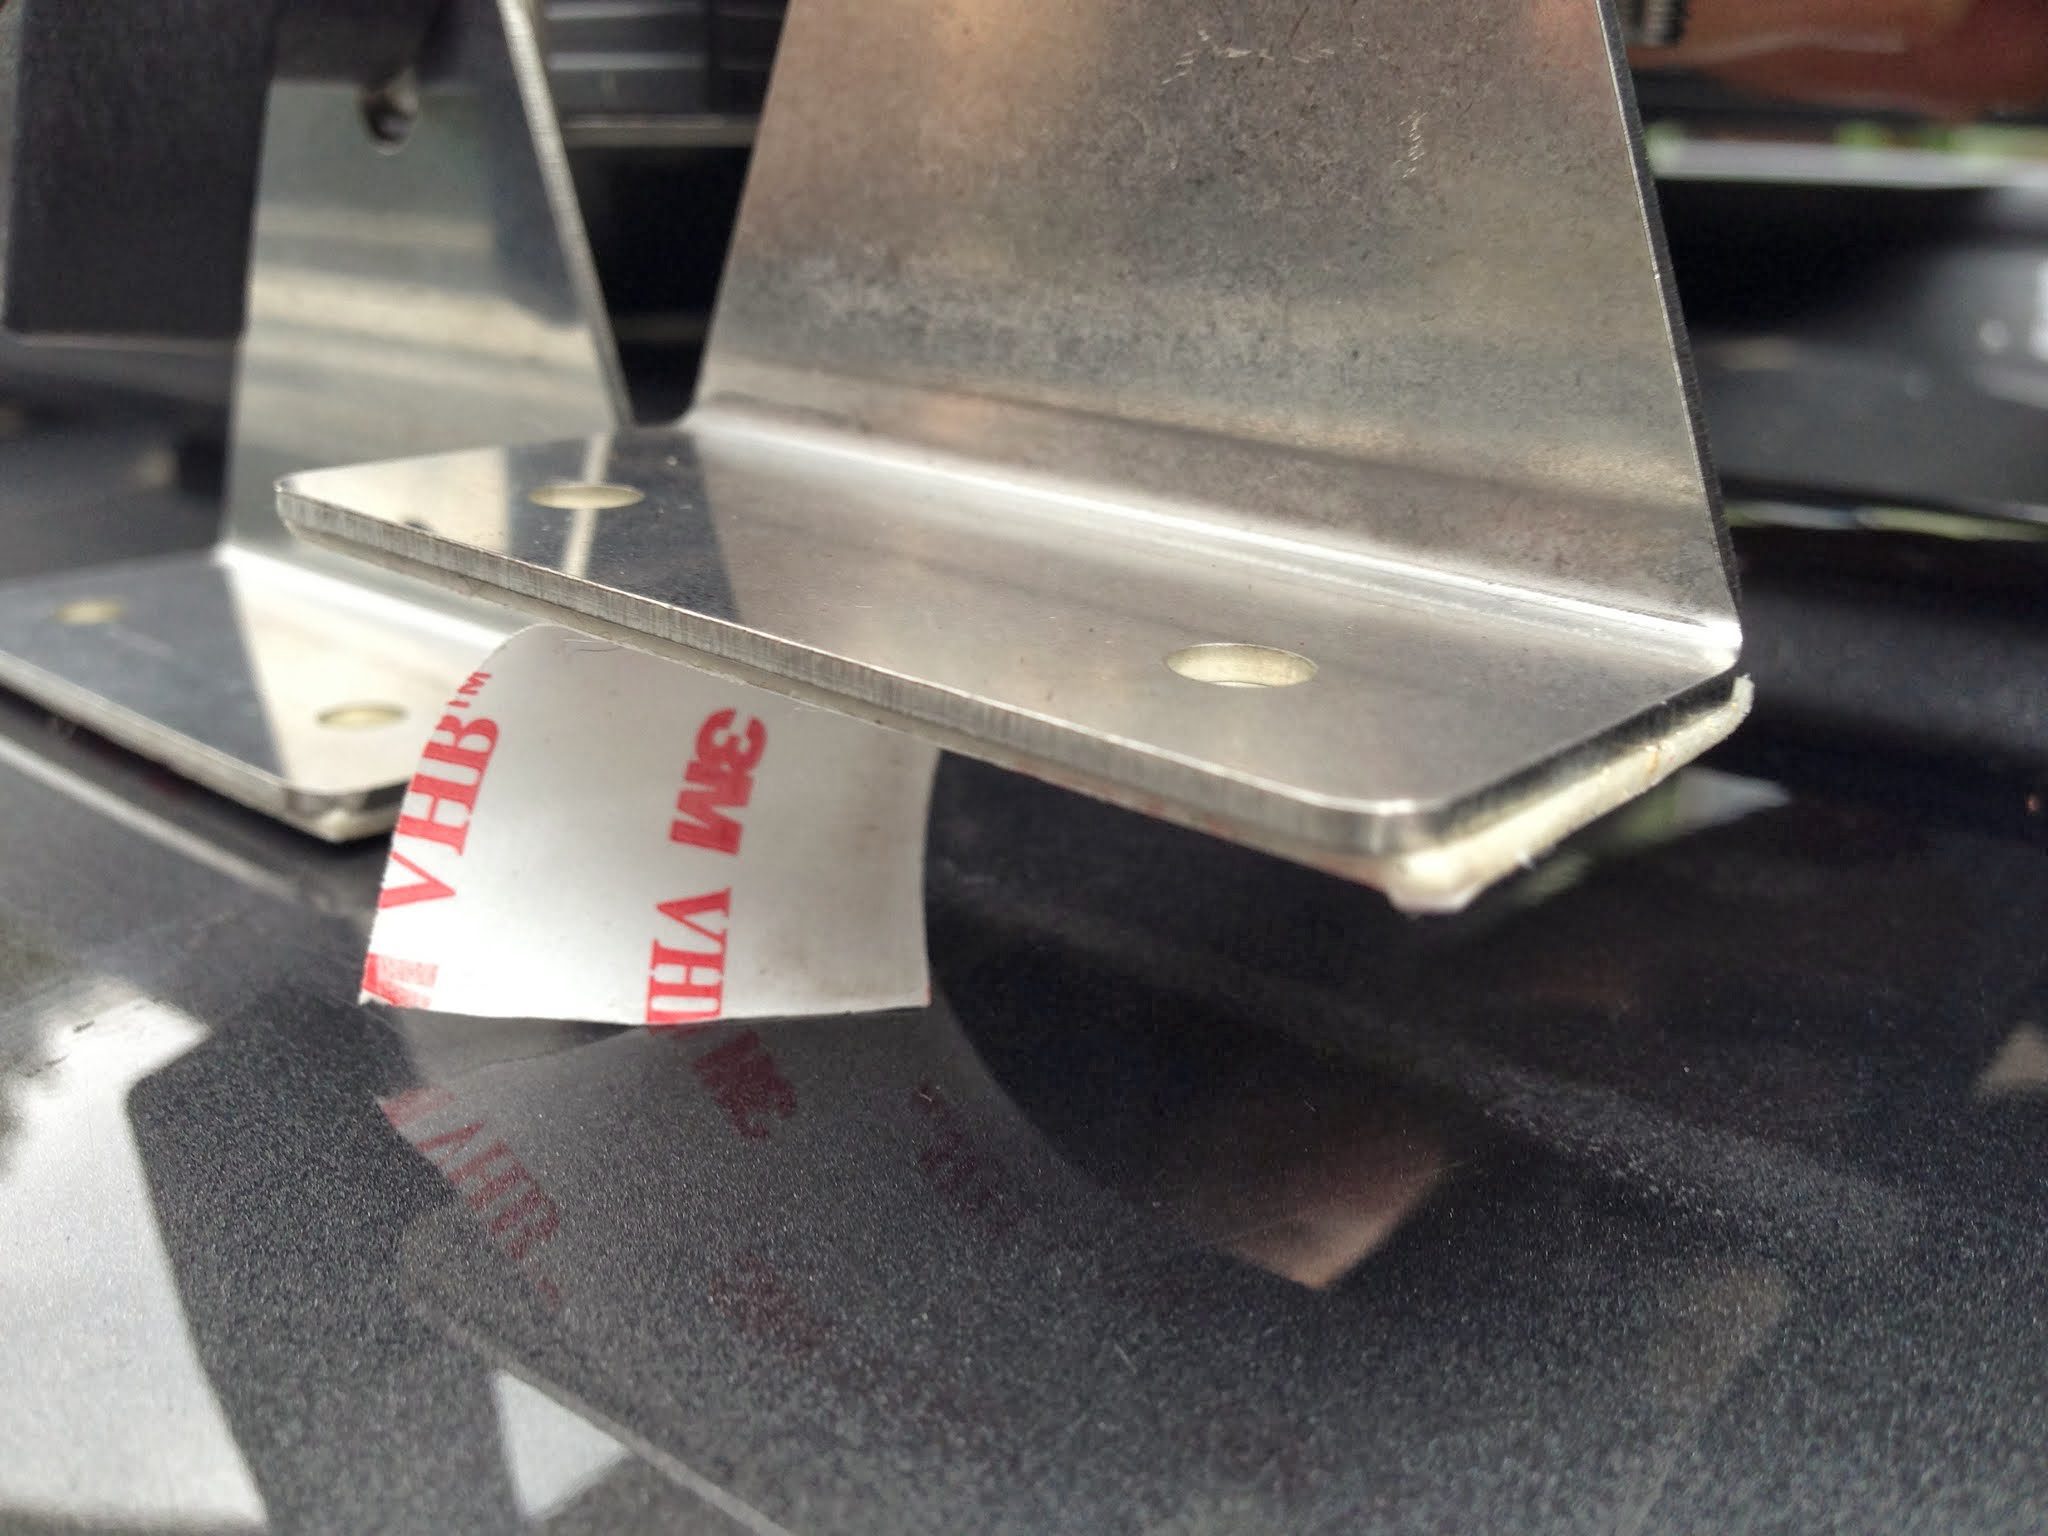
Once your combiner box is installed, you can mount the panels on the roof. (Or do this step last.) After a lot of research, I used 3M VHB 4950 adhesive tape. Some people screw their panels to the roof, which certainly would work, but that’s just 16 more holes to rust or leak. Make sure to put a layer of self-leveling sealant over the top of the solar panel feet/adhesive pads to prevent dirt and water from compromising the attachment and haven’t had any issues. Updated June, 2017: A recent event made me VERY happy I used the VHB tape. A string from a deck snagged a solar panel and ripped it off the roof! Luckily, the pads peeled off, the panel wound up dangling in mid-air with merely a couple bent brackets, and it was an easy fix. If it had been screws into the roof…*gulp* Our VHB tape has lasted 35,000 miles through all kinds of weather and is holding strong, though the sealant over the feet does need a refresher.
3M VHB 4950 tape. No drilling or screws required! Make sure to put self-leveling sealant over the entire foot afterward.
To the inside we go! Here is where you just follow all the wiring diagrams. (See how easy that was?) Buy a kit that has all the connectors and shrink tubing clearly labeled so you don’t have to go back to your favorite hardware store (where they probably already know you by name) five more times in a weekend to get this project done. Before cutting any wire, carefully fitting and laying out the location of the charge controller, on/off switch, IPN remote and shunt relative to your inverter (if you have one) and other stuff is important or you’ll be cramming stuff into a wall cavity or struggle to find places to attach all the components. I mounted the charge controller inside the wall with flush-mounted face plates after I finalized the interior.
Turn on the beast! Hopefully there is exactly zero popping, crackling and fizzing. Crack a cold one and sit back and enjoy the fruits of your labor.
Power flowing. Works first try, exceeding my expectations!
All in all, this install was surprisingly straight forward and easy. Save yourself $1,000-1,500 and do it yourself! It took me an afternoon and part of another day, plus research about the system. One weekend and you’re dialed in with power on your van!
A Few FAQs
Q: Is 200W enough?
A: Yep! The only time we’ve run lower on power is when we have practically zero sun for awhile and haven’t driven recently. You could certainly put more on there if you want. When we’re in direct sunlight, which isn’t all that hard to find where we like to go, our system is at 100% almost all the time even with the fridge running, stereo on and laptops and other stuff charging.
Q: Is your Vitamix/hot water boiler (1500W each) always able to run?
A: NO. When the voltage in the batteries gets below about 12.2V, which happens around 70% battery life, the inverter will fault. Gotta keep the system pretty topped out to run that kind of wattage and amperage pull. Note: We have started the van up and run it for a few minutes while boiling water to get around this. Works great, and only has been necessary a couple times before you think we’re earth haters. Consider getting a Ninja blender (less wattage) and/or a lower wattage hot water boiler.
Q: Aren’t you worried about your panels blowing off while you drive?
A: Initially, I was worried about this. I haven’t had a single issue with it. Make sure to use the sealant to cover the solar panel feet and I suspect you’ll be fine. We’ve been fine for 35,000 miles!
Q: Do I need to wash my panels?
A: Yes! After a few months driving around, I got on top of the van and the panels were practically coated in dirt. I’d say a solid wipe down every month or two would be a good idea.
https://www.traipsingabout.com/wp-content/uploads/2013/11/IMG_1314.jpg9001200Dakotahttps://www.traipsingabout.com/wp-content/uploads/2018/03/Traipsing-About-logo-white-background-450x156.pngDakota2014-04-21 12:02:072023-05-06 15:06:44How to Install Solar Panels on a Camper Van
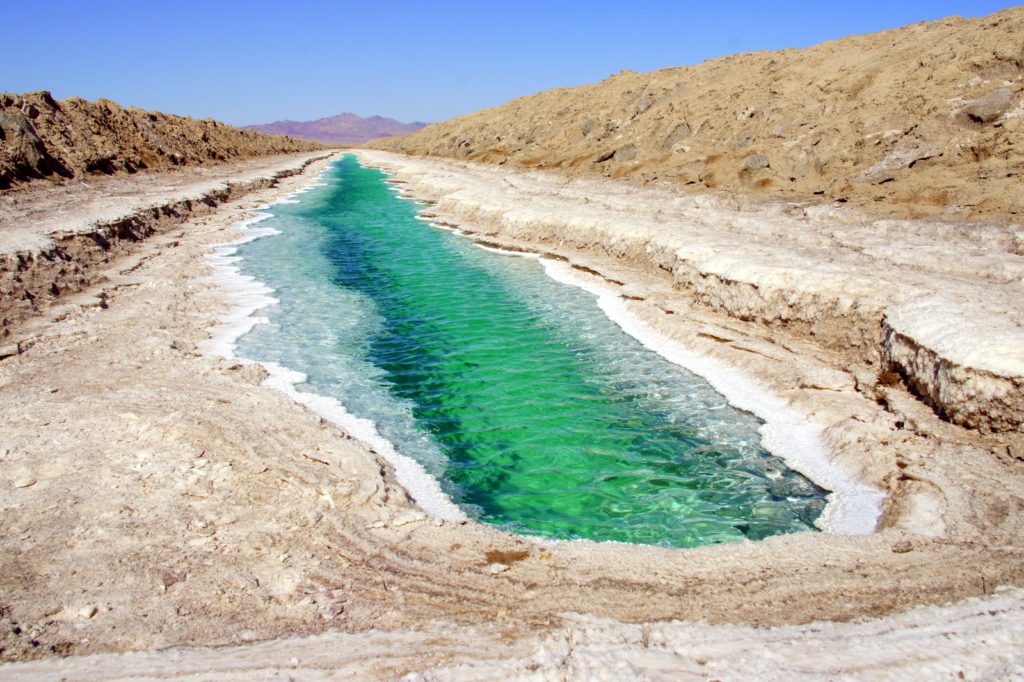
Caribbean-green salt mine in the middle of the Mojave.
The angel of time continues to flit her fickle wings. California, has it really been four months since we crossed over the border from Oregon? Since the day before Thanksgiving, we’ve wandered pine-needled paths of the redwood forests and then puttered south from there along Highway 1, hugging the coastline all the way to San Diego.
Google Maps says it takes 18.5 hours to bomb straight through that 968 miles, and we did it in scarcely a third of a year for a smoking eight miles per day average! *Fist pump* Albeit with some meandering along the way, as we’ve put 3,500 miles on the van during that time, just ticking over the 10k mark on the odometer two miles before Arizona.
There was lots of inspiration in that 1,000 miles! You initially welcomed us in with your empty winter beaches and towering trees, then entertained with your bridges and food in the Bay Area. Served up perfect roads and trails for our feet and our bikes, both road and mountain. Got me thinking about my past and why I write. Dropped our jaws with condors and elephant seals. Blew us away with ocean views in Big Sur. Amazed us with the silence, and the fury of a desert storm, in Joshua Tree. Surprised us with Malibu Creek State Park, just a stone’s throw from Los Angeles, and with trails north of L.A. with a view of Hollywood. Plus gave us ample time to visit friends and spend quality days with family.
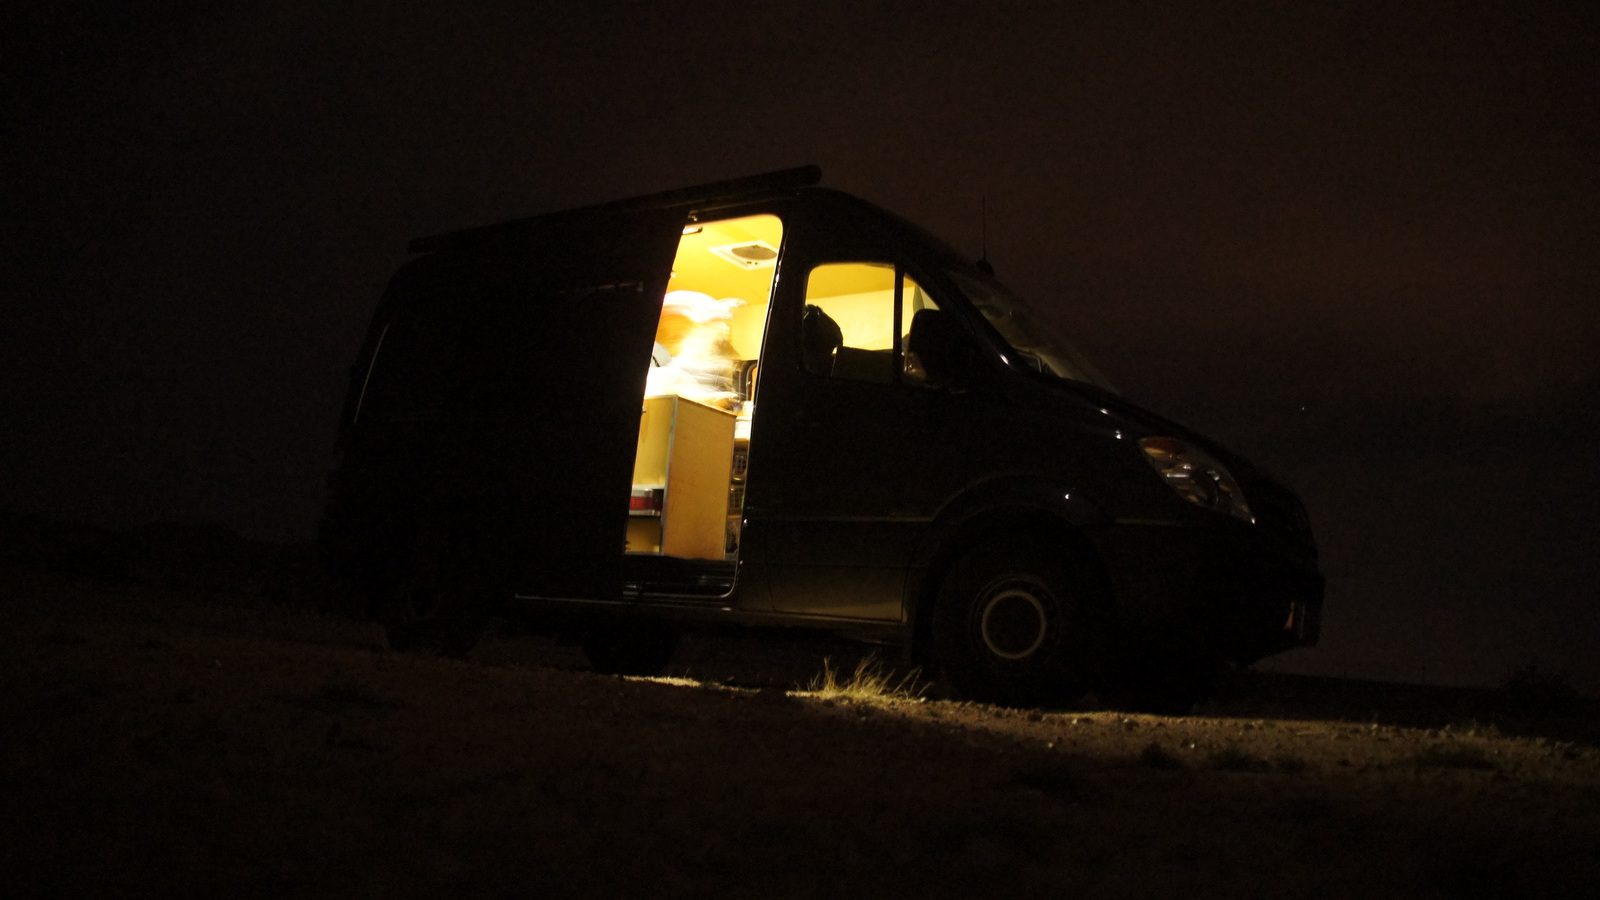
Camped out on BLM land somewhere near Joshua Tree.
I mused at the start of this blog about how slow travel is different from our usual rocketship journeying with a day here, day there. To spend a week (or three) in one place has felt odd occasionally, an unsettled feeling like we’re sacrificing unseen fun. There are times when the pull to get in the van and cover tons of ground strikes – “we should drive around the country!” – before breathing deeply and remembering we don’t want to travel that way. We’ve done it many times, and this time we’re shaking things up and finding it far more fulfilling. A better, deeper connection with places and people and a relaxed pace that doesn’t burn us out is the result of slowing down. We can’t recommend it enough and are grateful to have the luxury to travel this way!
We haven’t felt so flexible since traveling the world almost ten years ago. Both of us miss our friends deeply, yet this opportunity to seek adventure and stretch our boundaries is proving to be a formative change in our lives. Portland is our geographical home, yet we’re discovering home is inside where our heart pumps in our chests and GPS coordinates don’t matter. We wouldn’t trade this current experience for a fixed location anywhere.
The generosity and cheer we encounter along the way sure helps. Yesterday, a woman from L.A. asked me, “have Californians been friendly?” and I was surprised that she felt they were not. Yes! There are kind, amazing people that made us feel loved in every single place we’ve visited in the Golden State. Thanks to you all!
Golden hour at Hole-in-the-Wall in the Mojave Preserve.
At times, travel feels almost meditative. Walking on the beach next to crashing waves in the salty wind has cleansed our feet and cleared our minds time and again on this trip. The oceanic feeling that comes from experiencing anything as vast as the Pacific Ocean or soaring redwoods is hard to describe. Alone and small, yet part of something huge, it reminds of our interconnection and also individuality in the world. There is no place better than nature to decompress and be inspired to emerge reinvigorated. To be sure, the enormity of the sea and forest holds a special place for us and we will miss it and always feel the magnetic pull of the coast and redwoods.
What’s next? I’m writing this in the red-rock desert of Mojave National Preserve just southwest of Las Vegas. From here, we head into Northern Arizona for some backpacking in the Grand Canyon (happening as you read this post) and mountain biking in Sedona while hanging with Chelsea’s family. Then we take a break from the van (!) and fly to visit my bro and his new baby in Idaho followed by a trip to Portland to see our buddies.
A flight south will bring us back to our adventure mobile to continue on through the slot canyons and slickrock paradise of Utah. From there…who knows. We’re not entirely sure and are taking it one day at a time and hoping for the best. Too flexible to plan, you might say. Such openness creates both opportunity and fear of the unknown, and we’re learning to be ok with that.
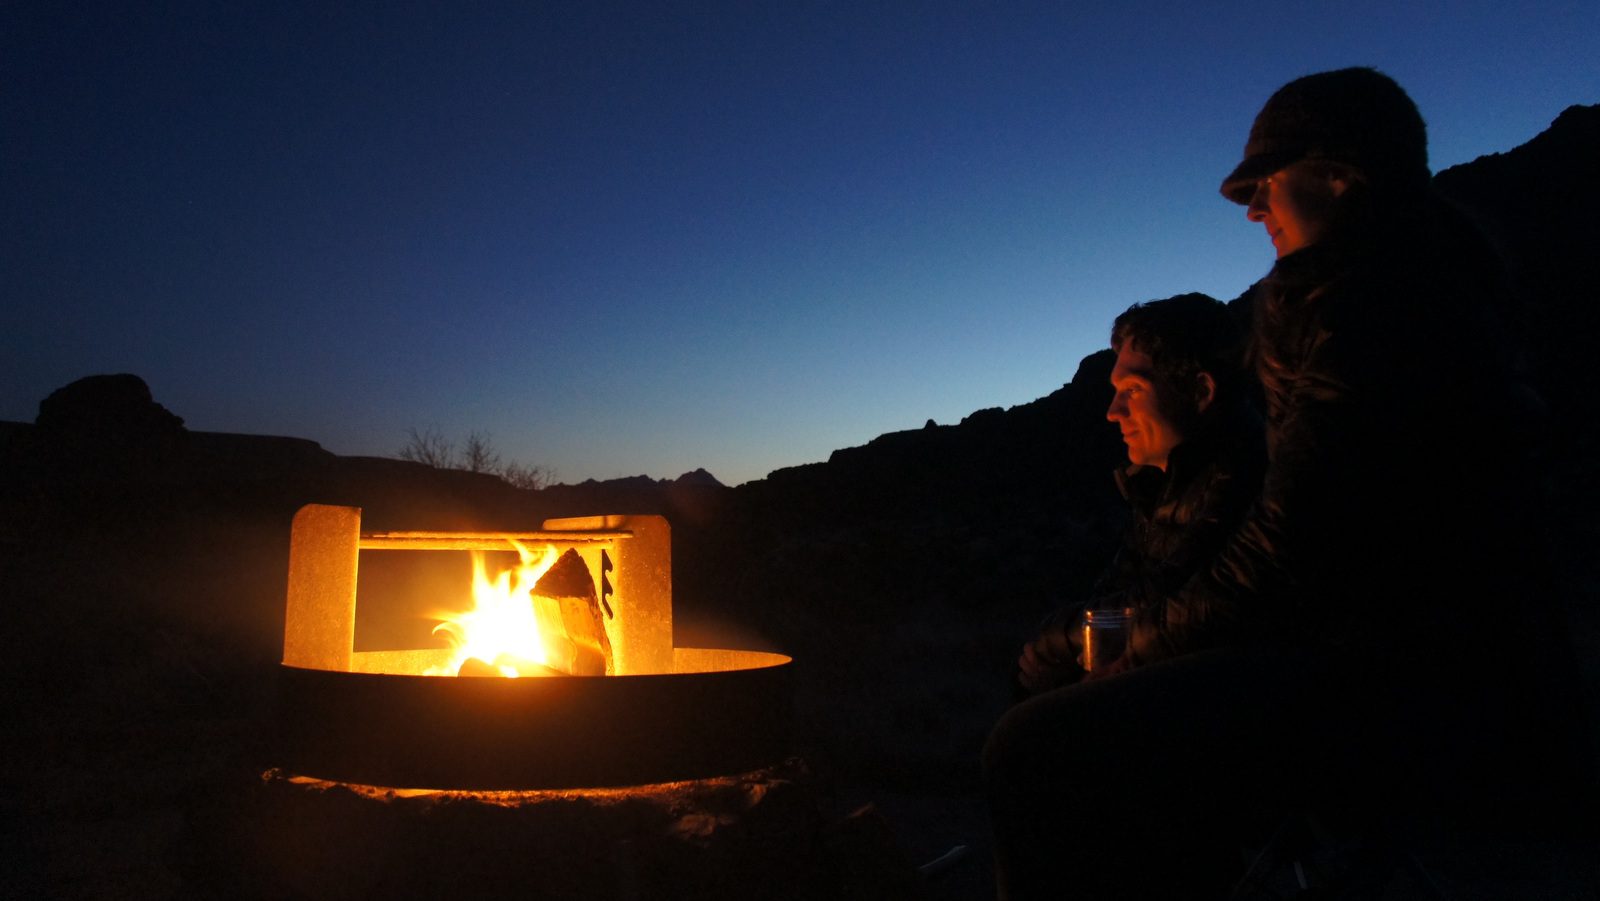
We spent our eight year anniversary exploring the Mojave Desert. and finished up with a nice fire under the stars. Here’s to many more days together just like this one!
For all of you following along, thanks for all your emails and comments of support. We love hearing from and meeting readers and dig your suggestions of places to visit and things to do. The internet and its power to connect us to people back home, those we’ve met along the way, plus new digital pen pals is awesome. I hope our stories and photos are proving to be fun, inspiring, or at least putting a pretty picture on your screen to bring a smile to your face. There are plenty more to come.
Au revoir to California and all our friends and family here. It has been fantastic. See you again soon.
Dakota and Chelsea
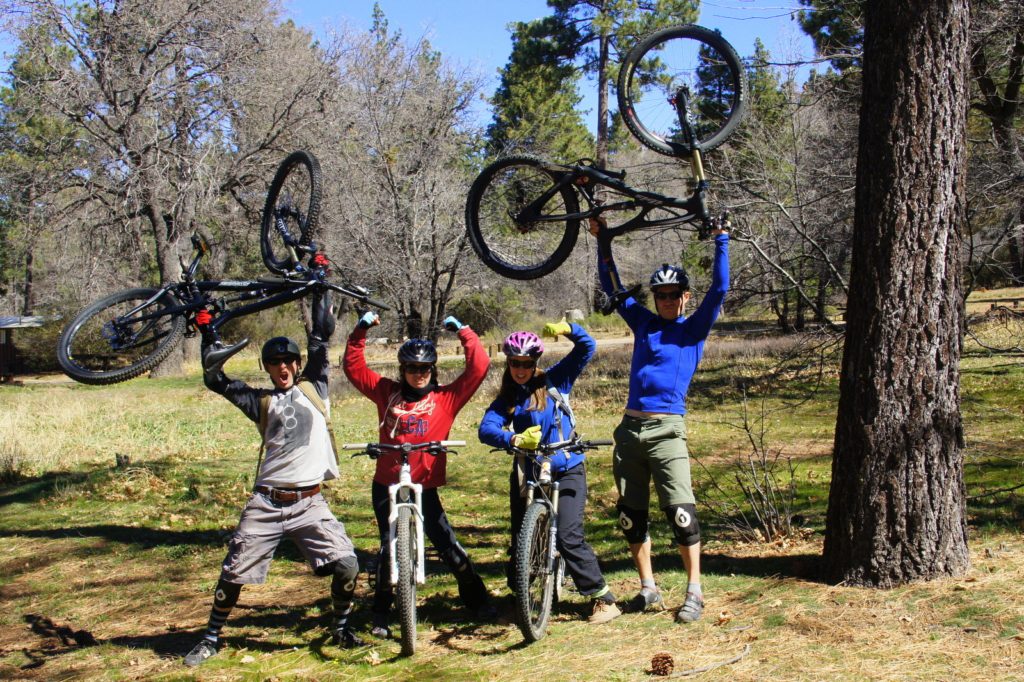
C’s bro Jesse, his GF Jen, C and I toast to a ride near San Diego. Cheers to more traveling!
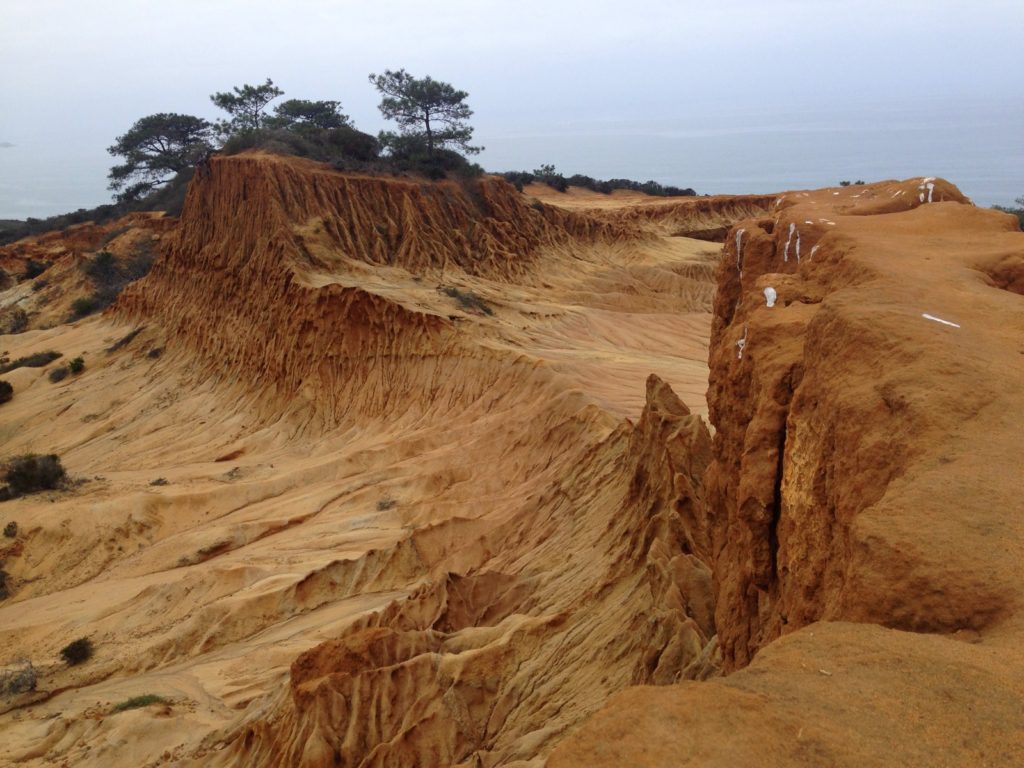
Coastal cliffs and sculpted sand and trees of Torrey Pines north of San Diego.
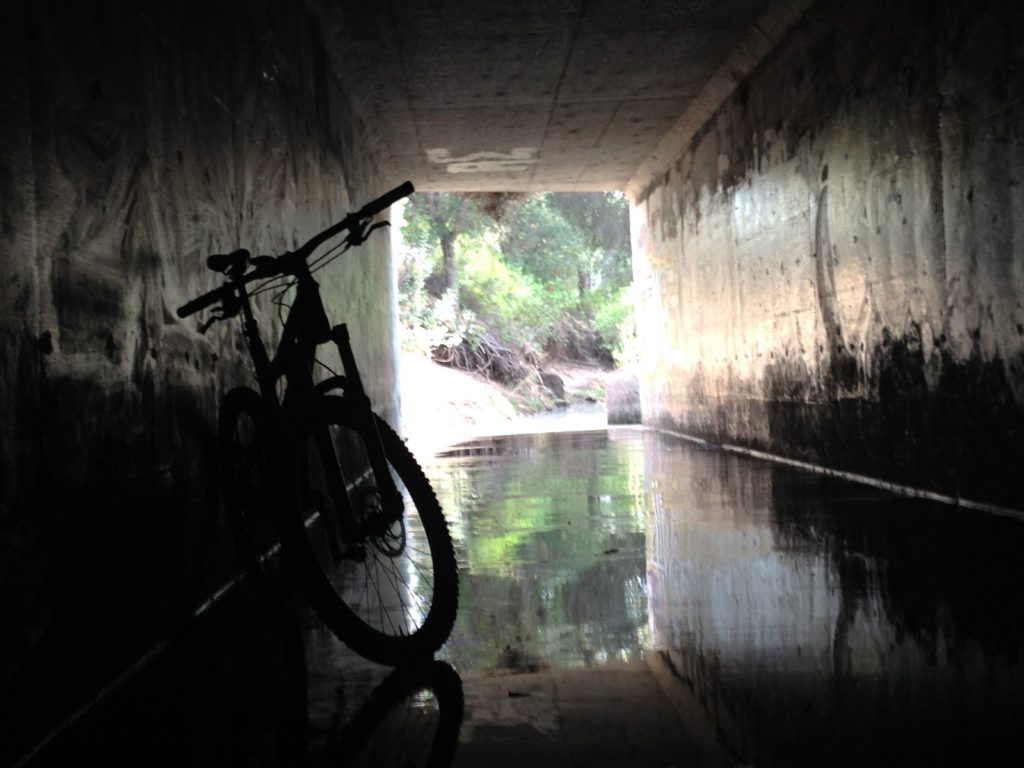
Urban mountain biking. Single track to single tunnel trails.
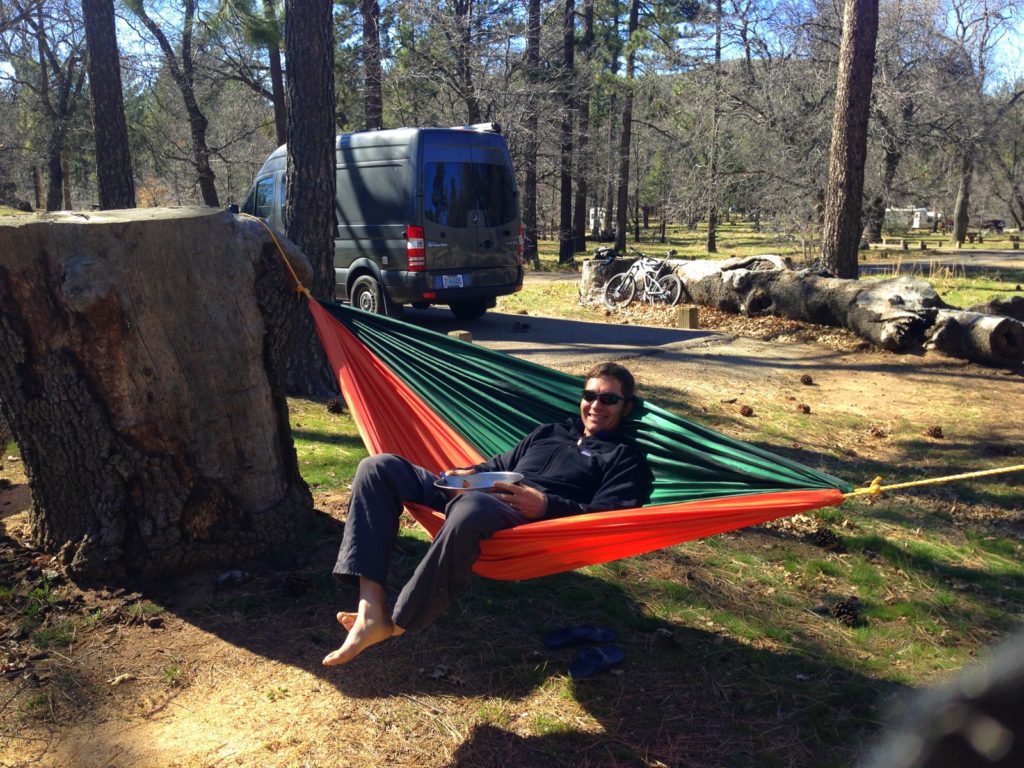
Relaxing after a fun day on the mountain bikes near Noble Canyon east of San Diego.
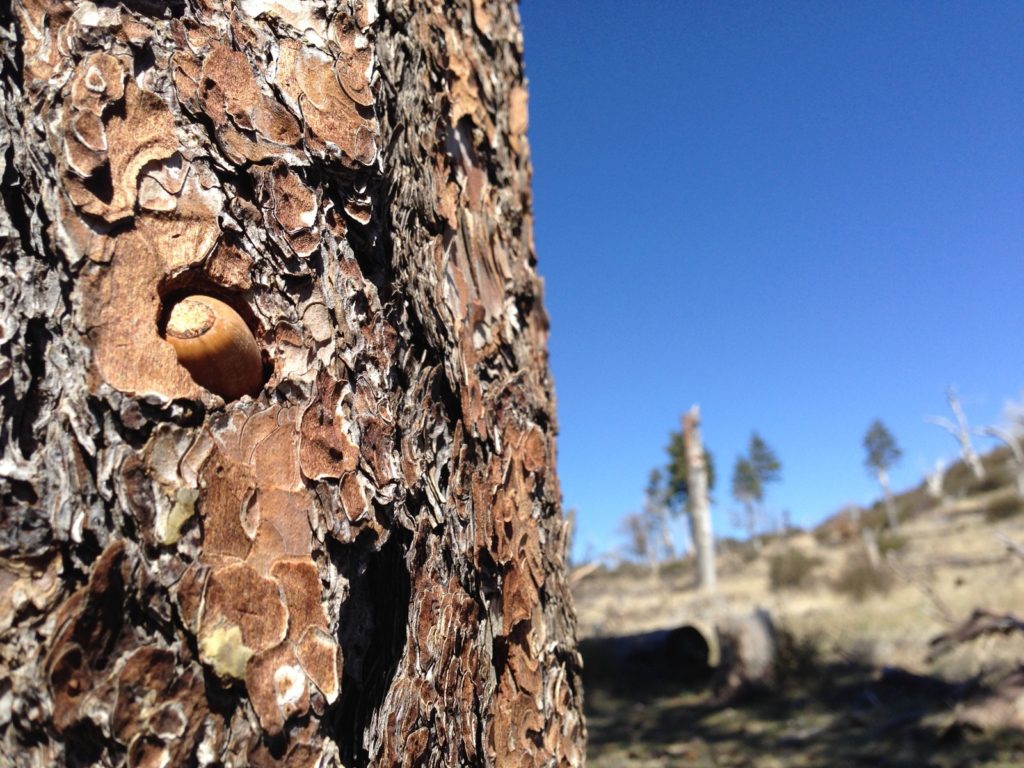
An acorn woodpecker’s granary tree in the Laguna Wilderness.
https://www.traipsingabout.com/wp-content/uploads/2014/04/DSC09652.jpg6821024Dakotahttps://www.traipsingabout.com/wp-content/uploads/2018/03/Traipsing-About-logo-white-background-450x156.pngDakota2014-04-08 07:08:142015-12-21 14:33:32Goodbye to the Golden State - California Recap
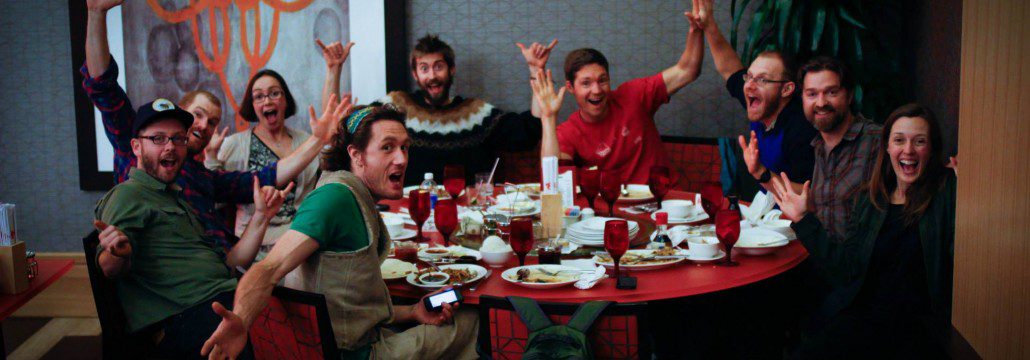
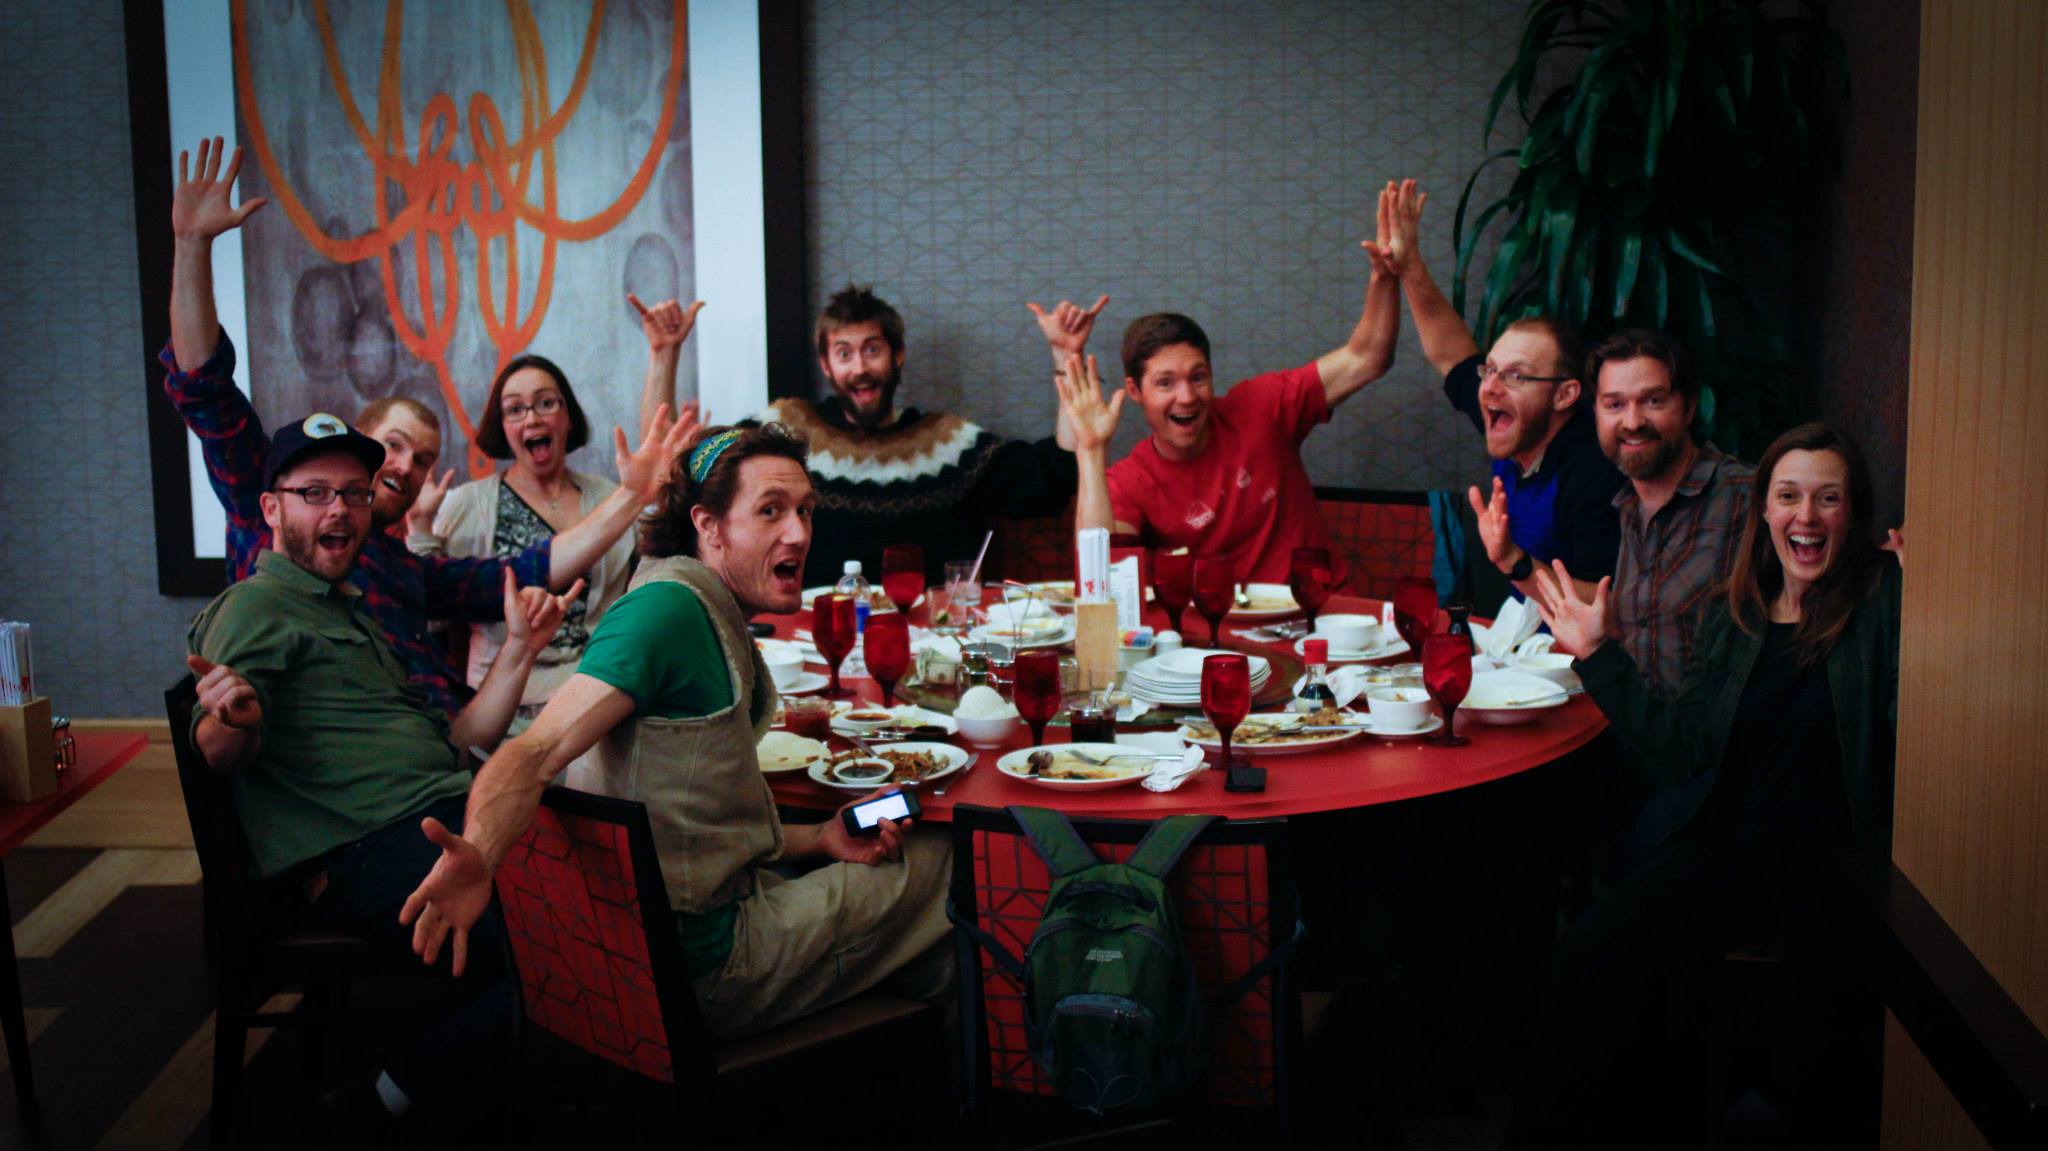
Dinner with a crew at the conference. Photo credit Souki Mehdaoui.
In the middle of March, I spent four days immersed in an eye-opening conference near San Diego. This was the inaugural Permaculture Voices (PV1), a gathering of 600 teachers, leaders and business people passionately curious about making an impact through permaculture, and it totally blew away my preconceived notions about what permaculture is all about. Prior to this, I only had a loose understanding of the players involved and the scope of their work, and the conference completely changed my viewpoint.
Seeing all these people together and listening to their informative presentations leads me to believe permaculture is transcending its fringy past and breaking through to have a shot at gaining status alongside other standards such as LEED and Fairtrade. Schools are now offering permaculture design as part of their curricula, including Merritt College in California, the University of North Carolina, and Evergreen in Washington. And celebrities like Alicia Silverstone, Robert Downey Jr. and James Cameron (director of “Titanic” and “Avatar”) are hiring permaculture designers to work on their properties. As soon as Kanye and Beyonce start tweeting about it, game time!
What the heck is permaculture anyway? Toby Hemenway, a well-known permaculturist author and teacher, has a great article where he defines it as “an instruction manual for solving the challenges laid out by the new paradigm of meeting human needs while enhancing ecosystem health.” Based on that, plus my understanding of the 20+ talks I attended in the four-day conference, my layman’s interpretation is “a toolkit for designing efficient, sustainable systems in a holistic way.” Take all the disciplines available from science, agriculture, health and wellness, engineering and beyond and select the right tool at the precise time to create a harmonious system that benefits the world. It is hard to pin down. Perhaps it should just be three words: Smart. Holistic. Design.
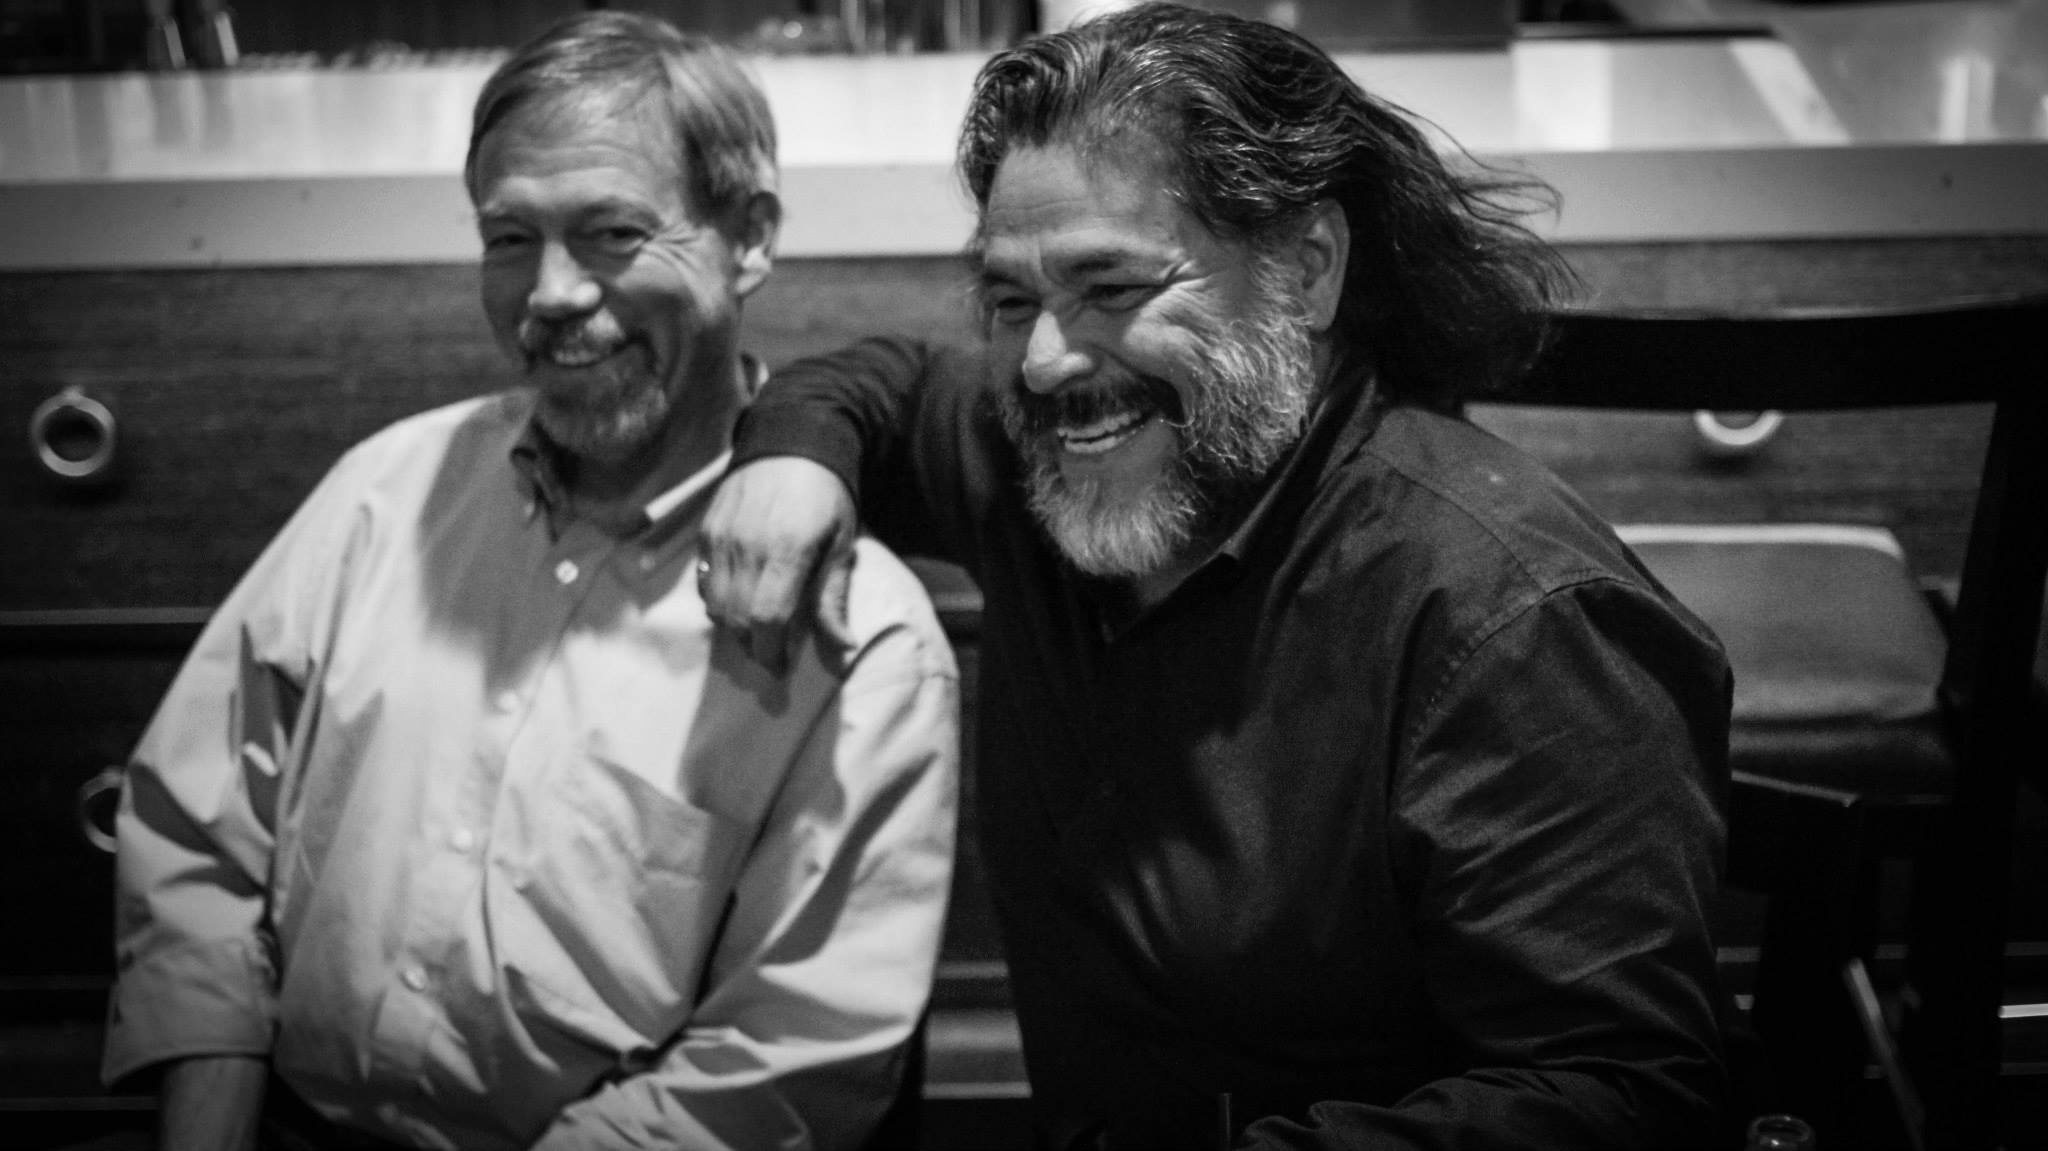
Toby Hemenway and Larry Santoyo enjoying a laugh over dinner. Photo credit Souki Mehdaoui.
Permaculture Voices shifted my perspective because the hundreds of people at the conference were the doers and shakers. People like Joel Salatin from Polyface Farms and his four-generation operation with revenues in the millions that supports multiple families while feeding thousands of customers. He also pushes the boundaries of farming while speaking eloquently and writing books about his experiences. Or Willie Smits, a scientist who is directing a 500,000 acre project in Indonesia to rehabilitate Orangutan habitat. The project is designed as a waste-free, closed-loop system supporting the local economy (previously crushed by the logging collapse) while generating fuel and electricity and a saleable resource, palm sugar. Oh, and it offers a 43% rate of return for investors! THAT is holistic, smart design that legitimizes a movement.
The accomplished and well-known keynote speakers included Michael Pollan, Geoff Lawton and Allan Savory and were incisive and inspiring. That said, two of my favorite talks at the conference were by guys in their early 30’s. Curtis Stone, owner of The Urban Farmer, built a successful urban micro-greens business on less than an acre of land that he astutely chooses not to own. This gives him the flexibility to test new markets and expand and contract nimbly. Not just that, he is teaching others how to do the same, which allows entrepreneurs to earn money and deliver organic, fresh and healthy produce straight from the farm to a local restaurant just a few blocks away. Curtis has a goal to educate hundreds of farmers in urban areas to do the same, traveling the world and creating productive farms in each city he visits.
My other favorite was Javan Bernakevitch. Besides being an engaging speaker, Javan talked about doing. His goal is to help others find success through concrete steps, not just theory. “Here is how you can build a successful permaculture business.” To me, Curtis and Javan are the new face of permaculture. They have the panache and business minds, plus the drive, to take things to the next level and push permaculture from the edge past the tipping point and into the mainstream while sticking to what matters. And that’s just a sampling – there were many others giving inspiring talks and attendees working to create positive change. People like Luke Callahan and Seedwise.com, an Etsy-type platform for farmers to sell their seeds through an online marketplace.
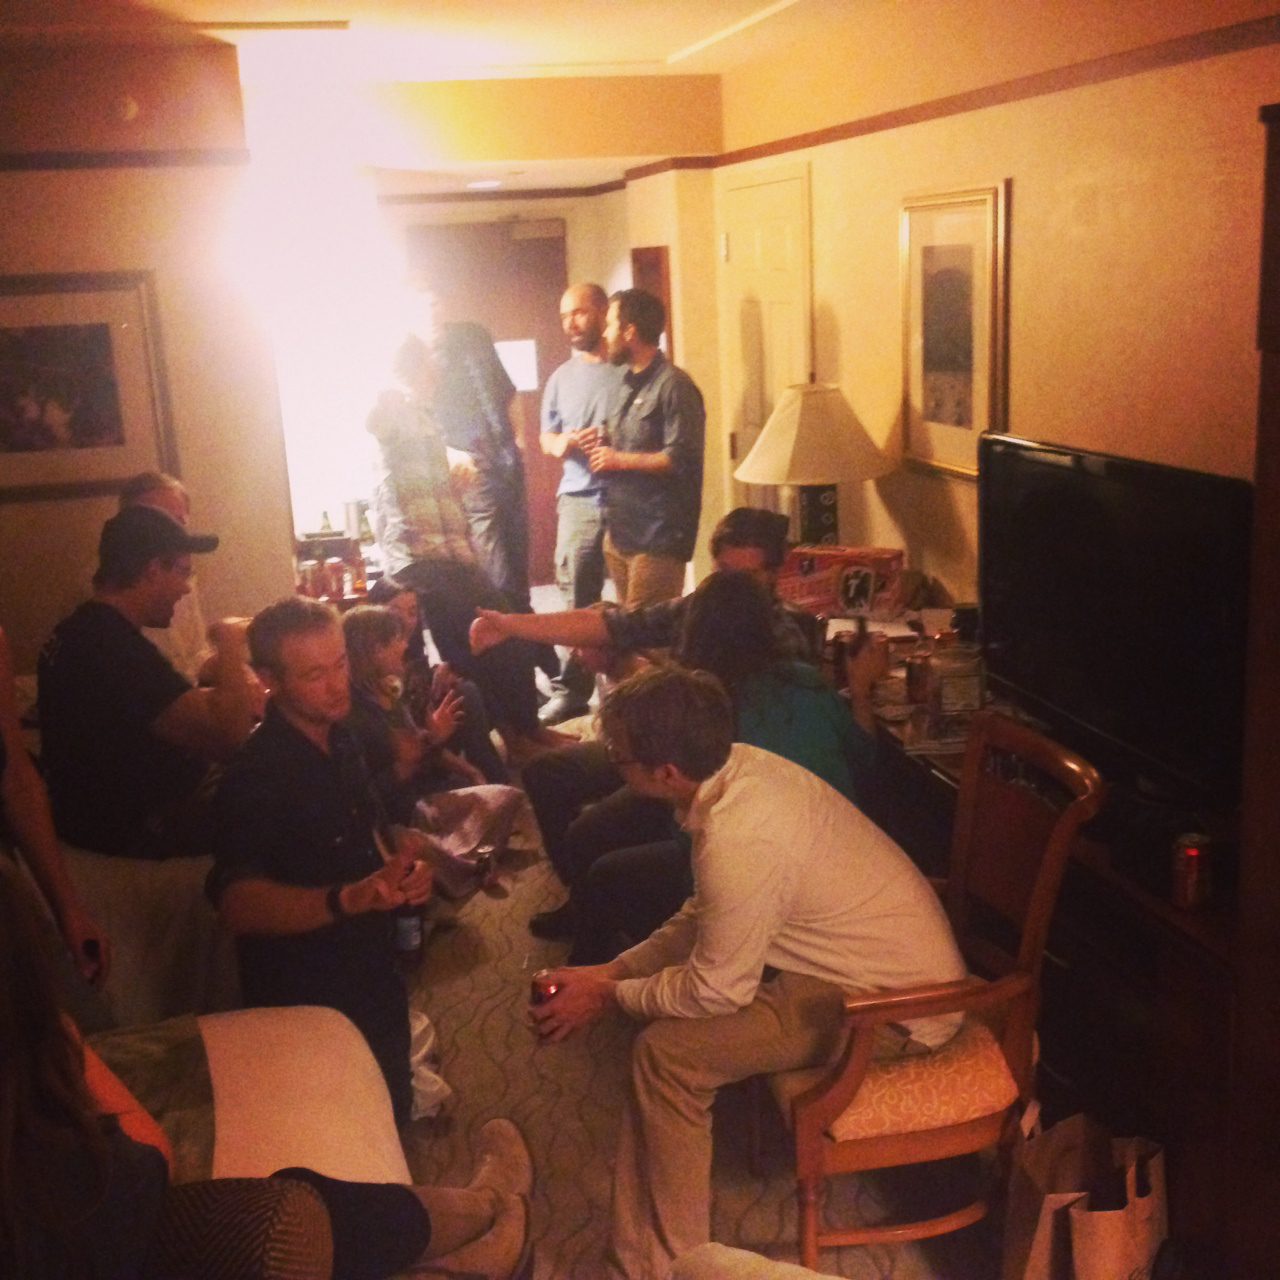
One of the many after-parties where the ideas just kept flowing. Apologize for the quality – iPhone in a dark room, ya know.
We in “sustainability” are all angling at the same thing – preserving the world we live in while still embracing progress, yet each business is siloed in this world, whether it’s farming, green building, selling outdoor gear, or building electric cars. Permaculture principles such as “observe” and “catch and store energy and materials” incorporate aspects that contribute to a holistic system, and I’ve seen similar mindsets via past work that incorporated green building guidelines such as the aforementioned LEED or the Living Building Challenge. With B Corporations on the rise, profit and practices beneficial to eco-systems need not be mutually exclusive. Demonizing profit isn’t going to get us anywhere and never has. The people with the money simply laugh and bulldoze through it.
My biggest takeaway from Permaculture Voices is that there is a new guard primed to hit the scrimmage line just as the people with money and influence are willing to pay for it. This new group of leaders is more mainstream, yet still driven to care deeply for the world and want to make a solid living while creating change. They have a message of hope to galvanize action. To me, this is a shift that inches things closer to the tipping point. Consumers these days are dialed into these types of business. Thanks to sites like Change.org, it is no longer a one-way street where businesses dictate how we consume and we have no voice or choice. Personal wellness and preserving our eco-systems aren’t a trend!
Permaculture dials into this sentiment by touching all we hold precious. It has the power to preserve and regenerate our planet while growing GDP at the same time. Beyond farmers, it needs more CPAs and engineers, lawyers and dentists, to shore up the foundation and expand the potential impact of all the talented people involved. After my experience at the first Permaculture Voices, I’m not only convinced it is a great toolkit for change, but am hoping to get involved to help with some of the amazing projects around the globe to contribute my skill set.
Onward!
Dakota
https://www.traipsingabout.com/wp-content/uploads/2014/04/Permaculture-Voices-dinner.jpg11512048Dakotahttps://www.traipsingabout.com/wp-content/uploads/2018/03/Traipsing-About-logo-white-background-450x156.pngDakota2014-04-04 08:20:542016-01-02 10:04:01Permaculture Voices - A Newcomer's Perspective