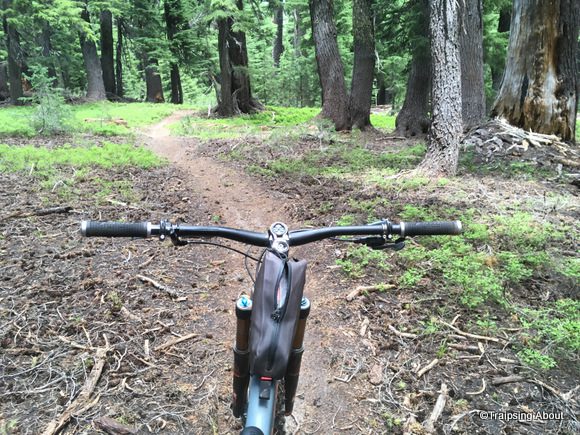
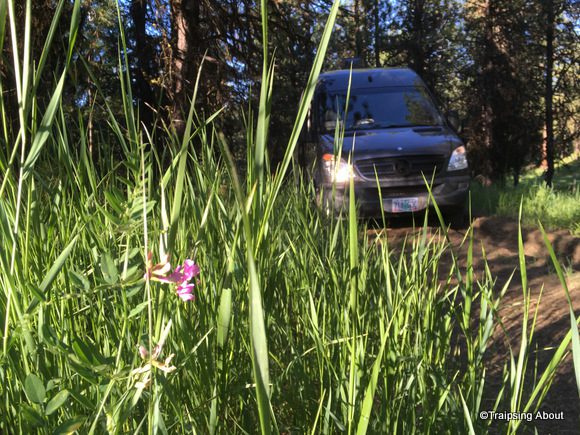
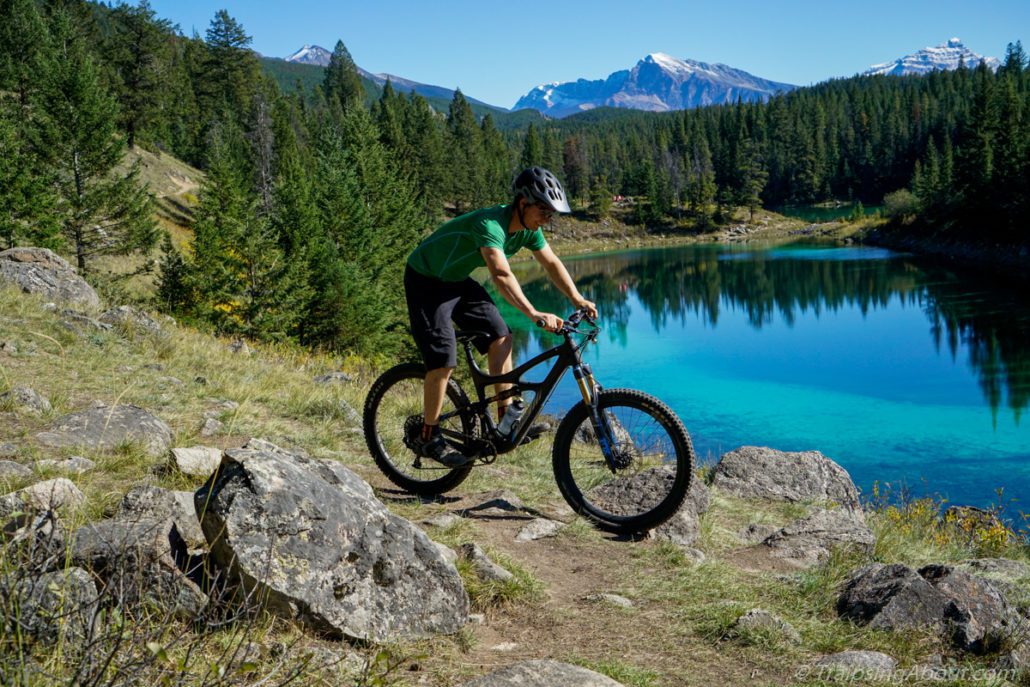
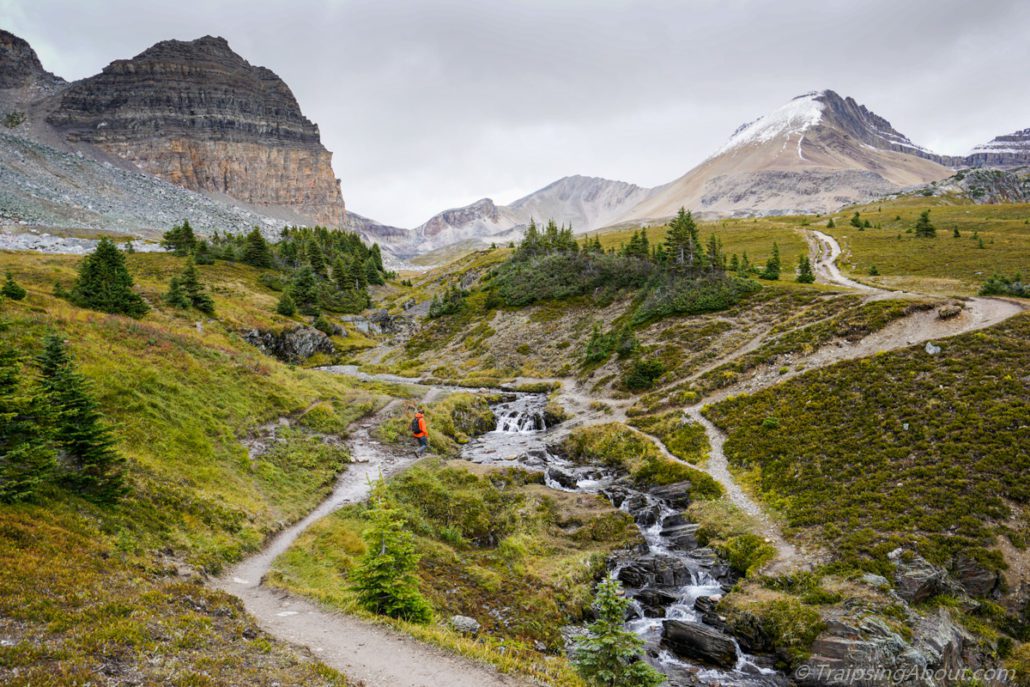
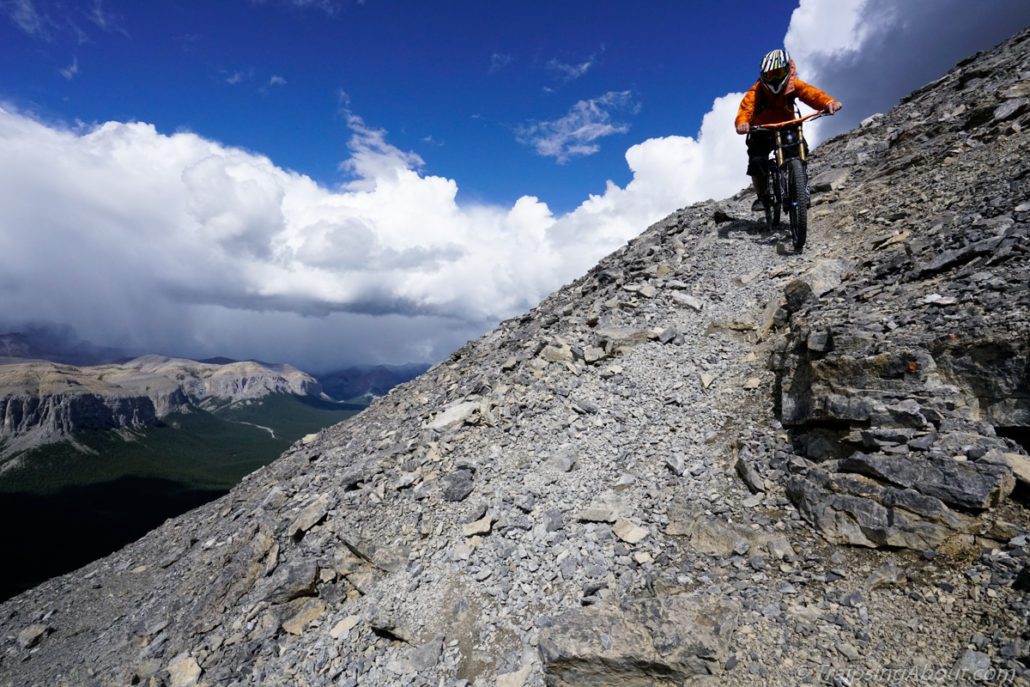
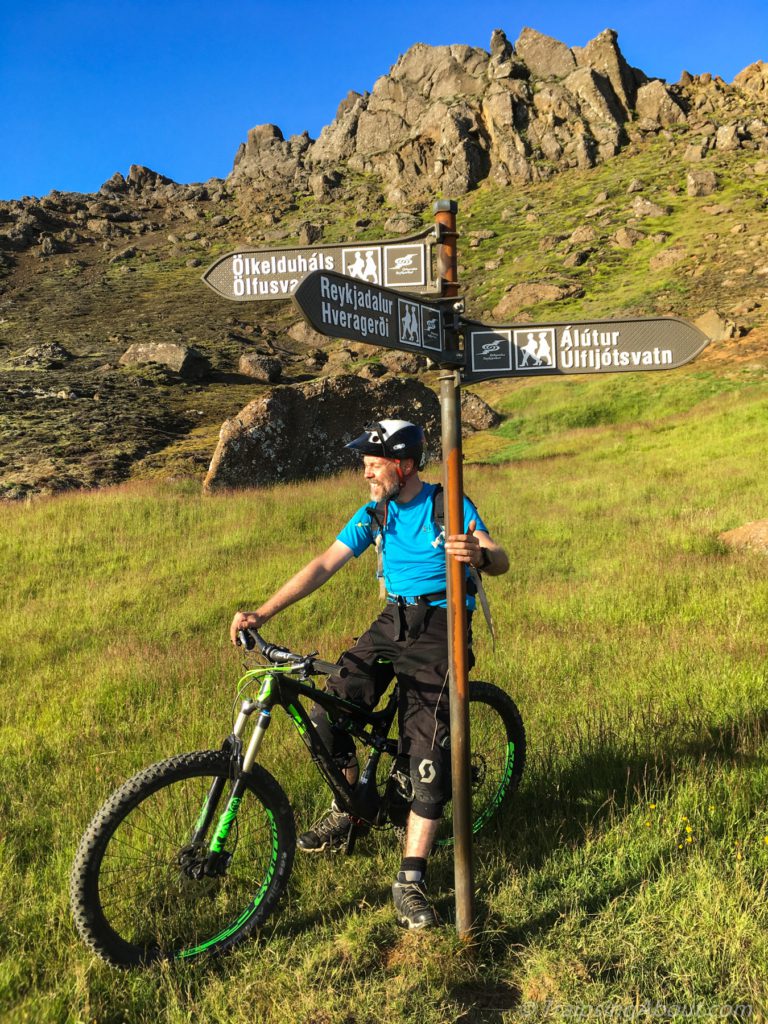
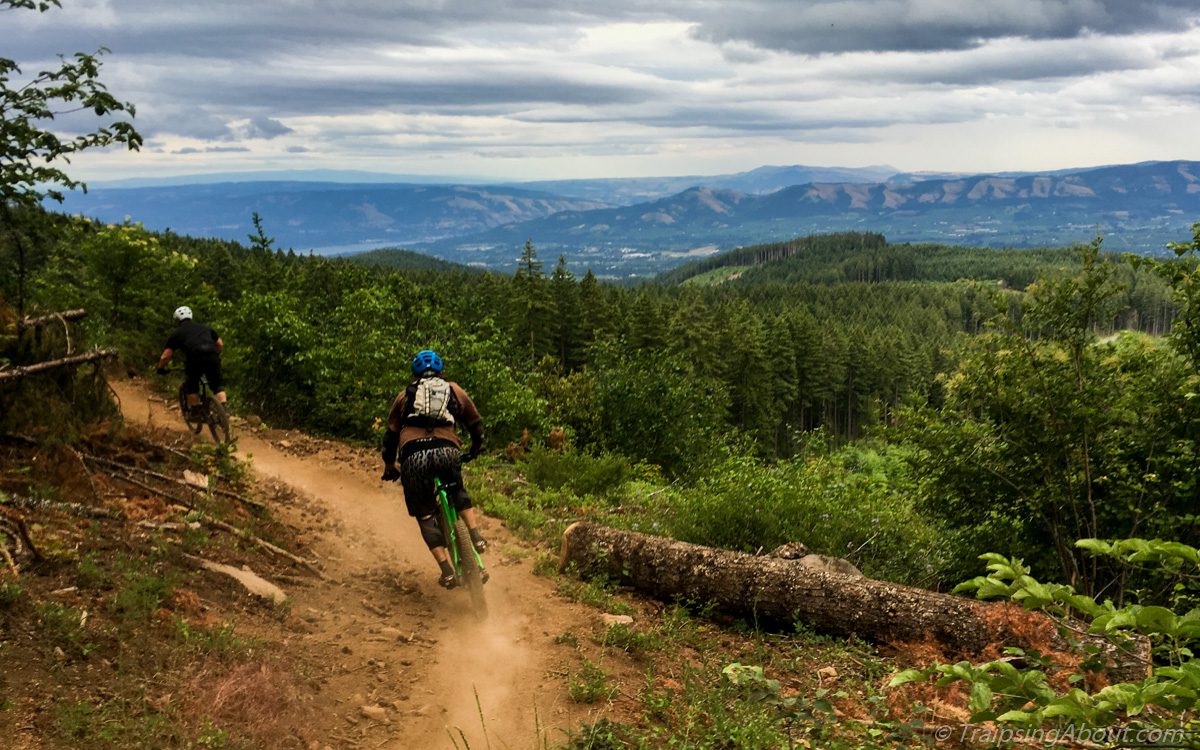
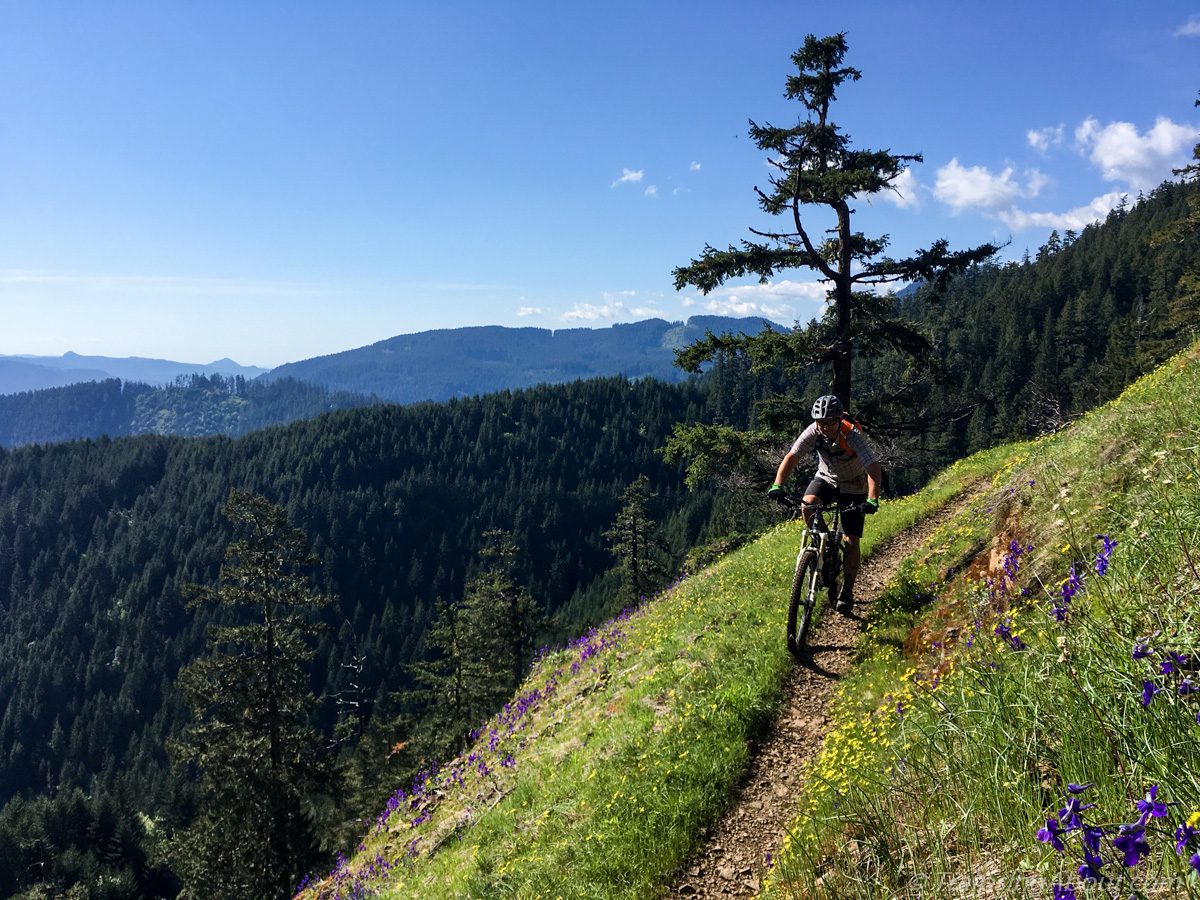
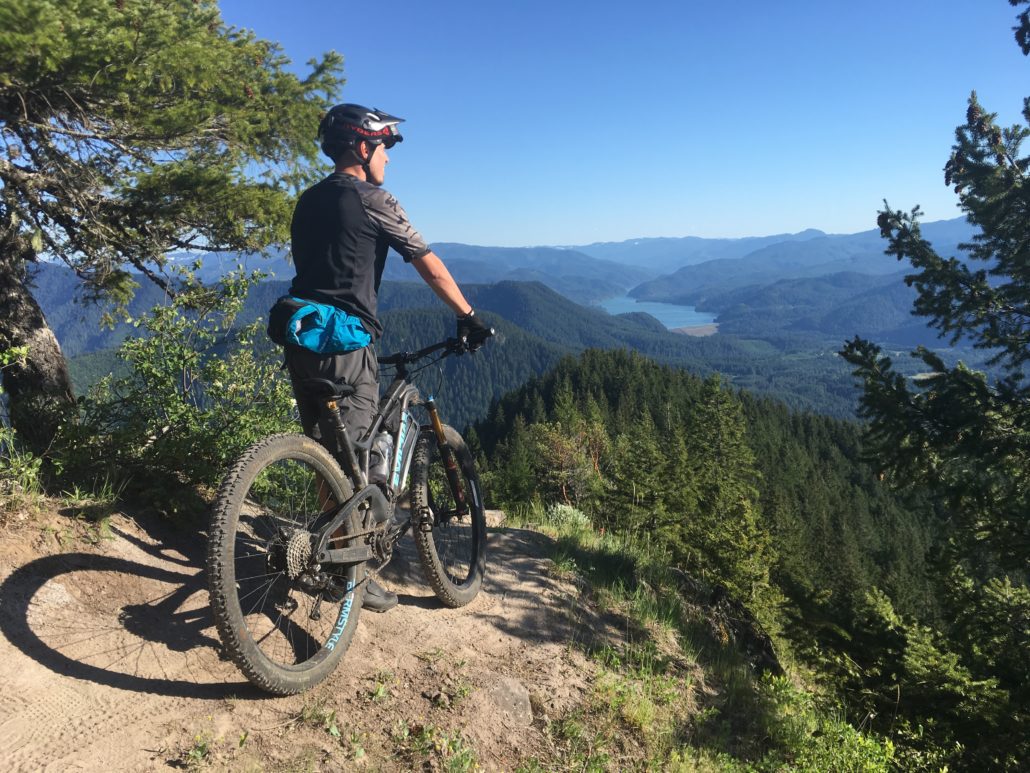
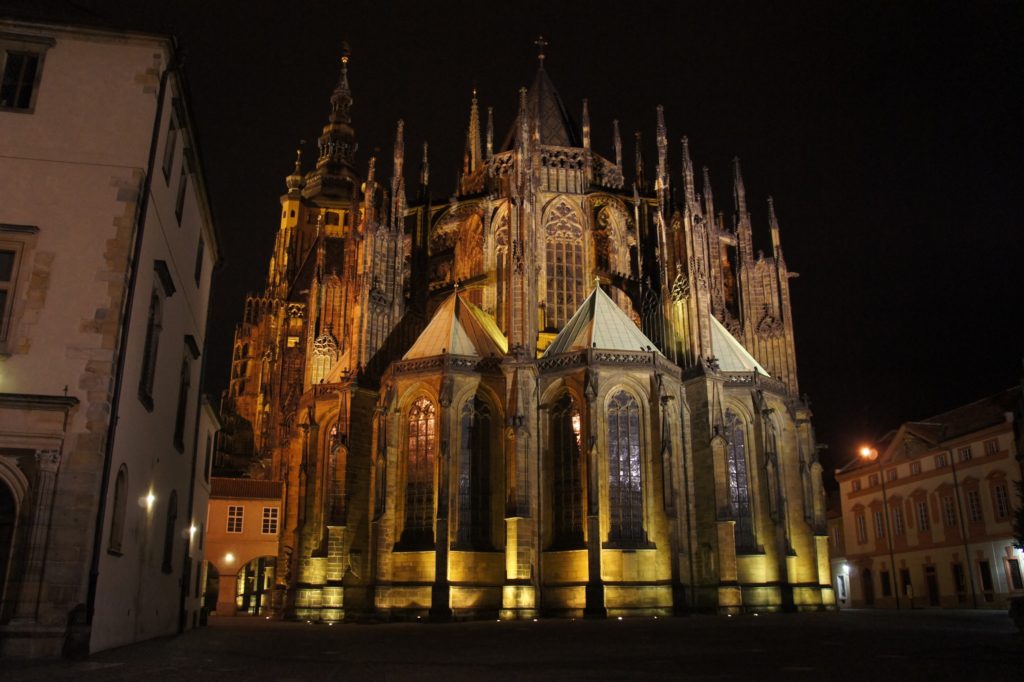
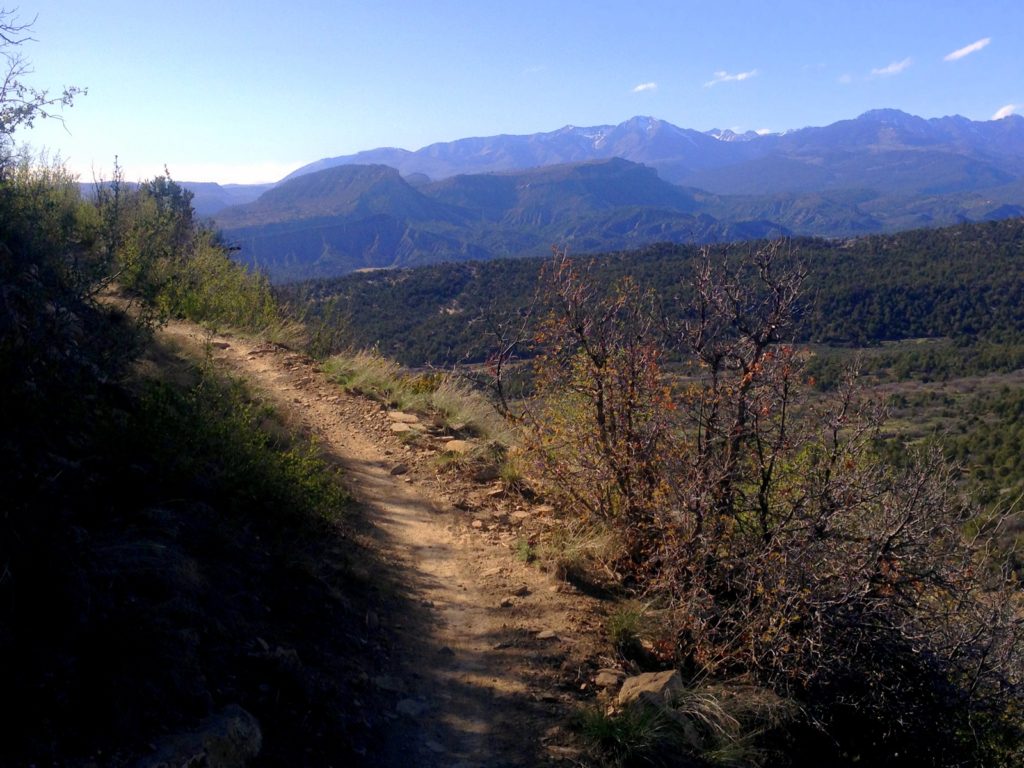
I clearly remember the first time I rode Tyler’s, a popular local bike trail. I walked some rocky uphill ramps, awkwardly landed jumps, and generally hacked my way down it like a noob.
I still had a hell of a fine time.
These days, I’ve ridden Tyler’s dozens of times and know every major feature. I fly down that sucker.
But is Tyler’s more fun/exciting/fulfilling now, or the first time?
In general, is there a way to develop appreciation and deeper comprehension rather than boredom for a repeated experience?
Travel to the same places. Hobbies we’ve done for years. Meals we’ve made for a decade.
Or piano pieces I play.
(YES. Brought it back to piano!)
Navigating the creative gamut
Like a new bike trail, the first time I play a piano piece my brain scrabbles to survive, assembling information to jam the notes into my brain. I’m walking rocky sections and taking in turns, one measure and phrase at a time.
Take Schubert’s Serenade, a song I’ve always loved that I started learning in December.In my initial efforts, I pushed through the technical challenges of the piece and could “play” it. Then I tabled it for month, letting the music sink into my synapses. Cue round two, with more nuance and expression…and yet I’m barely getting started.
Bridging that gap between what I can DO and what I WANT to do is the hardest part. I listen to professional recordings and think, “yup, do that, fingers!” Then I sit down and create some monotone pabulum akin to playing bongo drums with wet laundry. *sigh*
I’m exaggerating, but the gap between my expectations and my abilities does feel frustrating sometimes. Like some truculent kid, I want to play it that PRO way, now now now!
After I turn my pre-frontal cortex back on, I can (usually) reframe things. Because truly, I find this so motivating: I’m going to grow not just with new pieces, but enjoy a deep satisfaction revisiting piano works for the rest of my life. Something fresh to discover, to experience.
And dang it, I AM making progress. Even if I’m roughly 9,000 hours shy of mastery, there’s magic in the journey and daily satisfaction in the learning. I don’t need to be pro to have fun.
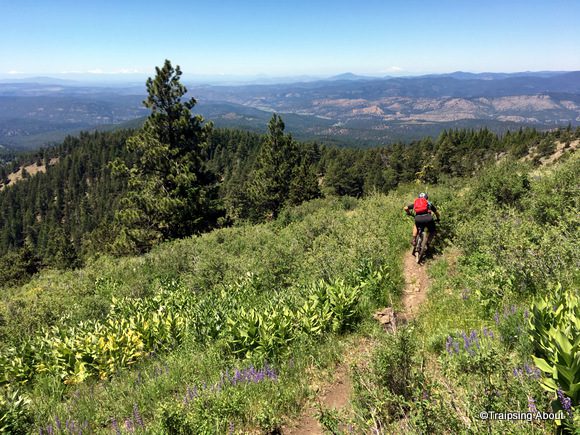
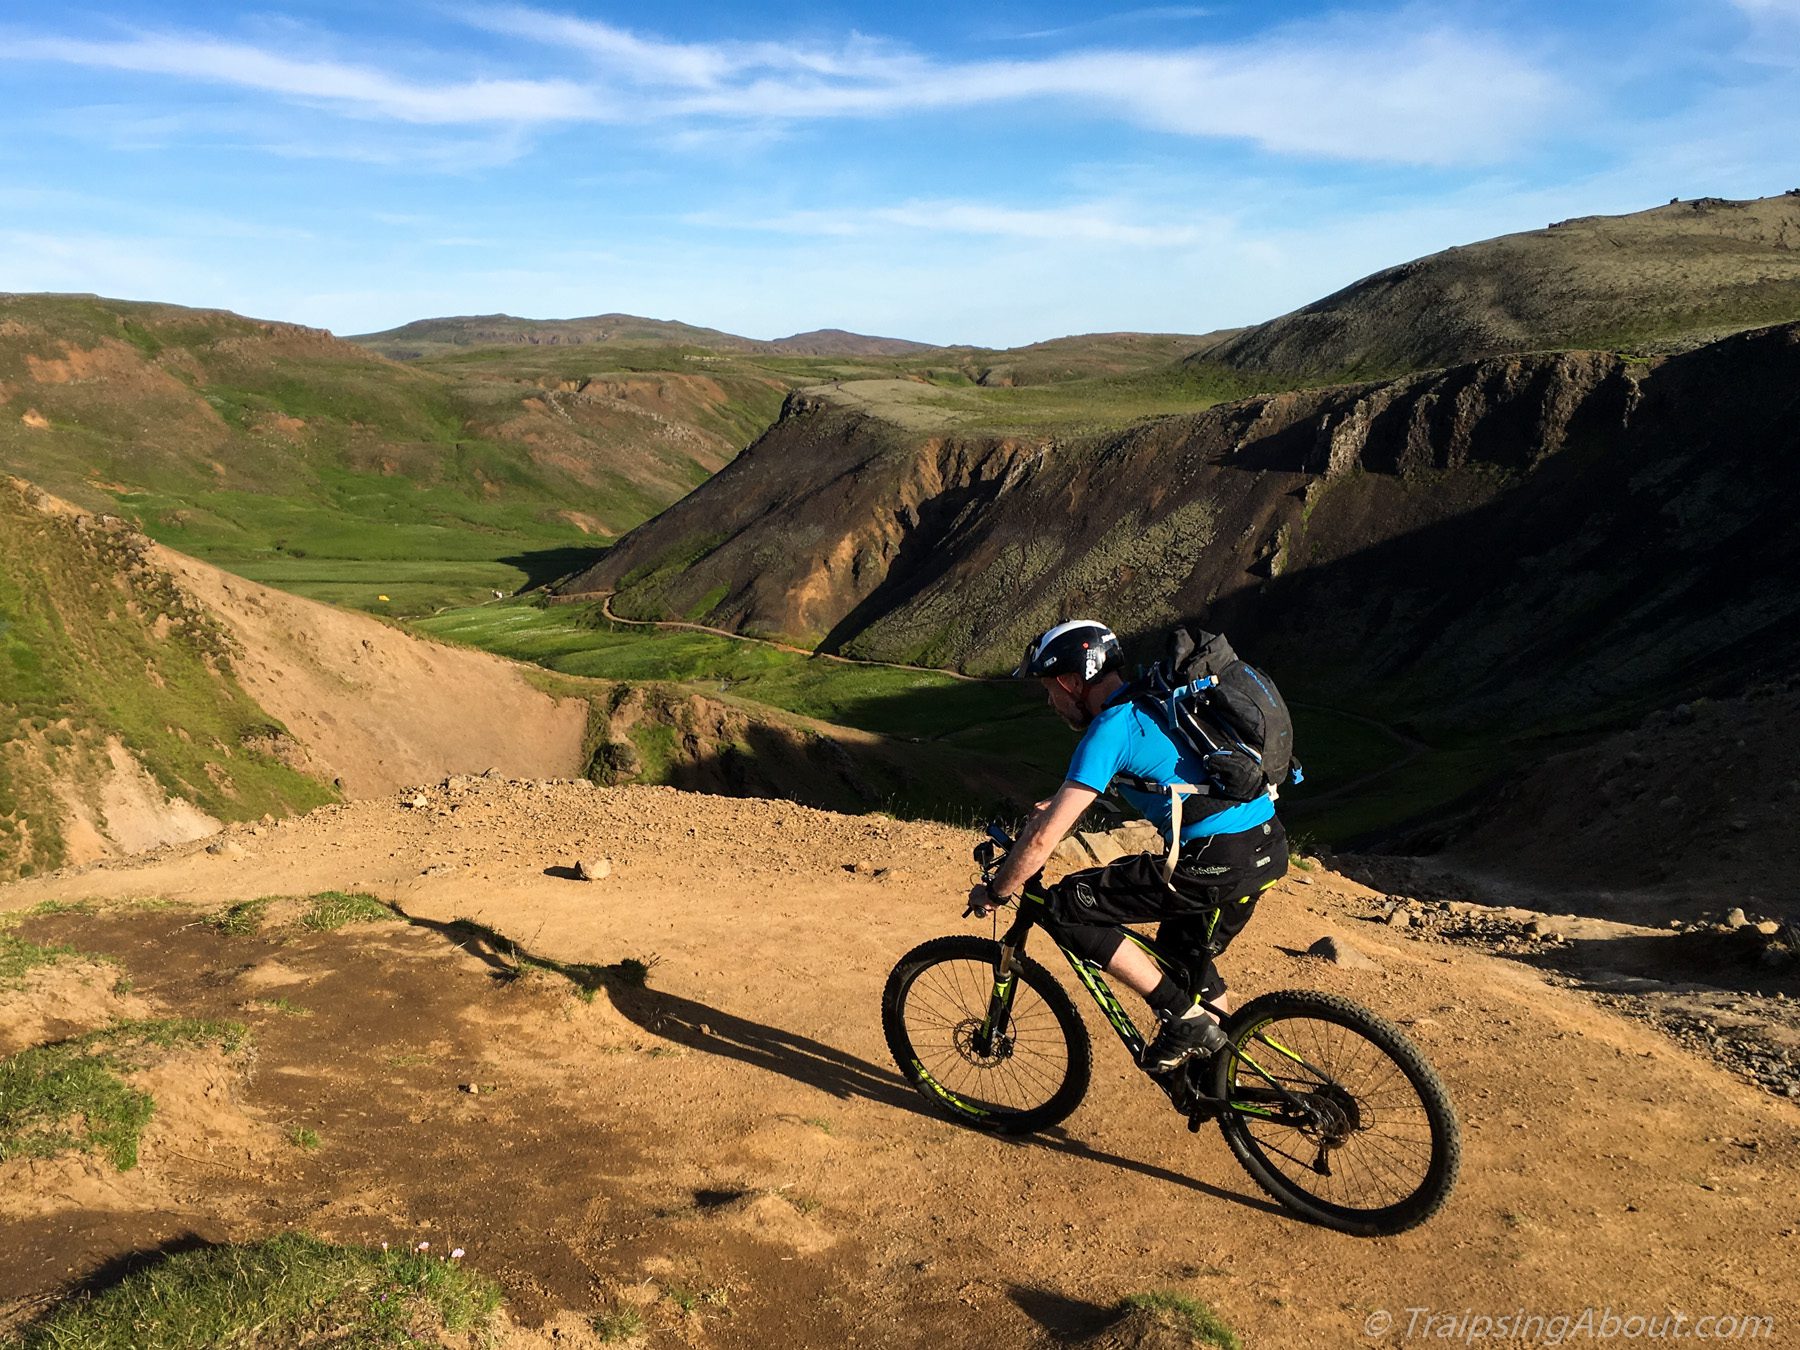
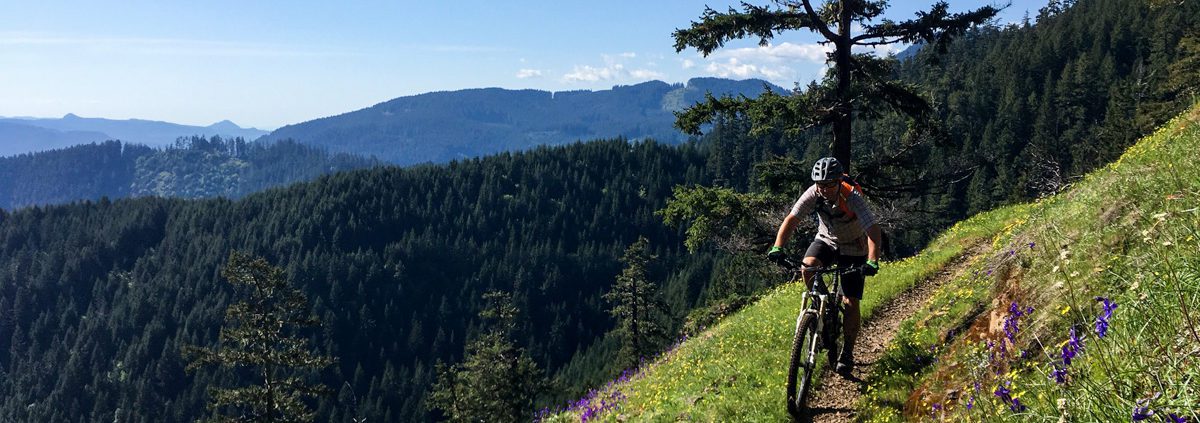
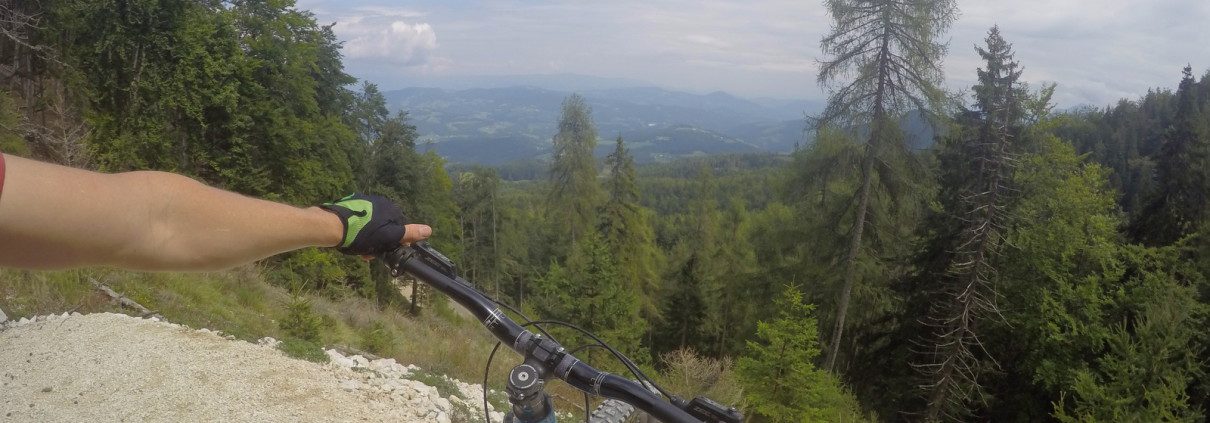
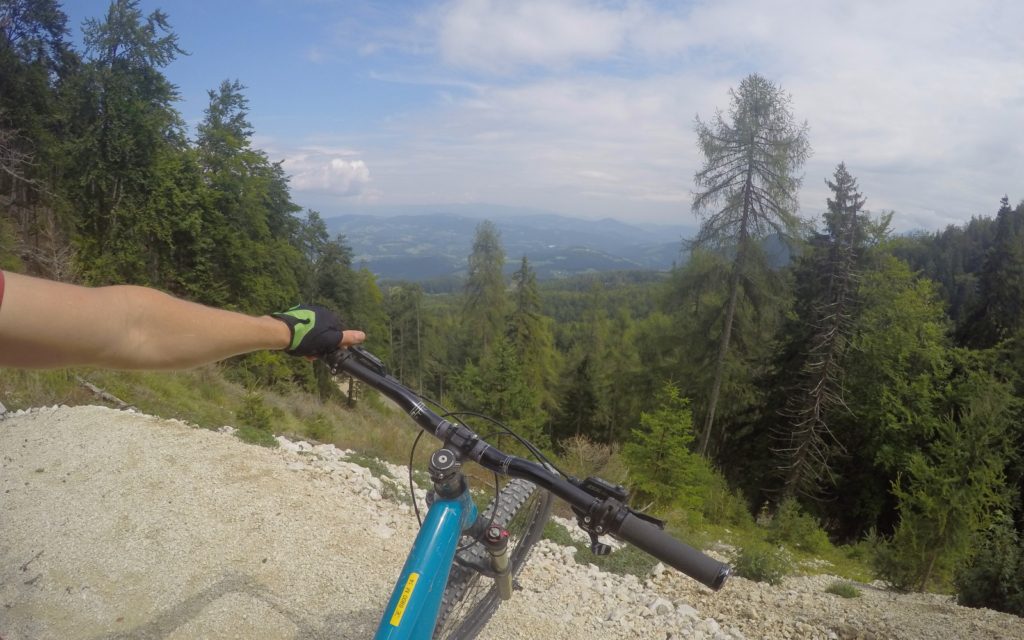
Plus, pushing myself on challenging songs pushes me to greater heights on those I already play. It’s the same thing that happens when I ride rocky trails on my bike. I may not slip effortlessly through the toughest moves, but that difficulty makes technical trails feel even more cruiser in comparison.
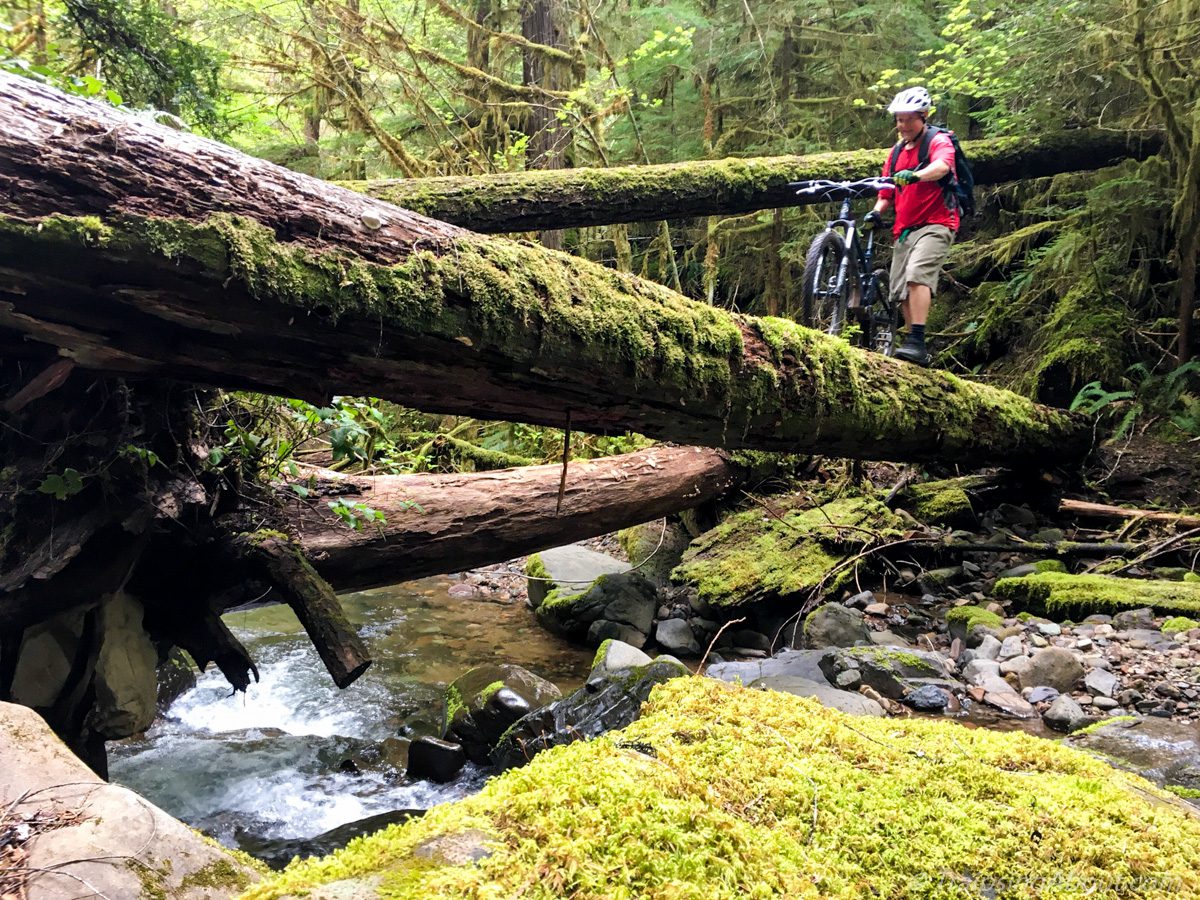
Unlike during piano pieces, sometimes I pause mid-climb on a bike to eat…
As piano, as life
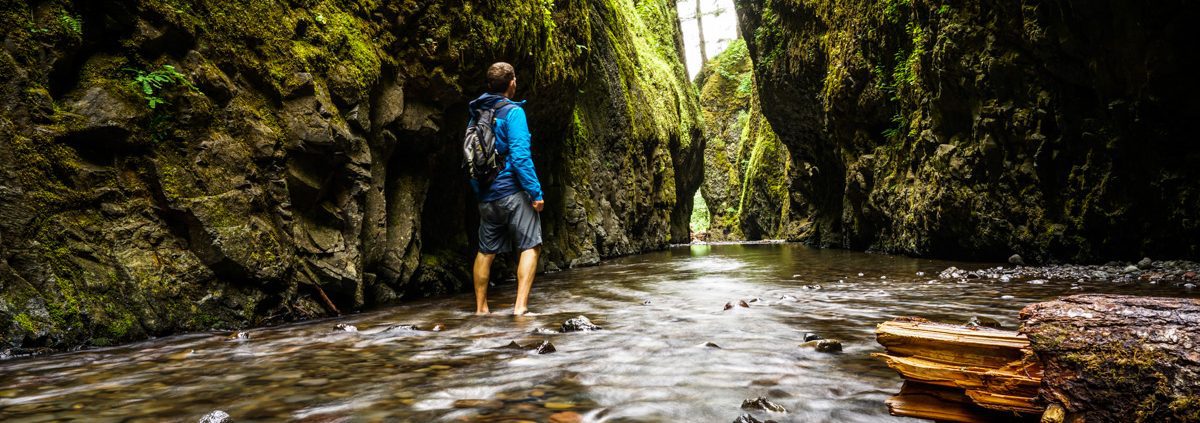
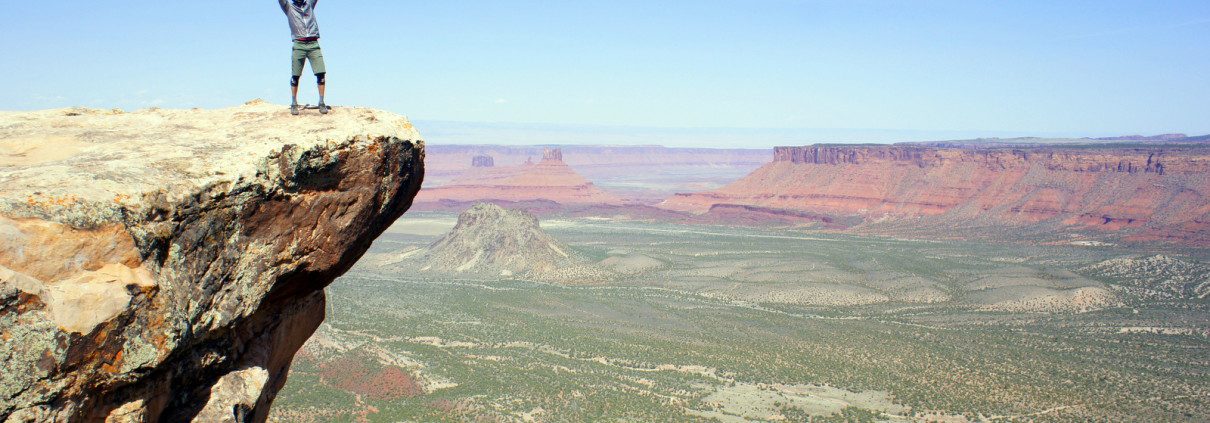
I love how this mindset so easily translates to other endeavors or pastimes. We’re a different person when we revisit a city or national park, reread a book, build a piece of furniture, or play an old song. Depth, additional context, a slower pace…it all modifies the experience and likely results in a deeper appreciation.
With this in mind, I’m continuing to actively push myself to share not-perfect work like my beginner drawings and music recordings. It’s tough because I want the work to be better, to make insane progress overnight. Sometimes I shake my head at how hard it is to take what’s in my brain and put it on paper or piano.
Whatever. There’s a reason every book on creativity decries perfectionism. I’ll probably always find blemishes and wish-it-were-different aspects of ANYthing I create.
The good news? It creates constant motivation to keep improving, growing, seeking.
That’s a beautiful thing.
As for Schubert’s Serenade? Maybe it’s not perfect, but I recorded it (Youtube link) and hope it resonates deep in your core the same way it does mine. I’m looking forward to a lifetime of it evolving beneath my fingers.
And if I get frustrated, I can always go rip down Tyler’s on my mountain bike.
Dig this post and want more like it? Check out my free 2x/month newsletter.
https://www.traipsingabout.com/wp-content/uploads/2023/01/Tylers-1-scaled.jpg7681024Dakotahttps://www.traipsingabout.com/wp-content/uploads/2018/03/Traipsing-About-logo-white-background-450x156.pngDakota2023-01-29 11:58:312023-05-06 14:46:39Revisiting the same-but-not-boring
The Colorado Trail is the big leagues of bikepacking. Get ready for leg-thumping elevation gain, lung-emptying altitude, afternoon thunderstorms tossing lightning and rain at the passes, and remote, rocky terrain with significant consequences.
Oh, AND prepare yourself for a fabulous adventure you’ll never forget.
We experienced no days I can label easy, but for determined bikepackers, it’s not unreasonably difficult. (Well, maybe a couple hours of it…) At our pace of 12 days for the trip, the town resupplies slotted nicely into the program, downed trees weren’t a thing, and perfect trail conditions from rain kept the dust down.
Sure, obstacles appeared. Forest fires from the west tainted the air for the first week. The elevation gain and hike-a-bike are no joke. We fled thunderstoms. My bicycle showed up 2.5 days late with a bonus of a broken dropper post…
But hey— no mosquitoes swarmed us, beautiful vistas assailed our eyeballs, fantastic descents delighted us, dozens of CT backpackers chatted it up, and we had the opportunity to ride through the Colorado mountains on a famous trail. What more can a bikepacker ask for?
Another day on the CT. (Near Kokomo Pass, between Frisco and Leadville.)
Shortcuts for Colorado Trail details
Here’s my experience bikepacking the Colorado Trail. I wrote this as a resource for folks looking to bikepack this route, so free to skip to any specific sections below.
Traveling between Denver and Durango, the Colorado Trail’s originated as a hiking route. Perhaps that’s why so many backpackers stared at us like we’d escaped the loony bin…
Featuring 70,000+ feet of steep climbing in ~550 miles, the bikepacking route bypasses a few wilderness sections on fire roads and pavement. Mostly, it follows singletrack up and down over 10-13k passes. Check out the main Colorado Trail page on Bikepacking.com for a complete write up.
Down down down…sometimes.
The Best-Laid Plans
My plan was simple: fly into Denver and out of Durango with 15 days to complete the trail. About 40 miles each day with space for half-days if thunderstorms whupped our butts or we needed a rest day. No problem.
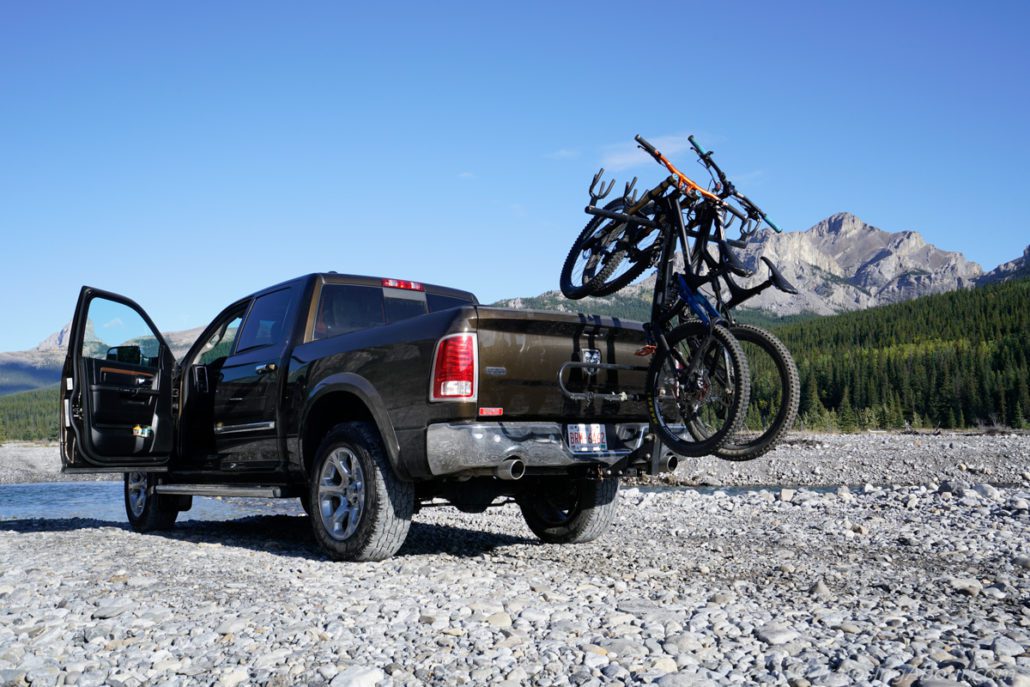
I live in Oregon, so flying lopped dozens of hours of driving time off the trip. Since airlines love to charge $200 to bring a bike only to dropkick them down ramps, I mailed mine with Bikeflights instead.
Sadly, UPS blew it and my bike arrived 2 days late. Instead of bikepacking, my trip companion Mason and I explored Denver. We broke tested traffic laws on Lyft scooters, toured the Denver Art Museum, bought final trip items, and generally made the best of it. Lesson learned: ship bikes with a bigger time buffer.
My bike finally arrived at 5 p.m on Monday. We reassembled it in a chandeliered banquet hall, caught mass transit to Littleton, and pedaled 10 miles to the CT start at Waterton Canyon. We arrived riiiight at sunset—spirits high, visibility low. Trips ideally start at 8 p.m., right?
No matter. Mason and I enjoyed an easy cruise up the canyon and camped near the start of the singletrack, poised to leap into the adventure the next morning.
Here’s the tl;dr for our Colorado Trail trip: up at 6-7 am, on trail after a cold-soak breakfast of oatmeal with nuts and berries. Go uphill (pedaling or hike-a-bike). Go downhill (mountain bike amnesia! Hard climb forgotten!).
Stop pedaling around sunset. Aim for days to end at the bottom of a descent to reset spirits and cleanse the mind. Better for morale.
Repeat.
In between, eat as much as possible, listen to audiobooks when the hike-a-bike gets soul-crushing, stop and talk with as many thru-hikers as possible, and keep eating (always).
Want the real details? Read on.
By the way, dig these kinds of posts? Sign up for the free 2x/month Traipsing About newsletter for more tales from the mountains and creative challenges like drawing and piano when I’m off the bike.
(Real) Day 1: Waterton
Unless you’re already a mountain goat or already live at elevation, your lungs will hurt out of the gate on the Colorado Trail.
Our first two days climb from Denver at 5k’ to 12.5k’ above Frisco. We enjoy occasional downhill moments and plateaus, but generally, we work. I’m immediately glad I swapped my front chain ring out to 26T—unless you have thunder cannons for quads, do it! Loaded bikes are heavy, treat your knees nicely.
My first Colorado Trail surprise is the sheer number of thru-hikers. We pass SO many. The Colorado Trail Foundation estimates 600 hikers will complete it in 2021, 4x the usual.
Chatting with people, we learn the backpackers span all ages and distance traveled per day. Everyone on their own journey, with different experiences and fitness and goals. The majority of hikers are college-age or retired, taking 30-45 days. Compared to bikepacking, it’s another world, a solid chunk of summer spent on trail with rest days and trail families. If it weren’t for so much walking, I might be into it.
My second surprise is my recently-serviced seat dropper post. It worked fine before I put it in the box in Oregon, but refuses to pop back up on trail. *sigh* I finagle a solution to keep it fixed in place.
First descent! End of segment 1 heading down to the S. Platte River.
Our inaugural thunderstorm booms overhead when we meet Jay, a Colorado Trail racer. He’s looking rough thanks to a wreck, blood seeping through bandages. Sounds like the CTR racers got their butts kicked with three days straight of pounding rain out of Durango. We trade beta and commiserate, three guys in the woods looking for adventure. We’ve got it, in some form at least.
At our first bypass around wilderness, we chat with another CTR racer who sounds ready to sell his bike and embrace playing Fortnite instead. “Seven major thunderstorms, I counted.”
The Lost Creek detour proves to be an undulating, soft fire road. Rain spits from the gray sky, but the Bikepacking Gods keep the intensity dial below pouring.
To celebrate our first day on the Colorado Trail, Mason loses his phone at the end of a lonnnng descent. Dark:30 is incoming, plus we’re tired and low on water. I convince him to pedal back up and he miraculously finds the phone.
It’s almost dark and I’m shivering, body heat gone. We descend a mile and YES there’s a random stream with a perfect camping spot. I don all my clothing, pitch the tent, chug water, gobble down a freeze-dried meal, and get in my sleeping bag RIGHT before the skies open up. We drift off to raindrops smacking the tent.
Traversing a plateau on day 1 west of the S. Platte River.
Day 2, Tarryall detour to Kenosha Pass
We rise to soaked gear, but at least the rain has stopped. It’s a fresh day and more bicycling awaits!
Turns out the Tarryall traverse is steep climbs and descents, repeated forever. A couple miles in, we pass a father-son duo about to kick off day 3. They’ve under-estimated the trail and are bailing. “We’re playing golf in Breckenridge tomorrow. This trail is HARD.”
At Goose Creek campground, we chat with the friendly camp hosts as their giant tom cat plays in the brush. Our lunch wrap is vegan Violife cheese, Primal jerky, hot sauce and spinach. We’re living the good life out here!
The wide open views of the Tarryall Road detour.
And yet (small) wheels are threatening to come off: while drying my wet socks, I lose one on a descent. NOOOO. Rookie mistake. Second issue: my water filter is already slowing down to a trickle. WTF, it worked at home.
We hit pavement and push on into a headwind. Hours later, Mason’s enthusiasm jumps back to 10/10 when we reach the Stagecoach Saloon, which features a solid selection of snacks. We restock on super healthy options junk food. Stagecoach is our only food stop for the 150 miles between Denver and Frisco.
Another hour of fire road climbing and we’re back on the Colorado Trail. Always-Strong Mason pushes up the final climb as sunset sparks to the west. Over the top, mountain bike amnesia strikes as I descend through waving aspen.
We crash out at Kenosha Pass campground. Two Ibuprofen and ear plugs = blissful sleep.
Wrapping up day 2 at sunset, just before the descent to Kenosha Pass.
Day 3, Kenosha Pass to Frisco
We kick things off with a smoky morning climb through sun-dappled aspens. We’d considered bailing on the trip, but an AQI of 175 is only a couple hundred cigarettes per day.
All’s going well, minus the giant hand squeezing my lungs on the long approach to Georgia Pass. Altitude is real and I can’t take deep breaths! We’ve climbed from 5k to 11.8k in 30 hours, so it makes sense.
The descent off the pass is initially fantastic, then devolves into rocky madness near the bottom. I’m a fan of rocky terrain, but this tests me and my loaded bike, especially with a broken dropper post..
Break-your-bike rocky on the Georgia Pass descent.
Halfway down, we catch a hiker who plods along with headphones in. They must be noise-cancelling because we yell like psychos for two minutes until he hits a switchback and yelps in surprise. Hikers and bikers: one earbud while recreating, please.
Mason and I soak our shirts in a cold creek and chat with a backpacker from Florida. He torched his knees out of the gate with big days and may need to bail on his trip. The CT’s elevation gain is hard on a bike, but I can’t fathom hiking all that downhill. Brutal.
Up and over another steep pass with about 12 seconds of pedaling. Podcast and hike a bike, go! Especially at elevation as our lungs adjust, hiking feels far better than gasping.
MOUNTAIN BIKE AMNESIA. The descent is fast, smooth, all the funzies.
However, we hit Breckenridge and realize it’s NINE miles out of the way to Frisco. All paved bike path, but I quickly decide retracing our route the next day will damage my psyche.
In Frisco, we swing by the post office for a restock that Mason mailed ahead. I pull my favorite trick: not eating enough on days finishing in towns. My energy flat-lines and I barely can drag myself around Whole Foods.
WE FOUND FOOD.
We pass the evening in repose in a hotel, cooking ravioli in the room, eating grapes and cherries, and laughing until we cry at the Coffin Floppers comedy sketch.
The only bad (?) news: Mason’s phone is torched from when he dropped it. He’ll spend the rest of the trip without one, probably the longest period of his life sans-phone.
Day 4, Frisco to past Leadville
We kick things off by fulfilling my goal to not be a purist. Gold Hill segment? Nah. We skip it and pedal the sweet bike path from Frisco to Copper Mountain. Between losing two days to my bike delay and the ominous weather forecast, it makes sense. I’d probably do it anyway.
I’m loaded down with a large bag of cherries, which I donate to the first backpackers I see. It totally makes the day of a fruitarian named Jay.
Jay and his cherries! I don’t see any tears of joy in his eyes, but I’m sure they were there.
The usual pass protocol: pedal interspersed with hike-a-bike. I’m huffing my way uphill when another fun moment occurs: “Hey, are you Dakota? I follow your newsletter!” It’s a woman and her husband out for a hike. Small world!
The weather forecast remains true and threatening clouds amass to the west. They aren’t THAT bad though… We push on while keeping an eye on bail-out options in the trees down the slope. Then we’re over the false summit and above the treeline. Keep moving! We move fast and don’t eat enough, but manage to avoid getting zapped.
Halfway down the screamer descent, rain hits. We take advantage and pause to eat trail burritos and animal crackers.
High above Frisco near Kokomo Pass.
It’s a solid push to Leadville, but we arrive in time to mow down giant burrito combo platters. Then we push on, another 10 miles of fire road before crashing for the night by a lovely stream.
Day 5, Twin Lakes to Buena Vista
We rise and immediately ride past a sign proclaiming “no camping within 100’ of water.” Whoops. We were good tenants, don’t worry.
The smoke hangs heavy, toeing 200 AQI. Playing piano is less taxing on the system, methinks. Mason’s bike rebels against the terrible air by jettisoning its chainring. No big deal, it’s only required to pedal. Somehow, he MacGyvers a genius combination of tools to get it tight enough to get to Buena Vista.
Through the aspen…
Hours later, we trade beta with three stoked bikepackers from California northbound on the CT. The exuberant sharing of trail details and what’s to come is a fabulous aspect of any travel, but especially outdoor adventures. They also give us Oreos, so maybe I’m biased.
It’s one of our easiest days, helped by utterly fabulous tailwinds on the pavement into Buena Vista. On a slight downhill slope, we rip along for 20 glorious miles with barely a pedal stroke except to change leg position.
My smirk sums up how I felt not pedaling for 20 miles into Buena Vista. Best tail wind of my life.
Buena (be-oona) Vista is a little town with a chill vibe. The post office is closed, but we planned ahead and scoop up a box we mailed ahead to someone on Warmshowers.
Once again, I make the cardinal error of not eating immediately when getting to a town. Instead, I buy a new, unclogged water filter and get my dropper post fixed at Boneshaker Cycles, a top-notch bike shop. Eventually, I Zombie-stagger my way across the street to get food.
We follow a pro tip on a camp spot and head out of town 10 miles. The smoke hangs heavy in the air and the headwind sucks. Thank god for sleep or bikepacking might feel impossible sometimes. How the ultra-endurance racers push on and on and on is beyond me.
We rinse off in an ice cold creek and crash. Halfway done with the Colorado Trail!
Careful where you step.
Day 6 – Buena Vista to Monarch
A hard day. My memories are mostly steep, unrideable uphills—like, why-is-my-bike-over-my-head steep. Our one big downhill is on pavement into Princeton Hot Springs. Sigh. Can’t win them all.
Mason hates it enough to cut off his shirt sleeves at a lunch stop. He’s officially a punk bikepacker. We channel the anguish and push on.
Getting my heart rate under 250 after the ridiculous hike-a-bike up Chalk Creek. Ouch.
A couple of bikepackers in their late 60’s tell us how they figured out their lackadaisical trip pace. “I don’t have anywhere to be until ski season,” one quips. The retired life!
Sunset approaches and we’re pedaling up the Highway 50 bypass to Monarch Crest. Sunday night traffic suuucks. I’m d-o-n-e. We have no idea where we’re camping and 1.5 more hours of climbing with trucks whipping by sounds suboptimal. Anyone want to buy a cheap bike?
Suddenly, a beacon of hope appears. What is The Butterfly House?! Why, a donation-based respite for weary travelers! The proprietor is out of town—how cool is this place—so we make ourselves at home per the sign on the door. We score showers and do laundry, chat with the handful of backpackers staying there, and feel like humans again.
The quote of the day is from a backpacker named Alex, who asks us, “So, how many times a day do you wreck, 1-2?” HAAAA. If I wreck 1-2 times a year, I’m doing something very wrong. Thru hikers officially think we’re insane.
The Butterfly House! Take the detour up Highway 50 and stay here. Thank me later.
Day 7, Butterfly to Sargants Mesa
We barely peel ourselves away from Butterfly Hostel. A rest day doesn’t sound bad… My legs immediately agree once we resume pedaling up toward Monarch Crest. All good—it’s a beautiful morning, traffic is light, and we’re heading into a fabulous section of the CT.
The Monarch Crest general store revives my spirits with mind-blowing junk food options and cheery employees. Still, when Fritos improve one’s mood, the loony bin isn’t far away.
Monarch Crest trail delivers. Even the uphill pedaling is fun, with views unfolding until the smoky air diffuses them. Pro tip: skip the Ten Mile hike-a-bike and pedal the road. Thank me later.
We descend, climb, the usual. It’s subtly difficult rocky terrain and the elevation is real.
However, we’ve arrived at the most-maligned section of the Colorado Trail, the dreaded Sargent’s Mesa. Descriptions of this zone are either very short or laced with expletives.
Yup, it’s rocky. Unrideable uphills and annoying bumpy flat sections aren’t fun, thought not as bad as expected. The downhills are rowdy as hell, but rideable and fun for us. (Glad I got my dropper post fixed.)
Still, somehow I screw up fueling and my energy feels like dog poo. Too much sugar after the bonanza at Monarch Crest, methinks. I flop on my back on the tent footprint and try to revive my appetite. Each day on the trail is so similar and yet so different, elation easily switching places with, shall we say, less positive emotions.
The result of eating too many Mike and Ike’s and not enough real food.
We push on into sunset, striving for Razor Creek. My energy levels and enthusiasm scrape the depths. Tomorrow, I shall eat less sugar. A descent in the dark, headlamps blazing, brings us to the trickle of water. We pitch the tent in an (almost) flat field and slip downhill into the foot of the tent 25 times an hour that night. It’s not restful.
Day 8, Sargents to Cathedral Cabins
A cold morning wrapped in all our gear, rain pants included. The air is clear and crisp, the nagging smoke moving north for a bit.
Traill magic! Two cheery ladies are cooking pancakes out of their Airstream. “We had 17 people camp in that field last night,” they proudly announce. We roll on with a heads-up that a guy named Eric needs grub—with a restock coming up for us, we give him two freeze-dried meals and pistachios. The backpackers have 10 days between restocks in this section, ouch.
A professional trail angel, Apple, is up next. He leaves broiling Cincinnati every summer to come stay in Gunnison, where he drives out to the CT and sets up a trail angel station from 8-5 every day, chatting away the hours with travelers.
Full-on trail angels! Trail angel, take 2! Apple travels from Ohio to help out hungry hikers all summer.
The fire road bypass around wilderness at mile 361 is long and hot. Maybe I’m just mad because a freeze-dried meal with turmeric spilled in my frame bag and some of my possessions now feature yellow splotches?
We grind out the fire road, up a beautiful valley toward the pass. Sun. More sun. Audiobook territory.
But whatever! A looong descent on the other side erases the hard work from our memory banks and drops us right at our destination for the evening: CATHEDRAL CABINS.
I capitalize CATHEDRAL CABINS because it’s a trip highlight. Cute cabins nestled back in a side valley, moose stomping by in the meadow, a box of food we mailed ahead, and tons of tasty snacks available for purchase. Bikepackers: if you don’t stop here, you’ve made a grave mistake!
We spend a fabulous evening joking around with three other bikepackers and the cheery, friendly owners.
The splendid Cathedral Cabins. For sure stop here even if you don’t stay the night! Food resupply and cool folks in the middle of nowhere.
Day 9, Cathedral past CT high point
Since all nice things must end, we uproot from Cathedral and push on. Low-grade climbing allll morning on a gravel road, friendly ranchers cruising past in their trucks.
Pavement riding isn’t my thing, but Slumgullion Pass is a fantastic name. We aim for the sound barrier on the descent and almost crack 50 mph.
The kindness of strangers on the CT amazes me. We’re eating lunch by the side of the highway when a lady driving a truck slows down to ask if we need anything. She’s got four grungy backpackers in the back. Later we learn that she runs a volunteer shuttle from Lake City all the way up to the trail and back every day to help backpackers with resupplies.
Sadly, there’s no shuttle for the next section, a steep, rocky climb off Spring Creek Pass. We play hopscotch with backpackers, pushing our bikes and even occasionally pedaling. At least the views are stunning—the Colorado Trail’s beauty amplifies as it unfolds from Denver.
Beautiful…and hard work.
At a water stop, we meet a family of four backpacking the CT for three months. The kids are just 8 and 10! What a summer.
Rather than stopping at 5 p.m., we decide to push on (literally) over the CT’s high point. It’s another three hours of hike-a-bike as we ascend to 13,200’. At one point, I’m wrestling my bike up a ridiculous switchback as the sky drips warning rain…and then it clears.
Instead, we’re served a delicious evening dessert of sunset views. The smoke merely deepens the reddish hues. The descent ain’t bad either.
We dry camp at 12k’ overlooking a pretty valley. Another splendid day on the CT, even if we’re face-plant exhausted.
This riiiight here is why we bikepack. (Colorado Trail high point)Best campsite ever, even if we were exhausted afterward from sleeping at 12k!
Day 10, to Silverton
Did I say exhausted? NOW we’re exhausted. We both feel slammed this morning; are we dragging chunks of steel behind our bikes?
Chalk it up to elevation. I haven’t spent much time at 10k+ and spending the night at 12k hurt us.
Thanks to that, we grind. All. Day. Long. Survival mode, a group of hikers with a tour company passing us again and again. Hooray for splendid views because otherwise…dark thoughts.
Tired as can be, but COME ON. How is it so beautiful out here?
Luckily, there are marmots squeaking and skittering about. Their enthusiasm is contagious. Life is good.
We go over three 13k passes, up/down/up/up/up. Yegads the views are good, but clearly I am not cut out to be a high-altitude Sherpa.
The huge descent off Stony Pass is less than smooth, but gravity still works. Somehow, a half dozen masochists are driving up the insane road in beaten vehicles—were they new at the bottom?
SILVERTON. A hotel awaits us, but first we mow vegan pizza, tacos and tofu wraps. Food, life’s panacea. I grab a wrap for the road, Mason fixes a nagging flat tire at the excellent little bike shop.
The final push to Durango is all that remains!
These photos sum up our enthusiasm levels at the end of day 10 in Silverton. High altitude efforts are hard!
Day 11, Silverton to Hotel Draw Road
Two major wins to start the morning: our energy levels are revamped from sleeping at (only) 9k AND our bikes didn’t get stolen from the hotel’s backyard.
We notice immediately that today is different than yesterday…we’re actually pedaling our bikes instead of pushing them. There’s a lovely road climb to Molas Pass, then MORE pedaling on trail. Enthusiasm is high, even if we do spend a few hours pushing our bikes later in the day. (You don’t gain 6800’ in 34 miles just pedaling…)
Good news! You can actually pedal up some of the climbs between Silverton and Durango.
Also, my tofu wrap from yesterday is the best. Always buy extra to-go food in cities!
It’s a fabulous day. Maybe the best one of the trip? We can’t remember more than a day prior at this point—bike, eat, hike, sleep blends together a bit—so who the hell knows.
Two people highlights from the day: at Blackhawk, we joke around with a Boston couple and Mason donates an extra Food for the Sole freeze-dried meal to their cause. Hey, they’re vegan too! There’s almost a spontaneous group hug before COVID awareness stomps the fun.
Another group of backpackers arrives while we’re at the top and compliments us on our passing etiquette. Apparently most bikepackers scare the hell out of hikers? (I’ve done it too.) A reminder to dial it back and be an ambassador out here.
We descend off the pass and stop riding at 6:30 (early for this trip) and lounge about. It’s cool to push to dark, and also rewarding to hang out in a nice campsite and enjoy a little free time.
Top of Blackhawk Pass!
Day 12, Hotel Draw Road to Durango
No rush today, so we sleep in and roll at 8. Just up the trail, some volunteers for a mtb race that day tell us “coming up you’ve got the best 11-12 miles of trail.”
LIARS. It’s mostly uphill and traversing. WTF. Expectation setting sucks! I prefer to be surprised—good or bad—with what’s ahead.
At a water source, we catch a young rider—he looks like a DH racer— from the Midwest who is 32 days in on the CT. He clearly hates bikepacking, but is sticking with it. If I felt as depressed as he looks, I’d sell my bike for scrap and bail immediately.
Wildflowers show off as we climb to Indian Ridge. No passes can faze us at this point, I think…and then hustle like mad to get off the ridge as weather threatens. We learn later that a bunch of the bike racers got stuck in a massive hail storm and bailed.
Our 6,000 descent into Durango is only briefly punctuated by an overgrown hike-a-bike. Otherwise, it’s downhill for days. My arms and wrists are exhausted from the huge quantities climbing and descending in the past 12 days, but hot food and a hotel await us in Durango.
End of the Colorado Trail!
Parting Thoughts
The Colorado Trail is magnificent. Many times during the trip, I’d take in the scenery and think, “Wow, I get to be here.” It’s truly a bikepacking trip of a lifetime.
That said, this is not a trip I’d recommend for a brand-new bikepacker or new mountain biker. The CT is a tough mofo! We met a number of groups who were bailing because they under-estimated the difficulty. A seasoned local we met guessed that only 30% of bikepackers who set out actually complete the entire trail. The altitude is real, the elevation gain is serious, and inclement weather means taking one’s time sometimes isn’t an option given the risks of Bikepacker Flambe on a pass.
I well-know bikepacking contains obstacles and suffering pushing through things are part of it. There were STILL times I questioned what the helllll I was doing with a bicycle on the CT, usually when my bike was above my head on an insane hike-a-bike.
Bikepacking.com says 90% of the trail—time wise—is rideable. I’d peg that closer to 70-80%…and I like technical riding and my bike has a 26T front chainring. TO SUM UP: YOU WILL HIKE YOUR BIKE A LOT. Thank the Bicycle Gods for mtb amnesia, aka forgetting heinous climbs during a fun descent.
Hard work in them hills! (Kokomo Pass)
As any bikepacker knows, it’s not all fun and games. Day rides from my house or camper van aren’t even 100% fun; bikepacking is far from it. It’s all about the spirit of adventure, traversing beautiful landscapes, independence and ingenuity, camaraderie, eating Oreos on a mountain ridge, starry skies and sunrise vistas, and delirious laughter at the end of a hard day. And, sure, going downhill…
My deep thought from bikepacking the CT is this: weather creates half the adventure in outdoor pursuits. Heat, rain, smoke, snow, and wind can conspire to smote a trip upside the head and create insane conditions. Or they might step aside and make for a peaceful outing.
Such is the case with the Colorado Trail. An afternoon of lightning and rain on day one set my mind racing on the dread treadmill. “Will this happen every day?!” My soaked feet and gloves said oh hellll no.
Be prepared to get owned by thunderstorms. Everyone talks about them. We (mostly) got lucky and avoided the Devil’s Dance on alpine ridges, but many trip summaries and friends of mine mentioned fearing for their life at some point. One couple we met dealt with long thunderstorms every.single.day and started riding only at night. (He also got poison ivy so badly that his trip required THREE hospital visits. #cancelmytrip)
That said, the Colorado Trail deserves a slot on every bikepacker’s bucket list. It’s a spectacular chunk of Colorado and will inscribe itself in your memory. Start planning your trip now! Just bring rain gear and an adaptable mindset. Oh, and did I mention hike-a-bike? Pack light.
The Colorado Trail, folks. It’s magic out there.
Photo Gallery
Click on any photo to enlarge and flip through them slideshow style.To get a sense of the trail’s progression, they’re in chronological order.
Mason shreds like a boss on Lyft scooters.
An excellent place to put a big together. Thanks, Holiday Inn Express Denver!
Here we goooooooooo. Look how fresh-faced and innocent we look. We haven't even hiked our bikes yet.
Heading up Waterton Canyon to kick things off.
First descent! End of segment 1 heading down to the S. Platte River.
Traversing a plateau on day 1 west of the S. Platte River.
Mason cooking up some grub during a rain break on day 1 at Wellington Reservoir.
Campsite, day 1. 10 minutes later, it started pouring...so glad we had a tent!
The wide open views of the Tarryall Road detour.
Through the aspens at the end of the Tarryall detour.
Wrapping up day 2 at sunset, just before the descent to Kenosha Pass.
Heading up from Kenosha Pass toward Frisco.
Does red mean it's good to eat?
Break-your-bike rocky on the Georgia Pass descent.
Yup, I love coconut water. Best electrolytes ever.
Heading down toward Frisco.
The grin of someone who just rode 2,000 fun feet downhill.
WE FOUND FOOD.
Pedaling the Frisco to Copper Mountain bike path on a perfect morning.
Jay and his cherries! I don’t see any tears of joy in his eyes, but I’m sure they were there.
High above Frisco near Kokomo Pass.
Hard work in them hills! (Kokomo Pass)
Another day on the CT. (Near Kokomo Pass, between Frisco and Leadville.)
He might look crazy, but Mason makes a meaaaan vegan trail burrito. Spinach, Violife cheese, jerky, and hot sauce...with animal crackers for dessert.
Trail burrito, veg style. I should eat these at home...
Whaaat the...? Oh, just a WWII POW camp for Italian and German prisoners in the middle.of.nowhere near Leadville. Spooky.
Eating a massive quantity of food at Casa Sanchez in Leadville. Yes, I ate more two hours later.
A nice evening listening to the burbling creek...and 12,000 cars from Denver driving by to get an early start on Mt. Elbert. Ear plugs rule!
Hot chocolate to round out a long day.
Through the aspen...
Side view of my Why Cycles Wayward CT setup.
Front view of my Why Cycles Wayward CT setup.
Top view of my Why Cycles Wayward CT setup.
Mason shows off his field repair skills: Leatherman + chain tool to tighten a Cinch chainring!
Errrr, getting a bit hazy, folks... (North of Buena Vista.)
That smirk sums up how I felt not pedaling for 20 miles into Buena Vista. Best tail wind of my life.
Bikepacking grub. Freeze-dried is good, but I always buy additional food in towns when I can.
Careful where you step.
Getting my heart rate under 250 after the ridiculous hike-a-bike up Chalk Creek. Ouch.
The Butterfly House! Take the detour up Highway 50 and stay here. Thank me later.
Restocking at the Monarch Crest general store. All the necessities: Mike and Ike's, pickles, Fritos, and Nutter Butters.
Heading up Monarch Crest trail.
Monarch Crest views. Smoke barely at 175 aqi.
Curious cows on Sargent's Mesa.
The result of eating too many Mike and Ike's and not enough real food.
Late finish on Sargent's Mesa. GPS says elapsed time is 12.5 hrs, 7,100' of climbing, and too many Nutter Butters consumed.
Sunrise on Sargent's Mesa. We use the bikes to stake out the tent fly.
Full-on trail angels! They had 17 people camp by them the night before just to get the morning pancakes.
This trail angel, Apple, comes out from Ohio for the entire summer to help out hungry hikers.
Heading down toward Cathedral Cabins on the detour.
The splendid Cathedral Cabins. For sure stop here even if you don't stay the night! Food resupply and cool folks in the middle of nowhere.
Um, is this a trail? Walking the flat section above Spring Creek Pass. Pro tip: stay on the fire road and skip this BS.
Mason demonstrates an exhausted 1,000 yard stare.
Food for the Sole! I'm not sponsored or anything, but recommend this for anyone who wants real, delicious food in the backcountry.
Food break before the push over the CT high point.
Literally a final push over the CT high point at 13,000+ feet.
The Colorado Trail, folks. It's beautiful.
Over the high point of the CT at sunset.
This riiiight here is why we bikepack. (Colorado Trail high point)
Heading off the CT high point.
Down down down...
Best campsite ever, even if we were exhausted after sleeping at 12k!
Best campsite ever, angle #2. This is west of the CT high point before the next big climb.
This about sums up the climbs for the 35 miles before Silverton.
Above treeline, living the hike-a-bike dream!
The prettiest flat tire repair station I've ever seen.
COME ON. How is it so beautiful out here?
Push uphill, ride downhill! Hard work forgotten. Kinda.
More splendid views east of Silverton.
The terrain up high on the CT showing off yet again.
Oooooh, we get to ride down all of that?!
A perfect day in the San Juans, heading toward Durango.
Good news! You can actually pedal up some of the climbs between Silverton and Durango.
These photos sum up our enthusiasm levels at the end of day 10 in Silverton. Food soon (mostly) revived us. High altitude efforts are hard!
Another day, another pass. (Somewhere north of Durango.)
The San Juan Mountains, folks.
Hiding from an afternoon thunderstorm.
Top of Blackhawk Pass on our 2nd to last day.
A perfect campsite near Hotel Draw Road. Final night on the CT!
More views in the San Juan Mountains near Durango.
The final push to Indian Ridge.
Feeling VERY glad we're 30 minutes ahead of that cloud system on Indian Ridge.
End of the CT!
Logistics for bikepacking the Colorado Trail
Tips and suggestions for the route
Getting to/from start/finish
If you aren’t driving to the start, logistics to get to the trailhead are a little extra. From downtown Denver, catch mass transit to Littleton and then pedal the 10 miles to Waterton Canyon. It’s a nice warm up. Pro tip: your fare out of town is TWO zones, or $6 at the time of this writing.
Time of year
There’s no perfect time to ride the Colorado Trail, merely options. Go in June and risk snow on the passes. Go in July and risk daily monsoon-driven thunderstorms. Go in August and risk heat and/or thunderstorms. Go in September or later and you might get snowed on.
We opted for early August to ideally a) avoid snow b) get ahead of forest fires (sigh) and c) dodge the monsoon season.
We avoided snow and (mostly) dodged monsoon deluges. Forest fires served up shitty air quality for the first week (150+ aqi), but we pushed through it. What’s the equivalent of 200 packs of cigarettes going to do to my lungs anyway?
It was 99F in Denver at the start, but thanks to the high elevation, temps ranged from 45-75F from day 2 onward. Perfection.
May your trip avoid snow, smoke/fires and rain. Or at least two out of three.
Navigation
Navigation was straight-forward—the Colorado Trail is well-marked. I downloaded the route GPX from bikepacking.com and used Ride with GPS a bit, but wound up mostly using the Guthook app because it has more marked water sources. Highly recommend getting it.
My preferred method to save battery is to keep my phone on airplane mode with the volume turned up loud enough to hear the DING when a turn is approaching. There’s also another tone when you miss a turn, which quickly corrects any missteps.
Food
As usual, I rolled on a plant-based diet for this trip. My companion Mason is also vegan, which made things easy.
With the exception of restaurant meals in Frisco, Leadville, Buena, and Silverton, I ate mega-delicious Food for the Sole freeze-dried meals. Lunches were a mix of freeze-dried options and various snacks from restocks along the way. Mason got sick of freeze-dried meals toward the end, but I enjoyed them the entire trip.
Overall, I aim for 400 calories an hour without counting calories. I prefer to have an extra meal and bonus snacks in case of a mechanical…or just raging hunger! It’s never perfect and sometimes I screw up and underfuel, but it usually works for me.
Food for the Sole! I’d recommend this for anyone who wants real, delicious food in the backcountry.
The section from Buena Vista to Silverton is LONG without a restock. Check out the Monarch Crest store and do not miss Cathedral Cabins before Lake City. You can mail a box to them, but they have tons of freeze-dried meal options and piles of delicious snacks for reasonable prices.
Riding on a vegan diet and curious what you can find in convenience stores? Traipsing About reader, badass cyclist and fitness coach Lauren Costantini put together a list of foods for all you plant-based folks.
Water
Tons of water on this route except for the Tarryall bypass and Sargent’s Mesa. You’ll (likely) never need to carry more than 2-3 liters at a time unless you for some reason are dry camping.
We both used Katadyn BeFree filters until mine got so clogged that I bought a Platypus flter in Buena Vista. The frustration of doing the boa constrictor squeeze on a filter every time you want water is not to be underestimated! Bring a new filter or clean yours thoroughly before the trip.
Sleeping
We stayed in hotels for four nights (Frisco, Monarch Crest Butterfly House, Cathedral Cabins, and Silverton). Otherwise, we slept outside.
We brought my Big Agnes Fly Creek UL2 bikepacking tent and split carrying duties between poles and fabric. Given temps, overnight moisture (dew and rain), I was glad to sleep in a tent every night. You’ll have no problem finding places to sleep along the route.
Best campsite ever. This is west of the CT high point before the next big climb.
Cell signal
With Verizon, I had at least a weak signal up high most of the time. To save battery, I mostly kept my phone on airplane mode.
Gear
My Why Cycles Wayward setup for the Colorado Trail.
I rode my 2019 Why Cycles Wayward V.1 set up with a Terrene McFly 2.6” rear and 2.8” front tires. I run a 140mm front fork, which seems to handle most anything I’d want to ride a loaded bike down.
This year I added a 26T chainring on my Wayward to complement the 11-46 Shimano XT setup I’ve got. It was AWESOME. Spinning is the name of the game while bikepacking! You’ll never miss your taller gears as much as you’ll dream of more climbing range, trust me.
Rounding out my gear was a Revelate front roll bag for sleeping gear, a custom Rockgeist frame bag, and a Bedrock Black Dragon dropper bag.
https://www.traipsingabout.com/wp-content/uploads/2021/09/Colorado-Trail-bikepacking-August-2021-66-scaled.jpg19202560Dakotahttps://www.traipsingabout.com/wp-content/uploads/2018/03/Traipsing-About-logo-white-background-450x156.pngDakota2021-09-16 06:00:002023-05-06 15:04:26Bikepacking Magic on the Colorado Trail
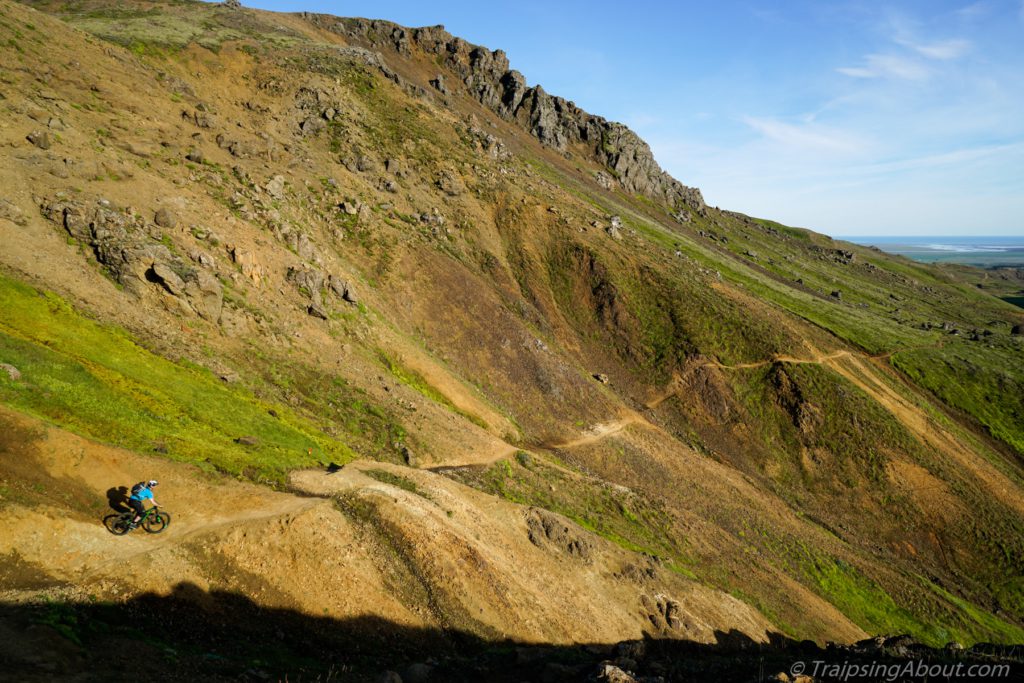
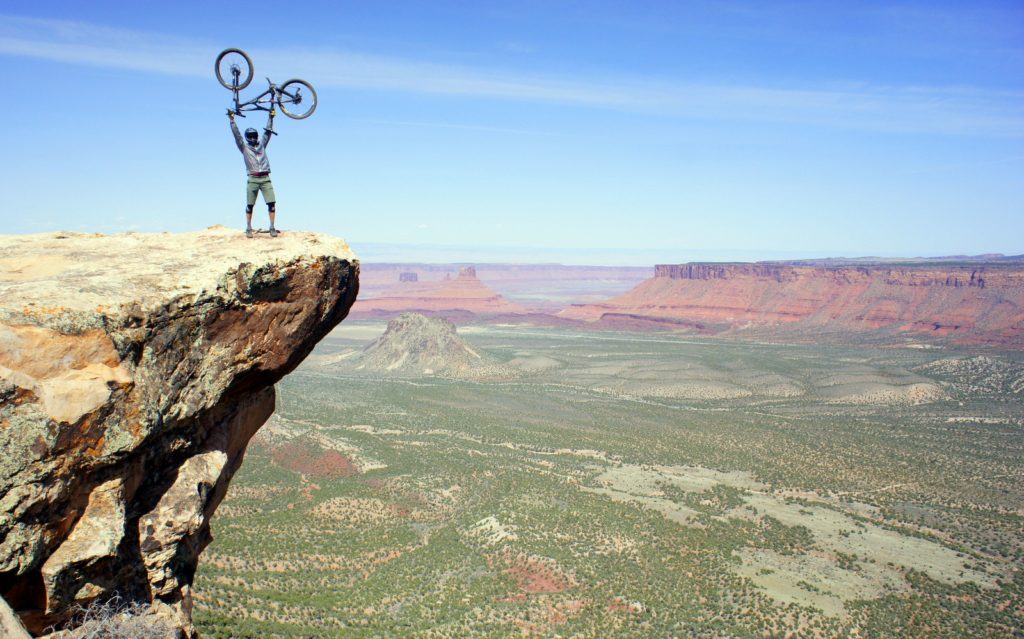
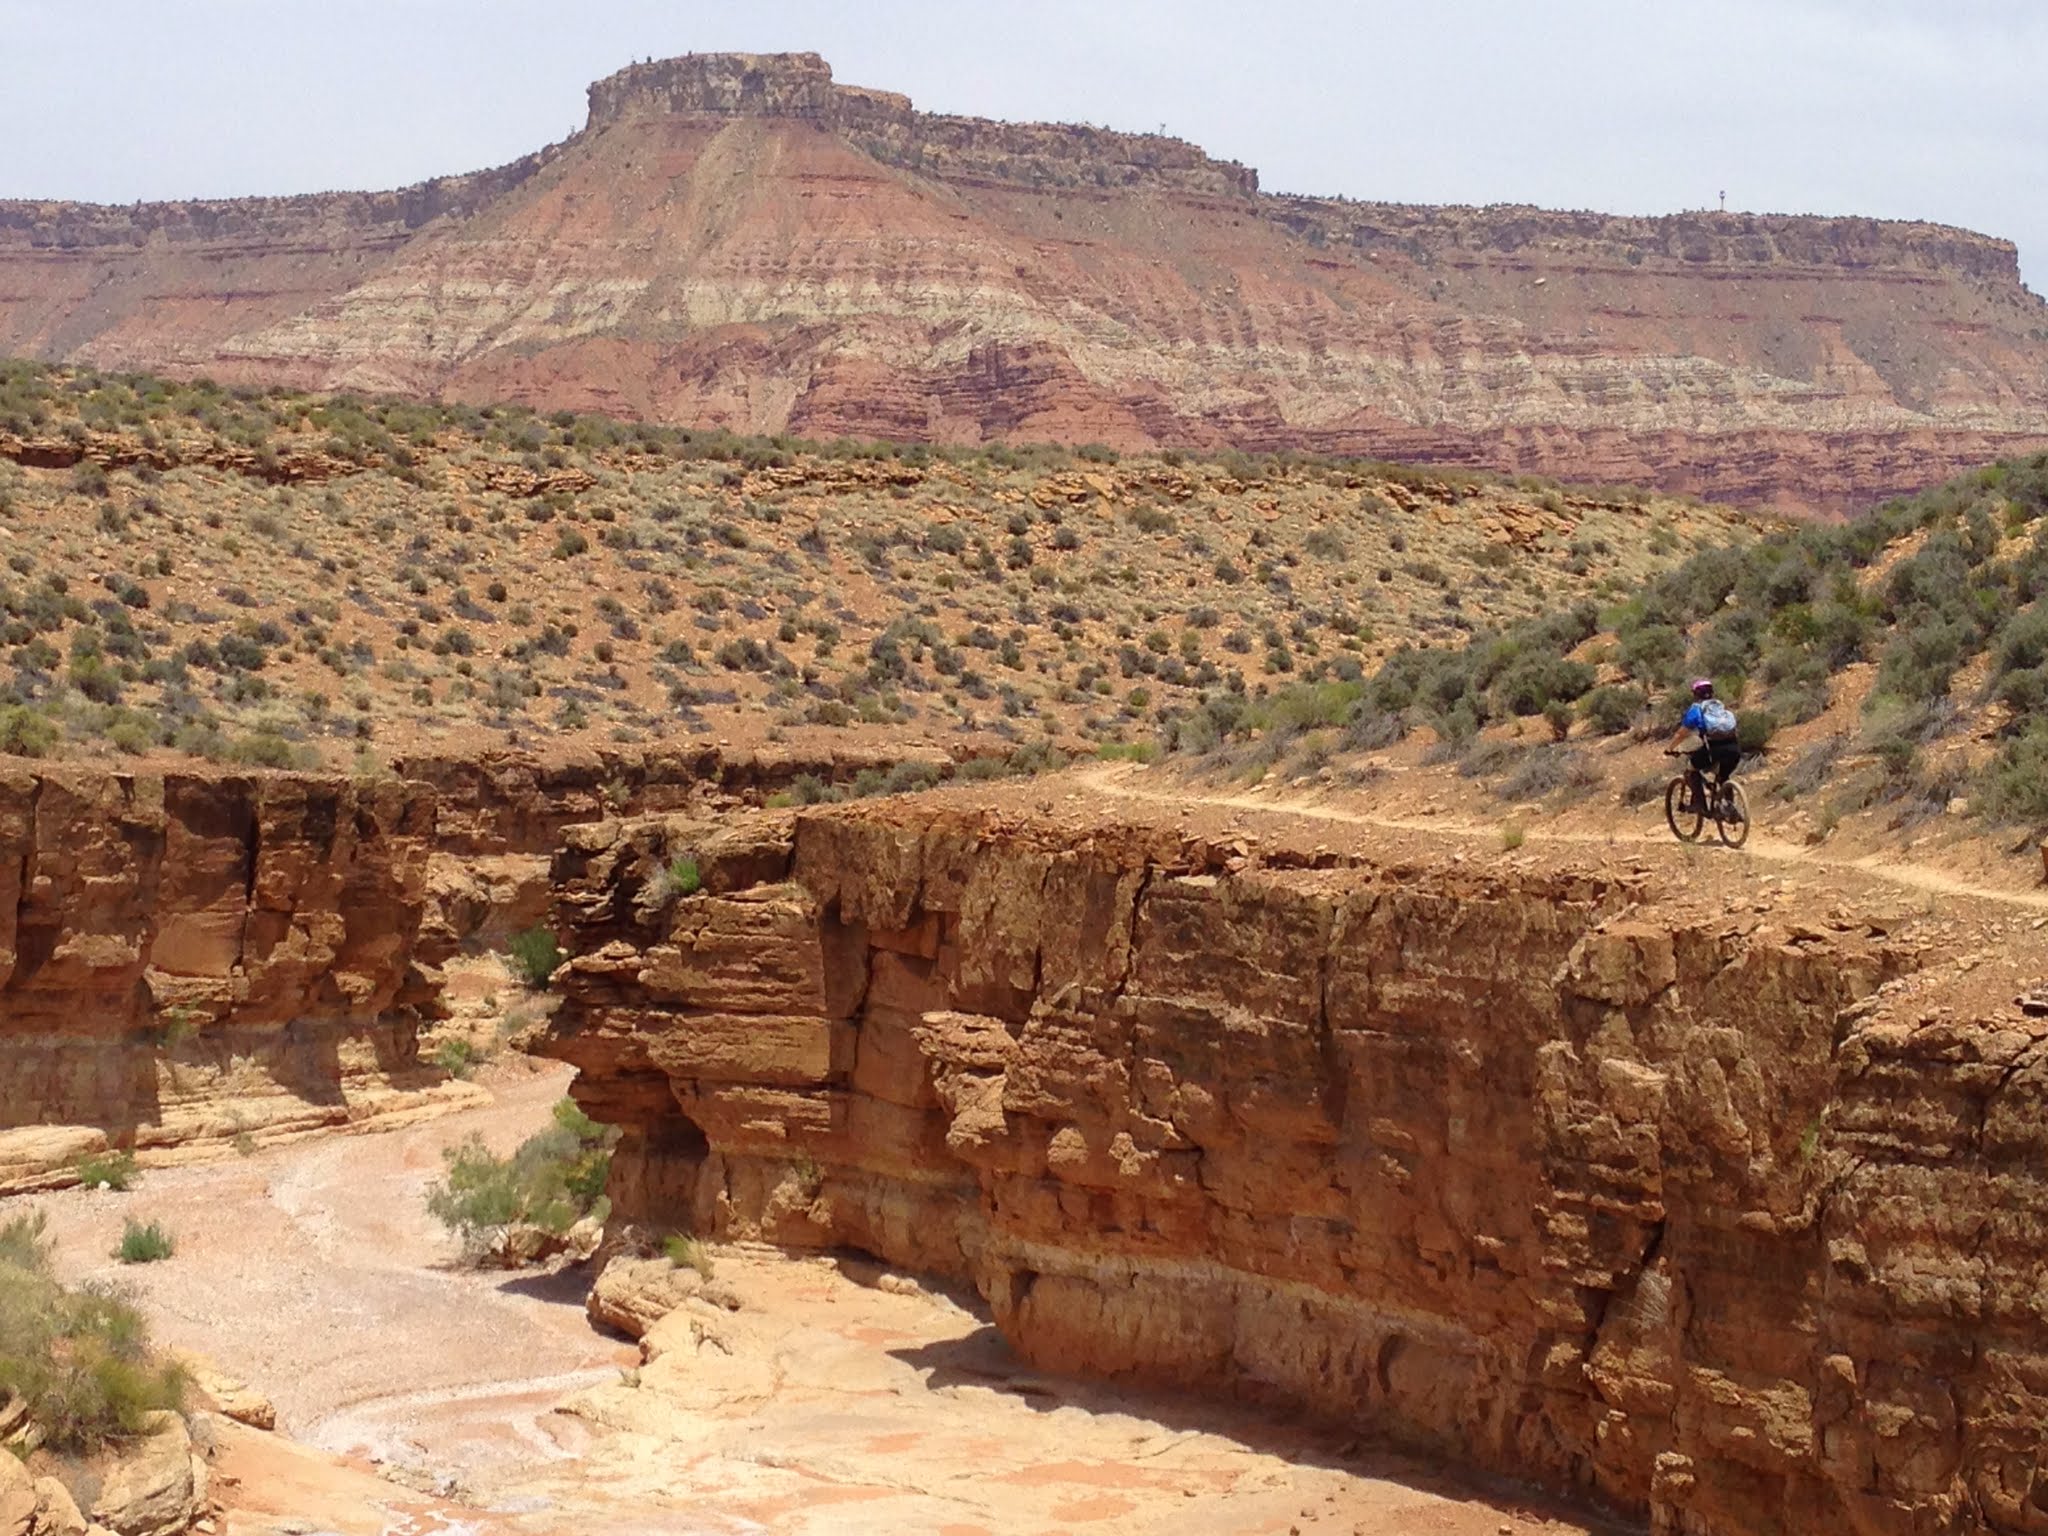
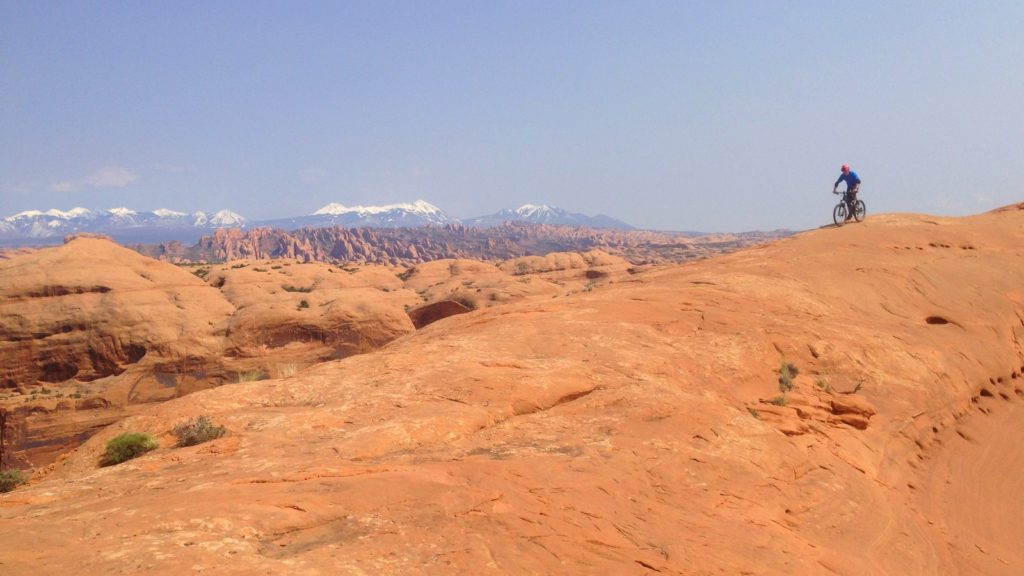
The area around Hurricane, Utah is a tumultuous riot of steep, rolling rock, an outdoor playground. The expansive views and fine winter weather create a dream destination for desert lovers, including mountain bikers sick of snowy home trails.
In January 2020 P.C. (pre-COVID), I’d journeyed to the desert with my friends Paul and Eric in search of sunshine and temps over 35 degrees. I’d quickly figured out how to pronounce Hurricane – Hurr-UH-CUN – and so far the only trip negative was Paul’s penchant for hiding in surprising places and scaring the bejeebus out of me, an immaturity battle I quickly escalated. (Eric wisely steered clear of our asinine antics.)
However, I generally prefer my heart-palpitating moments on a mountain bike. (Earmuffs, mom.) To that end, we beat my bike rack to death on the rutted dirt road to Gooseberry Mesa, a fabulous piece of terrain overlooking the surrounding valleys. Astride our bikes, we pedaled the undulating terrain, a natural skatepark for bikes.
At the bottom of a particularly steep rock, three guys – clearly experienced, with all the cool gear – were “sessioning” or repeating (and failing) the same move. As I rode up, a break in the action presented itself, so I gave it some gas and clawed up it.
I stopped at the top and one of the trio yelled, “Hey, have you ridden this before?”
“Nope. I’m from Oregon.”
Long pause.
“What kind of tires you got?” “Minion DHFs.”
“OHHHHH…”
Commence excuses. Justifications. Posturing. Typical tough guy BS reinforced starting in childhood. Anything to help these three guys feel ok that I, a root and dirt rider from the PNW, might waltz onto their terrain and ride something they couldn’t.
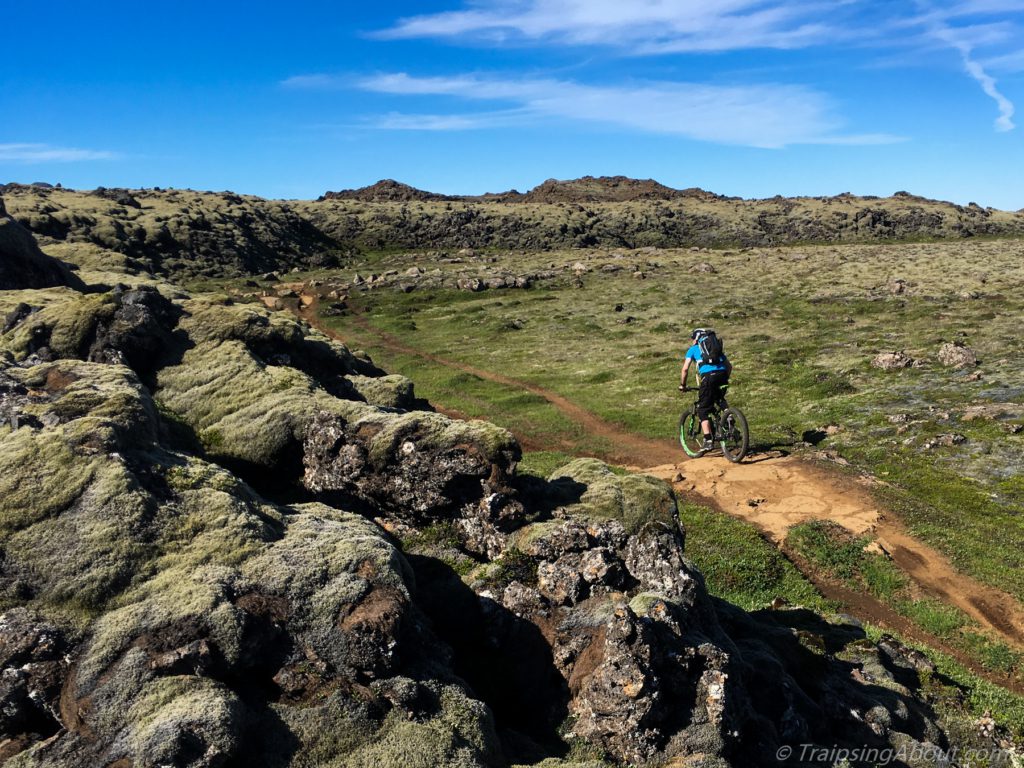
Picture a rock move like this, but about 2x steeper, with a turn. So awesome.
Paul and I exchanged glances as the guys spouted excuses – one had tired legs, another was on a new bike, and of course one owned the wrong tires. It was like I’d grabbed their ego voodoo dolls as I pedaled by, then smashed them in my Magic DHF Tread.
Never mind that Minion DHFs are best known for loose, wet terrain, NOT for rocks. If I’d sported Teflon tires, these guys would have said I could slide my way up the rock.
We left their empty excuses behind us and vamoosed to the viewpoint. Enjoying lunch with a spectacular vista, we forgot the guys…until they rolled up again. Sigh.
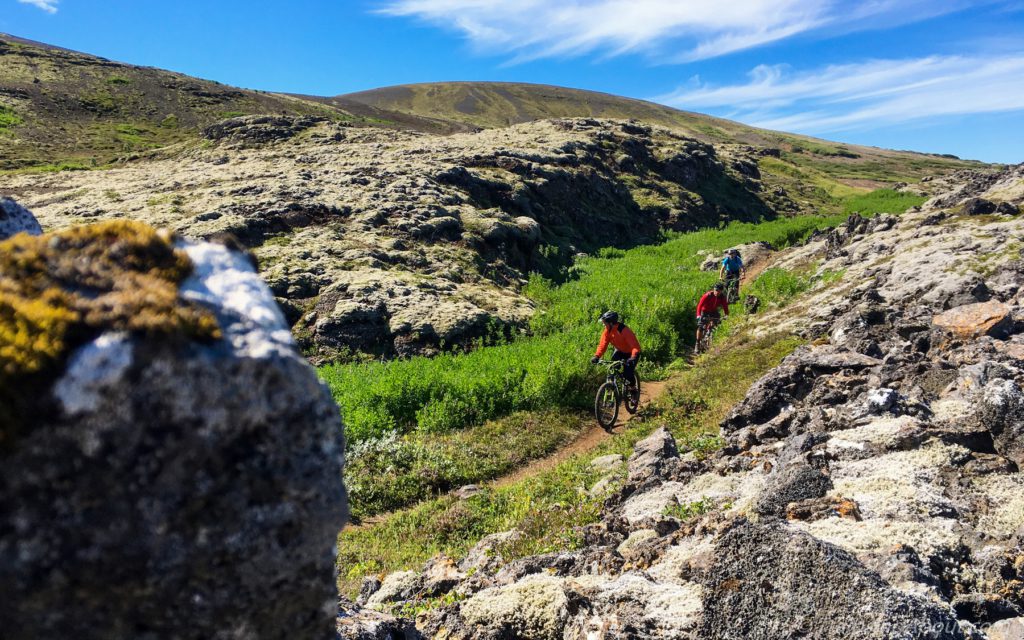
Endless vistas… (Little Creek Mountain’s Big Loop trail.)
One of them immediately blurted, “I rode it.” It wasn’t genuine pride: it was an ego looking for affirmation. I pictured a kid seeking a gold star.
In the inimitable fashion of posturing males (takes one to know one), the guys blathered on about their trip. Paul, who suffers no fools, pointedly walked away to enjoy the view and his PBJ in silence. I briefly hoped he’d turn around and scare the crap out of the guys, but social decorum prevailed.
Luckily, they left soon enough, echoes of excuses and pathetic tire tread marks the only proof of the brief interlude. Well, that and our laughter at their ridiculous comments. We adopted “If only I had a DHF” for any mistake for the rest of the trip, on the bike or off.
Even with the sour aftertaste, I love experiences like this for an opportunity to learn. Those three riders remind me to steer clear of a) excuses, especially to random strangers, and b) posturing versus letting performance speak for itself.
All a work in progress for me depending on the day. I’m not perfect and will slip up, so perhaps I need a frequent reminder of this 15-minute episode in the desert.
I’m hoping that tattooing ‘DHF’ on my forearm will suffice.
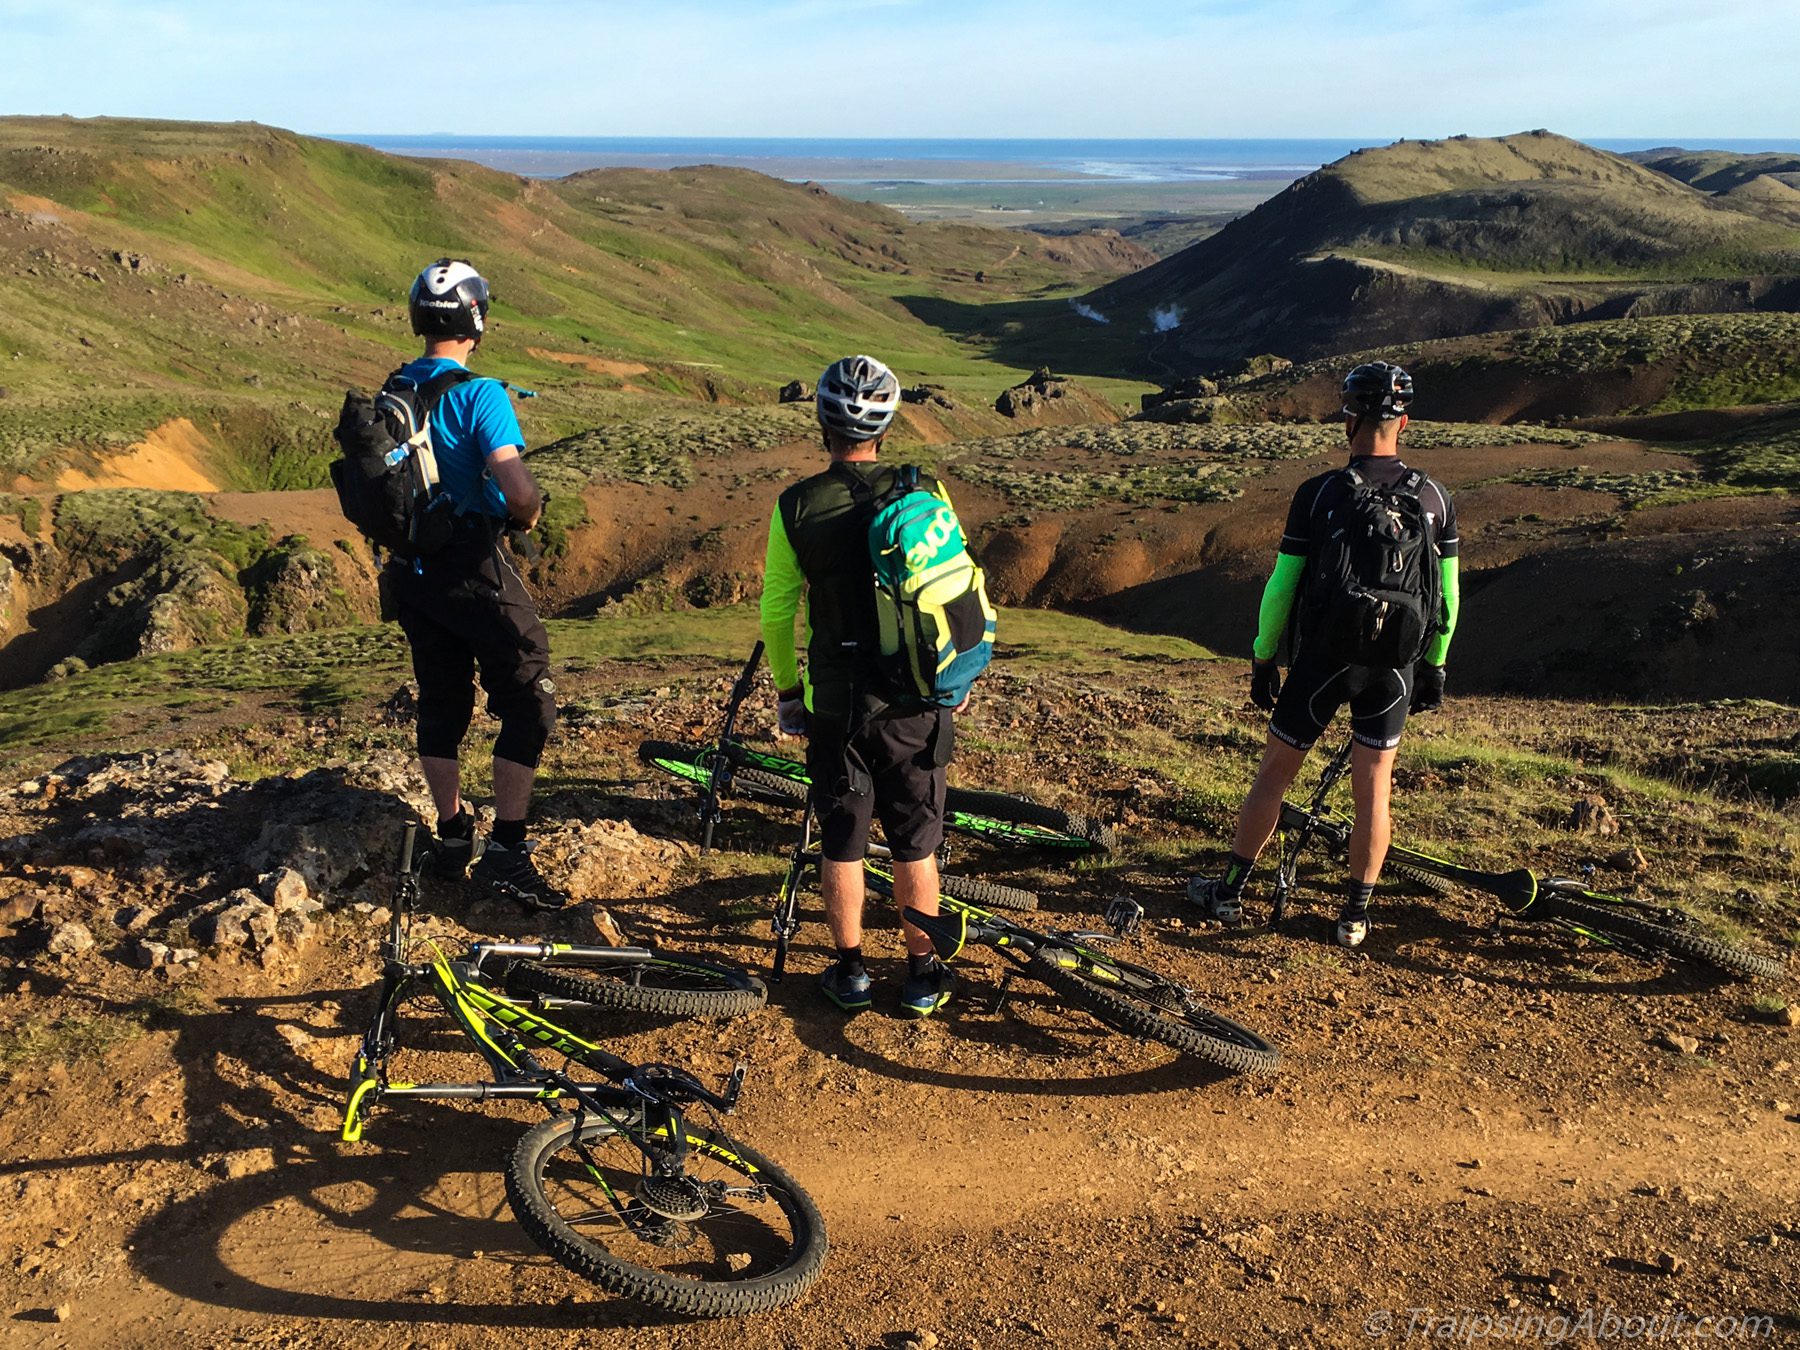
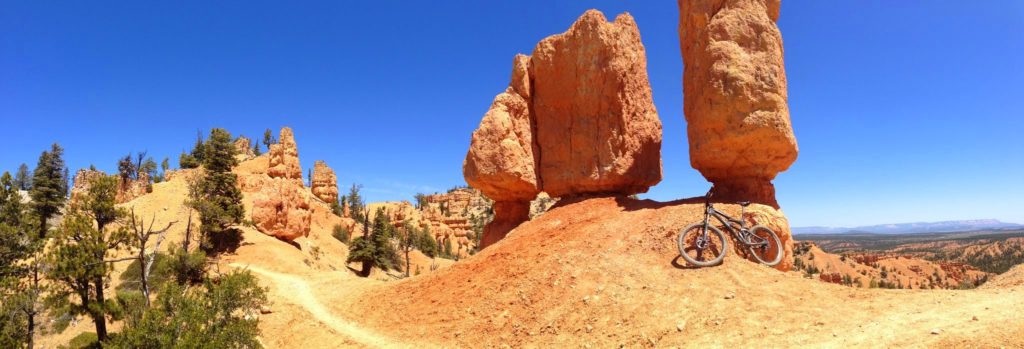
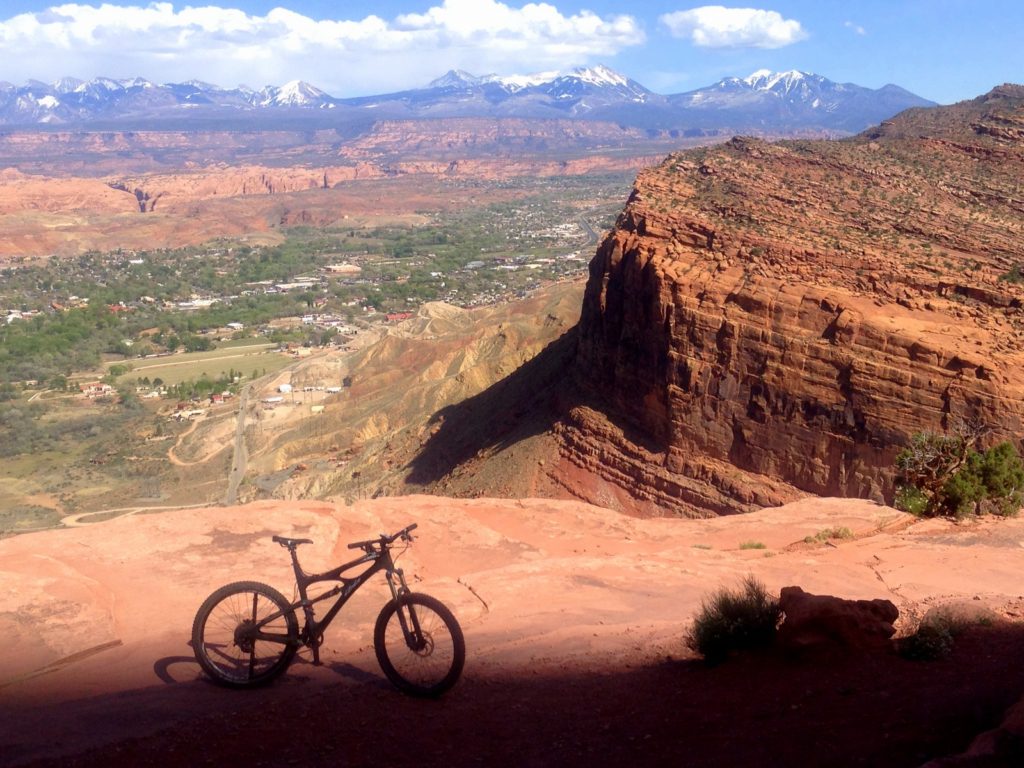
Gooseberry Mesa viewpoint! Hope my parachute works…Eric playing around on Guacamole Mesa while Paul looks for the levitate button on his bike.More Guacamole Mesa magic. Ahhh, the desert.Paul searches for the paraglide button on his bike on Little Creek Mountain.
https://www.traipsingabout.com/wp-content/uploads/2020/11/Guacamole-Mesa-views-mountain-biking-scaled.jpg19202560Dakotahttps://www.traipsingabout.com/wp-content/uploads/2018/03/Traipsing-About-logo-white-background-450x156.pngDakota2020-11-18 19:54:292020-11-19 11:32:14Posturing Ain't Pretty (and Other Desert Teachings)
Coming off two weeks working on my parents‘ property right before the 2020 election drama, I craved time alone in nature. En route to home, I swung through the Wallowa and Elkhorn Mountain ranges for some true solitude. Below is a photo essay from my time there.
The summary:
No phone signal for days.
Two total other people encountered on the trail. My favorite was the ebullient Pastor Dave, who “moved to the area 17 years and 75 pounds ago, found hiking, and have been to all 76 lakes in the Wallowas!”
Lots of time on foot and pedaling in the mountains.
A big shout out to Chelsea for graciously supporting my extra time away. It made me appreciate her even more and brought to mind this Rainer Maria Rilke quote:
I hold this to be the highest task of a bond between two people: that each should stand guard over the solitude of the other. For, if it lies in the nature of indifference and of the crowd to recognize no solitude, then love and friendship are there for the purpose of continually providing the opportunity for solitude. And only those are the true sharings which rhythmically interrupt periods of deep isolation.
Photos from the Elkhorn and Wallowa Mountains!
A clearing storm on the Palouse en route to the Wallowas. It made me think of the potential in the election…Taking in the Matterhorn view on Hurricane Creek Trail in the Wallowas. No wonder they call them The Little Alps! (Also, props to apps with 30 second camera timers…see how relaxed I look? Didn’t even have to sprint.)The sign read “Bridge Out,” but clearly it was fine.Firing larches and a perfect fall day on the S. Fork of the Imnaha.Rather than destroying the van on a rough fire road, I opted to bike in. The snow/ice had other ideas. I’ll be back, Bonny Lake!Strange bedfellows on this trip: my keyboard, a bronze sculpture by my dad that I picked up at a foundry, and a maple 4×4 that we’re going to grow mushrooms on! All less cuddly than Chelsea, but they don’t toss and turn at night… ‘Tis the season for magic larch colors! The air was adrift with floating golden needles.Sunset on the stunning Elkhorn Crest Trail on Oregon’s highest singletrack trail! Looking west, you see this…And looking east, you see the desert near Baker City.The U.S. ain’t perfect by any stretch, but I sure love the huge swaths of public land for recreating and van camping with a view!Fallen larch needles.Tired but alive at the top of Dutch Flat trail in the Elkhorns. This trail is incredible, a combo of views, gold larches, and grin-inducing rocks, speed and… anyway. #mountainbikedorkalertSing us a sooooong, in the piano van! (Thanks to my friend Eric for getting THAT ditty stuck in my head for a week.)Sunset on the sublime Elkhorn Crest trail.Deep in the zone in my happy place.
And that’s a wrap! Sing us a song la da deee da da… Ciao for now, folks.
https://www.traipsingabout.com/wp-content/uploads/2020/11/Hurricane-Creek-Wallowas-with-Matterhorn-scaled.jpg19202560Dakotahttps://www.traipsingabout.com/wp-content/uploads/2018/03/Traipsing-About-logo-white-background-450x156.pngDakota2020-11-04 18:53:572020-11-04 18:57:09Solitude in the Elkhorn and Wallowa Mountains
The ride summary of a fellow racer in the High Cascades 100 mtb race were two sentences not often found together: “Fun day. GI issues for 20 miles, plus 2 code browns.”
Riiiight. Fighting a lurching stomach while pooping yourself twice is everyone’s idea of a fun day! Perhaps only for types with screws loose enough to race 100 miles on a mountain bike?
Clearly I’m one of them. At least I wasn’t the racer with the code browns!
High Cascades 100 Race Report, Round Two
I raced the High Cascades 100 in 2017 to explore Bend’s trail network during training and test myself against an intimidating distance. Before that year, I’d never ridden more than 50 miles straight on a mountain bike.
For my second High Cascades 100 attempt in 2019, I scored a free entry a week before the race. Compared to my previous structured efforts, my training plan was a bit different. By which I mean…uhhh, I didn’t have one. Hey, it’s only 9-10 hours of riding, so what could go wrong?
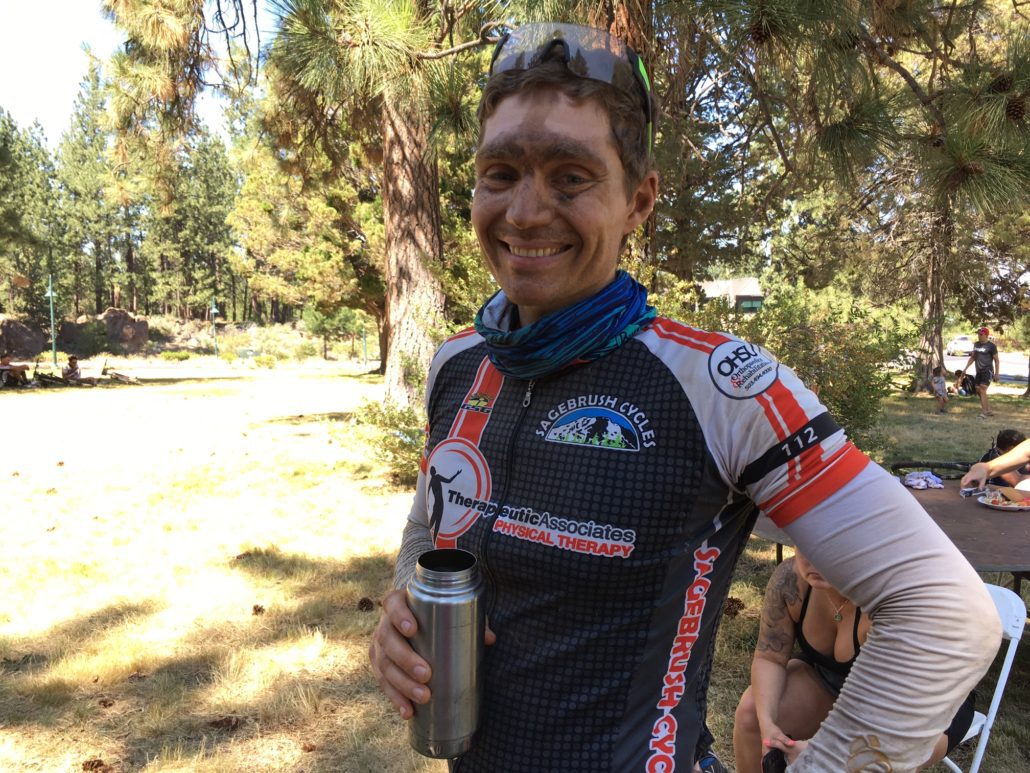
What could go wrong beyond getting veryyyy dusty, that is.
Training For The Race
Don’t let me mislead you. I wasn’t off the couch given that Chelsea and I had bike toured through Spain and Portugal that spring. As an ambassador for Pine Mountain Sports in Bend, I also led a HC100 training series in June and July. Those were 40, 55, and 70 mile rides at a “non-conversational” pace (about 10 mph average).
A bunch of crazy mountain bikers ready for a training ride.
That first 40-miler in June didn’t go well. I’d traveled for 30 hours from Europe the day before and was jet lagged, dehydrated and unprepared for the powerful bursts of energy that mountain biking requires. Thirty miles in, both my quads felt like a viper’s fangs were buried in them every time I got out of the saddle.
I survived (without antivenom) and did regular rides into July. For the final 70 mile ambassador ride, we all pushed hard and I finished feeling great.
Hang on. The race is going around Mt. Bachelor this year, you say? What’s that, a free entry is available?
Finishing place out of 388 riders: 40th (better by 25 places versus my 2017 time)
Hours behind the winners: over 1.5. HOW DO THEY GO SO FAST?!
By the way, dig these kinds of posts? Sign up for the free 2x/month Traipsing About newsletter for more tales from the mountains and creative challenges like drawing and piano when I’m off the bike.
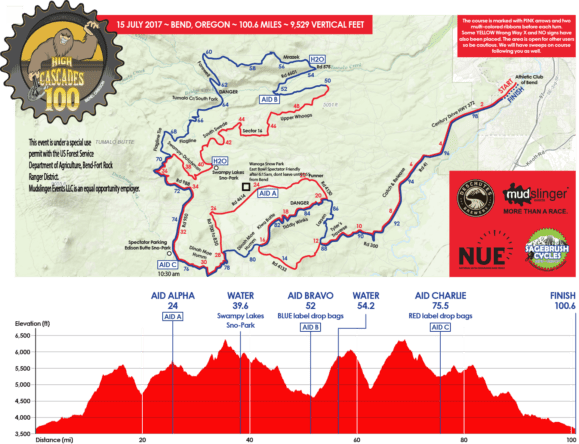
All the details.The vert on this map was off according to most people’s GPS. What’s 1000′ anyway?
Race Report/Memorable Moments:
Morning: I wake up at 4:45 and eat my standard breakfast, oatmeal with fruit. I pedal to the starting line in the dark.
Mile Zero: I’m less nervous this time around compared to 2017. I’m confident 100 miles is doable. Still, the energy is palpable and I’m fired up. The starting line song “How You Like Me Now?” by The Heavy will be stuck in my head all.freaking.day.
Let’s do this!
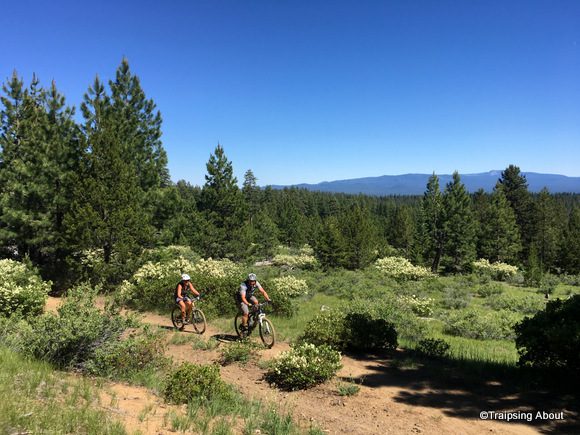
Mile 9: As planned, I hang with the front peloton through the road section to the climb at Tyler’s, chatting with various people that I recognize. It’s striking how connected I feel to the Bend community compared to 2017.
Last time, my mantra was “slow on the uphill, steady on the flats, free speed on the downhill.” This year, I’m planning to be on the gas more, riding that anaerobic threshold.
Mile 17: the first singletrack descent features Spandex-clad racers exploding in horror at the sight of any rocks. My chance to make up time! Next is a fire road past Wanoga Sno-Park, then back up the sandy hell pit along the highway to Mt. Bachelor. A woman on a single speed (!) is haaaammering up the fire road. I’ll catch her on the steeper climbs when she runs out of gears, but sheesh, she’s strong.
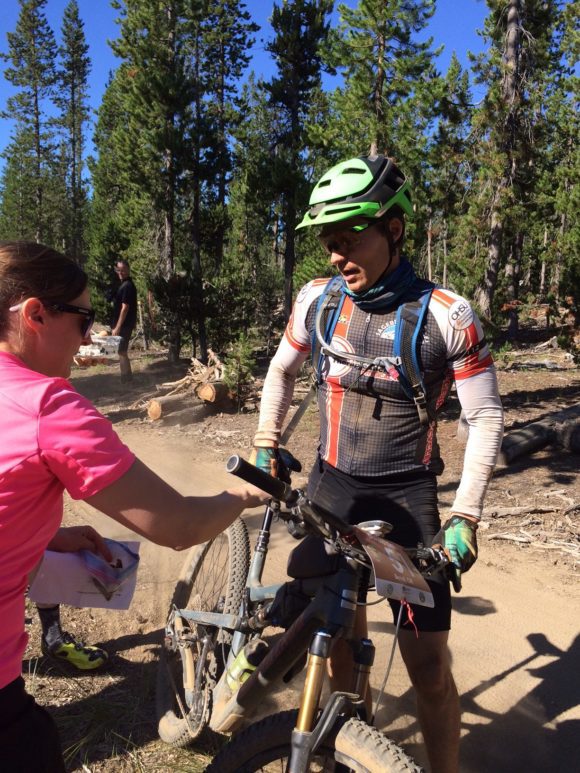
Back on singletrack for the climb and descent down to Swampy Sno-Park. I’m feeling good and pushing hard. I roll into Swampy at mile 30, ready to switch out my hydration pack and grab food from Chelsea…wait, where is she? WHOOPS, I’m ahead of schedule. (She arrives shortly after, phew.)
Rookie move, D! Two minutes lost. So much for my chances of winning HAAA.
Next up is a fun section of singletrack down to Skyliner Snopark…sayonara to the morning climbing as I head downhill. I know these trails cold and it’s a pleasure ripping along in the morning light. Long races are taxing due to maintaining focus, but I rarely find my mind drifting or feeling emotionally exhausted from any big mountain bike ride.
It’s not all hard work!
Mile 42: Back on the climb train. I continue to stay on the gas and feel great up Tumalo Ridge. I’m playing cat and mouse with the same riders as we yo-yo along. Fun fact about 100 mile races: chatting with people as you race isn’t that uncommon.
Mile 57: Aid station at Mt. Bachelor! Cheery volunteers hand me my food drop bag. Unfortunately, other than delicious, salty pickles (SO GOOD), I’m not feeling that hungry during this race and don’t feel like eating my PBJ wrap (<–foreshadowing). Pushing one’s athletic limits pulls blood from the stomach to extremities, which is why so many endurance athletes experience GI and stomach distress during races. As if the exercise isn’t hard enough?
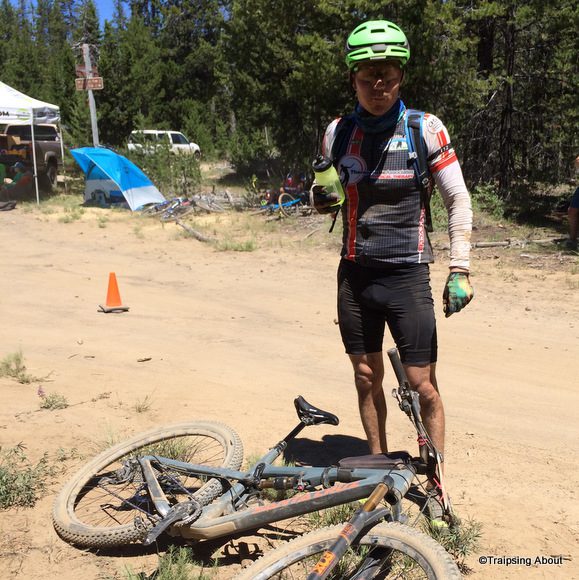
Mile 57-71: Ohhh man, the downhill part around the backside of Bachelor is a blast. It’s a loose, fast jaunt, especially tailing a fast rider from Colorado. The hard effort means I don’t get a chance to eat anything (risk of dying from crashing outweighs my hunger) or drink much. That’s fine though, it’s not like the climb up Edison Lava is hard af, riiiight?
Mile 73: Poor fueling catches up with me. My legs weigh 1,200 pounds and I’m walking my bike. (So are others.) Sections of Edison are steep, rocky and sandy face punches after eight hours of pedaling. Smiles are…infrequent.
This energy lag isn’t fitness, it’s a fueling issue. After the race, I total my calories and I only ate 2,400. That’s about 1,400 lower than planned given my goal of 400 per hour.
I gut my way through it, walking a bit and stuffing Shotbloks down my gullet. I start to feel better, but sure get sick of sugary carbs during these long rides. If only pickles sported substantial calories!
At least there was watermelon later.
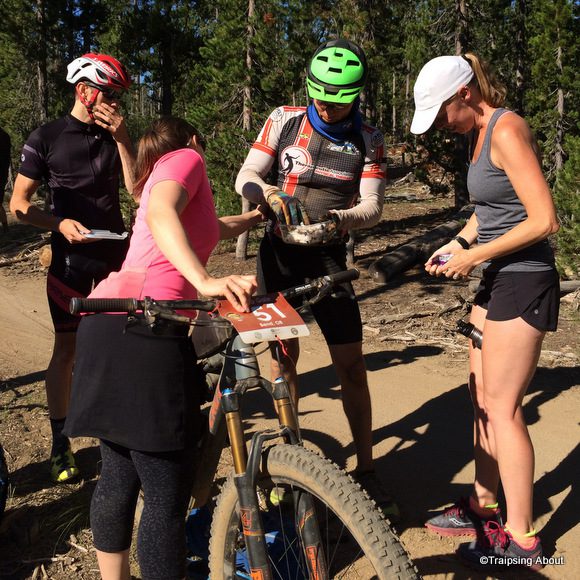
Mile 80: Chelsea and our friend Jules jump up and down in the aid station. Jules, a recent arrival from New Jersey’s suburbs, is wide-eyed watching the crazed, spittle-covered riders coming through. I eat a few bites of PBJ wrap, crunch a pickle (delicious again) and swap my hydration pack.
My energy levels are still lagging thanks to not eating. I dog it for another 10 minutes and a couple riders pass me (nooo) before I pull out of my torpor. Not like it matters where I place since I’m not contending for the podium, but…you know, competitive spirit!
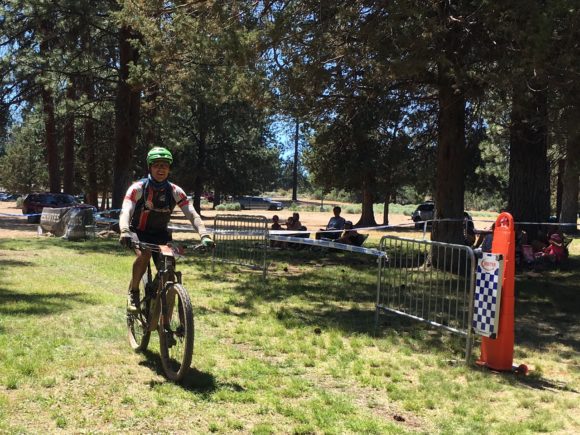
By the time I hit the top of Tyler’s Traverse again, I’m ready to go. From there, it’s a hard push on singletrack for miles (Tiddlywinks, Stormking, Catch and Release). For the last highway section, three of us form a pace line and hammer it home on Cascades Lake Highway. We’re doing 25 mph on and my legs smolder, then burst into fiery pillars of torched muscle from the effort.
They drop me with a mile to go and I roll into the finish line solo but grinning, 40th overall. Nothing to write home about, but 25 places better than my first High Cascades 100 and this time with no structured training. I’ll take it.
The end of a long, excellent day.
I’m not tapped out though, which is better than I expected at mile 80. At the finish line, I chug (you guessed it) pickle juice, eat a little food and congratulate other riders.
Then I pedal home to sit in a bathtub full of ice, a delightful tradition for me after crusher rides. I round out the day with our monthly vegan potluck, where those behind me in line are left with empty plates in the wake of me eating all the food.
Sorry everyone. The food is all mine. (Plate 1 of 3 pictured.)
All the Details
Yes, I took training and preparation for this race less seriously than my first High Cascades 100. However, a couple years of (relatively) long-distance mountain biking prepped me for success (i.e. not collapsing on the trail or crapping in my chamois). #winning
Here are my takeaways and lessons learned from my second time racing the High Cascades 100..
My Racing Technique:
To avoid choking dust and crowded trails, stick with the front peloton until it hits dirt. For the HC100, that’s nine miles of road to Tyler’s Traverse (same every year to break up the crowd).
Steady pace for climbs, but push harder early on relative to 2017.
Push the descents to make up time vs people riding hardtails who crush me uphill. Impossible to make up the difference given how XC-oriented High Cascades is. Or maybe I’m just slow.
Not be afraid to pass on downhills. “Pass when you’re good, please” was my go-to phrase. Other riders were polite and accommodating.
Eat food and drink water consistently. I did the latter well, but not eating much from miles 40-70 put me in a fueling hole by mile 75 that hurt.
Stop as little as possible. I ended up at six minutes total split between mile 40, mile 56, and mile 80, even with the mishap with Chelsea arriving late to the first refueling.
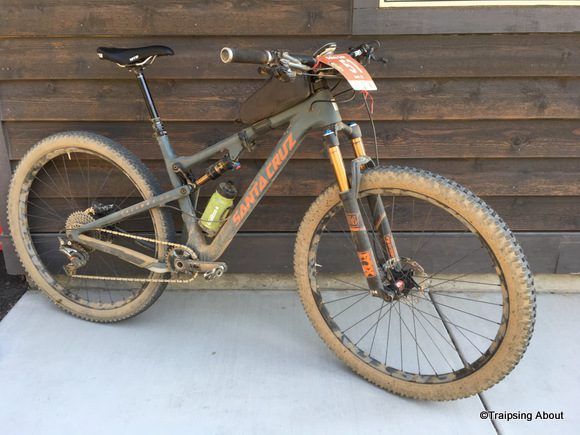
My steed for the race: a Santa Cruz Tallboy.
My Training
Most people don’t ride a full 100 miles preparing for a race and neither did I. My longest ride was 7 hours and my maximum distance was 70 miles. Rather than lots of back-to-back long rides, this year I just rode for fun when I felt like it. Here’s a general sense of my prep:
Bike touring in April/May on a heavy AF bike through Spain and Portugal. Base training!
This time around, I skipped all the back-to-back 3-5 hour days. However, I still think that’s the best approach for being ready physically and mentally for such a long day. I’ve logged plenty of long rides since 2017’s High Cascades 100, including ~50 miles/day for two weeks straight bikepacking the Oregon Timber Trail. I was confident my accumulated fitness would carry me along.
Unlike some riders, I don’t ride bike trainers or aim for heart rate zones or power thresholds. Yes, I would be faster if I did this. However, I hate it. (As I like to joke, I’d rather be slow than ride inside.) If you’re trying to podium or win an age group in a well-known race like HC100, I think it’s almost mandatory to train like that though.
For fitness-building threshold efforts, I simply ride uphill climbs hard for 10-30 minutes. No data, just by feel.
My mileage pre-race wasn’t anything crazy. In talking to other riders, it seems like 10-15 hours a week is fine for a comfortable performance.
Base training in Portugal on a lesser-traveled path.
My Food
I aim for max carbs. Your body won’t process any fat/protein that you eat during the race, so only consume those if it helps you down carbs. For me, that’s a little peanut butter in a tortilla/jelly/banana wrap.
Split carbs 50/50 fructose and glucose. We can only process a certain amount of each before uptake stops, so balance it for maximum crushing.
What I Ate
Shotbloks, about 2-4 blocks per hour
Medjool dates
Picky Bars (not 100% carbs, but they go down easily for me).
Pickles. Zero calories, but all the happiness and salt.
PBJ wraps with raisins and bananas. Not much peanut butter.
Hydration
Same as my first HC100, I decided to a) maximize water access and b) minimize transition times. To accomplish this, I used two hydration packs that Chelsea cycled out and handed to me at the aid stations all refilled and ready to rumble. I also carried a water bottle with water, salt, and lemon water.
I used 50 oz. of water in each pack plus Skratch Labs electrolytes. The secret weapon: I made Skatch ice cubes and put those in the water on race day. Not only was cold water delicious, the ice cubes don’t dilute the electrolyte mix.
My goal was simply to drink water, and lots of it. For a race with so much singletrack, the hydration packs made it possible for me to drink basically whenever, as opposed to only on smooth trails or fireroad. My approach worked well for a second time and I’d recommend it!
Note to people trying to crush it: some kind of carb formula (Hammer, etc) mixed into water is the elixir pros dominate with. Sugar lets you buzz like a hummingbird at max sustainable output!
Or just drink pickle juice.
Lessons learned:
Give my aid station helpers a bigger buffer zone in case I’m ahead of schedule.
Eat consistently, even if it means slowing down or quickly stopping. The time gained from full energy supplies easily makes up for this. Plus bonking in a race sucks!
For the second time, my Santa Cruz Tallboy was the perfect bike for this race. My gear list was almost identical to last time; check it out in my original post.
A dust guard or mask is worth using until the 40 mile aid station. (Gawd, do we have to wear these forever?! F off, COVID.) I used a neck gaiter and it saved my lungs. I didn’t need it after the pack split up at mile 40.
Overall, I enjoyed the heck out of round two of the High Cascades 100. Mike Ripley from Mudslinger Events puts on a fantastic event, other riders are respectful and awesome, and I highly recommend checking out the race in coming years. Who knows, could even happen this July.
Ride on!
Still enjoying riding a week later in the Gifford Pinchot in Washington.
https://www.traipsingabout.com/wp-content/uploads/2020/05/High-Cascades-100-Lava-Edison.jpg10741600Dakotahttps://www.traipsingabout.com/wp-content/uploads/2018/03/Traipsing-About-logo-white-background-450x156.pngDakota2020-05-28 21:51:052023-05-06 15:12:26Racing the High Cascades 100, Round Two
The wind-swept eastern peninsula of Madeira. (Vereda da Ponta de Sao Lourenço)
Don’t let the flight into Madeira and the island’s treacherous roads scare you off. Once your knees stop shaking, you’re in for a magical time on this outdoor oasis off the coast of Portugal!
For a week, we hiked and mountain biked from Madeira’s mist-shrouded peaks to cliffs overlooking the ocean. It’s one of the coolest places I’ve traveled.
Wheeeeee.
Misty cliffs.
Glad I flew 4,392 hours to ride a trail like what we have in Oregon…
Decent Airbnb views…
To keep it interesting, Madeira’s airport is Europe’s most dangerous and pilots need special training to land there. Picture intense crosswinds, a short runway, and mountains and ocean as constraints.
Our flight landed as gusting wind slapped our plane updownsideways like a malevolent hand of God. Terrified passengers shrieked, then clapped and cheered when the plane landed.
Next step: revving our tiny rental car on the twisty roads, jousting with the “laid back” locals who drive like their cars are engulfed in flames. Grades I wouldn’t even consider walking up (30+%!) are a feature on any drive into the mountains. I’ve never driven in 1st gear so much. (Make sure you can drive a manual if you rent a car.)
Ah, but those treacherous roads are worth it!
If you can handle that…
Oh. Yes. Madeira is sweet. A nugget of fun and beauty sparkling in the Atlantic. Coming from bike touring to the island was a shift from adventure to pure vacation. We embraced it!
Tunnels!
‘Nuf said.
Above the clouds!
Scenic riding much?!
I alternated days hiking with Chelsea and mountain biking, whereas she hiked every day. If our days apart were a video cutting between me and Chelsea: . BAMBAMBAM downhill rocky mega testosterone mtb madness . CUT to Chelsea: twittering birds, fields, flowers, smiling farmers, and pretty views . CUT jumps, fist bumps, roots, dust, woot wooting, high fives. . CUT quiet sugarcane fields, mama cat with nursing kittens, lizards, more flowers to smell…
Thus passed our magical days in Madeira. Simplicity and complexity need one another, right?
Chelsea disappearing into the looking glass during a lavada hike through laurel forest.Don’t worry Mom, I wasn’t going (too) fast! #contrast
Mountain Biking in Madeira
Two days before our flight from Porto, I couldn’t have placed Madeira on a map. The island pinged my radar thanks to mountain biking.
Since our visit to Madeira was a trip pivot from bike touring, I needed to rent a mountain bike. Enter Freeride Madeira. This small local company has created a top-notch mountain bike destination that brought the Enduro World Series to the island twice. They offer well-priced guiding and shuttling services that make exploring the trail systems easy.
Through the trees!
Flow trails toward the ocean.
Laurel forest chutes.
Pedro jumping a lavada!
The trails aren’t ragged, overgrown hiking trails. Since a solid chunk of Freeride’s revenue goes to trail building, everything is custom-built for mountain biking. No need to wear a bell on your bike: hikers steer clear and the trails only point one way: DOWNHILL.
To prevent eye-rolling, I won’t go all BroDuro on you describing jumps, berms, and rocks. YAWN. I’ll skip the word shred and gnar too. (I for SURE won’t say braaap.)
Know that trails in Madeira vary widely, from flowy to steep roots and rocks, and that you’ll encounter all kinds of terrain. If you’re a mountain biker who likes enduro riding in beautiful places, you’ll dig Madeira!
Riding for all skill levels in Madeira. “Dude, there’s no way I’m hitting that road gap.”
Me enjoying some sweet Madeiran flow trail action.
Not much rain this year and the trails were a biiiit dusty!
Mountain biking down down doooown toward the ocean.
Hiking in Madeira
Everything on Madeira is steep!
Don’t let wanna-be bros like me scare you off if you aren’t a mountain biker. The hiking in Madeira draws people from all over Europe as well. For good reason: it’s varied, beautiful, challenging, and easily accessible.
From the popular wind-swept peninsula at the eastern end of the island with falcons soaring above to peak to peak hiking above the clouds to lush, moody laurel forest to traversing irrigation canals through terraced fields, you can’t go wrong.
High above the ocean along a lavada.
The scenic bay near where we stayed.
Finishing up the Pico Ruivo hike.
Flowers above the clouds.
Speaking of fields, Madeira grows so.much.food and was almost entirely self-supporting for centuries. (It was discovered uninhabited only 600 years ago by Portugal.)
“Lavadas” or irrigation channels carry water in a network across the island and their access paths are the backbones for much of the hiking. We saw ox-strong old men hauling food and farming equipment just as their grandfathers did.
All you need to navigate ALL the hikes: the excellent WalkMe app. For $5, it guided our hiking efforts for our stay.
Hiking PR1: Pico do Arieiro and Pico Ruivo
Misty mountains and me descending some stairs on the PR1 hike.
There are plenty of blogs talking about favorite hikes in Madeira, so I’ll only describe my favorite, PR1: hiking above the clouds between Pico do Arieiro and Pico Ruivo, the two tallest peaks in Madeira. It’s a destination-worthy hike and one that attracts serious hikers kitted out in their finest gear with carbon trekking poles.
To get there, we drove straight up from sea level to 6,000’ on roads that felt like walls. Roaring along in 1st gear, our car felt like it might flip over backward if the road got any steeper. Chelsea gouged finger marks in the door panel she was so excited to get to the hike. (There’s a less-direct, well-graded option that we took on the way back.)
Finishing up the Pico Ruivo hike.
I have no idea how they built this trail!
People with vertigo should steer CLEAR of this hike!
Just. Wow.
In the ten miles of hiking out-and-back, the trail features a dozen tunnels, thousands of stairs, and enough exposure to send people with vertigo into lockdown. To the north, a giant bank of clouds hovered below us; to the south, steep mountains dropped away to the ocean. A hike to remember.
A Destination Worth Visiting
In short, Madeira is SO COOL. The hiking. The mountain biking. The views of sunsets while sitting on a balcony overlooking the ocean. The stories about terrifying roads and plane landings… What else do you need for a magical trip?
View from the top of Pico Arieiro before heading back to Pico Ruivo. Such a cool hike!
Resources We Used:
My wise-and-awesome guide, Pedro. He’s taking a break from electrical engineering to guide awhile. Smart man!
This post ain’t sponsored, so the below is simply a reflection of the services we used:
Flying: Unless you’ve got a teleporter or a yacht (or can stomach a cruise ship), you’ve got to fly to Madeira. The landing is going to suck (I surveyed other tourists and 100% agreed), so steel yourself for that. There are lots of cheap flights from the European mainland.
Driving: We rented from Insular Car and they were awesome! Our car (a Clio) was billed as underpowered, but I found it to be a fun little rocketship. Second reminder: make sure you are SOLID at driving a manual transmission or driving will be a nightmare vs just entertaining. Lots of buses and shuttle services are available.
Lodging: Great deals abound. Lots of apartments in the $50-75/night range on Airbnb and tons of options on Booking.com.
Mountain bike guiding services: Look no further than Freeride Madeira. The guys are all cheery, friendly, helpful and excellent riders. Can’t go wrong with their services in my experience!
Finding Trails: Trailforks has many (but not all) of the mountain biking trails. The WalkMe app has all the hikes.
Once you get to Madeira, you’re in for a treat. HAVE FUN!
The coastline of Madeira seen while hiking Vereda da Ponta de Sao Lourenço.
https://www.traipsingabout.com/wp-content/uploads/2019/07/Mountain-biking-Madeira-clouds.jpg12001600Dakotahttps://www.traipsingabout.com/wp-content/uploads/2018/03/Traipsing-About-logo-white-background-450x156.pngDakota2019-07-11 23:55:192019-07-12 00:07:58Adrenaline and Beauty in Madeira (If You Survive the Flight!)
TAHOOOOOE! The word is fun to yell and the mountain biking there is even better.
When a blog reader asked for recommendations of California mtb trails, I pointed him at a past blog post about coastal rides. However, I didn’t have anything written about Tahoe trip Chelsea and I did last summer. Now I do!
I’ve ridden all these, with the list drawing from various websites and local friends who recommended their favorite trails. I’m an advanced rider (stop chortling, mtb friends) and these trails are blue or black difficulty. I linked to many of the trails on Trailforks to make it easy.
I love multi-hour rides that cover lots of distance, plus enduro-style descending. If you’re looking for tame, flat (cough boring cough) trails, this isn’t your list!
Without further ado, my favorite Lake Tahoe mtb rides:
Rolling down the TRT above Spooner Lake.
Tahoe Rim Trail (TRT) from Mt. Rose to Spooner to Van Sickle: Starting at Mt. Rose, pedal the Tahoe Rim Trail up and down to the top of Van Sickle, then descend into the tourist loony bin that is the S. Lake Tahoe. Fantastic lake views, playful and engaging riding (ahhh, granite is so fun), remote riding, and a healthy dose of effort make this a must-do. The full shebang is 45 miles and took me about 5 hours, so plan for a full day of riding and bring a water filter.
Getting up there at High Meadows near Star Lake.
TRT from Kingsbury S to Star Lake, Freel Peak/Meadows, down Mr. Toads: A close second place for favorite ride around Tahoe! Starting from the Heavenly Resort (we stayed at Chelsea’s parent’s timeshare there), pedal south on the TRT Heavenly and High Meadows to a refreshing (cold!) dip at Star Lake and eat some lunch.
Keep pedaling on Freel Peak trail as views across Lake Tahoe open up, then one last push on Freel Meadows. Finish with a rollicking shred down Mr. Toad’s Wild Ride (a fantastic ride by itself). There’s a huge day ride called Rose to Toad’s that combines these first two rides.
Monument Pass and Cold Creek – you’ve got to get up there somehow (I pedaled in from Kingsbury South trailhead on the TRT Heavenly), but once you’re there, it’s all fun downhill. Monument Pass is smoother terrain with lots of switchbacks up high; Cold Creek sports rocky sections with large boulders that are a) fun and b) dangerous when your front wheel disappears into a deep pit. #wreckingsucks
My sister-in-law on Sidewinder.
Corral/Sidewinder – I linked Monument and Cold Creek (above) with this ride, but most people do them on their own. FUN trails! Sidewinder is a natural granite playground into Corral’s flowy jump trail. Gotta ride it if you’re in the area. The climbing is on pavement so you can crank out laps if you want.
California Hangtown, baby! The climb to the top of Sidewinder.
Christmas Valley – a local Tahoe rider recommended this. Moderate-grade climbing that results in a low-flow descent with way more pedaling than I expected. Entertaining and the end makes it a worthwhile ride, but if you are only doing a couple rides in the area, I vote for skipping this one.
Chelsea’s bro enjoying the fruits of Tahoe.
Armstrong Pass – I linked this with Christmas Valley and it worked well. Similar riding to the rest of the Tahoe Rim Trail and it dumps you out right at the top of Corral/Sidewinder for more fun. A good way to get up to Star Lake if you want to ride Monument Pass and Cold Creek.
Hole in the Ground and Donner Lake Rim – Everyone loves Hole in the Ground…and I confess that I don’t know why! There’s a big climb up, lots of techy traversing (ok, that part is fun), and then it dumps you onto a FIRE ROAD for almost the entire 2,000’ descent.
I don’t know about you, but I don’t ride UP singletrack and DOWN fire roads without a lot of sadness… An out-and-back on Donner Lake Rim Trail was interesting purely for the tech-nasty bike handling required, but it’s mostly flat.
Sneaked a gratuitous van shot in after all!
Bonus Rides:
Flume Trail – Ok, so I didn’t ride ALL of these. Everyone rides Flume Trail near Tahoe, but I opted for the Tahoe Rim Trail from Mt. Rose right above it. However, 12.7mm tourists and Instagram posts can’t be wrong…right? If you want a green trail with views of the lake, I hear it’s great.
Downhill to Downieville!Downieville fun on Gold Valley Rim.
Downieville – my mountain bike friends speak of Downieville like it’s hallowed ground, a shrine of trails not to be missed. I needed to go there, so on the way back from Tahoe we detoured a bit to explore.
You can pay to shuttle from Downieville to avoid the ~3k’ climb up from the highway. NAH. Just pedal it! The fire road is steep, but the views are great. I added a bit to my day and did the climb from Sierra City, then rode Gold Valley Rim, Pauley Creek, Butcher, 2nd, 1st divide, which is (mostly) the route that the Downieville Classic follows.
Note: I considered riding up the highway, but it’s narrow and people are going fast. Hitchhike or catch a shuttle if your awesome wife isn’t available to meet you at the end of the ride.
The less fun, but good-for-ya route to the top at Downieville. Shuttles are overrated.Getting up high on Mt. Elwell near Graegle!
Graegle – Say it like “Gray Eagle” and fly like… anyway.
This little town is COOL and geared toward mountain biking like Oakridge, Oregon. I did a double-whammy day of Mills Peak and Mt. Elwell, which is either a big ride or my legs were tired from all the Tahoe riding! Mills is the easier of the two, with climbing on the highway/fire road to the trailhead. From there, shred back toward town on well-built, varied trails.
As for Mt. Elwell… Pedal back up from town (or ride this on the second day if you’re wiser than me) and then huff and puff up the too-steep-to-ride trail to the top of Elwell. I knew it was steep when a guy on an electric bike couldn’t pedal it!
Why ride uphill when you can carry your bike?
From the top, buckle your shoes and don the pads cuz it’s game time. Rocks! More rocks! ROCKS. Be prepared for black diamond riding. Nothing is crazy and there aren’t any big gaps, but the riding is in your face and challenging. Disclaimer aside, it’s also suparad! At the bottom, jump in the reservoir and enjoy the laidback vibe in town.
Chelsea’s mom laying down a patch of rubber on the trail from Tahoe City.
Family Fun: we did two rides with C’s family on the paved trails along the lake. One starts west of S. Lake Tahoe and the other we started in Tahoe City on the north shore. Both were fun and bike rental shops abound.
The first is shorter (maybe 10 miles available), whereas the second one has ~30 miles out and back, which Chelsea’s parents crushed on their rental cruisers. Someday I’ll be that tough!
Fabulous lake views from the top of Ellis Peak.
Hike Ellis Peak – need a rest day (well, from biking)? This six mile hike ends with a full-on amazing view of Lake Tahoe. Highly recommended!
In a funny small-world moment, we picked up two PCT hitchhikers on the drive back from Ellis Peak’s trailhead. Turns out one follows me on Instagram and is the personal trainer for Portland friends. Her girlfriend Carrot is a well-known thru-hiker whose excellent book we’d read. I love that kind of random stuff!
Small world!
That’s all I’ve got. If you have trails to recommend, fire away below in the comments. Happy pedaling!
Onward!
https://www.traipsingabout.com/wp-content/uploads/2019/02/Tahoe-Rim-Trail-mtb-Mt-Rose.jpg7681024Dakotahttps://www.traipsingabout.com/wp-content/uploads/2018/03/Traipsing-About-logo-white-background-450x156.pngDakota2019-02-06 06:06:372019-02-05 23:12:37My Favorite Lake Tahoe Mountain Biking Trails
Ten days ago, we stripped down to our oh-so-dirty riding shorts and entertained three tipsy ladies by diving into the Columbia River. Zach, Brady, JT and I had pedaled across the entire state and reached the end of the Oregon Timber Trail! It was a rowdy 15 days and 700 miles, and a hell of a fine time (<–full story).
Since then, I’ve luxuriated in my comfy bed, taken powerful naps as my body jumped into repair mode, ate (occasionally uncomfortable) quantities of food, and generally relaxed. (Well, Brady and I have mountain biked and ran a half dozen times since…can’t be TOO lazy.)
I’ve fielded many questions about the Oregon Timber Trail (OTT). Since it’s new as of 2017, I want to share the gear and lessons learned that worked well in the hope of making the journey smoother for future riders.
Me and Zach on Gunsight Ridge near Mt. Hood. (Photo: Brady Lawrence)
Overall Approach to Gear
There’s only two ways to carry your gear on a bike trip: on your back or on your bike. The lighter, the better. This was my first bikepacking trip, so I stayed conservative with my gear and aimed for being prepared vs. going ultralight. That said, my total weight (bike/gear/water/food) was far less than what I carry on road tours. It was also WAY more fun rolling light.
I jumped into the Oregon Timber Trail with no experience bikepacking other than a single overnight shakeout trip. That said, I have 7,000 miles of road touring experience in the U.S. and around Europe, plus hundreds of hours of mountain biking under my belt. I scoured the internet for gear lists and felt prepared for tackling such a difficult trail. In the back of my mind, I also knew that if a trip-ending bike mechanical or injury occurred, that was part of the risk.
My full setup with 3 days worth of food for miles 100-200 on the trip. (We wound up doing it in two days.)
If you aren’t sure how your gear will work, test test test! Go on day rides with your gear; sleep in your backyard and see how cold you get. Play around with your GPS, know how to use your maps, and be well-versed with your technical gear. (JT used CalTopo maps and Zach/Brady/I downloaded the Ride with GPS track for our Garmin eTrex.)
Learn some basic bike maintenance. We met one dude 200 miles in who couldn’t tune up his bike’s shifting, which is awkward (at best) when you’re pedaling a remote trail for 700 miles and only can use three gears.
Bare minimum, dial in your bike before you leave – I stripped mine down and replaced the entire drivetrain, put on new tires + sealant, bled the brakes and replaced pads, greased my bottom bracket and all my suspension pivots, trued wheels, and generally tried to anticipate headaches. It worked: I had zero mechanicals the entire trip (part luck, part preparation, I’m sure).
Most of all, don’t overthink it! People have done crazy adventures on old bikes with makeshift gear and had an awesome time. Get out there and have a kickass trip.
General Thoughts and Lessons Learned:
Weight matters more on a mountain bike. While road touring, ten extra pounds isn’t a big deal. Laptop? Extra shoes? Surrrre, throw it in! Not the case for bikepacking, where you’re pedaling steep trails, not to mention lifting bikes over downed trees (one day featured 200+ of them) and intensity is generally higher than on a road tour. Both up and down, a light kit will make your trip considerably more fun. I’ll aim to shave weight next time.
The more you carry, the harder the (already difficult) section can be! We kicked off day 4 with this brushtastic start from Silver Creek. JT was still smiling.
For trips with multiple people, split/share gear. Leathermans, camp stoves, tents, water filters, and so on are all great candidates.
You don’t need fancy bikes or bags. Any mountain bike will work on the Oregon Timber Trail. Dry bags lashed to your bike can carry gear.
Our bike choices varied from fully rigid/no suspension (JT) to hardtail (Brady) to me and Zach on full-suspension bikes. Most important was a tight and well-balanced gear setup. You can have fun out there on a steel Karate Monkey or a carbon shredder, but if your gear is loose and banging around, it’s gonna suck. (My recommendation is to at least have front suspension, but I’m not as tough as JT.)
Limited clothing is the name of the game, with layering absolutely key. Think riding gear and (maybe) a couple alternate items for camp. I went with a lightweight sleeping quilt and wore my jacket to sleep. In general, items that can cross over (e.g. rain pants for bad weather AND as a replacement for thermal bottoms) is a great way to cut back.
Go light on water whenever possible. Know where water sources are, how consistent they tend to be (spring vs. fall varies a lot) and how much water you drink. Chug water at water sources (camel up!) and motor through to the next refill. Other than the first 200 miles, water was plentiful on the OTT, but be ready for 20-40 mile sections with no refills on the Fremont Tier.
Zach’s ultralight setup with some views of Mt. Jefferson and Black Butte on Trail 99 (south of Sisters)
Contrary to the above, more food is better than no food! A pound of food (maybe a spare dehydrated meal or two) won’t wreck your riding experience, but can make you feel reaaaaal good at night.
Be prepared, but not TOO prepared. You can’t plan for everything! See Point #1: you don’t want to have a crazy amount of safety equipment and bike repair gear if it is so heavy that it slows you down. You can always push your bike to a highway and hitchhike if things go totally awry.
Get some medical training. Both Zach and I are Wilderness First Responders, and knowing how to use a first aid kit is always a good move. All of us had some injury on the trip ranging from bruises and scratches to more serious (Brady peed blood after a minor accident; Zach finished the trip with a couple cracked ribs). None required evacuation, but easily could have. Check out a Wilderness First Aid weekend course at the bare minimum.
Deep scratches (healing well) on my arm from a protruding branch on a trail. Brady found me bleeding, cursing, and yelling as I destroyed the offending branch.
Things I Considered Bringing But Left Behind:
Solar panel – These are fairly heavy and we were in/out of shade most of the time without many extended rest breaks for charging. Glad I left it at home.
Folding saw – potentially handy, but most of the trees blocking our way were too big to cut. Past mile 200 (Chemult), there weren’t many downed trees anyway. I’d leave it at home for the OTT.
Big camera/large tripod: My Sony RX100 worked great and is 1/2 the weight of my DSLR camera. A mid-size crop sensor camera like the Sony A6000 series would work great. Leave the giant tripod at home unless you are road touring, Ansel!
Paddleboard break on Big Lake with a view of Mt. Washington! Yep, left the SUPs behind too…
Weight Carried:
For all you people who loooove numbers, I put together a spreadsheet with a full breakdown of my gear weight. Totals for each section are also below for your reading enjoyment. The weight adds up fast.
Gear weight on bike: 24.76 pounds
Gear on body (clothing, backpack): 5.96 pounds (similar to any day ride that I do)
Bike weight with bags: 31 pounds (27 bike, 4 bags/empty water bottles/cages)
Water: varied! My maximum was on the Winter Rim without many water sources where I carried 2.5L (~5.5 pounds), but most of the time it was closer to 1.5L and we’d filter at the frequent streams/lakes.
Food: 2-5 pounds unless I said the hell with it and bought fruit (cherries/grapes) and carried them. The reward vs. extra work ratio in the heat was worth it for me some days. We also ate huge meals every 2-3 days when we’d hit civilization (diners, resort restaurants, and the buffet at Breitenbush Hot Springs yesssss).
Final grocery stop (in Parkdale) on our final day.
Tires: 29” Maxxis Minion DHF EXO 2.3” front, Ikon EXO 2.35” rear, both set up tubeless. Experienced bikepacking friends swear by these and they worked great! The EXO sidewall is a protective weave to help avoid tearing your tire apart. I had zero flats or any issues with tires the entire trip.
Gearing: 30T front chainring, 11-46 rear. This was spot on – when it was steep enough to warrant more climbing range, pushing my bike was a welcome respite to stretch my legs and calm my hammering heart.
Carrying Water: Two fork-mounted water bottles with cages attached using hose clamps, a liter strapped to the downtube and a 2.5L water bladder (rarely filled) in my riding pack. My plastic side-mount bottle cages did NOT work well (I resorted to ski-strapping the bottles on after losing two). Some bikepackers don’t like the change to suspension that happens with fork-mounted water bottles, but I thought it was fine.
An excellent camp spot at Silver Creek on the Fremont Tier.
Bags: Bedrock Bags from Durango, Colorado.
The core of any bikepacking setup is a set of bags to carry gear. Rather than heavy metal racks with chunky panniers like I’ve used on past road tours, soft, lightweight bags are the way to go when riding singletrack (or anything!).
The bags I bought from Bedrock Bags, a small company in Durango, are fantastic. Customer service was incredible, the construction is solid (both zippers and material) and they stayed in place remarkably well the entire trip. I was pleasantly surprised that the rocky, technical terrain we rode was still fun, even with bags on.
If you have any questions about bags, email Bedrock directly. The company has tons of online tutorials and a staff who knows bikepacking and outfits many Colorado Trail racers. They helped me dial in my kit and I’m sure they will do the same for you!
Glad to have dialed bags on the rocky Winter Rim! (Photo: Brady Lawrence)
Handlebar bag: the Entrada. Some bikepackers use a simple dry bag for a handlebar bag, but those can flop around when the riding gets rough. The Entrada, in contrast, has multiple attachment points on the bars, straps to cinch it down, and doesn’t move at ALL.
Even descending chunky, rocky trails, my sleeping kit stayed lashed to the bike like it was part of the frame. There’s also a spacious front pouch as part of the attachment where I stored extra food or quick-access light items.
Top tube bag: The Dakota Tank.
My namesake bag (not) sure is handy! For easy-access snacks, phone, camera or whatever, this nifty number is perfect. It has three attachment points and doesn’t slip sideways off the frame, unlike other top tube bags I’ve used in the past. A must-have.
Me and all my stuff on a cold morning just before Surveyor’s Ridge! (Photo JT Lehman)
Water bottle/Feed bags:Tapeats
Don’t bikepack without these! They are easy to open with one hand while riding, hold a ton of snacks or a big water bottle, and don’t bounce around. Mine were stuffed with bars most of the time. So, so handy.
Custom frame bag:
A downside to doing this trip on a full-suspension bike is that I lose frame space. Ohhh well – worth it for the fun! Bedrock has templates for various bikes, but mine was a newer model.
No problem: I just laid a measuring tape on the bike, snapped a couple pictures, and POOF, two weeks later my custom frame bag showed up. This sweet little number held my repair kit, tech gear, and medkit. I like it so much that I’m leaving it on my bike for day rides as a permanent fixture.
Sinbad Stash Pack:
Strapped to the bottom tube, this handy item is stable is light, stable and holds a full Nalgene water bottle size item. My 29” tires initially rubbed on the bottle when I hit big drops, but that was fairly infrequent and relocating the bag lower on the frame fixed this. Make sure to measure things though!
Dropper Seat Post: the Black Dragon
This is a magic device. I’ve heard/read complaints about swaying, crappy seatpost bags that make riding annoying. Thanks to a dual-pronged metal seat attachment (the RailWing), the bag has zero sway. There’s also a “valais” that clamps onto the seatpost and prevents any chafing on the dropper post. The result is a seat post bag that held all my clothing for the trip and balanced the bike and gear weight.
One thing to consider: if you have a 150mm dropper post, your rear tire will most likely rub on the bag when hitting big jumps or drops. An extra 10-15 psi in the rear shock helped this for me, though I still can’t drop it all the way without rubbing.
Onward to the rest of the STUFF. I’ve linked to the bigger, specific items; some are affiliate links (meaning Amazon kicks me a commission if you buy through it), and some aren’t.
Sleeping: 4.8 pounds
Light is the name of the game! Lots of options out there for 1-person tents, bivy sacks or tarp shelters. Sleeping pads just keep getting lighter (and less durable, curses).
A fine evening cowboy camping on Timothy Lake. One of our best overnight spots for sure.
Tent: Big Agnes Fly Creek 1 or 2 person. This tiny, light tent is easy to set up and use. Brady and I shared the Fly Creek 2, and a bivy or tarp tent works until there are mosquitoes. We cowboy camped under the stars all nights but two, but were glad to have a tent at Timpanogas “Mosquito Den” Lake.
Sleeping bag: EE Revelation Apex 40 degree quilt. This quilt loses the zipper and simply lies over the top of the sleeping pad with straps to secure it. It seems everyone in the outdoors is going to using quilts and I can see why! Sleeping socks were key on cooler nights where it dropped below 40 degrees.
Sleeping pad: Big Agnes Q-Core SL regular. A bit bigger than a Nalgene and 3″ thick. Comfortable, and also bigger than the new Thermarests. It also takes enough air to blow up that I start feeling like I’m hallucinating! I’d get a ¾ length Thermarest Neoair (JT used one and likes it)
Pillow: Sea to Summit inflatable. Yeah yeah, a jacket works…and this is tiny and works BETTER. Hey, a guy needs a little luxury.
Cooking equipment: 2.25 pounds
We split camp stoves and fuel between the four of us. Small stoves worked great for dehydrated food dinners and instant oatmeal for breakfast. Other than the pot, the only other items I brought was a tin cup and a titanium spork. Zach used a compressible 1.4L Sea to Summit X-Pot that I plan on getting.
For water filters, I shared with the team. For time efficiency, next time I plan on bringing the excellent, light filter that JT had, the Katadyn BeFree. Zach carried a syringe to pull water out of shallow or swampy sources and then filter, which was key a few times.
Filtering water from a trough on the Fremont Tier. (Photo: Brady Lawrence)
Clothing worn: 5.96 pounds (including shoes and backpack)
Bike shorts: Dakine Boundary. I love the stretch and fit on these shorts and have ridden in them for years. Chamois: Pearl Izumi, four years old and threadbare but still kickin! Yep, only one for the entire trip – rinse out at night (sometimes) or jump in streams/lakes during the day. Look mom, I’m (almost) clean! Short-sleeve jersey/shirt: Patagonia collared nylon. Since I’m vegan and don’t buy wool, I initially considered a synthetic polypropylene shirt. However, they STINK for day after day use. I picked up this shirt at the local used gear shop the day before the trip and it worked great!
The shirt rinsed out easily, was light and cool, and (the best part) JT had the exact same shirt style. Twinsies! As a bonus, it makes you look slightly less backwoods when you wander into a town or lake resort restaurant to eat all the food.
Convenience store food refill in Chemult, no collared shirt required…
Gloves: lightweight Giro Socks: quick-dry synthetic. Shoes: Specialized 2FO. These are da bomb. Easy adjustment, comfortable, wide(ish) toebox, and lots of protection for banging toes while riding) Helmet: Smith Forefront (Love this helmet for comfort and the custom sunglasses integration on top) Sunglasses: Smith Attack Backpack: Osprey 10L w 2.5L bladder. I rarely filled the bladder with more than .5-1L at a time except for a couple days where water was tough to come by for 6+ hours.
Spare/Warm Clothing: 4.41 pounds
For future trips, I may skip the thermal bottoms and just use rainpants like Zach (Bikepacking Mentor). The thermal top wasn’t necessary, but it was nice to change out of my riding shirt every day. Otherwise, this list worked well.
Brady hiding from a thunderstorm under a tree. Bring your rain gear, even if it’s summer!
Thermal Jacket: Patagonia Nano-Air Rain Jacket: Outdoor Research Rain Pants: Marmot Precip Thermal bottom: Patagonia longjohns Thermal top: Smartwool (I don’t buy new wool items, but this old top keeps on kicking; no reason to throw it away) Waterproof gloves: Black Diamond Beanie Sunsleeves – fantastic for riding in the sun without needing sunscreen
Me haaaangry and tired after a long day on the trail, banged up and yet fajitas soon made everything better! (Photo: Brady Lawrence)
Arm warmers – I never used these, but they’d be handy on chilly mornings, especially at higher elevation. Knee warmers – I used these once and don’t plan on bringing them for future trips. Rain paints will suffice for cold mornings. Extra socks for sleeping or if socks are wet in the morning (I wore the same pair to ride in, though I started with them damp a few days) Underwear: Exofficio quick-dry. Towel – mine was tiny (5”x5”) and next time I’ll go bigger. It was hot enough to air dry most of the time (silver lining for the heat?) Stuff sack – good for clothes and/or extra food to strap to bars Camp shoes: Xero sandals. A cheap pair of light flipflops is so worth having so you don’t need to wear bike shoes for your ENTIRE trip. Mosquito Net
Electronics: 2.89 pounds
Ah, camaraderie on the trail! Isn’t technology great?
Camera: Sony RX100V with 2 spare batteries and charger. Sweet little camera with SO much power for the size. Next time, I may leave the spare batteries/charger behind and charge via USB off the external battery pack
Tripod – small Gorilla pod
iPhone 5SE and headphones – I listened to a few audiobooks on the trip, mostly during long hike-a-bike sections or steep fire road climbs. I’ve suffered enough bike touring to feel ok about distracting myself!
External battery: Anker Powercore 13,000 (it’ll charge my phone 6 times). I prefer this over others because it has two charging cable slots vs just one. Fundamental rule for staying topped up is Zach’s ABC: Always Be Charging. Gas stations, restaurants, motels…fill ‘er up!
Satellite messenger for emergencies: SPOT Gen3 tracker. This is only 1-way communication and you can’t do a monthly-only plan, so I may get Garmin InReach Mini for future trips.
Headlamp: Black Diamond Revolt + spare batteries
GPS: eTrex 30x w/lithium ion batteries – Thanks for loaning me this, Paul! The user interface is weak, but it sips batteries relative to other GPS units so most bikepackers seem to use it. Someone please invent a better one!
Charging/USB cables
Tool, repair and emergency kit: 1.16 pounds
My goal was to have everything I needed for most field repairs for my bike or gear. As it turned out, I didn’t need any of this gear, but I’d carry the same kit next time!
Mid-trip brake pad replacement. Brady’s bike experienced other fun that I’ll talk about later!
-2 Voile ski straps – excellent for many applications ranging from holding bottles on a cage to fixing a broken bike frame
-Multitool
-Patch box w/2 tubes of glue, 9 small patches, 1 large patch, and 2 speed patches
-Spare derailleur hanger
-Spare derailleur cable
-Spare brake pads (2 sets)
-Spare SPD cleats/bolts
-2 chain links
-Quicklink x 3
-4 cable ends in baggy
-FiberFix spoke replacement
-Chain lube in micro dropper bottle (one bottle was good for the entire 15 days)
-6”x10” T-shirt rag for cassette flossing
-Old toothbrush w/cut handle for cleaning drivetrain
-2 plastic tire levers
-4 large zip ties
-4 small zip ties
-4 safety pins
-1” roll of Gorilla Tape
-GoreTex repair tape
-Kleartape universal repair tape
-Sleeping pad repair kit w/one Hot Bond adhesive and 5 patches
-Mini compass All above in a Ziploc bag (a more durable bag could make sense for a longer trip)
Misc: 1.32 pounds
Spare 29er tubes (2) – not a single flat for any of us on the entire trip, but gotta have these! For flat protection, fill the tubes beforehand with Stan’s sealant. Leatherman -must-have for any trip
Water break in the midst of big trees on Middle Fork near Oakridge.
Medical kit: .32 pounds
Taking the Wilderness First Responder class upped my game dramatically for wilderness first aid. The below is similar to what I carry on any day ride. NOLS sells well-equipped medkits.
A fabulous day in the Old Cascades Crest zone on the Mt. Hood tier. (Photo: Brady Lawrence)
-3 2”x 3” non-stick dressings
-4 Band Aid Tough Strips
-10 wound closure strips
-Irrigation syringe (for cleaning out cuts/scrapes)
-Tegaderm in big sheets – can be trimmed to fit smaller scrapes/burns
-4 Neosporin applications
-5-Q tips
-2 tincture of Benzoin applications
-10 Advil, 10 Ibuprofen & 4 Benedryl in flip top container
-Toothbrush/toothpaste and travel-sized Glide floss
-1” camp roll toilet paper and small bottle of hand sanitizer (most people get giardia from dirty hands, not water!)
-Dr. Bronner’s soap in micro dropper bottle
-SPF 30 stick sunscreen
-SPF 15 lip balm
-Chamois Butter – skip the individual wipes and just fill a small container from a big chamois butter like this
-100% DEET insect repellent wipes
Any Questions?
That’s a wrap! Drop me a line with any clarifications, feedback or (constructive) thoughts. Commenting is great because it helps out future readers of this post.
Have fun out there! By no stretch of the imagination is the Oregon Timber Trail easy, but it’s a hell of an adventure and one I won’t forget soon.
Brady descending off Surveyor’s Ridge with Mt. Hood cheering him on.
https://www.traipsingabout.com/wp-content/uploads/2018/08/Gunsight-Ridge-Oregon-Timber-Trail.jpg387580Dakotahttps://www.traipsingabout.com/wp-content/uploads/2018/03/Traipsing-About-logo-white-background-450x156.pngDakota2018-08-02 22:19:442019-03-17 11:54:53Packing List and Lessons Learned from Bikepacking the Oregon Timber Trail
Mile 57. I’m five hours into the High Cascades 100 mountain bike race and five miles up its longest climb. My stomach grumbles. Twists. I’ve heard that if things go wrong with the gut, it’s now.
NOT TODAY. While spinning uphill, I force down a Picky Bar and ShotBlocks, then chug electrolyte water.
My stomach stabilizes. I push on. At the top of the climb, I hit Farewell trail, a 3.5 mile descent that I grin through.
It’s game time.
Chelsea refueling me at an aid station.
WHY Would Anyone Ride a Mountain Bike 100 Miles?
Hoooold up. Surely one of you is thinking the above. Friends’ responses ranged from, “Wow, I could never do that” to “that sounds like my private hell” to “that’s on my bucket list.” To each their own!
For perspective on difficulty, High Cascades is 70 miles of singletrack, 14 miles of road (to/from the trailheads to break up the pack), and the rest on fire roads. Riders climb (and descend, wheee!) ~10,000 feet of elevation on the extensive trail system west of Bend, Oregon in the shadow of Mt. Bachelor.
Here’s the map of the entire race course if you’re interested! Mike at Mudslinger Events put on a well-organized, awesome event. (Also, here is my blog post about my second shot at the High Cascades 100, which was even more fun.)
High Cascades 100 course map for 2017
A Dirty Century, as they’re called, is hard, FAR harder than 100 miles on a road bike. So much singletrack requires focus and a different kind of stamina – upper body, mental, plus legs. It’s intense, but as my buddy Aaron said, “For endurance competitions, it ain’t even fun until somebody quits.”
My goal wasn’t the joy of a day ride or the camaraderie of a group road ride. I raced High Cascades as a physical test, an endurance push past anything I’d done before. It took dedicated training, days where I didn’t want to ride, a shelving of other goals. I didn’t need a reason or prize money. Personal satisfaction was enough.
The Verdict
How did it go? It was radtastic! (It’s a word. Look it up.) The race environment was stimulating, my competition was friendly, and my overall experience was positive. Yes, I worked hard. Yup, there was dust and it hit 90 degrees. All part of the challenge!
Results: I finished in 9 hrs 17 min, handily beating my 10 hour goal and good for 64th out of ~400 people. I only stopped for ~2 minutes total at the aid stations and my body felt solid the entire time. Ok, ok, I could have used more chamois butter to ease the chafing from mile 70 on…
I finished with energy to spare and think I could have gone below 9 hours. Still, for my first-ever mountain bike race, I’m stoked with the results! Check out the ride details here on Strava.
Done! Feeling good, if a bit dirty from all the dust…
Good Friends, Sage Advice
Let’s be clear: I didn’t race to stand on a podium. High Cascades is a popular race and attracts pro racers and badasses with sustained power output that makes my quads shiver in fear. For me, racing was simply a personal challenge.
My buddy Joe, a seasoned 24 hour MTB racer, gave me two pieces of advice for my first endurance race. 1) Don’t stop and 2) Ride to finish, not for a time. Competitive numbers guy that I am, I wanted to shoot for a time – 10 hours or bust! – and so advice like Joe’s was helpful.
My friend Julie, a fitness coach and endurance racer, shared a mantra that I adopted: “slow on the uphill, steady on the flats, free speed on the downhill.” For such a long ride, hard efforts early on can torch chances of success later. I stuck to Julie’s advice and am glad I did. Given the energy I had left at the end, next time I can toe the line a bit harder.
Since I’m a good descender on a mountain bike, I made up time ripping downhill. That said, High Cascades is more of a cross-country race, so the people who do well are stronger climbers than descenders. It’s no enduro race!
By the way, dig these kinds of posts? Sign up for the free 2x/month Traipsing About newsletter for more tales from the mountains and creative challenges like drawing and piano when I’m off the bike.
Snippets From Race Day
Some pros, like the famous boxer Floyd Mayweather, are relaxed before fights. As he’s said, ‘I’ve done everything I’m going to do. Nothing I do in the next little bit is going to change anything, so ain’t no use getting worried about it.”
I knew I was ready, but I didn’t feel quite so laid back. Thanks to jangled nerves, I only slept a few hours the night before. (Our cat Oliver contributed, yowling all night because he gets worried when we appear to be packing for a trip.) Luckily, the training was done and only pedaling my bike remained.
Miles and miles of training, luckily some like this one of Mt. Hood that Paul is taking in.
Race Moments:
Breakfast at 4 am: I stuck with tried and true foods my stomach knew well. Green tea, a giant bowl of quinoa with fruit and nuts, plus a smoothie.
Starting line at 5:30 am: 400 athletes pent up and raring to go as the sun creeps over the horizon. The gun goes off and we surge off in a giant peloton on the road toward Mt. Bachelor. It’s 9 miles of road to split the group before we hit dirt, a necessity to avoid a terrible bottleneck at the start. People chat with buddies, vie for position.
Mile 9: The pack splinters as we hit the first fire road, the uphill part of Tyler’s Traverse. It’s 6.5 miles to the top and the dust clouds billow and swirl. Some racers (myself included) use a buff or bandanna to curb the dust. I’ll still feel a pinch in my lungs for a few days after the race. The hardest part on this climb is letting people pass when I know I can go harder…pace, Dakota, pace!
Riding with friends on Tylers. I didn’t even glance at this view during the race!
Mile 17: The first real downhill on Tiddlywinks, a rad jump trail. I tail a couple XC riders on their hardtail bikes, then bust a move on a jump line and pass them, grinning away. Riding bikes sure is fun…but are we really only 20% done?!
Mile 24: first aid station. Nice to see Chelsea cheering away! I zoom right past as planned. Legs are feeling good!
Mile 40: I share the suffering of a 3-mile steep, sandy fire road climb with a few other riders, then zip into the first aid station. Chelsea! Smiling friends! They pit stop me in 1 minute flat, NASCAR style, placing on a ice pack on my neck, stuffing new bars in my jersey, swapping water bottles and my hydration pack and pouring ice water on my arms to help cool me off. I stuff my face with homemade rice bars and hit the trail.
Best aid station team ever. Thanks for the help, Paul, Bayen, Emily and Chelsea!
Mile 52: Well THAT was a great 12 miles! Zippy singletrack, one of my favorite descents in Bend (Upper Whoops), and I passed about 15 people, including a single-speed racer looking dapper in cargo shorts and a plaid shirt. (Yes, people ride 100 miles on a single speed.) Now the hard work begins/continues with an eight-mile climb up Mrazek. Not much talking happening between racers as temps head toward 90 and the climb steepens.
Mile 60: Farewell to the climbing…for a few miles, followed by a steep, rooty effort up South Fork all the way back over to the other side. My legs and energy levels are staying high and I’m starting to turn it on and pass people.
Mile 75: 7 hours in, I hit Aid Station #2 after a 3-mile long, FAST sandy fire road descent. Chelsea hands me a refreshed hydration pack and a few more bars to finish the race. Ice water never tasted so good.
Mouth full of rice bars!
Miles 75-100: I start cranking harder, feeling good and knowing I’ll finish. No leg cramps, no stomach troubles! I’ve ridden these trails dozens of time and I’m still smiling, even after over 7 hours on my bike. I see a couple people hurting and taking a rest by the side of the trail and I’m thankful to have stayed out of the pain cave all day.
The Finish: The last five miles are flat on pavement. I tuck and crank hard, wind whistling as I sail along. There’s a final singletrack section at the finish line and I hit a jump, a few twisty turns, and then sprint for the finish with Chelsea rooting me on.
At long last, the finish line!
I’m DONE. I hug Chelsea. My friend Tucker claps me on the back so hard I almost fall over. I feel good…and then it hits me. I’m tired. It’s hot. I need to sit down in a cold bathtub and not move my legs. Get this boy home!
Annnnd adrenaline gone. TIRED. It hit me just like that.
Aftermath, a.k.a. Did I Hacksaw My Bike to Death
My bikes are all still intact! I still like mountain biking (strangely?) and the race didn’t take TOO much out of me. In fact, the next day I spun around the neighborhood and felt great! (My chafed undercarriage, on the other hand, was scorched.) All the training paid off, I guess.
ALL THE DETAILS: Training, Gear, and Fueling
Interested in details and/or looking to race 100 miles? Read on below for allll the dorky talk about my training, the gear I used, and what I ate/drank during the race.
Training for a 100 Mile Mountain Bike Race
Similar to marathon training, most people don’t ride a full 100 miles straight preparing for the race. In fact, my longest ride was only 7 hours, and my maximum distance was only 61 miles.
I focused more on volume, i.e. pedaling pedaling pedaling! Consecutive longer days (3+ hours) were the most important, since nothing emulates tired legs in a race like tired legs in a training ride. I’d crank out a 50 mile ride on Tuesday, then wake up the next day and do the last thing I wanted to do: go ride my bike a few hours.
To make sure my body could handle the physical duress of a long mtb race, I focused on mountain biking and didn’t touch a road bike the entire time. For my next longer XC race, I’ll likely add a day of harder tempo/threshold road riding efforts to focus on increasing my power so I can crank harder uphill.
Typical training weeks from late June.
My destroyer-endurance-racer friend Paul’s advice was to take rest days. Actual, sanctified days off – no going for a run or climbing super hard. This felt strange, as resting is NOT my natural state. After a big block of rides, I’d sometimes take even two days – with nothing more than a spin or walk around town – to let myself fully recuperate. My rock climbing took a hit, but it’s already coming back fast.
So how many hours/miles did I ride per week? Well, with all the snow this winter in Bend, I skied and rock climbed and didn’t touch my bike for months! Skate and backcountry skiing kept me fit, of course, but I wasn’t cranking on a trainer like some guys who roasted the trails at High Cascades.
As the snow (finally) melted in late April after a huge snow year, I started riding frequently and started logging consistent 10+ hour training weeks. Some people don’t do any hard efforts in their endurance training, but I love going fast and so intervals and all-out efforts were part of the package to keep me entertained. Overall, I find it amazing that two big months of riding prepped me for such an intense race.
That’s enough training. Ride your bike a lot and you can totally ride 100 miles! If you’re a data geek, check out all the stats on Strava.
Let’s talk about gear!
Gear for Race Day
Biking, while more complicated than running, is still basic. My gear list for High Cascades was straight-forward:
My noble steed: Santa Cruz Tallboy CC
Full-suspension 29er bike: Santa Cruz Tallboy CC. Set up with 120mm front suspension, 110mm rear, this bike is the perfect fast uphill, fast downhill bike. New to me in May, I love it! My poor Ibis HD3 sits sad and lonely in the garage…
Tires – for you bike geeks, I rolled a tubeless setup with a Schwalbe Rocket Ron 2.2” in the rear and a WTB Vigilante 2.3″ up front
Helmet and shades: Smith Forefront with MIPS and Smith sunglasses with the Pivlock tech.
Did I mention all those riders kicked up some dust? Clear shades with a little UV filter were key!
Shoes – Specialized 2FO Cliplites. I love the boa clasps on these for easily changing tension on the fly (literally while biking), not to mention they’re comfortable and grip rocks like crazy when needed. Warning: they are sized small and I wound up going to an 11.5 from my usual 10.5
Two 10L hydration packs – at aid stations, Chelsea and friends traded me an empty hydration pack for a full one, which made transitions fast and seamless.
Repair gear – last-minute, I bought a Salsa top-tube pack that wound up carrying a spare tube, CO2 canister, and all other repair tools for the race. This kept the weight off my back and removed the need to move stuff between packs (with the exception of my bike pump).
Clothing: Jersey, spandex shorts, socks, sun sleeves (my fav from bike touring) and gloves. RECOMMENDATION from experienced friends: make sure your gear is comfortable and you’ve used it all for many hours prior to a race. A weird seam in a new chamois or a pair of gloves can wreck a race.
All the gear!
What Did I Eat? Plants!
Most people who toe the line of a 100 can ride the distance. It’s the fueling and hydration that take out competitors. As I caught up to a guy 3 hours into the race who blew by me earlier, I learned he hadn’t eaten or drank anything yet. I’m no seasoned endurance racing expert, but I knew he was in trouble. (He didn’t pass me again.)
FUELING IS KEY. If there’s one thing to get right, learn how to eat and drink on the bike while moving. My goal (which I met) was to only stop at mile 40 and mile 75 for my rad wife and friends to help me swap out hydration packs and reload my food supplies. I multi-tasked and snuck in my lone pee break while walking up a steeeeep, sandy fireroad. Otherwise, I was on my bike the entire 9+ hour race.
Food Plan:
During Training:
Lots. Of. Food. I follow a vegan diet (#plantpower, woot!) and have for four years now. Probably related to that, a couple people asked me if I changed my diet during training. NOPE. The only thing I did was increase calories, eating huge varied salads, lots of burritos, big rice bowls with vegetables, and the occasional pizza.
Doofy smile time! After one ride, I ate two of those giant burritos…
For long rides, I’d go with a few bars and maybe a sandwich. My favorite, however, was to swing by my favorite food cart in Bend, eat half a giant burrito, and take the remainder with me to be eaten at a viewpoint hours later.
Race Day Food:
My takeaway from research was that eating 350-450 calories an hour during racing is a good target. (This Training Peaks article has more detail.) I came in somewhere in that range, but my primary goal was consistent fueling during the race. Here’s what I ate:
Bars: Picky and Lara bars, ~1 per hour. ~200 calories each.
ShotBlocks: 2 blocks/hr, 100 calories/package. Stuck to this schedule entire race.
Hammer Endurolyte pills: I popped 1-2 of these per hour and experienced zero cramping.
Medjool Dates: 1 date/hr until they turned into a mush paste at an aid station. Whoops!
Secret Weapon: this recipe for blueberry and chocolate coconut rice cakes. Clean, easily digestible calories, plus the bars are moist thanks to the blueberries and coconut milk. I STUFFED my face with these at aid stations (always good for a laugh) and mainlined 200-400 calories. Also could be wrapped up and kept in a jersey pocket for snacks on the go as well.
Easy on the stomach, quick to digest, and full of water, these are GREAT!
Hydration Plan:
After kicking around ideas, I decided to a) maximize water access and b) minimize transition times. To accomplish this, I had two hydration packs that Chelsea cycled out and handed to me at the aid stations, refilled and ready to rumble. I also had a water bottle on my bike with water, salt, and some lemon water.
I used 70 oz. of water in each pack plus three Nuun electrolyte tablets. The secret weapon: per my buddy Eric’s idea, I made Nuun ice cubes and put those in the water on race day. Cold water was so, so, so good when temps tipped into the 90s in the afternoon.
My goal was simply to drink water, and lots of it. For a race with so much singletrack, the hydration packs made it possible for me to drink basically whenever, as opposed to only on smooth trails or fireroad. My approach worked well and I’d recommend it!
Final Thoughts on Racing 100 Miles
The only thing I have left to add is this: you can do it! Put in the time for training, steel your muscles and your mind, get a game plan in order, and get after it. I hope the experience I’ve shared helps you realize it’s doable even if you’re someone like me who has never raced off-road before.
Want to race the High Cascades 100? Here’s the link.
Ride on!
My first big ride after the race took me here…how can we not love mountain biking?!
https://www.traipsingabout.com/wp-content/uploads/2017/08/High-Cascades-start.jpg465580Dakotahttps://www.traipsingabout.com/wp-content/uploads/2018/03/Traipsing-About-logo-white-background-450x156.pngDakota2017-08-10 06:23:232023-05-06 15:16:35One Hundred Miles On a Mountain Bike: Racing the High Cascades 100
The dust has settled and the High Cascades 100 race is fading into the rear view mirror. Don’t worry, 100 miles and 9+ hours of pedaling didn’t beat the love of mountain biking out of me – I’ve already ridden again!
I’ve got a blog post brewing with details of the race (spoiler: it was awesome), which I’ll post soon. For now, here’s a 1-min video cut showcasing pre-race preparation. I hope you dig it.
Onward!
https://www.traipsingabout.com/wp-content/uploads/2017/07/High-Cascades-100-Video-e1500429264329.jpg327581Dakotahttps://www.traipsingabout.com/wp-content/uploads/2018/03/Traipsing-About-logo-white-background-450x156.pngDakota2017-07-18 19:04:492017-07-18 19:04:49Fun at the High Cascades 100 (Video)
At 5:30 tomorrow morning, I’ll pedal off on my mountain bike (along with 350 other lunatics) to race 100 miles. The event, High Cascades 100, traverses some of the best trails around Bend and climbs about 10,000 feet in the process.
It’s the culmination of months of hard training. I’ve put in the time and am confident, but feel excited, a bit nervous, and ready to ride!
I’ve never raced mountain bikes before, so starting small with a mere 10 hours of pedaling is just the ticket. HA. At least I’m consistent, since that’s the same way I jumped into bike touring – “hey, let’s ride across the US!” or started a business – “I’ll leave engineering for finance and fake it ‘til I make it!”
Registering for High Cascades was partially a reaction to landing last fall after three years on the road. Both Chelsea and I were tired of constantly saying goodbye to friends and wanted to park it in a cool outdoorsy town, but that glitzy sparkle of long-term travel was hard to shelve. A goal months down the road was just the ticket, so I woke up Thanksgiving Day and signed up for the race, ran a 10k event, then ate myself silly.
Nearing the end of a long, hard ride with my MTB crusher friend Paul.
If I’m honest with myself, I’ve coasted a bit the last three years. With my business running nearly on auto-pilot and the open road in front of us, it was easy to live in the moment and enjoy myself. Sure, we did some big bike tours, volunteered at Farm Sanctuary, saw stunning places, and I blogged frequently – but that’s for fun. I wasn’t elbow-deep in any projects with a long view.
For five years prior to 2013, I’d focused on chasing greenbacks. I worked like a tornado, spinning in one place until I realized I needed to think about something – anything – other than work/business/making money. Thanks to my supportive and adventurous wife, that led to travel and a focus on creative projects. Blogging, photography, video: all were intentional projects with no revenue model in mind. I’m no expert in any of them, but can now produce work that I’m proud of.
Still, I’m not the type to sit around and relax. After the dust from High Cascades settles (and my legs stop hurting), I’ll need a project to set my sights on. This time around, it won’t be a purely physical one. I’m feeling the desire to make something, be it a business, a creative work, or a service for others. (Don’t get me wrong – my bucket list continues to grow. The 670 mile Oregon Timber Trail, yessss!)
Camped out after a great day in the mountains.
I’m currently intrigued by the intersection of the athletic/plant-based movement, which is gaining more steam every day. The desire to create a documentary still lights up my ambition circuits. All it takes is commitment and daily effort. Waiiiit a second…just like getting up with tired legs and heading out for a training ride when I’d rather sit at home and read a book.
If I can train for a race by riding a bike like it’s a part-time job, why can’t I apply the same long-term, sustained effort to a project? The possibility of failure is no excuse, since racing and creative/business efforts are fraught with peril. Time to buckle down.
These ambitions will swim in my thoughts tonight, though I’ll dream mostly of singletrack and logistics for the race. Speaking of that, where is that spare water bottle? I should probably snap this laptop shut and go tune up my bike. Tomorrow’s 4 a.m. alarm is chiming soon, so au revoir and wish me luck!
A beautiful day in the Ochoco Mountains NE of Bend.
https://www.traipsingabout.com/wp-content/uploads/2017/07/Mountain-biking-Alpine-Trail-Oakridge.jpg435580Dakotahttps://www.traipsingabout.com/wp-content/uploads/2018/03/Traipsing-About-logo-white-background-450x156.pngDakota2017-07-13 21:47:182017-08-09 22:11:23A 100 Mile Challenge in the High Cascades
After two summers of bike touring, we carved out September for a Canada mountain biking van trip. A glance at the Trailforks app whet my appetite: British Columbia has 7,182 mountain biking trails and Alberta chimes in with 1,329.
This was a lifetime of pedaling, and there just weren’t enough sunny fall days to explore it all. My ambitious goals to explore more of British Columbia and Vancouver Island ran aground the shoals of realistic time constraints, so a return trip is already brewing!
Not all biking – the Rockies have some awesome hikes too! Here’s Chelsea heading down toward Waterton on the Carthew-Alderson.
Still, in 25 days, I managed to squeeze in 20 bike rides, plus four excellent hikes. The only thing that accumulated faster than the lactic acid in my legs was my appreciation for the beauty and fun of Canada. I also learned that solo rides make all tree stumps closely resemble large grizzly bears…
Here are some of my favorite locations and rides (plus hikes) from the Canadian Rockies and eastern B.C. It’s not even close to comprehensive, but hey, it’s a start. We didn’t make it west of Nelson/Revelstoke, so please cease irate trolling if you think I missed something in another area.
Hiking above Lake Agnes in Banff.
Lake-side break in Waterton.
Note: Chelsea joined me for a few rides, but mostly stuck to hiking and running because the trails in Canada are, shall we say, a bit gnarly and not her style. Her sense of self-preservation is more acutely developed than mine!
1,000 miles of views and outdoor fun!
Favorite Mountain Biking Town: Fernie, B.C.
Bikes perch on every car in Fernie, B.C. If you’re looking for a place to park and just RIDE without driving all over, this is it.
Known as a ski town in the past, strong investment in bike infrastructure makes this a MTB destination. The signage is fantastic and there are dozens of trails accessed directly from town.
Nathan cranking up Hyperventilation in Fernie.
Stay downtown, or camp at Fernie Provincial Park, which has big, private camp spots, hot showers, and feeder trails leaving right from the campground.
Trails of note:
–Stovepipe/Brokeback: rooty, rocky chaos after a lung-popping effort to the top via the aptly-named Lactic Ridge
–Hyperventilation/Hyperextension: switchback climbing to test your skills, then a fast descent back to town. Try Broken Hip as a kicker finish – it has a corkscrew section you won’t forget.
–Lazy Lizard: machine-built trail that is fun for beginners or at Mach 7.
Hot tip: make sure to get a huge smoothie downtown at Lunchbox. The Solara was my favorite.
Hiking a couple hours north of Fernie in Banff.
Bright Blue Rivers and Wildlife Viewing: Jasper, Alberta
Jasper is renowned for its beauty, not to mention the stunning drive up the Icefields Parkway. It’s a laid-back town 1/10th as crazy as Banff, with equally impressive sights. The wildlife is also very present: giant elk stopped traffic on the highway and mountain goats/sheep gazed down as I rode by.
Overlander Trail north of Jasper.
Trails of note: Valley of Five Lakes: rooty, rocking riding through pretty forest, along lakes like blue gems, all with views of snow-capped mountains. Hard work, but so worth it. Overlander: similar to #1, but less rooty and with bigger views. A good point-to-point ending right in Jasper.
Hot tip: Try the pizza downtown at Famosa Pizzeria; do your laundry at the most-excellent Coin Clean Laundry.
A fine day on the Valley of Five Lakes trail.
Crazy Alpine Adventures: Black Rock Mountain near Canmore, Alberta
I’d never heard of alpine hike-a-bike until Instagram showed me a dude drifting steep, rocky mountain slopes. His buddy Jake was kind enough to invite me on an alpine MTB adventure at Black Rock Mountain. What followed was a day of riding unlike any I’d done before.
If you’re an experienced rider looking for an adventure, try bagging some alpine peaks in the Rockies while you’re there! Make sure to bring a full-face helmet.
Good times on Black Rock Mountain.
Best Flow Trail: Nelson and Revelstoke, B.C.
Two options here, both awesome. Nelson is famous for tough, steep trails; Revelstoke has stuff equally as fun.
Turnstiles and Lefty (Nelson): For huge, perfect berms, head up to Nelson’s magnificent jump trail, newly built in 2016. Flowdown (Revelstoke): grand fun easily accessed with a pedal up from the highway. Four miles of quintessential Canada fun.
Sean pretending it’s not snowing on Keystone Standard near Revelstoke.
South of the Border Bonus: Continental Divide NST #337 (Helena, Montana)
A varied, challenging, and FUN trail. If you ride uphill through the rock gardens without dabbing a foot a few times, I’ll buy you lunch!
Best done as a shuttle from MacDonald Pass, about 30 min west of Helena on Highway 12. Rowdy, tough rock gardens the first few miles, then FAST downhill from there on the Switchback Ridge Trail.
A fine day on the Continental Divide!
Favorite Day Hikes:
Since my focus this trip was riding, we stuck to accessible, well-known hikes for rest days. They were all scenic and worth doing!
Hiking Helen Lake in Banff.
Waterton National Park: Alderson-Carthew
Everyone goes to Glacier National Park, but just north across the Canadian border is Waterton. This scenic park shares the border with Glacier and gets 1/10th the traffic.
We checked out the excellent Alderson-Carthew hike, a 15 mile point-to-point journey. There’s a free shuttle from town that runs until mid-September. Sign up online or at Tamarack Outfitters on the way into town.
Chelsea takes in the view on the Carthew-Alderson.
Banff/Lake Louise: Devil’s Thumb
Fear the crowds of Lake Louise! They are REAL, and they will engulf you like the flames of Mordor.
As usual, if you hike a couple miles up, you’ll escape the crowds and find the real fun. A local photographer showed us Devil’s Thumb, a scramble up steep scree to a viewpoint of Lake Agnes and Lake Louise.
For my money, you won’t a much prettier view than those two with the snowy mountains as a backdrop. Throw in yellow larches and the scrum of selfie-snapping tourists around the lake is a small, small price to pay.
View of Lake Agnes and Lake Louise from Devil’s Thumb.
Yoho National Park: Iceline hike
Just the name of this park makes it worth a visit, and a trek up Iceline is another reward. For the full shebang, do the 17-mile loop; for a more sedate hike, just head to the toe of glaciers, eat lunch with a stunning view, and head back.
Lunch break below the glacier on Iceline.
Iceline hike looking north.
Banff Honorable Mention: Helen Lake
This hike is a steep climb through forest until you break into the scenic valley. Freezing sleet and snow dampened our enthusiasm for scaling snowy peaks around the lake, but apparently the views are stunning from up there.
Winding trails toward Helen Lake.
And that’s all she wrote!
https://www.traipsingabout.com/wp-content/uploads/2016/10/Hyperventilation-climb-Fernie.jpg9001200Dakotahttps://www.traipsingabout.com/wp-content/uploads/2018/03/Traipsing-About-logo-white-background-450x156.pngDakota2016-10-25 22:35:492019-03-17 11:56:13Favorite Mountain Bike and Hiking Trails in the Canadian Rockies
The text message read, “You interested in an alpine adventure?” Having no idea what that meant, I (of course) said yes.
My guide was Jake, a local from Canmore I met through Instagram who offered to show me around. Our destination was Black Rock Mountain, a peak in the Canadian Rockies near Canmore, Alberta.
A bit of exposure on the way down…
Biiiig cliff, tiny little biker.
Jake’s truck easily bombed through gnarly 4×4 roads and river crossings to the bottom of the mountain. We were ready to rumble.
Well, almost: For the first time in my life, I forgot my cycling shoes, making a great impression on my new friend. Nothing like downhill mountain biking on SPD pedals while wearing thin, flexible barefoot shoes. Sigh. I’m sure he wondered whether this total noob was going to survive the day.
We pushed and carried our bikes 3,000 feet up steep rock chutes, scree slopes, and other “holy crap, this is unrideable terrain” and finally arrived at a fire lookout. Peering down the 45 degree slope, I admit to having a questioning moment. However, I sure as hell wasn’t going to carry my bike back DOWN the mountain.
Nothing but downhill and views!
Jake leads the way down a narrow ridge line.
Up next was one of the gnarliest, scenic, fast, and exhilarating mountain bike rides of my life. Words don’t do it justice, so check out the video I made and Jake’s incredible pics of our descent (see below).
For reference, he’s in the orange jacket, I’m in yellow. Follow him on Instagram for more amazing alpine shots. Unlike me, he does this all the time!
Enjoy.
P.S. Don’t worry, mom, this isn’t my typical kind of ride! There were no wrecks and I only used up one of my nine lives (and one carbon rim).
Me dropping through a steep rocky chute.
River crossing on the way in, Black Rock Mtn in the background.
Top of Black Rock at the decommissioned fire lookout.
Dropping down a narrow ridge near the top of Black Rock Mtn
Running from the thunder clouds.
https://www.traipsingabout.com/wp-content/uploads/2016/09/Black-Rock-mountain-biking-steep-descent.jpg8001200Dakotahttps://www.traipsingabout.com/wp-content/uploads/2018/03/Traipsing-About-logo-white-background-450x156.pngDakota2016-09-11 19:12:372016-09-11 19:12:37An Alpine Adventure in the Canadian Rockies
I had to try mountain biking in Iceland. How often can I pedal on a volcano and soak in a hot springs in the middle of a ride?
(Want to see live action? Here’s the video, or click the ridiculous photo above!)
With only two days between our camper van trip and our trek in the highlands, I opted for two MTB day trips out of Reykyavik. I chose Icebike Adventures because their reviews were good, they were the first company to start running mountain bike tours in Iceland, and their website was slick. Chelsea opted to rest up in Reykyavik and hang with her folks, so it was just me and other mountain bikers from Italy, Belgium, and Virginia.
Views south to the ocean on the Steamer Trail.
My cheery guide, Magne (badass Viking name!), picked me up in a lifted Land Rover Defender with big tires and an even bigger sense of style. Many of the Super Jeeps in Iceland cost $100k-$250k and live on pavement. Not so with the Defender.
We roared out of town, past a huge geothermal plant that provides all of Reykyavik’s hot water. Soon we were in the volcanic hills east of town.
Skipping the road, Magne blasted through 30 river crossings in the Defender, blowing walls of water into the air. The little boy in me giggled; the adult hooted in appreciation.
The Trips
I rode with Icebike for two separate trips, the Steamer trail and the Edge trail. These can be combined into one day if you’re feeling up for it. I’d recommend the Edge first so you can relax in the hot pools later in the day.
My take: If you don’t have much time in Iceland and want a cool experience with bubbling mud pools and a soak in a hot springs, go for the Steamer. If you want to ride XC singletrack through lava fields and log more distance, go for the Edge trail.
Rip-roarin’ fun on the Edge Trail.
Ride #1: Steamer Trail
This 14k (8 mile) ride starts across a crushed lava field, then climbs up to a viewpoint. There are bubbling mud pots (a cameraman boiled his foot there a couple years back) and a few curious sheep might say hi.
Then there’s some fun, mildly-rowdy singletrack down to the halfway point in Reykyadalur, the “foggy valley.” A bubbling hot stream sprouts from the hills; don’t jump in the top or you’ll be a boiled tourist. Halfway down, the water cools enough to enjoy. You’ll have to share with other tourists, but hey, aren’t hot pools and mountain biking enough?
Fun fun fun on the Steamer Trail.
From there, traverse through a steamy section of trail, then blast downhill on double and single track. You’ll have the option to finish with 15 minutes zipping through grassland singletrack at the bottom.
Crack a beer, say skál (cheers!) to your fellow riders, and head for town.
Singletrack on the Steamer Trail.
Now that’s a snack break location. (Steamer Trail)
Ride #2: Edge Trail
Looking for more riding and less soaking? Hit the Edge trail. It’s 23k (14 miles) of rip-roaring fun through a quintessential Icelandic landscape.
Riding through ancient moss-covered lava on the Edge Trail.
According to Magne, there are only about 100 serious mountain bikers in Iceland. This means trails are empty and running into another car at a trailhead is a weird occurrence. Given how fun the terrain is, I expect that to increase dramatically in the coming years, though apparently trail maintenance is a pain with the harsh winters. I wouldn’t be out there doing trail work in freezing spring sleet, that’s for sure.
Edge Trail starts at a trailhead on the shoulder of an extinct volcano. You’ll pedal past moss-covered lava or down rough, chunky trails that will test your technical skills. Finish up through grassy plains and fields of flowers, over rough bridges, and right into the eastern edge of Reykyavik. Edge was my favorite ride of the two that I did.
AARGH, congested trails are the WORST.
Cranking along the Edge Trail.
The Bikes
I ride a nice mountain bike back home and have higher expectations than most. Rental bikes, as a rule, tend to SUCK. Tourists destroy them and many times it seems they are maintained with a rusty hacksaw by a hiker who hates mountain bikes.
Icebike impressed me with their well-maintained, quality Scott full-suspension bikes. The bikes easily handled any of the terrain we encountered (or was that my wannabe-pro skills?). Size-wise, get a large bike if you’re my height (5’10”). A medium is for someone shorter than 5’9”.
Magne putting out the sign vibe.
More Options
Both trails were great and I’d recommend either. Steamer is fairly short, but the hot pools halfway are a cool experience. It’s a better trip for a beginner. Edge is rowdier (and more fun) and you’ll work harder, but hey, that’s all part of the fun!
If I have one regret, it’s that I didn’t get to experience the heli-biking that Icebike also offers. After all, what’s cooler than landing in a heli on top of a volcano and biking straight off the side? I’ll just have to come back for that, and also for some multi-day trips in the Iceland highlands. SO MUCH TO DO.
Thanks for showing me around, Icebike!
Valley view mid-ride on the Steamer trail.
https://www.traipsingabout.com/wp-content/uploads/2016/08/Iceland-valley-view-MTB.jpg13501800Dakotahttps://www.traipsingabout.com/wp-content/uploads/2018/03/Traipsing-About-logo-white-background-450x156.pngDakota2016-08-16 08:34:242019-06-10 16:06:05Mountain Biking on Singletrack Gnar in Iceland
This post is inspired by a podcast interview I did with The Consummate Athlete. Check it out here! Topics ranged from my daily habits to navigating van life to benchmarks for my personal fitness to why I love ping pong as much as shredding rocky trails on my mountain bike.
—–
I didn’t “exercise” as a kid. Like most people my age, I simply played. Exercise was climbing trees and running around. There wasn’t a routine or plan – it was simply part of my daily lifestyle.
Then came the years of sitting at desks at school and lifting weights so I could smack a baseball over a fence. (And impress the ladies). I could bench 285, but I couldn’t touch my toes without my eyes bugging out.
Zip forward three decades and here I am, recently 34 years old. I’m still very active, but the range of motion in my hips, shoulders, and other joints are closer to a rusty Tin Man than my younger self.
As I head toward the Land of Middle Age, my goal is to stay active in many sports. To achieve this, I’ve realized a haphazard approach to fitness and flexibility won’t suffice. It’s going to take more of a concerted effort.
Exploring the Oneonta Gorge in Oregon…with icy toes.
What Are Your Fitness Benchmarks?
The esteemed mountaineer Conrad Anker does two things every year to encourage staying in shape – run a marathon and climb El Capitan in Yosemite. This got me thinking about what my personal fitness barometers might be. I encourage you to do the same.
Rather than a couple big goals, I opted for specific items along the lines of the Presidential Fitness test we did as kids, with some other sports mixed in. My baseline goals – ones I want to be able to do anytime, anywhere – are:
50 pushups
15 pullups (no kipping!)
15 dips
Hold a plank for 2 minutes without shaking like a rabid rattlesnake
Touch my toes with straight legs
Run ten miles
Ride a century on a road bike OR 35 miles of gnarly, physical terrain on my mountain bike
Swim a mile straight (in a pool)
Lead 5.11 climbing routes
Beat my friend Jaysun at ping pong (I love the outdoors and adrenaline sports, but for some reason also find a ton of joy in the focused fun of this sport)
While we’ve been landed in Portland, it’s been easy to maintain these. Most can be done while traveling, though it depends. Some will atrophy during long, single-activity trips like bike touring, backpacking, or eating large servings of carrot cake for three months. Others are a starting point – if I’m planning a long climbing trip, I’ll get after it and hopefully be cranking on 5.12s by go time.
I’ve also enjoyed benchmark Crossfit workouts as an excellent way to test overall fitness, not to mention a damn fine workout when I’ve only got time for a short workout. I’m not a Crossfitter and have never been to their gyms, but my favorite test is one called Cindy. It’s 20 minutes to complete as many sets as possible of 5 pullups, 10 pushups, and 15 air squats. If don’t splat on your back in a puddle of sweat afterward, you are a cyborg.
All that’s nice, but what about staying limber? That’s where mobility work comes into play.
.Exploring an old tunnel in Oregon.
Mobility Training (Ok, Stretching)
Lately I’ve also incorporated a mobility practice into my life. I don’t want tight hips, shoulders, ankles, and forearms limiting my performance in the activities I enjoy, and this is the ticket for that.
We all know we need to stretch more, warm up better, blah blah blah. Well, it still matters. Paraphrasing an Olympic strength coach: “If world-class power lifters are using their limited training time to stretch EVEN THOUGH their focus is strength, why aren’t you?” Fine.
I’m not the best at regular stretching, but have found that triggers work best for me. (I do one thing, then immediately do the desired activity afterward. e.g. Eat breakfast, brush teeth.) To accomplish this, I integrated a mobility practice into something I already do frequently: reading.
A number of books inspired this, most recently Ready to Run. I also drew on an interview with an Olympic gymnastics coach and incorporated his fundamentals program. There’s no magic pill though – it still takes work. Most of us, including me, have so much body memory in the wrong positions that it’s going to take consistent, focused effort to repair the damage.
Working on tight hamstrings in the Columbia Gorge. Photo: Scott Rokis.
The good news is that many mobility exercises provide entertainment for your partner. Chelsea routinely has laughing fits when I’m struggling through an ape or crab walk. Even with her antics, my mobility is improving after just a month of 10-20 minutes per day and I can actually picture the day when doing the splits won’t put me in the hospital.
If you’re like me and have tight hamstrings, hip flexors, and shoulders from biking/running/hunching over a device, these are my favorite exercises. You may dig them too:
Couch stretch – no, it’s not reeeeaching for the T.V. remote from the couch. Do a lunge with your rear knee on the ground, then reach back and lift your foot until it touches your butt. Shriek loudly, then relax until your eyes stop watering. Two-four minutes each side a couple times each day will change your hip flexors from twangy to the envy of all the ballerinas you know.
Deep squats – my ankles and hips are both tight. Until a week ago, sitting in a squat with heels on the ground resulted in me toppling over backward. My goal is a full squat with feet flat on the ground, and two minutes a few times a day is moving me forward.
Table top/crab pose – great for shoulder flexibility to stretch the pec minor muscle, the one in our chest that is constantly constricting as we hover over our glowing devices. Lots of variations on this – just Google “pec minor stretch”
Jefferson Curls – I’d never even heard of this exercise, but it’s the #1 recommendation from Gymnastic Bodies. It’s basically a weighted standing forward curl to bring back curvature and flexibility in your spine. My hamstrings and spine are in love with this stretch.
Do those four exercises consistently and I bet you’ll see great progress. I choose 2-3 each day and do them while I read books or blog posts, prior to a climbing session, or after a bike ride or run.
Taking a break during a ride near Mt Hood. June alpine rides are the best.
When I hear about older athletes who are still crushing it, consistency is the dominant theme. By staying on top of mobility and regularly exercising, they avoid injuries that sideline many athletes for big chunks of time and require starting over. Day in, day out, they take a few minutes to bang out some pushups or pullups, stand instead of sit at a desk (standing desks are magic for better posture), or choose stretching on the floor while watching a movie versus sinking into the couch. The small things add up over tie!
I write about this as both an accountability statement for myself and a reminder that it is TOTALLY possible to stay flexible, strong, and active as we age. I see it as an investment similar to saving for retirement. With a few minutes per day sunk into a Body 401(k), hopefully I’ll be pulling out returns for many years.
Zipping along perfect trails at Post Canyon. Here’s to more of this for a long time!
https://www.traipsingabout.com/wp-content/uploads/2016/06/Oneonta-Gorge-Oregon.jpg8001200Dakotahttps://www.traipsingabout.com/wp-content/uploads/2018/03/Traipsing-About-logo-white-background-450x156.pngDakota2016-06-29 23:39:012019-06-10 16:01:50Investing in Your Body's 401(k)
I recently spent four days mountain biking in the outdoor playground of Oakridge, Oregon. All I can say is: Visit. This. Place.
Riders out there, bring your mountain bike. If you or your family are into other sports, there’s fun to be had in a kayak, with a bird spotting scope, and by lacing up hiking shoes. It’s time to play outside.
Oakridge is a small town on the west side of the Cascade Mountains. Founded as a rough and tumble logging town with more taverns than churches, it wasn’t always a place that attracted adrenaline-loving yuppies like me.
Old habits meet new activities on a connector fire road.
These days, it’s different. You’re as likely to see a cycling jersey as a plaid work shirt.
With a vision many rural communities in the west can learn from, Oakridge is leveraging its natural assets via tourism. It now hosts big events like Mountain Bike Oregon, races like Trans-Cascadia, or great fun for groups of friends coming in to ride. It’s not a one-stop solution, but the town is definitely attracting cash to revitalize the local economy.
The climb to Heckletooth Mountain might just pop an artery, but what a place for lunch.
Access is a key component – Oakridge lies at the center of five major trailheads with enticing ridges rising in all directions. The International Mountain Biking Association (IMBA) just labeled it a Gold-Level mountain biking destination, just one of six in the country. The town is the hub in a spoke system radiating outward with hundreds of miles of trails.
These trails saunter along alpine ridges speckled with wildflowers, slip through old-growth forest and wind along green, moss-lined green river trails. Pedal from a cheap rental in town or camp at the dozens of great National Forest Service campgrounds; either way, life is good. Five friends and I rode until we dropped and barely dinged the shiny surface of this pedaling paradise.
Gabe enjoying wildflowers (and fast downhill) on Alpine Trail.
The badass trails are the major draw. What also impressed me is the vision and creativity the people of Oakridge are employing to make it a destination, not just a place Oregonians ride. They aren’t just order takers like a cotton candy vendor at a busy fair. It’s a place where you can tell they appreciate having you around.
Take the Mercantile, for instance. This cool bike shop rents and sells fancy downhill bikes, but also stocks plaid workshirts. There’s a huge trail map on the wall and the employees happily pointed out which trails were clear of snow and which had tons of downed trees.
You know there’s some fun about to happen when the rigs are loaded and lined up like this!
Then there’s the We Speak pins that people around town wear, touting their local-only knowledge. “I Speak Camping,” says Heather’s pin, and another guy knows wildflowers. Instead of grouchy order takers, the town seems to exude hey, we’re glad you’re here!
Oakridge isn’t a secret. We met multiple parties from out of town, including one down from British Columbia (a destination itself). Still, with so many trails dedicated to non-motorized vehicles, there’s lots of room to play!
If you’re planning a summer or fall mountain biking trip, put Oakridge on your list. Forget the crowds in Moab and the lifts of Whistler and head to this Oregon gem. I’m definitely going back soon.
Greg takes a moment to enjoy the views over Larison Creek.
In our four days in town, we explored five different trail systems. The only thing more tired than my legs was my jaw from all the grinning!
Based on my experience and beta from friends who know the area well, I can recommend the following trails for anyone heading to Oakridge. Ride Oregon Ride has good info too.
Updated fall 2017: After additional time in Oakridge, I added other favorite rides. The town only continues to grow the riding in the area, so it’s even better now!
Alpine – the famous (for good reason) shredfest. Get ready for alpine wildflowers with views of the valley followed by fast single track snaking through forest.
Evan topping out on a big climb to the stellar views on Alpine Trail.
ATCA (Alpine-Tire Mountain-Cloverpatch-Alpine) – even shuttling this, you’ll pedal 5,000′ of elevation in less than 30 miles. IT’S WORTH IT! The huge trees on Tire and fine, fine descending on Tire will make that climb out of Cloverpatch totally worth it.
Larison Rock – fast fast fasssst rip right into Oakridge. Watch out on the marble-slick corners on this one – it’s easy to overcook those and launch off your bike.
Little Bunchgrass into Heckletooth Mountain – you’ll weave through huge trees high on a ridge, test your skills on some steep rocky sections, and then climb (and climb some more) to the top of Heckletooth. The descent is a steep, furious ripper on switchbacks that’ll test your skills. Enough said – this is my favorite ride of the trip. (I might have said that after every ride…)
Dead Mountain – great views of the valley plus machine-built jumping and radness up top into a fast single track. Easy to pedal right back into town too, which is always nice.
Jason from Bermstyle.com takes in the valley view from Dead Mountain.
Eula or Hardesty – accessed via the same fire road, these two are SO good. Eula is so-steep-there’s-no-stopping in places and you’ll drop 3k’ in a few grin-inducing miles. Hardesty is a favorite of mine and is zippy, twisty fun through cut logs and over roots. Don’t miss it!
Lawler – an Oakridge classic that was rebuilt recently. Classic Oakridge singletrack up top followed by the new part down low – machine-built, ripping fun.
Middle Fork Willamette River – this one has echoes of the McKenzie River Trail, a famous destination in Oregon for biking. I’d ride the West Fork any day for the remoteness and lack of hikers gaping at the oncoming bikes. Beautiful riding.
Jim splashes through a creek on the Middle Fork trail.
Larison Creek – a 10 mile fire road climb followed by some of the most beautiful, mossy, technical creekside riding I’ve done.
Gabe zips through the emerald palace of Larison Creek.
Salmon Creek Falls Trail – accessed right from town, it’s a smooth beginner trail on the north side, classic technical river trail on the south. The climb out of the south will test any rider’s fitness!
Local 180 Brew Pub – a top nanobrewery and watering hole for mountain bikers. Live music and friendly staff.
Oregon Adventures – don’t feel like pedaling to the top or need a local guide? We didn’t need their services, but multiple friends have recommended this company for those looking to shuttle Oakridge or not get lost in the wilderness arguing with your map about which direction is west. They arrange a 17k in a Day shuttle with close to 20,000’ of descending on the best trails in Oakridge.
Local Mountain Biking Events and Races
Mountain Bike Oregon – this event put Oakridge on the map. Join hundreds of mountain bikers for food, riding, and tales of valor after three days shredding the best trails in Oakridge.
Trans-Cascadia – friends of mine created this enduro race series. Test your mettle against some amazing riders.
Ricky wisely chooses to walk, not ride, mossy logs on Larison Creek.
The winds over the Cascade Mountains in Washington always punch airplanes around. As I sat in a 20-seat propeller aircraft during a recent trip, the metal creaked, the engines roared, and the pilot fought winds so strong the flight attendants stayed seated the entire time. (Never a good sign.) Luckily, I happened to be reading a book chapter about fear.
But I’m not talking about that kind of fear.
I’m talking about creative fear. The kind that stops you in your tracks and makes you say no, to shelve an idea, curb a project and stay safe. As Aristotle said, “to avoid criticism, say nothing, do nothing, be nothing.”
Liz Gilbert’s new book, Big Magic, describes how she pictures any creative endeavor as a road trip with twins named Creativity and Fear. They’re always there, but she sets ground rules before the trip: Fear gets no radio station control, and definitely doesn’t get to drive.
Creativity, meanwhile, rides shotgun and picks the music, points out restaurants, and picks fun side diversions along the way, loving the ride. Yet through it all, Fear sits in the backseat with arms crossed and points out how stupid it was to take the road trip, that everything is going wrong, and whines about taking a pee break.
Lounging by a lake in Italy
I fight fear every time I hit publish on a blog post or video. Blogging is easier these days since I’ve published 120 of them (how did that happen?!) without anyone shipping me off to the gulag for dissent. However, I’m a neophyte with video, so each completed work is a large percentage of my lifetime efforts. It’s a new arena where I’m equipped with a fork and spoon as I wish for a trident and lion-emblazoned shield.
Luckily, there are no other gladiators, and my life isn’t at stake. Just my self-confidence.
But hey! Learning with no expectations is good for me; video taps a different part of my brain versus writing or photography. Chelsea loses me for hours as I disappear into editing or drift off thinking about a fun angle for a shot. I know a well-done video when I see one – I think we all do – so efforts at this new endeavor frustrate me sometimes. But while these little video compilations don’t meet my vision for desired quality, they’re training, a method to figuring things out.
Ira Glass from This American Life said it well: “For the first couple years you make stuff, it’s just not that good… A lot of people never get past this phase, they quit. Most people I know who do interesting, creative work went through years of this…And if you are just starting out or you are still in this phase, you gotta know its normal and the most important thing you can do is do a lot of work.”
Every time I “finish” a creative project, a part of me still cringes because I know it’s not perfect. Making something feels like physical effort akin to scaling a castle wall, and publishing is tossing the work off a turret into the commons for all to see. Yet there, open and exposed, is where a project teaches me something. Readers email with support or (hopefully constructive) feedback, and I also ask for input from people whose skills I respect. (Brady, you wily film maker, you’re right – moving text and cross-fades are lame.)
If I don’t do that, there’s no improvement – I’d send text shooting across the screen and execute bad transitions forever. Instead, progress. Or at least it feels that way.
Wandering the castle grounds in Prague.
Just like this blog, which has expanded beyond what I expected when I started tapping keys two years ago, I have no idea how video will add to my life. Maybe it’s just a fun side project, a good outlet for my curiosity. Or maybe I can leverage those skills, our travel experiences, and my writing to tell stories about issues that needs attention. I felt too awkward to film the Syrian refugee situation when we were in Salzburg, but that is a perfect example of a story that needs to be shared.
Footage from our cycling trip in Europe is my current video medium. I’m parsing my way through it to learn new skills like decoupling video and audio for voiceovers, layering audio tracks, plus discovering free creative commons music sources. And while Fear sullenly plays Solitaire and Creativity babbles on about all the adventures around the bend, I’m enjoying the heck out of this road trip.
Check out my latest video – it’s a quick 1:20 and, I dare say, my cleanest one yet. Please let me know what you think!
https://www.traipsingabout.com/wp-content/uploads/2015/10/Kite-boarding-Resia.jpg6411024Dakotahttps://www.traipsingabout.com/wp-content/uploads/2018/03/Traipsing-About-logo-white-background-450x156.pngDakota2015-10-16 08:53:132015-10-16 19:12:48Creativity and Fear, My Road Trip Companions
Two months ago, my friend Michael told me about the Petzen downhill mountain bike area in SE Austria. Since it is hunkered in the Carpathian Mountains near Slovenia and 1,500 miles from where we were in England, I figured that would never happen. Nevertheless, I added it to Evernote just in case.
Sometimes, these things work out. As we pedaled through Slovenia, I mapped out a route to Petzen. As luck would have it, we found a vegan hotel/restaurant on Lake Klopein, the perfect location for a few days off after our tour through Hungary. Petzen happened to be just a few pedal strokes (ok, 15 miles) away. A perfect day trip.
The warm-up ride to the park was worth it: the stellar downhill and views of the valley make Petzen was the best flow trail I’ve ever ridden. It was so flowy that my first six-mile run through the berms actually made me slightly motion sick! The trail, which won IMBA’s 2014 Flow Trail of the Year award, is fantastic.
Enough said. Other than visiting it, the best way to experience Petzen is through a video. Here it is.
https://www.traipsingabout.com/wp-content/uploads/2015/08/1-GOPR1223.jpg6401024Dakotahttps://www.traipsingabout.com/wp-content/uploads/2018/03/Traipsing-About-logo-white-background-450x156.pngDakota2015-08-25 09:30:222015-09-02 13:06:40I Like Big Tires and I Cannot Lie (An MTB Video)
The spring pilgrimage to Utah is a common trek for avid mountain bikers. They flock to the southern part of the state in search of dry trails and to avoid nasty east coast weather or the rainy Northwest. Moab is the well-known Mecca of Fat Tired Fun, but there are two-wheeled adventures splashed from there all the way to Las Vegas.
In April, I was lucky enough to spend a few weeks romping around on the splendid singletrack in southern Utah. Under blue skies, my tires crunched and whirred over miles of red rock until my legs burned from climbing and my neck creaked from rocky descents. Some days I rode solo, hours in the middle of nowhere where I could stop on a bluff and enjoy a solitary lunch. I also met up with friends from Oregon, Colorado, and California to form biker gangs bandying about enough acronyms to make a newbie rider’s brain bulge.
We rode singletrack, not fire roads… This is a connector section on the Mag 7 trail.
Here are the trails I’ll ride again when I return to Utah…which I certainly plan on doing! Even if you’re on a family trip or are cruising with a partner who doesn’t ride, I suggest that any mountain biker driving through the five national parks of Utah should bring a (full-suspension) bike with them to fully enjoy the fun.
Porcupine Rim (Moab, UT) – first up, any mountain biker visiting Moab needs to shred down Porcupine. It’s one of the most famous trails in the U.S. (world?), and for good reason. The trail is miles of downhill fun that, depending on snow levels, starts as high as 11,000’ elevation and finishes at 4,000’ at the Colorado River. Along the way, the action heats up from silky singletrack into rockier terrain, finishing with riding to test the best riders. All the while, you’ll be craning your neck to catch views of the red rock valleys that make Utah famous.A tip: don’t be a Roadie Punk – pay $25 for a shuttle from one of the bros in town (Porcupine Shuttle is great, as is Coyote Shuttle) and let them drive your lazy butt to the bottom of the snowline. You’re going to have 20+ miles of downhill; save the vertical gain for your commute and weekly ride back home! You came to Moab to shred the GNAR, bro.
JEM/Goulds Loop (Hurricane, UT) – sick of rocky drops and full-face helmets, and simply want to grin your face off? If JEM were a song, it would be a Green Day jam cranked to full volume. Pedal as hard as you can on this IMBA Epic and live it up! The trailhead is right outside Zion National Park, an easy hop free of tourist throngs in the park. Add Goulds/Hurricane Rim to the mix if you want a big (and very fun) day on the bike.
Thunder Mountain (Bryce Canyon NP) – hoodoo rock spires, backcountry riding, and solitude are the name of the game on Thunder Mountain. Just a few minutes from the entrance to Bryce Canyon, this ride is a remote ride to a lunch spot overlooking the valley. If you see another person on the trail, I’d be surprised.
Hoodoos!
Gooseberry Mesa (Hurricane, UT) – bikers rave about Slickrock Trail in Moab, but I’d rather ride the mesas around Zion National Park any day of the week. Why? Gooseberry is the same style of riding (up and down on grippy, rolling rock), but is more technical and fun, especially the South Rim trail. The mesa is accessed via a rough road that results in empty trails and solitude any hermit worth his bushy beard would enjoy, plus free camping. Did I mention sweeping views of the valley outside of Zion National Park? Gooseberry is the well-known mesa, but there are others, such as Guacamole Mesa, that are good fun as well.
Magnificent 7 to Portal Trail (Moab, UT) – there’s a sign near a cliff edge on the Portal Trail that intones, “Walk your bike. People have died here. People like you. GET OFF YOUR BIKE.” Signs leading to Portal encourage turning around while you still can, shrilly proclaiming that you are approaching trails best ridden by <25 year old males with GoPros strapped to their heads. Don’t listen to them – Mag 7 through Portal is one of the most fun, physical and view-laced trails you’ll ever ride. Use your brain and walk the cliffs marked by warning signs, bring plenty of grub and water, and make this a must-do if you’re an advanced rider looking for an adventure around Moab. Shuttling to the top of Mag 7 (as they call it) and riding all the way out is a 20+ mile, all-day adventure through the rocky terrain around Moab that you won’t forget.
Durango, CO trail systems. I enjoyed a week of exploring this high-altitude mountain biking destination while local riders I met showed my lungs who was boss. All the trails are accessed right from downtown; this is another IMBA Epic that anyone who enjoys biking will dig. Phil’s World, right across from Mesa Verde National Park (about 40 miles west of Durango), is another stellar area developed by local trail builders.
For trail guides, I recommend picking up maps at any of the bike shops in Moab. For the other rides, the Singletracks.com or Maplets app are great resources. Even without a map, you’ll figure it out…and if you don’t, then you’ll get to do a longer (if unplanned) ride! Bonus miles are the best. Take a picture of the trail head map and head out.
Here’s to two-wheeled fun in the wilds of Utah. Snag a spring break from the cold and wet; head to the red rock! Ride on, amigos.
My buddy John riding a ridge on Amasa Back in Moab.
A post-ride session of Cards Against Humanity. John, you know I deserved the win on this round!
https://www.traipsingabout.com/wp-content/uploads/2015/05/1-DSC053531.jpg6391024Dakotahttps://www.traipsingabout.com/wp-content/uploads/2018/03/Traipsing-About-logo-white-background-450x156.pngDakota2015-05-20 10:26:592018-03-08 08:59:47Five Rad Mountain Bike Rides in Southern Utah

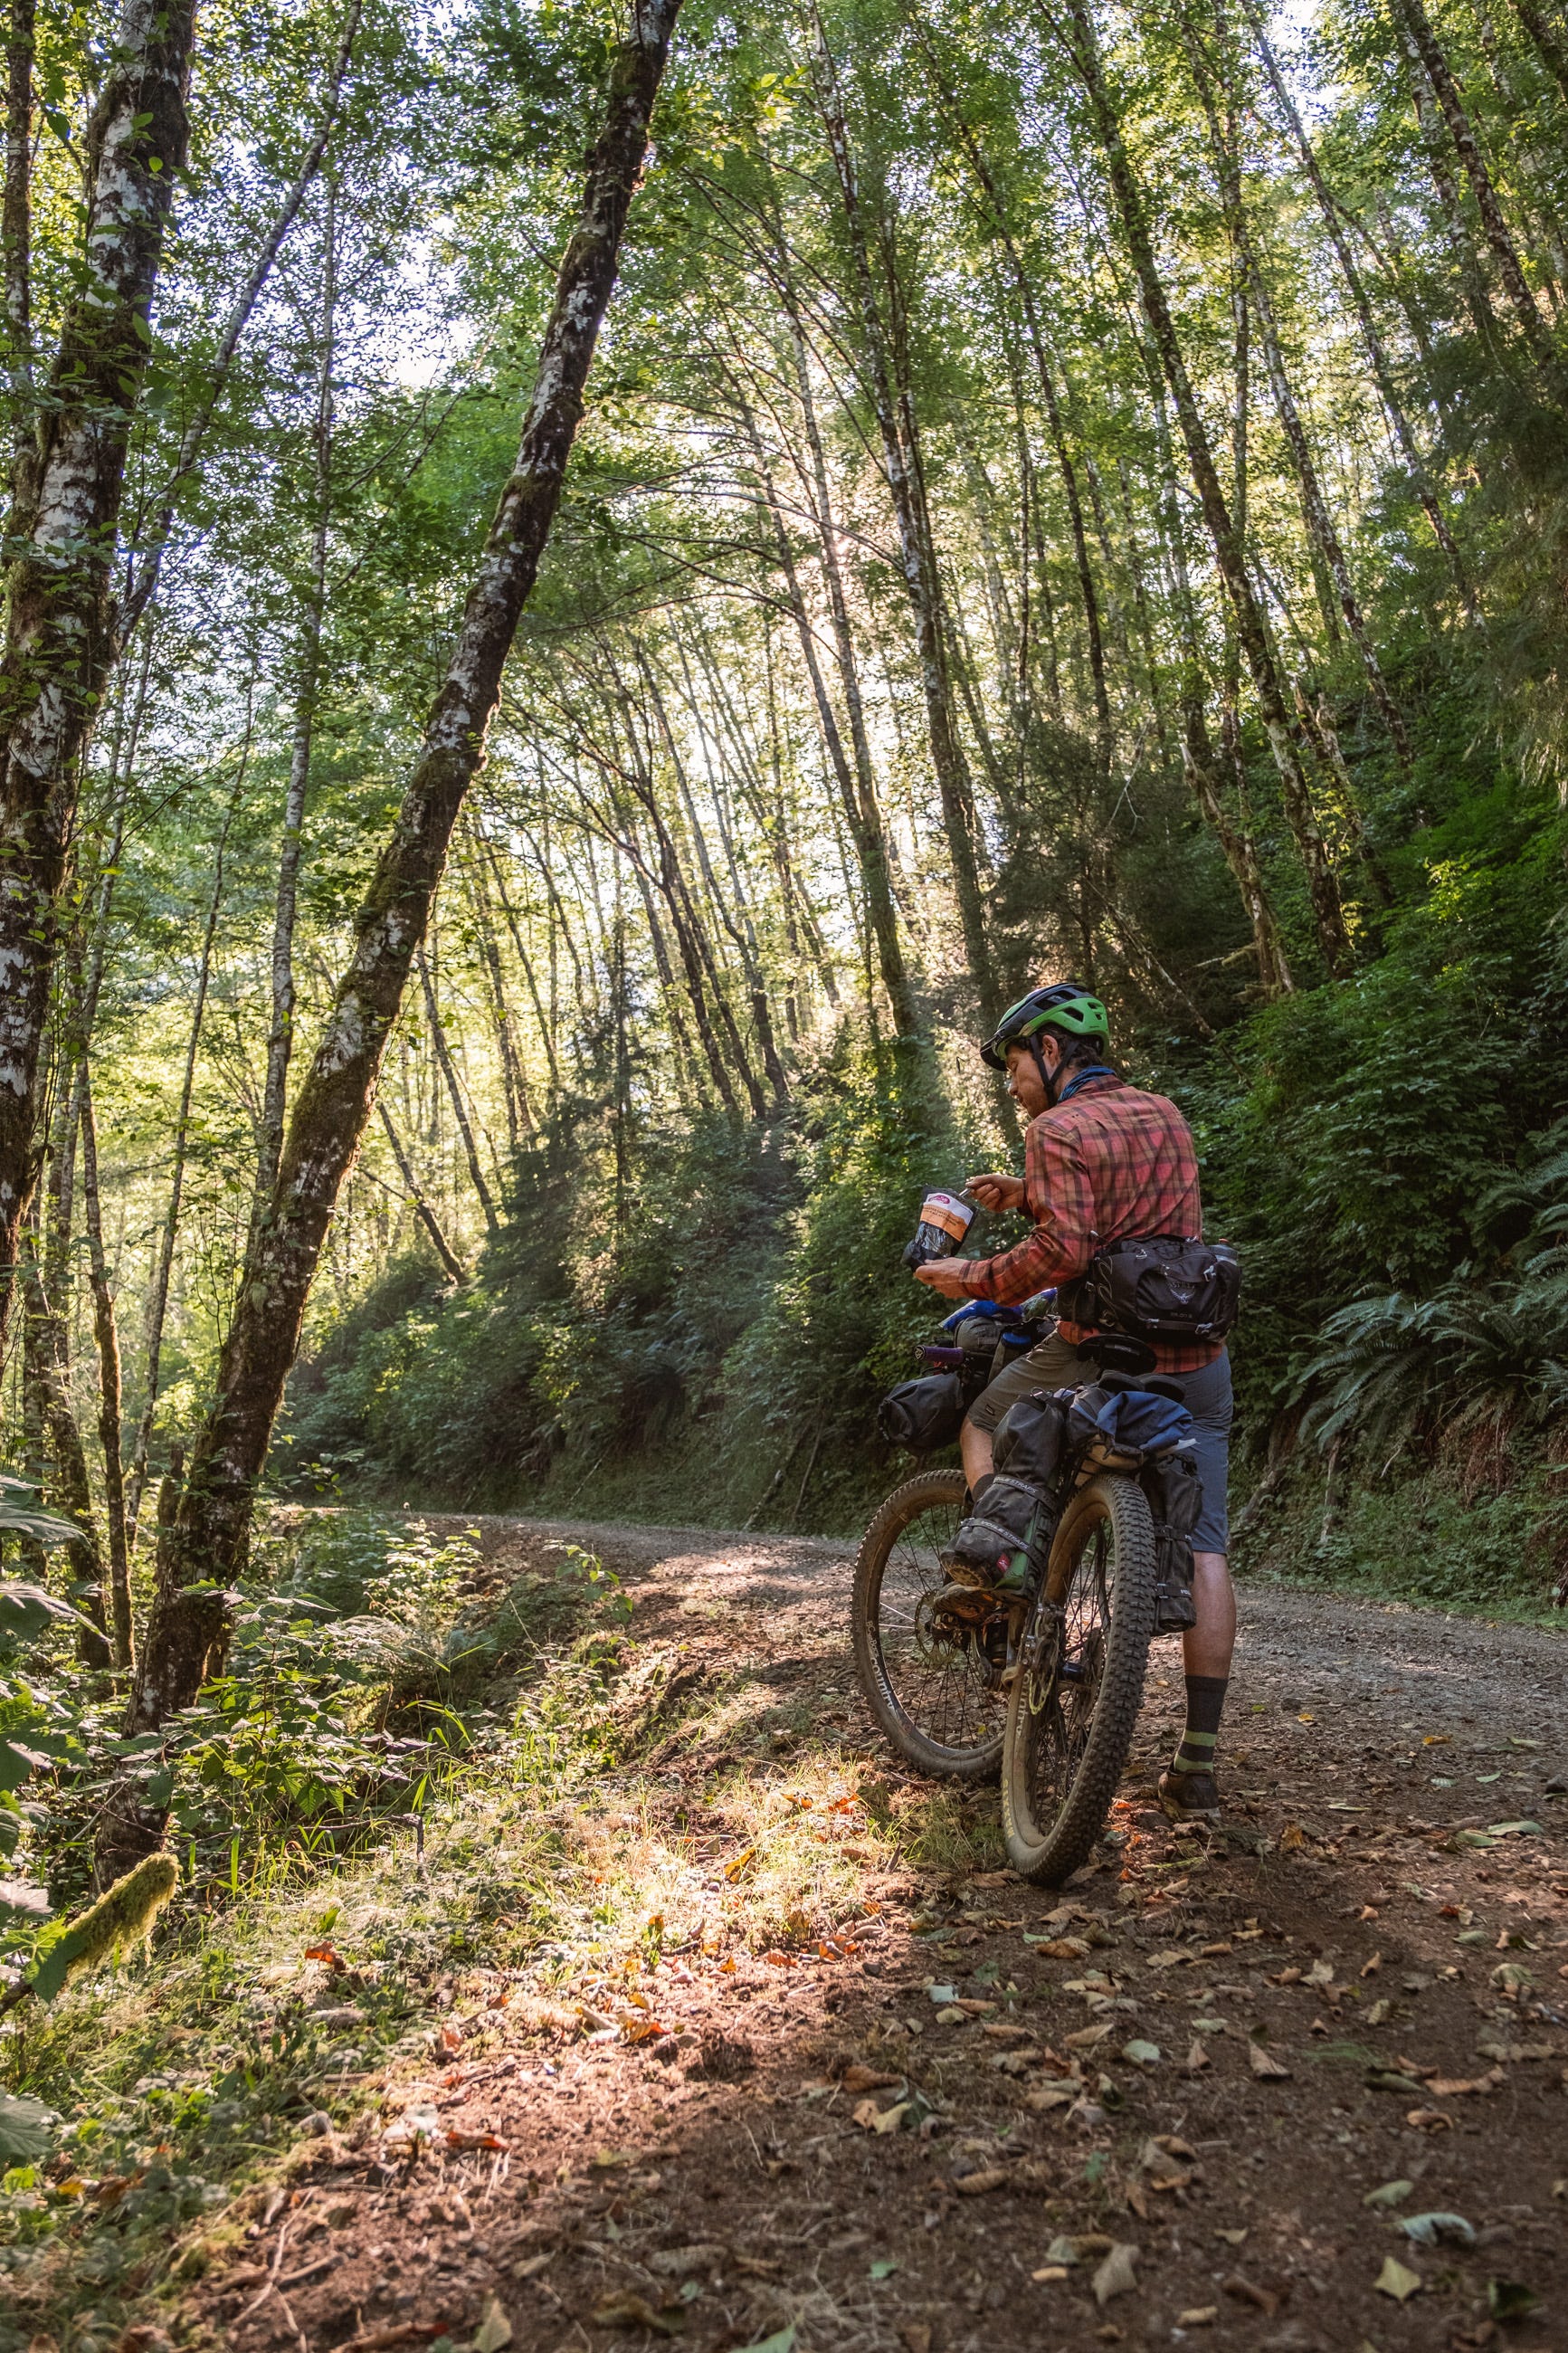
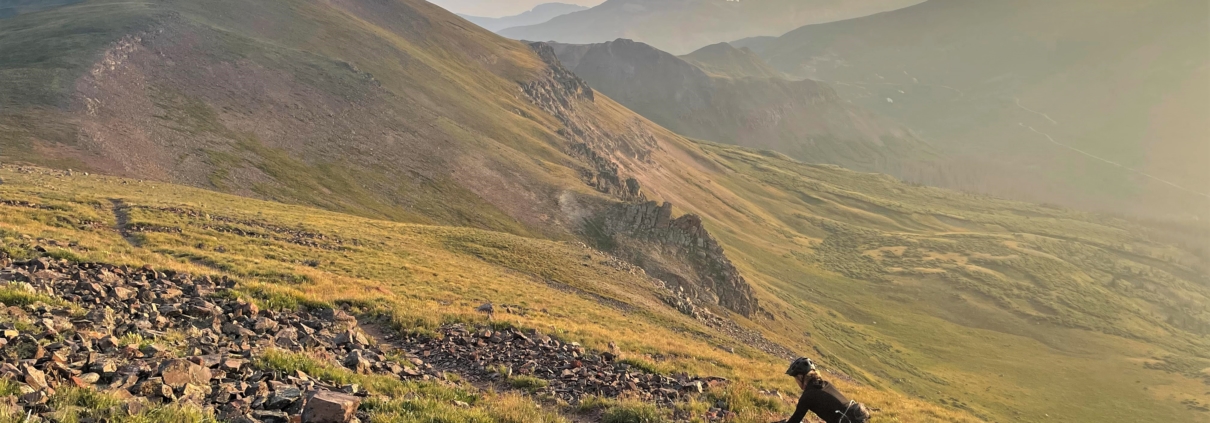
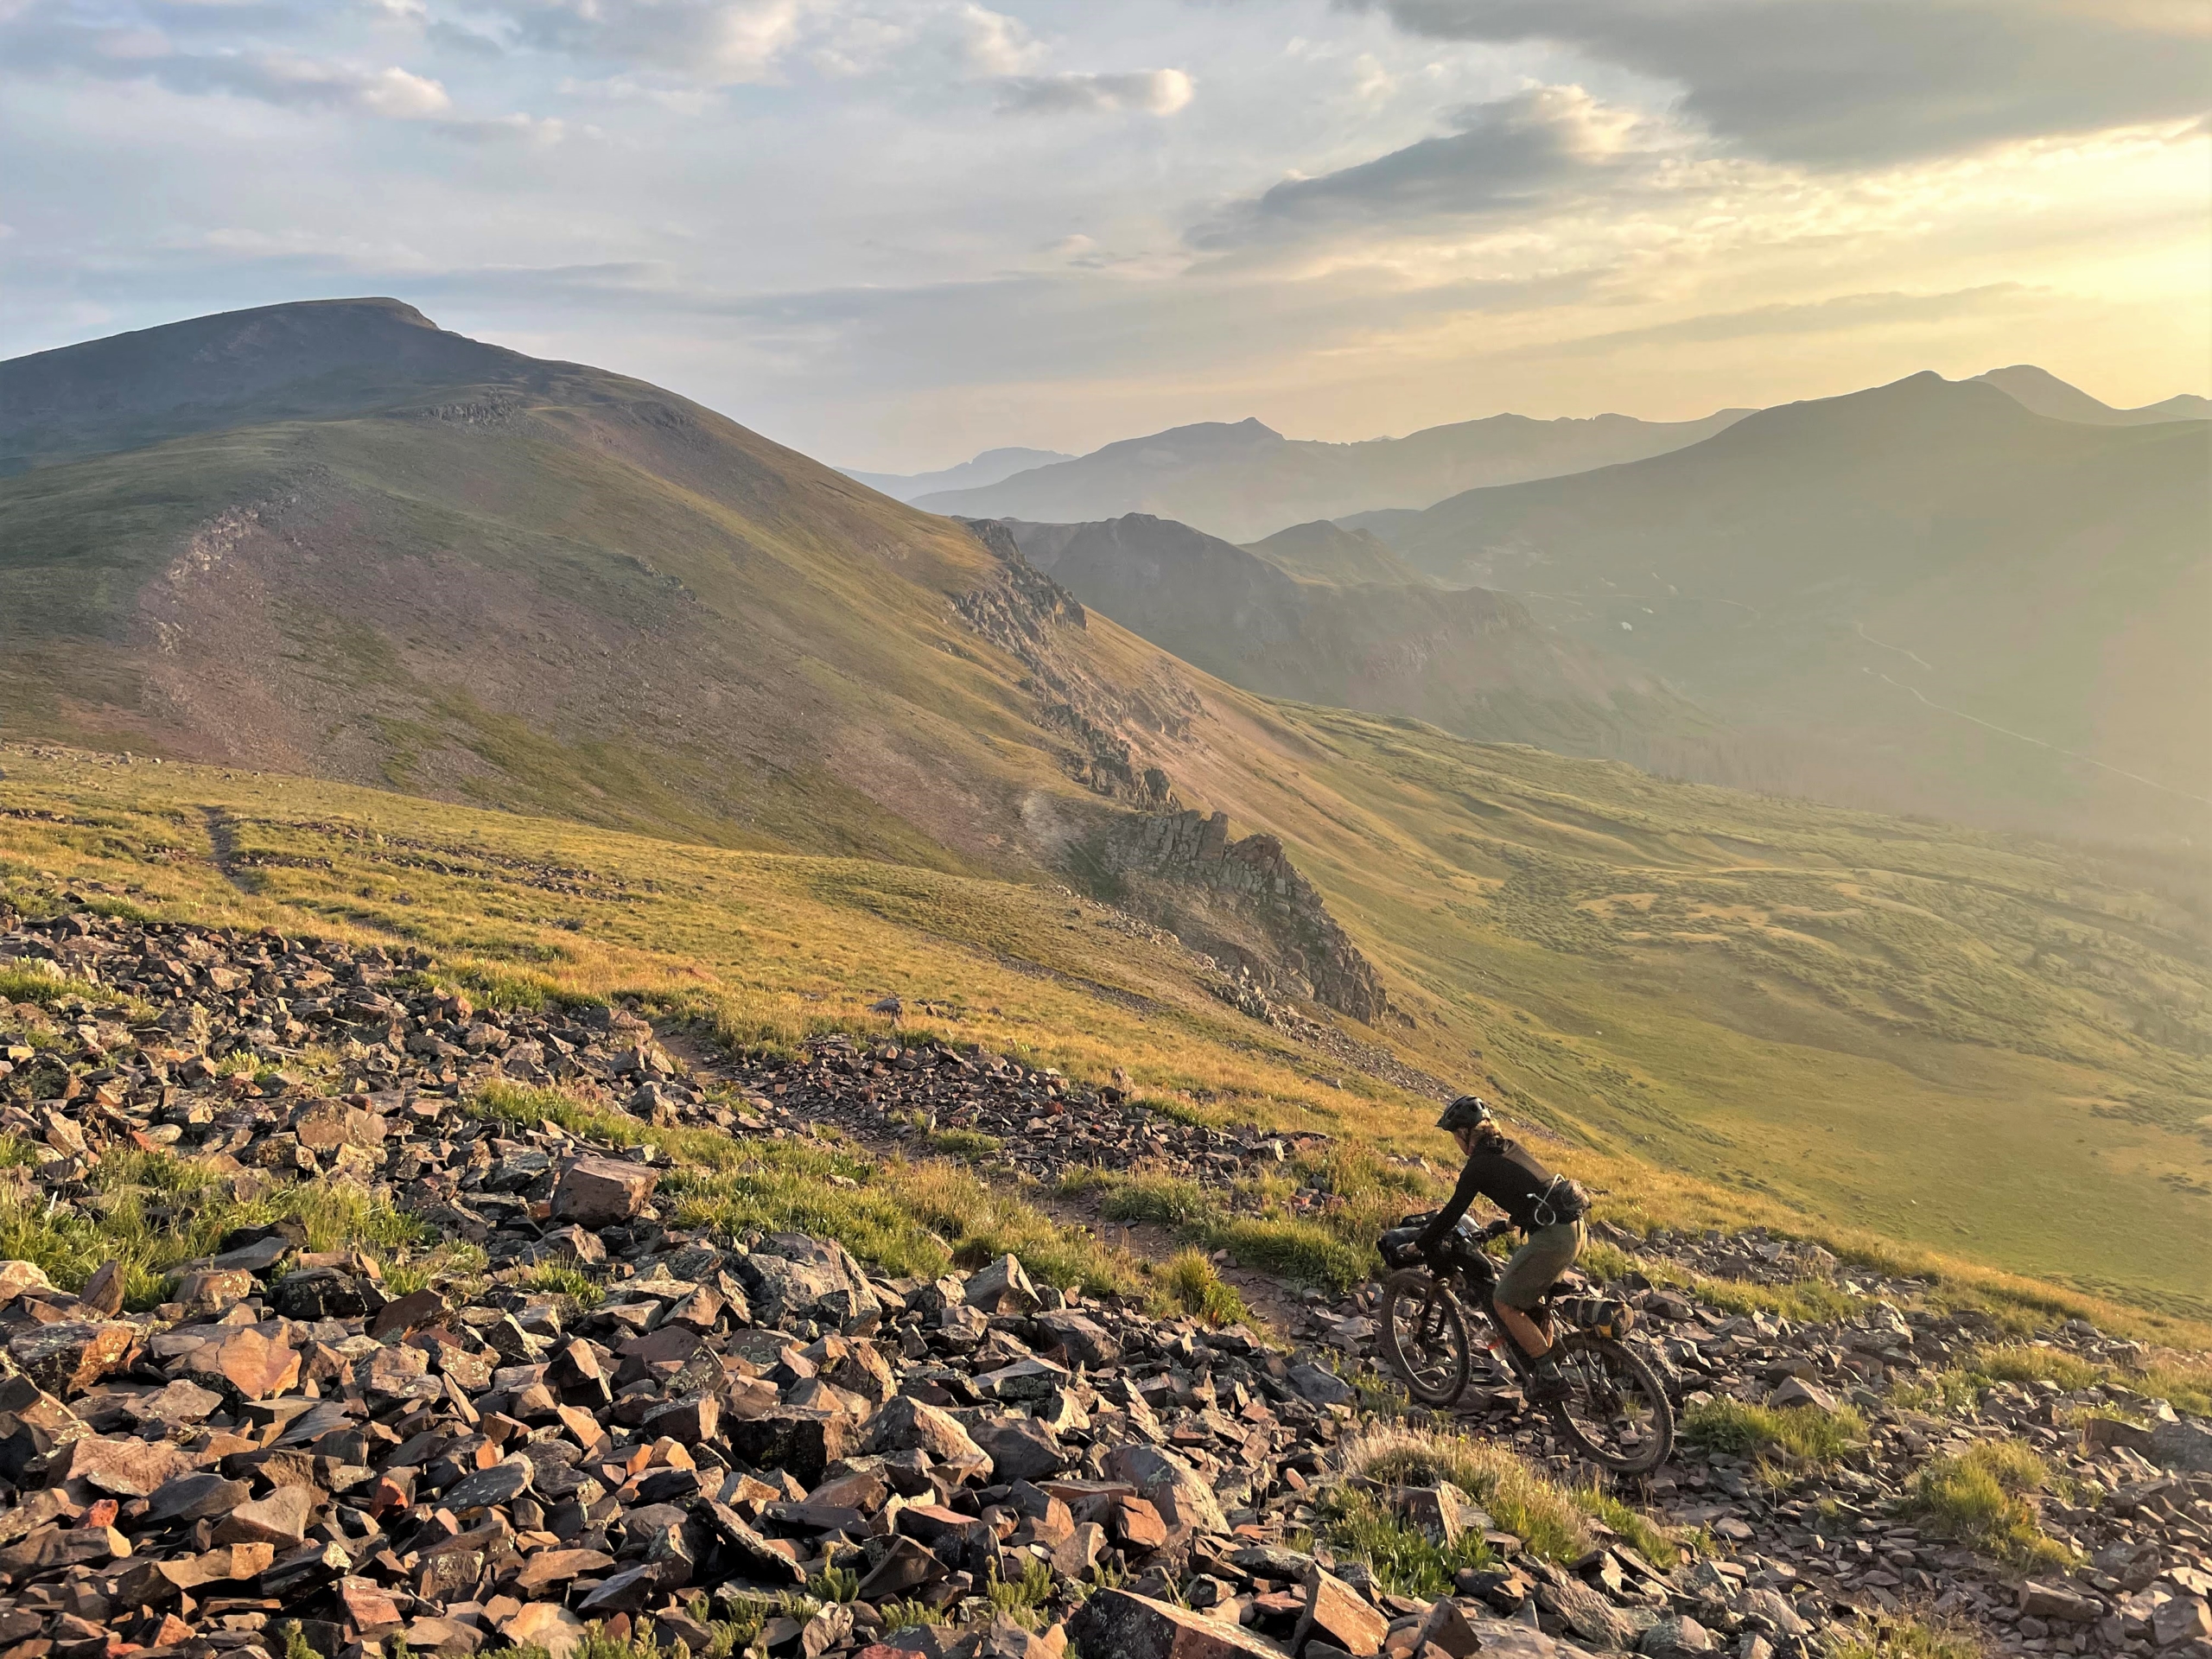
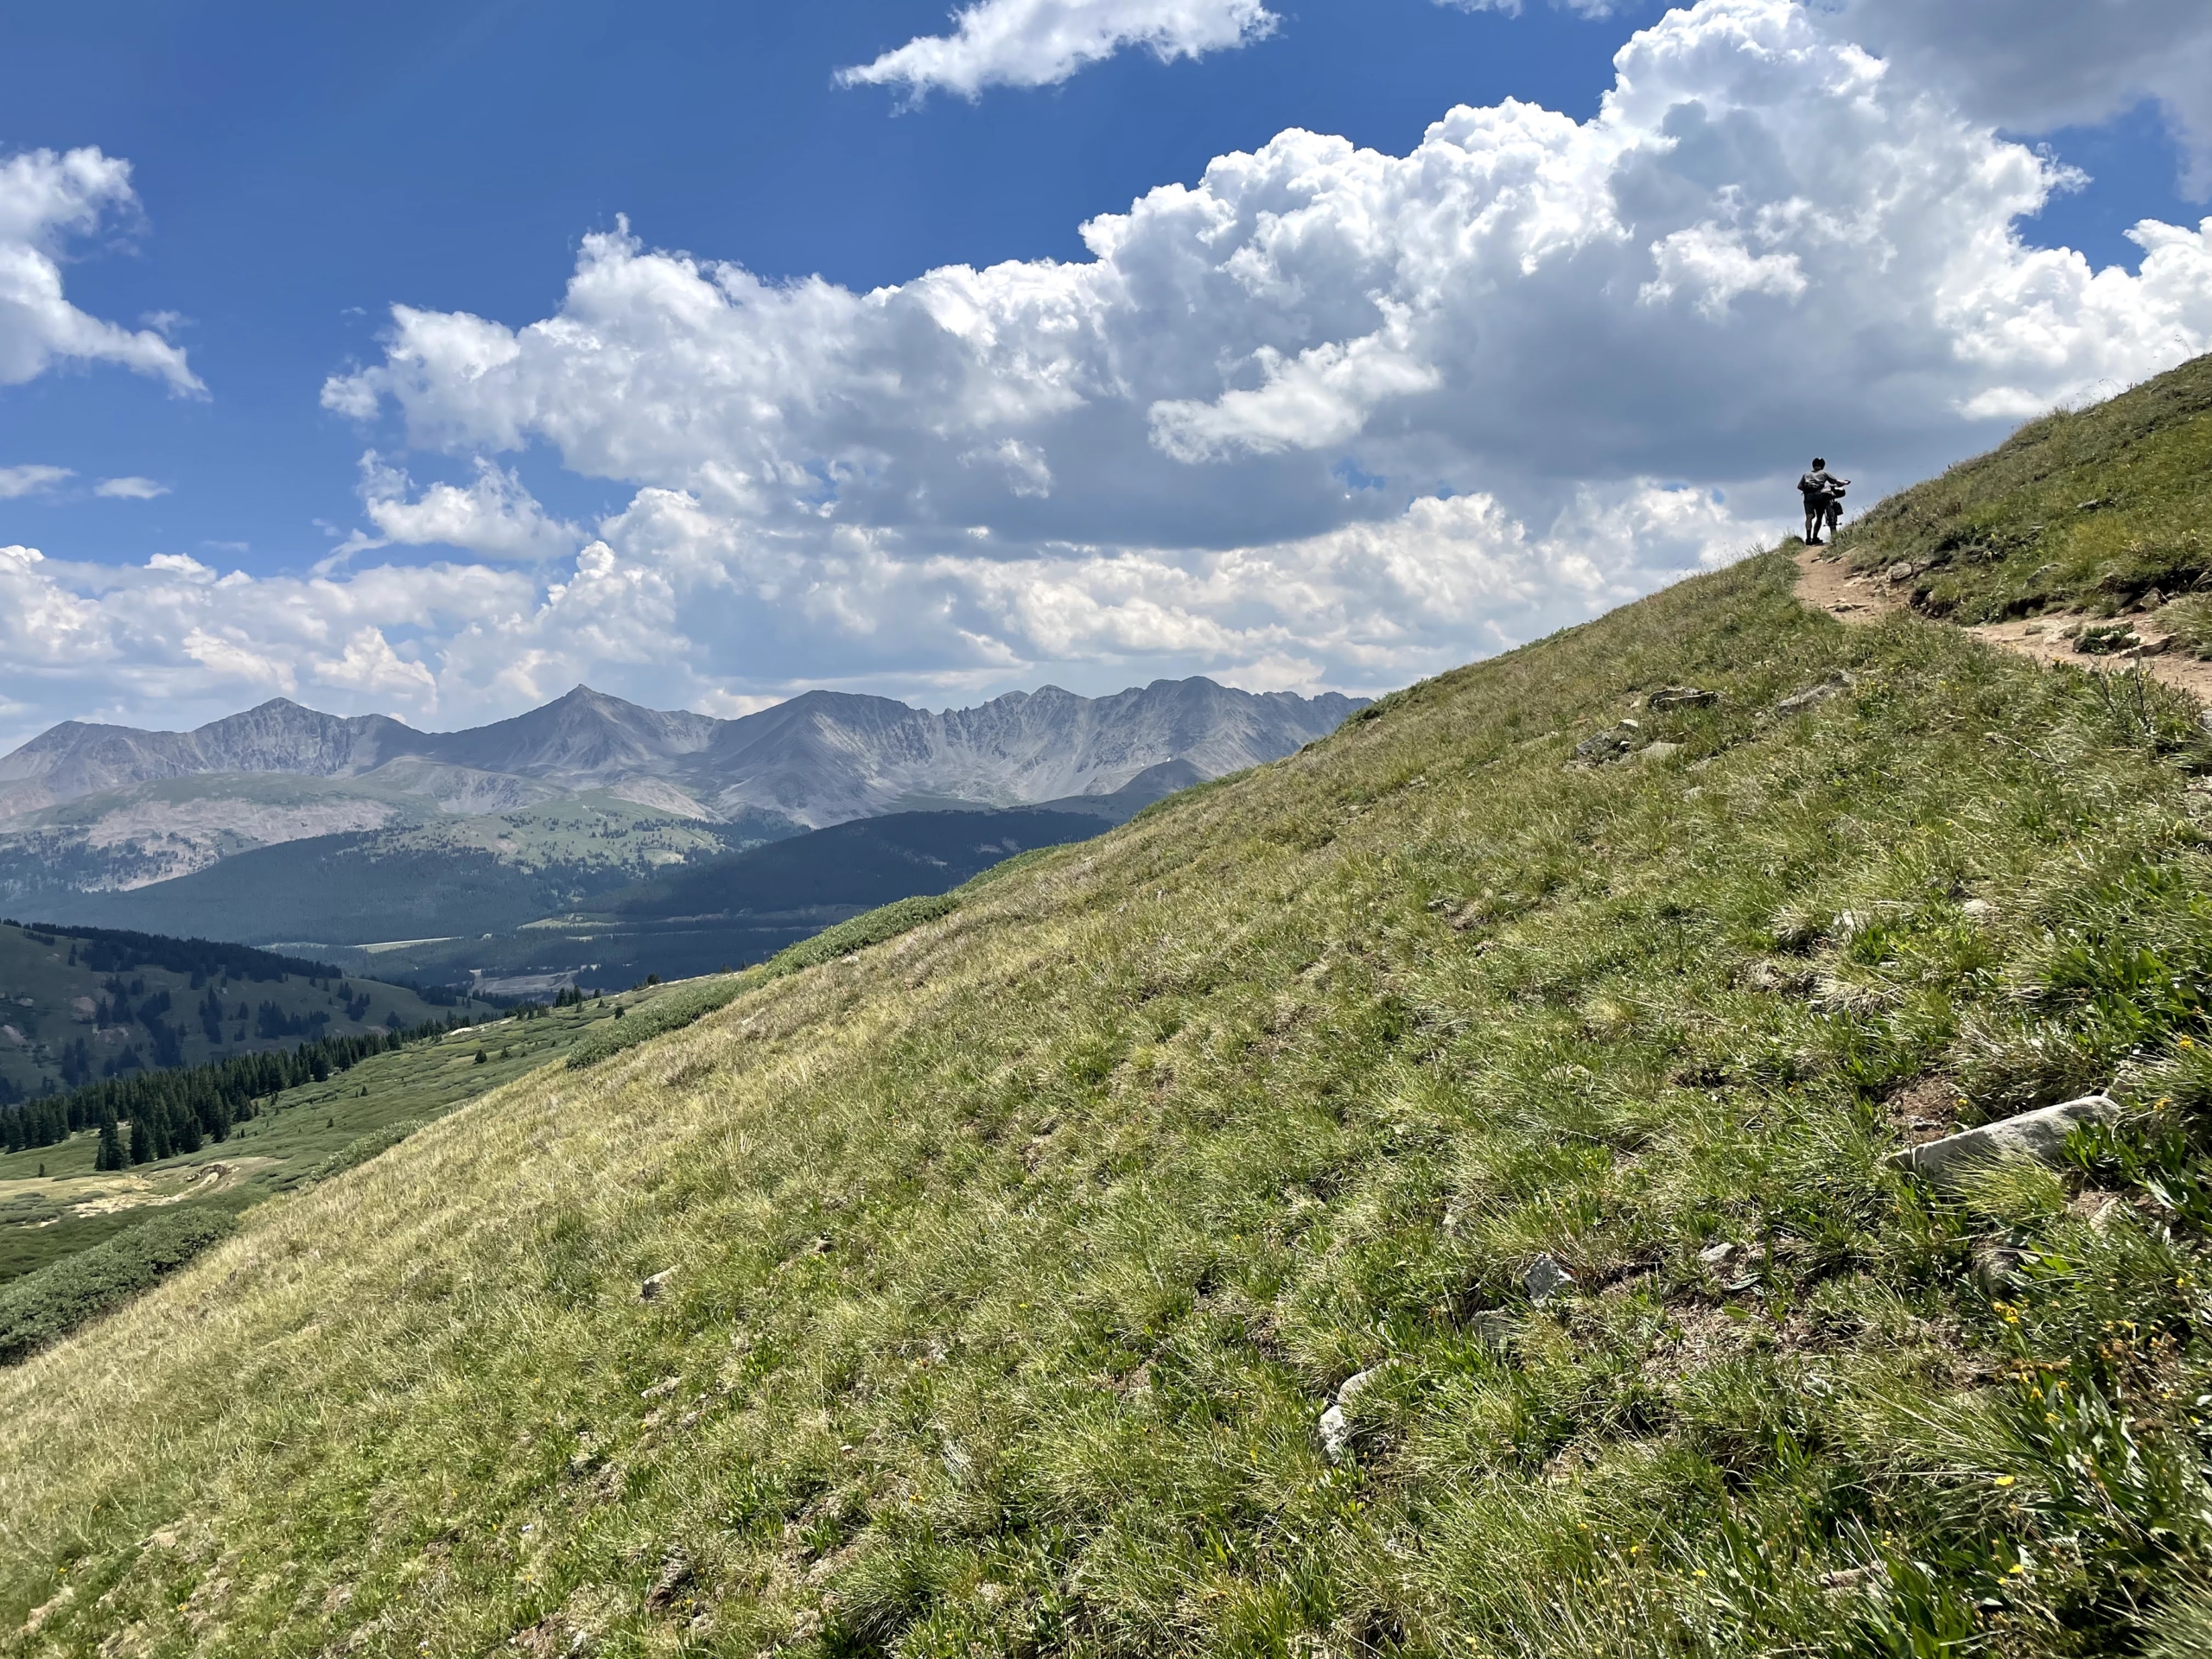
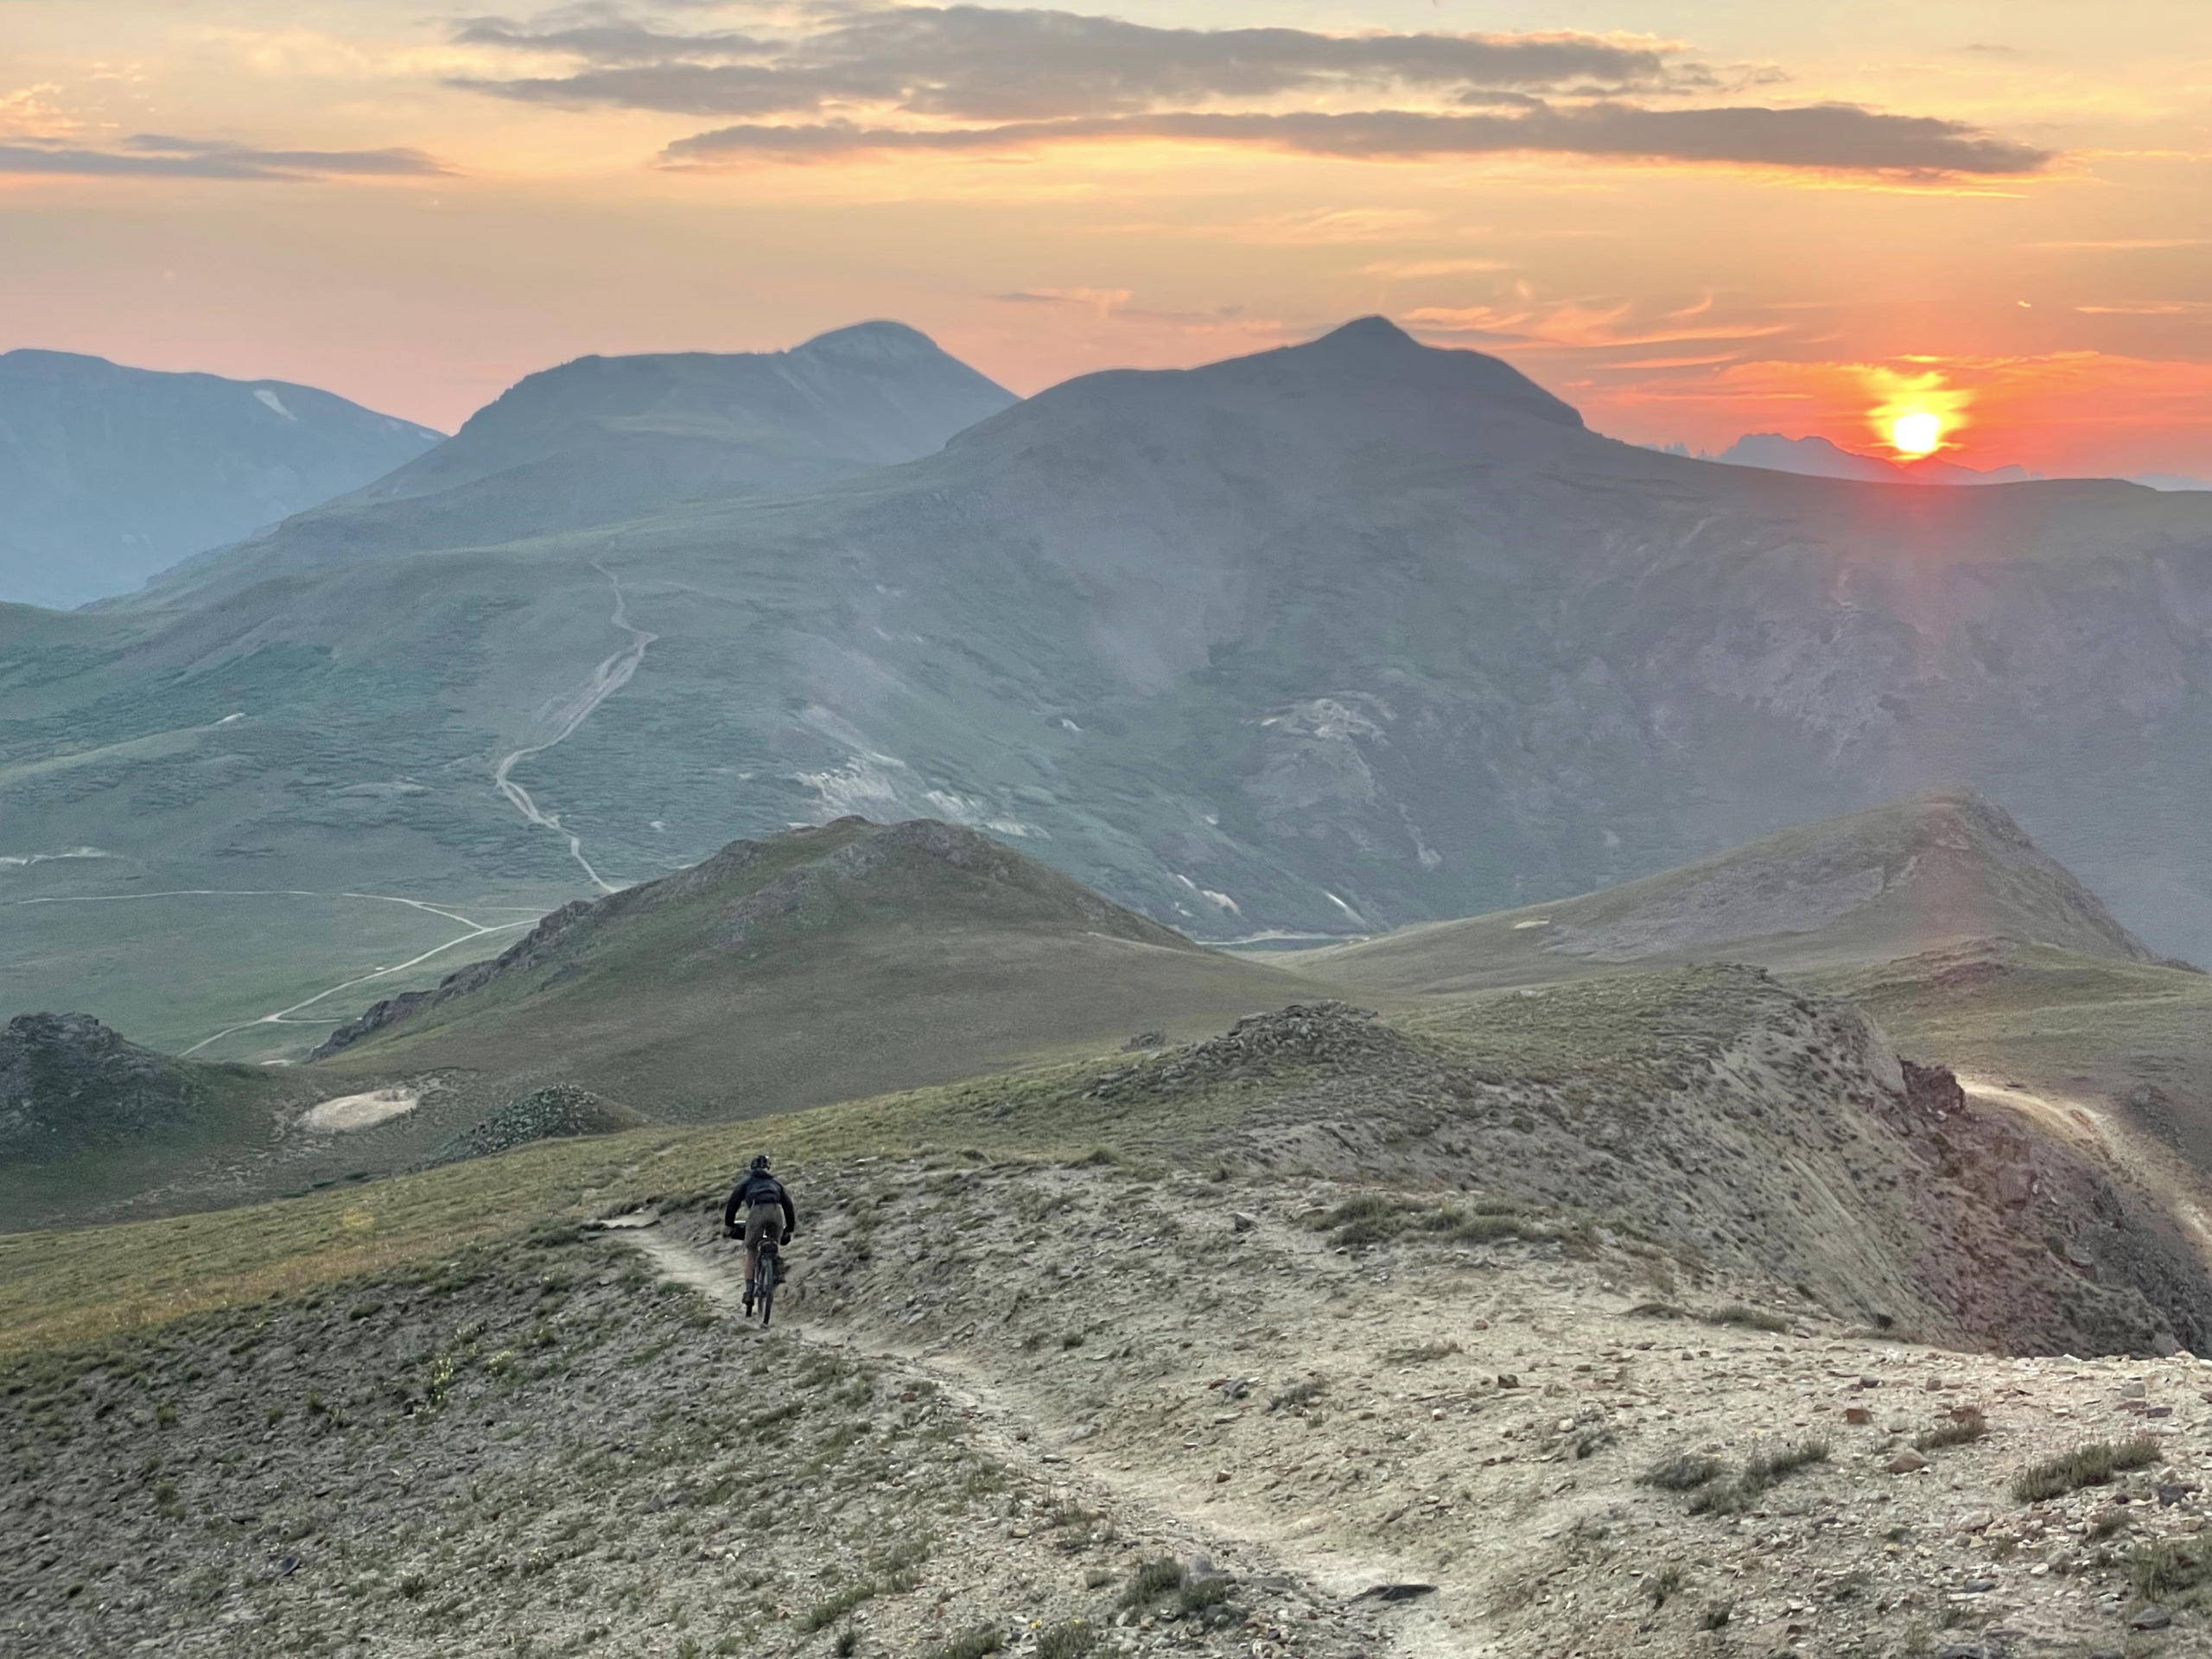
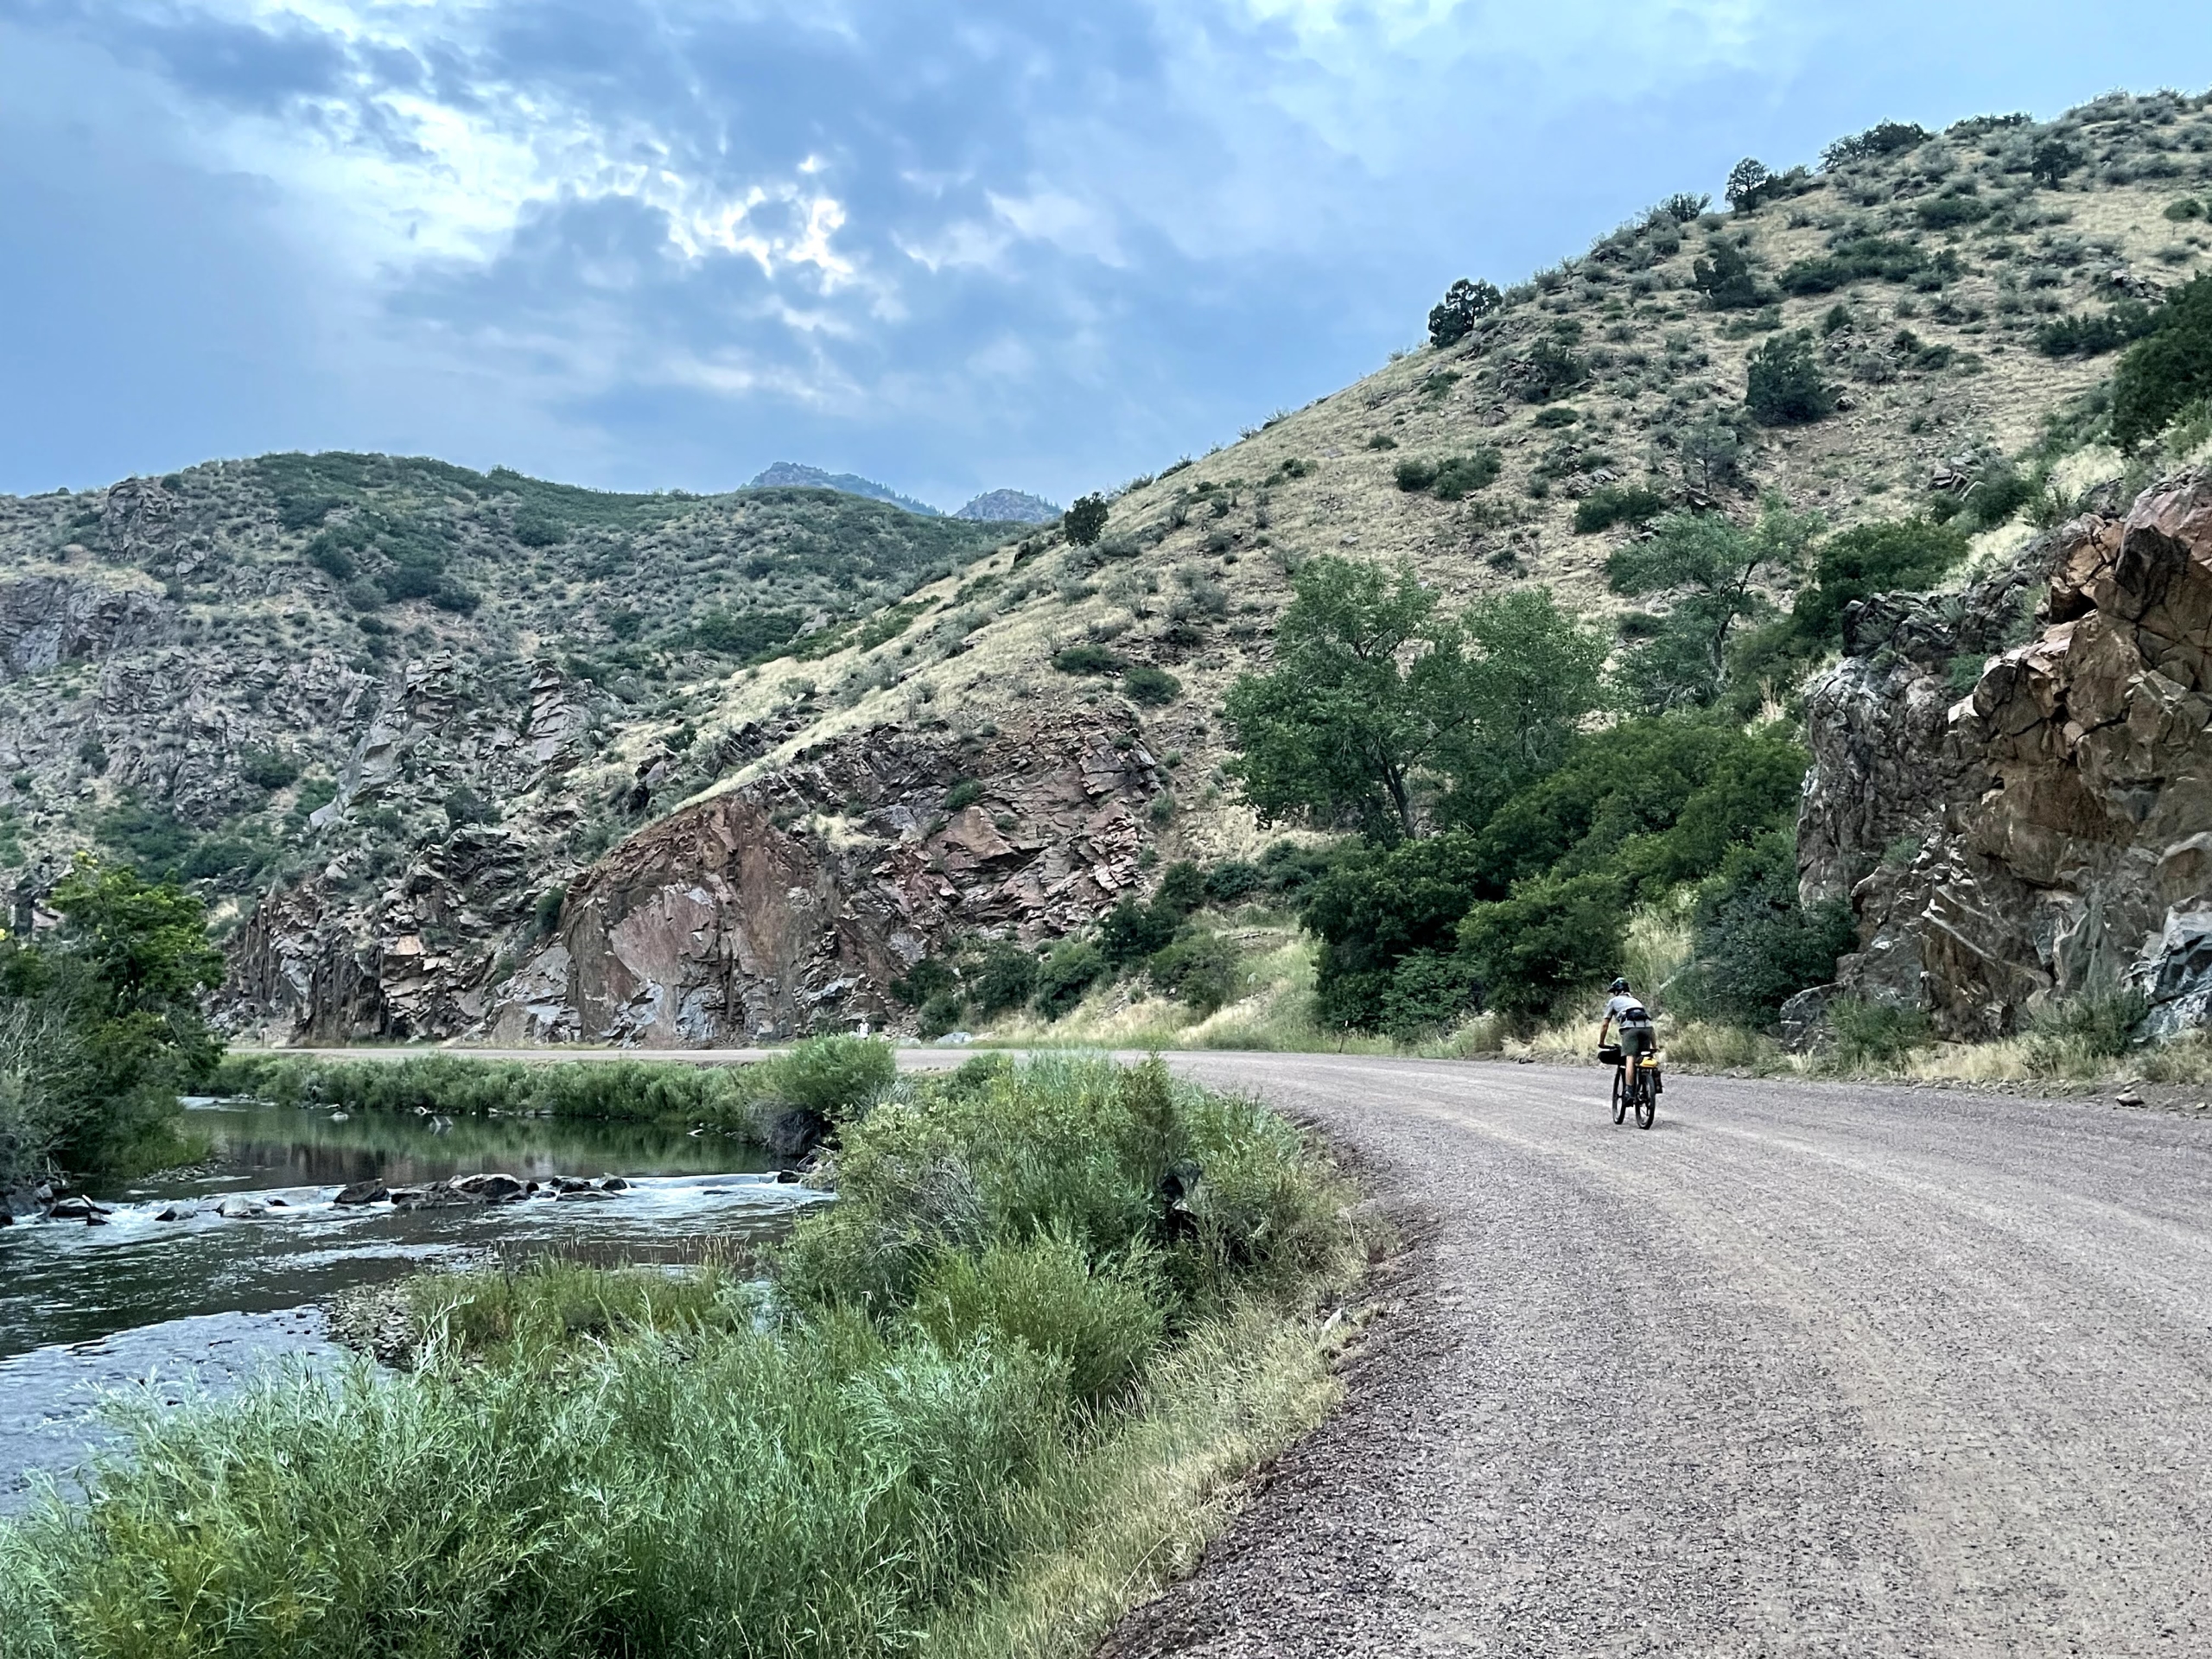

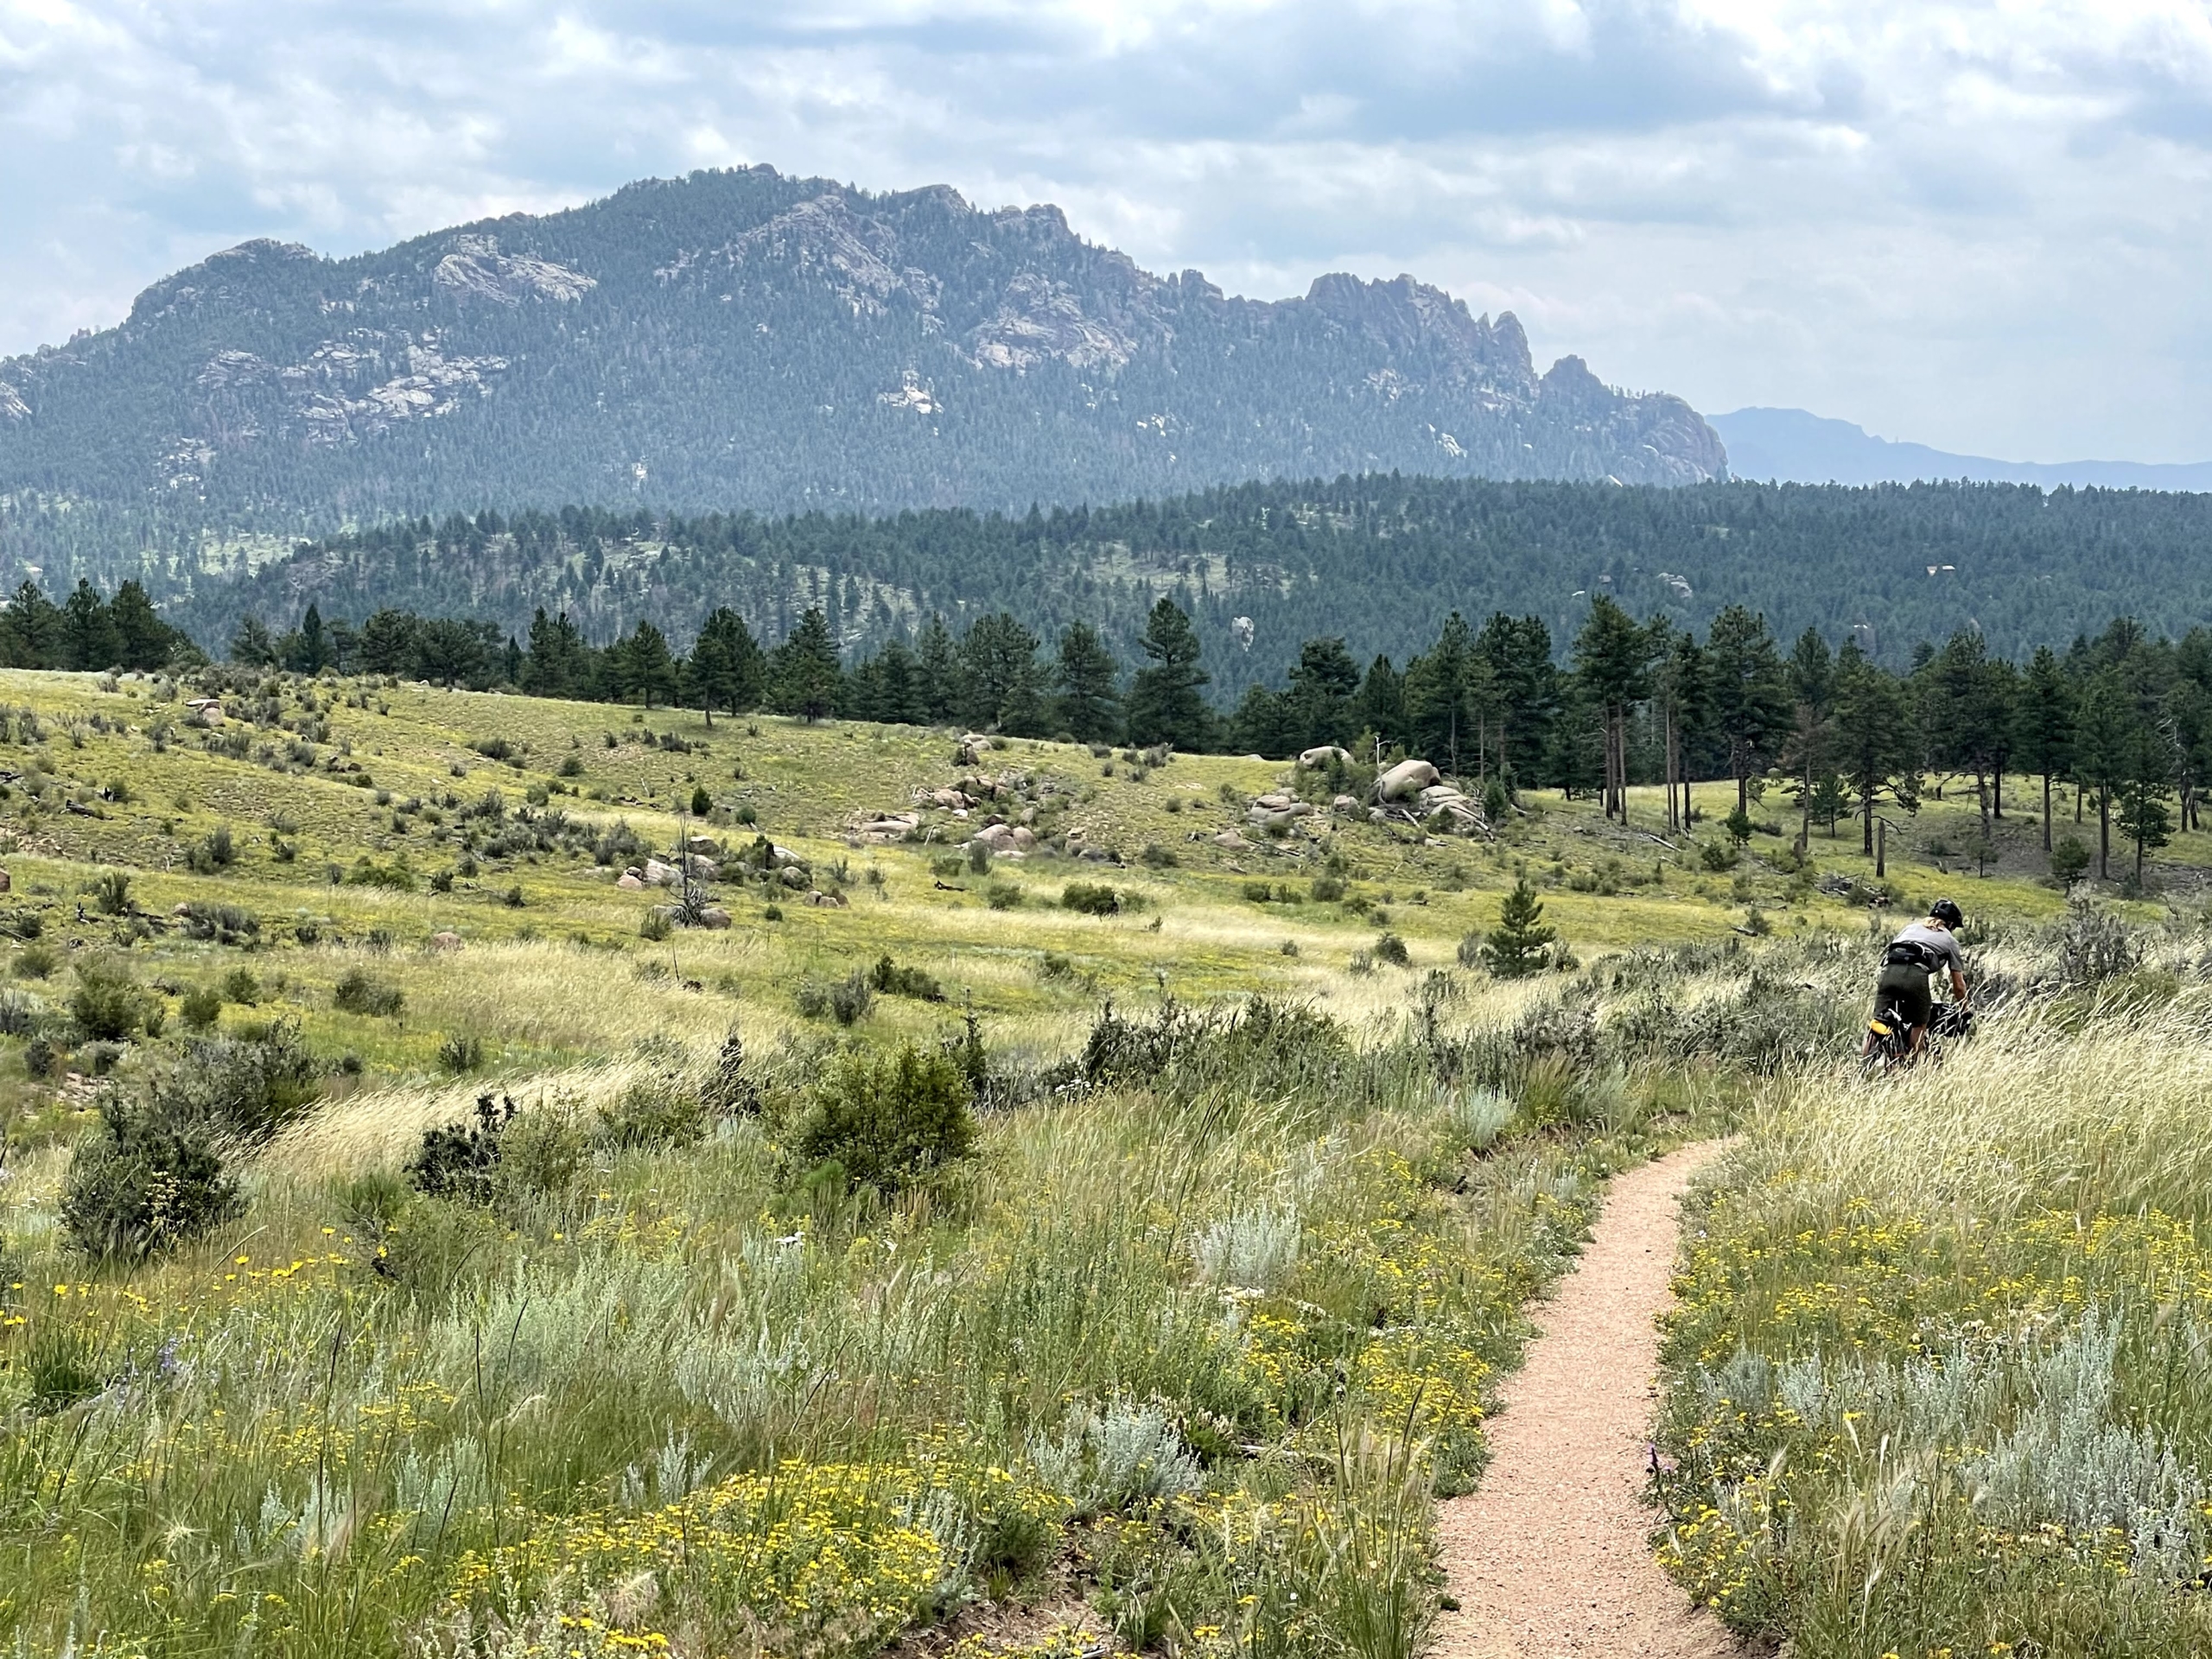


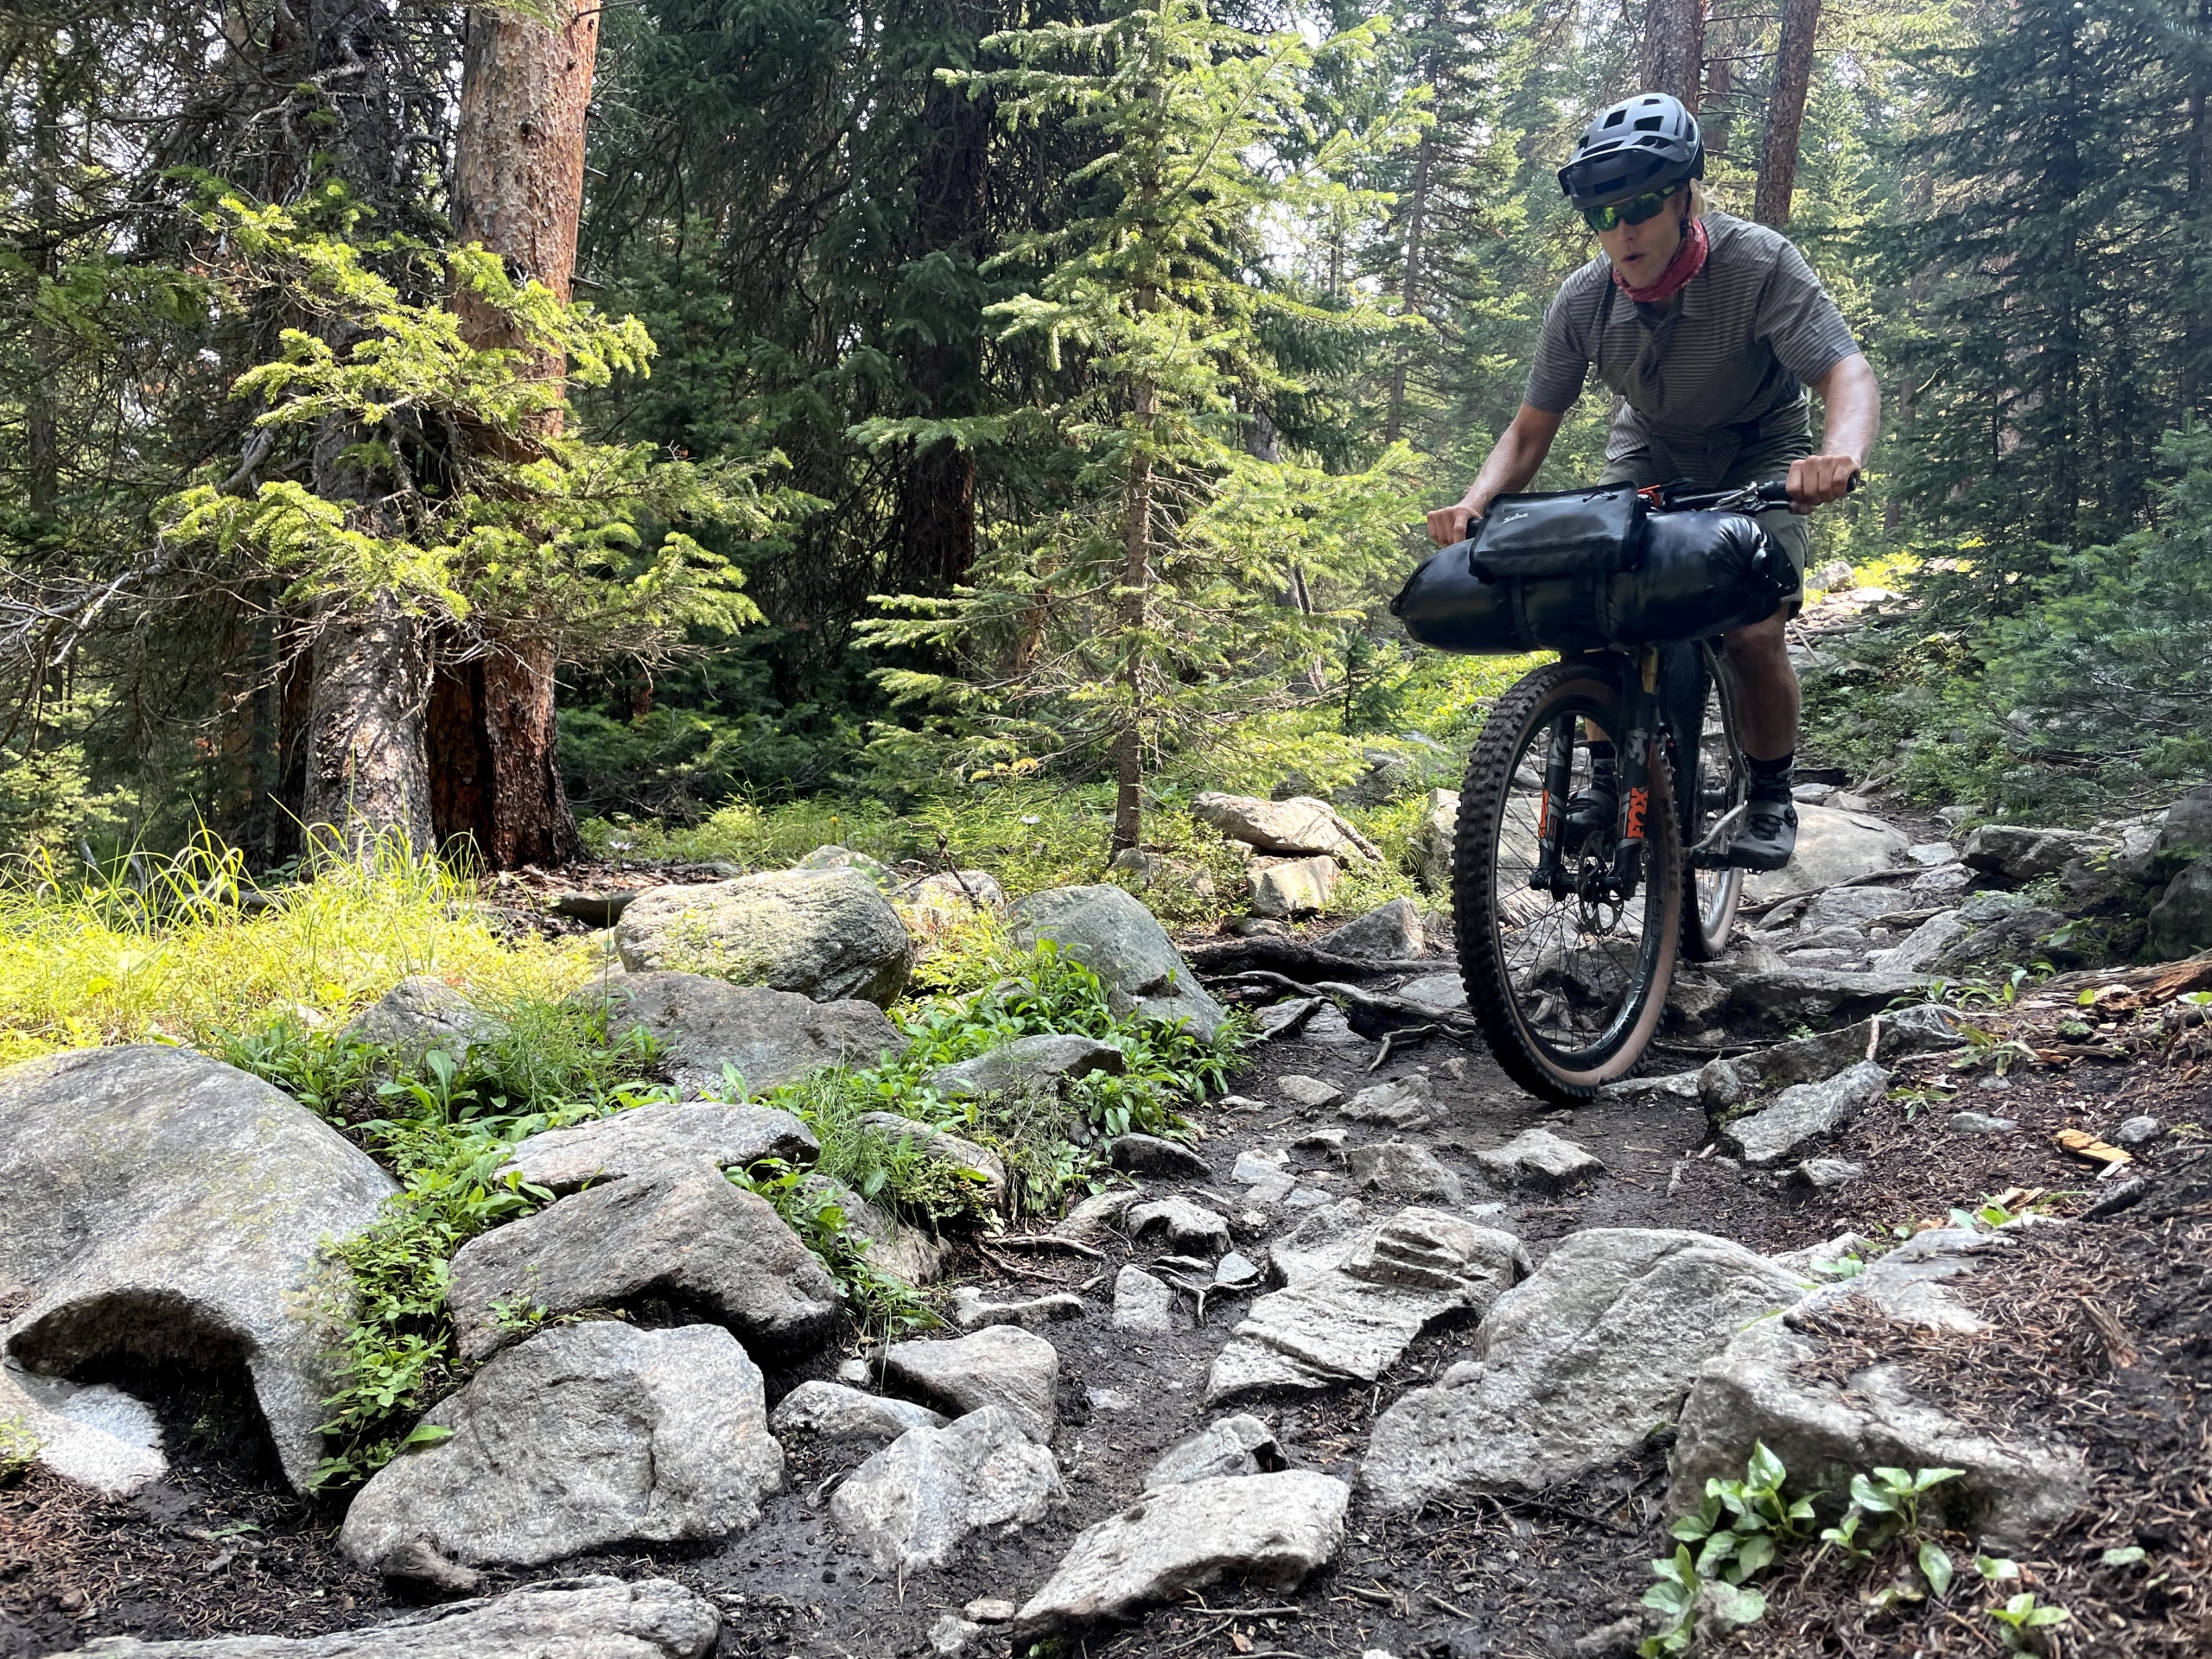
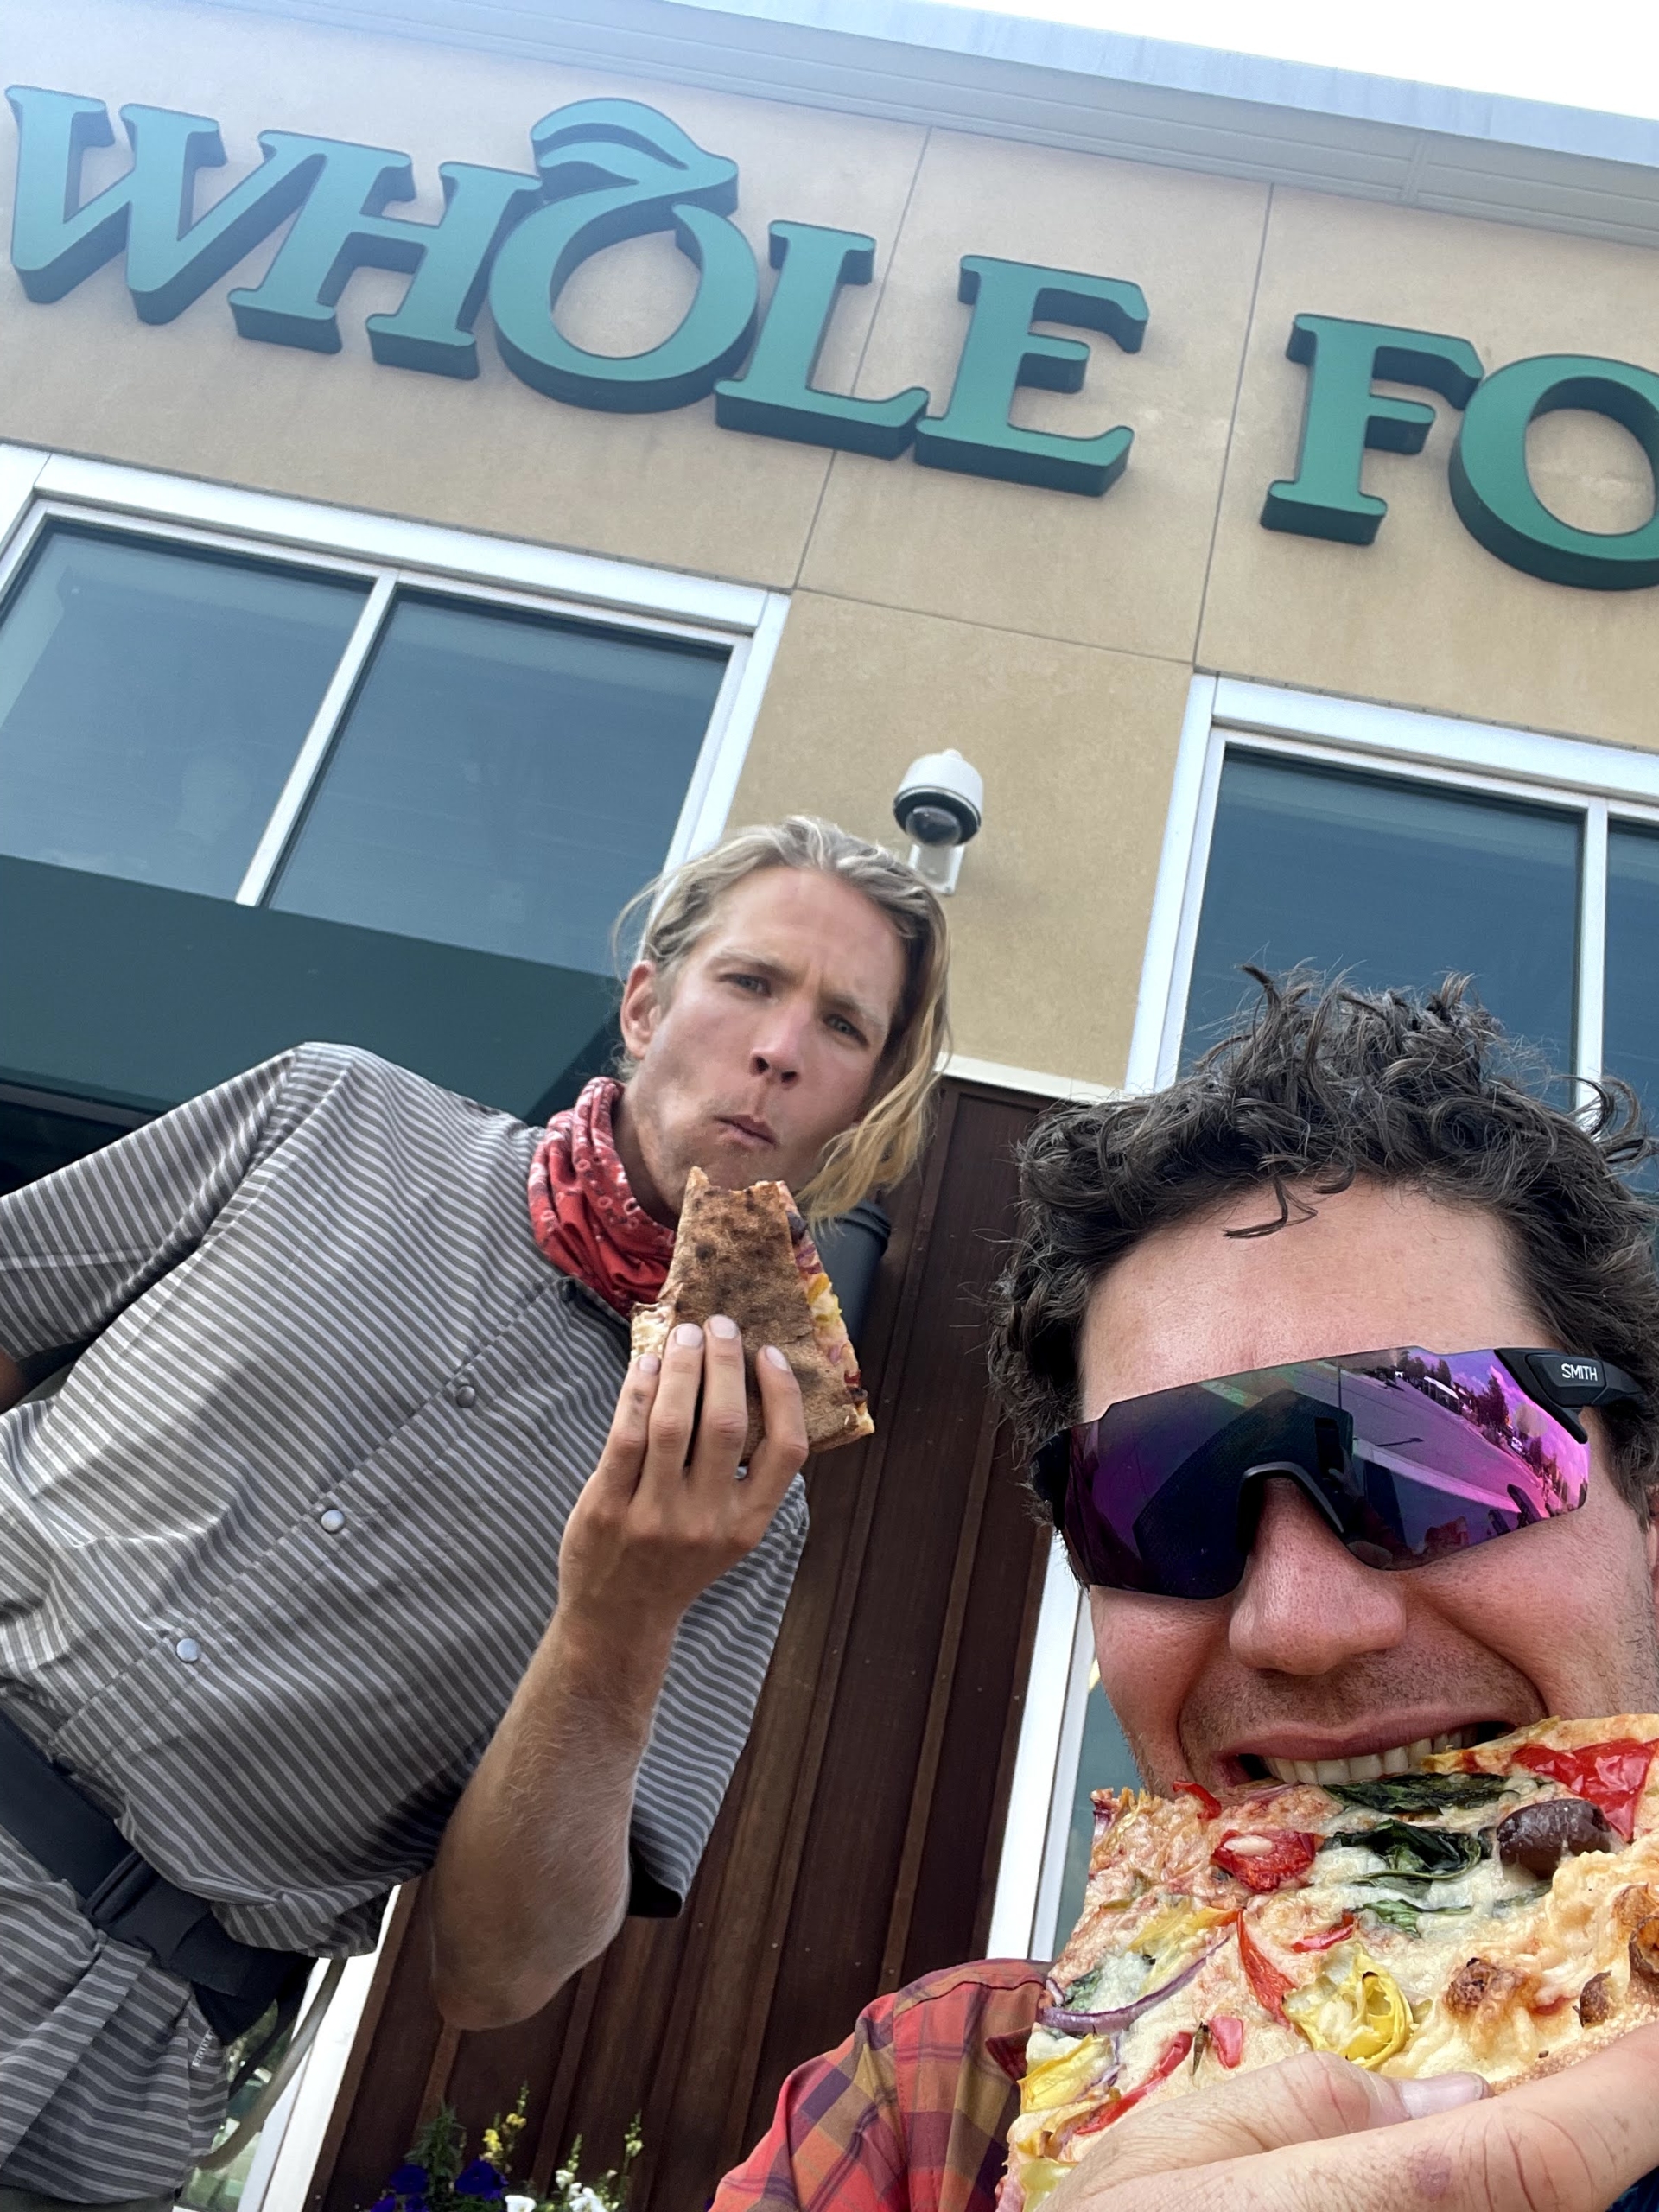

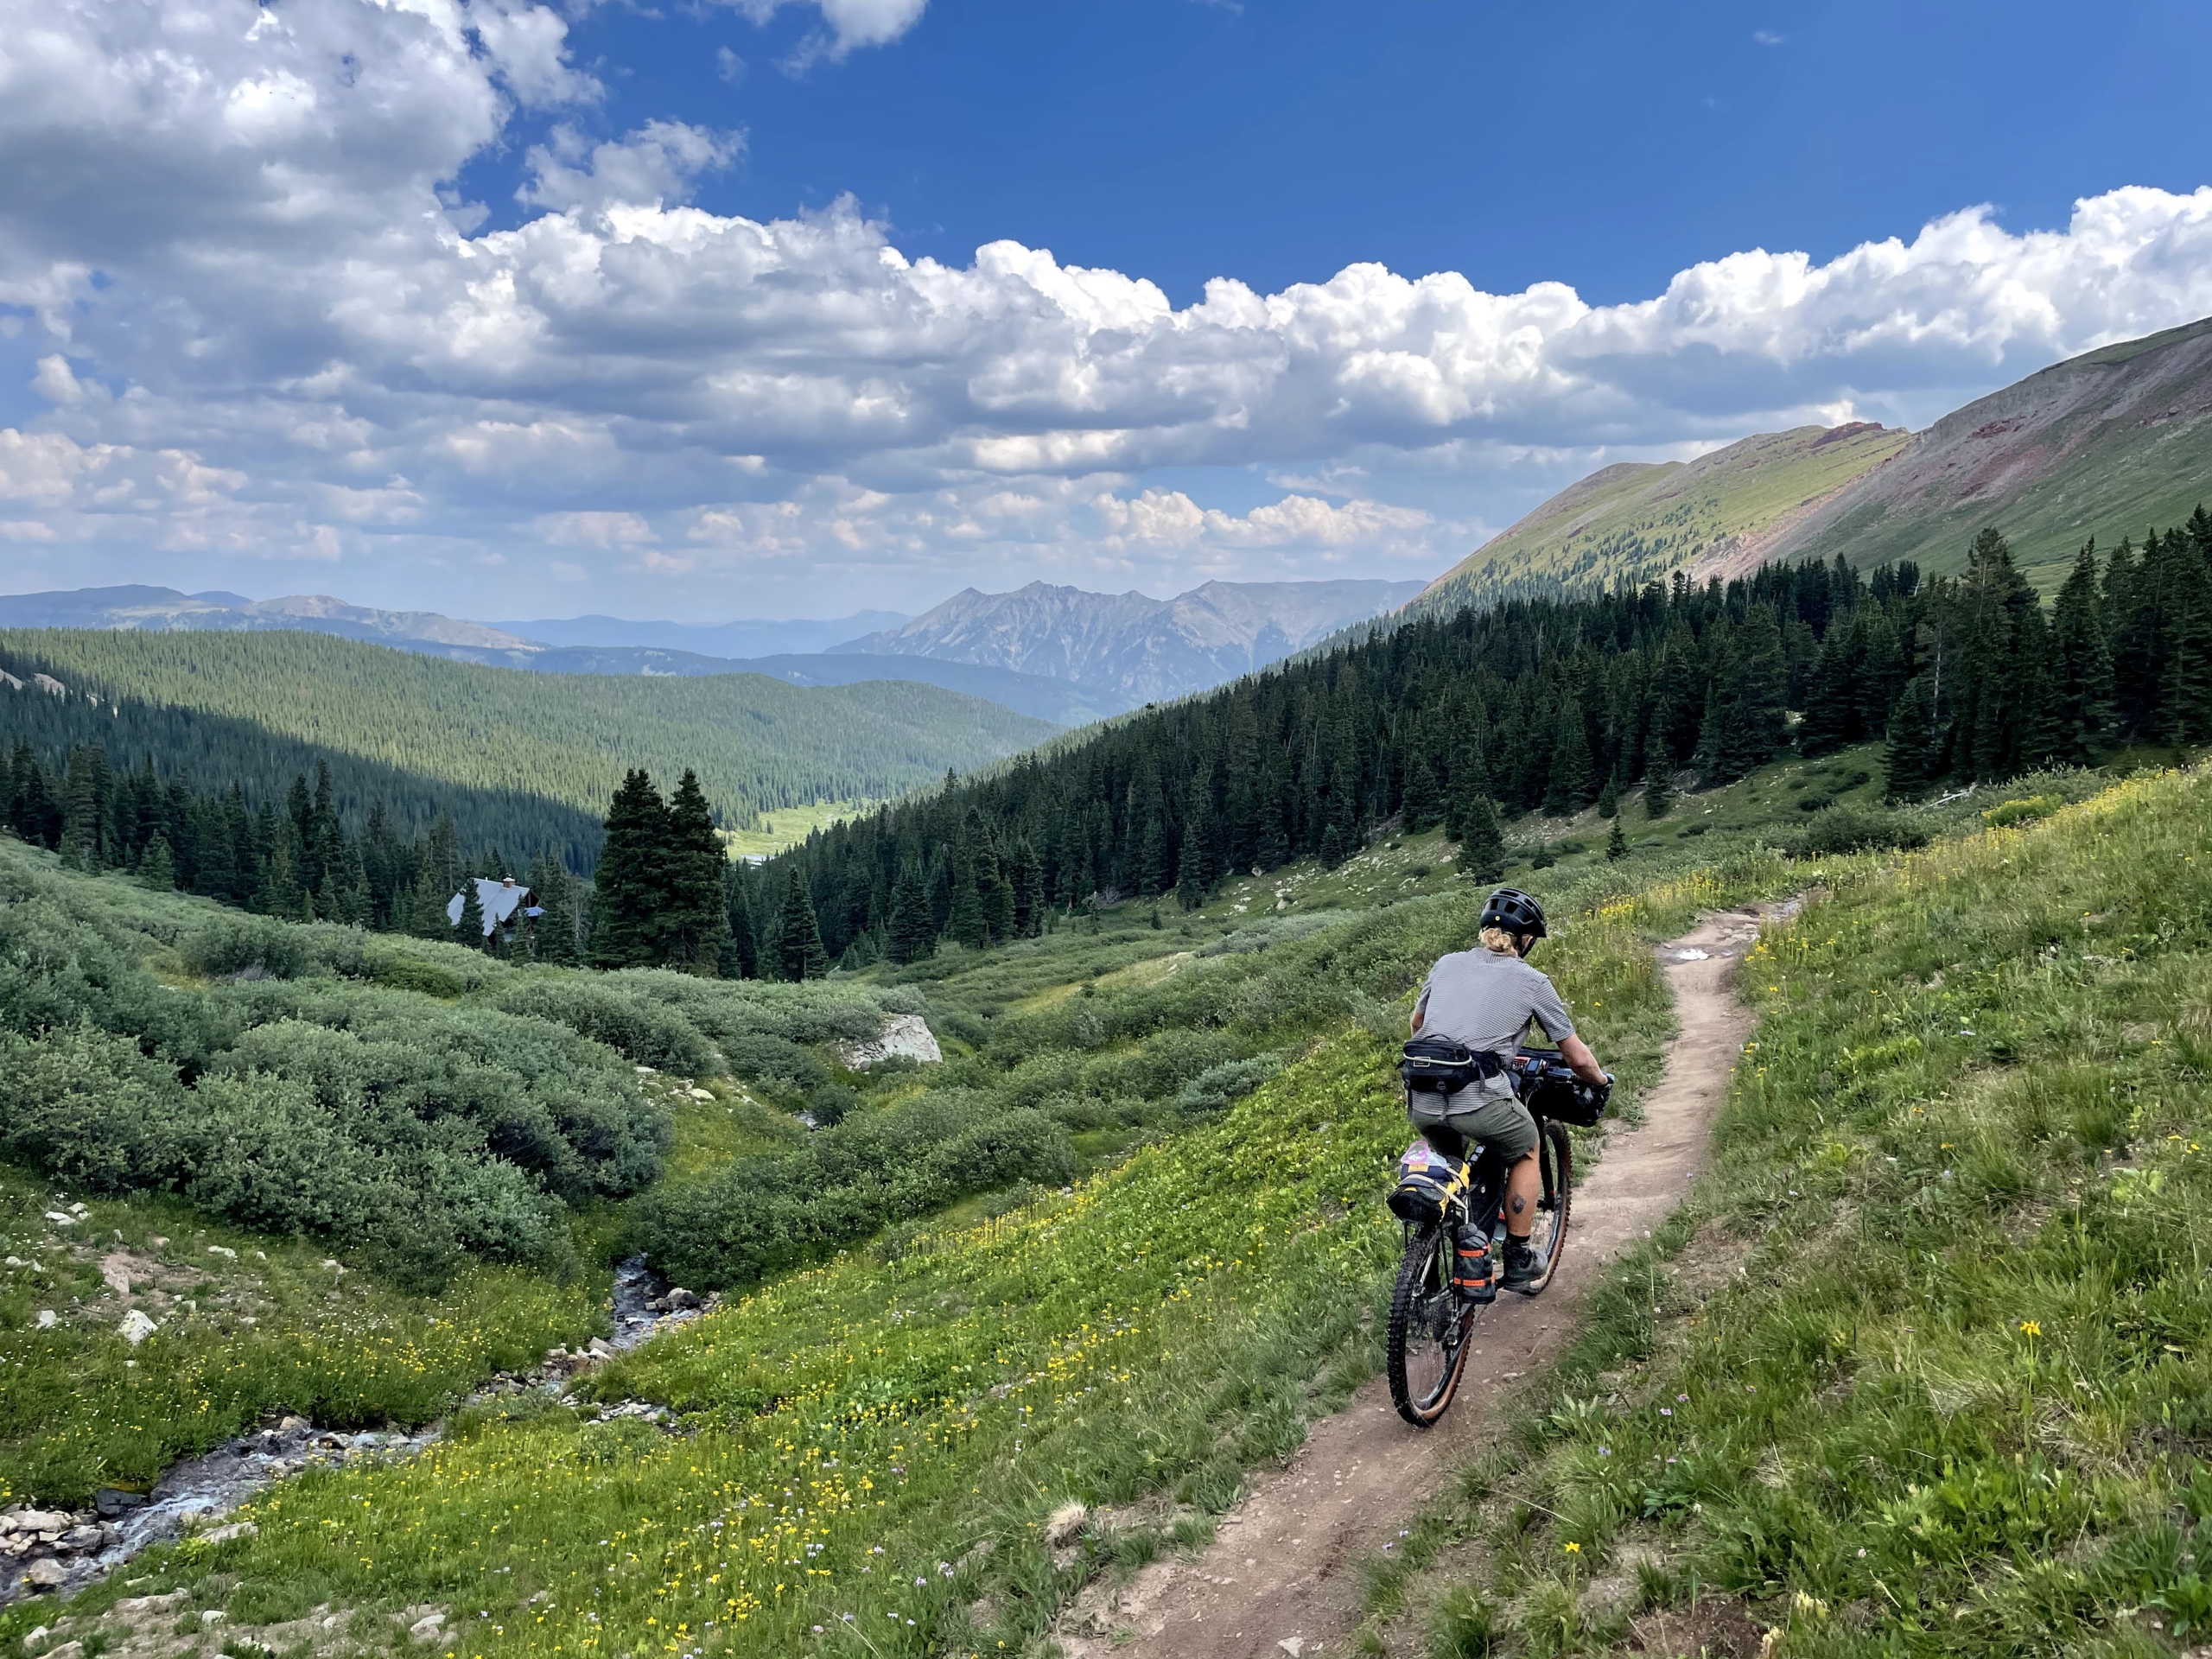
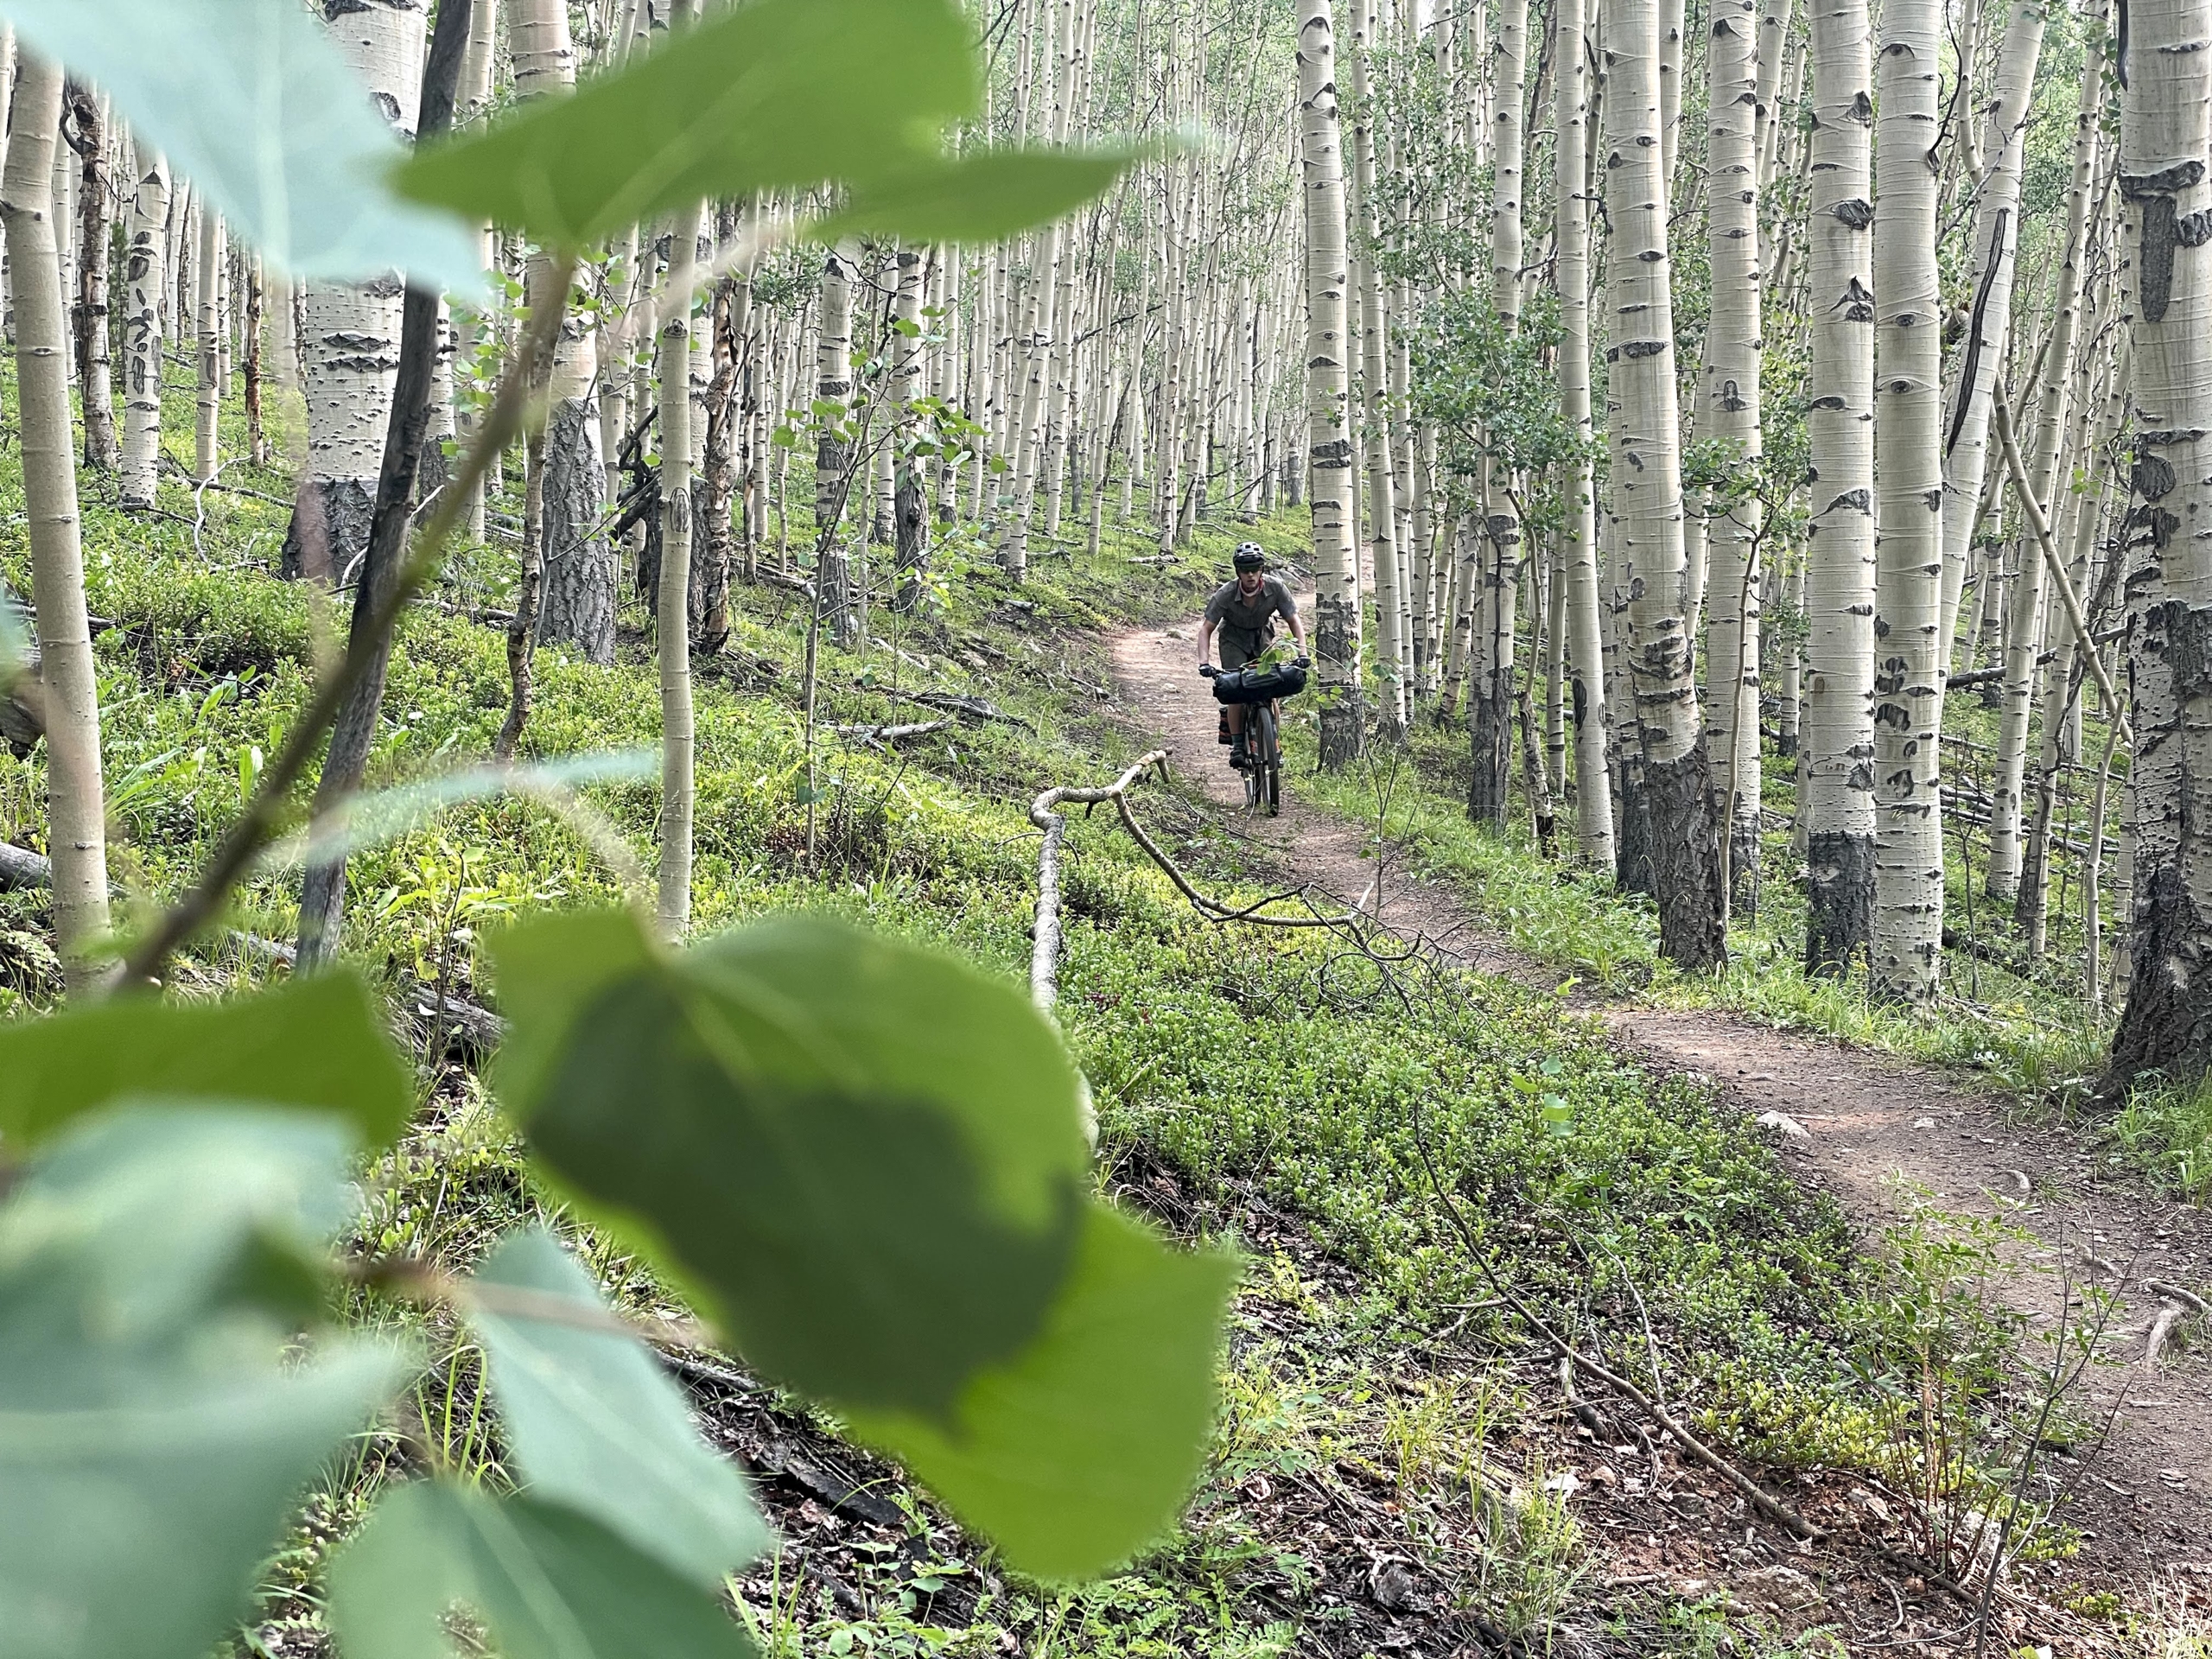
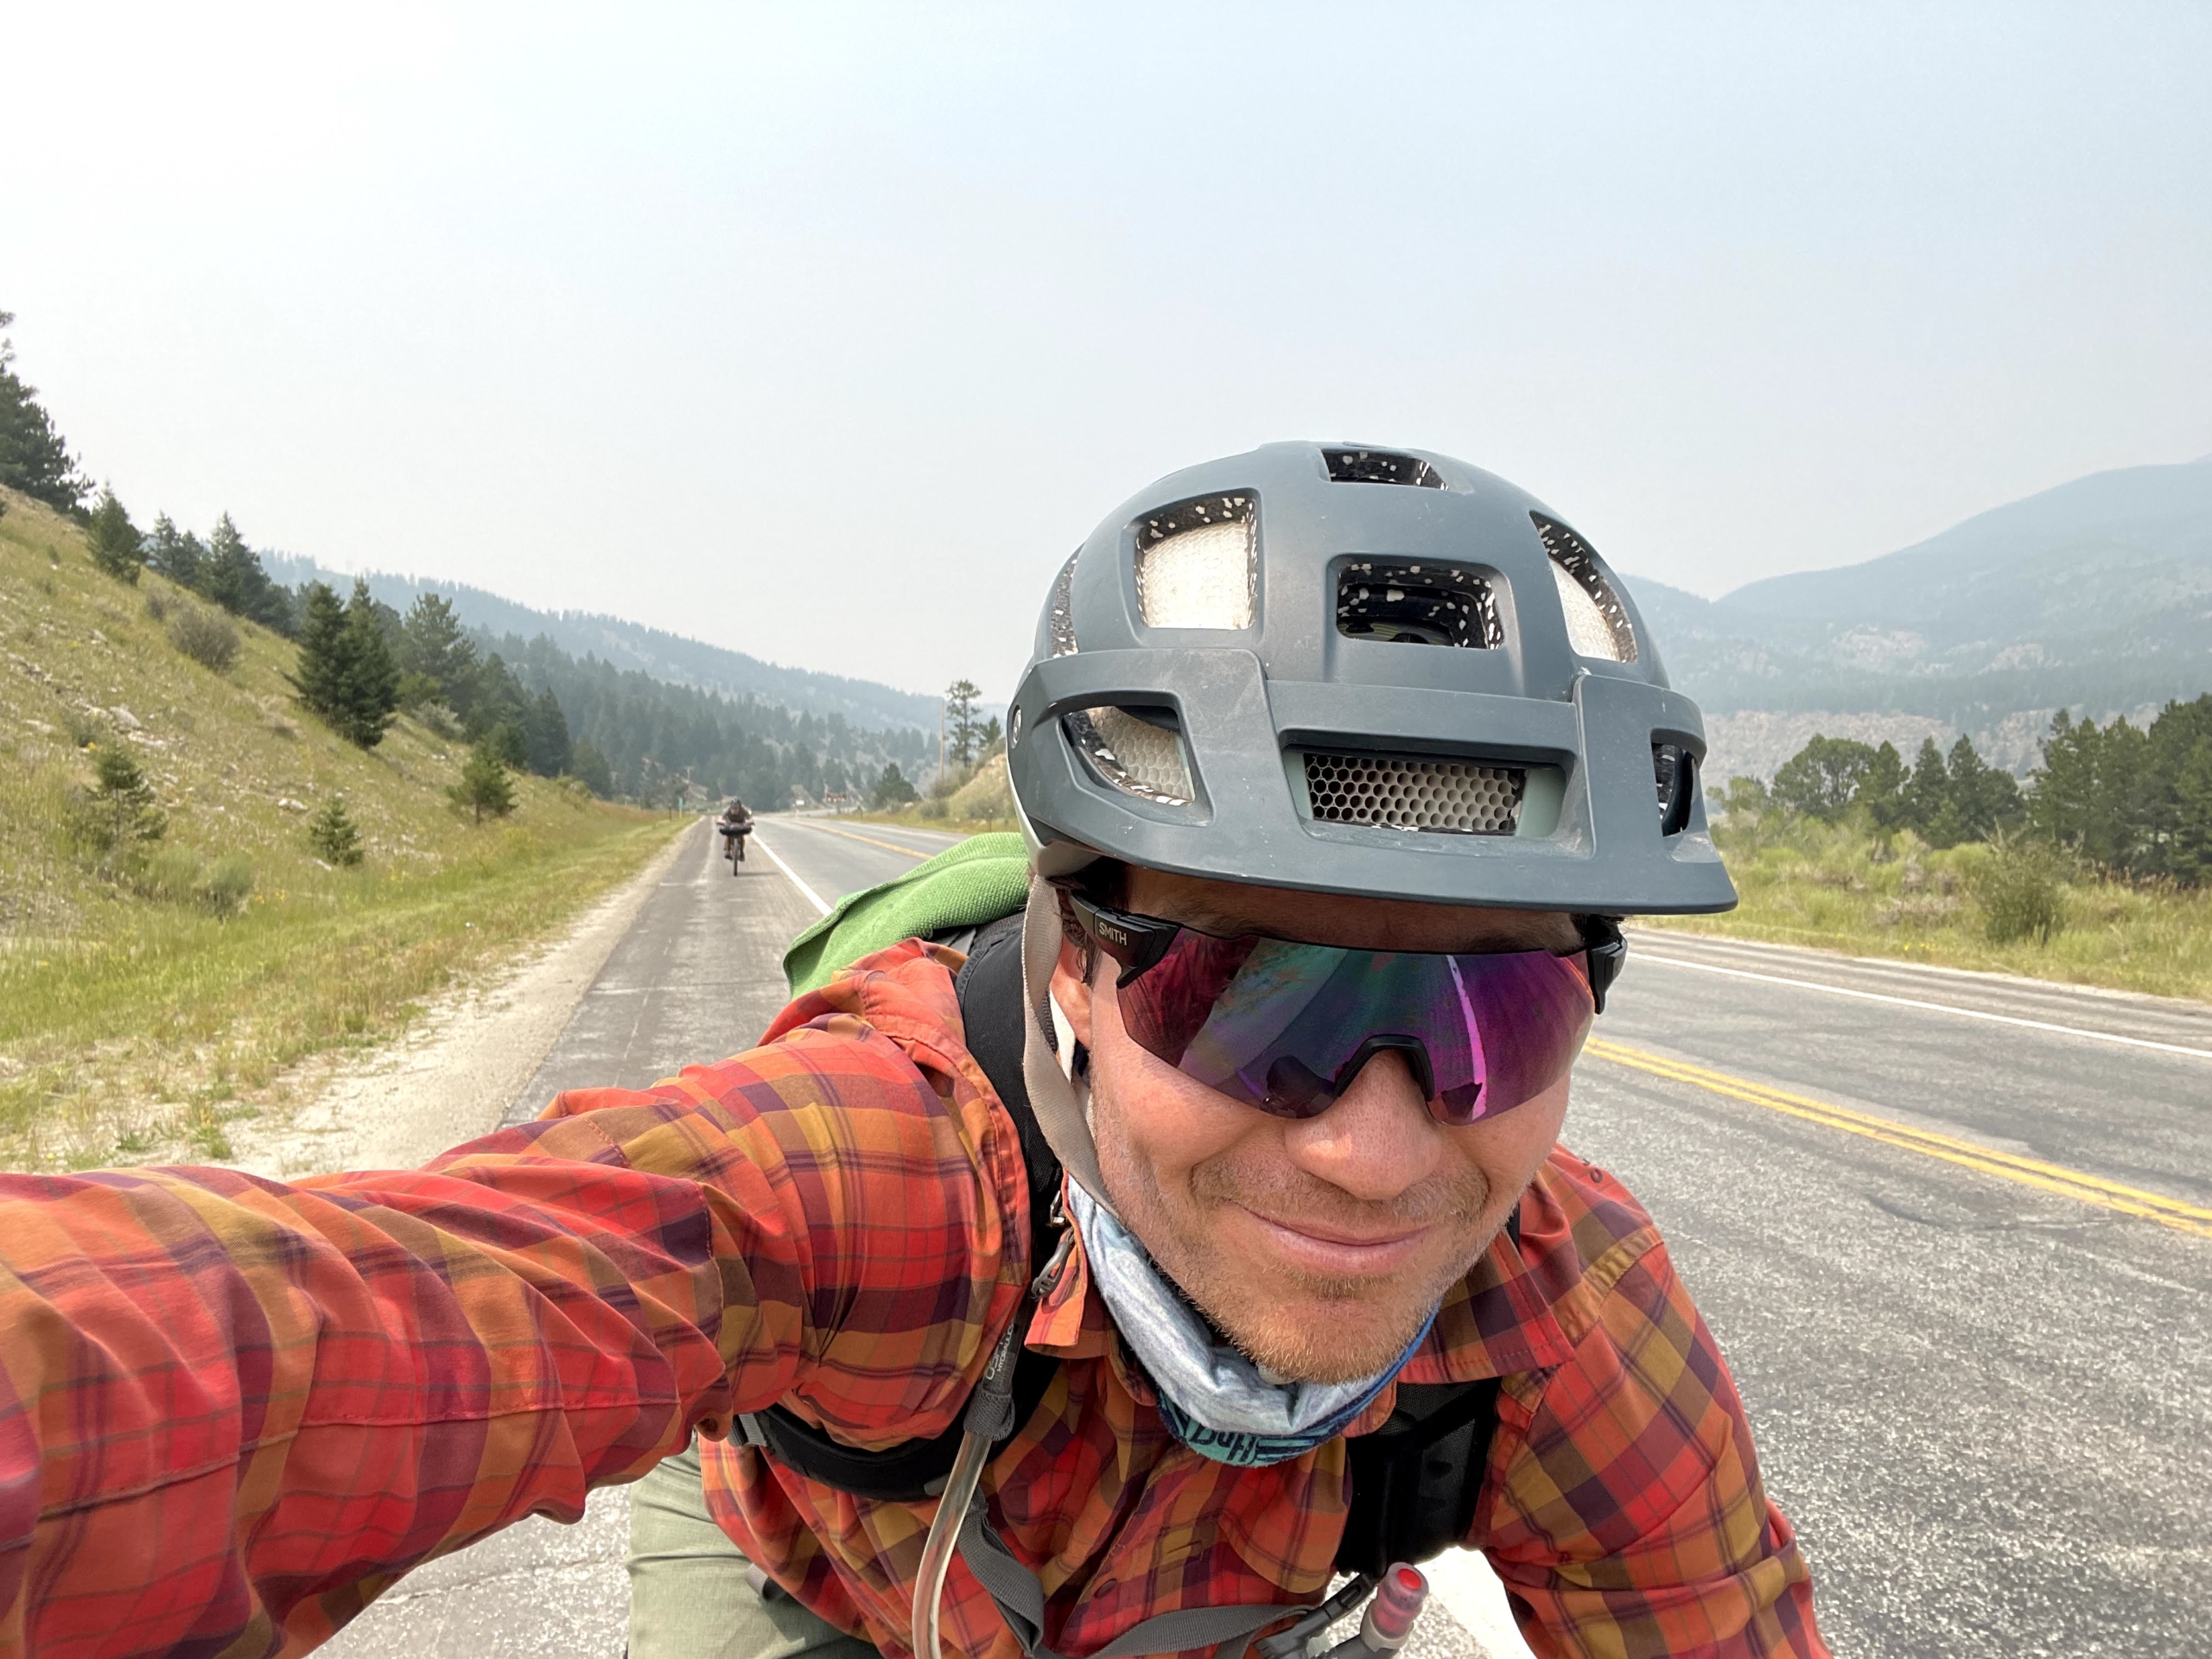
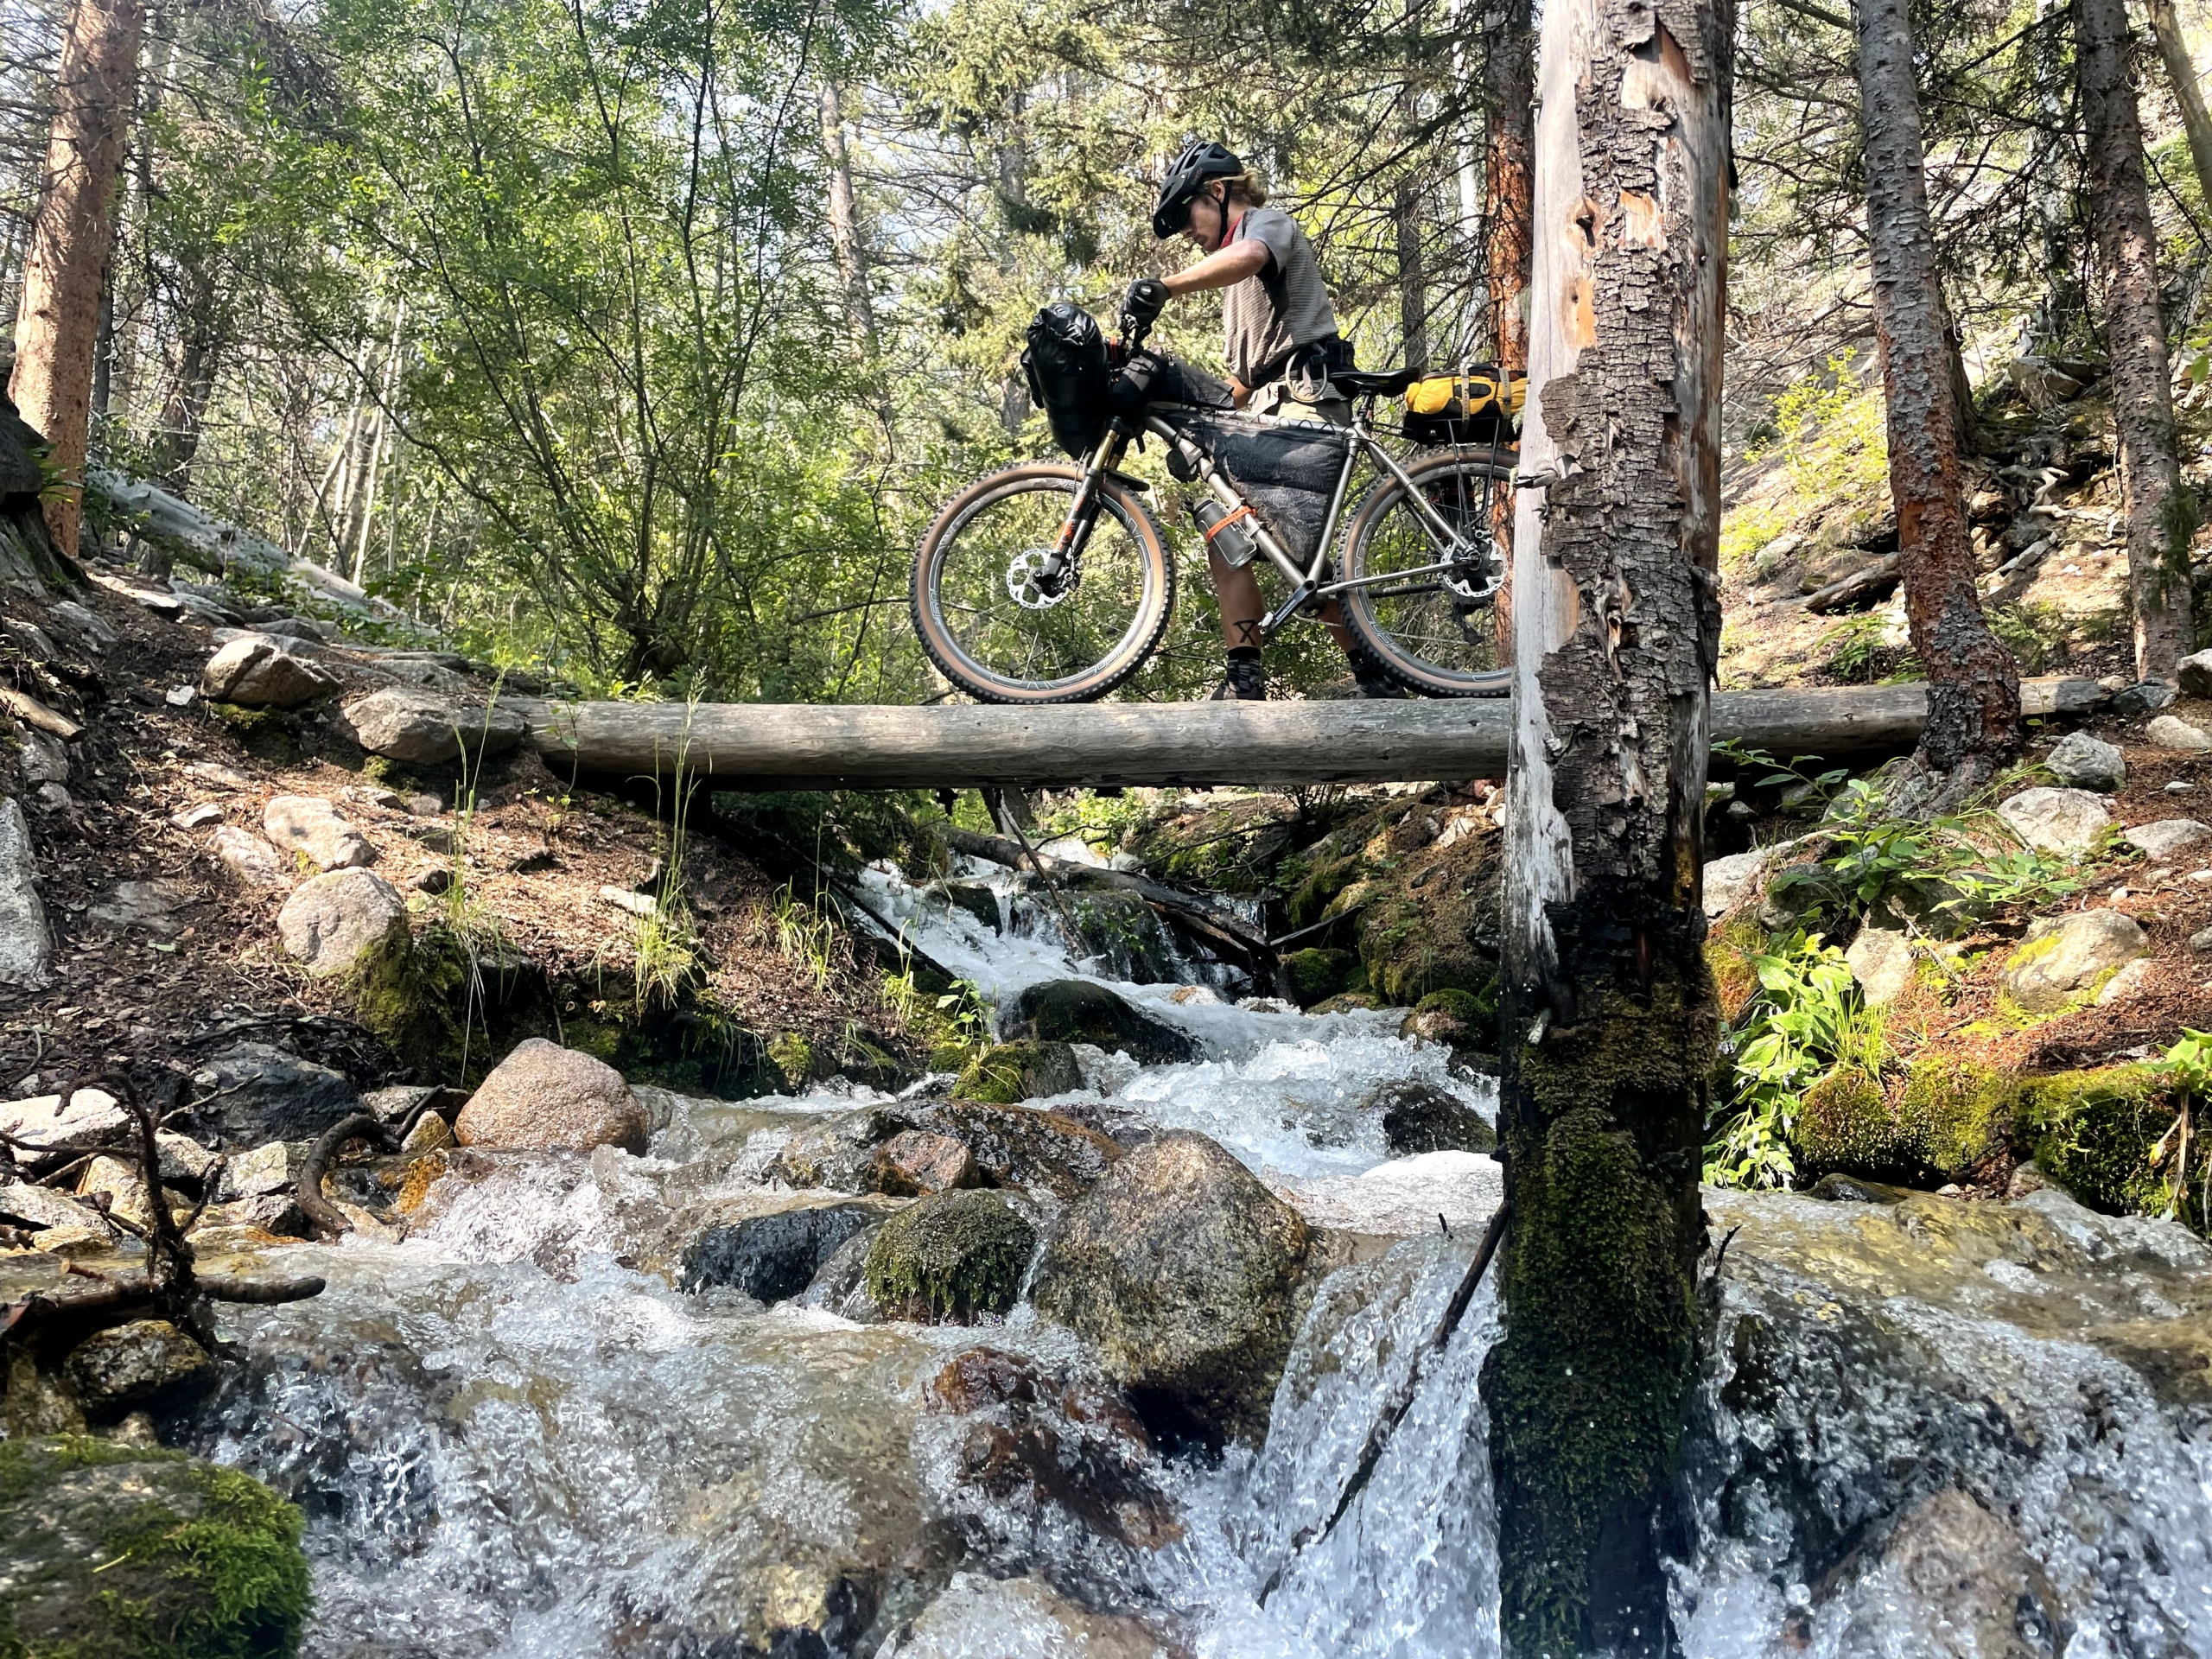
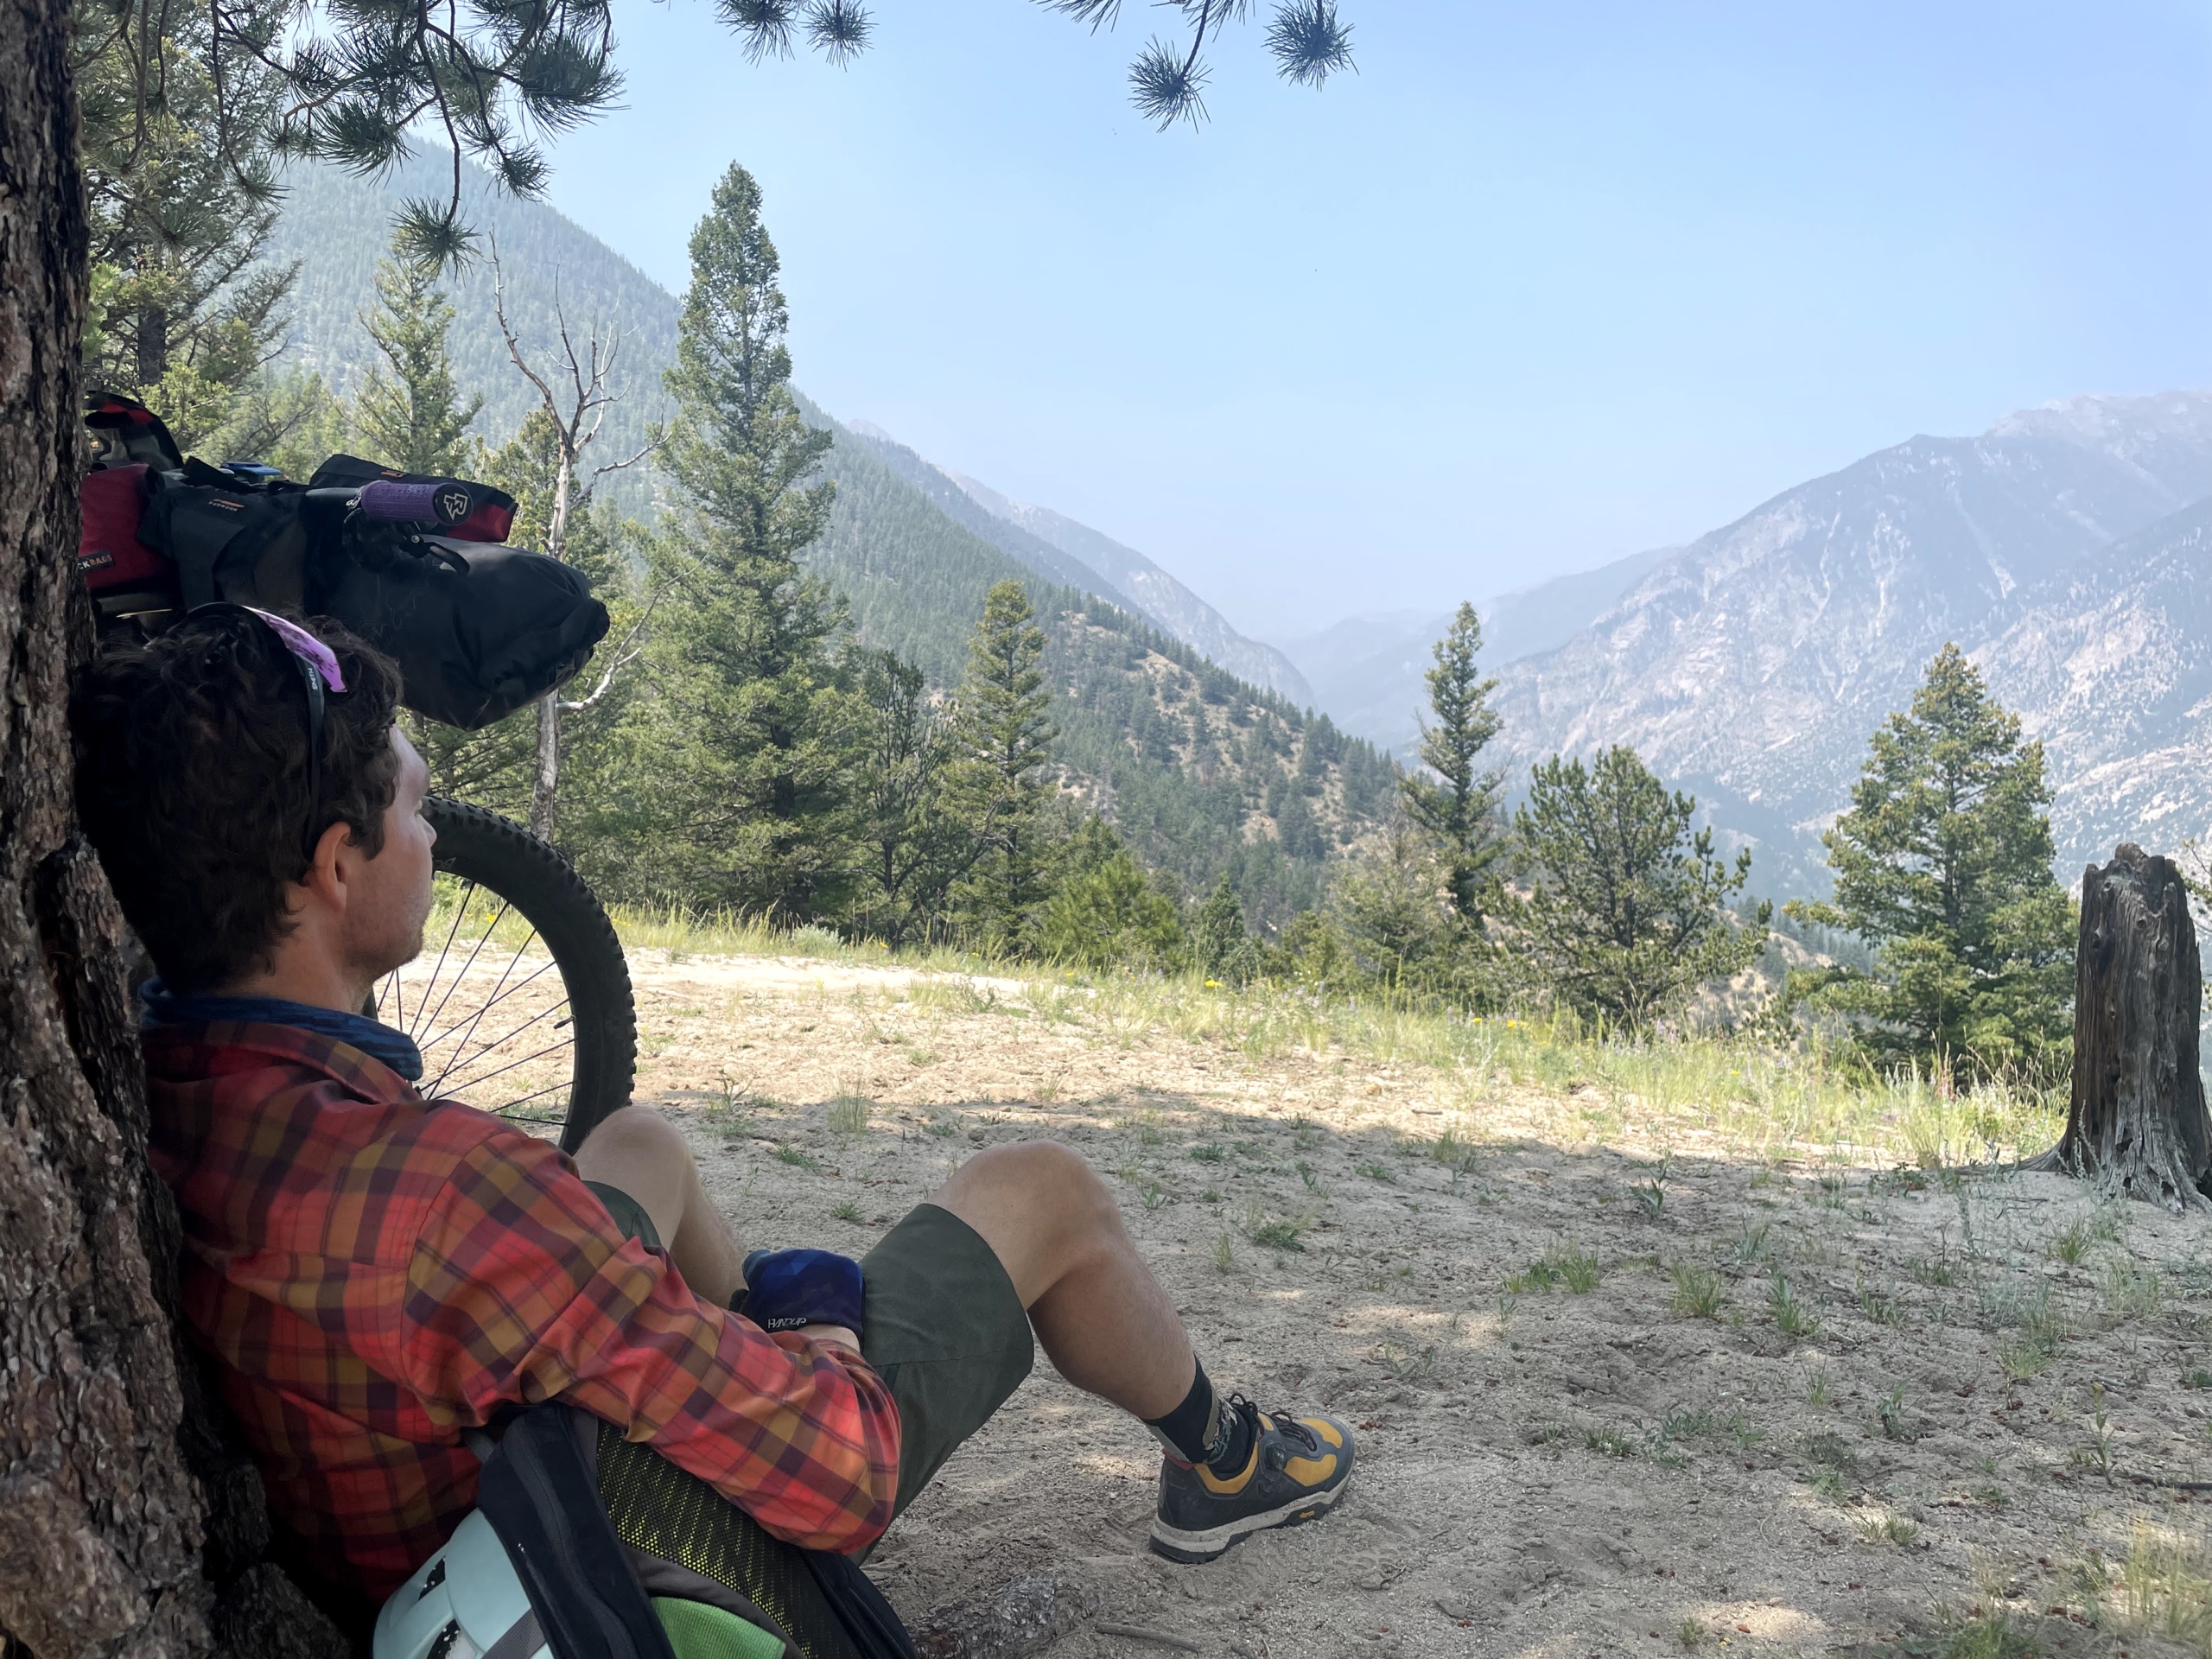


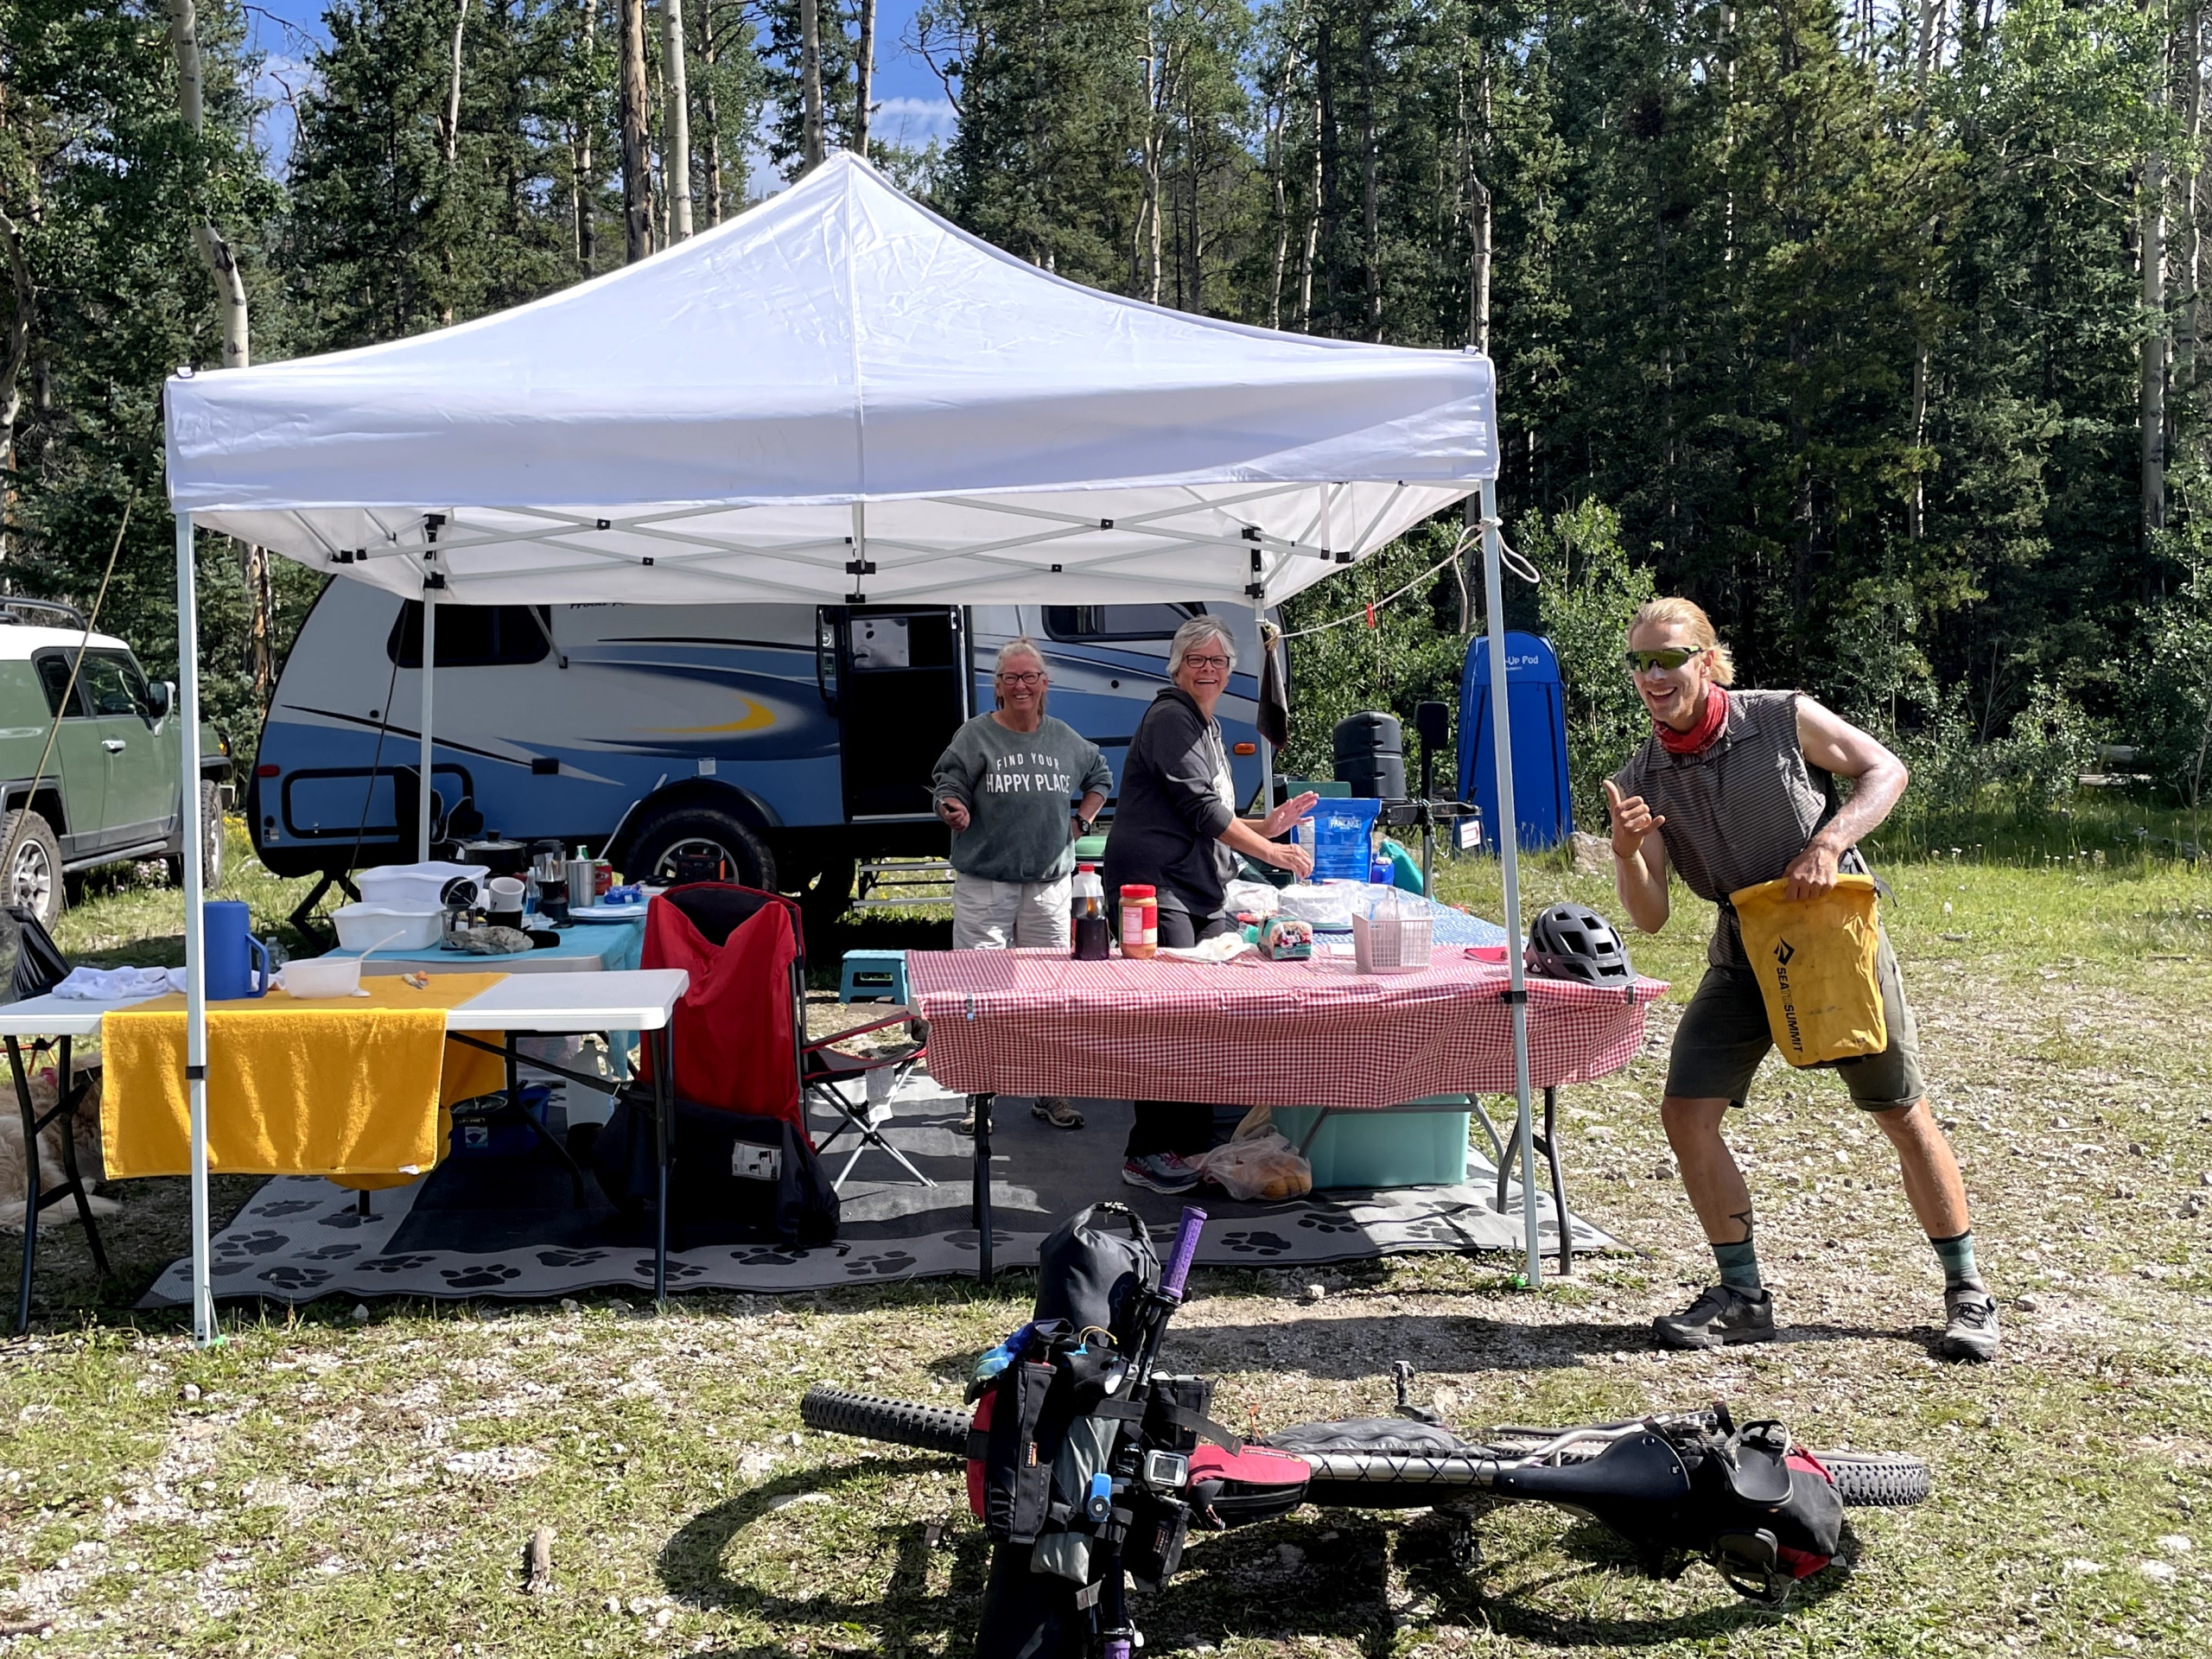

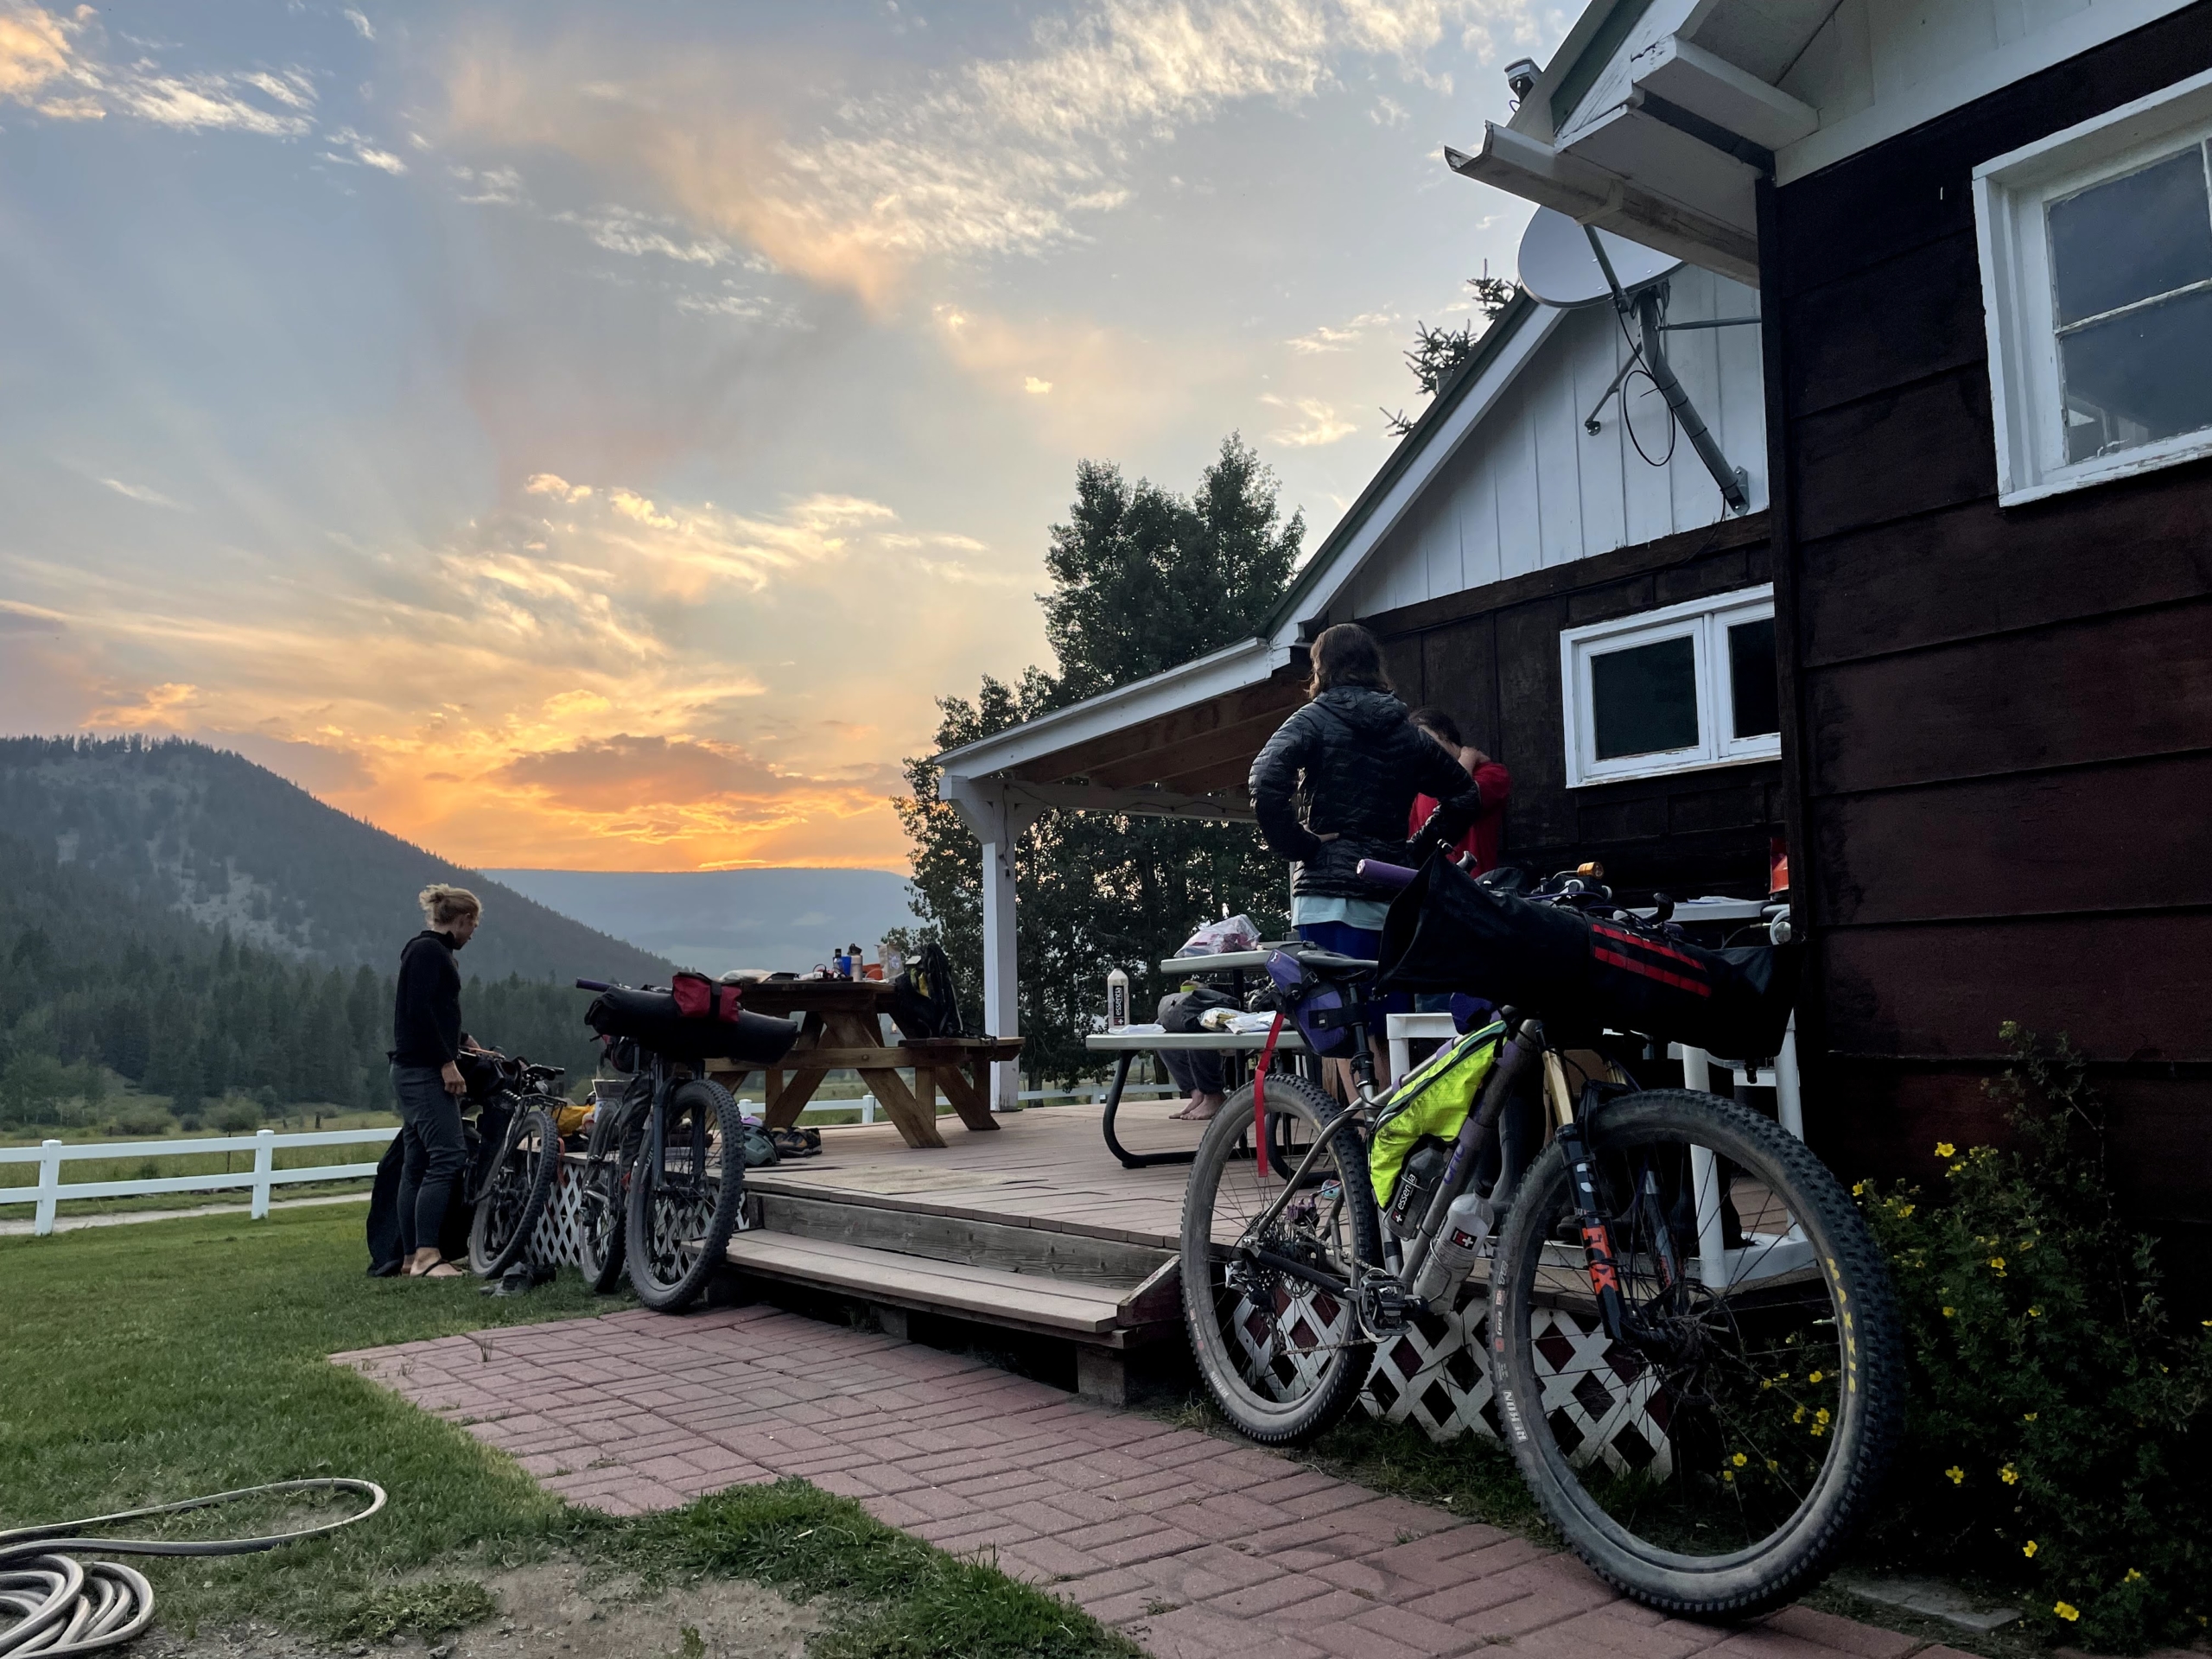
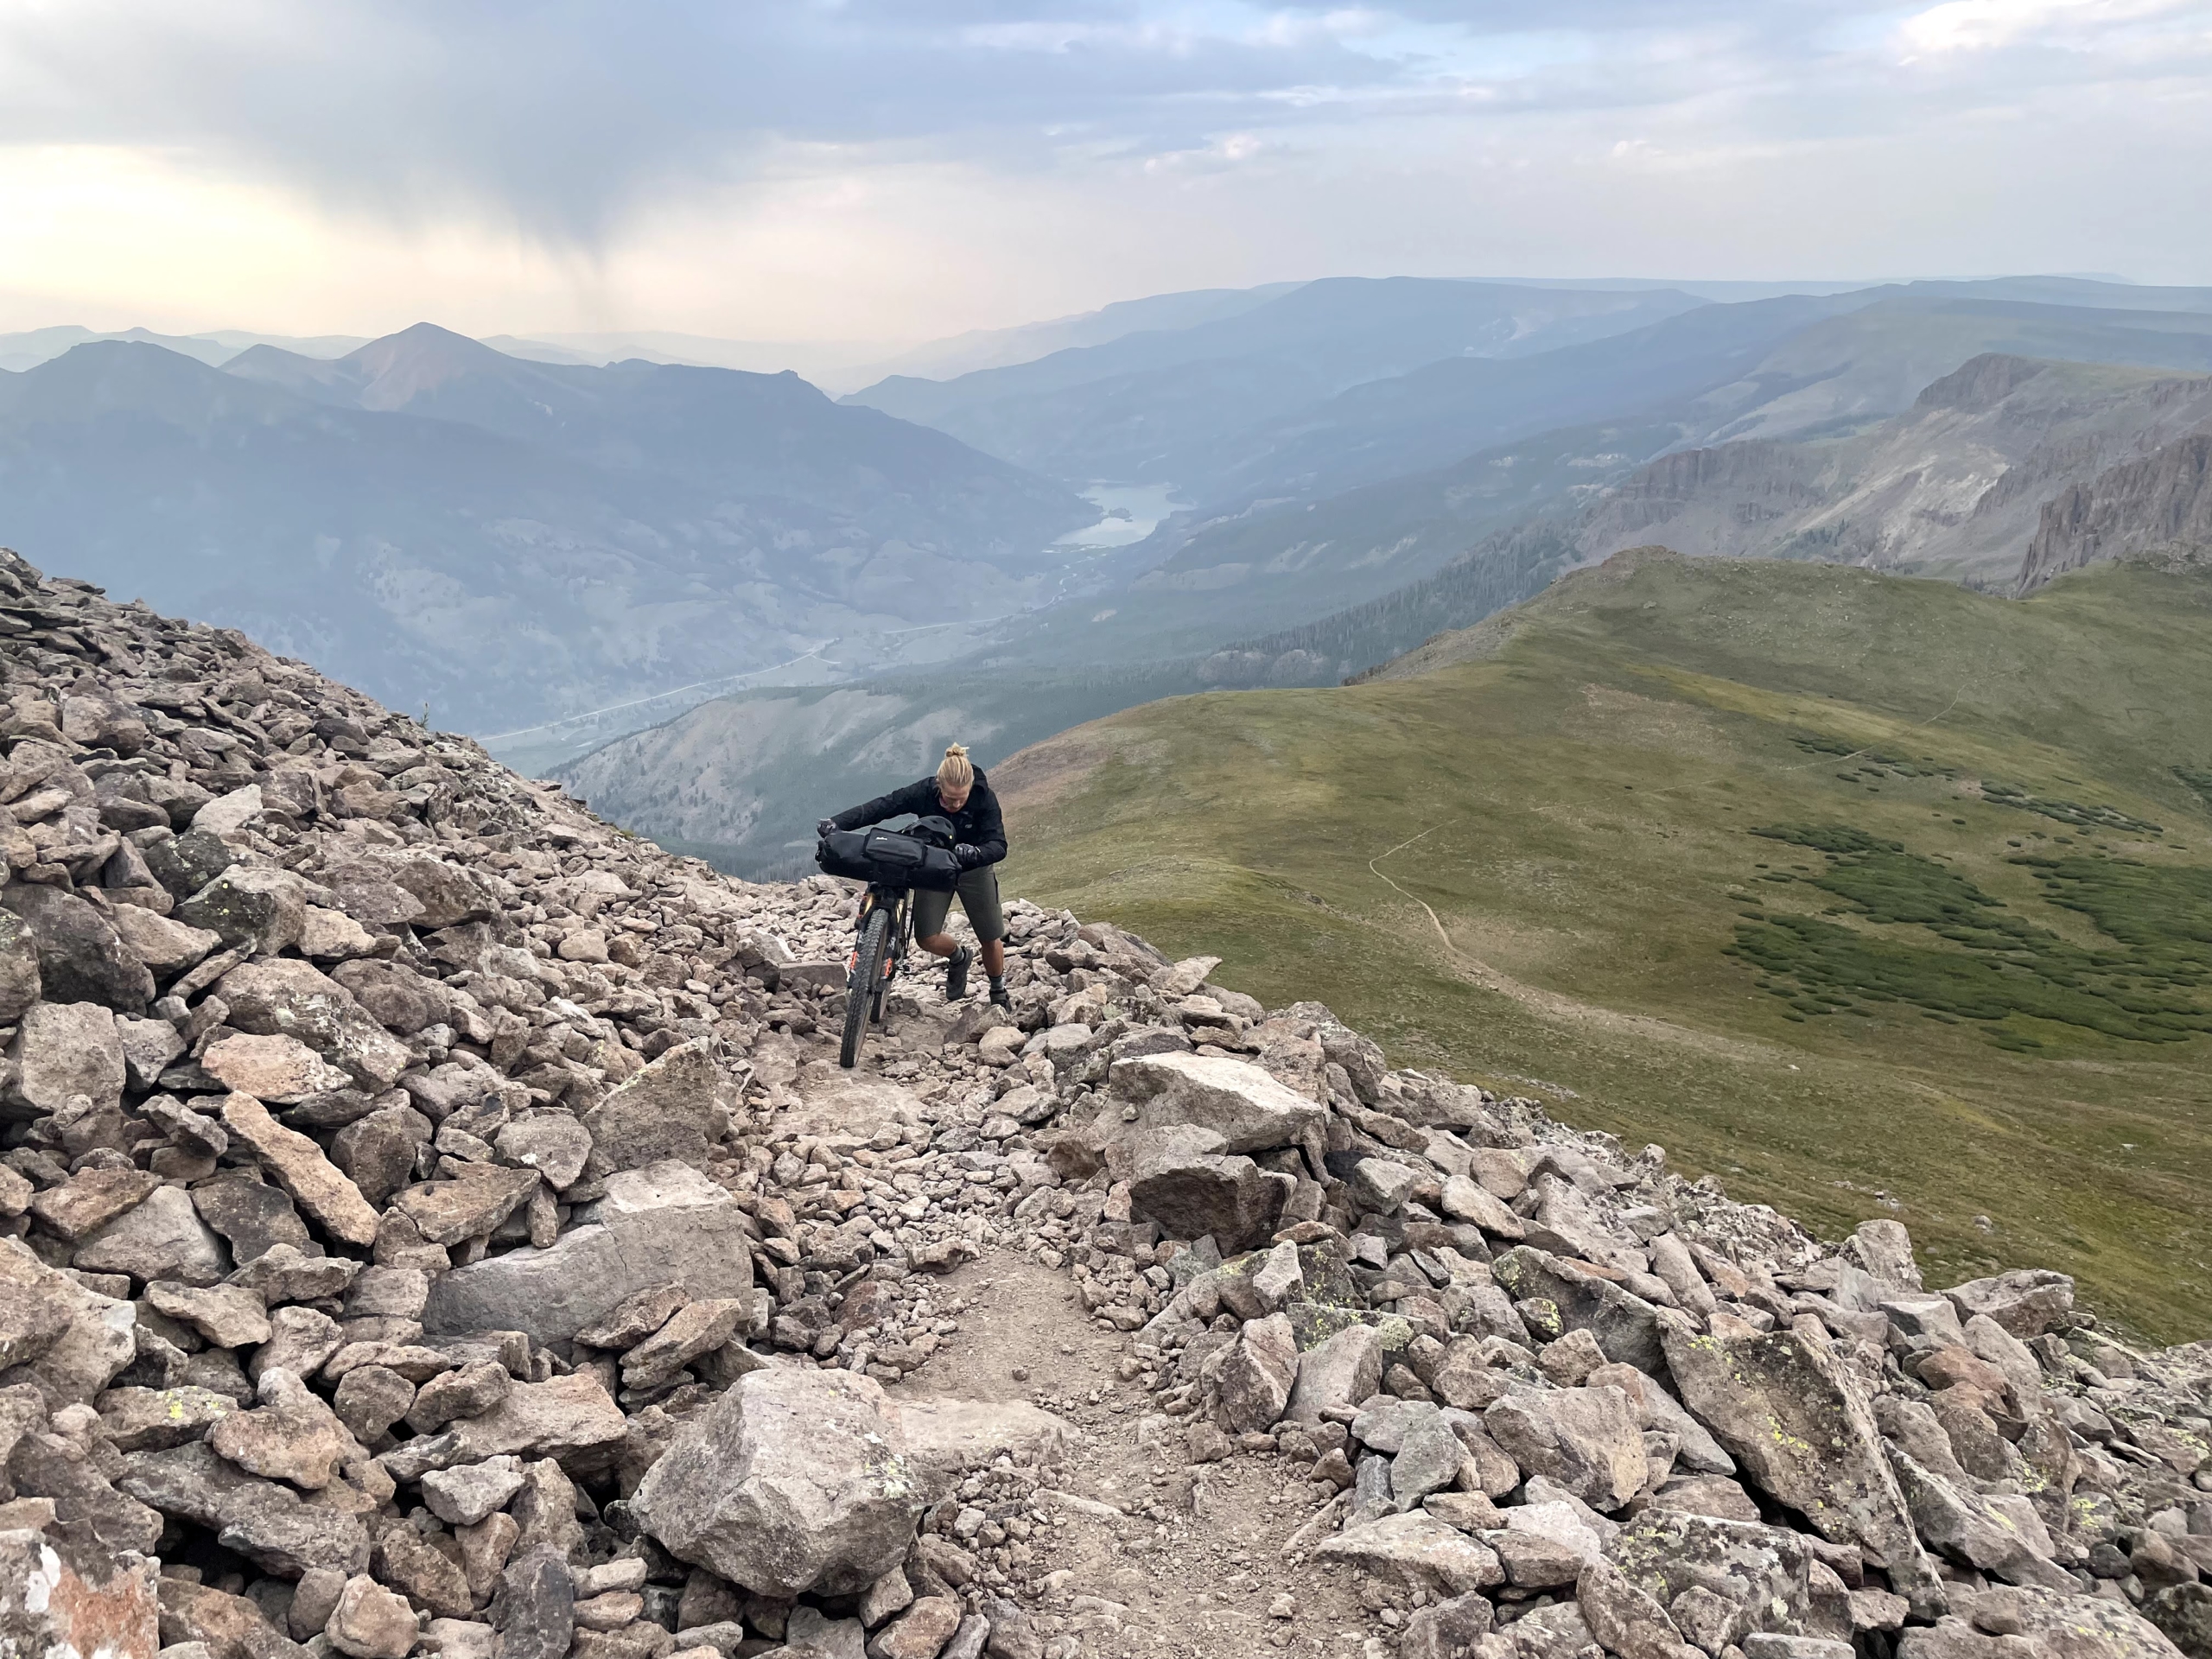
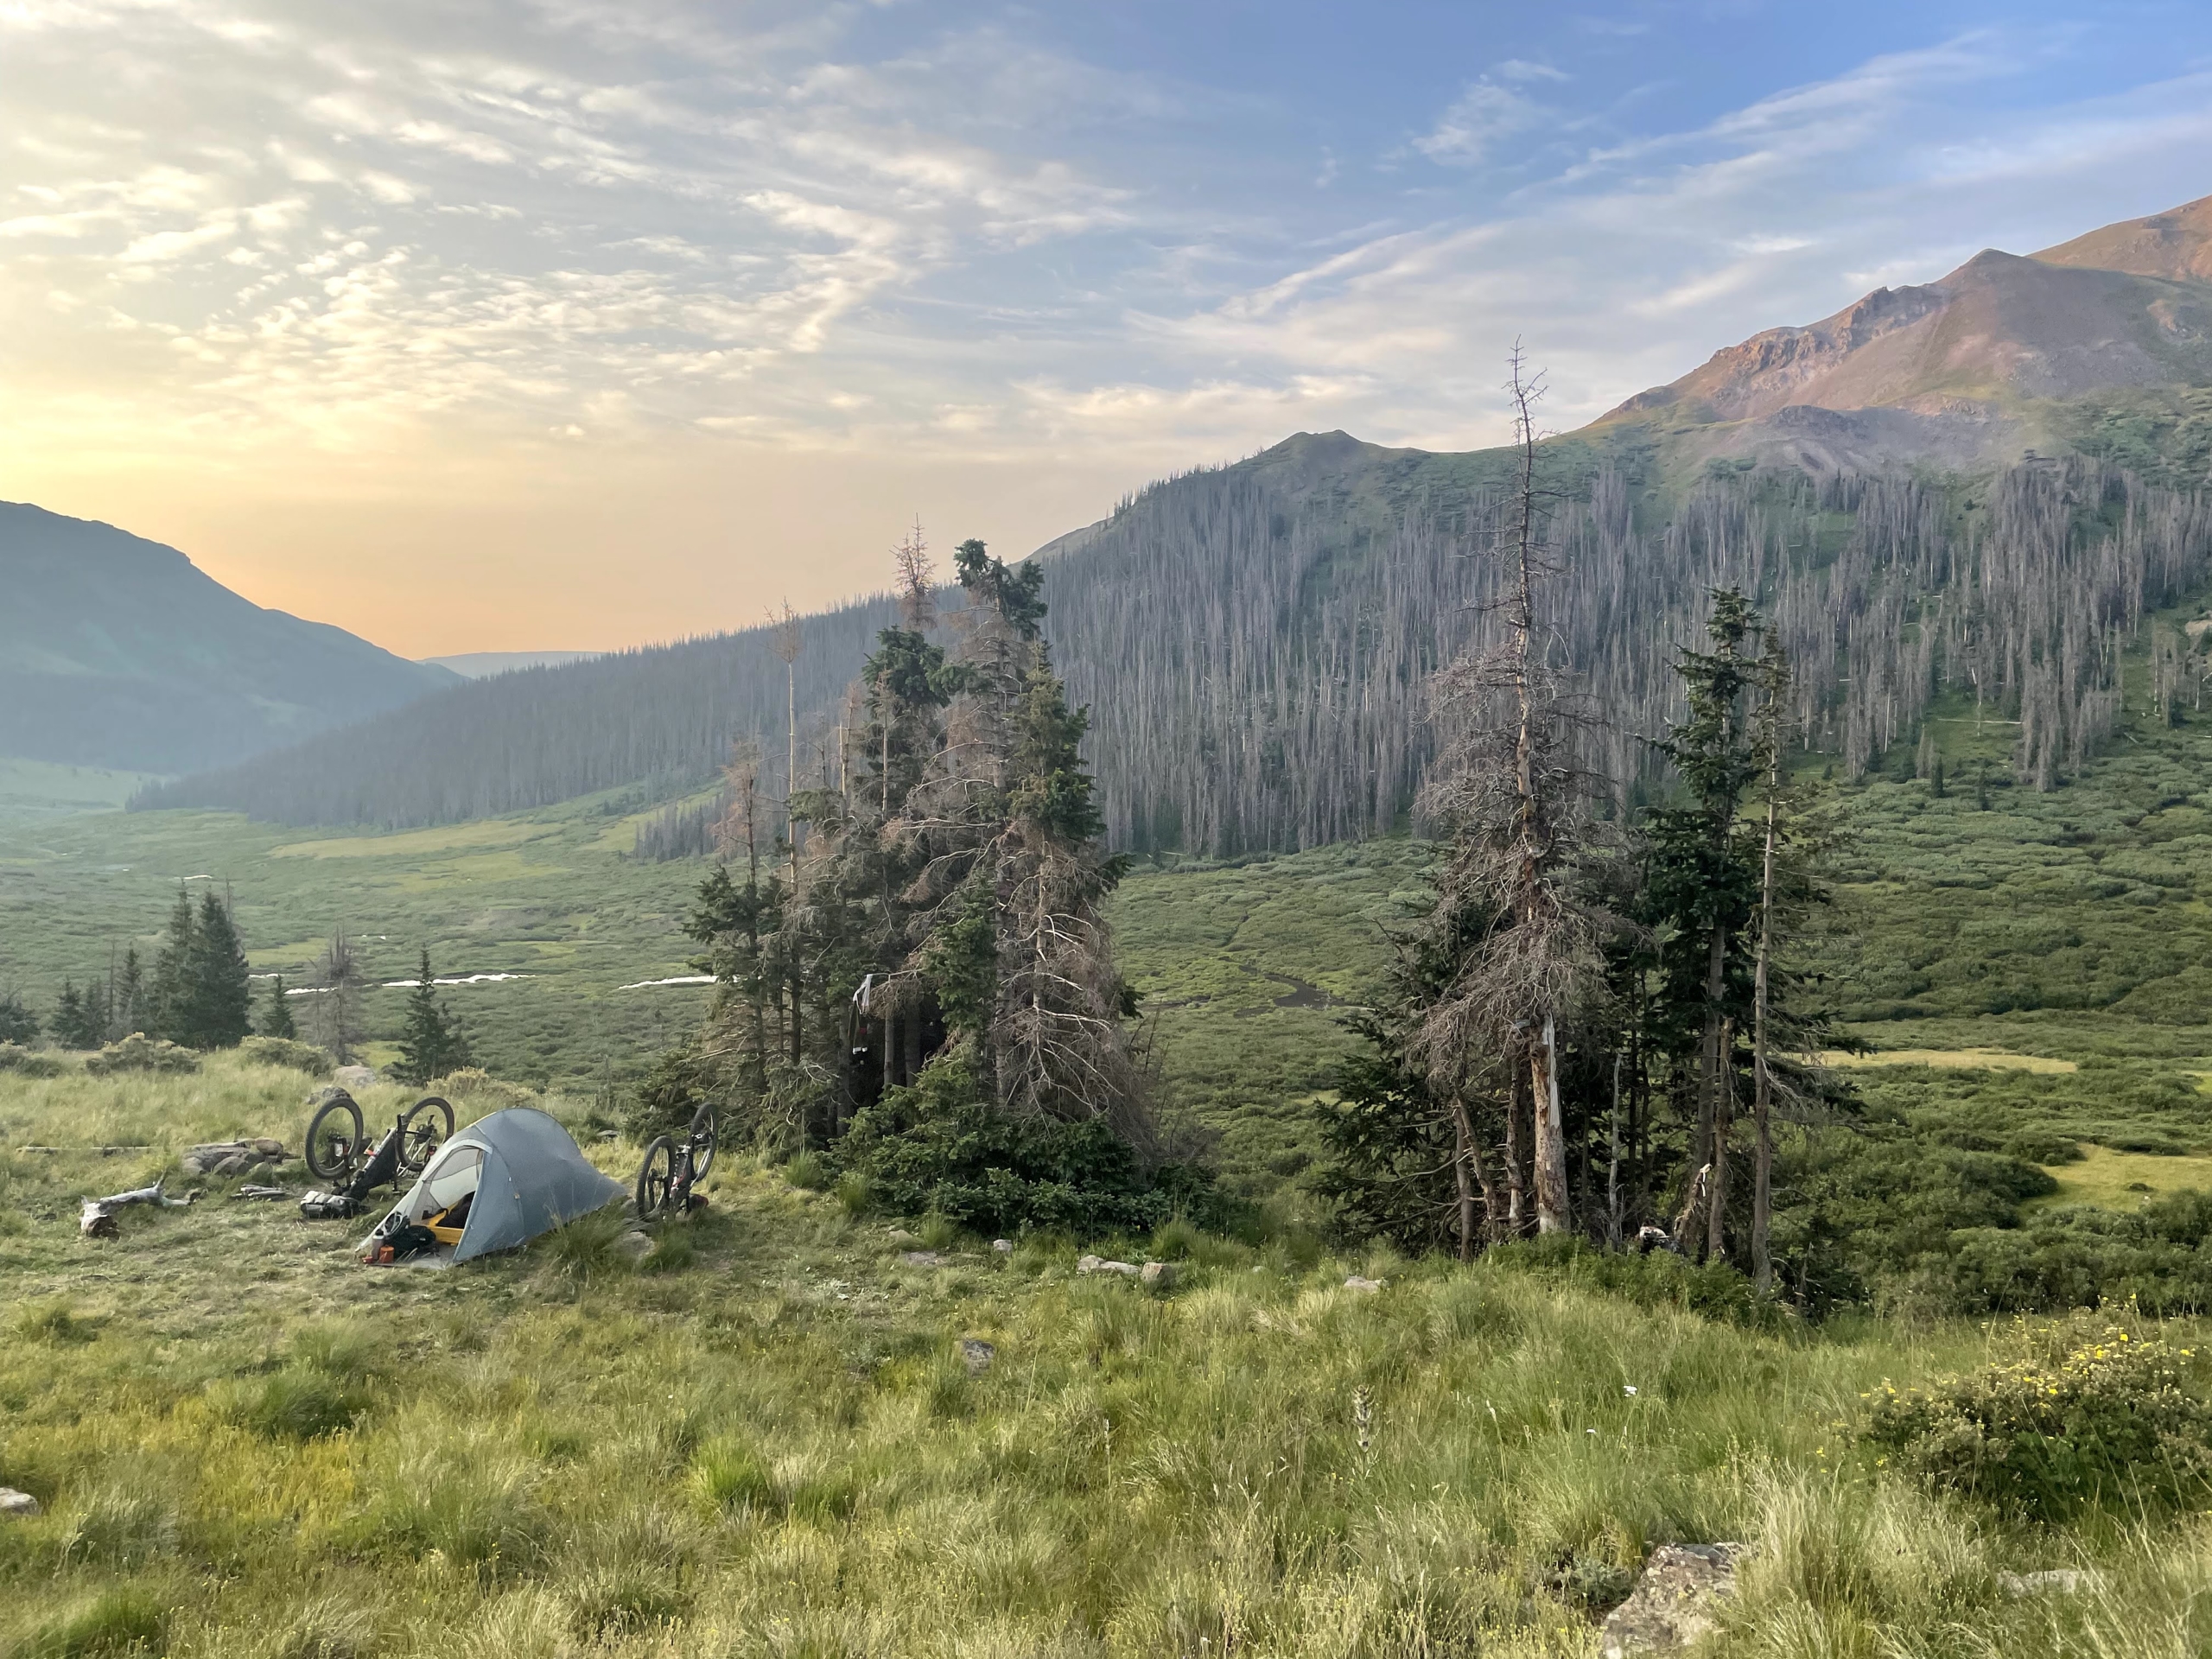
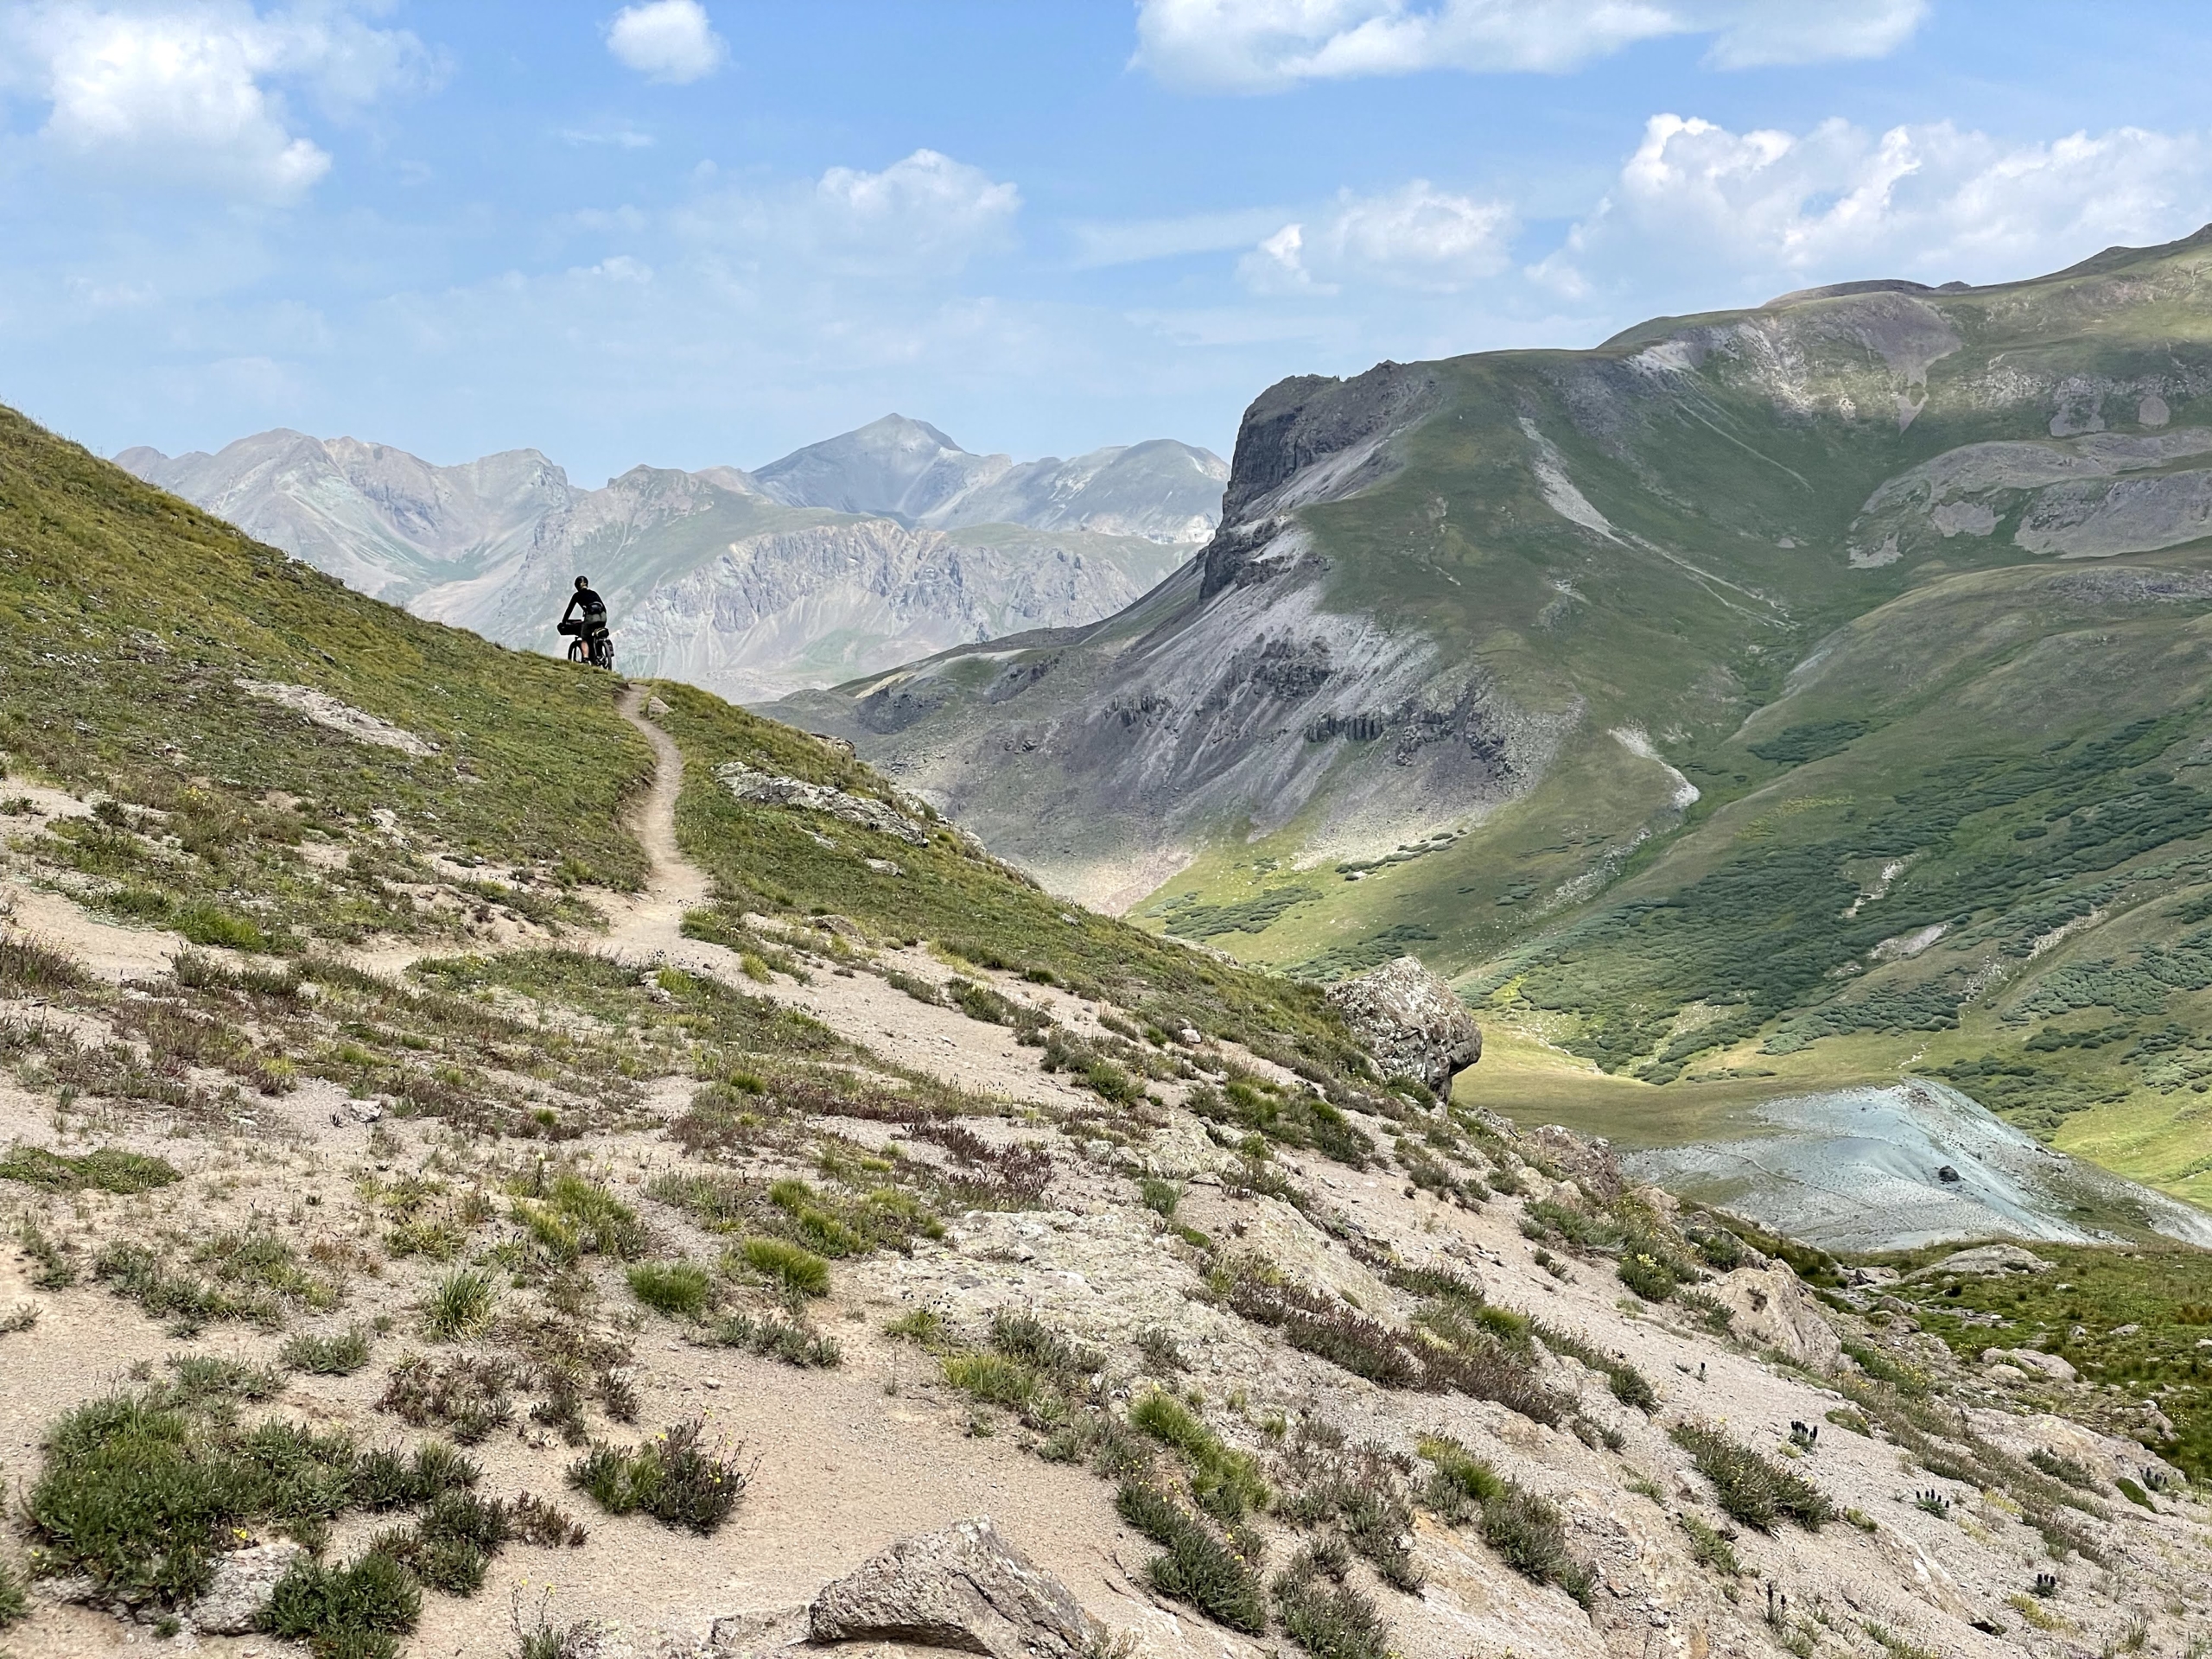
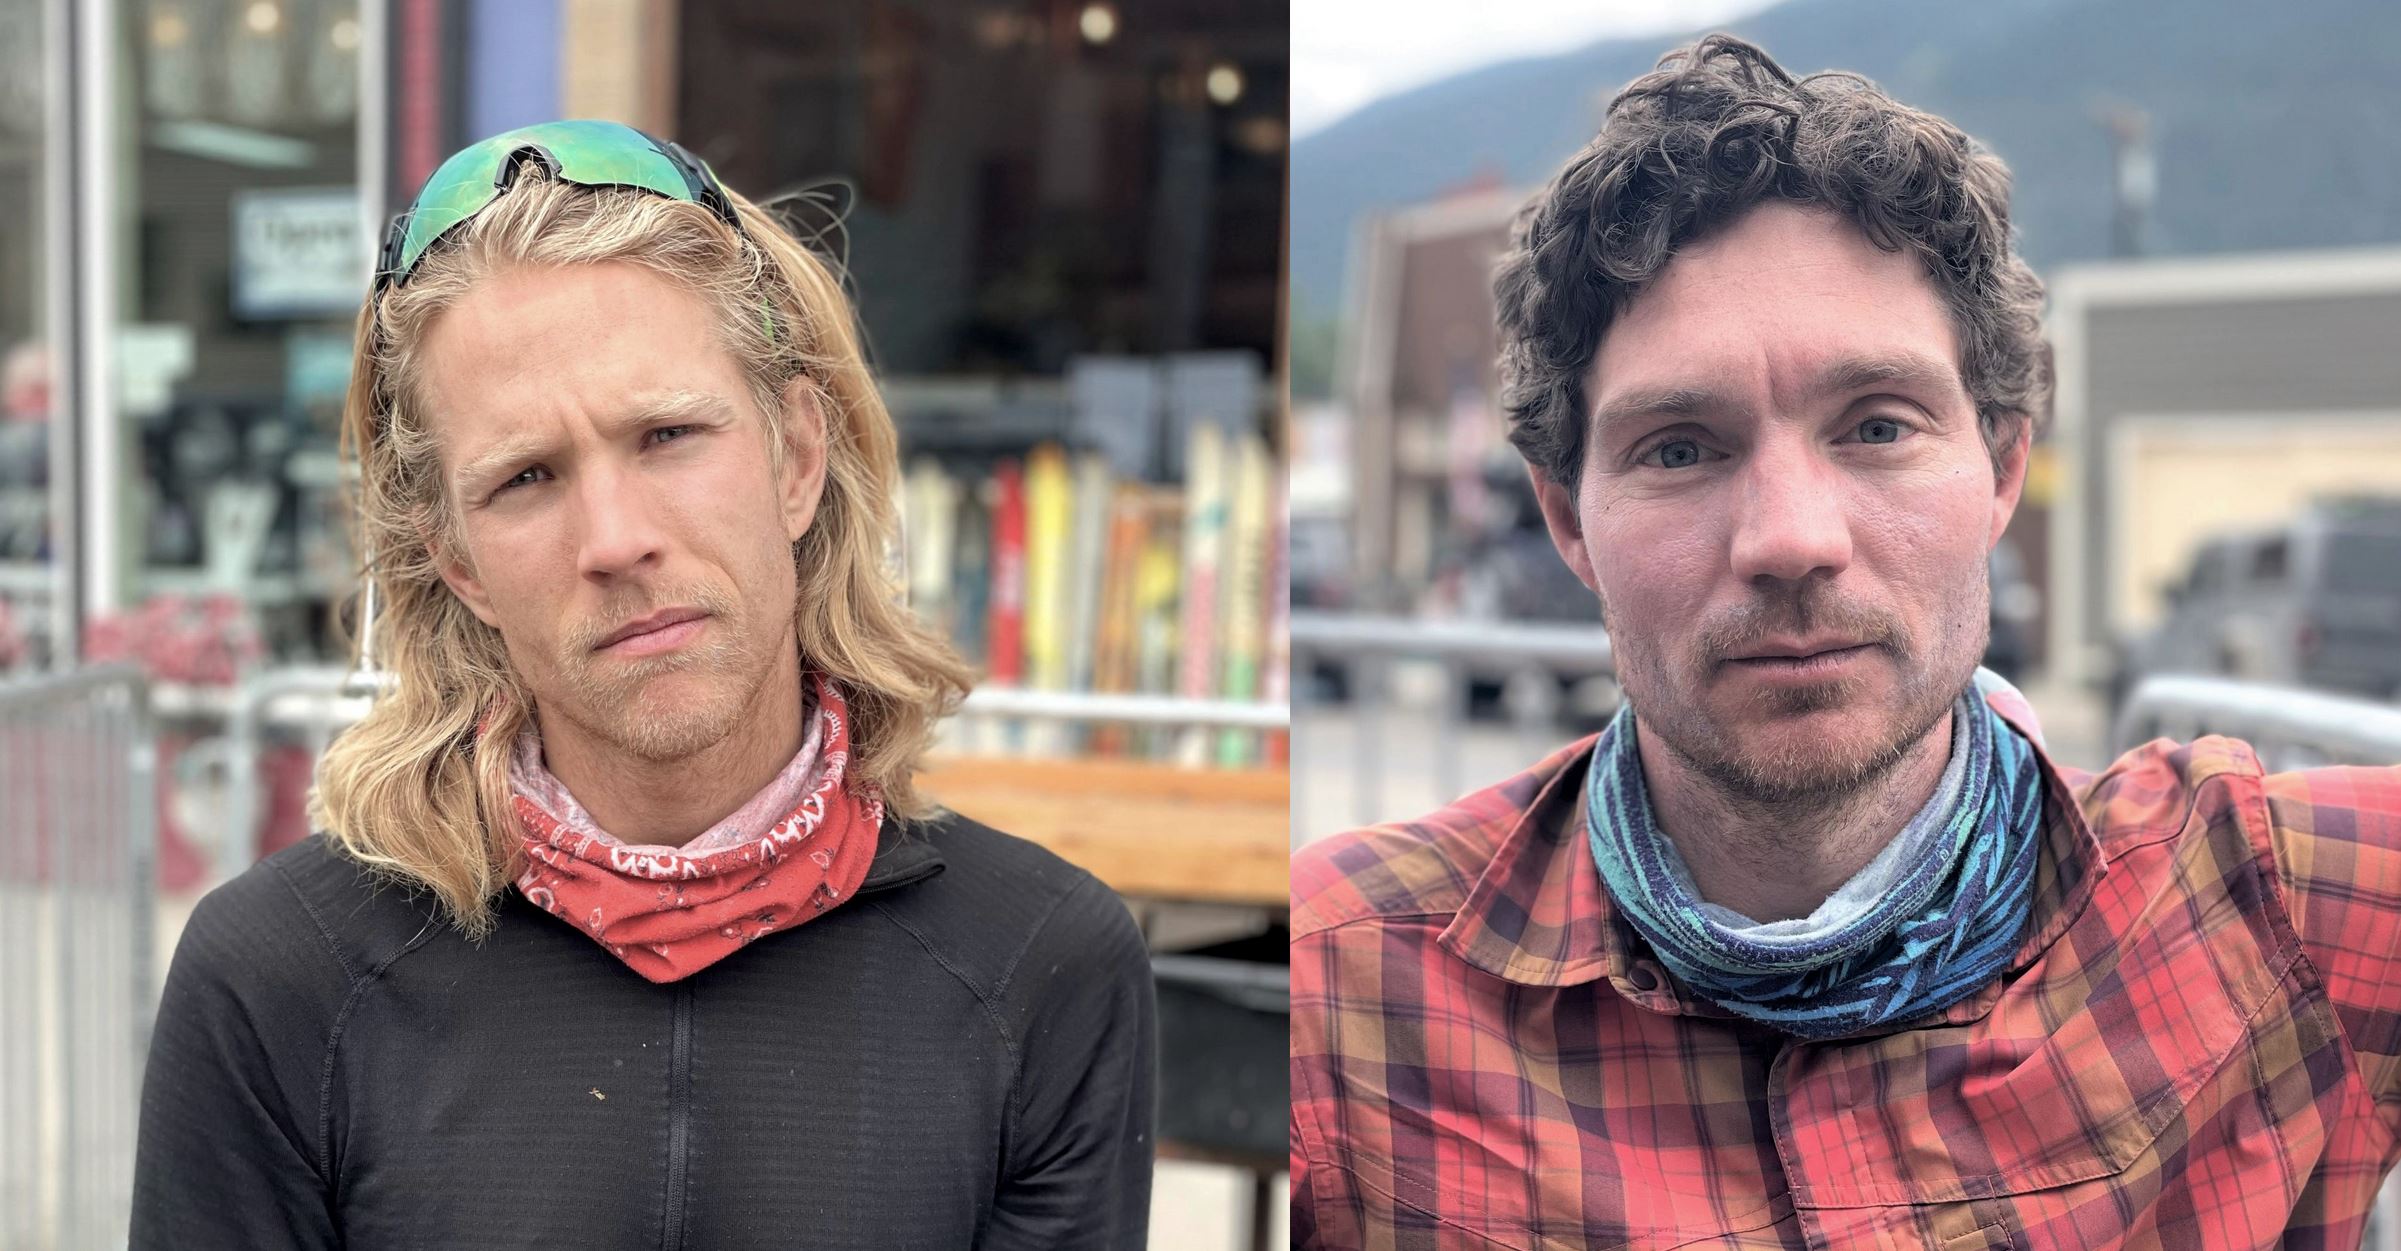
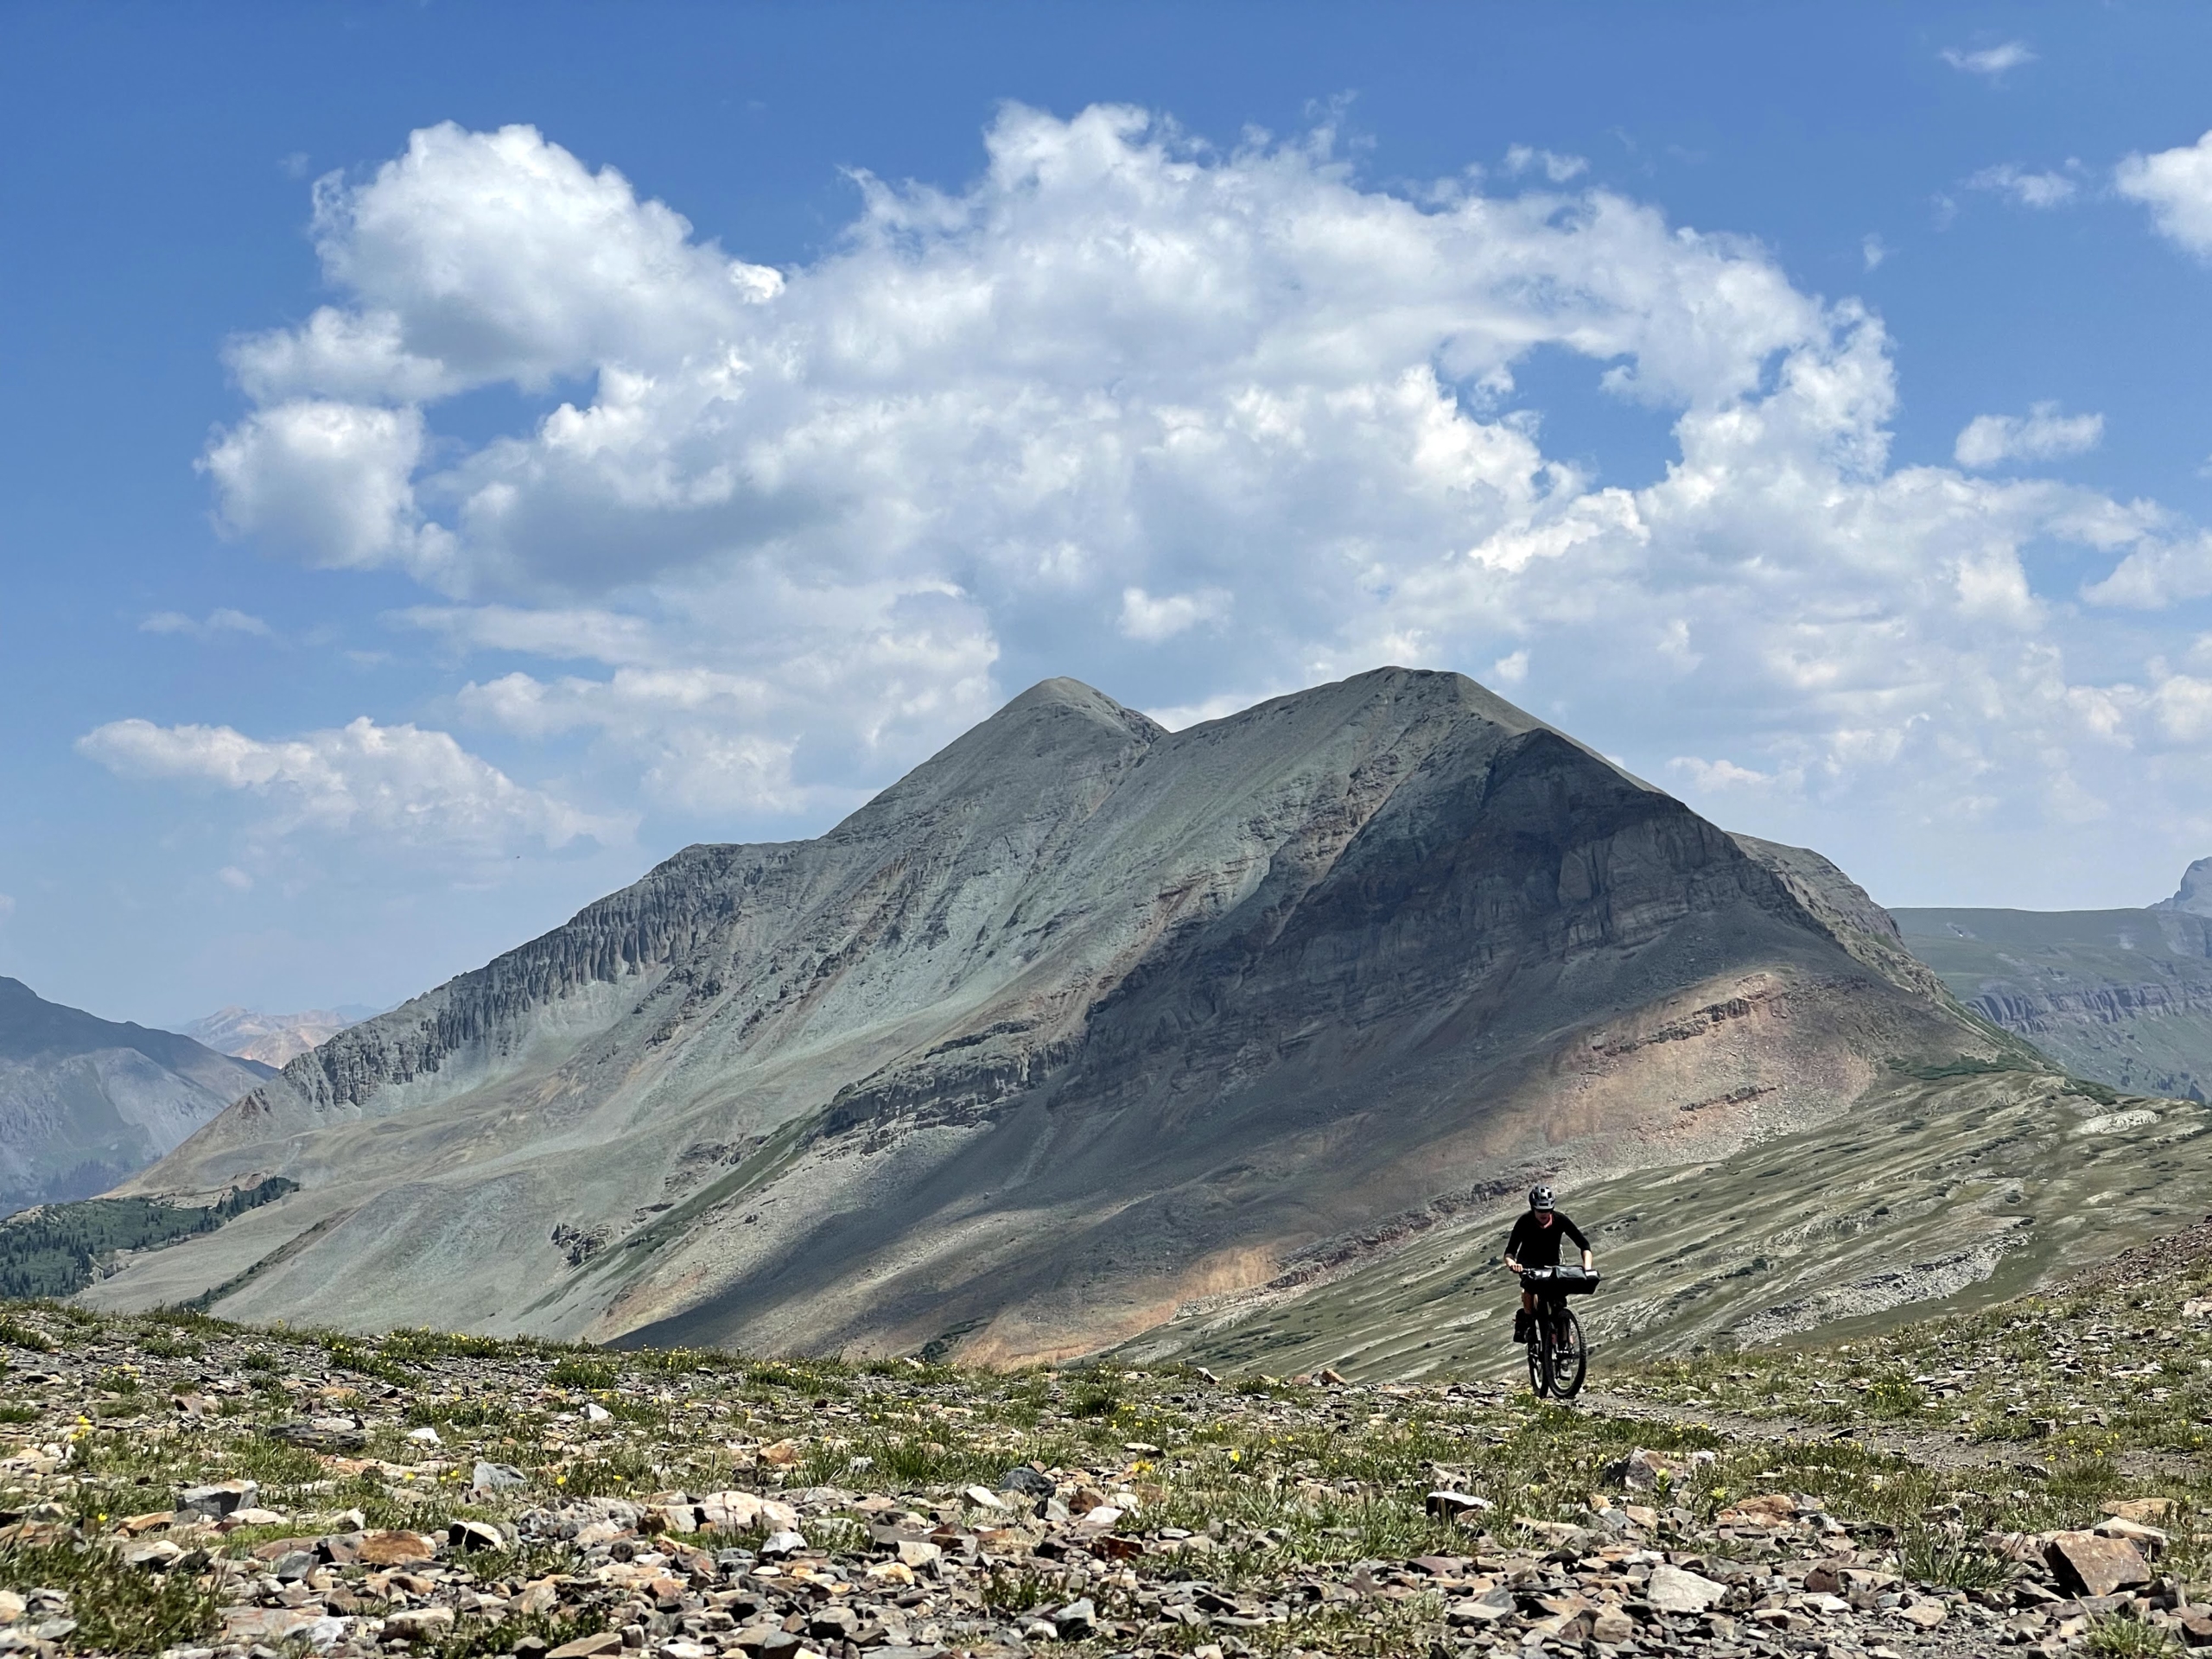

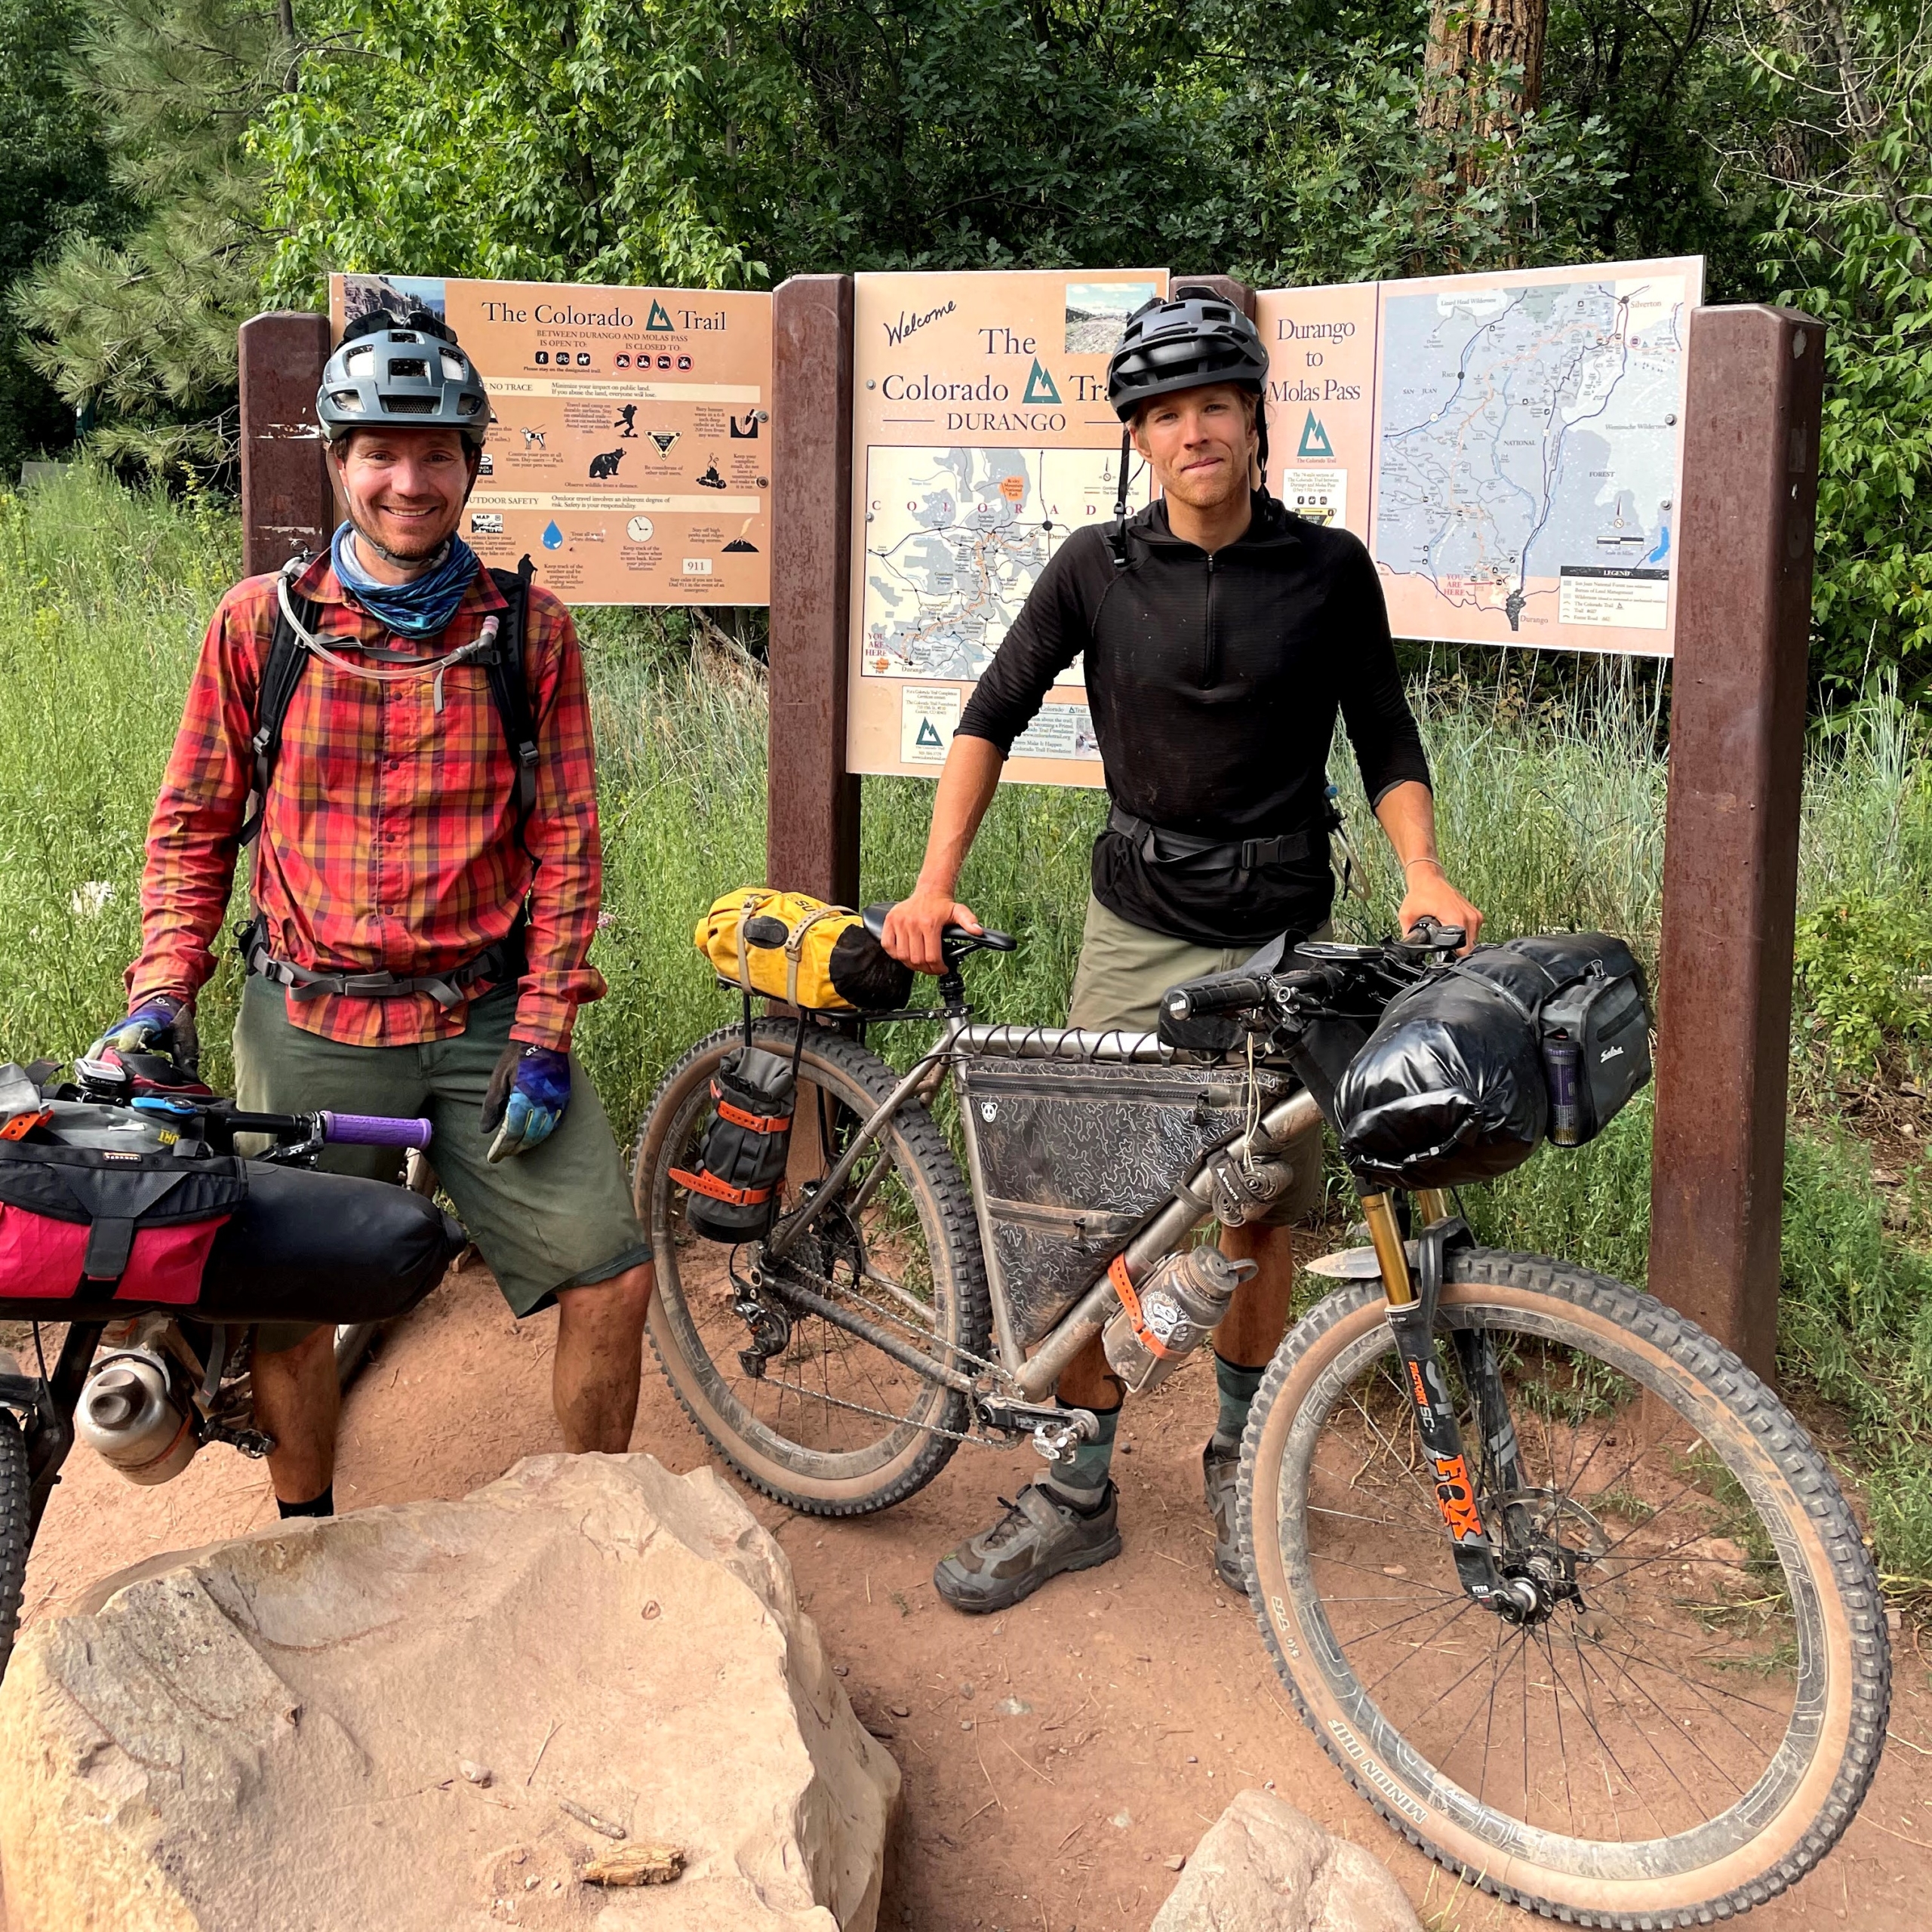

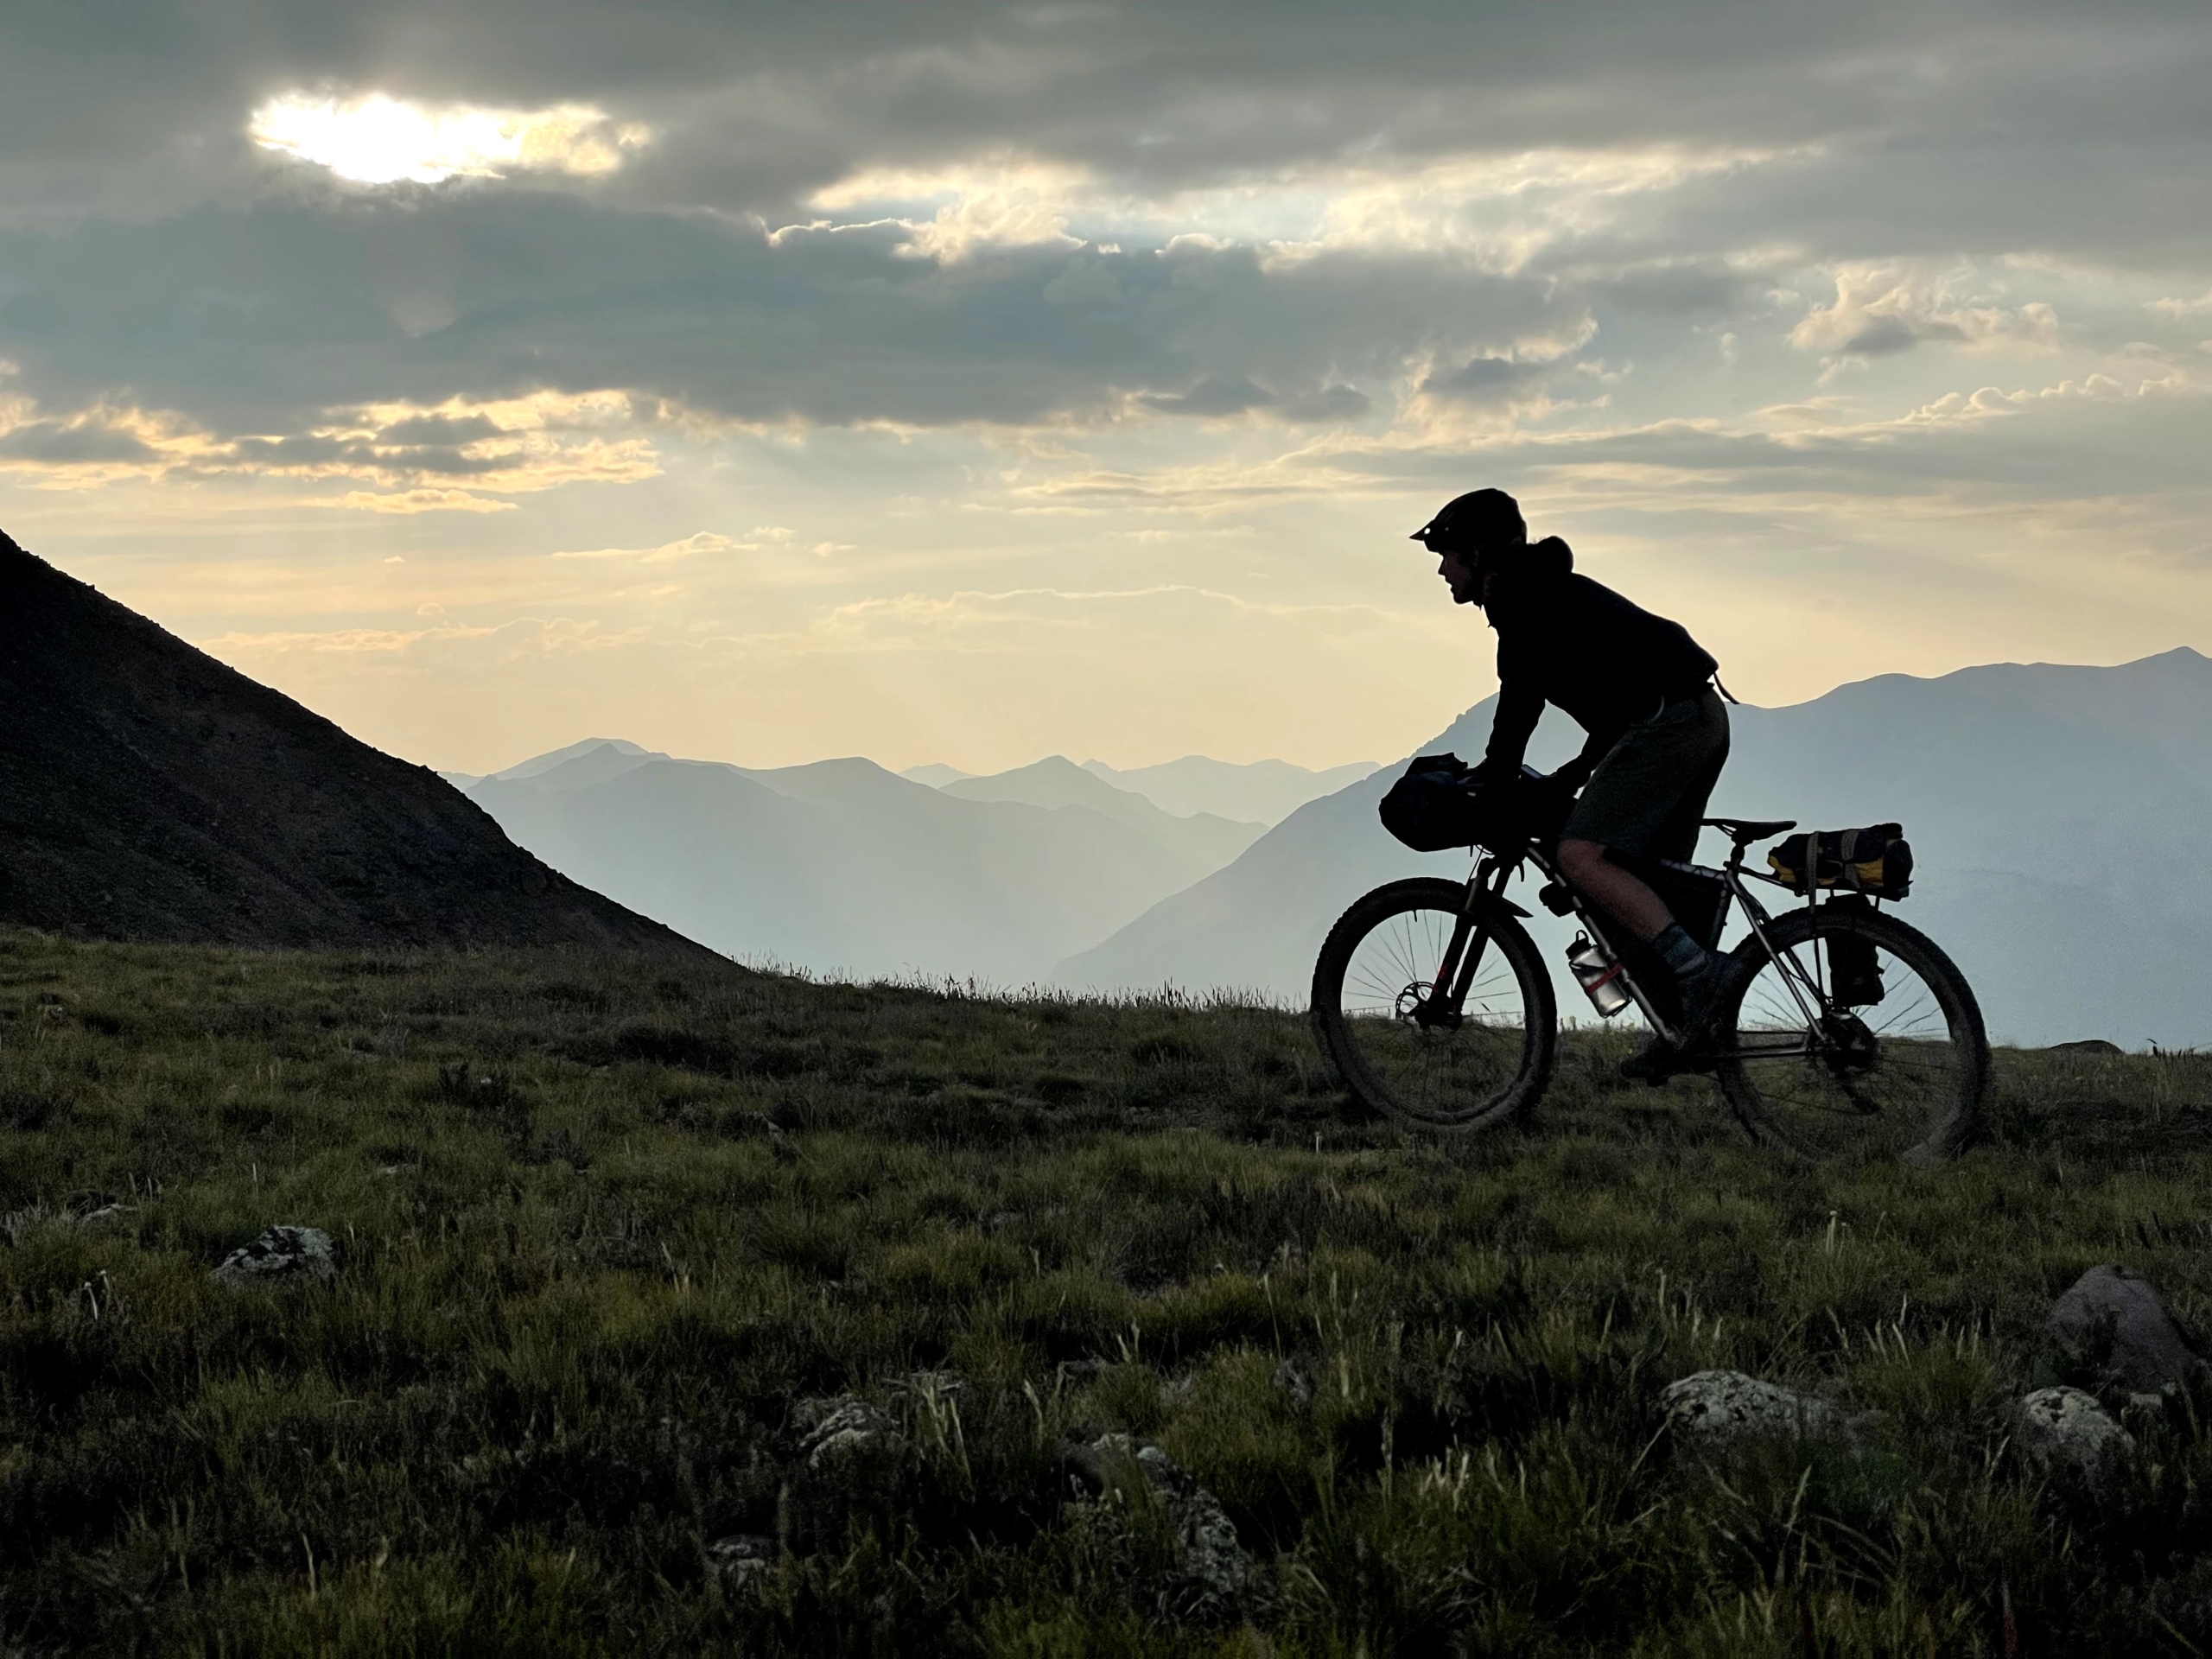


")


")


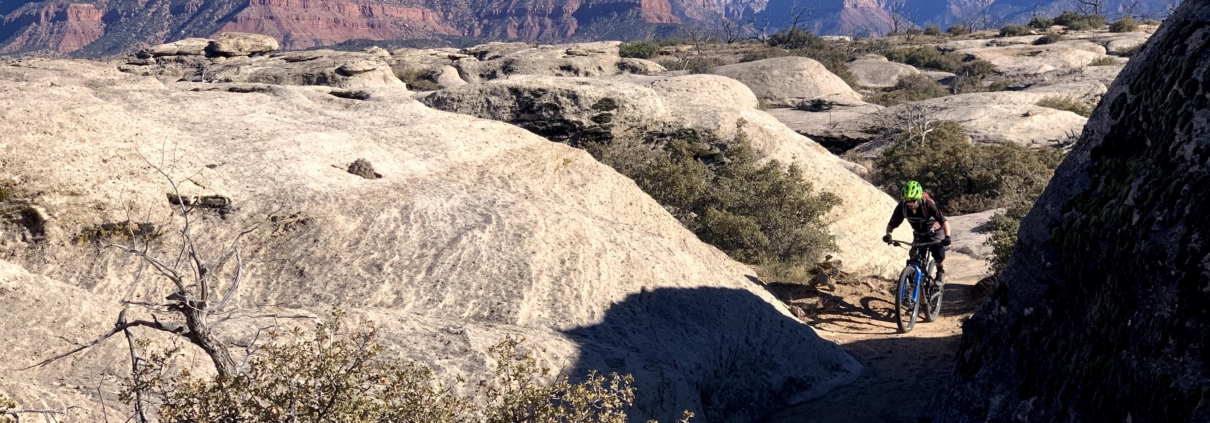
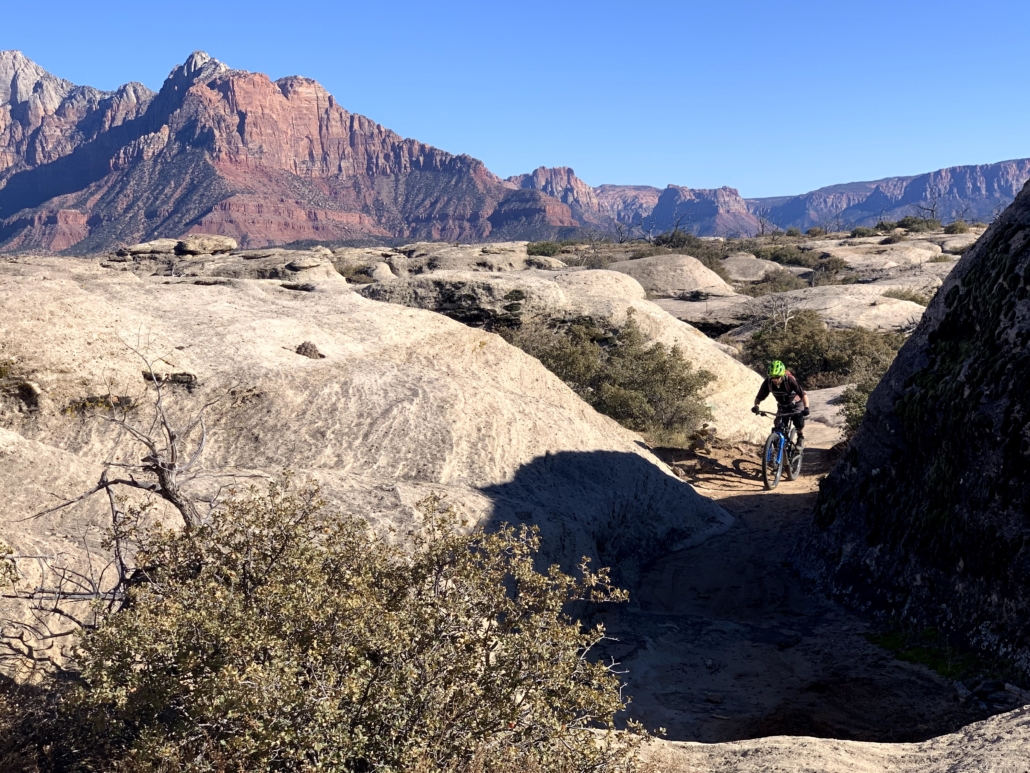
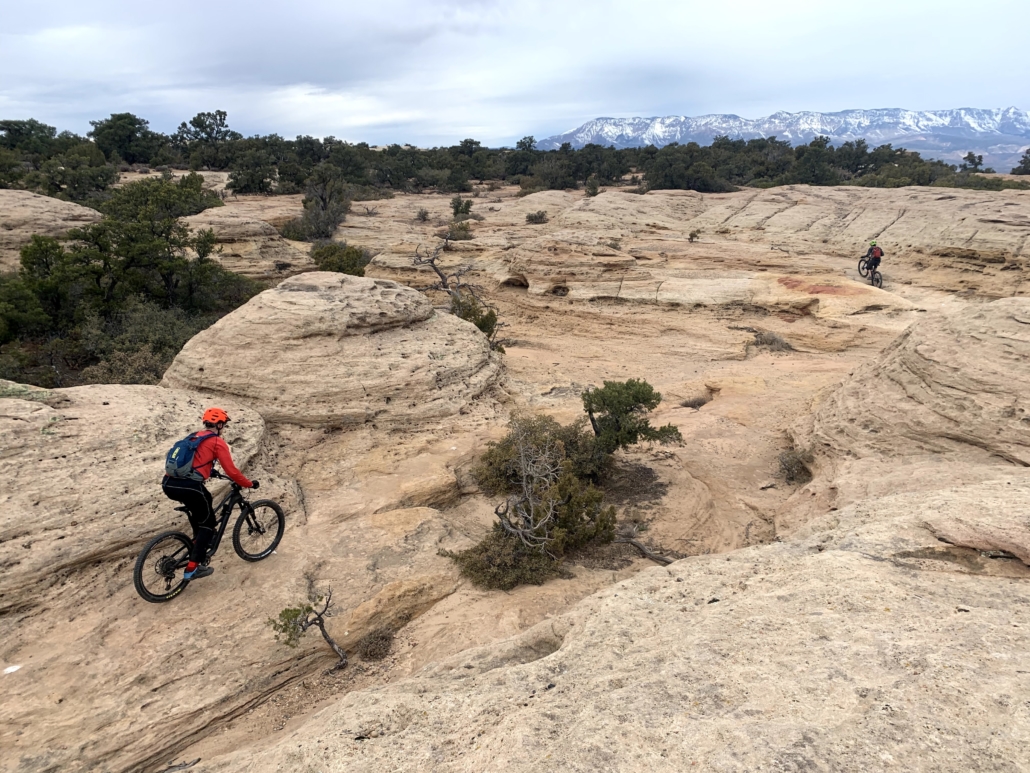
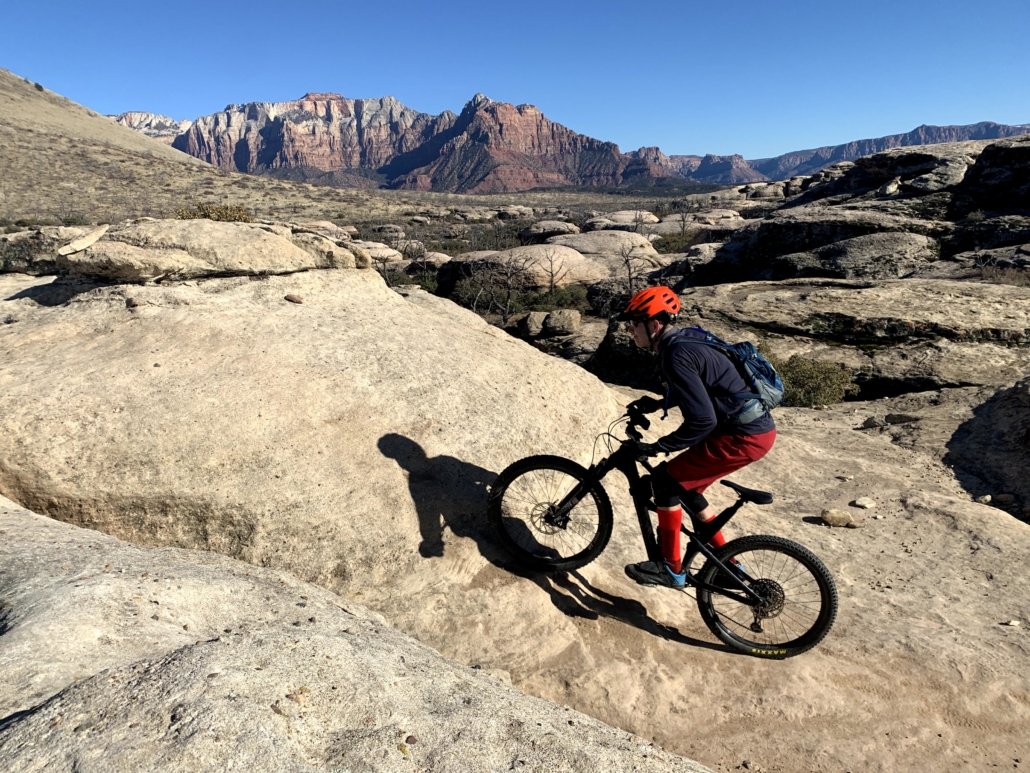
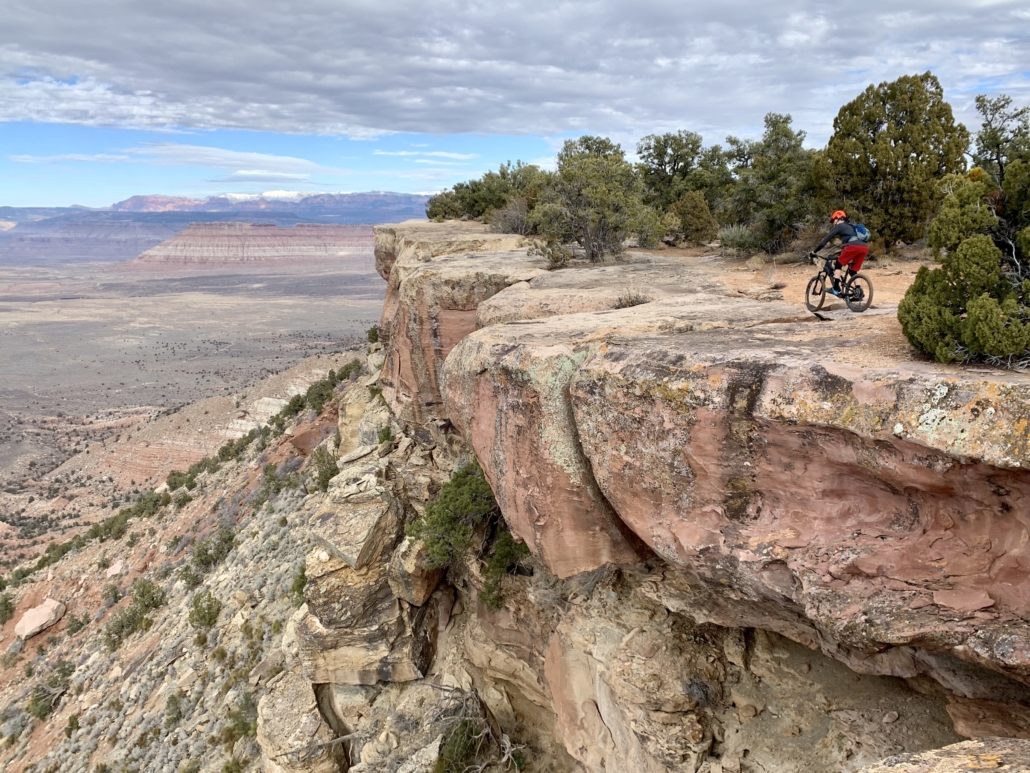
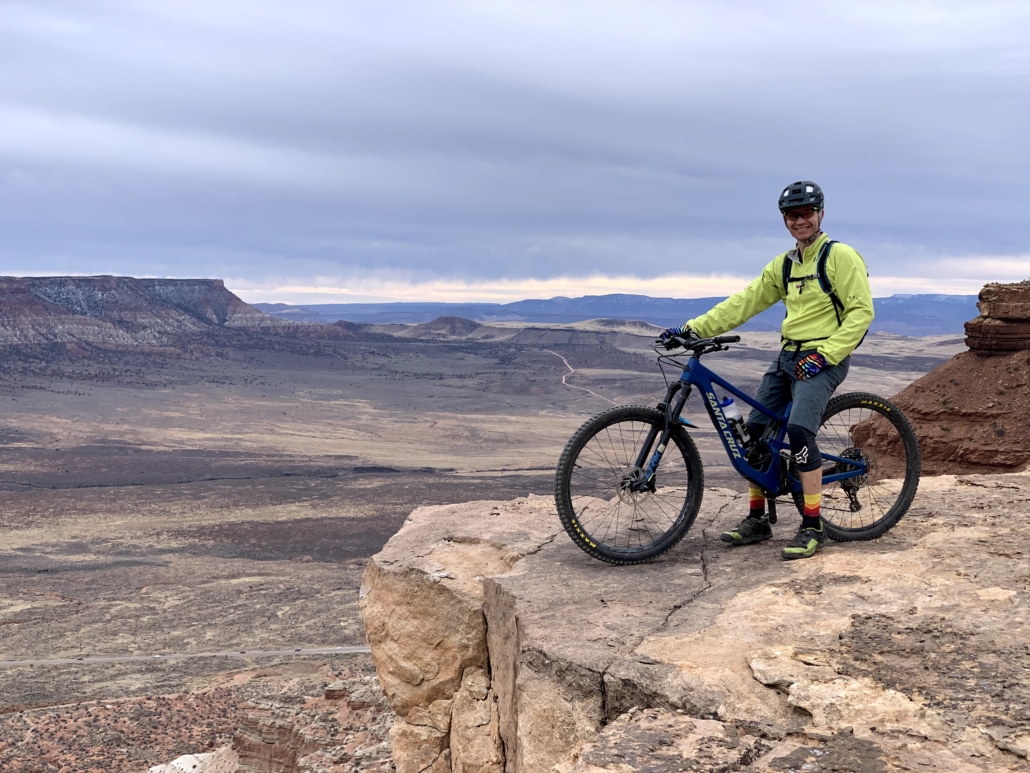
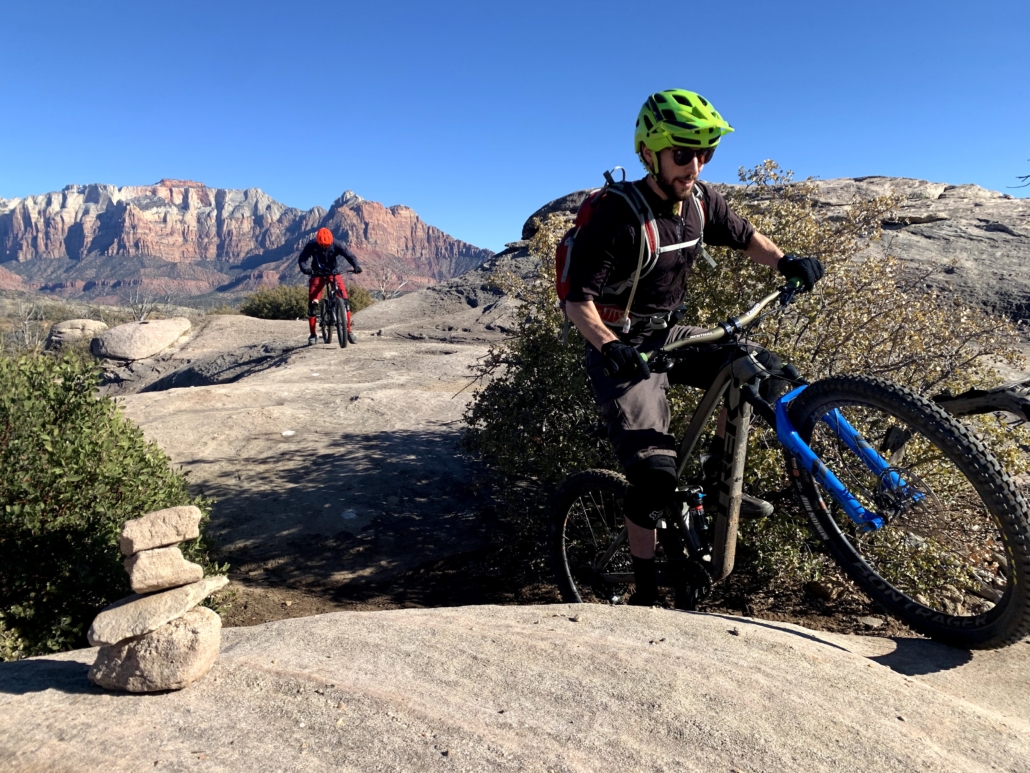
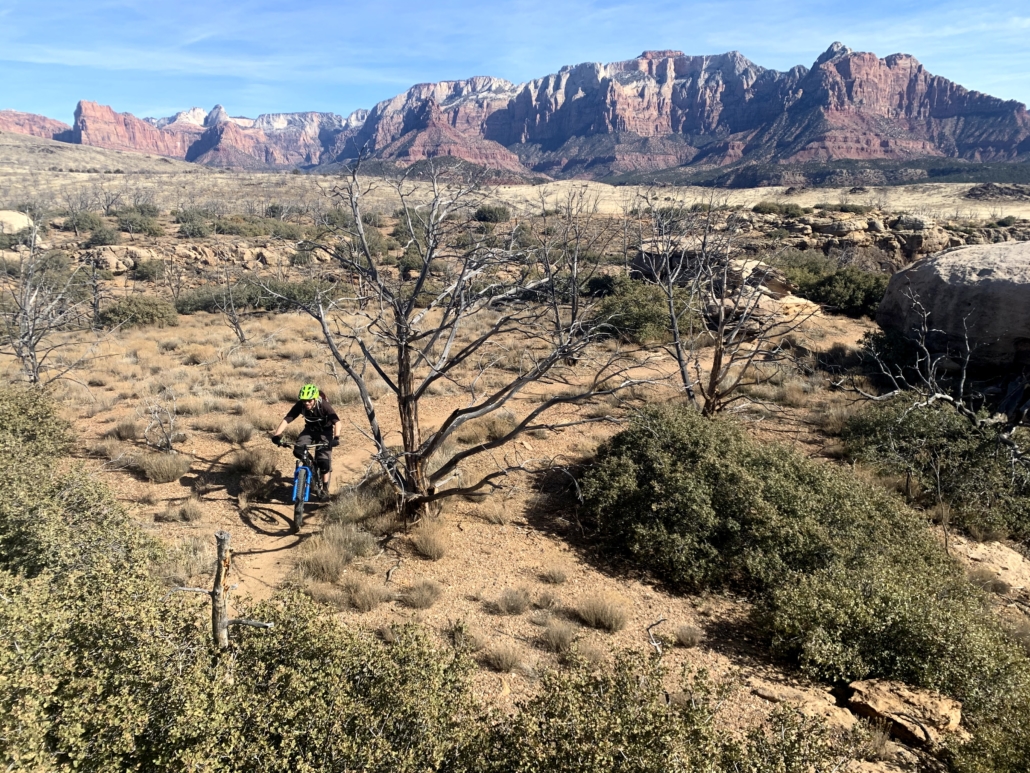
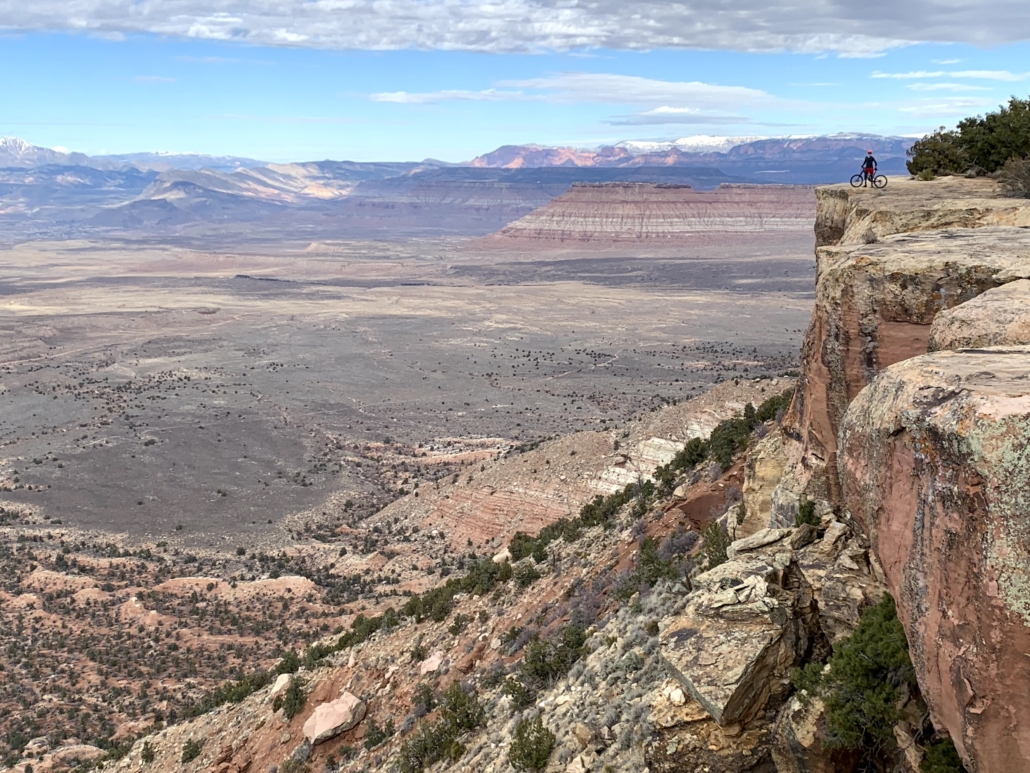
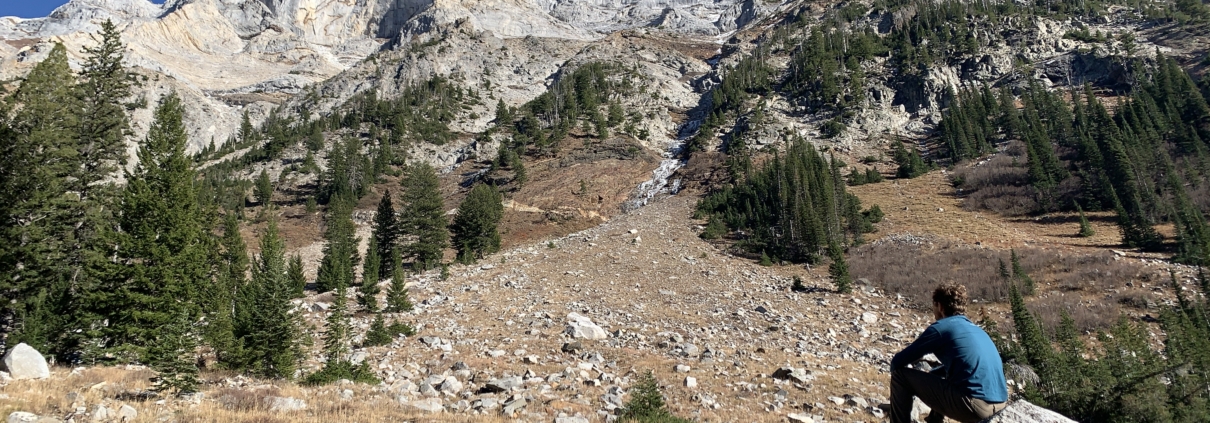
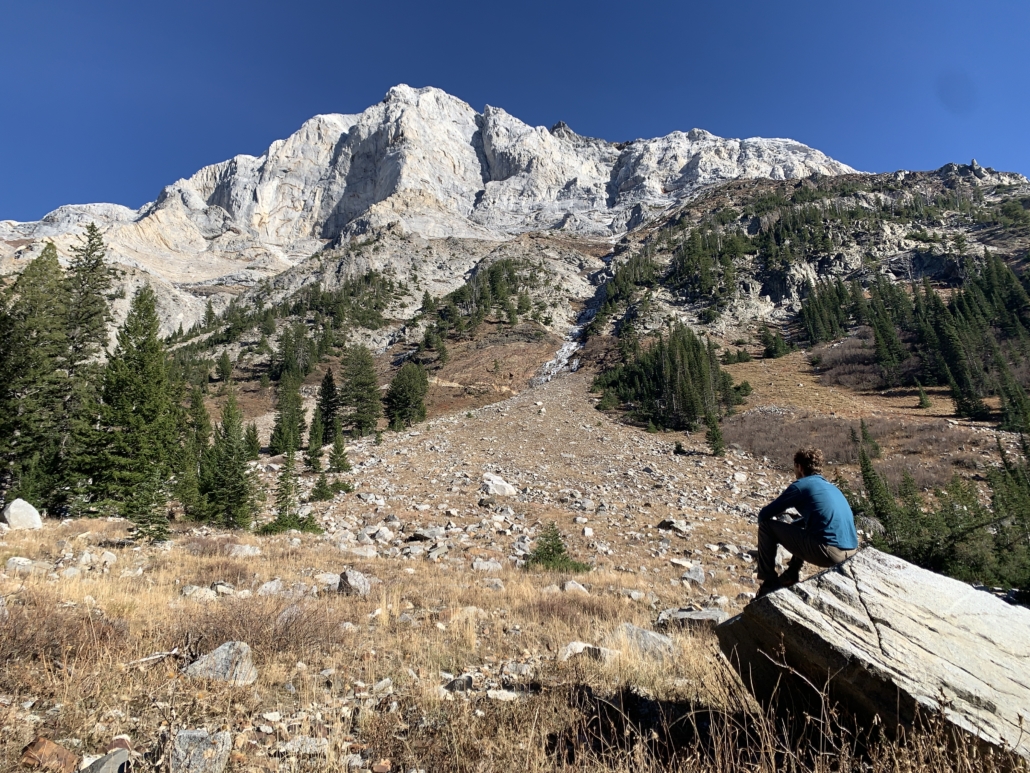
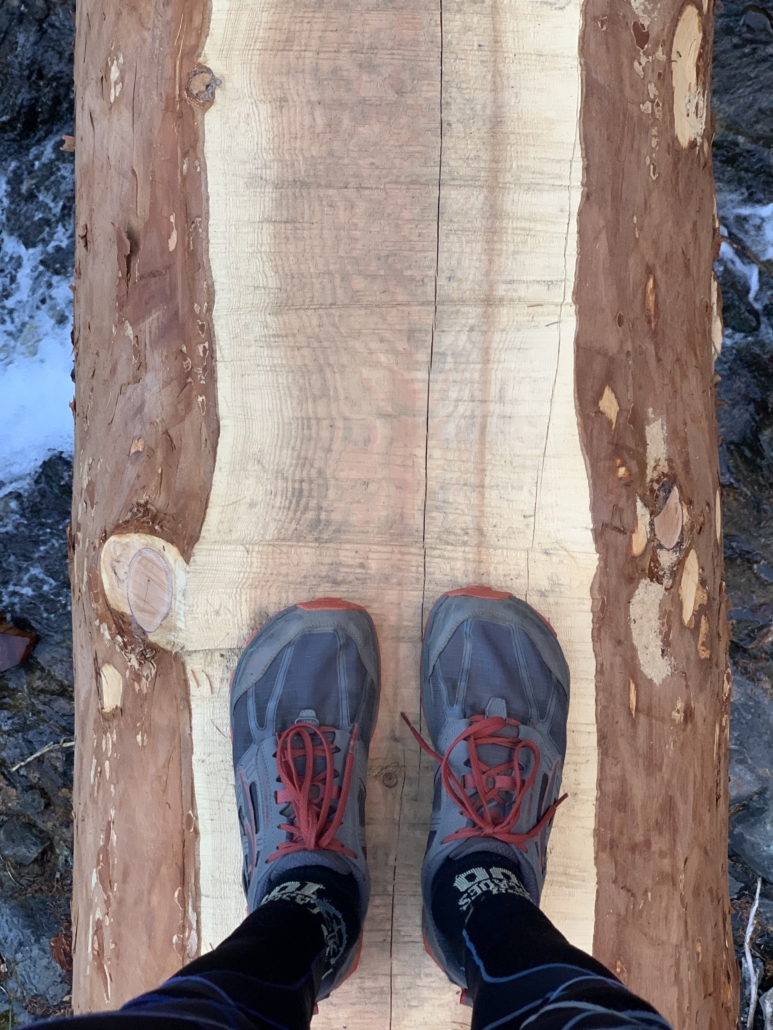
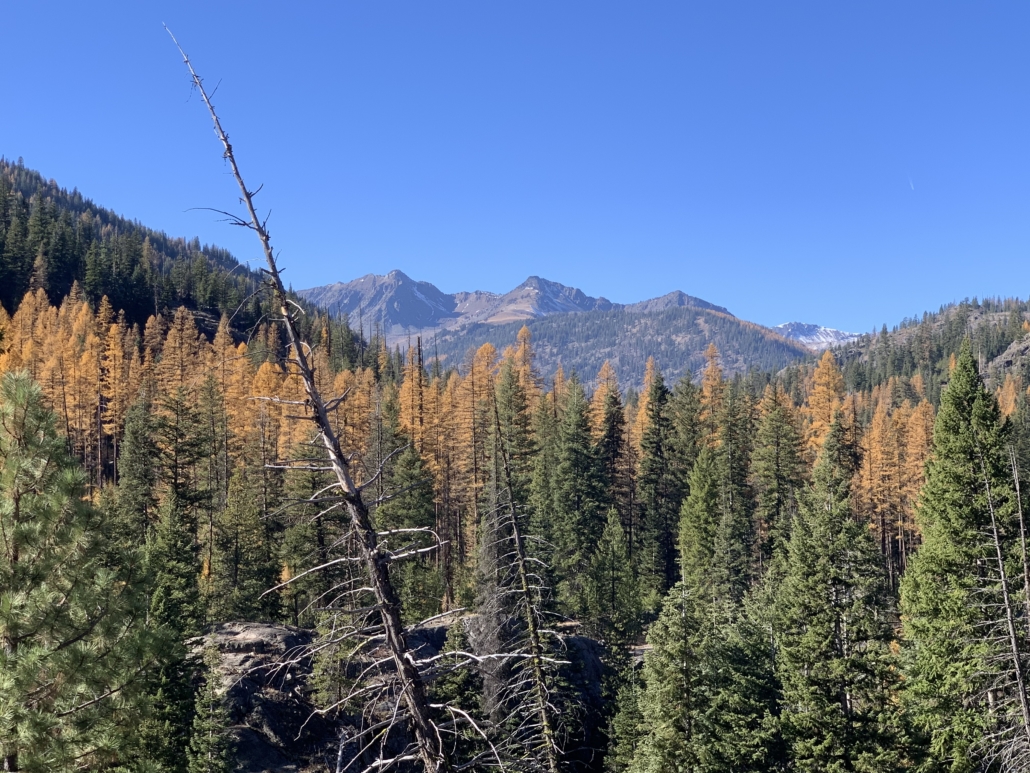
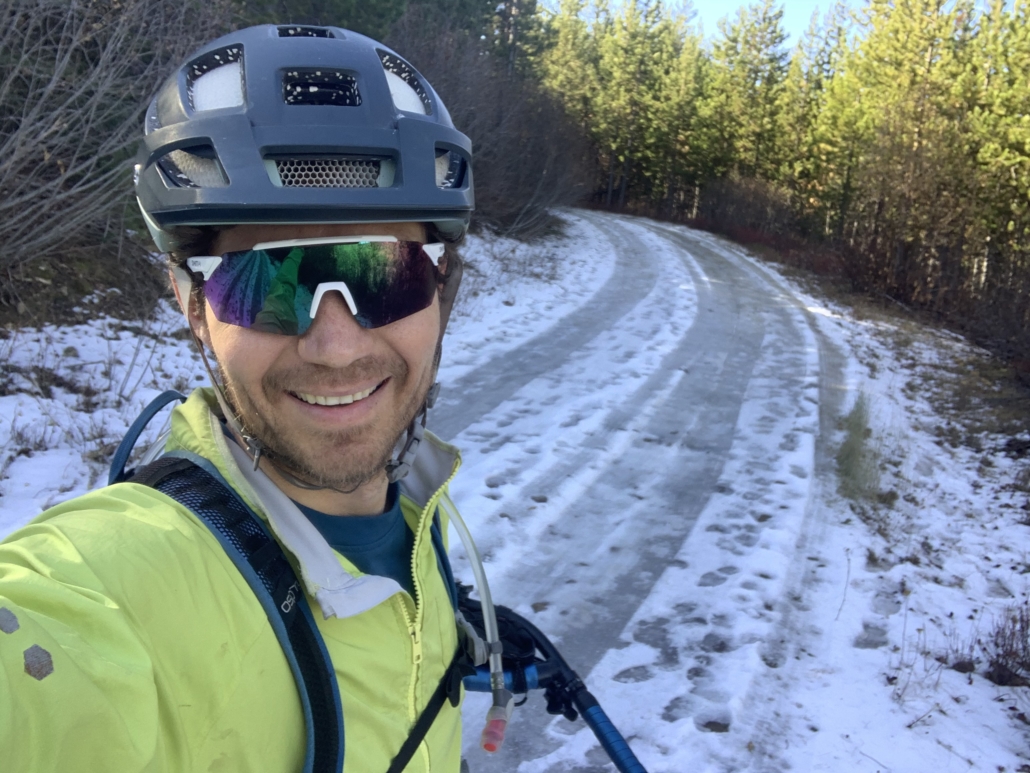
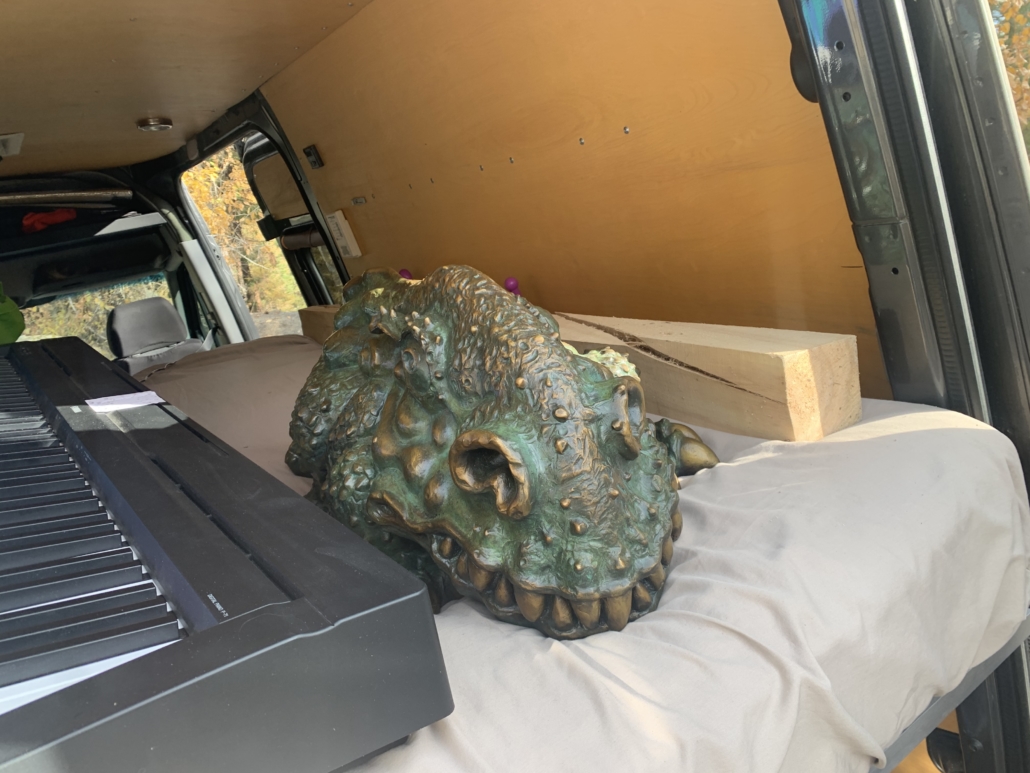
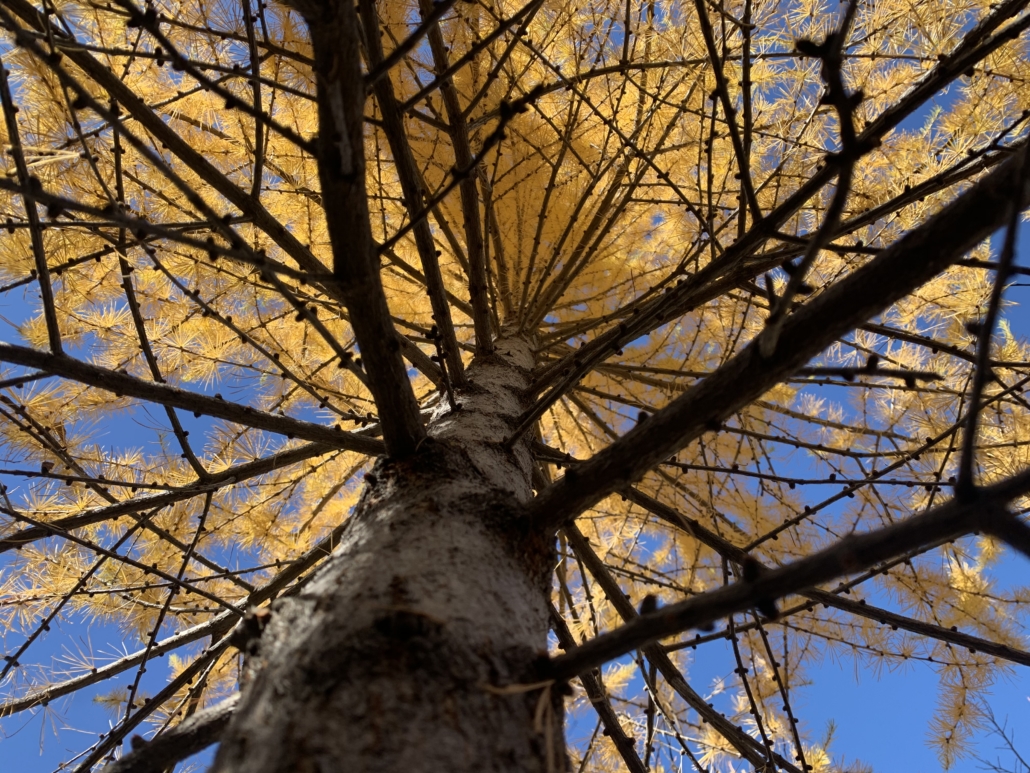

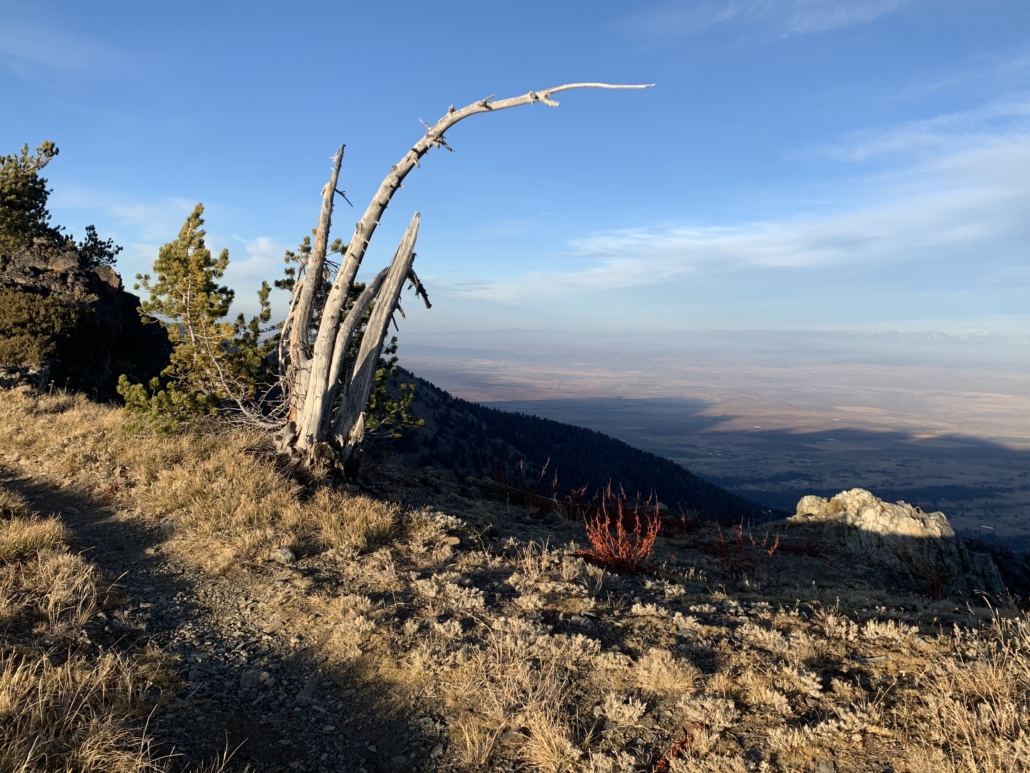
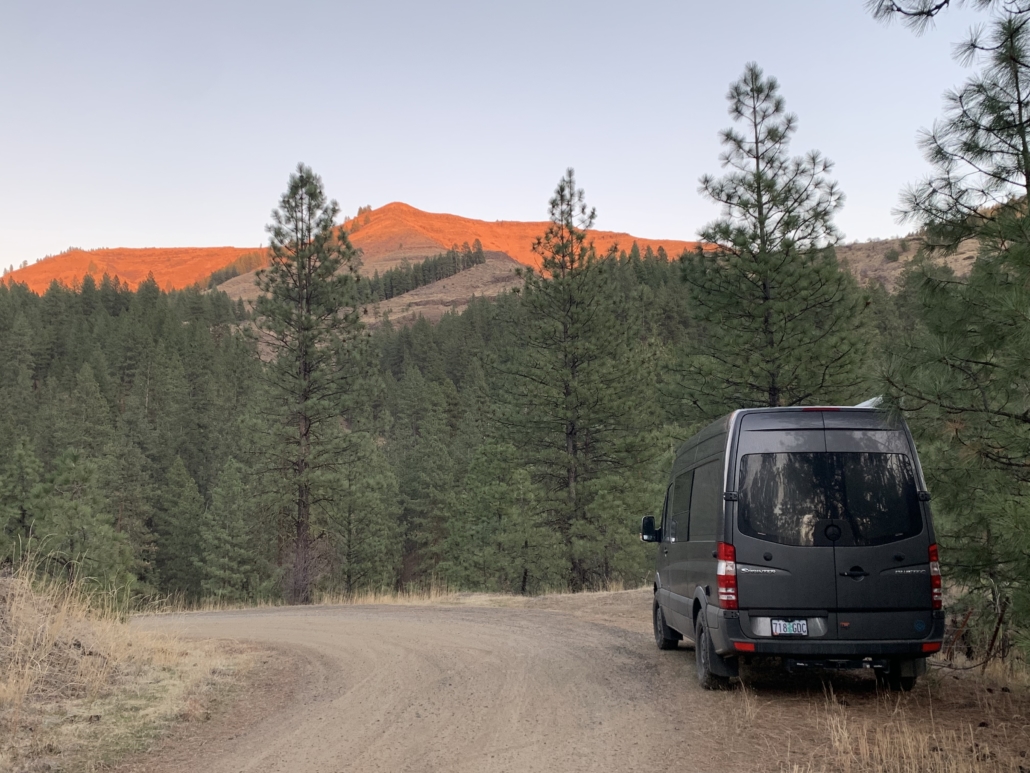
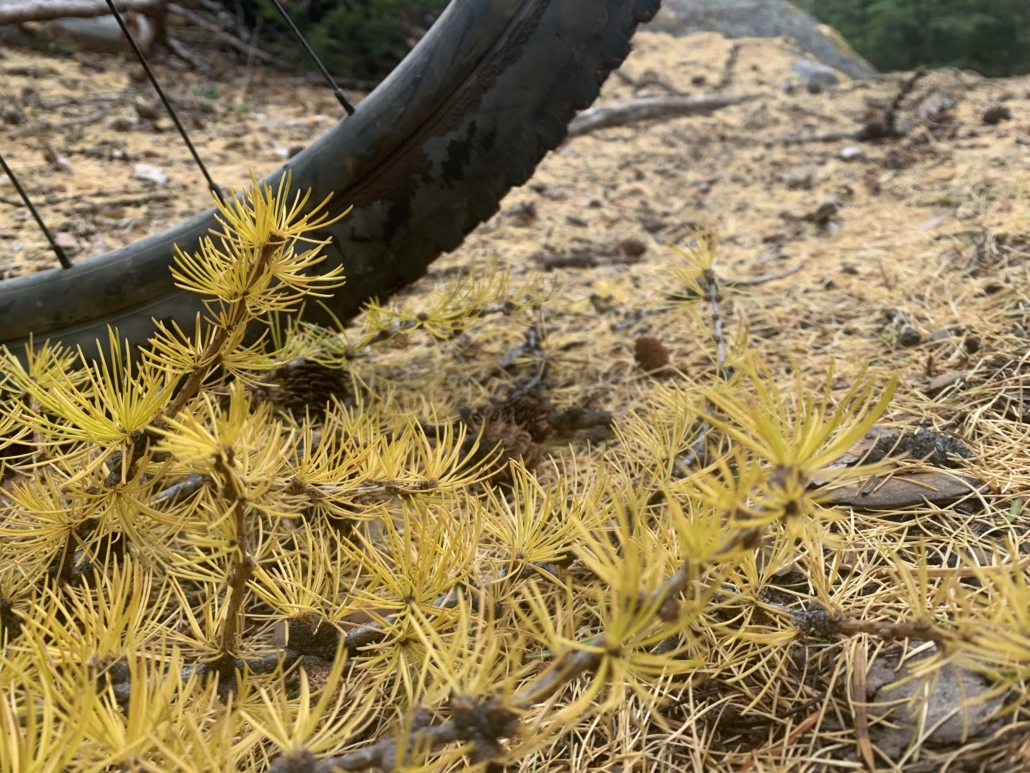
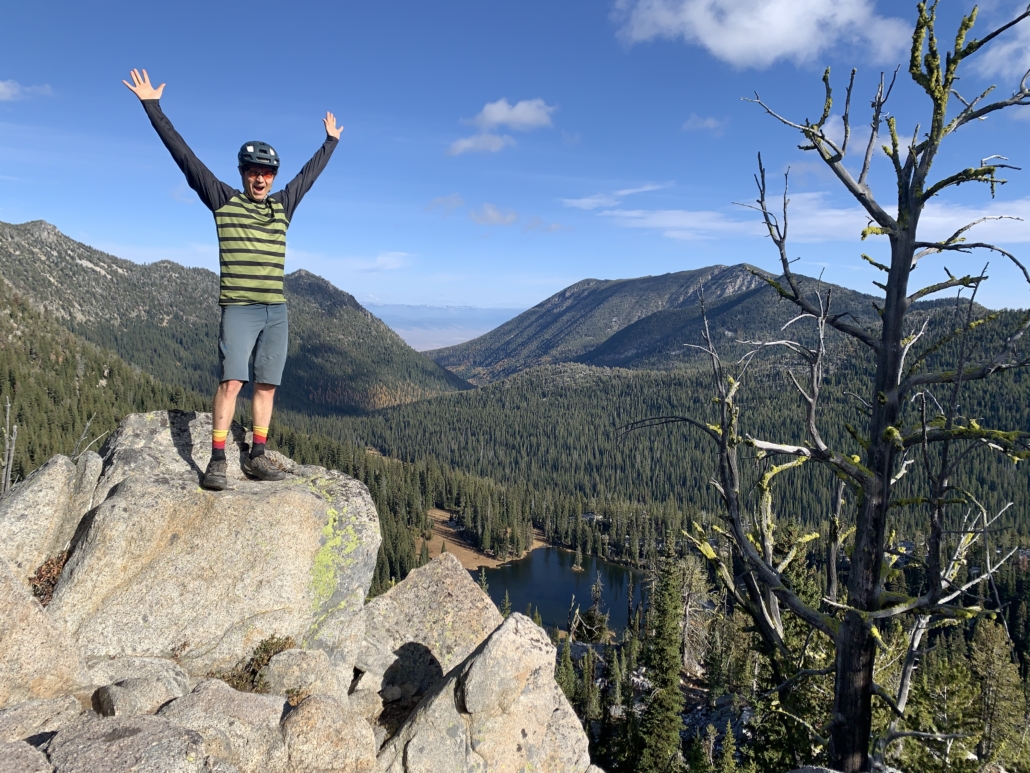
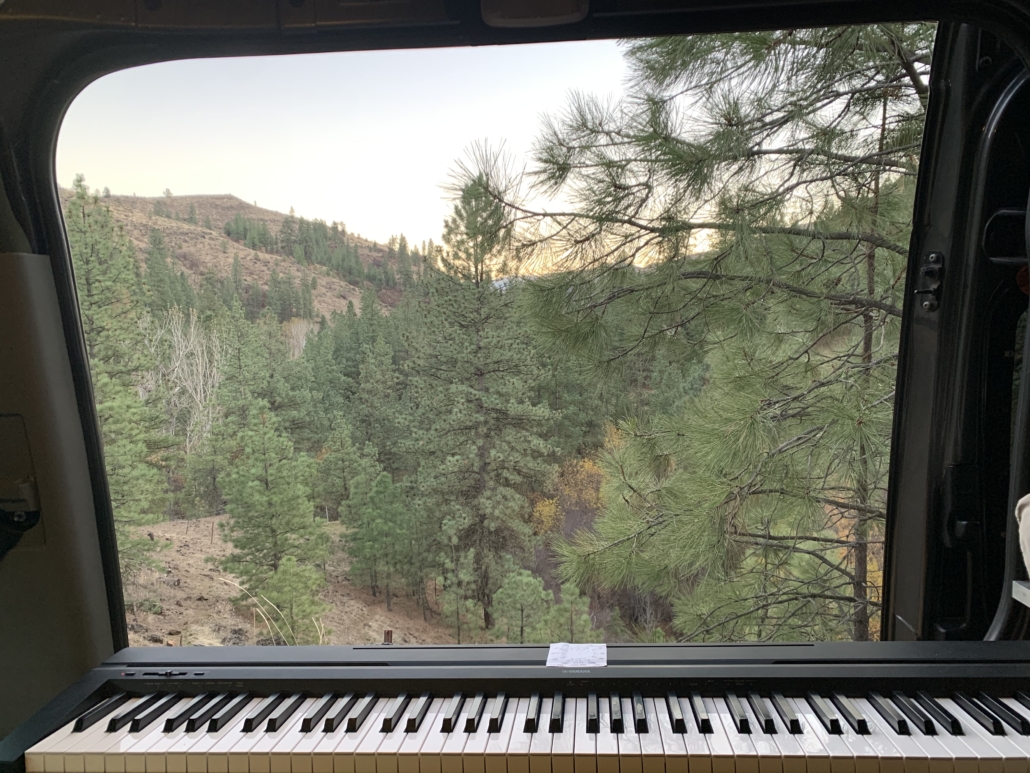
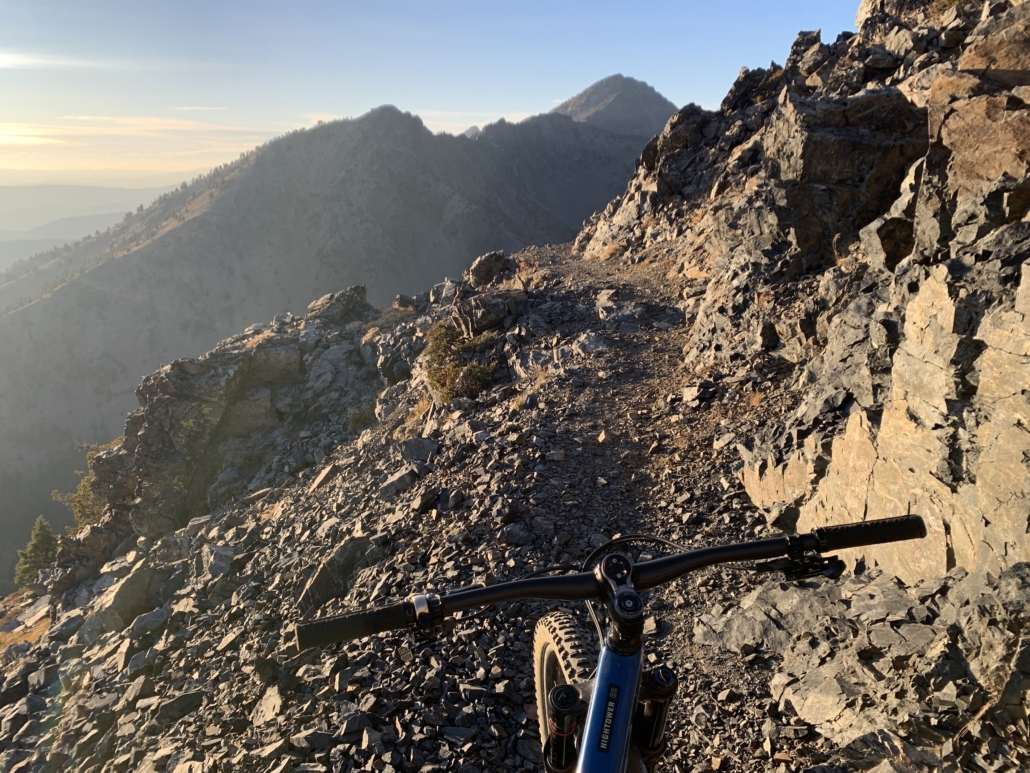
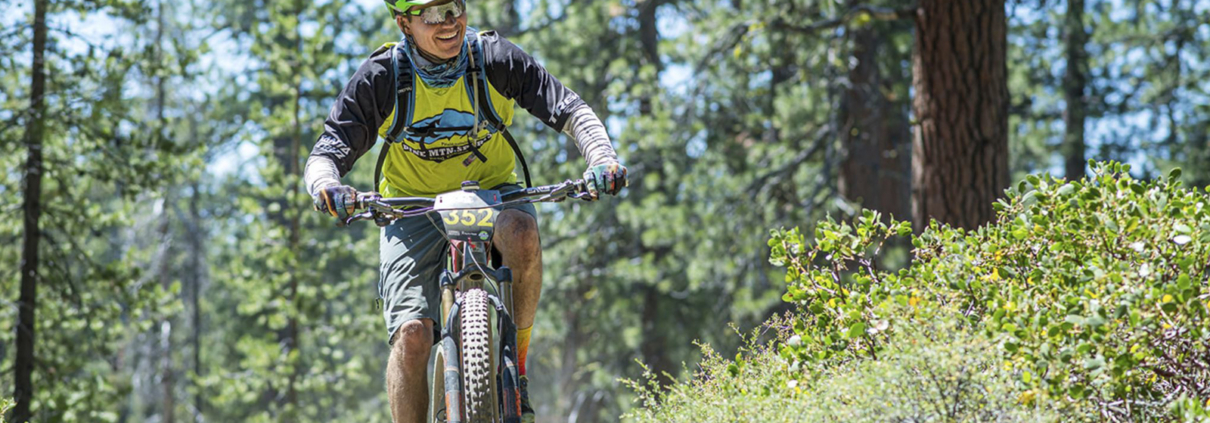

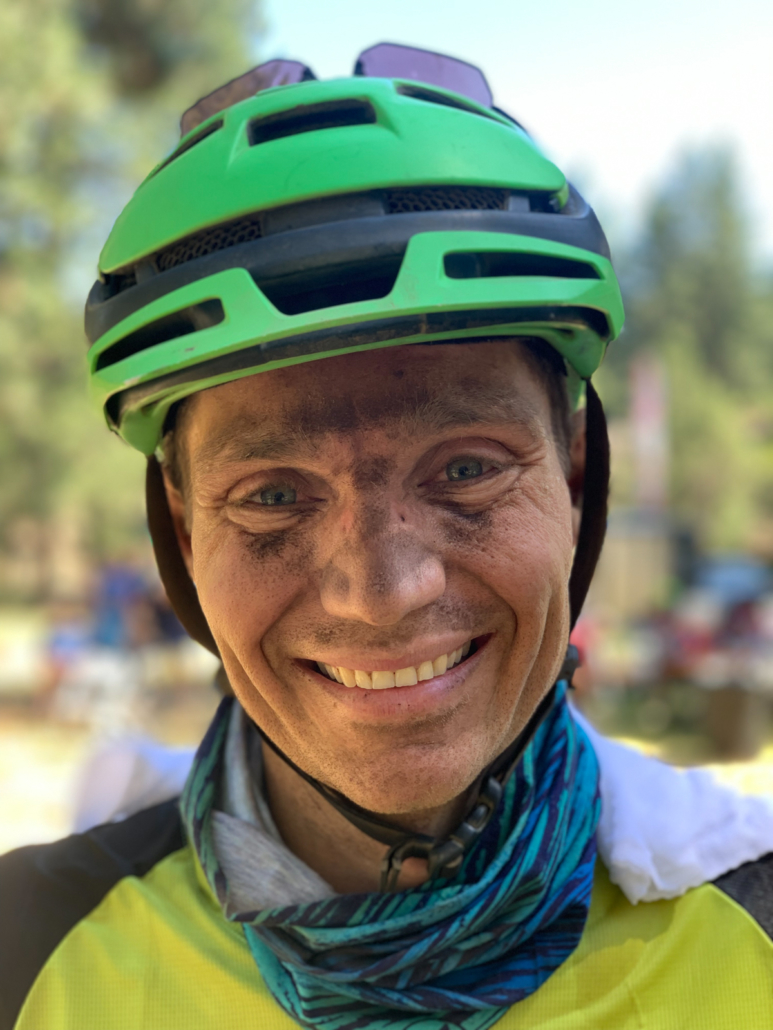
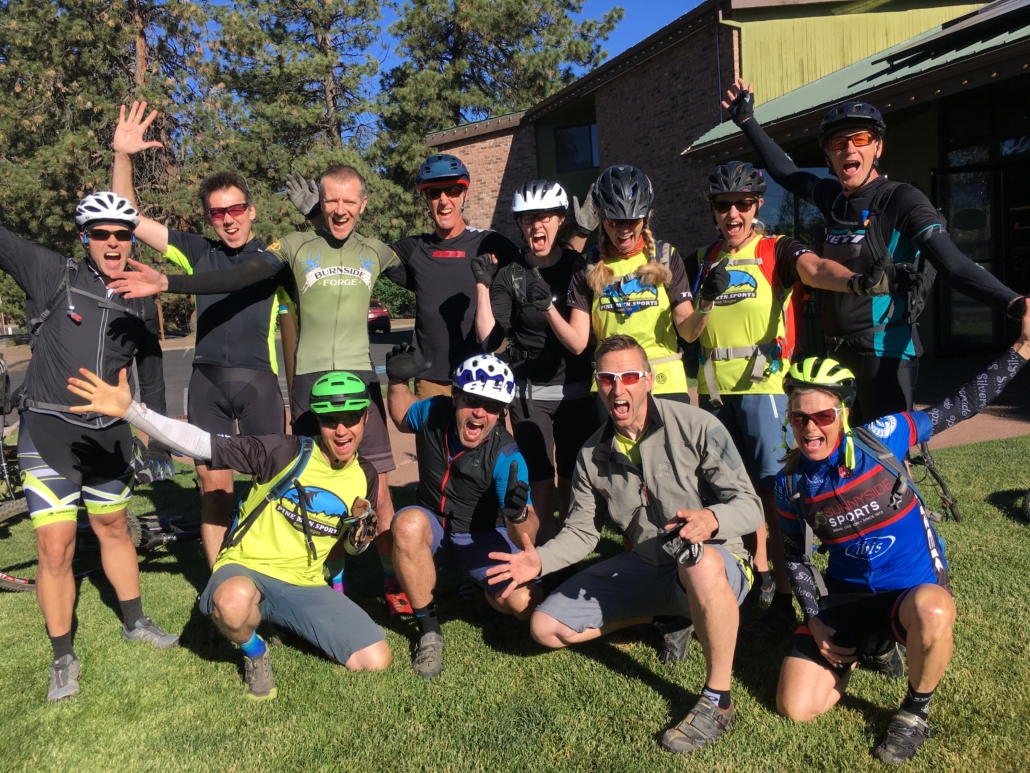
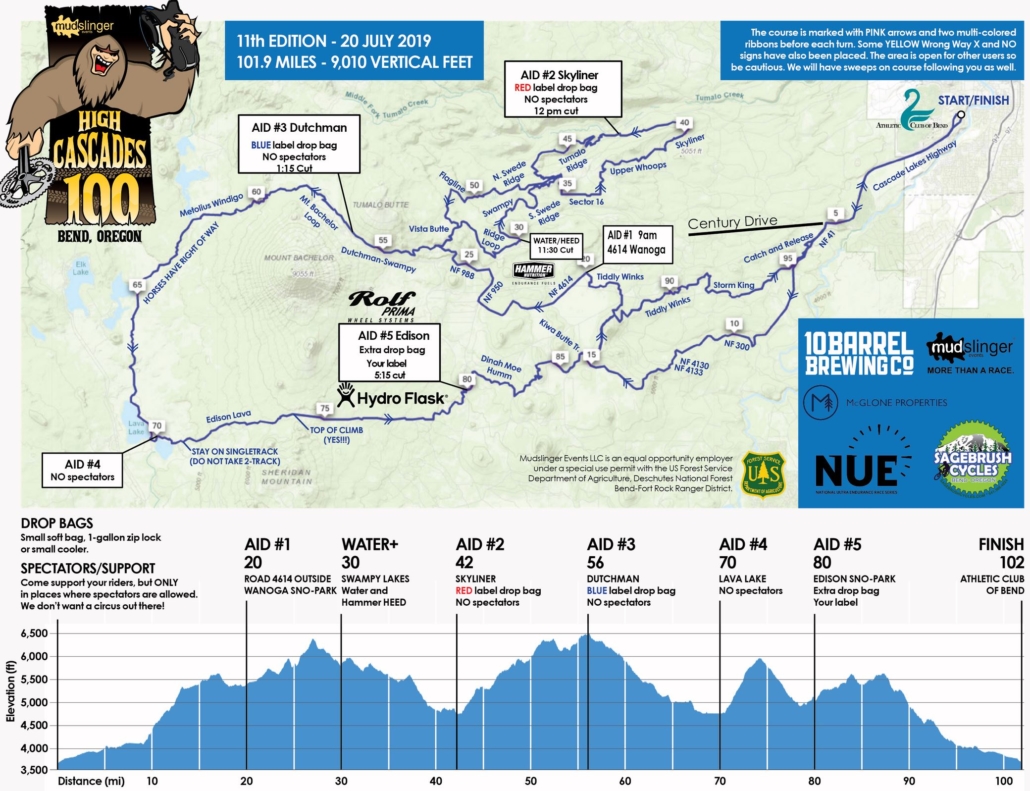
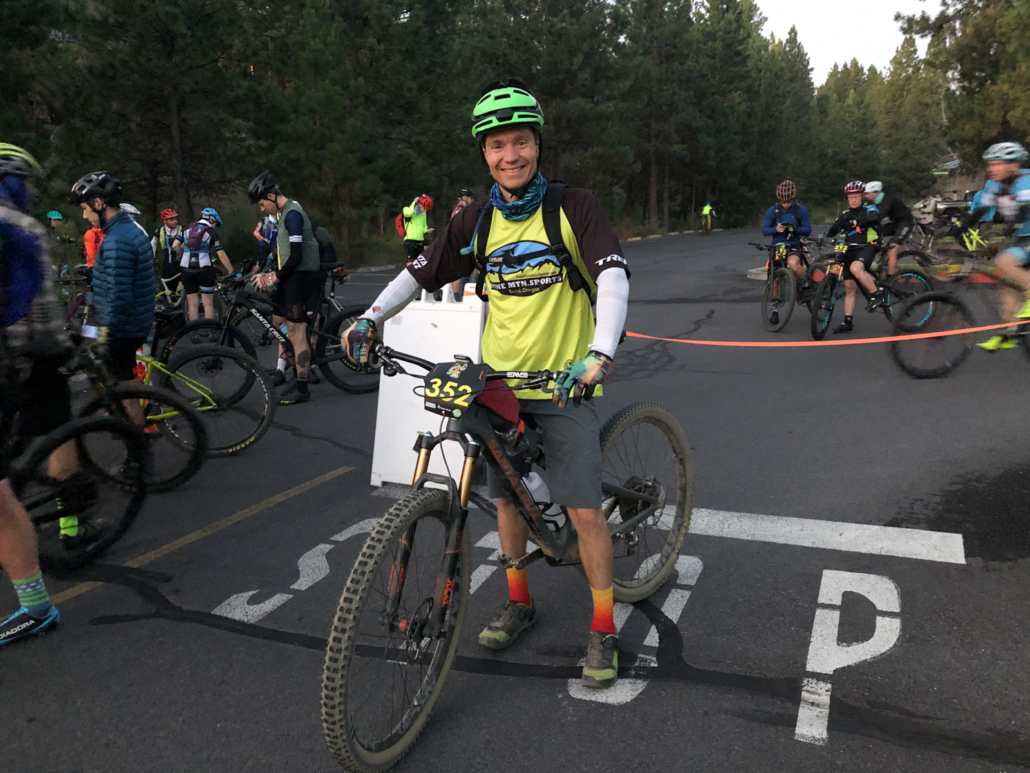
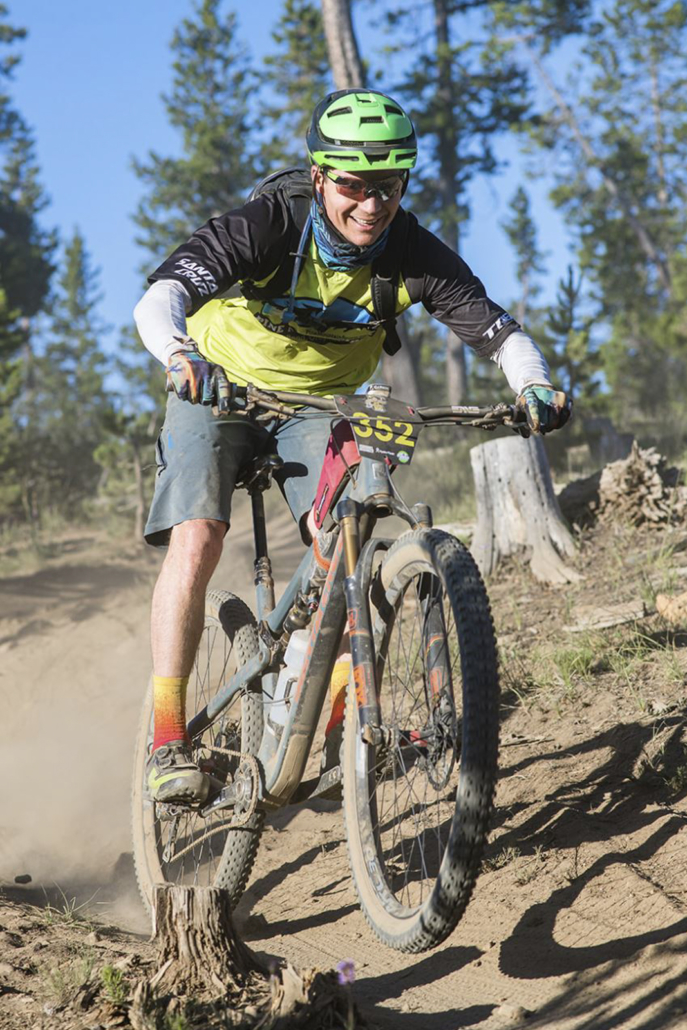
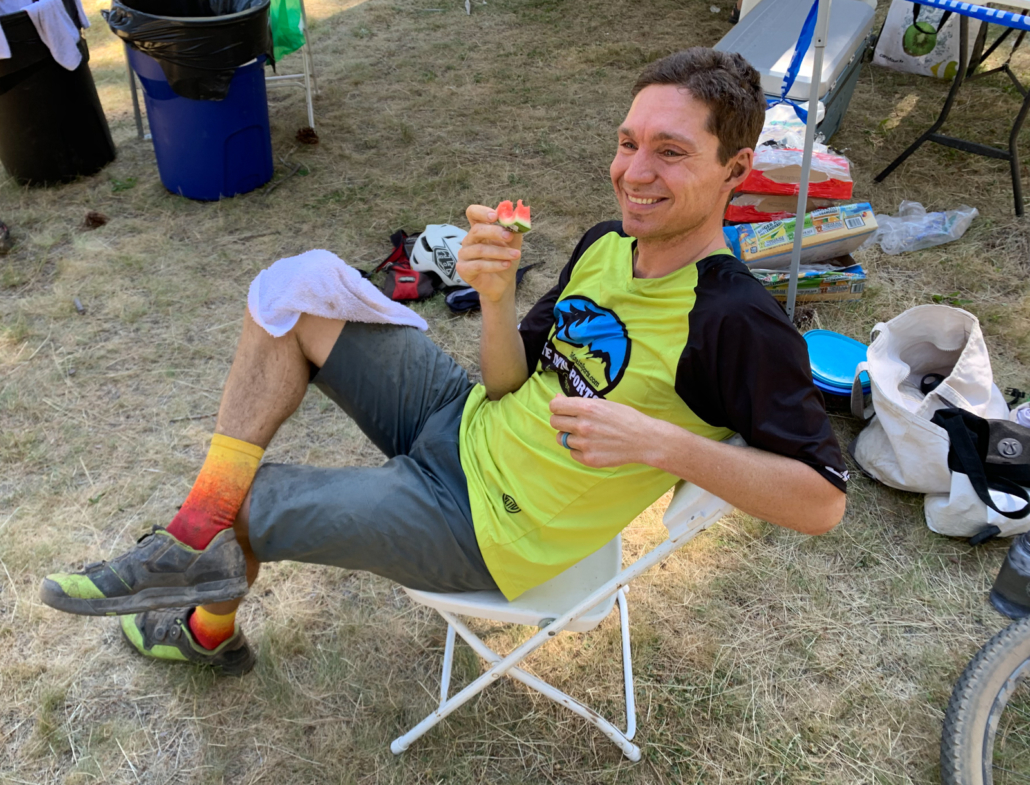
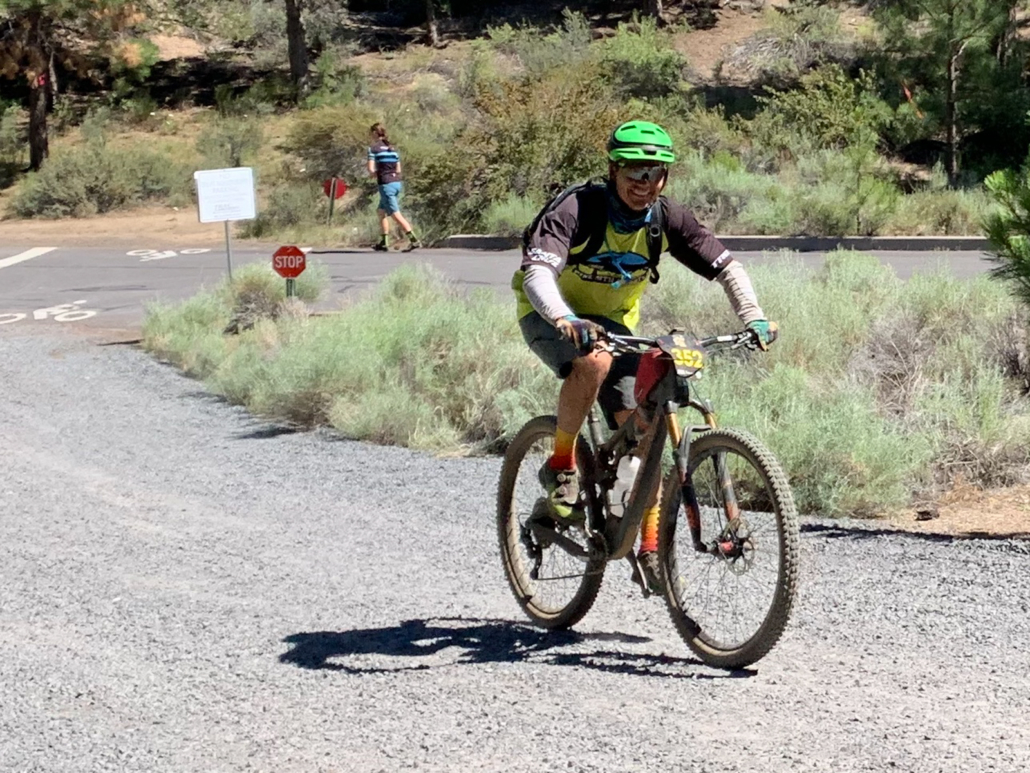
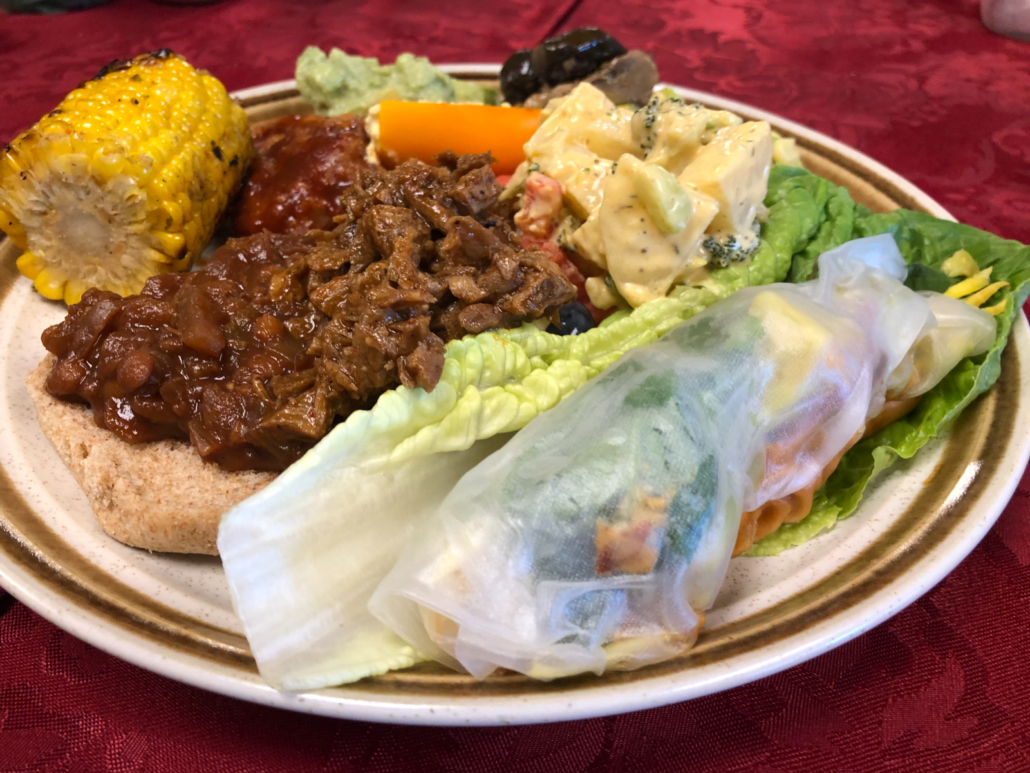
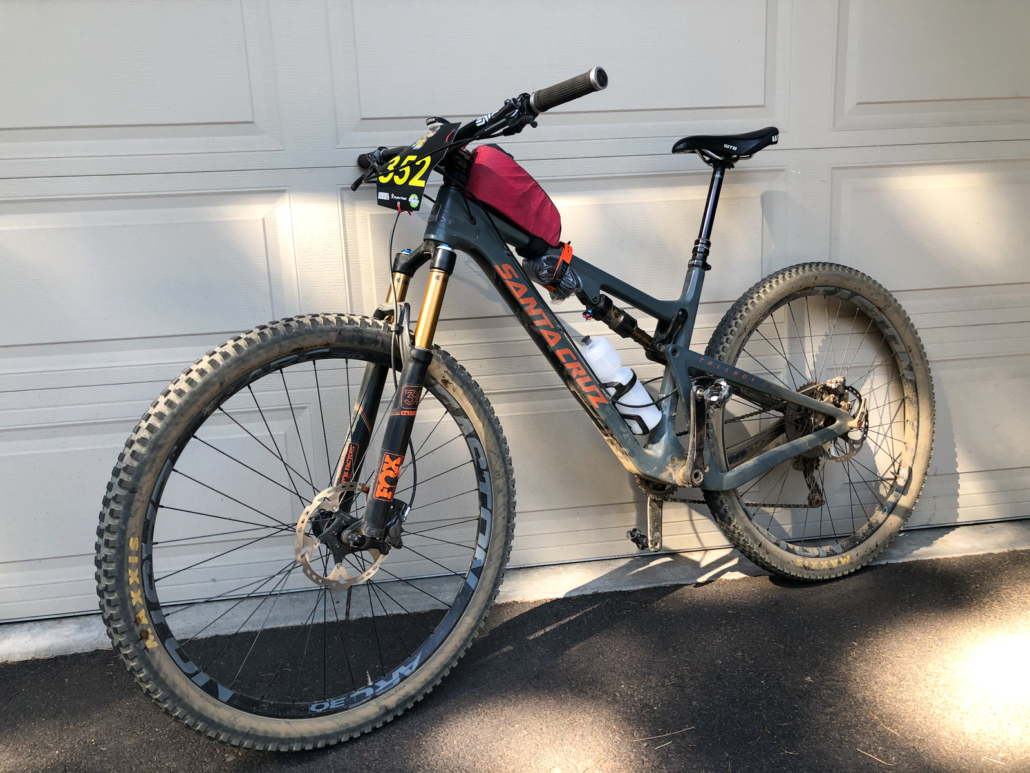

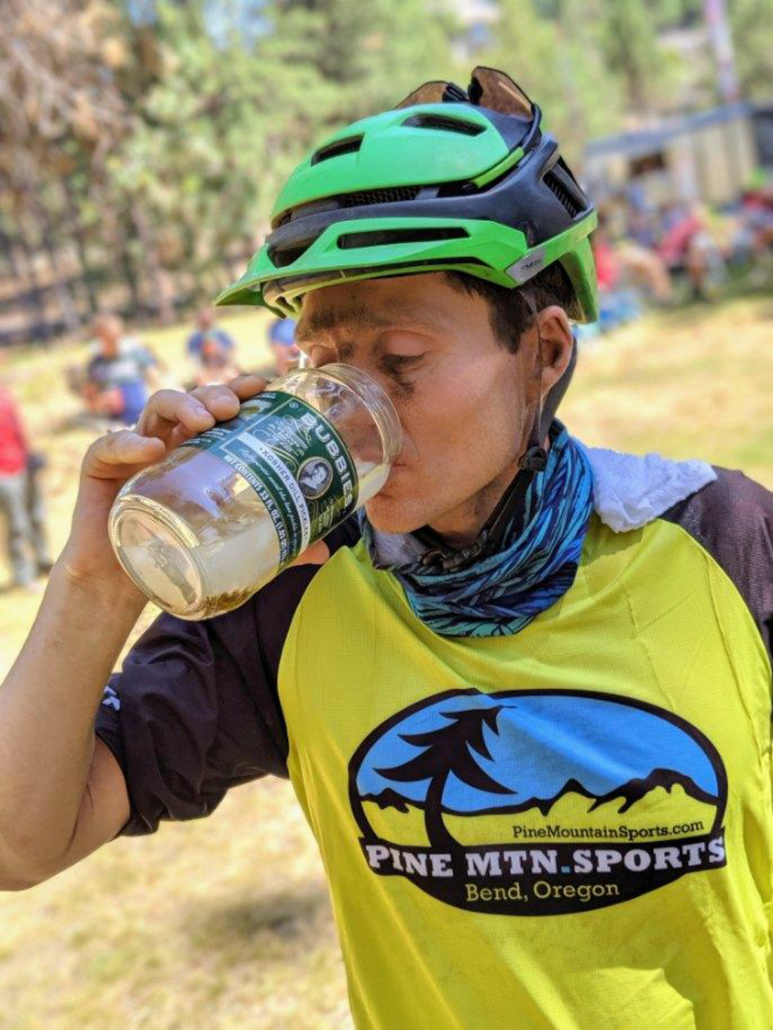

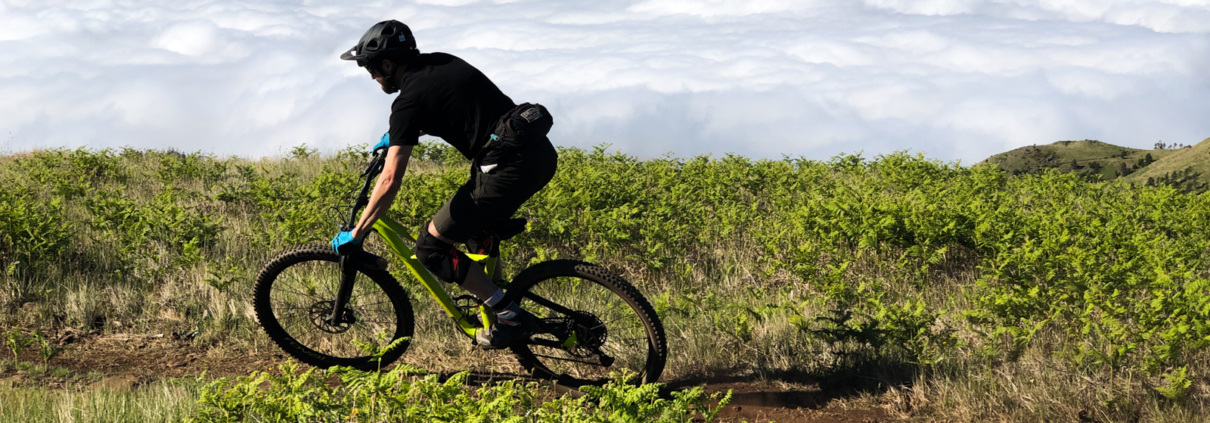
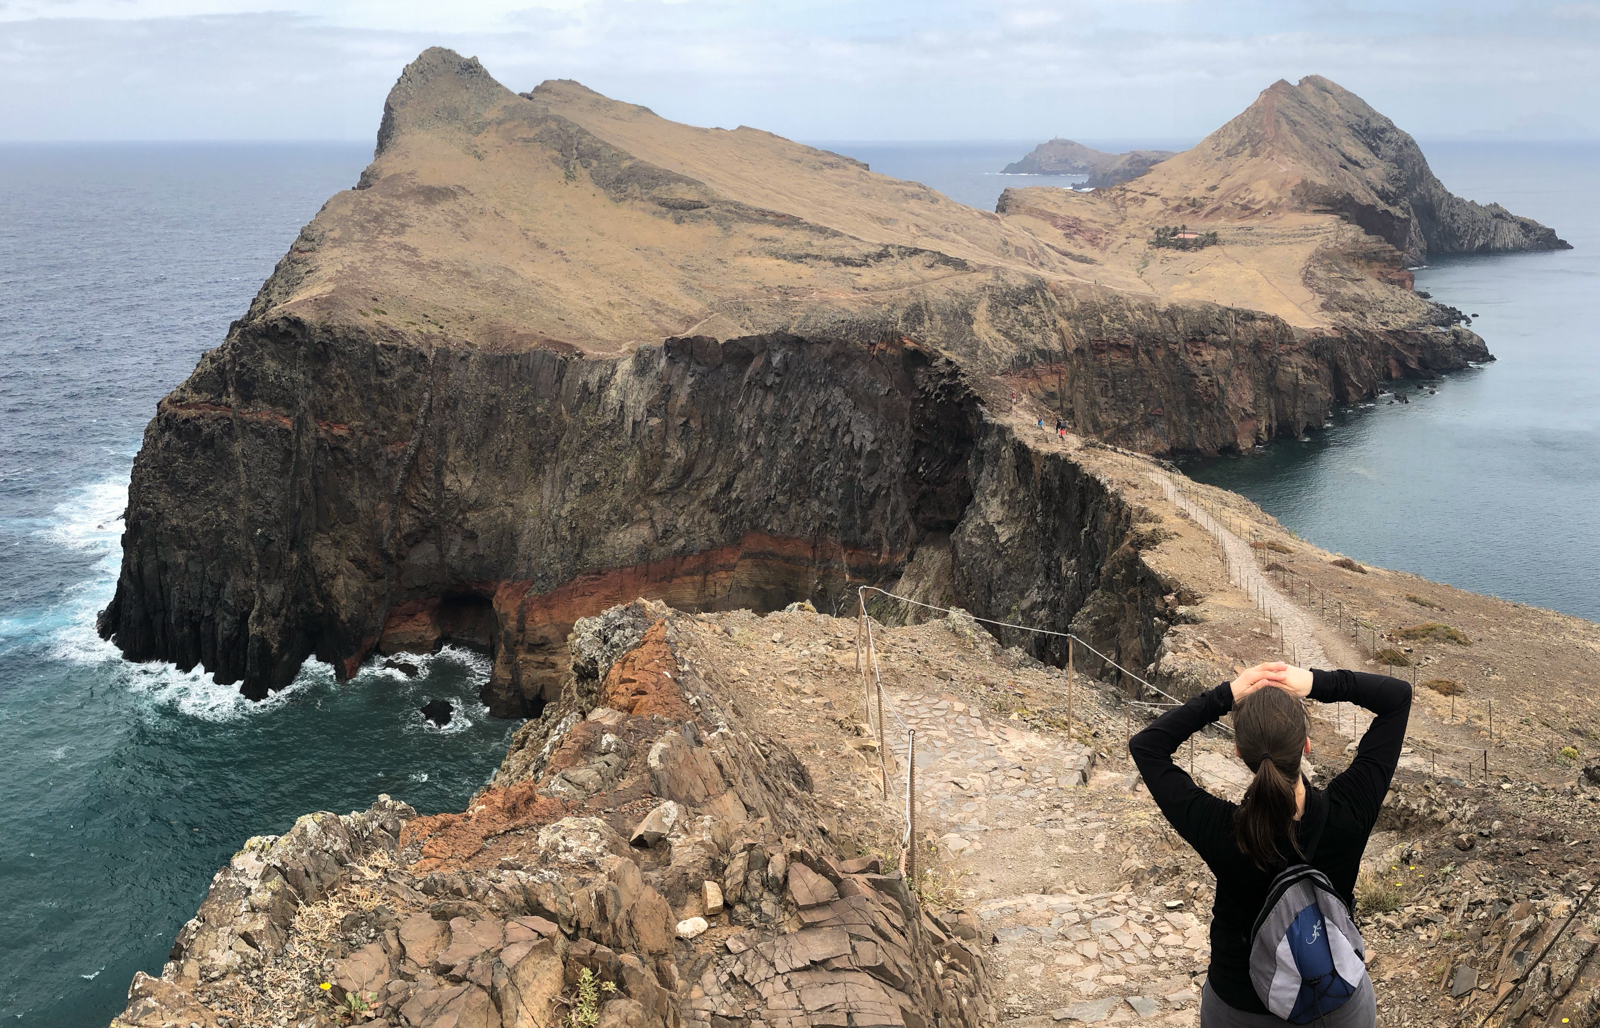
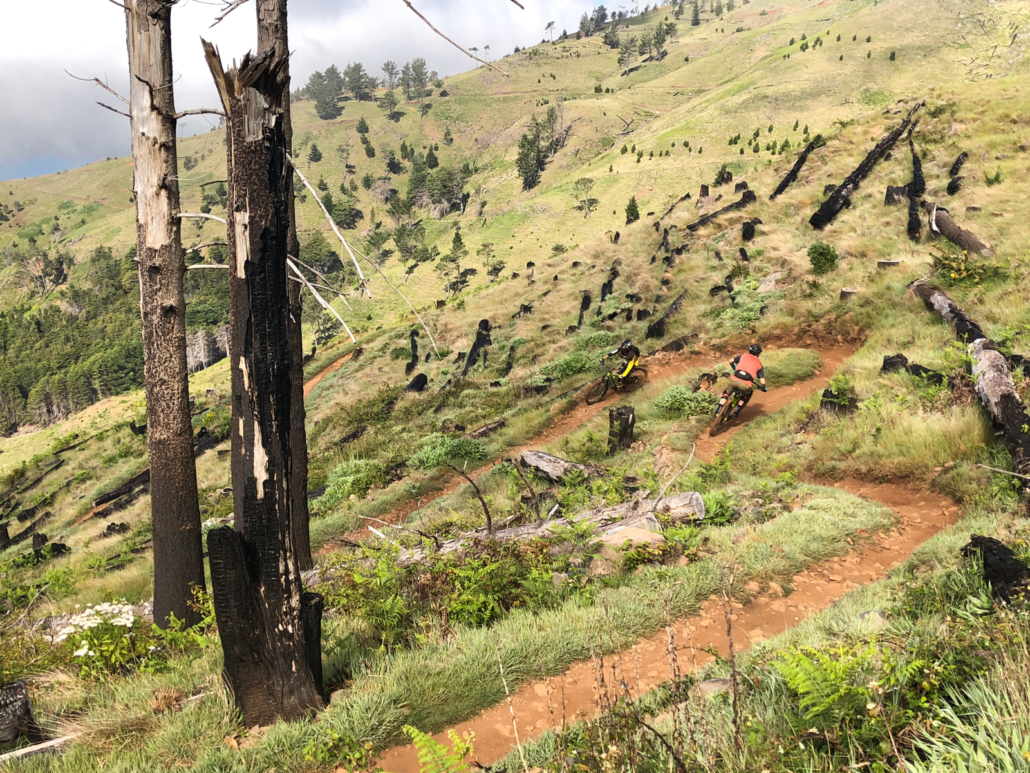
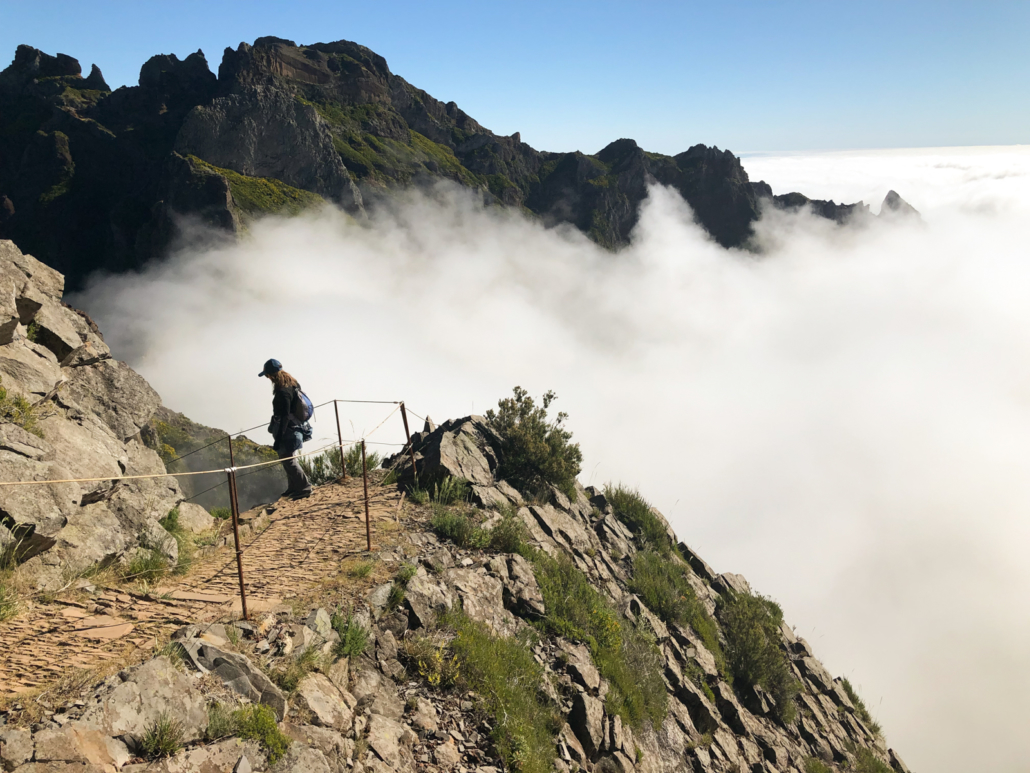
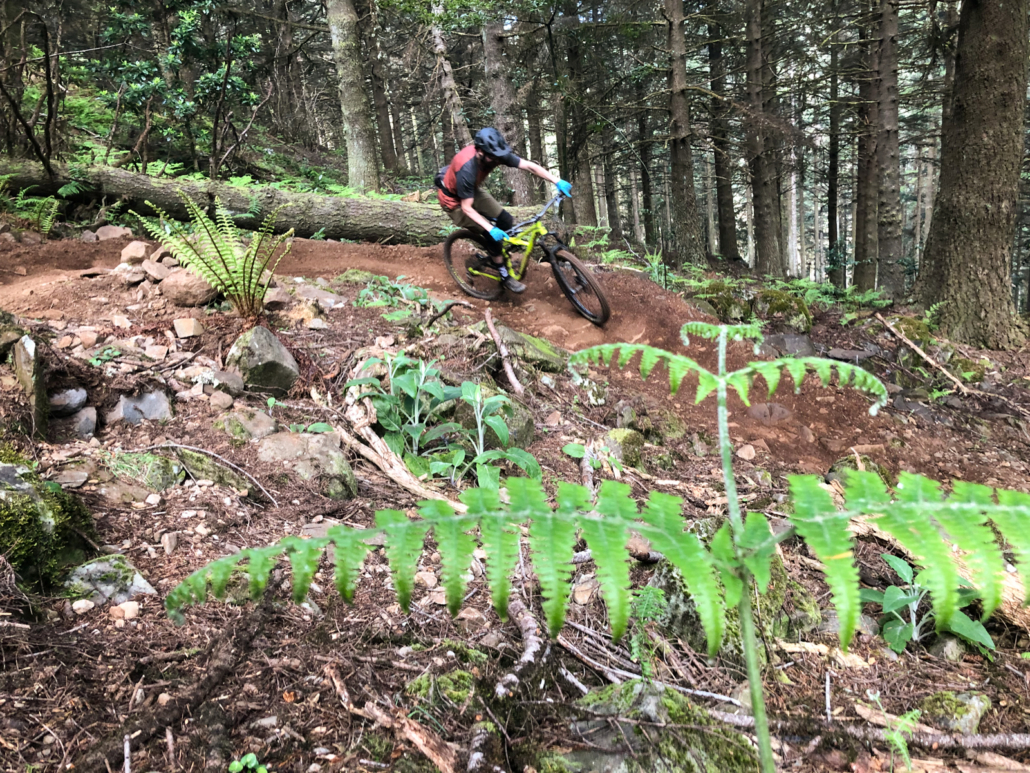
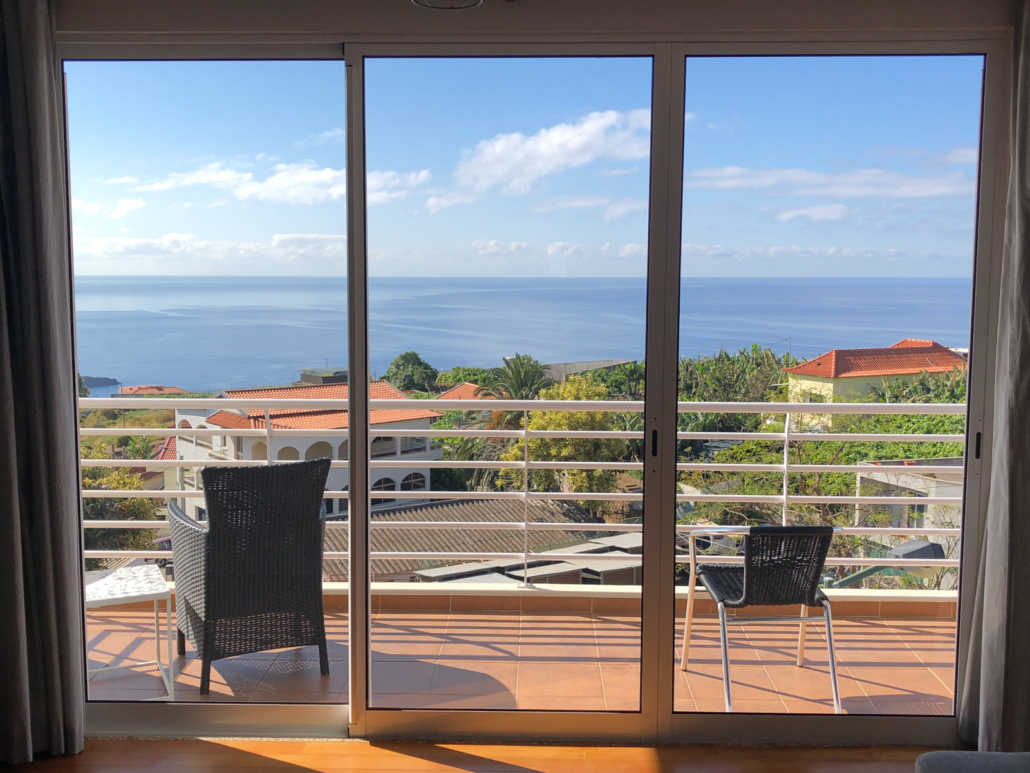
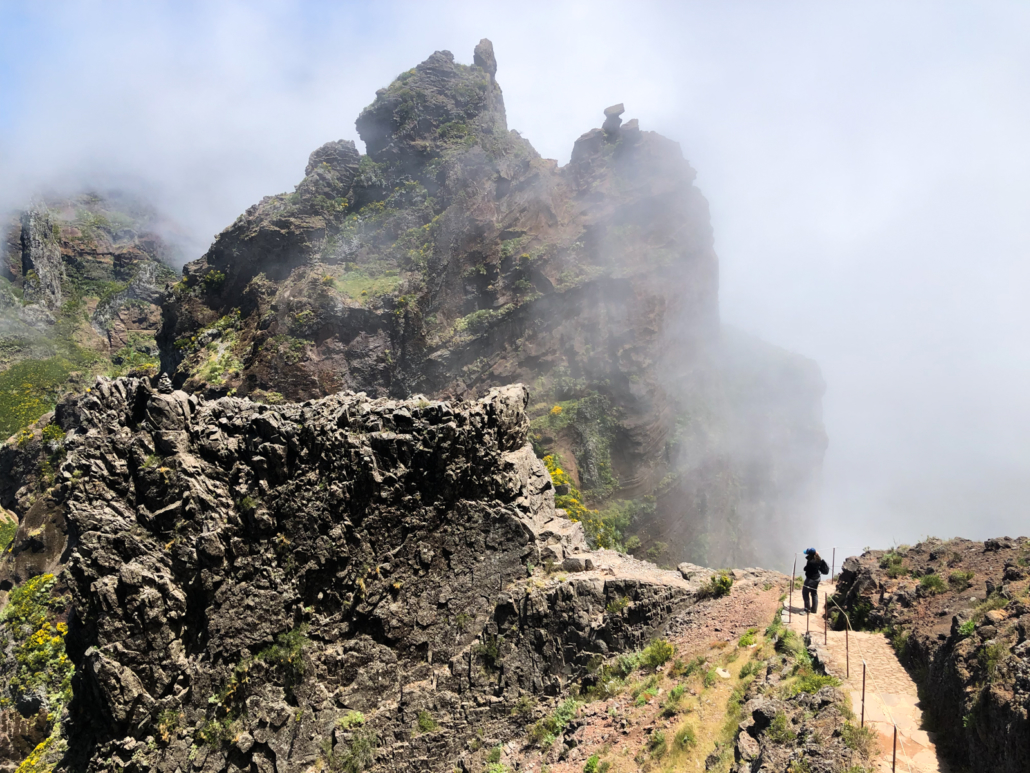
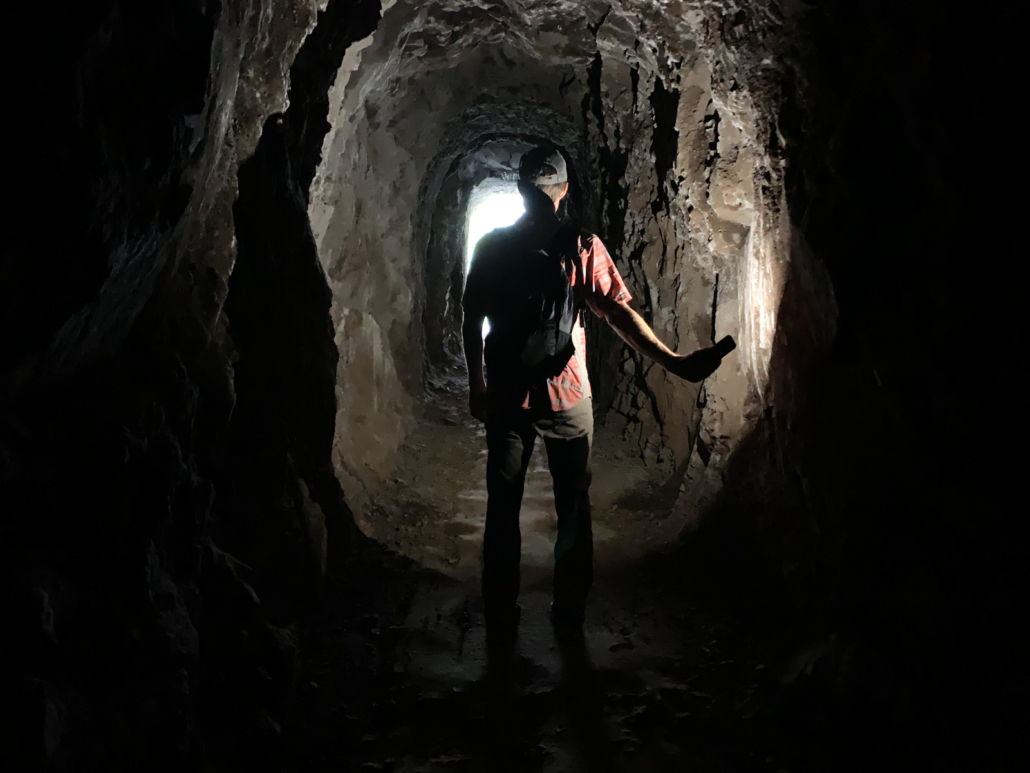
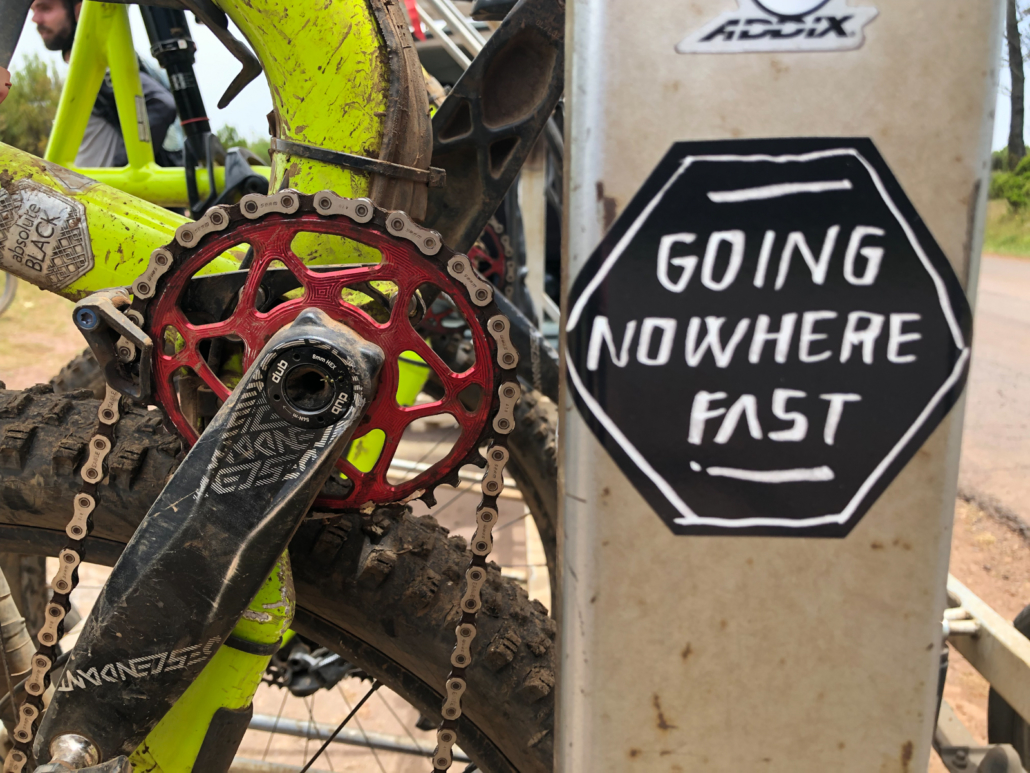

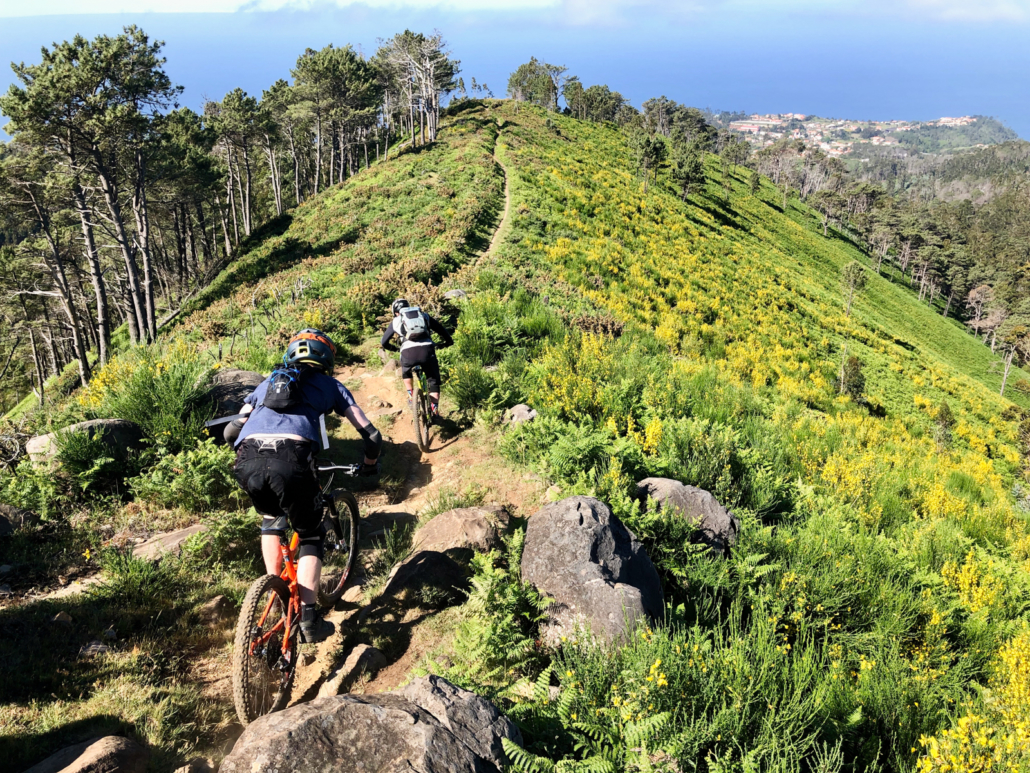
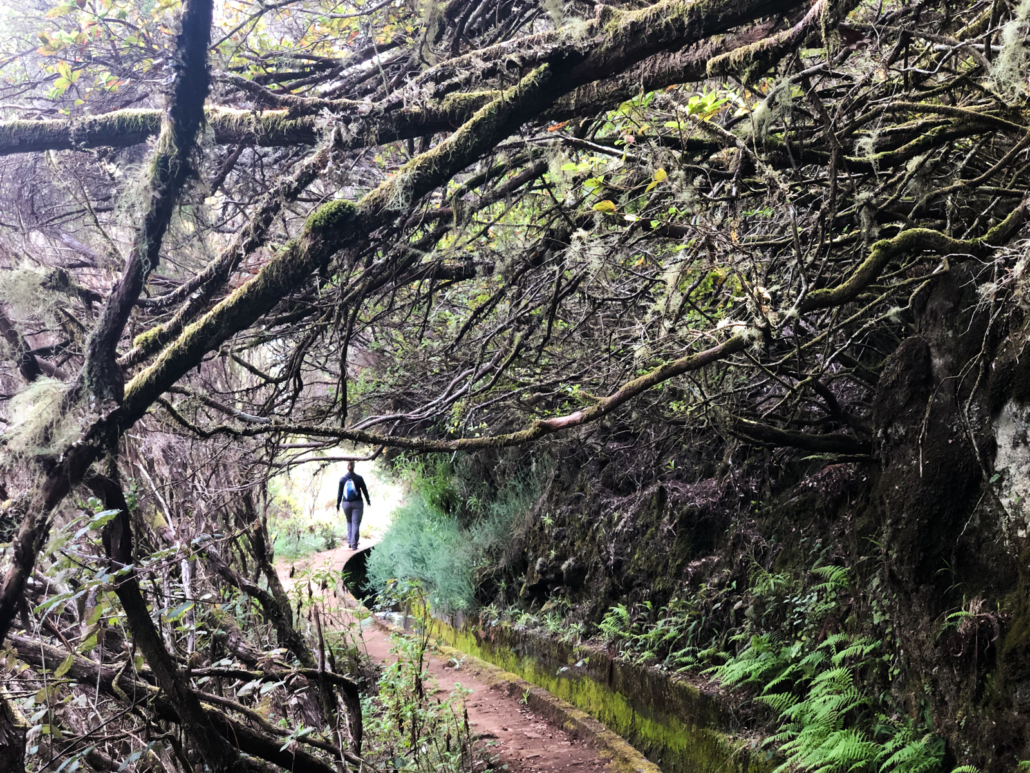
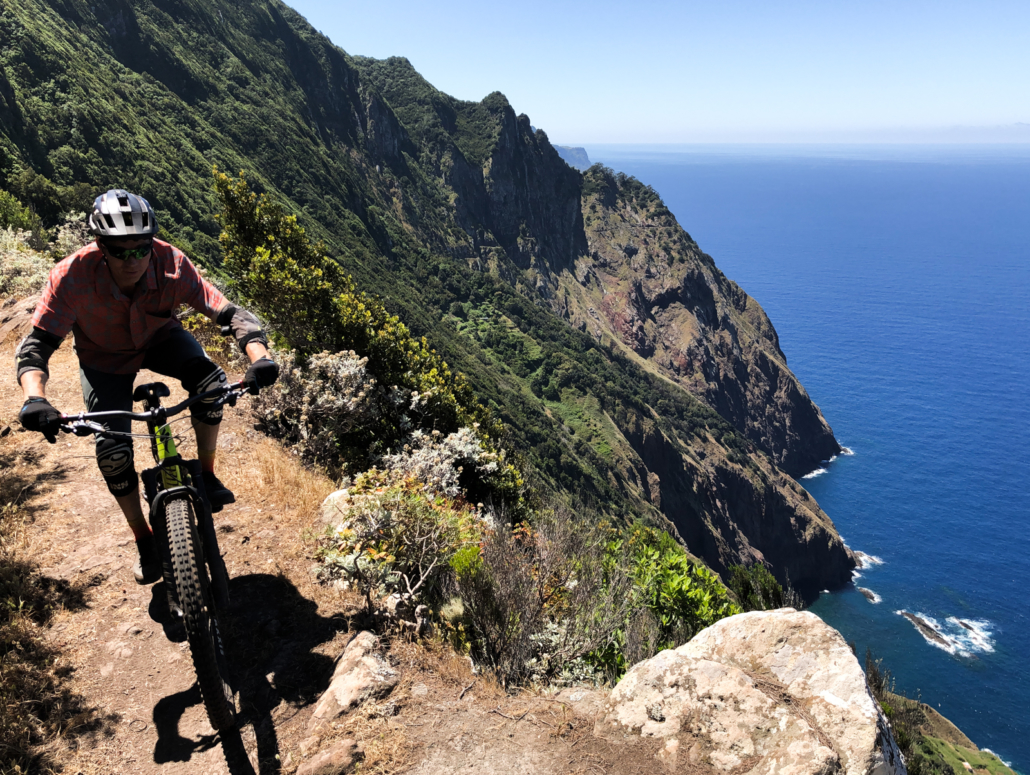
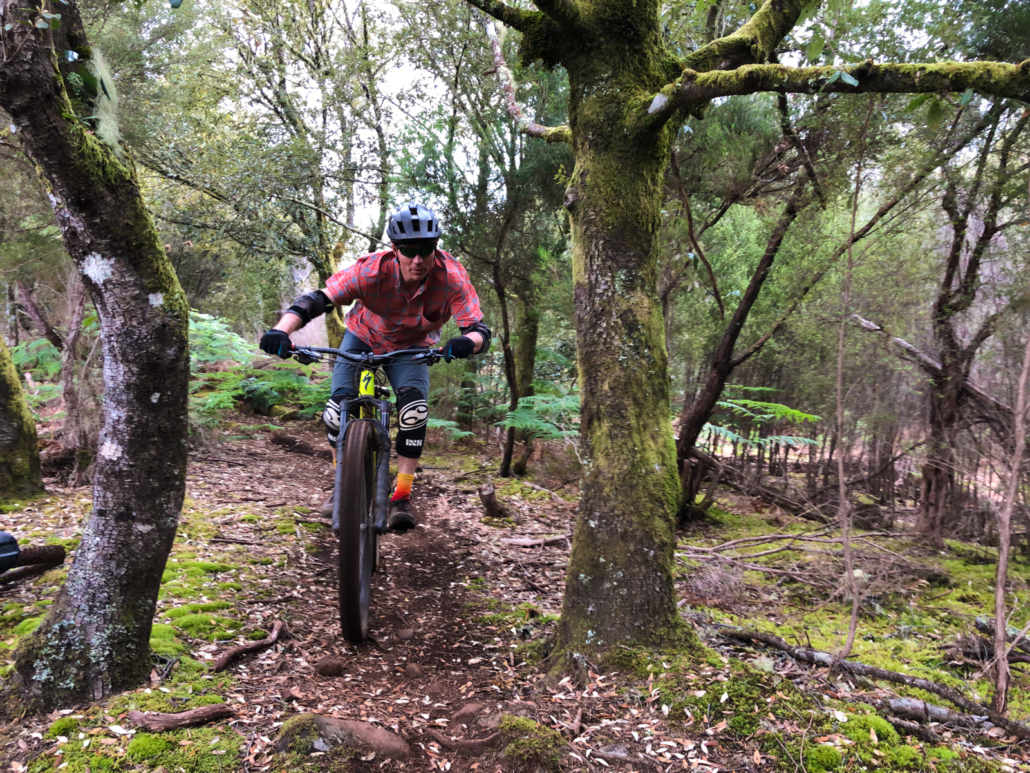
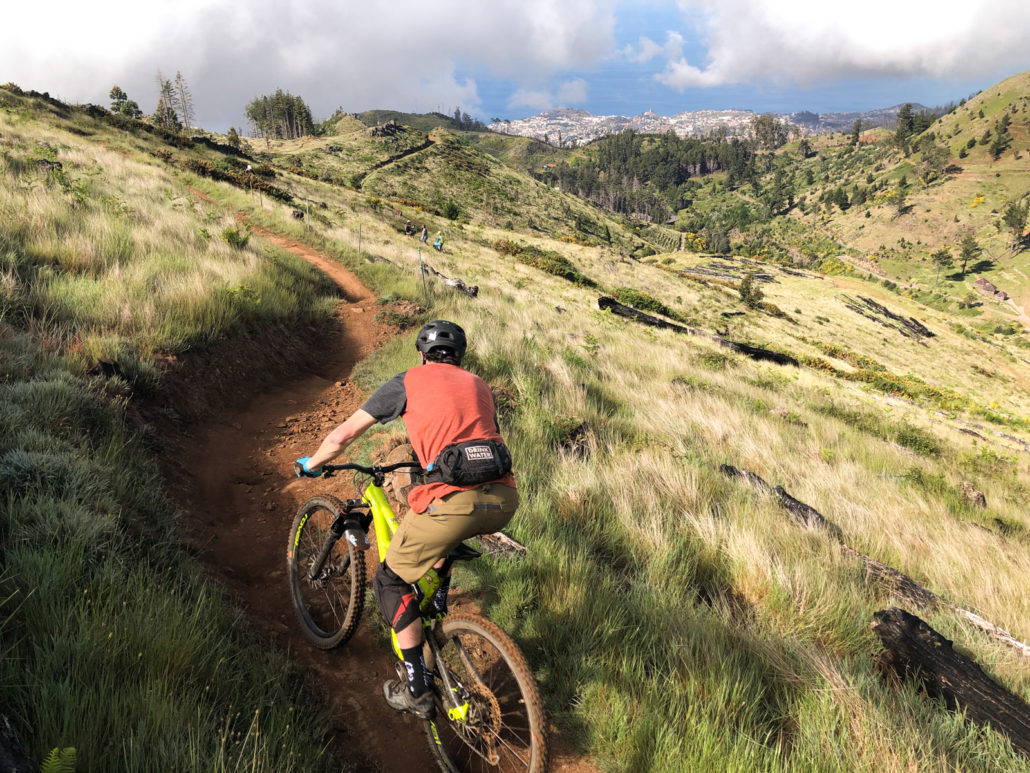
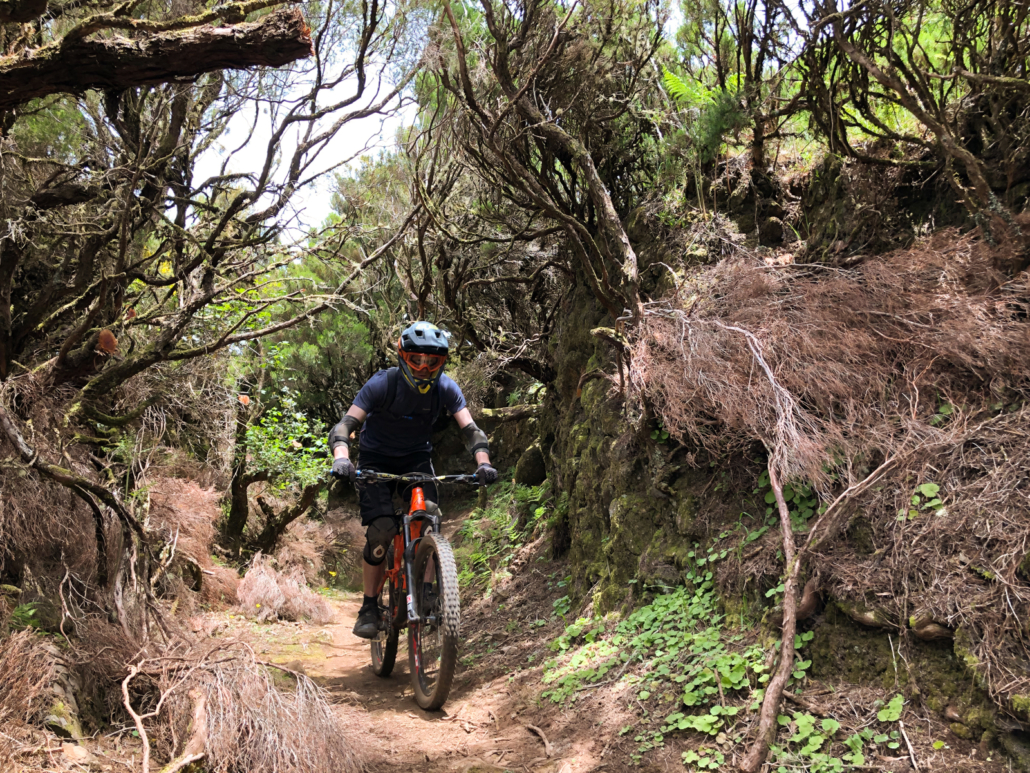
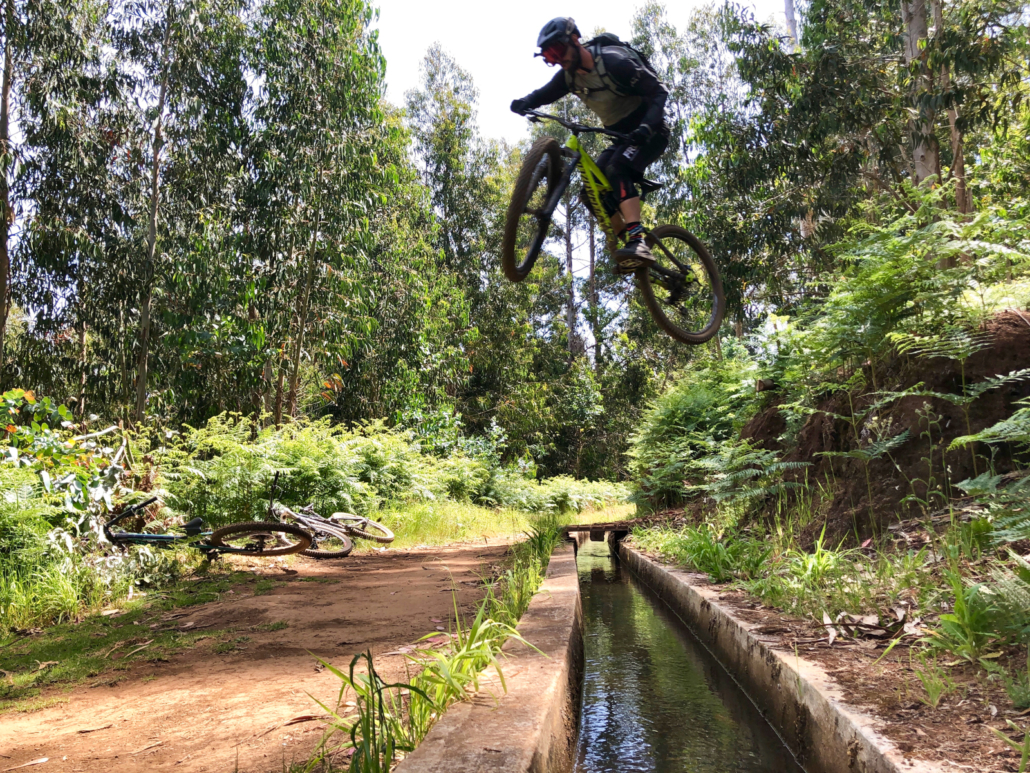
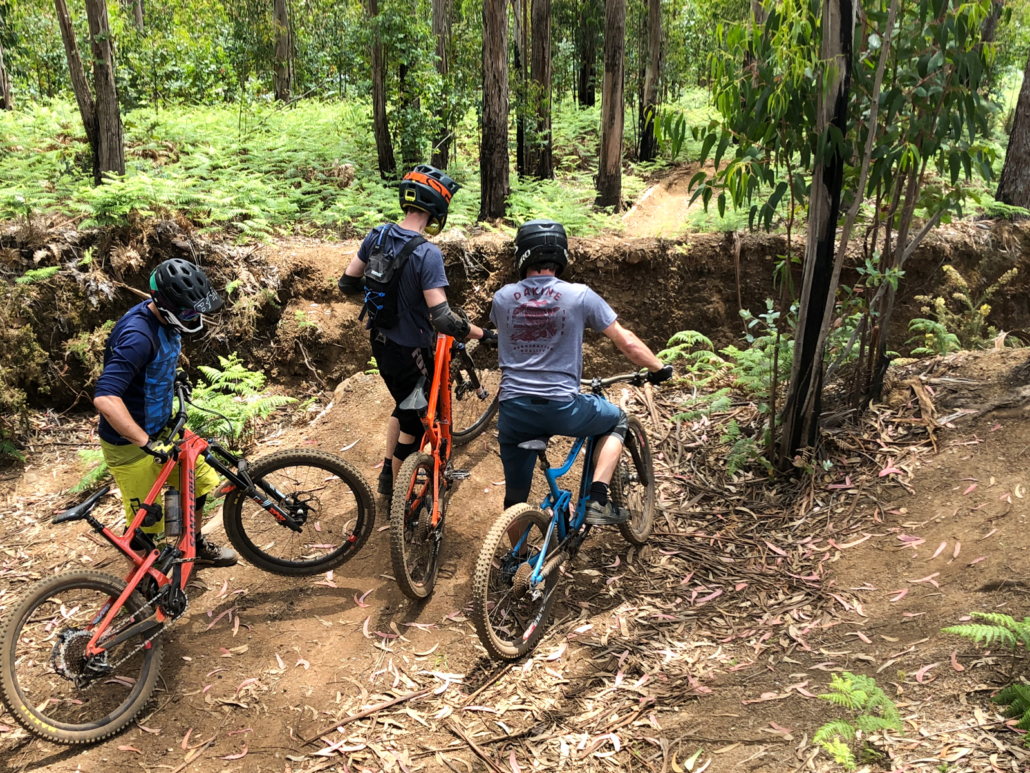
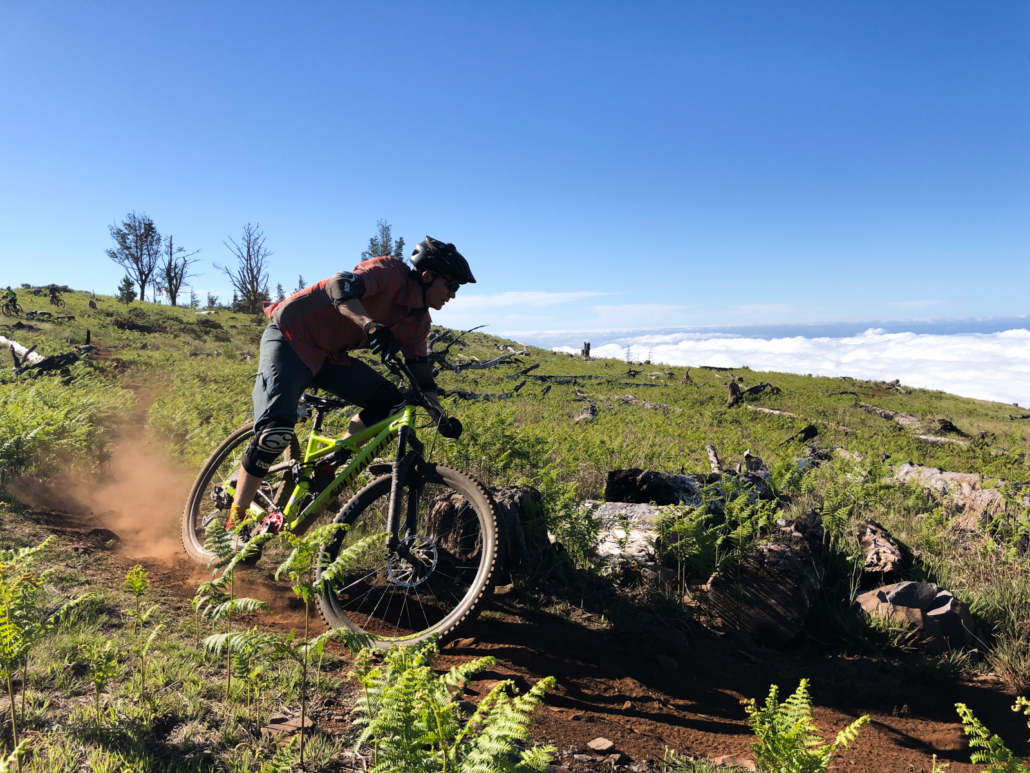
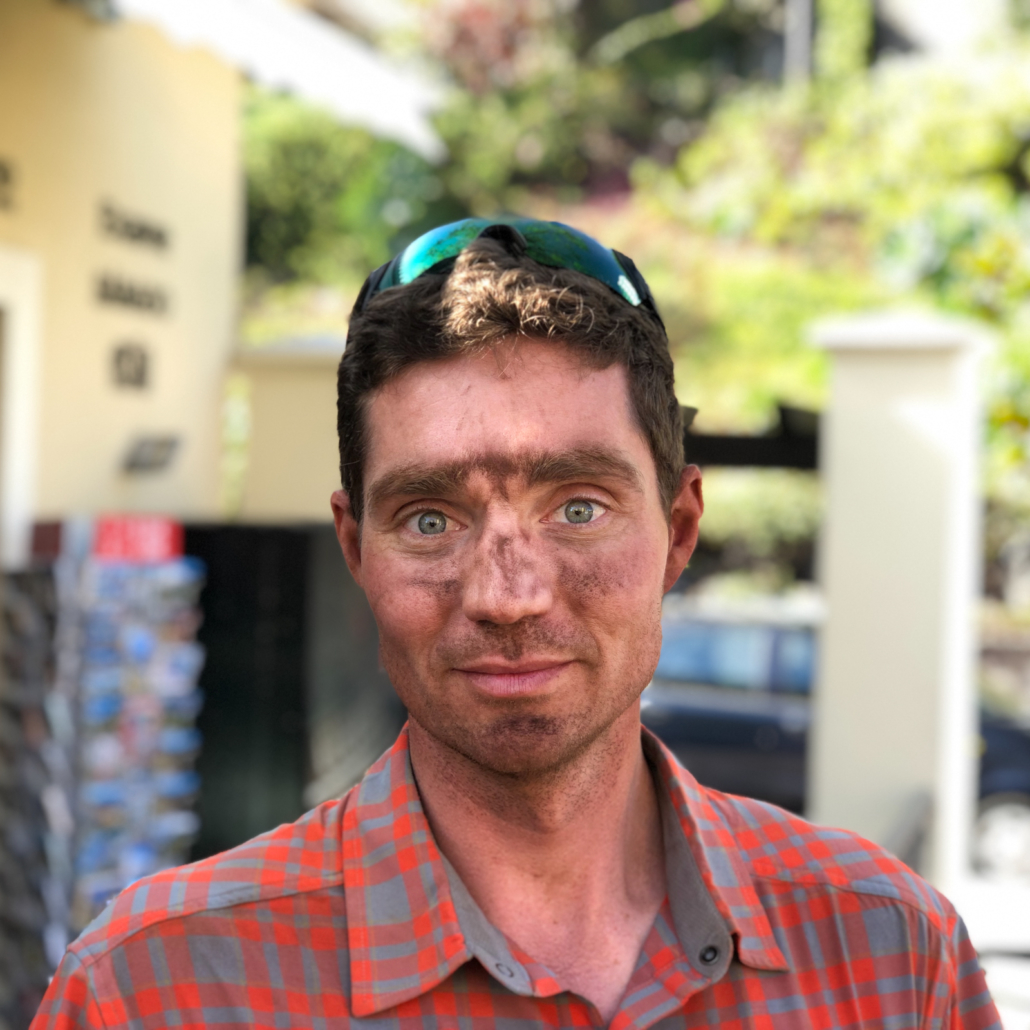
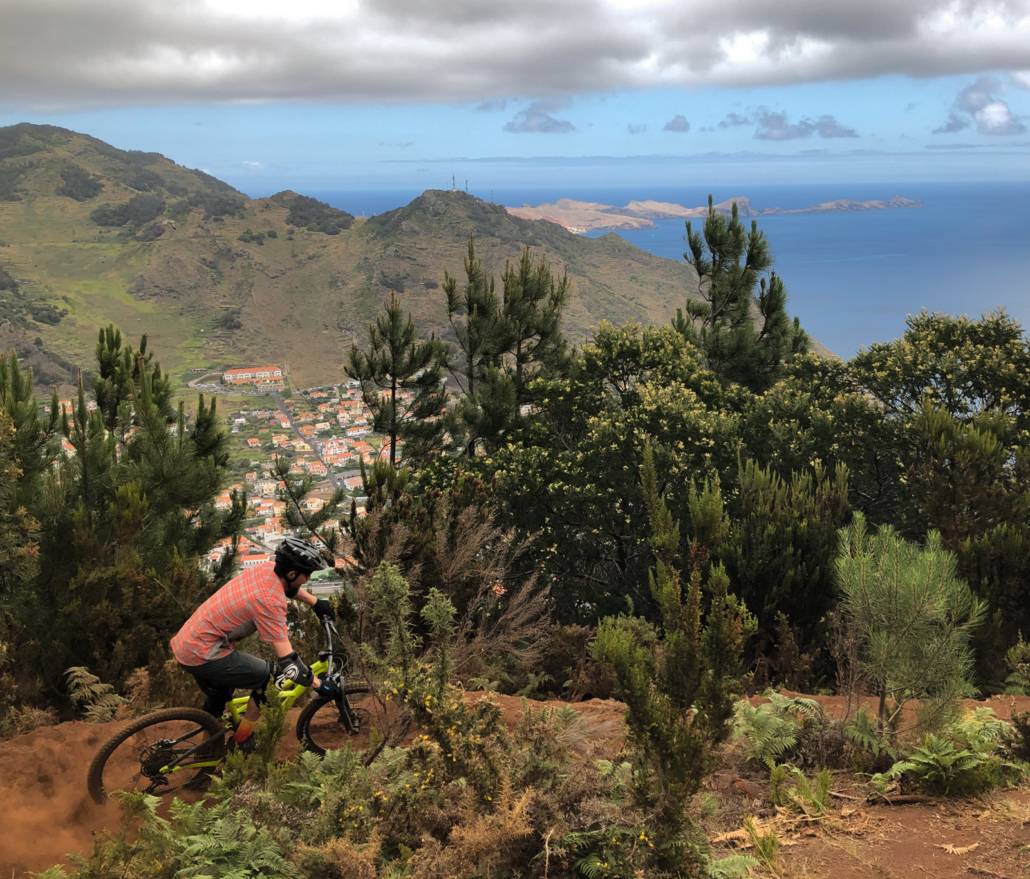
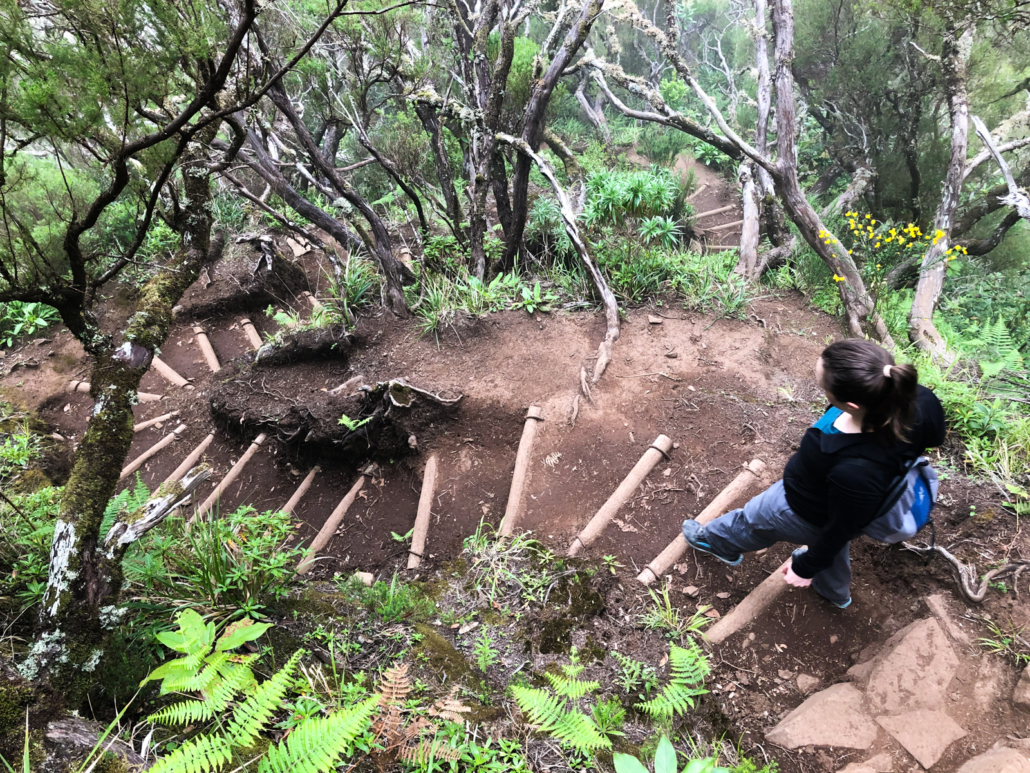
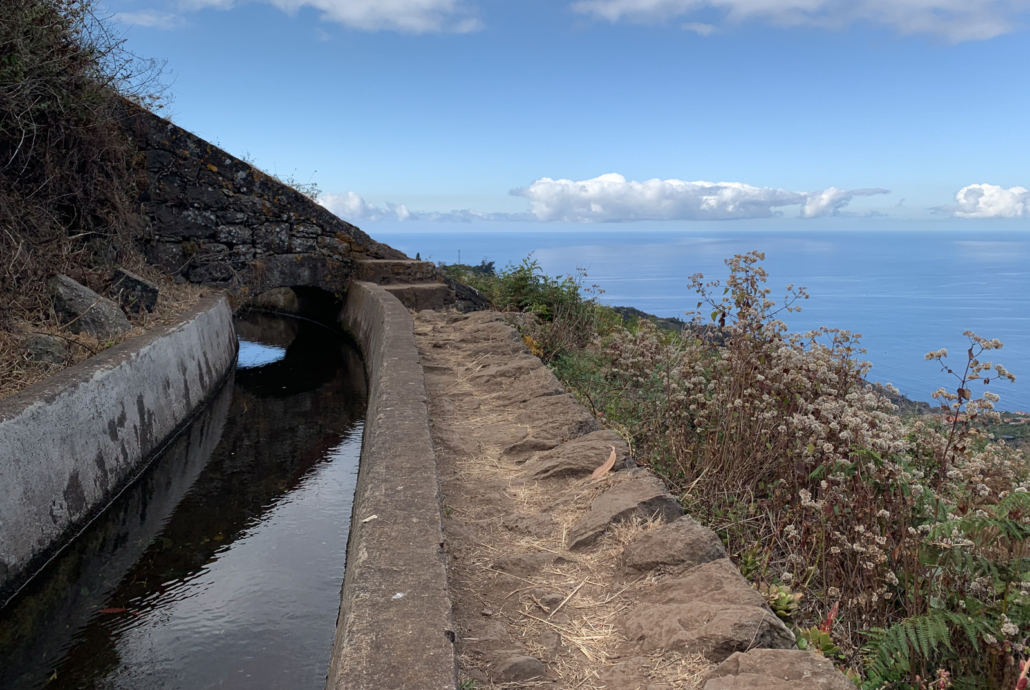
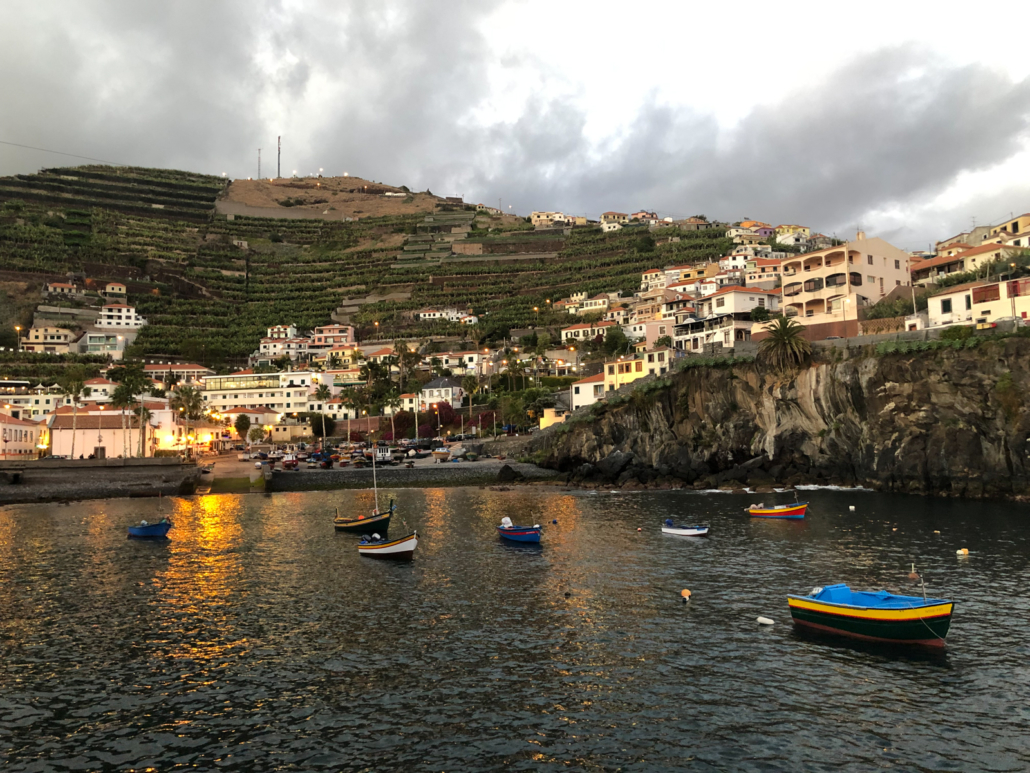
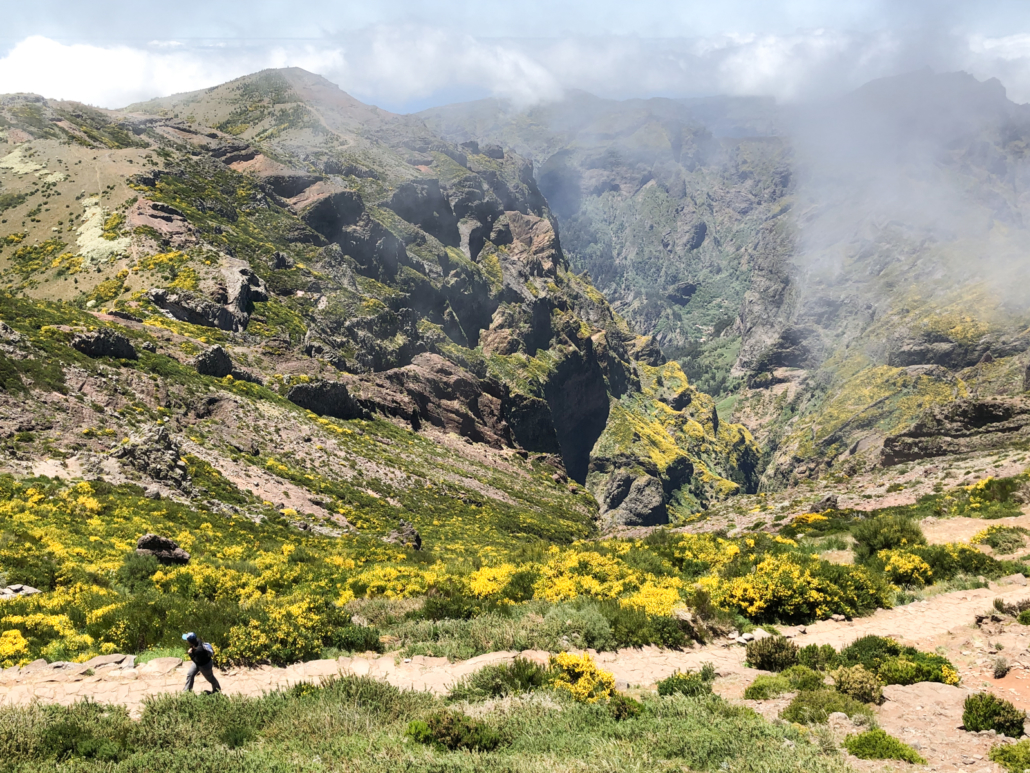
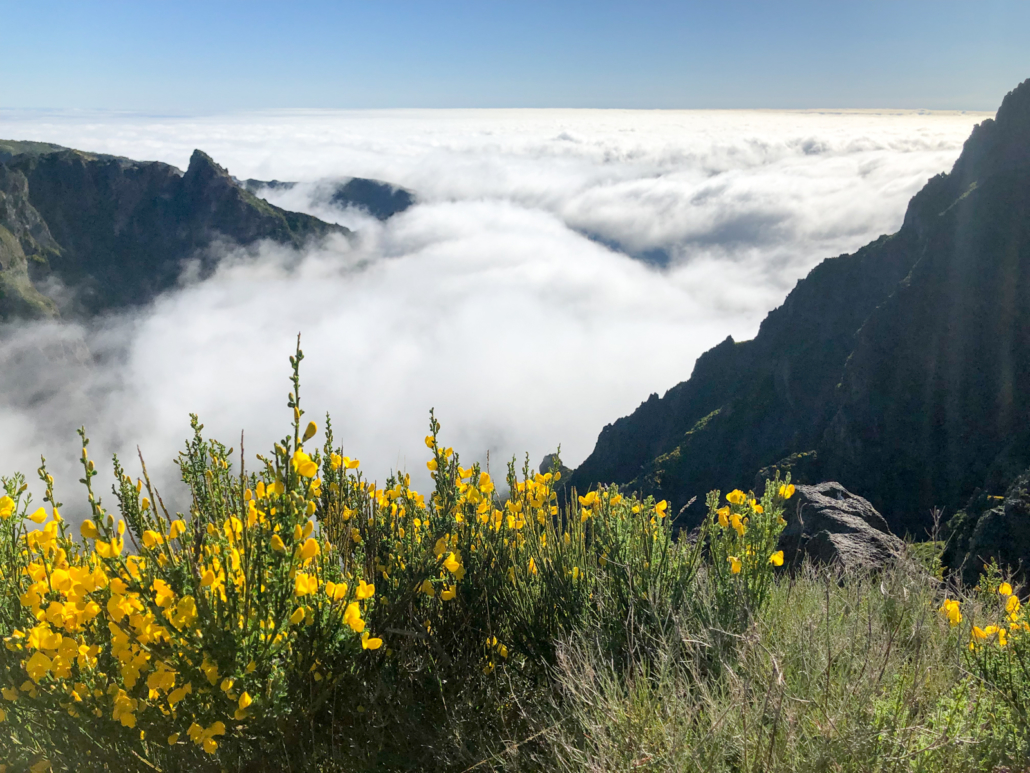
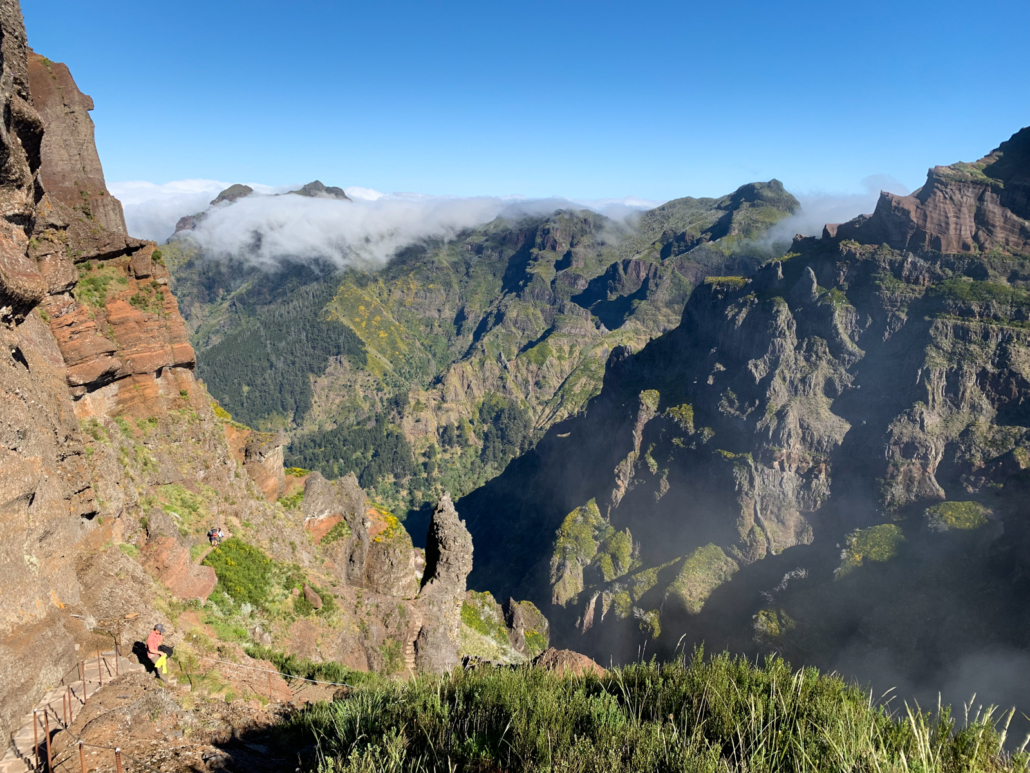
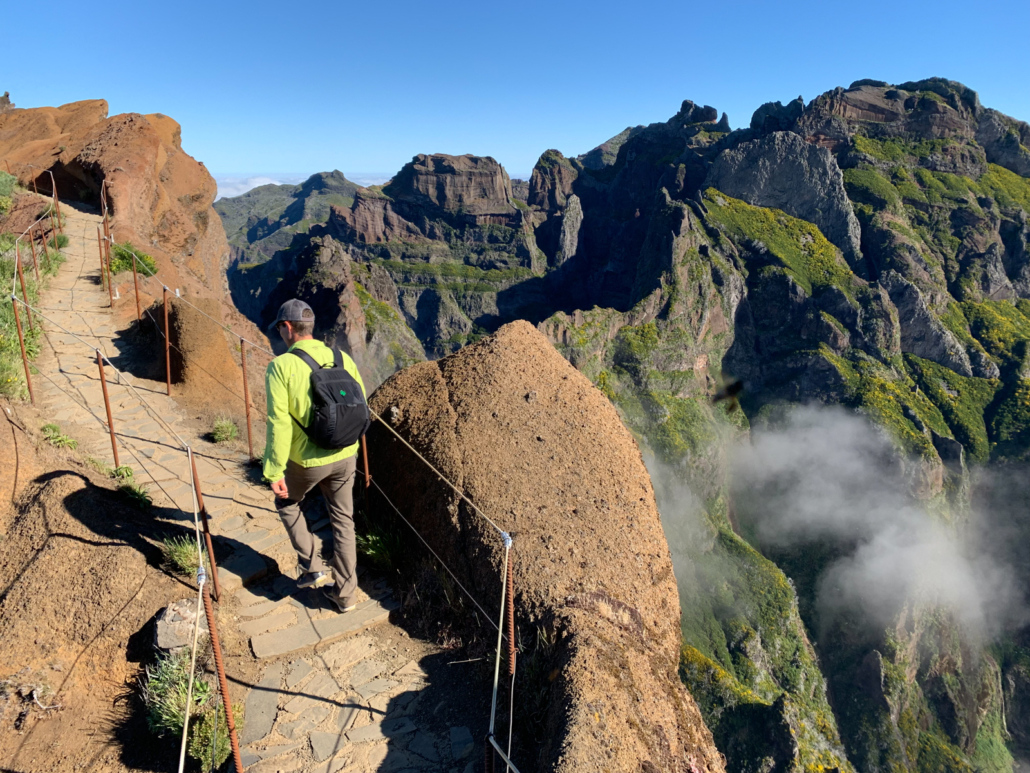
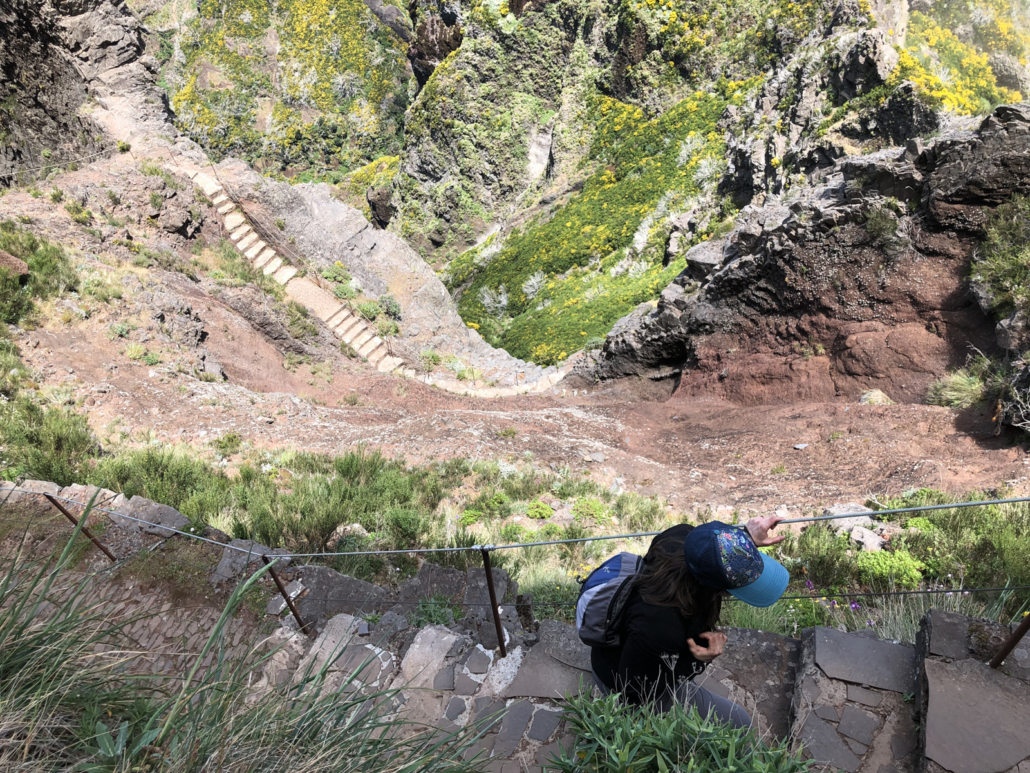

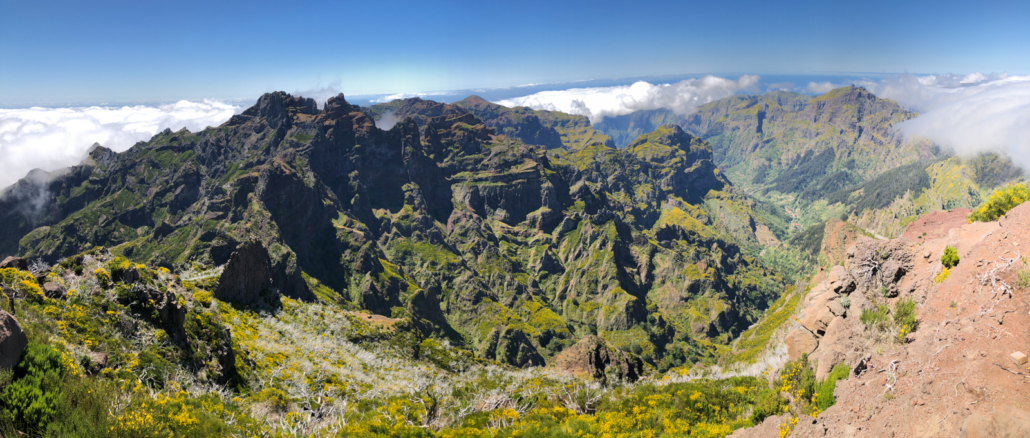
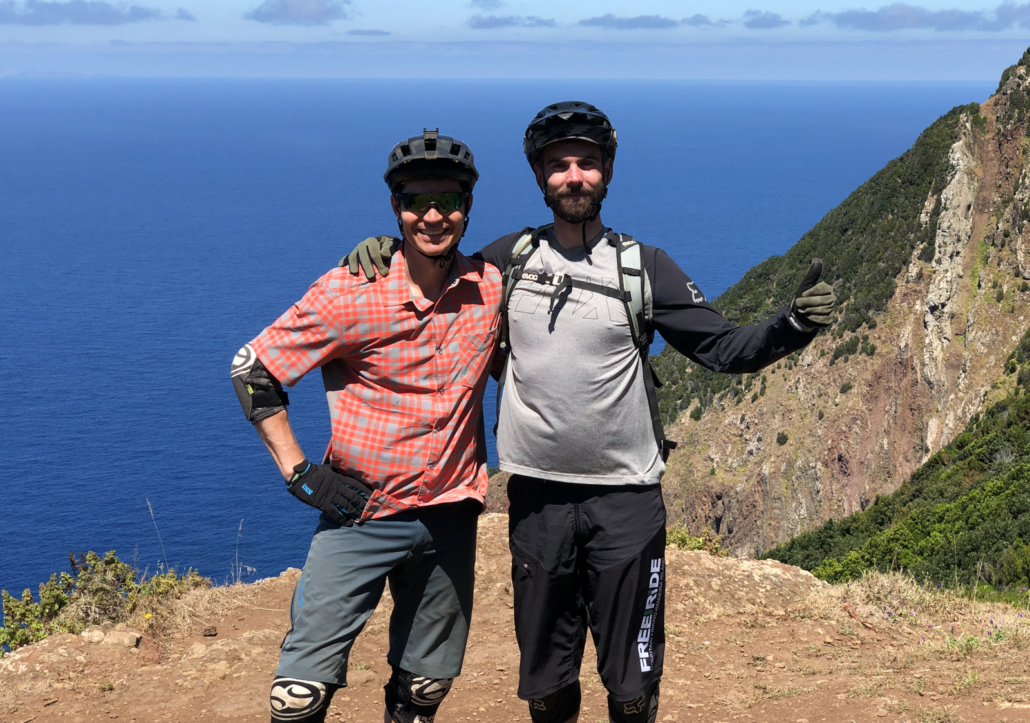
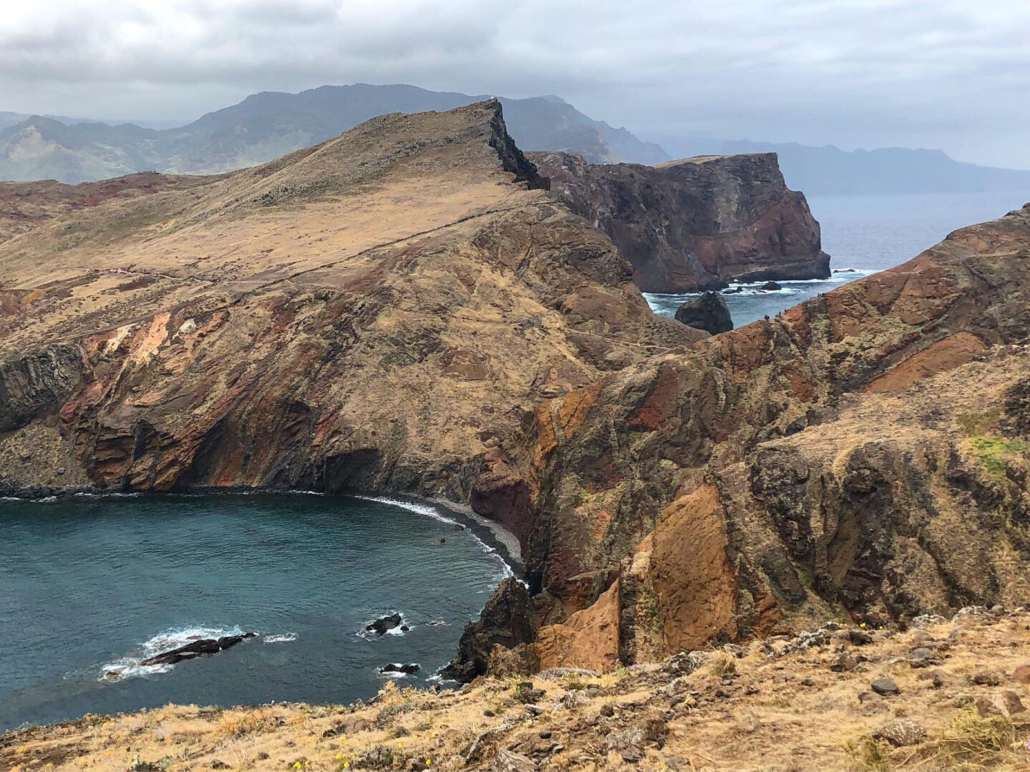
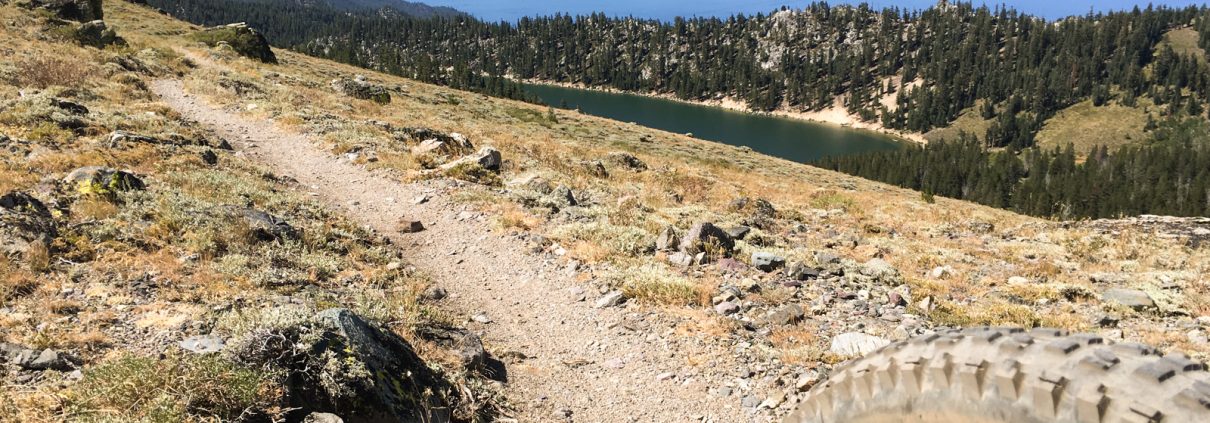

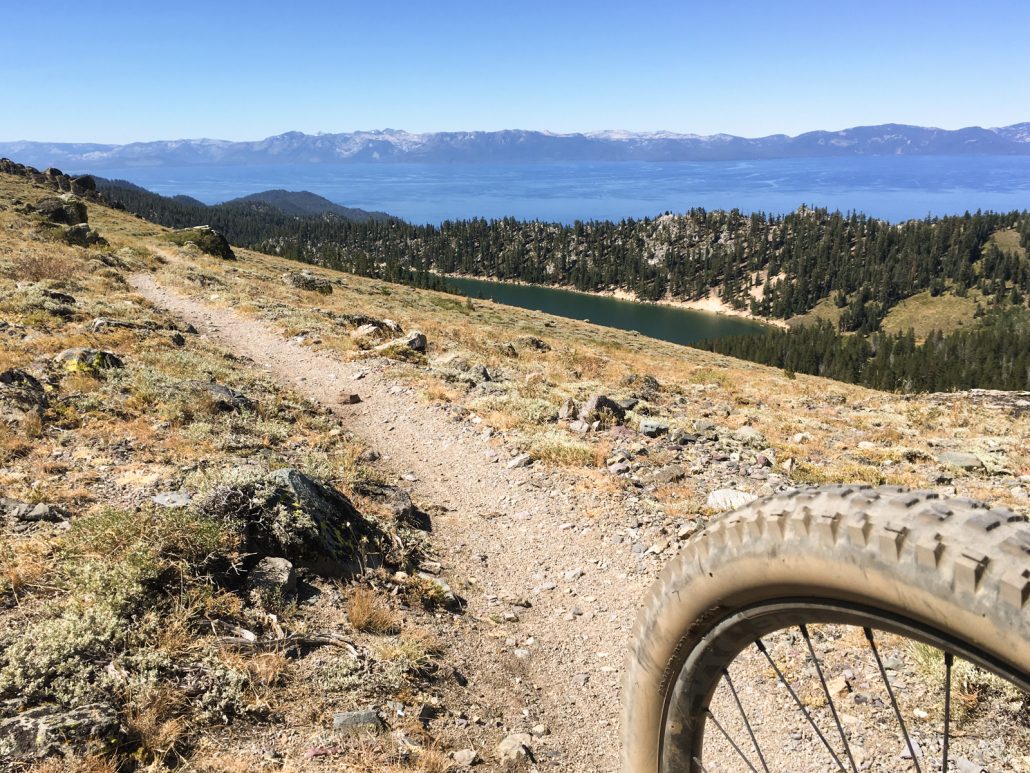


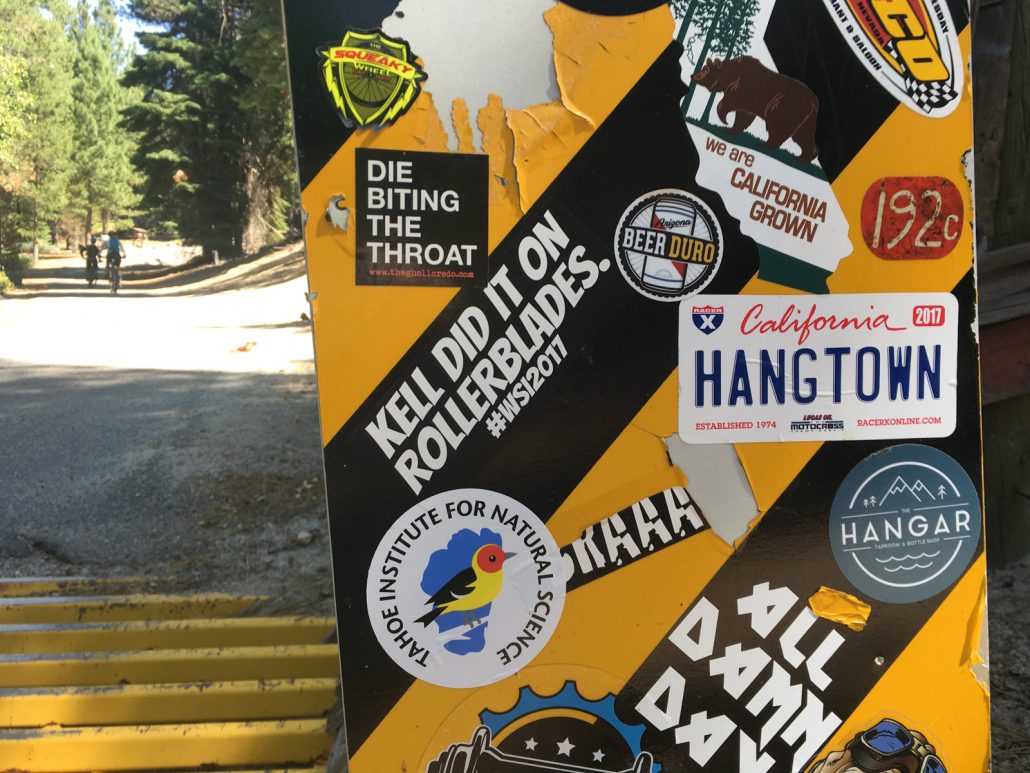
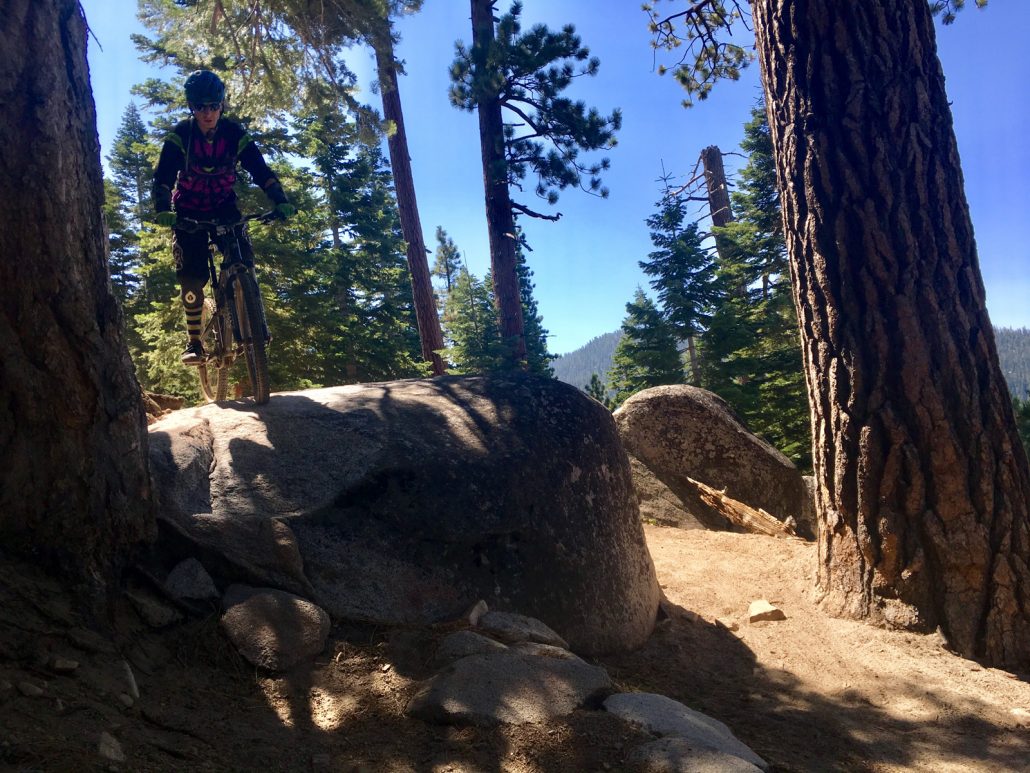
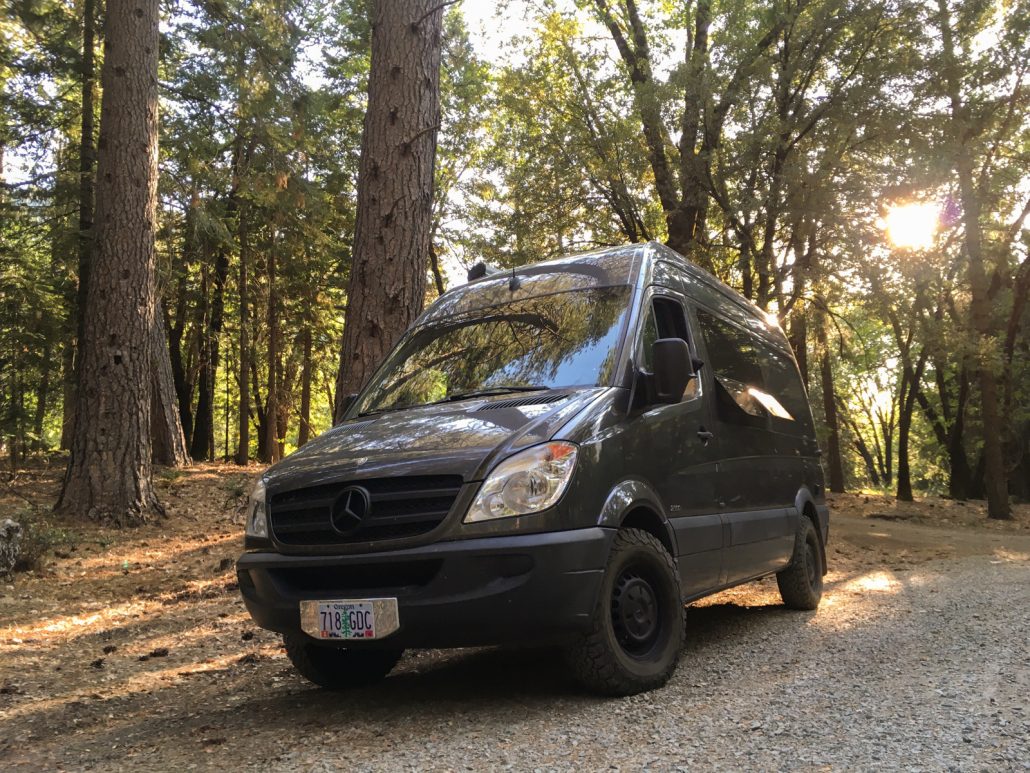
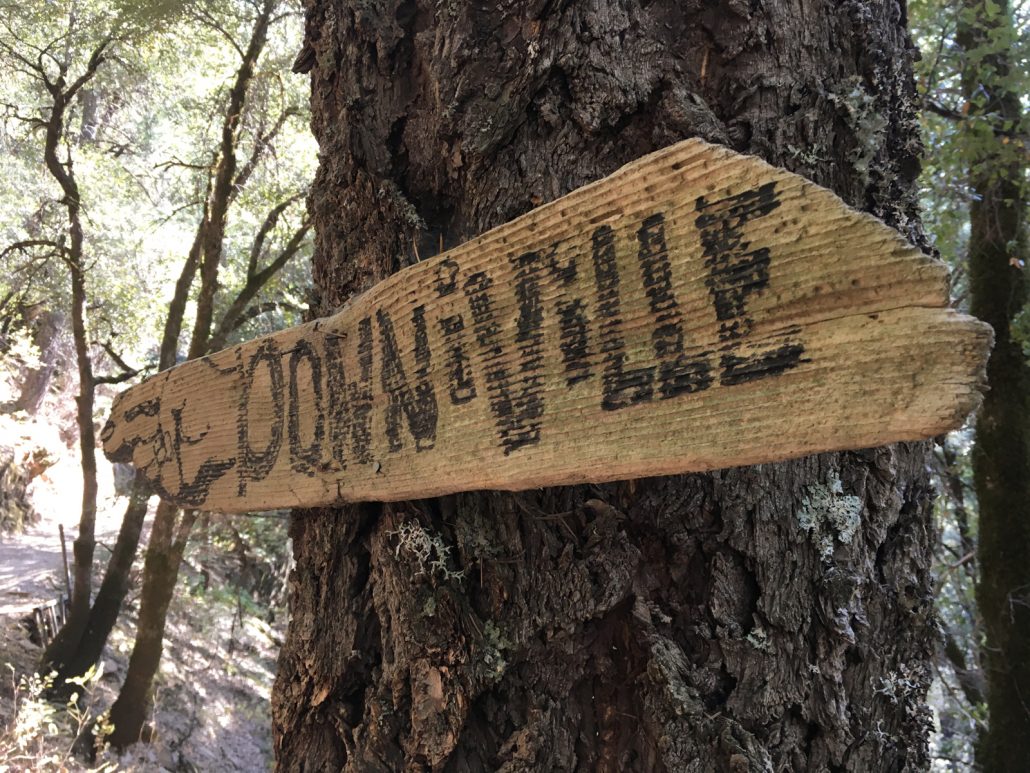
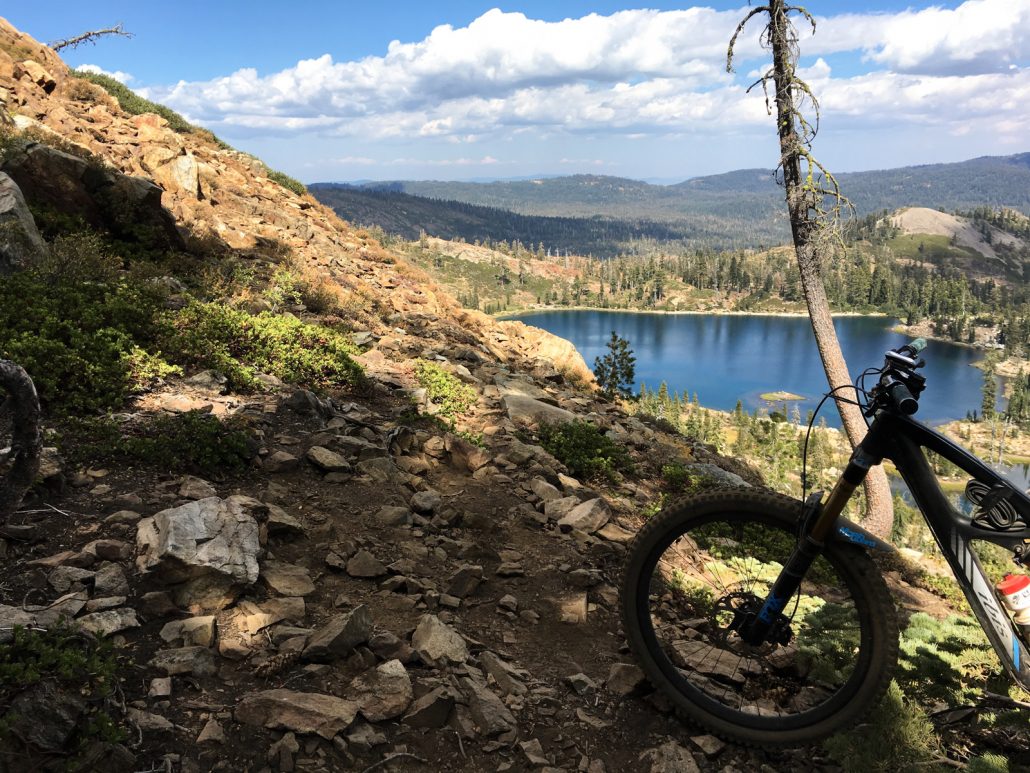
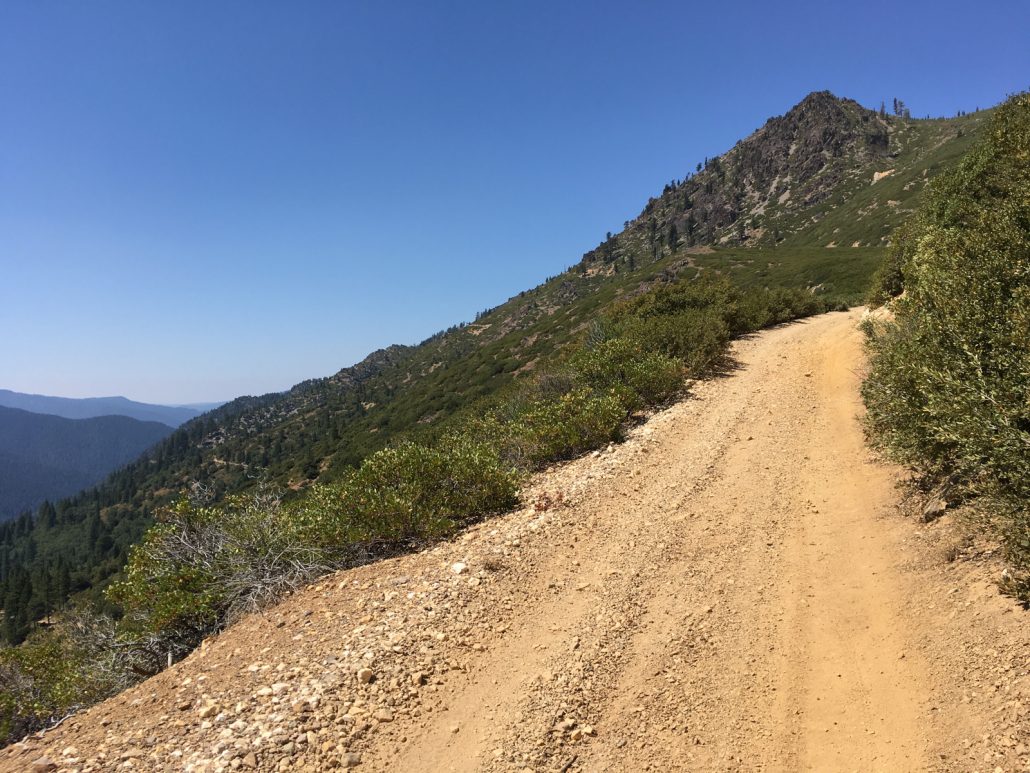
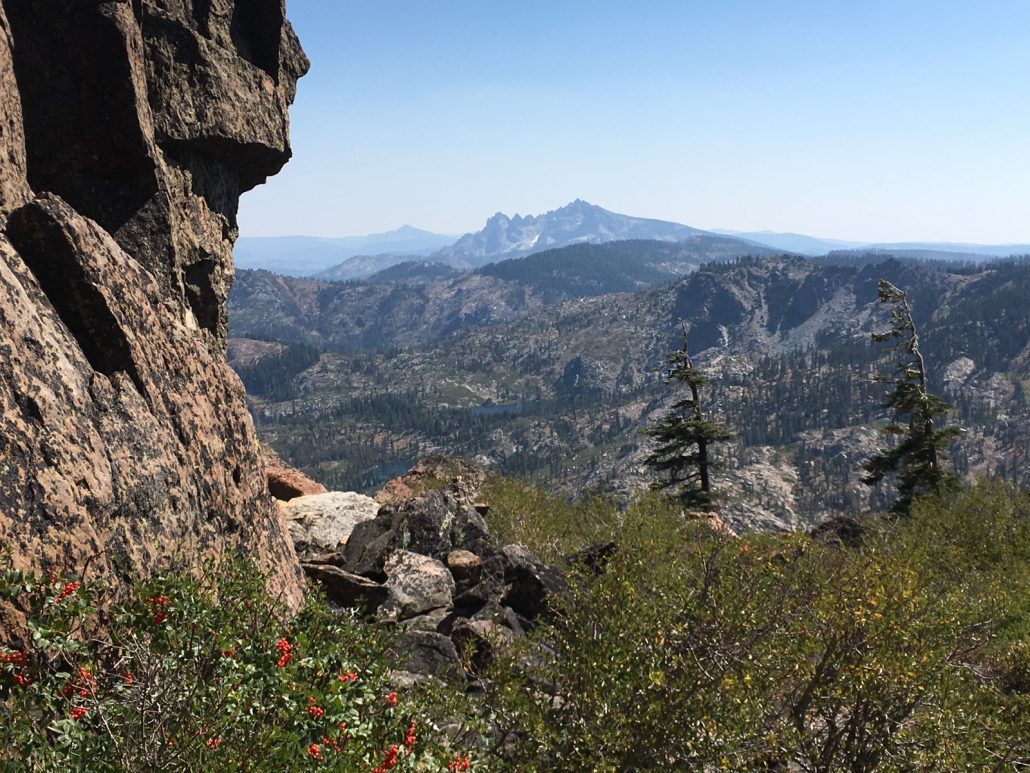
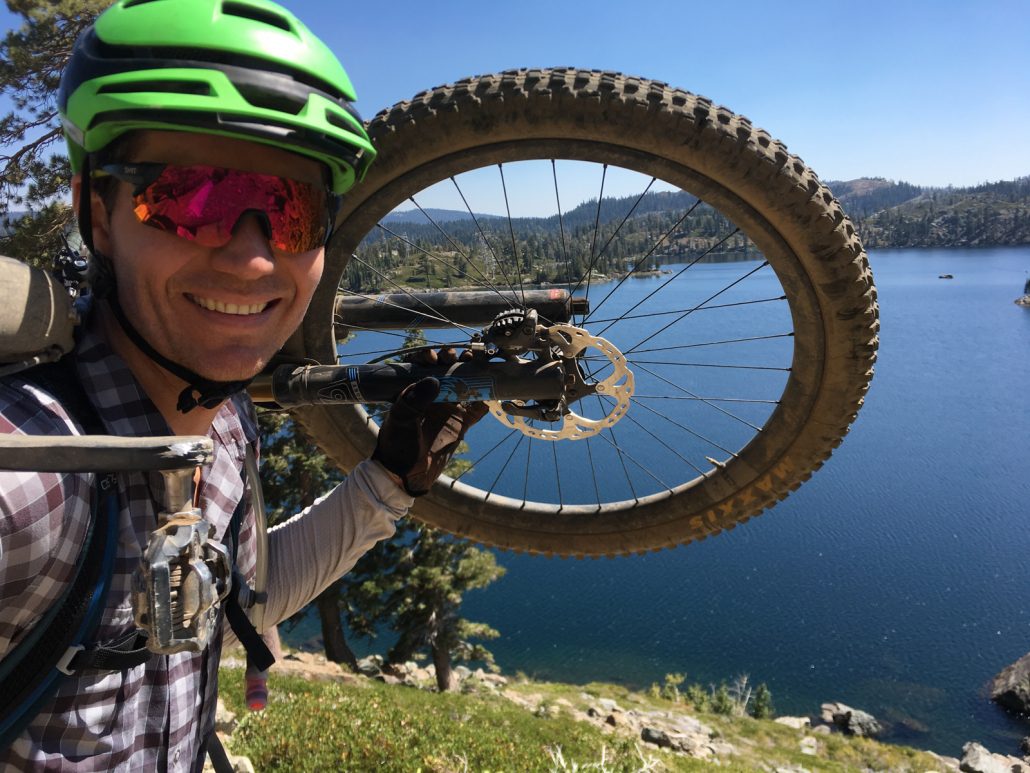
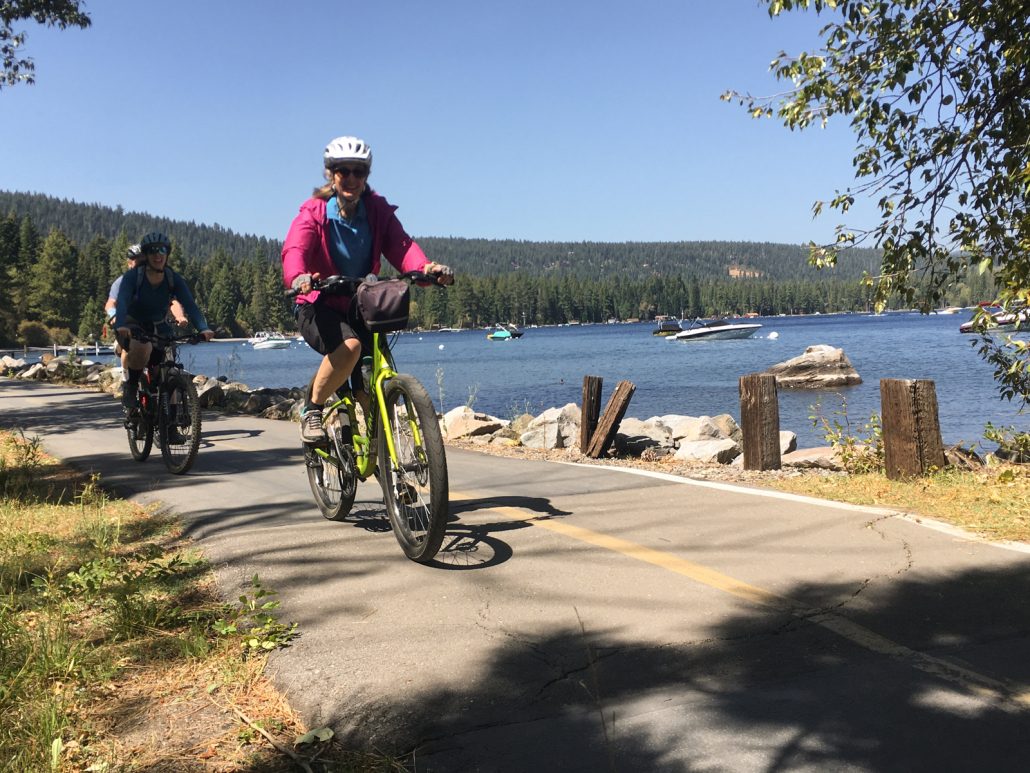
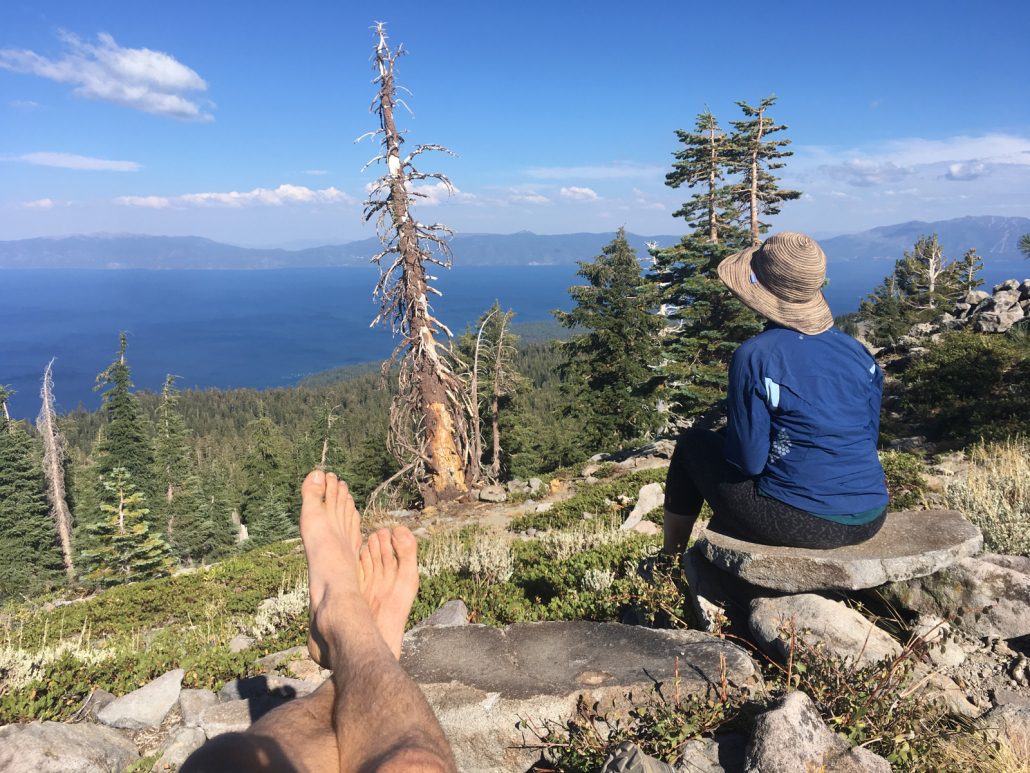
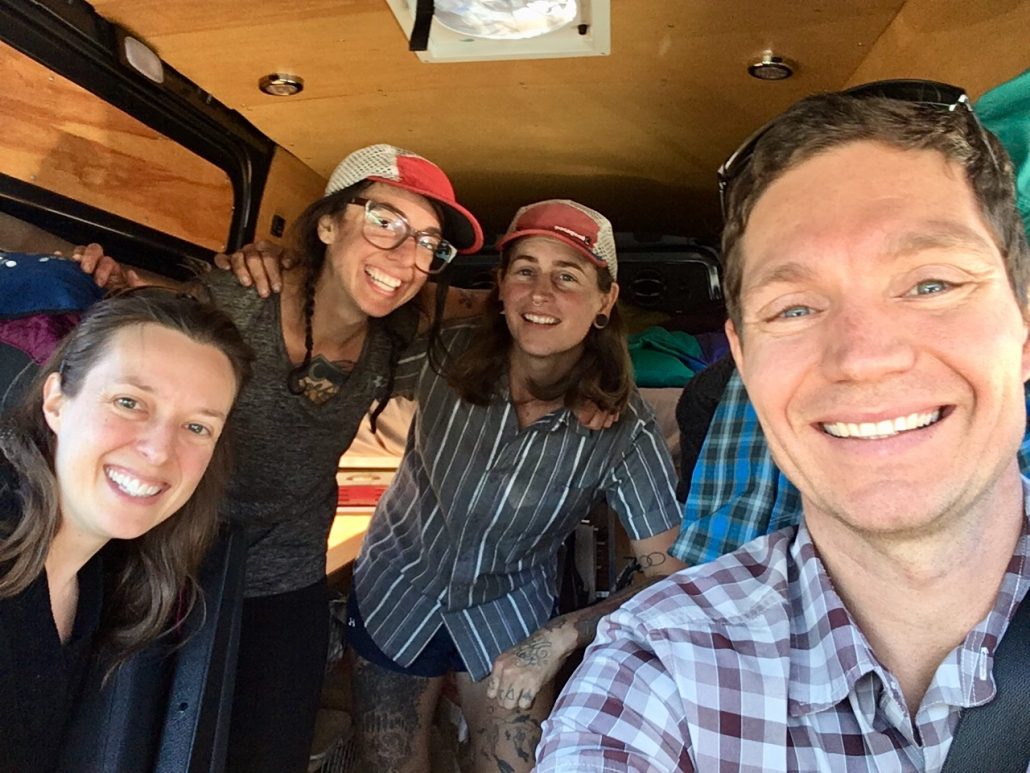
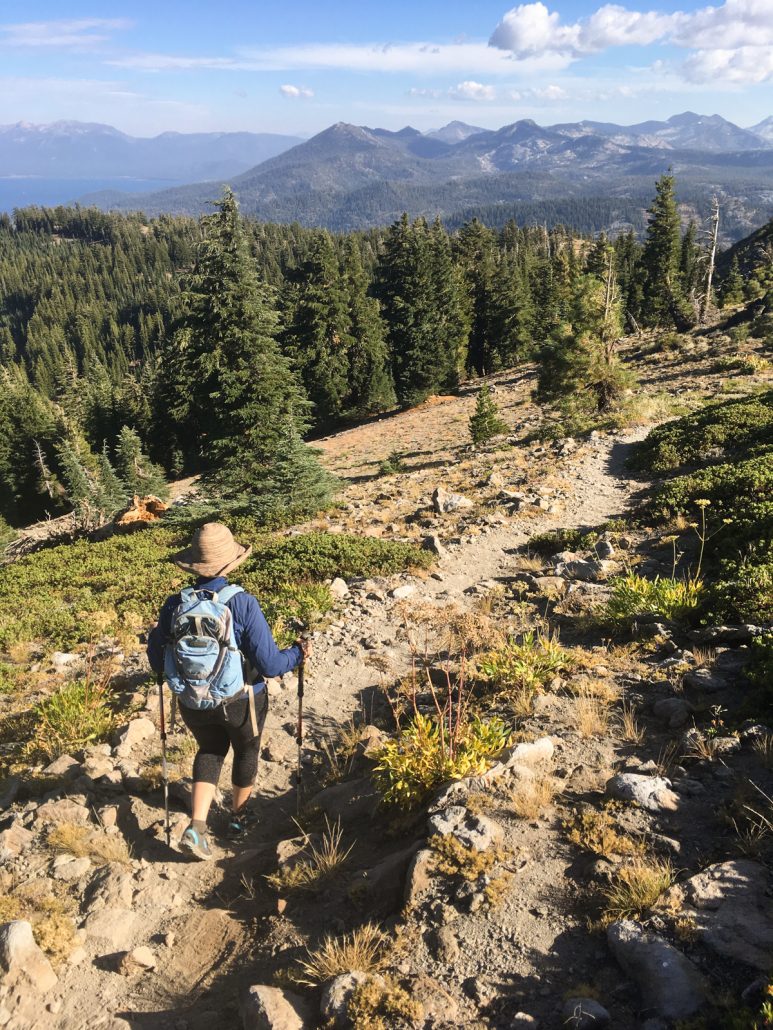
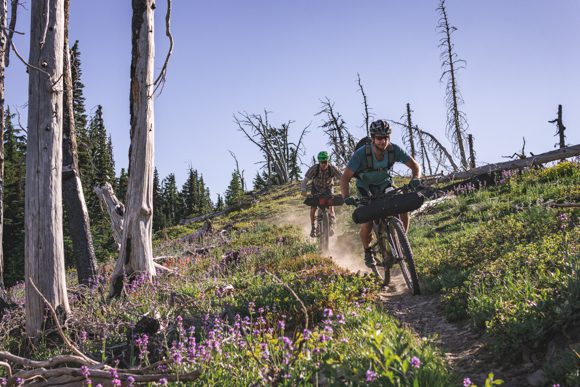
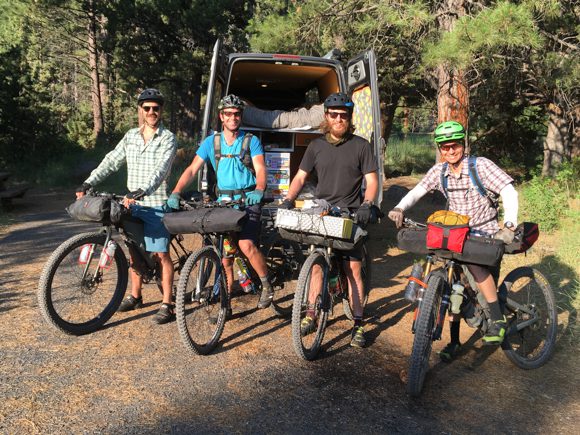
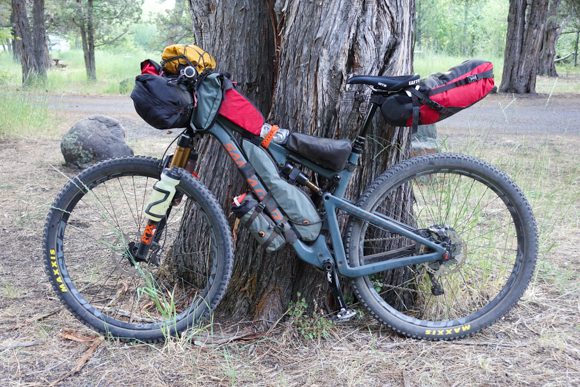
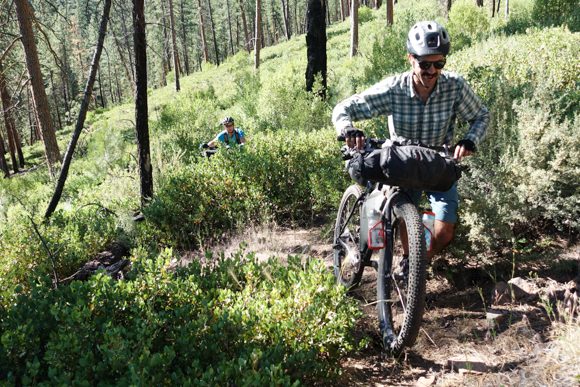
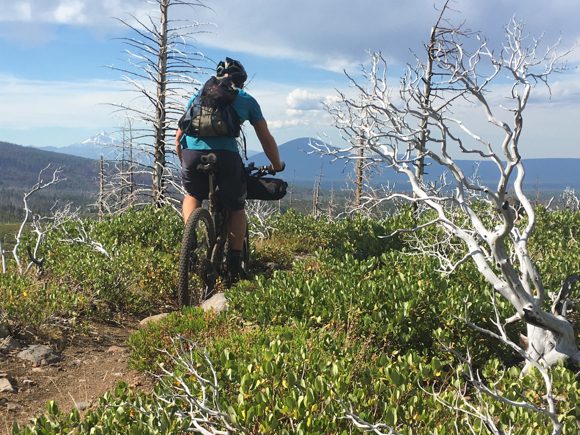
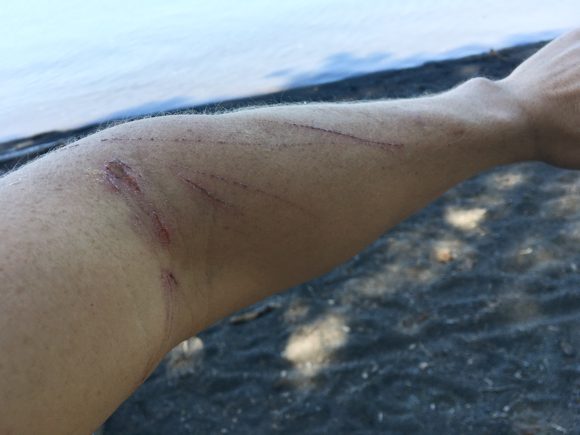
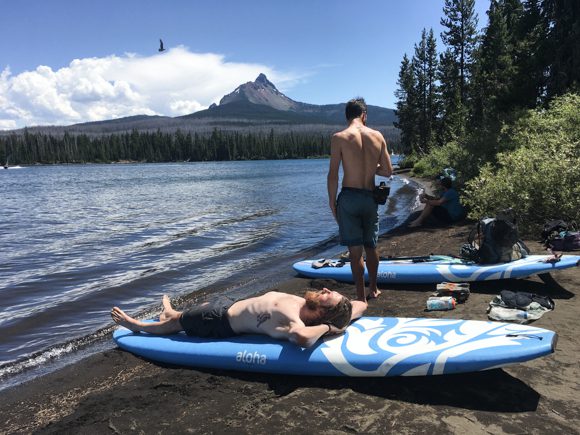
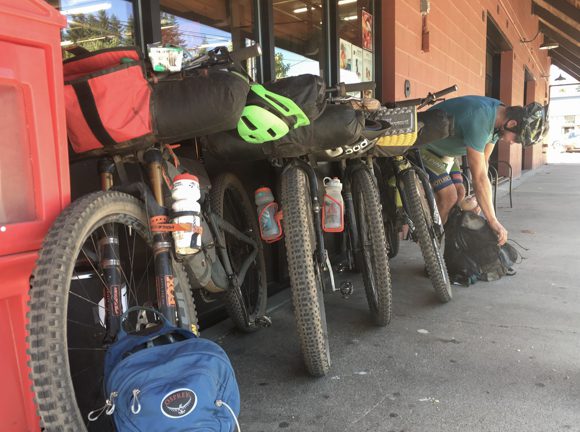
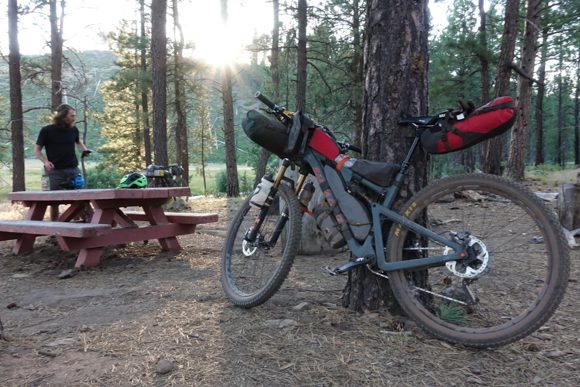
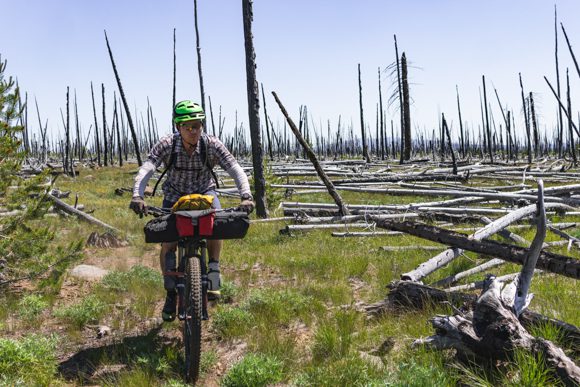
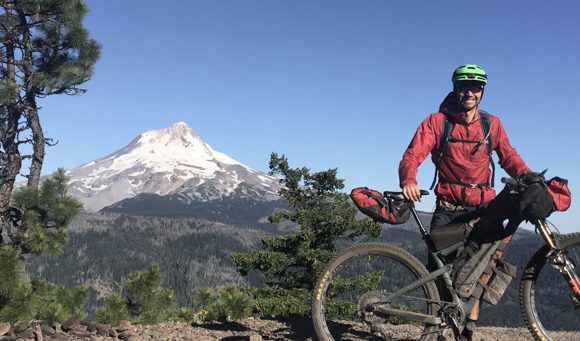
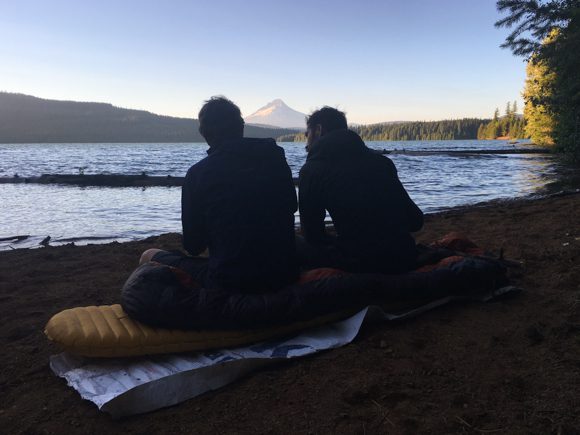
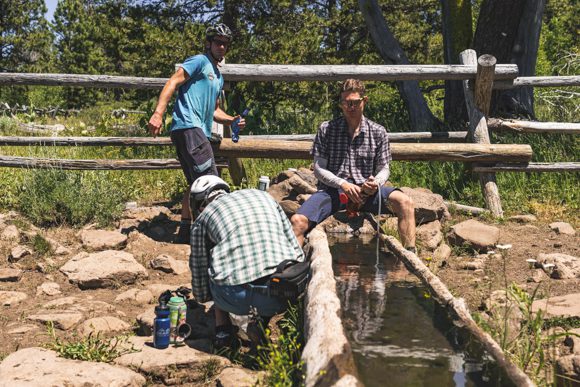
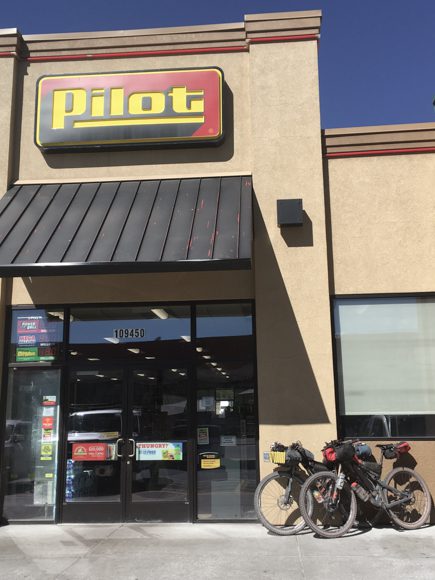
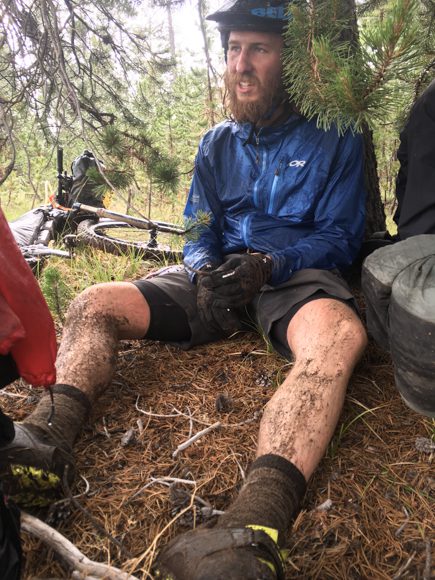
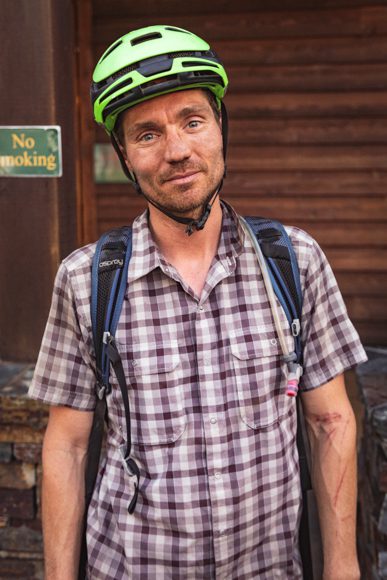
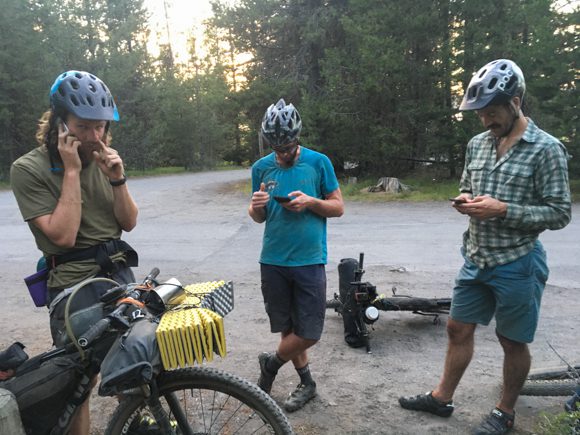
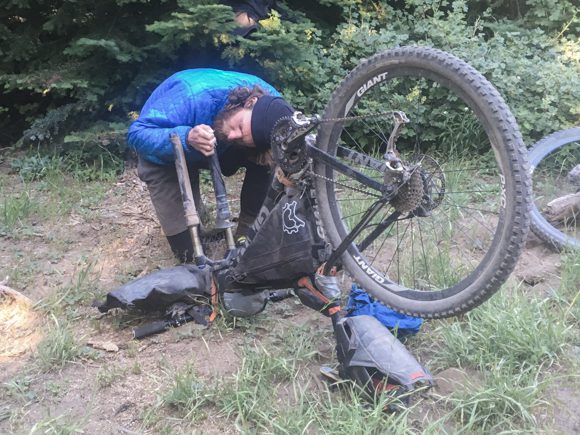
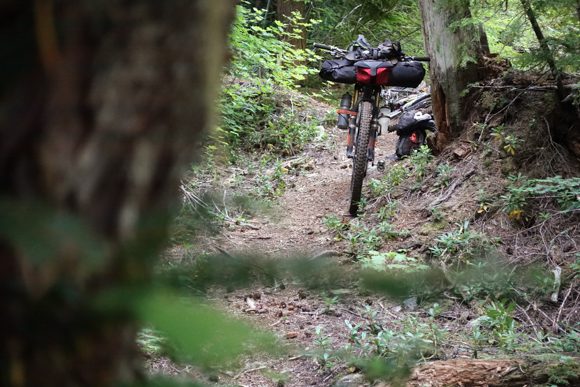
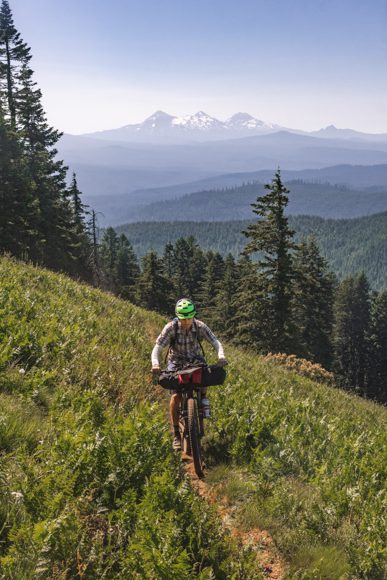
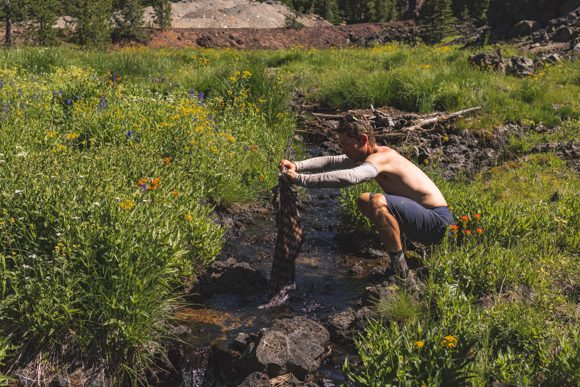
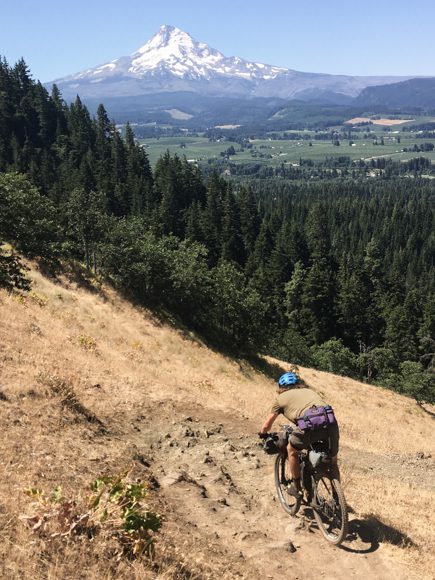
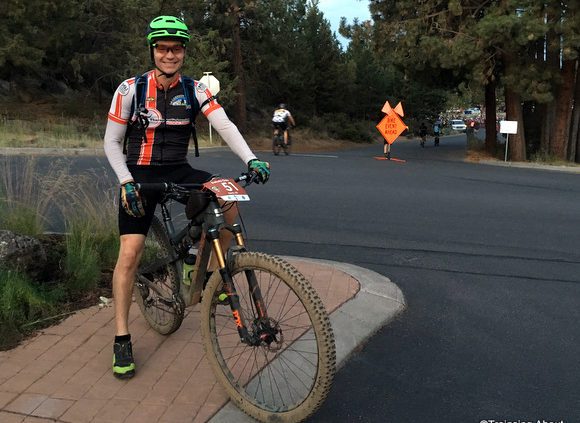
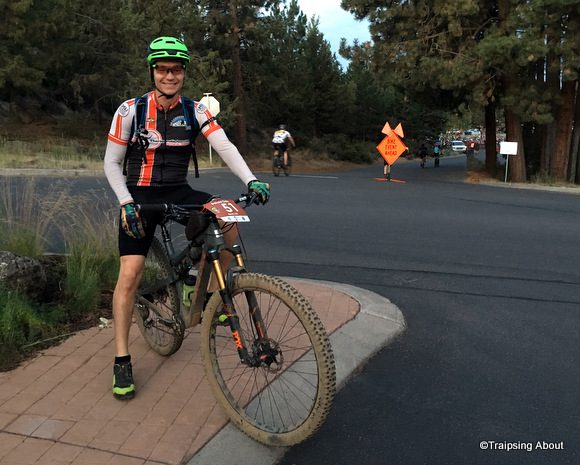 Mile 57. I’m five hours into the