
Packing List and Lessons Learned from Bikepacking the Oregon Timber Trail


JT, Zach, Brady and I heading out!
Ten days ago, we stripped down to our oh-so-dirty riding shorts and entertained three tipsy ladies by diving into the Columbia River. Zach, Brady, JT and I had pedaled across the entire state and reached the end of the Oregon Timber Trail! It was a rowdy 15 days and 700 miles, and a hell of a fine time (<--full story).
Since then, I’ve luxuriated in my comfy bed, taken powerful naps as my body jumped into repair mode, ate (occasionally uncomfortable) quantities of food, and generally relaxed. (Well, Brady and I have mountain biked and ran a half dozen times since...can’t be TOO lazy.)
I’ve fielded many questions about the Oregon Timber Trail (OTT). Since it’s new as of 2017, I want to share the gear and lessons learned that worked well in the hope of making the journey smoother for future riders.

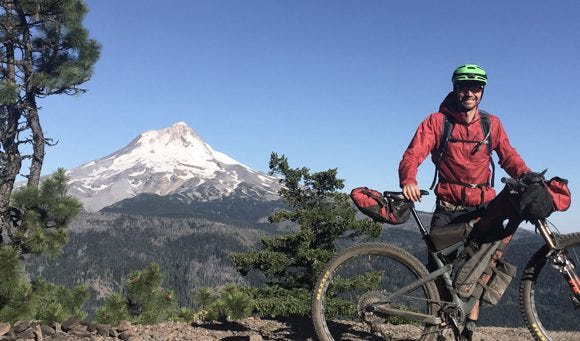
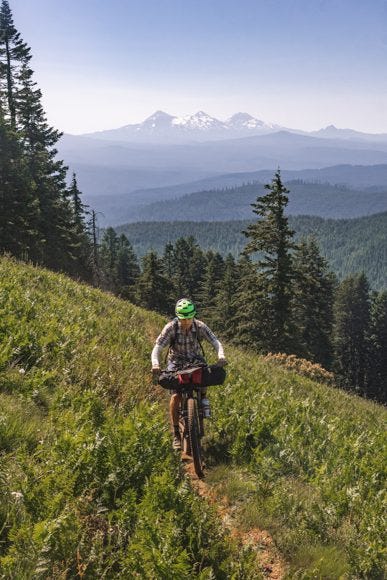
Me and Zach on Gunsight Ridge near Mt. Hood. (Photo: Brady Lawrence)
Overall Approach to Gear
There’s only two ways to carry your gear on a bike trip: on your back or on your bike. The lighter, the better. This was my first bikepacking trip, so I stayed conservative with my gear and aimed for being prepared vs. going ultralight. That said, my total weight (bike/gear/water/food) was far less than what I carry on road tours. It was also WAY more fun rolling light.
I jumped into the Oregon Timber Trail with no experience bikepacking other than a single overnight shakeout trip. That said, I have 7,000 miles of road touring experience in the U.S. and around Europe, plus hundreds of hours of mountain biking under my belt. I scoured the internet for gear lists and felt prepared for tackling such a difficult trail. In the back of my mind, I also knew that if a trip-ending bike mechanical or injury occurred, that was part of the risk.
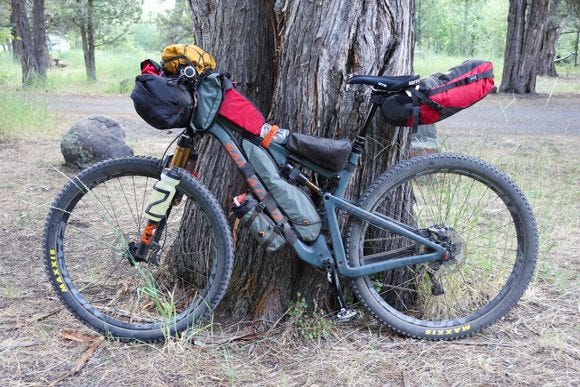
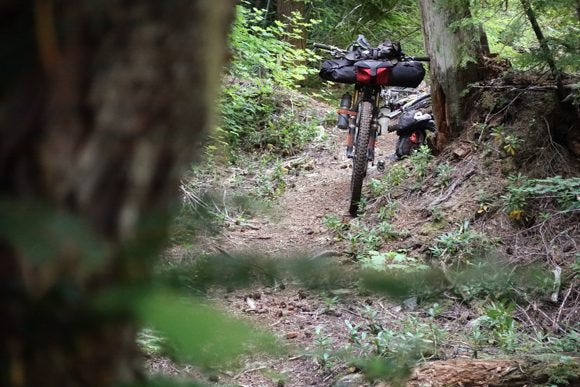
My full setup with 3 days worth of food for miles 100-200 on the trip. (We wound up doing it in two days.)
If you aren't sure how your gear will work, test test test! Go on day rides with your gear; sleep in your backyard and see how cold you get. Play around with your GPS, know how to use your maps, and be well-versed with your technical gear. (JT used CalTopo maps and Zach/Brady/I downloaded the Ride with GPS track for our Garmin eTrex.)
Learn some basic bike maintenance. We met one dude 200 miles in who couldn't tune up his bike's shifting, which is awkward (at best) when you're pedaling a remote trail for 700 miles and only can use three gears.
Bare minimum, dial in your bike before you leave - I stripped mine down and replaced the entire drivetrain, put on new tires + sealant, bled the brakes and replaced pads, greased my bottom bracket and all my suspension pivots, trued wheels, and generally tried to anticipate headaches. It worked: I had zero mechanicals the entire trip (part luck, part preparation, I'm sure).
Most of all, don't overthink it! People have done crazy adventures on old bikes with makeshift gear and had an awesome time. Get out there and have a kickass trip.
General Thoughts and Lessons Learned:
Weight matters more on a mountain bike. While road touring, ten extra pounds isn’t a big deal. Laptop? Extra shoes? Surrrre, throw it in! Not the case for bikepacking, where you’re pedaling steep trails, not to mention lifting bikes over downed trees (one day featured 200+ of them) and intensity is generally higher than on a road tour. Both up and down, a light kit will make your trip considerably more fun. I’ll aim to shave weight next time.

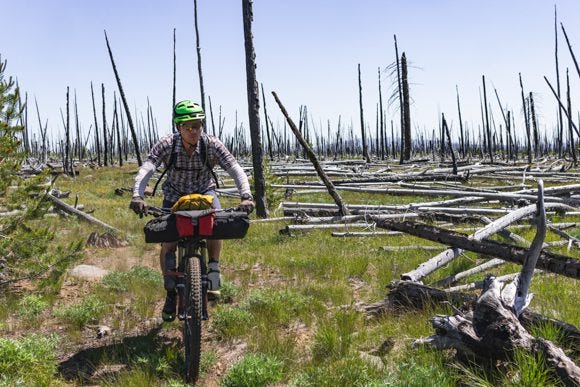
The more you carry, the harder the (already difficult) section can be! We kicked off day 4 with this brushtastic start from Silver Creek. JT was still smiling.
For trips with multiple people, split/share gear. Leathermans, camp stoves, tents, water filters, and so on are all great candidates.
You don’t need fancy bikes or bags. Any mountain bike will work on the Oregon Timber Trail. Dry bags lashed to your bike can carry gear.
Our bike choices varied from fully rigid/no suspension (JT) to hardtail (Brady) to me and Zach on full-suspension bikes. Most important was a tight and well-balanced gear setup. You can have fun out there on a steel Karate Monkey or a carbon shredder, but if your gear is loose and banging around, it’s gonna suck. (My recommendation is to at least have front suspension, but I’m not as tough as JT.)
Limited clothing is the name of the game, with layering absolutely key. Think riding gear and (maybe) a couple alternate items for camp. I went with a lightweight sleeping quilt and wore my jacket to sleep. In general, items that can cross over (e.g. rain pants for bad weather AND as a replacement for thermal bottoms) is a great way to cut back.
Go light on water whenever possible. Know where water sources are, how consistent they tend to be (spring vs. fall varies a lot) and how much water you drink. Chug water at water sources (camel up!) and motor through to the next refill. Other than the first 200 miles, water was plentiful on the OTT, but be ready for 20-40 mile sections with no refills on the Fremont Tier.
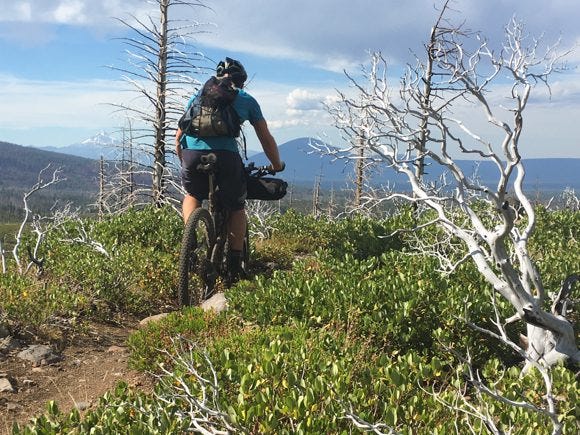
Zach's ultralight setup with some views of Mt. Jefferson and Black Butte on Trail 99 (south of Sisters)
Contrary to the above, more food is better than no food! A pound of food (maybe a spare dehydrated meal or two) won’t wreck your riding experience, but can make you feel reaaaaal good at night.
Be prepared, but not TOO prepared. You can’t plan for everything! See Point #1: you don’t want to have a crazy amount of safety equipment and bike repair gear if it is so heavy that it slows you down. You can always push your bike to a highway and hitchhike if things go totally awry.
Get some medical training. Both Zach and I are Wilderness First Responders, and knowing how to use a first aid kit is always a good move. All of us had some injury on the trip ranging from bruises and scratches to more serious (Brady peed blood after a minor accident; Zach finished the trip with a couple cracked ribs). None required evacuation, but easily could have. Check out a Wilderness First Aid weekend course at the bare minimum.
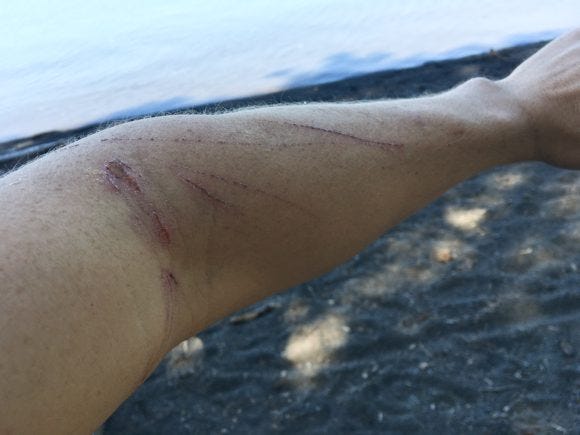
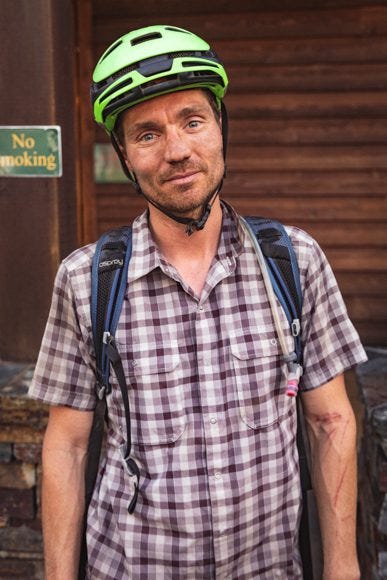
Deep scratches (healing well) on my arm from a protruding branch on a trail. Brady found me bleeding, cursing, and yelling as I destroyed the offending branch.
Things I Considered Bringing But Left Behind:
Solar panel - These are fairly heavy and we were in/out of shade most of the time without many extended rest breaks for charging. Glad I left it at home.
Folding saw - potentially handy, but most of the trees blocking our way were too big to cut. Past mile 200 (Chemult), there weren’t many downed trees anyway. I’d leave it at home for the OTT.
Big camera/large tripod: My Sony RX100 worked great and is 1/2 the weight of my DSLR camera. A mid-size crop sensor camera like the Sony A6000 series would work great. Leave the giant tripod at home unless you are road touring, Ansel!

Paddleboard break on Big Lake with a view of Mt. Washington! Yep, left the SUPs behind too...
Weight Carried:
For all you people who loooove numbers, I put together a spreadsheet with a full breakdown of my gear weight. Totals for each section are also below for your reading enjoyment. The weight adds up fast.
Gear weight on bike: 24.76 pounds
Gear on body (clothing, backpack): 5.96 pounds (similar to any day ride that I do)
Bike weight with bags: 31 pounds (27 bike, 4 bags/empty water bottles/cages)
Water: varied! My maximum was on the Winter Rim without many water sources where I carried 2.5L (~5.5 pounds), but most of the time it was closer to 1.5L and we’d filter at the frequent streams/lakes.
Food: 2-5 pounds unless I said the hell with it and bought fruit (cherries/grapes) and carried them. The reward vs. extra work ratio in the heat was worth it for me some days. We also ate huge meals every 2-3 days when we'd hit civilization (diners, resort restaurants, and the buffet at Breitenbush Hot Springs yesssss).

Final grocery stop (in Parkdale) on our final day.
Detailed Gear Breakdown
Bike: Santa Cruz Tallboy CC (2017)
Tires: 29” Maxxis Minion DHF EXO 2.3” front, Ikon EXO 2.35” rear, both set up tubeless. Experienced bikepacking friends swear by these and they worked great! The EXO sidewall is a protective weave to help avoid tearing your tire apart. I had zero flats or any issues with tires the entire trip.
Gearing: 30T front chainring, 11-46 rear. This was spot on - when it was steep enough to warrant more climbing range, pushing my bike was a welcome respite to stretch my legs and calm my hammering heart.
Carrying Water: Two fork-mounted water bottles with cages attached using hose clamps, a liter strapped to the downtube and a 2.5L water bladder (rarely filled) in my riding pack. My plastic side-mount bottle cages did NOT work well (I resorted to ski-strapping the bottles on after losing two). Some bikepackers don't like the change to suspension that happens with fork-mounted water bottles, but I thought it was fine.
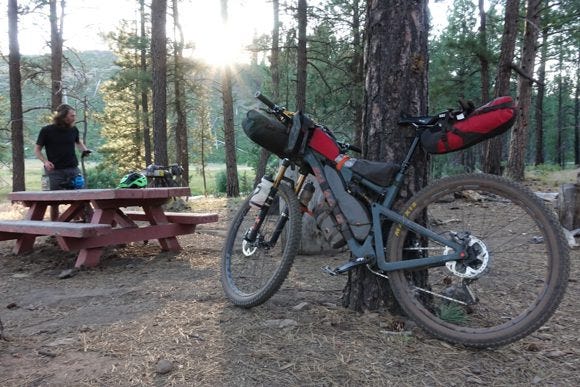
An excellent camp spot at Silver Creek on the Fremont Tier.
Bags: Bedrock Bags from Durango, Colorado.
The core of any bikepacking setup is a set of bags to carry gear. Rather than heavy metal racks with chunky panniers like I’ve used on past road tours, soft, lightweight bags are the way to go when riding singletrack (or anything!).
The bags I bought from Bedrock Bags, a small company in Durango, are fantastic. Customer service was incredible, the construction is solid (both zippers and material) and they stayed in place remarkably well the entire trip. I was pleasantly surprised that the rocky, technical terrain we rode was still fun, even with bags on.
If you have any questions about bags, email Bedrock directly. The company has tons of online tutorials and a staff who knows bikepacking and outfits many Colorado Trail racers. They helped me dial in my kit and I’m sure they will do the same for you!
Glad to have dialed bags on the rocky Winter Rim! (Photo: Brady Lawrence)
Handlebar bag: the Entrada. Some bikepackers use a simple dry bag for a handlebar bag, but those can flop around when the riding gets rough. The Entrada, in contrast, has multiple attachment points on the bars, straps to cinch it down, and doesn't move at ALL.
Even descending chunky, rocky trails, my sleeping kit stayed lashed to the bike like it was part of the frame. There's also a spacious front pouch as part of the attachment where I stored extra food or quick-access light items.
Top tube bag: The Dakota Tank. My namesake bag (not) sure is handy! For easy-access snacks, phone, camera or whatever, this nifty number is perfect. It has three attachment points and doesn't slip sideways off the frame, unlike other top tube bags I've used in the past. A must-have.
Me and all my stuff on a cold morning just before Surveyor's Ridge! (Photo JT Lehman)
Water bottle/Feed bags: Tapeats Don’t bikepack without these! They are easy to open with one hand while riding, hold a ton of snacks or a big water bottle, and don't bounce around. Mine were stuffed with bars most of the time. So, so handy.
Custom frame bag: A downside to doing this trip on a full-suspension bike is that I lose frame space. Ohhh well - worth it for the fun! Bedrock has templates for various bikes, but mine was a newer model.
No problem: I just laid a measuring tape on the bike, snapped a couple pictures, and POOF, two weeks later my custom frame bag showed up. This sweet little number held my repair kit, tech gear, and medkit. I like it so much that I’m leaving it on my bike for day rides as a permanent fixture.
Sinbad Stash Pack: Strapped to the bottom tube, this handy item is stable is light, stable and holds a full Nalgene water bottle size item. My 29” tires initially rubbed on the bottle when I hit big drops, but that was fairly infrequent and relocating the bag lower on the frame fixed this. Make sure to measure things though!
Dropper Seat Post: the Black Dragon This is a magic device. I've heard/read complaints about swaying, crappy seatpost bags that make riding annoying. Thanks to a dual-pronged metal seat attachment (the RailWing), the bag has zero sway. There's also a "valais" that clamps onto the seatpost and prevents any chafing on the dropper post. The result is a seat post bag that held all my clothing for the trip and balanced the bike and gear weight.
One thing to consider: if you have a 150mm dropper post, your rear tire will most likely rub on the bag when hitting big jumps or drops. An extra 10-15 psi in the rear shock helped this for me, though I still can't drop it all the way without rubbing.
Onward to the rest of the STUFF. I've linked to the bigger, specific items; some are affiliate links (meaning Amazon kicks me a commission if you buy through it), and some aren't.
Sleeping: 4.8 pounds
Light is the name of the game! Lots of options out there for 1-person tents, bivy sacks or tarp shelters. Sleeping pads just keep getting lighter (and less durable, curses).
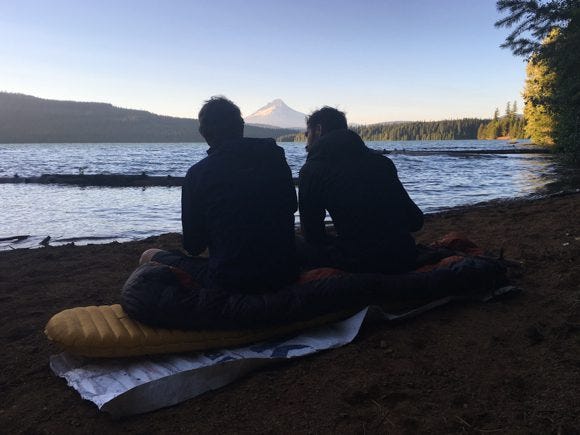
A fine evening cowboy camping on Timothy Lake. One of our best overnight spots for sure.
Tent: Big Agnes Fly Creek 1 or 2 person. This tiny, light tent is easy to set up and use. Brady and I shared the Fly Creek 2, and a bivy or tarp tent works until there are mosquitoes. We cowboy camped under the stars all nights but two, but were glad to have a tent at Timpanogas “Mosquito Den” Lake.
Sleeping bag: EE Revelation Apex 40 degree quilt. This quilt loses the zipper and simply lies over the top of the sleeping pad with straps to secure it. It seems everyone in the outdoors is going to using quilts and I can see why! Sleeping socks were key on cooler nights where it dropped below 40 degrees.
Sleeping pad: Big Agnes Q-Core SL regular. A bit bigger than a Nalgene and 3" thick. Comfortable, and also bigger than the new Thermarests. It also takes enough air to blow up that I start feeling like I’m hallucinating! I’d get a ¾ length Thermarest Neoair (JT used one and likes it)
Pillow: Sea to Summit inflatable. Yeah yeah, a jacket works...and this is tiny and works BETTER. Hey, a guy needs a little luxury.
Cooking equipment: 2.25 pounds
We split camp stoves and fuel between the four of us. Small stoves worked great for dehydrated food dinners and instant oatmeal for breakfast. Other than the pot, the only other items I brought was a tin cup and a titanium spork. Zach used a compressible 1.4L Sea to Summit X-Pot that I plan on getting.
For water filters, I shared with the team. For time efficiency, next time I plan on bringing the excellent, light filter that JT had, the Katadyn BeFree. Zach carried a syringe to pull water out of shallow or swampy sources and then filter, which was key a few times.
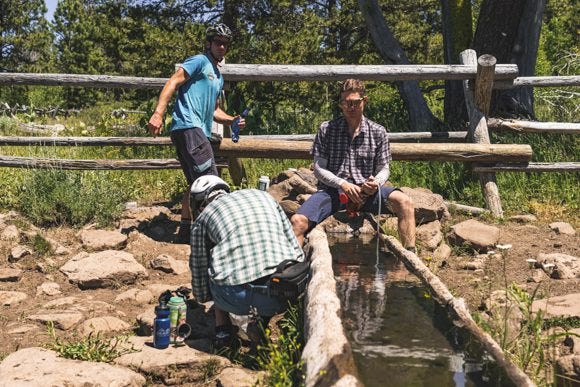
Filtering water from a trough on the Fremont Tier. (Photo: Brady Lawrence)
Clothing worn: 5.96 pounds (including shoes and backpack)
Bike shorts: Dakine Boundary. I love the stretch and fit on these shorts and have ridden in them for years. Chamois: Pearl Izumi, four years old and threadbare but still kickin! Yep, only one for the entire trip - rinse out at night (sometimes) or jump in streams/lakes during the day. Look mom, I’m (almost) clean! Short-sleeve jersey/shirt: Patagonia collared nylon. Since I’m vegan and don’t buy wool, I initially considered a synthetic polypropylene shirt. However, they STINK for day after day use. I picked up this shirt at the local used gear shop the day before the trip and it worked great!
The shirt rinsed out easily, was light and cool, and (the best part) JT had the exact same shirt style. Twinsies! As a bonus, it makes you look slightly less backwoods when you wander into a town or lake resort restaurant to eat all the food.
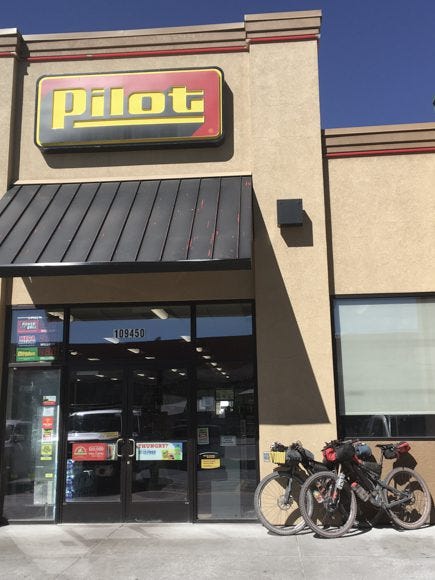
Convenience store food refill in Chemult, no collared shirt required...
Gloves: lightweight Giro Socks: quick-dry synthetic. Shoes: Specialized 2FO. These are da bomb. Easy adjustment, comfortable, wide(ish) toebox, and lots of protection for banging toes while riding) Helmet: Smith Forefront (Love this helmet for comfort and the custom sunglasses integration on top) Sunglasses: Smith Attack Backpack: Osprey 10L w 2.5L bladder. I rarely filled the bladder with more than .5-1L at a time except for a couple days where water was tough to come by for 6+ hours.
Spare/Warm Clothing: 4.41 pounds
For future trips, I may skip the thermal bottoms and just use rainpants like Zach (Bikepacking Mentor). The thermal top wasn’t necessary, but it was nice to change out of my riding shirt every day. Otherwise, this list worked well.
Brady hiding from a thunderstorm under a tree. Bring your rain gear, even if it's summer!
Thermal Jacket: Patagonia Nano-Air Rain Jacket: Outdoor Research Rain Pants: Marmot Precip Thermal bottom: Patagonia longjohns Thermal top: Smartwool (I don't buy new wool items, but this old top keeps on kicking; no reason to throw it away) Waterproof gloves: Black Diamond Beanie Sunsleeves - fantastic for riding in the sun without needing sunscreen
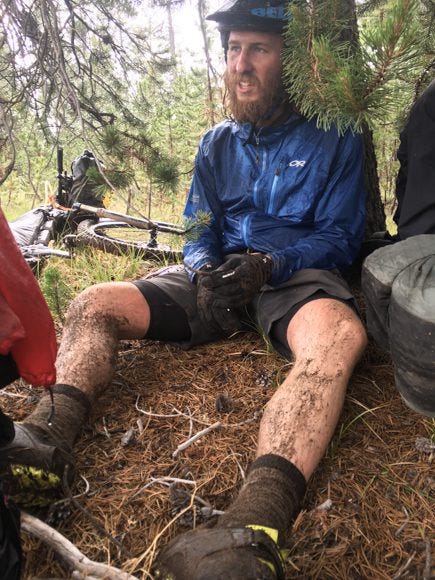
Me haaaangry and tired after a long day on the trail, banged up and yet fajitas soon made everything better! (Photo: Brady Lawrence)
Arm warmers - I never used these, but they’d be handy on chilly mornings, especially at higher elevation. Knee warmers - I used these once and don’t plan on bringing them for future trips. Rain paints will suffice for cold mornings. Extra socks for sleeping or if socks are wet in the morning (I wore the same pair to ride in, though I started with them damp a few days) Underwear: Exofficio quick-dry. Towel - mine was tiny (5”x5”) and next time I’ll go bigger. It was hot enough to air dry most of the time (silver lining for the heat?) Stuff sack - good for clothes and/or extra food to strap to bars Camp shoes: Xero sandals. A cheap pair of light flipflops is so worth having so you don’t need to wear bike shoes for your ENTIRE trip. Mosquito Net
Electronics: 2.89 pounds
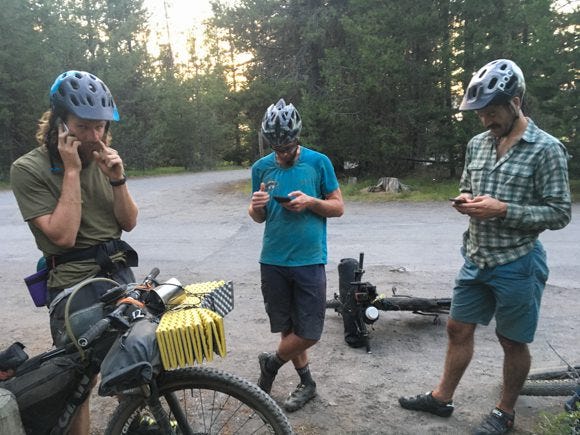
Ah, camaraderie on the trail! Isn't technology great?
Camera: Sony RX100V with 2 spare batteries and charger. Sweet little camera with SO much power for the size. Next time, I may leave the spare batteries/charger behind and charge via USB off the external battery pack
Tripod - small Gorilla pod
iPhone 5SE and headphones - I listened to a few audiobooks on the trip, mostly during long hike-a-bike sections or steep fire road climbs. I’ve suffered enough bike touring to feel ok about distracting myself!
External battery: Anker Powercore 13,000 (it'll charge my phone 6 times). I prefer this over others because it has two charging cable slots vs just one. Fundamental rule for staying topped up is Zach’s ABC: Always Be Charging. Gas stations, restaurants, motels...fill ‘er up!
Satellite messenger for emergencies: SPOT Gen3 tracker. This is only 1-way communication and you can’t do a monthly-only plan, so I may get Garmin InReach Mini for future trips.
Headlamp: Black Diamond Revolt + spare batteries
GPS: eTrex 30x w/lithium ion batteries - Thanks for loaning me this, Paul! The user interface is weak, but it sips batteries relative to other GPS units so most bikepackers seem to use it. Someone please invent a better one!
Charging/USB cables
Tool, repair and emergency kit: 1.16 pounds
My goal was to have everything I needed for most field repairs for my bike or gear. As it turned out, I didn’t need any of this gear, but I’d carry the same kit next time!

Mid-trip brake pad replacement. Brady's bike experienced other fun that I'll talk about later!
-2 Voile ski straps - excellent for many applications ranging from holding bottles on a cage to fixing a broken bike frame -Multitool -Patch box w/2 tubes of glue, 9 small patches, 1 large patch, and 2 speed patches -Spare derailleur hanger -Spare derailleur cable -Spare brake pads (2 sets) -Spare SPD cleats/bolts -2 chain links -Quicklink x 3 -4 cable ends in baggy -FiberFix spoke replacement -Chain lube in micro dropper bottle (one bottle was good for the entire 15 days) -6”x10” T-shirt rag for cassette flossing -Old toothbrush w/cut handle for cleaning drivetrain -2 plastic tire levers -4 large zip ties -4 small zip ties -4 safety pins -1” roll of Gorilla Tape -GoreTex repair tape -Kleartape universal repair tape -Sleeping pad repair kit w/one Hot Bond adhesive and 5 patches -Mini compass All above in a Ziploc bag (a more durable bag could make sense for a longer trip)
Misc: 1.32 pounds
Spare 29er tubes (2) - not a single flat for any of us on the entire trip, but gotta have these! For flat protection, fill the tubes beforehand with Stan’s sealant. Leatherman -must-have for any trip
Water break in the midst of big trees on Middle Fork near Oakridge.
Medical kit: .32 pounds
Taking the Wilderness First Responder class upped my game dramatically for wilderness first aid. The below is similar to what I carry on any day ride. NOLS sells well-equipped medkits.
A fabulous day in the Old Cascades Crest zone on the Mt. Hood tier. (Photo: Brady Lawrence)
-3 2”x 3” non-stick dressings -4 Band Aid Tough Strips -10 wound closure strips -Irrigation syringe (for cleaning out cuts/scrapes) -Tegaderm in big sheets - can be trimmed to fit smaller scrapes/burns -4 Neosporin applications -5-Q tips -2 tincture of Benzoin applications -10 Advil, 10 Ibuprofen & 4 Benedryl in flip top container
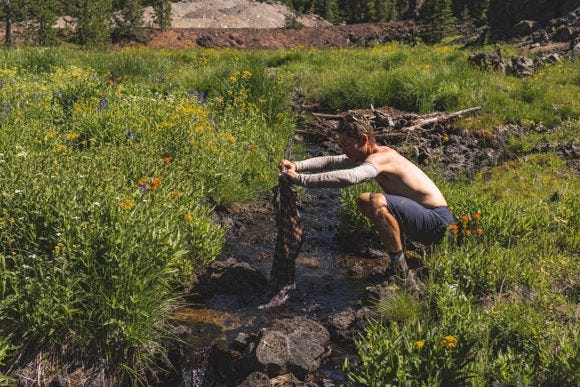
Laundry! It's (almost) clean... (Photo: Brady Lawrence)
Personal Items: 0.28 pounds
-Toothbrush/toothpaste and travel-sized Glide floss -1” camp roll toilet paper and small bottle of hand sanitizer (most people get giardia from dirty hands, not water!) -Dr. Bronner’s soap in micro dropper bottle -SPF 30 stick sunscreen -SPF 15 lip balm -Chamois Butter - skip the individual wipes and just fill a small container from a big chamois butter like this -100% DEET insect repellent wipes
Any Questions?
That's a wrap! Drop me a line with any clarifications, feedback or (constructive) thoughts. Commenting is great because it helps out future readers of this post.
Have fun out there! By no stretch of the imagination is the Oregon Timber Trail easy, but it's a hell of an adventure and one I won't forget soon.
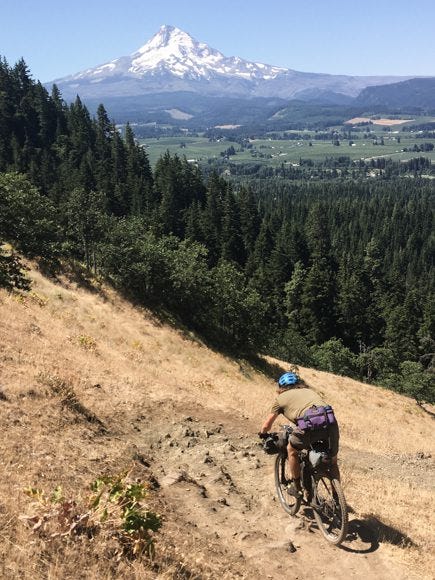
Brady descending off Surveyor's Ridge with Mt. Hood cheering him on.