Installing a DIY Gray Water System Under My Sprinter Van
For years, our Sprinter van’s “gray water system” consisted of a simple 3-gallon plastic jug. When it filled up, we’d haul the jug outside and dump it out. Usually discreetly, sometimes on an azalea in someone’s front yard.
After I upgraded our batteries to lithium and moved them inside, we lost the space for the ugly blue jug. How sad.
Instead, I schemed a fancy-but-affordable gray water system I could mount under the van.
My goals for the install:
Enough capacity to not need to empty it 1-2x a day like our previous system.
A sensor to keep track of how full it was. (Rather than “hey, can you check the jug?” or “OMG, TURN OFF THE SINK, THE UGLY BLUE JUG IS OVERFLOWING.”)
The ability to dump water while stationary or on the go. Aka a remotely-switched dump valve. Boss mode!
Not worry about ripping the tank off the van on rutted roads.
Not spend half of a Bezos fortune on the damn thing. (My total cost with tank, waterless p-trap, tank tray, wiring, and so on was ~$270.)
Mission accomplished! After scarcely a half dozen trips to various hardware stores and almost dying of starvation wandering around Lowe’s, my fancy new gray water tank is operational.
My goal is to save all you DIYer's the mental anguish of designing and sourcing all the components. Here’s a handy-dandy summary of the install.
Things to Consider Prior to Installation
I spent half an eternity pondering if I wanted to deal with this install. Simple is good.
A few considerations:
If you love snow sports and plan on spending months traveling in wintry locations, I’d probably keep the gray water inside your vehicle. There are tank and plumbing heating pads, but that’s more complex and also a drain on power systems.
If you frequent 4x4 roads (buy a jeep, dude), the less stuff attached to the bottom of your van, the better.
Is it worth the cost and install time for you? I enjoy these projects and $175 felt worth it to upgrade my system. However, a cheap 3-gallon jug under your sink surrrre is effective if you’ve got the space.
Dreaming of a sweet new gray water tank? Here’s how I did it.
Installation process for my gray water tank
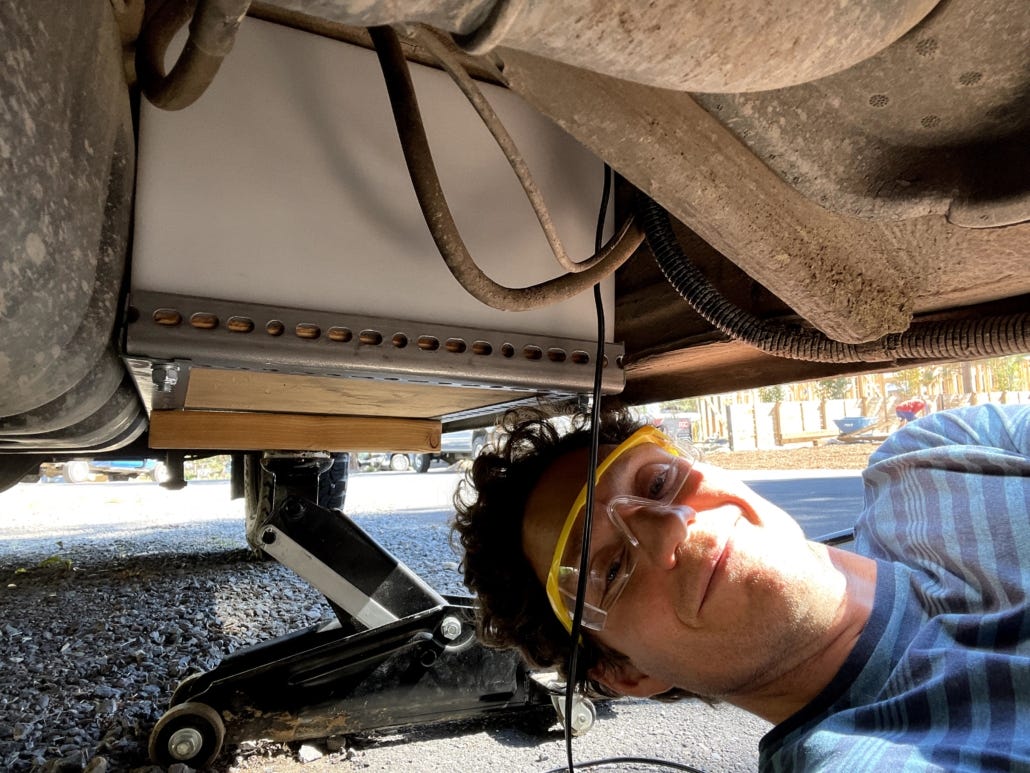
My first decision was the new tank’s location. I decided to put mine under the van just behind the driver’s seat where my old AGM batteries were previously mounted. I did so for a few reasons:
The space has easily accessible chassis ribs for mounting.
The gray water tank tucks in right next to the fuel tank.
My sink and electrical is right above there, so plumbing and wiring was easy.
From there, I ordered all the components, wandered around various hardware stores, cursed Lowe’s and all big box stores, and started the fun part: actually building stuff.
Dig this post and want to check out my future van upgrades and trips? Scope out my free 2x/month newsletter.
Install Prep:
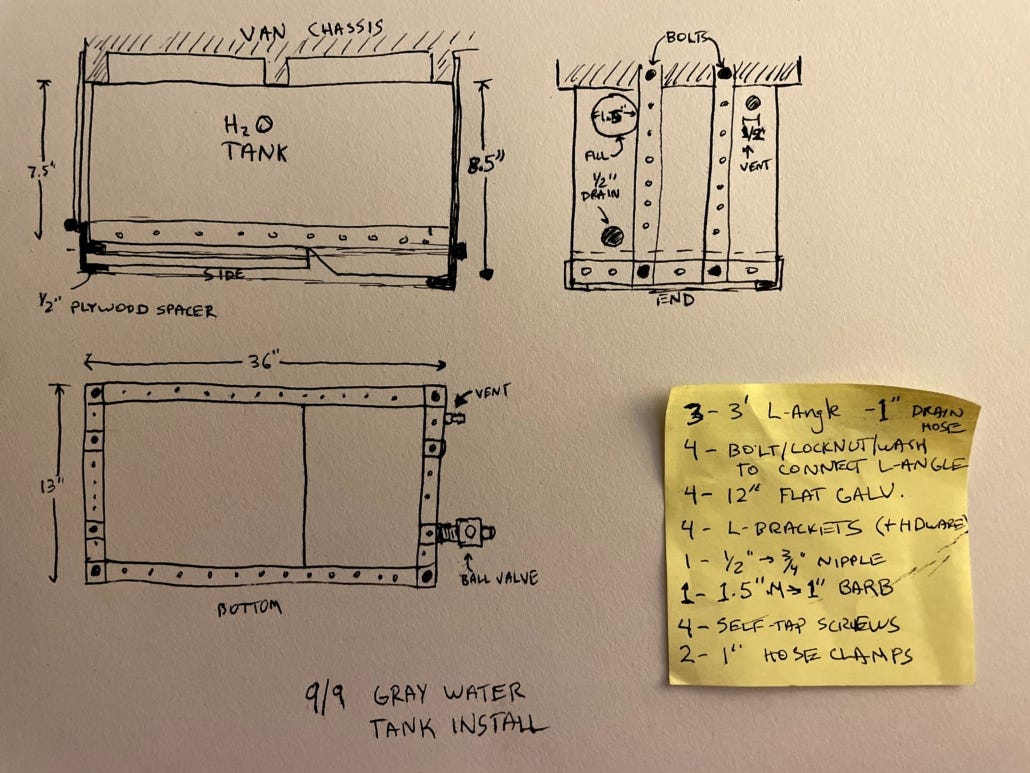
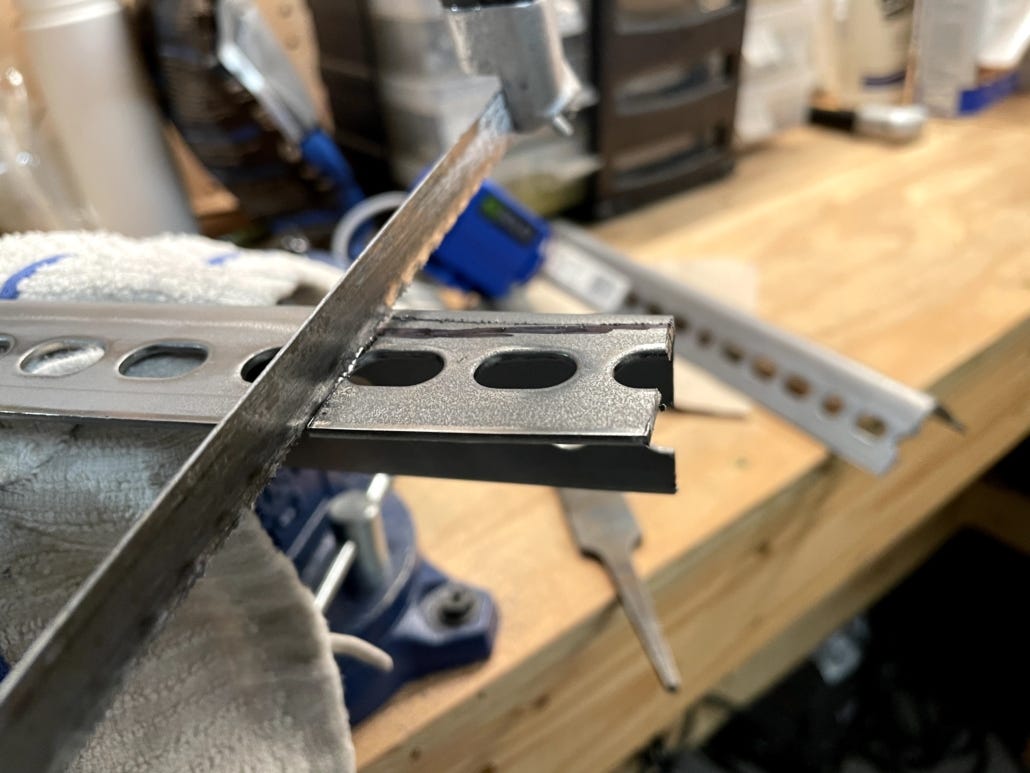
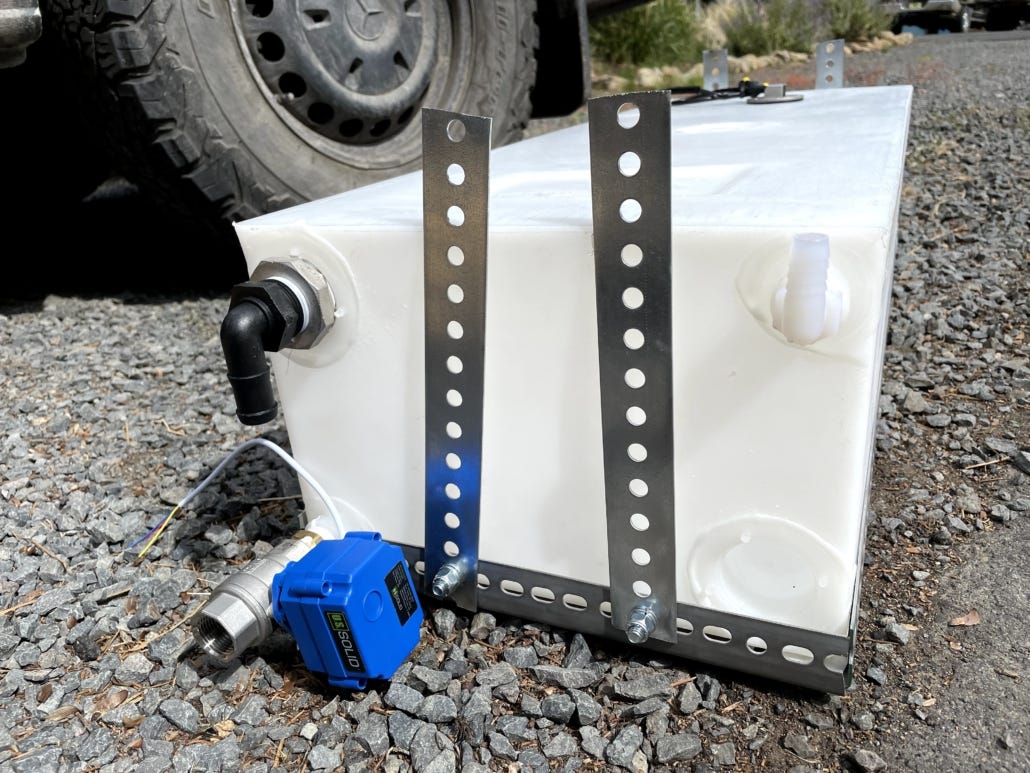
Cut frame rails. The two 3’ horizontal pieces fit my tank perfectly, so no cutting there. The horizontal ones I cut to match the width of the tank, with a cutout for the drain hole.
Bolted the assembly together, one ¼-20 carriage bolt in each corner.
Cut four 10.5” sections of flat galvanized metal (same style as angle) for vertical hanging pieces.
Attached the vertical pieces to my tank with the same carriage bolt setup.
Since the tank is tapered, I cut up some scrap ½” plywood and stacked two layers under the slimmer end of the tank with small sections routed out to fit over the carriage bolt heads. Bonus with the plywood is tank protection.
For the untapered tank end, I ran a line of ¼” thick weatherstripping to protect the tank from rubbing on the carriage bolts.
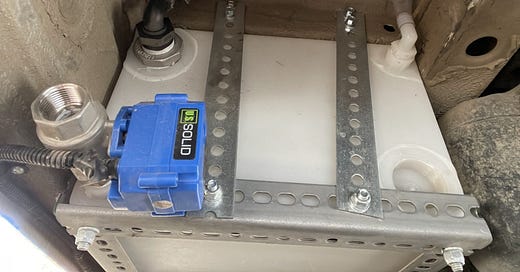
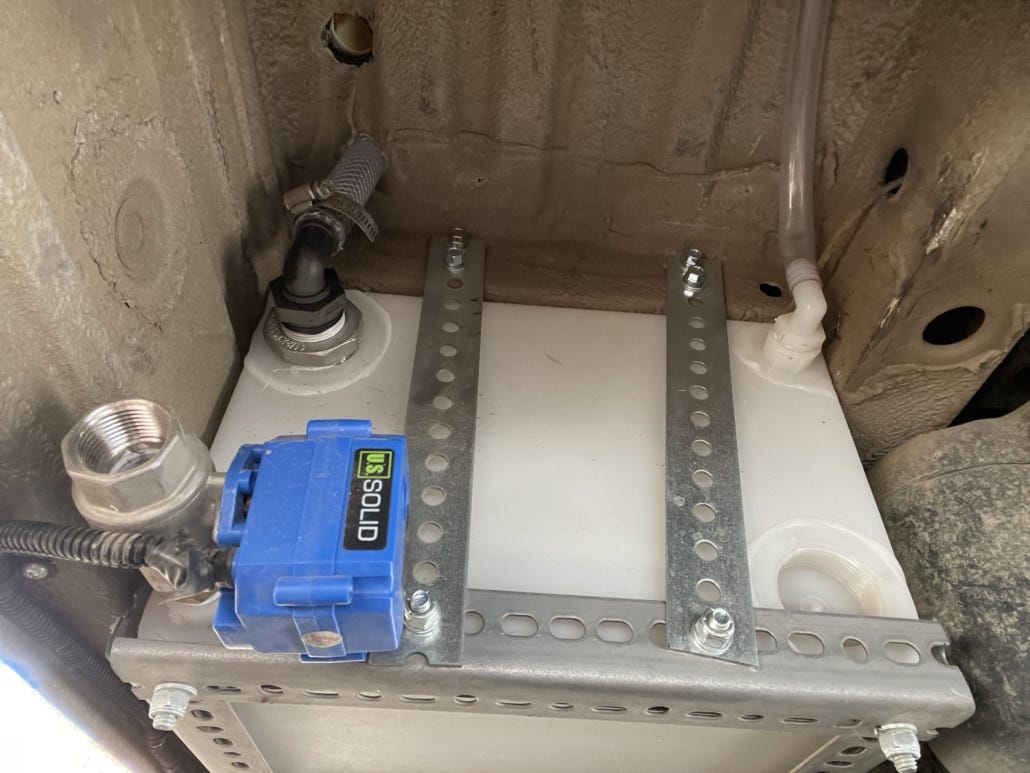
Drilled a hole in the top of the tank to mount the tank sensor and screwed the sensor to the tank, plus a little silicon caulk around gasket for good measure. Note: make sure your sensor location is between the horizontal chassis frame pieces. Mine is 10” from the forward-facing part of the tank.
Prepped sensor wiring for installation by splicing 16 gauge wire onto the sensor connections and covering wire loom for protection.
Installed the drain, outlet and vent plumbing. Note: do this before installing your tank. Teflon tape on the thread connections is all you need.
For the vent, I just used a 90-degree elbow and attached a small piece of vinyl tubing. No need to vent through the roof in my opinion. My van has enough holes in it.
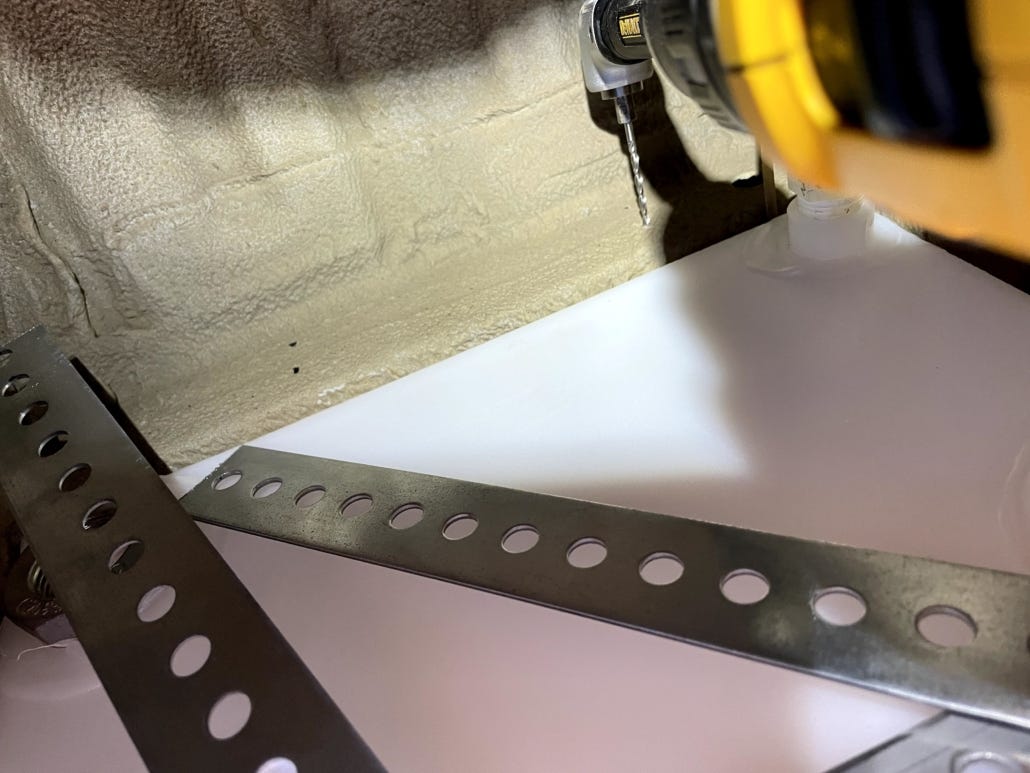
Speaking of holes… Next up was drilling eight of them in my van!
Installing the Gray Water Tank:
Most important step: borrow your neighbor’s lift jack. I also enlisted said neighbor's help getting the tank in position. I leave you to brainstorm other solutions if you don’t have a jack available.
Positioning-wise, the ribs in my Sprinter are exactly 36” apart, which lined up with the end of my tank. (I planned that!)
Crank that jack up and PRESTO your tank is in position. Line everything up because things are about to become a bit more serious…
Real-deal install time! Position your vertical hanging pieces where you want them and tap two holes in each van chassis support for each piece. Pro tip: this is impossible without a 90-degree adapter like this one for your drill.
Put a self-tapping screw (plus washer and lock washer) into each drilled hole.
Admire your work for 30 seconds, brag to your partner even though there's nothing to show yet, and then take a break before commencing wiring and plumbing.
Plumbing:
Once I tracked down all the parts, plumbing was quick and easy. (For plumbing...) Your system will likely be different, so I’ll keep this brief
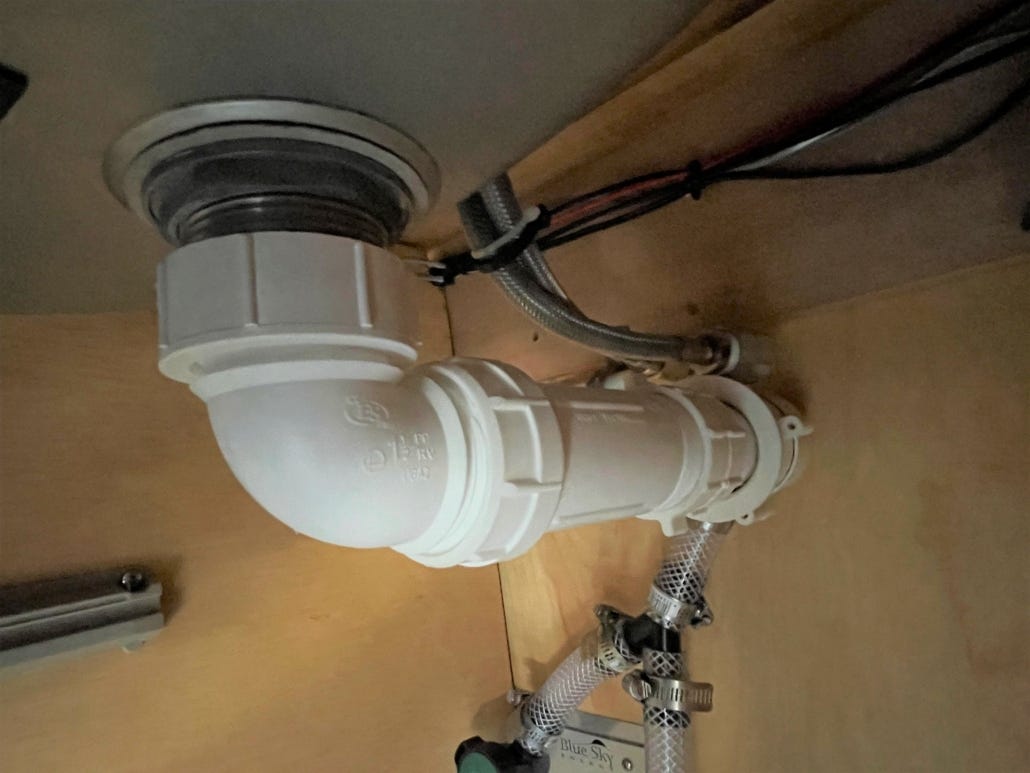
I connected a waterless p-trap from Uniguard to the sink drain.
I connected 1” OD tubing to the p-trap.
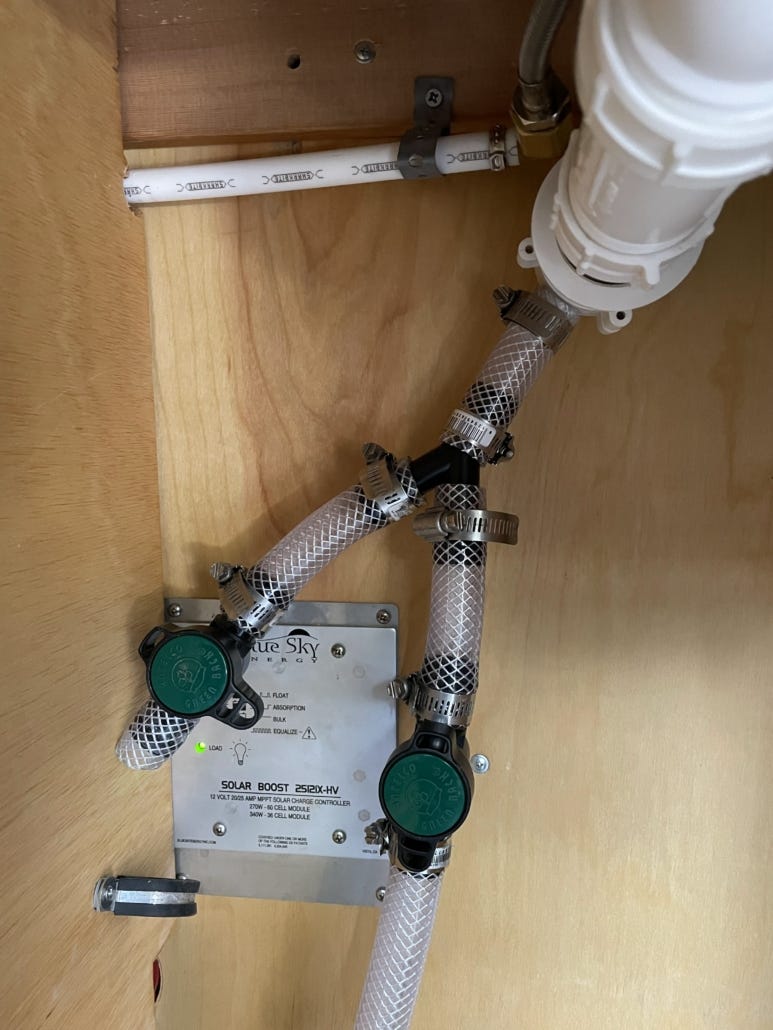
Put a tee in the main tubing line with a valve on each outlet. One will go to the tank, another straight through the floor in the rare case of freezing conditions during travel.
Under the van, I ran the 1" tubing straight down into an elbow at the top corner of the tank.
With a bunch of hose clamps on connections, plumbing is complete.
Wiring:
Wiring surprised me by taking an entire afternoon to complete. Lots of fun squished under the van, in the van, contorted in a cabinet… yay. The good news: it all worked as planned!
My two primary goals:
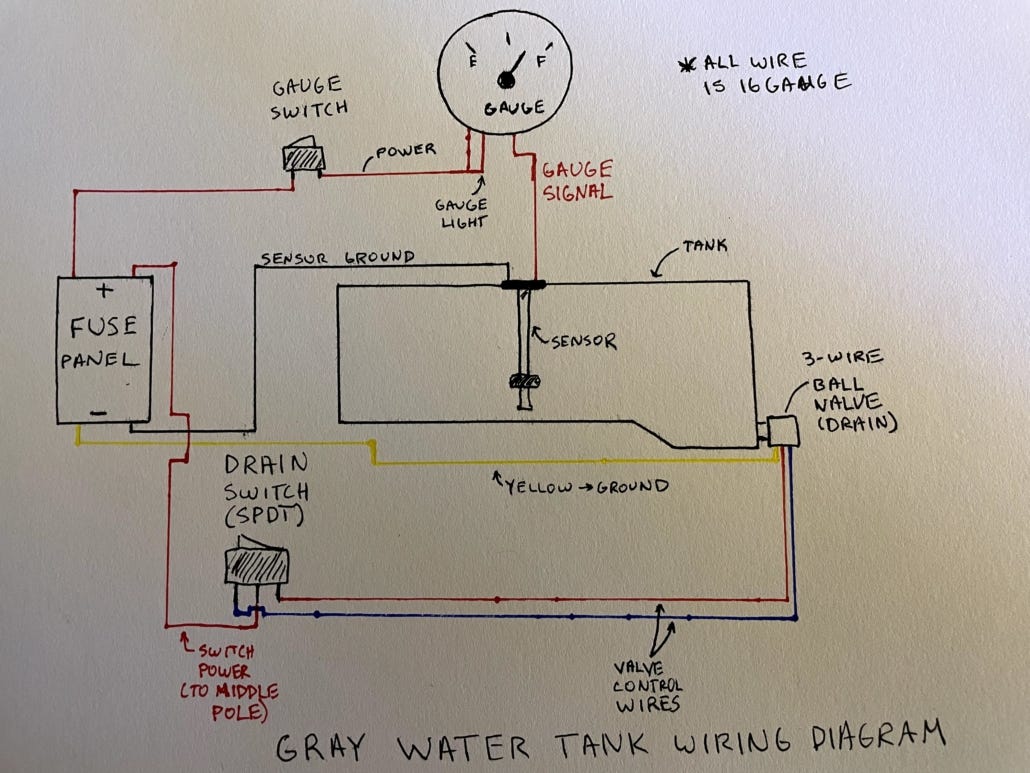
Put the gauge for the water tank on a switch so it is only on when I want it to be on.
Put the remote switch for the tank valve somewhere on the van driver seat so I can flip it while driving on some dirt road in the middle of nowhere OR in a sanctified RV dumping site.
Easiest way to handle this is with a wiring diagram!
Gray Water Tank Install Photo Gallery
See below for all the photos from the install. Click and scroll to see them all.
[foogallery id="11027"]
Parting Thoughts
Say what? Project complete!
Overall, I’m quite pleased with how this turned out and it worked like a charm during an inaugural roadtrip through eastern Oregon. Overall, I expect it to be a major improvement on having the nasty gray water tank sloshing around inside our van.
The extra capacity—15 gallons vs. our previous 3 gallons— means we won’t be emptying the tank nearly as frequently. When we do, it’ll likely be while driving on gravel roads. This played out exactly as planned during the first trip.
One thing I may add is a second drain pipe in case of super cold temps and frozen pipes. This would allow emergency sink draining directly onto the ground. Photos show the hole I pre-drilled for this, which I capped off for now.
Gray Water Tank Parts List:
Here’s the (mostly?) full list of what I used for my install. Some of these are Amazon affiliate links, which means Amazon kicks me some change if you buy it. Hey, it’s the least you can do if you follow this install guide, right?
All the fancy parts:
-This 15-gal water tank directly from Class A Customs (<--best prices for water tanks ANYwhere on the internet. Instead of $200-400, this tank cost 58 bucks including shipping.)
-This electronic ball valve, plus 1.5” to 1” reducer, then a 1”-¾ reducing nipple to connect valve to tank
-A SPDT (single pole, dual throw) switch to control the ball valve. Any kind will do.
-Tank level sensor (I bought the 6.5” one)
-Waterless p-trap by Uniguard (I bought mine from Etrailer.com)
-Gauge for tank sensor
-Switch to control gauge
Items for the tray (any hardware store has this stuff):
2 - 3’ pieces of 14ga galvanized angle (support tray sides)
1- 4’ piece of 14ga galvanized angle (cut in half for support tray ends)
1 - 4’ piece of flat 14ga galvanized metal (vertical support)
8 - self-tapping screws, plus flat and lock washers
8 - 1/4 20 carriage bolts (1”) with flat and lock washers.
½” plywood to stack under the tapered end of the tank. Also protects the bottom of the tank from sharp rocks or malevolent neighbors.
Weather stripping to cushion bottom edge of the tank against carriage bolts
Random wiring components:
-16ga wire
-Wire loom
-Crimps, shrink tubing, etc for wiring
Installation Tips
-Leave slack for your sensor wiring in case you ever lower the tank
-There’s of course the option to also install a manual drain valve. If I ever have a problem with my wiring, I’ll add this. In the meantime, I’m willing to accept the risk. Worst-case, my tank drains through the vent hole at the top of the tank, so life won’t end.
-If you’re concerned about tank mounting, you could always use Plus Nuts and bigger bolts for the chassis mounting. Given that the full weight of this system is <100 pounds totally full, I feel comfortable with this design. If something changes (aka my tank falls off and destroys my undercarriage), I'll update this with a bunch of swear words.

