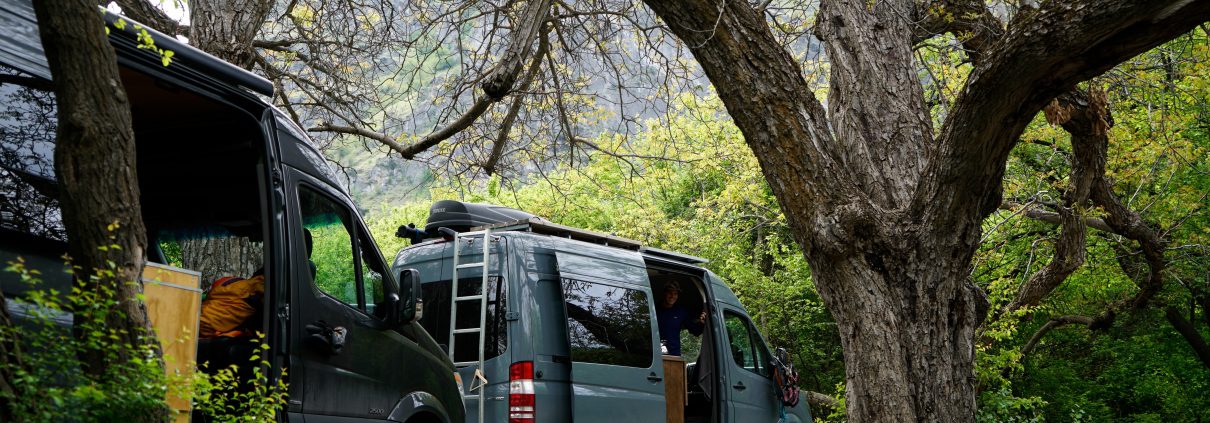
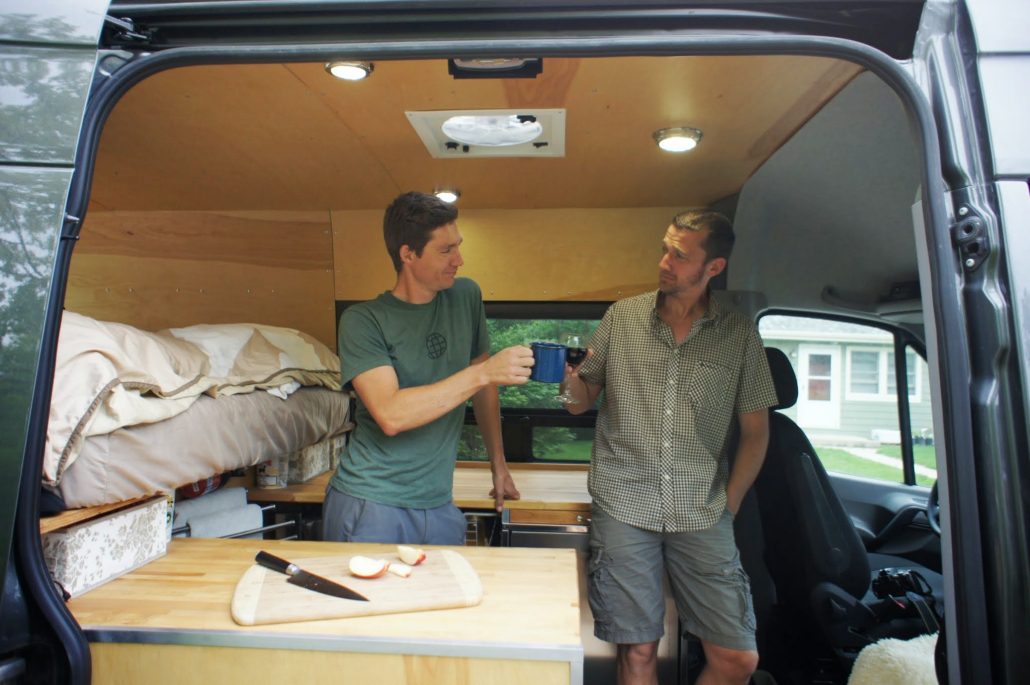
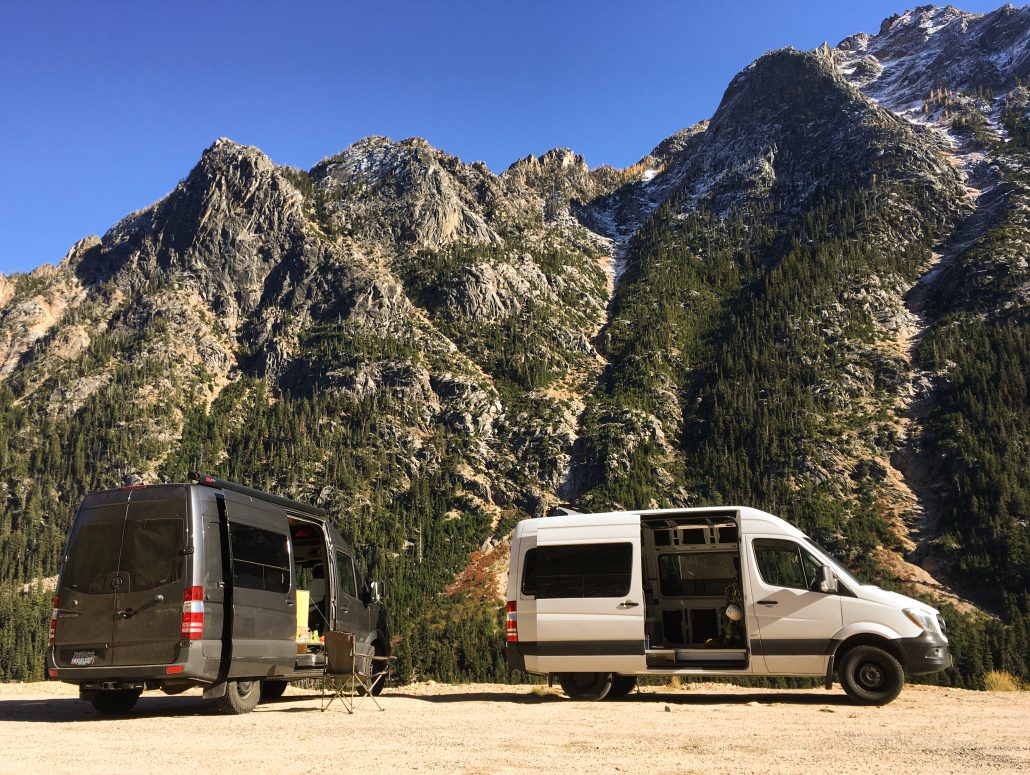
Good times in Leavenworth! (Pic: Kristen @bearfoottheory)
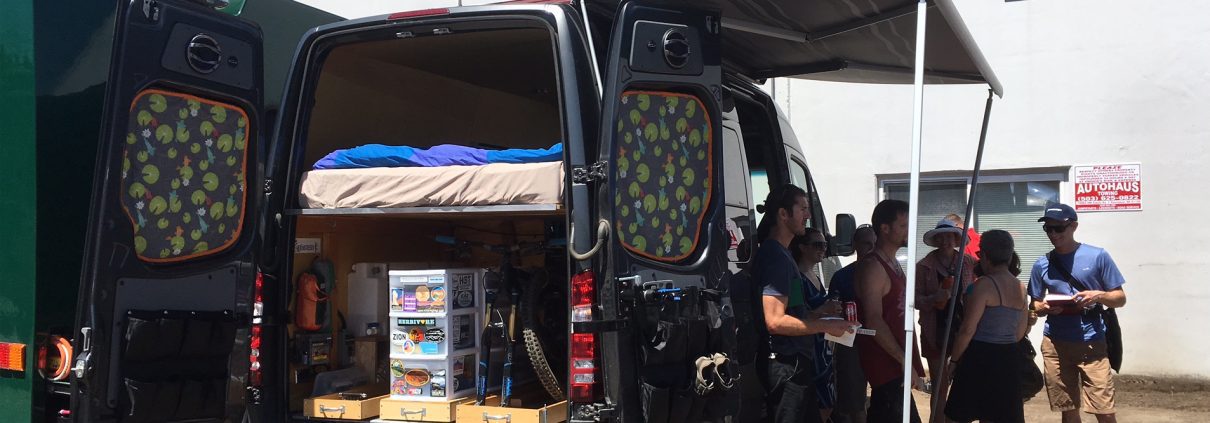
It appears this van life trend is sticking around. We’re sucking up wifi bandwidth at your library and stealth camping in your neighborhood…watch out! At most trailheads these days, I count the number of vehicles that aren’t vans.
I’m certainly not innocent. In fact, since I think all humans (and some dogs) need a van, let’s talk about how to make them Super Awesome Sauce. I’ve talked about my initial build, but never said “this still works” or “I’d change this.”
While I currently don’t plan to buy a new van, reader feedback and many weeks of van travel this year prompted me to make a list of:
Things I still love about our van
Things I’d reconsider, modify or do differently if I endured…err, engaged in a new buildout project.
My aim is to help your quest to design the ultimate adventure mobile to retain the comforts of home while exploring places like this.
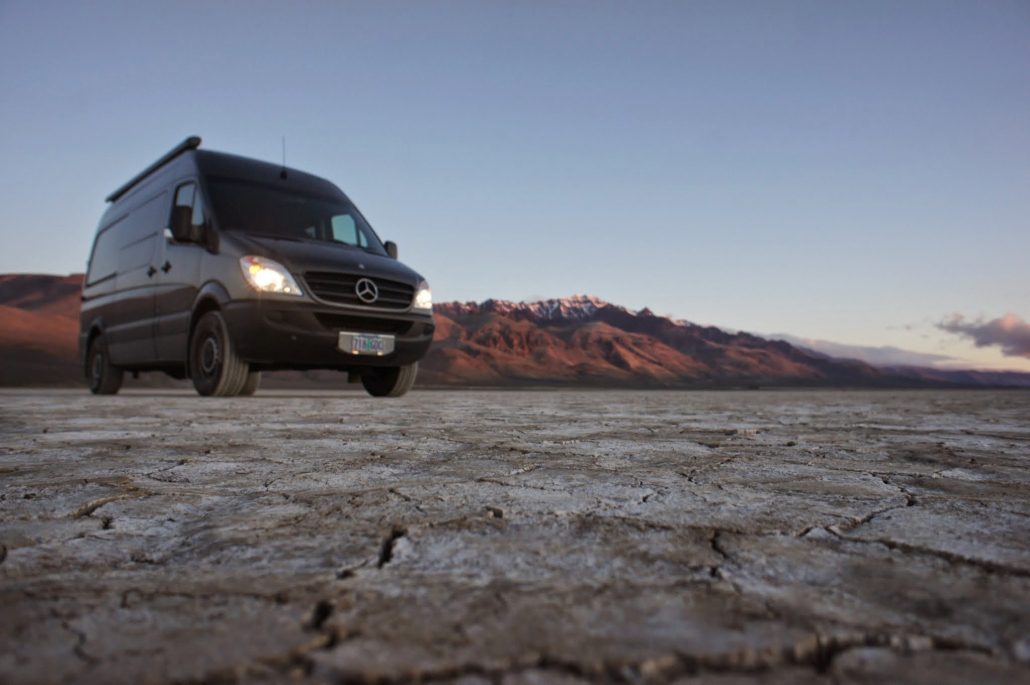
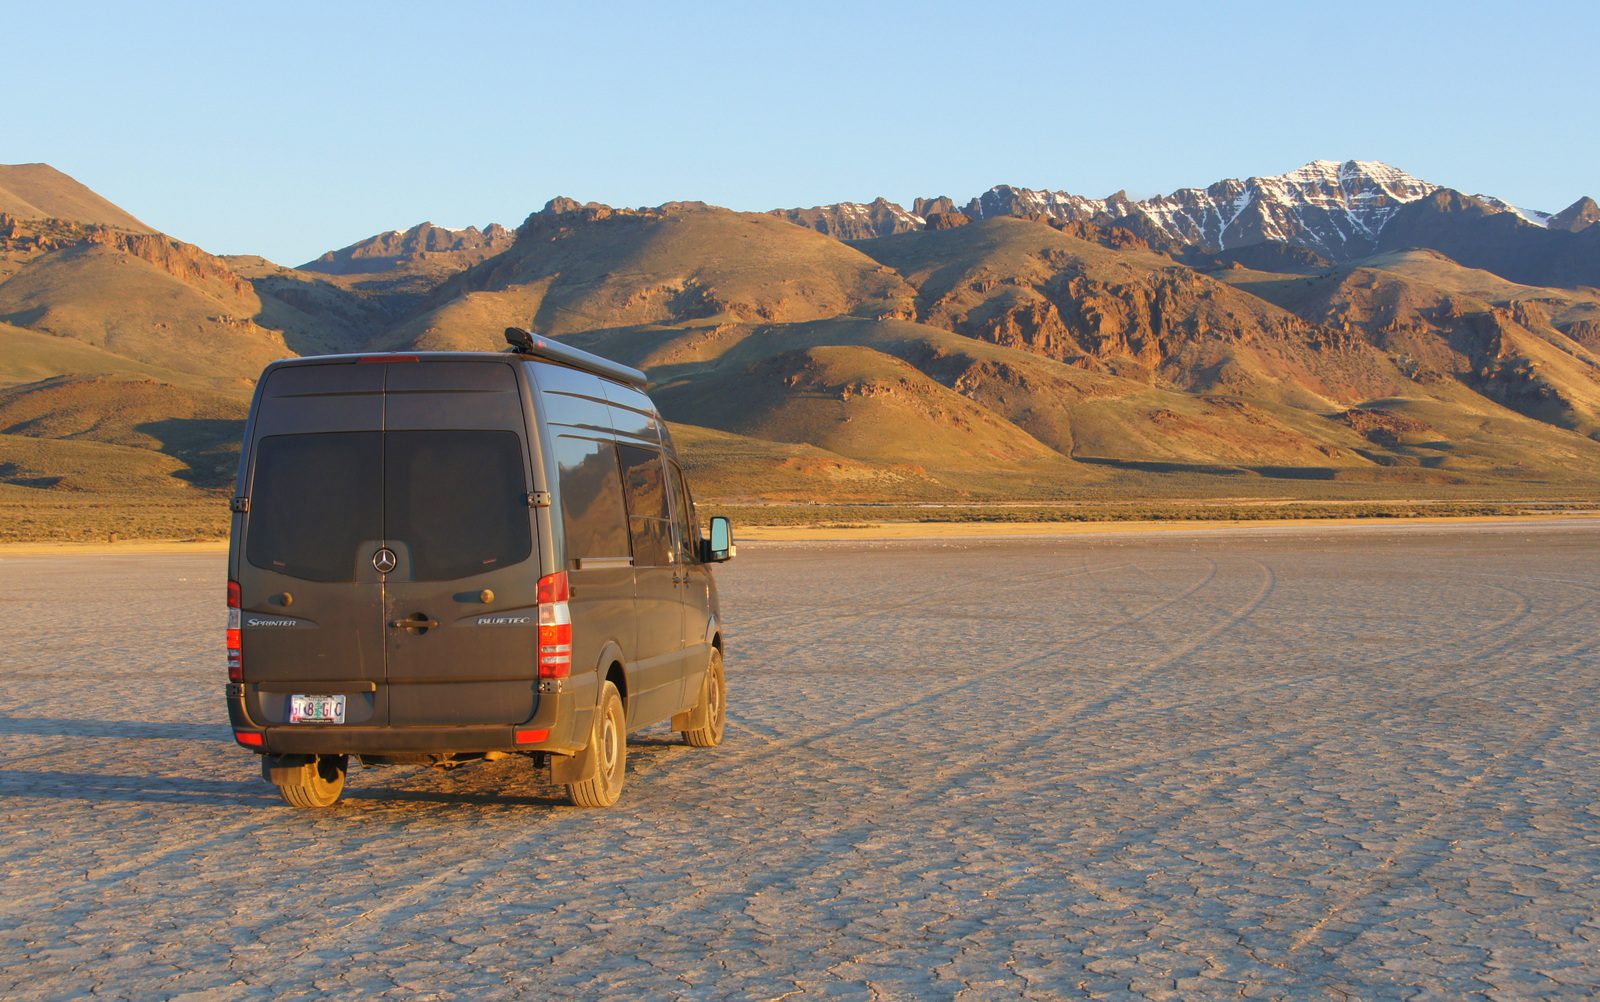
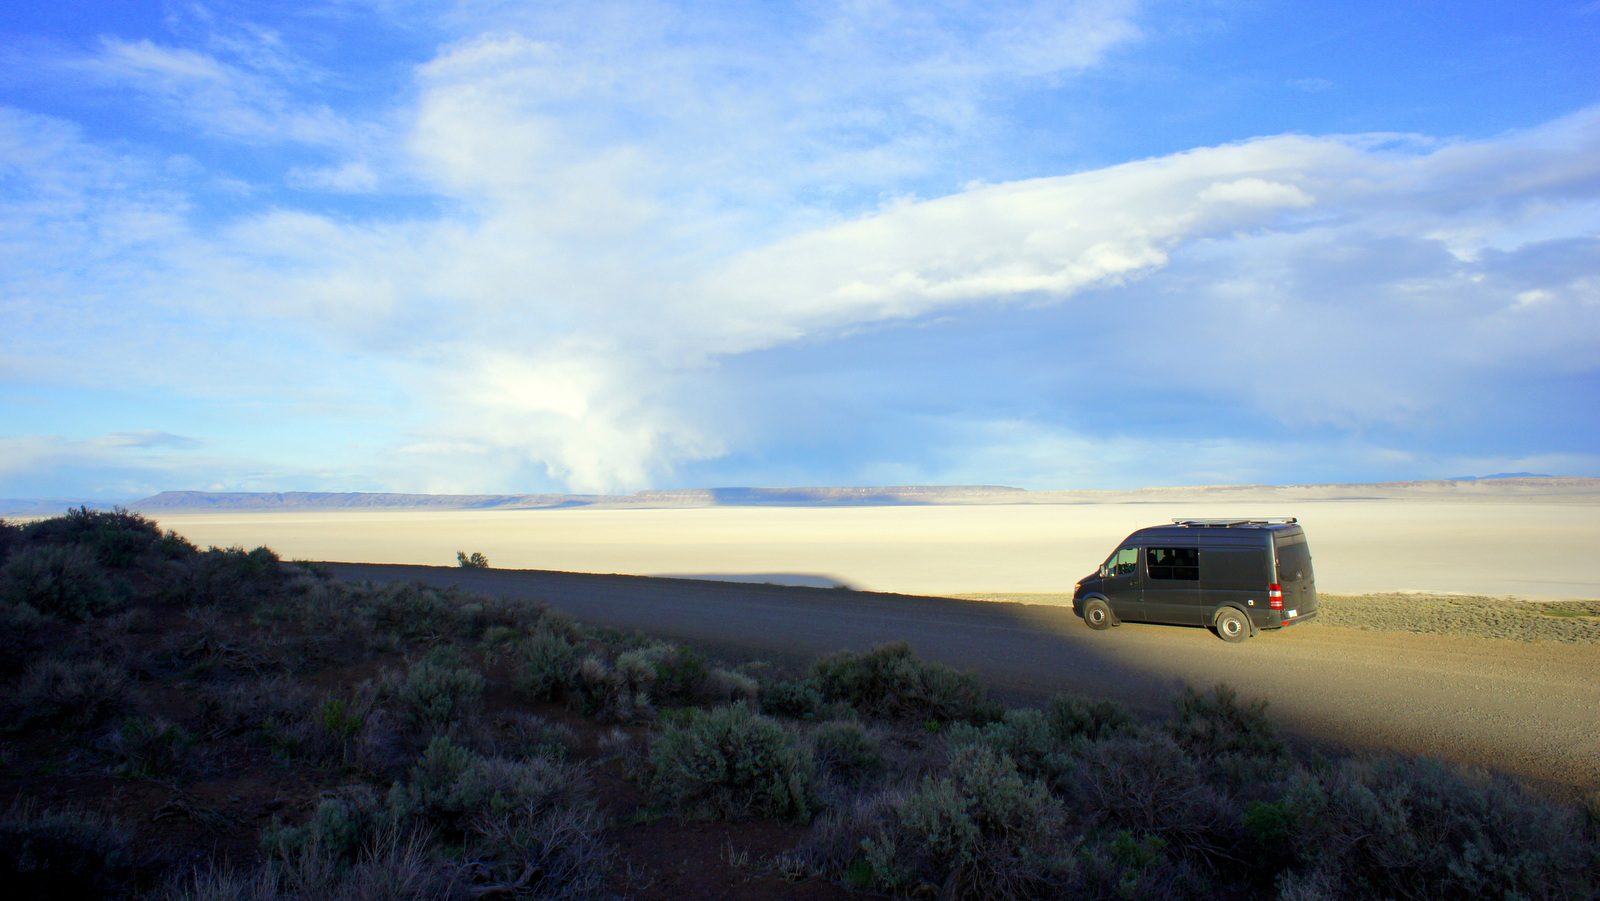
Sunrise on the Alvord Desert.
Why Should I Listen to You?
Hold on: why the heck does your opinion matter, Dakota? Do you even USE Snapchat? (Got me…)
Here’s all I’ve got: due to my writing about vans, I’m constantly awash in questions, comments, and thoughts about van life. Since 2013, my Adventure Mobile post has received hundreds of thousands of visitors and dozens of comments. (I’ve updated that article over 100 times with new info.)
I’m also lucky to have met many readers around the country during our travels. “Hey, I know your van…are you Dakota from Trapezing, Tripping, er Thrashing About?” (The name doesn’t matter, right? Next blog I’m using a word people know.) Trailheads, libraries, laundromats, grocery stores: Sprinter vans and their cool occupants are everywhere.
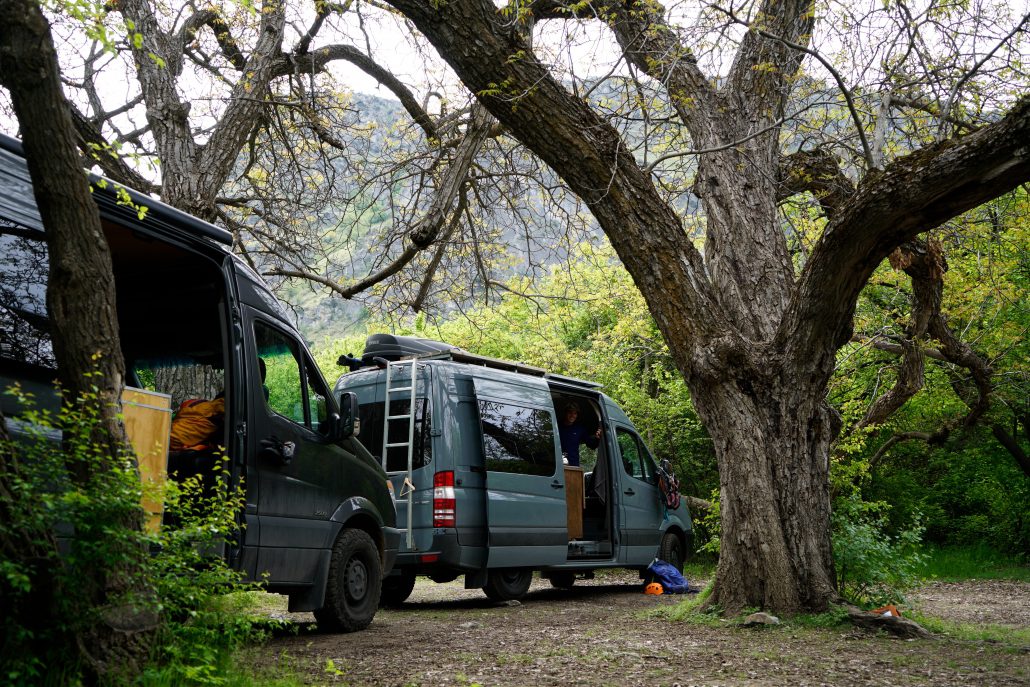
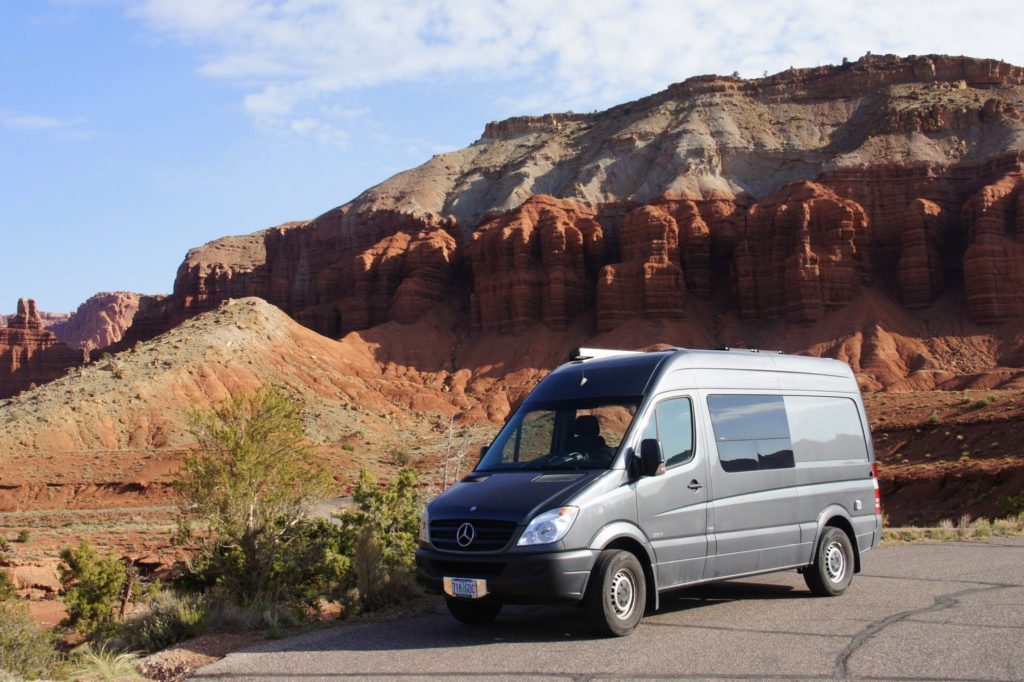
Van lifers everywhere except this empty trailhead in Utah. There’s still solitude to be found!
Keep in mind that my goal for the van was a low-stress, relatively low-cost buildout that wouldn’t consume months of my life. I aimed for a practical, simple, cost-effective design doable with basic power tools and a bit of chutzpah (over-confidence). Five years into our relationship with the Sprinter, I still love the van travel experience.
First off, things I’d do again!
—–
By the way, dig these kinds of posts? Sign up for the free 2x/month Traipsing About newsletter for more tales from the mountains and creative challenges like drawing and piano when I’m off the bike or not van tripping.
I’d Do This Again If I Built Out Another Van
Buy the 144” high-roof Sprinter: I’m sticking to my guns on this one. The longer vans I’ve seen often leave more (wasted) interior space and are tougher to maneuver on the bumpy fire roads that I frequent. Throw in easier driving around cities and I vote for going shorter if you’re a couple with the standard van life hobbies of ride, run, ski, climb. (Caveat: if you have kids or travel with gear – e.g. dirt bikes – that need a separate gear garage, then a longer van may make sense.)
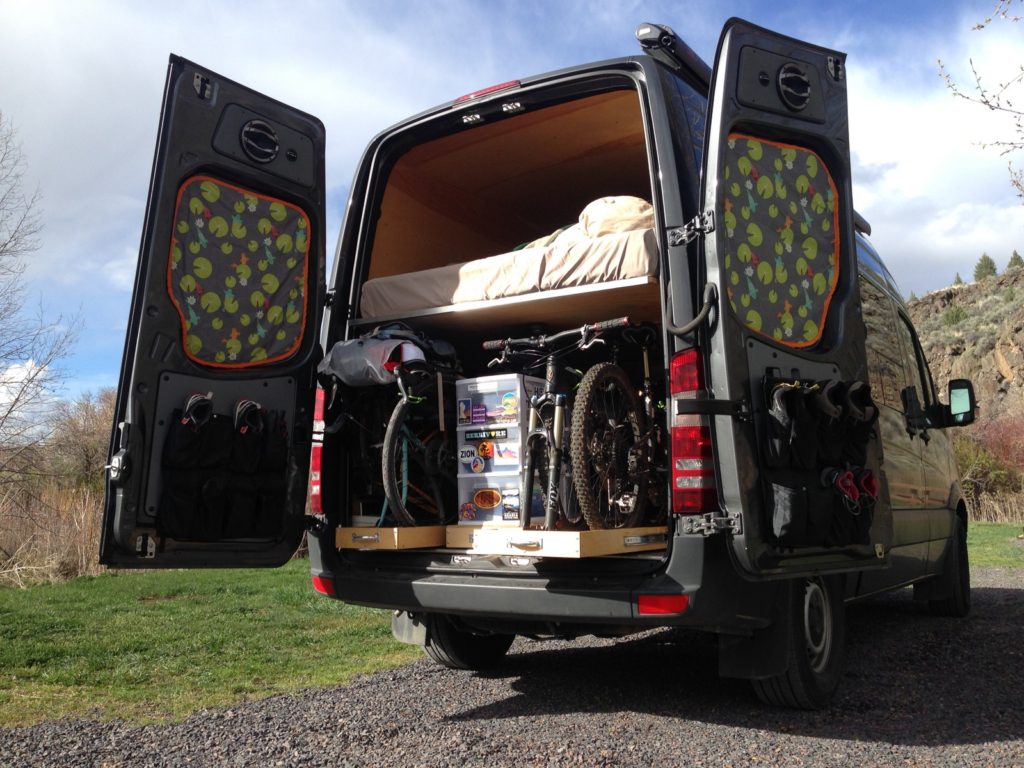
Bike racks on sliders: No better way to maximize space for vans that are hauling bikes. It also makes managing other gear easier. I vote for 2-3 slide-out drawers/storage to handle the entire gear compartment!
Big side windows on both sides: we love having the light and visibility from the CR Lawrence windows. Extra bonus is that the crank-out small windows allow great airflow when the vent fan is turned on.
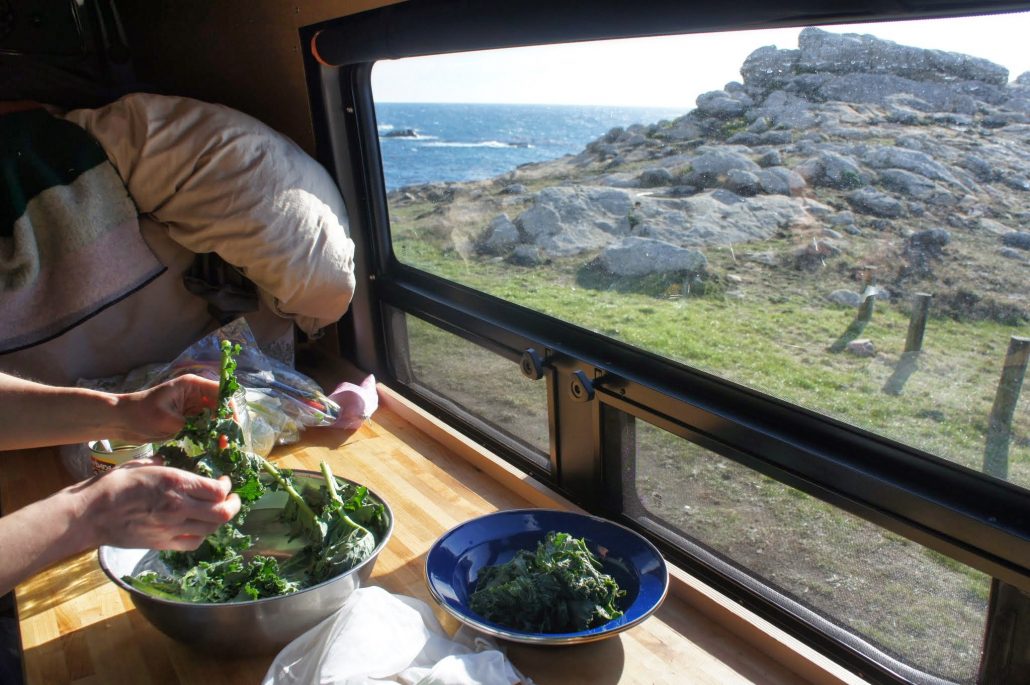
Lunch break with a view on the Oregon Coast.
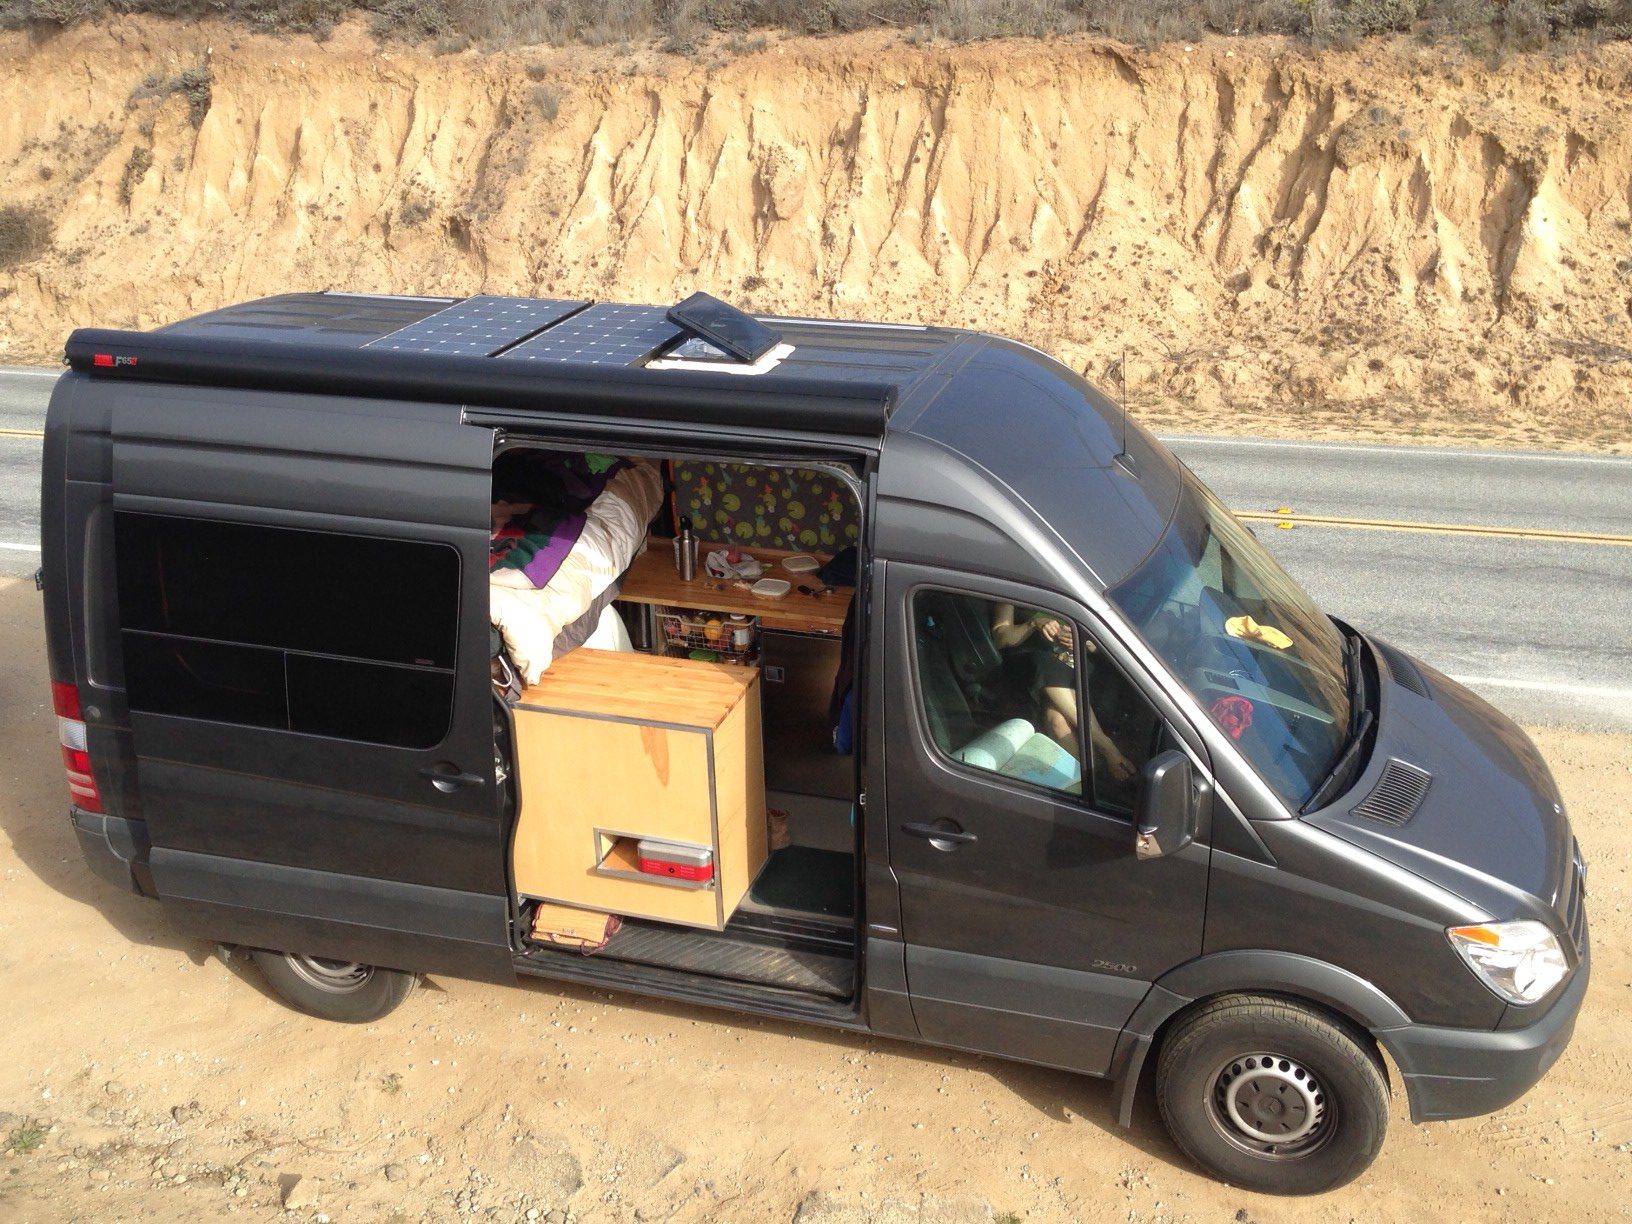
Cabinet in sliding door space: I’ve heard the arguments here: space for yoga, you can sit on the stoop… Meh, sorry… The extra storage and counter space, plus the ability to have a sweet drop-down table for post-activity snacking with friends or easy food prep, beats the piss out of your downward dog pose. I vote for folding chairs and a mat outside the van for sitting and stretching. But that’s just me…
Large fridge: I’m sticking with a big, side-entry fridge (4.6 cubic feet). Having space for a ton of food is key for travel over a few days; for a weekender rig, maybe not so much.
Swivel seats: must-have for the passenger seat, but maybe not for driver. I traded my driver swivel to a friend for a bike rack, in fact, and haven’t missed it at all.
One swivel is fine! Mr. Money Mustache approves. (This shot’s for you, Jules.)
Alternator wired to charge house batteries while driving: a must-have! Solar often isn’t enough to keep things fully charged, and just an hour of driving will top off most battery systems.
Update April 2021: things work slightly differently now, so check out my post on upgrading to Ohmmu lithium iron phosphate batteries and a Renogy DC-DC charger.Diesel heater: unless you only travel in the summer at low elevation, this is a key component of any van build. I still stick by what I said in my install post: “With 20/20 hindsight and many sub-freezing nights logged, it is officially one of our favorite things in the van.” Given feedback from others, it seems worth it to get the high-altitude kit, though our heater has worked fine.
Door-stop for sliding door: years into having this on our van, we still love it! My brother-in-law Jesse continues to manufacture and ship these and has a ton of satisfied customers.
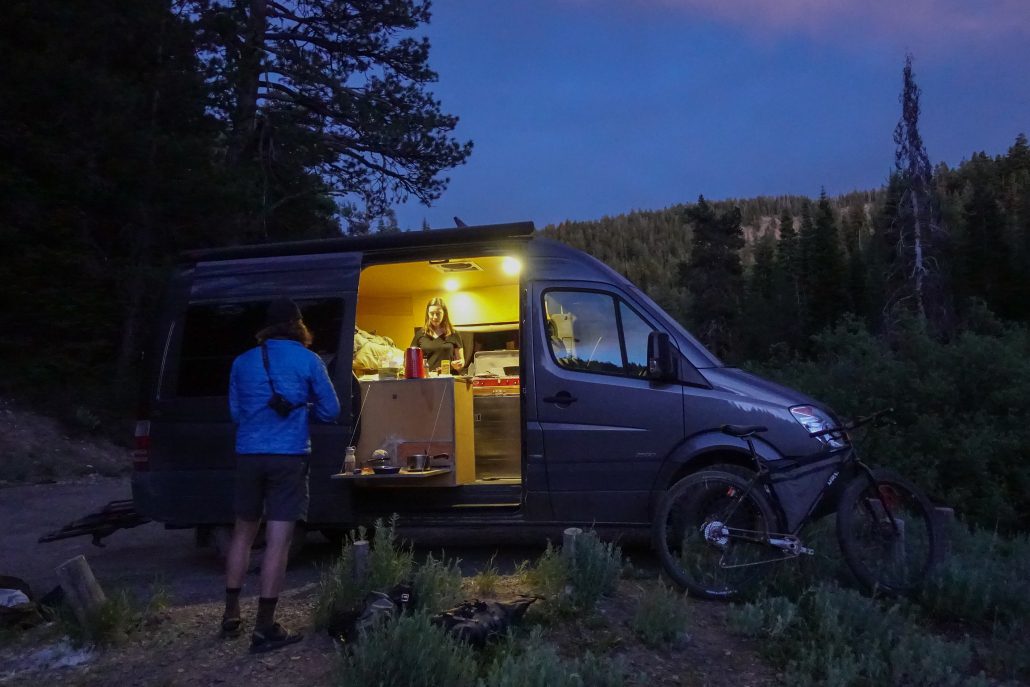
Drop-down side table: as I said in my favorite upgrades post, this is so handy for cooking or food prep, putting out snacks post-ride for friends, and general staging area for all activities.
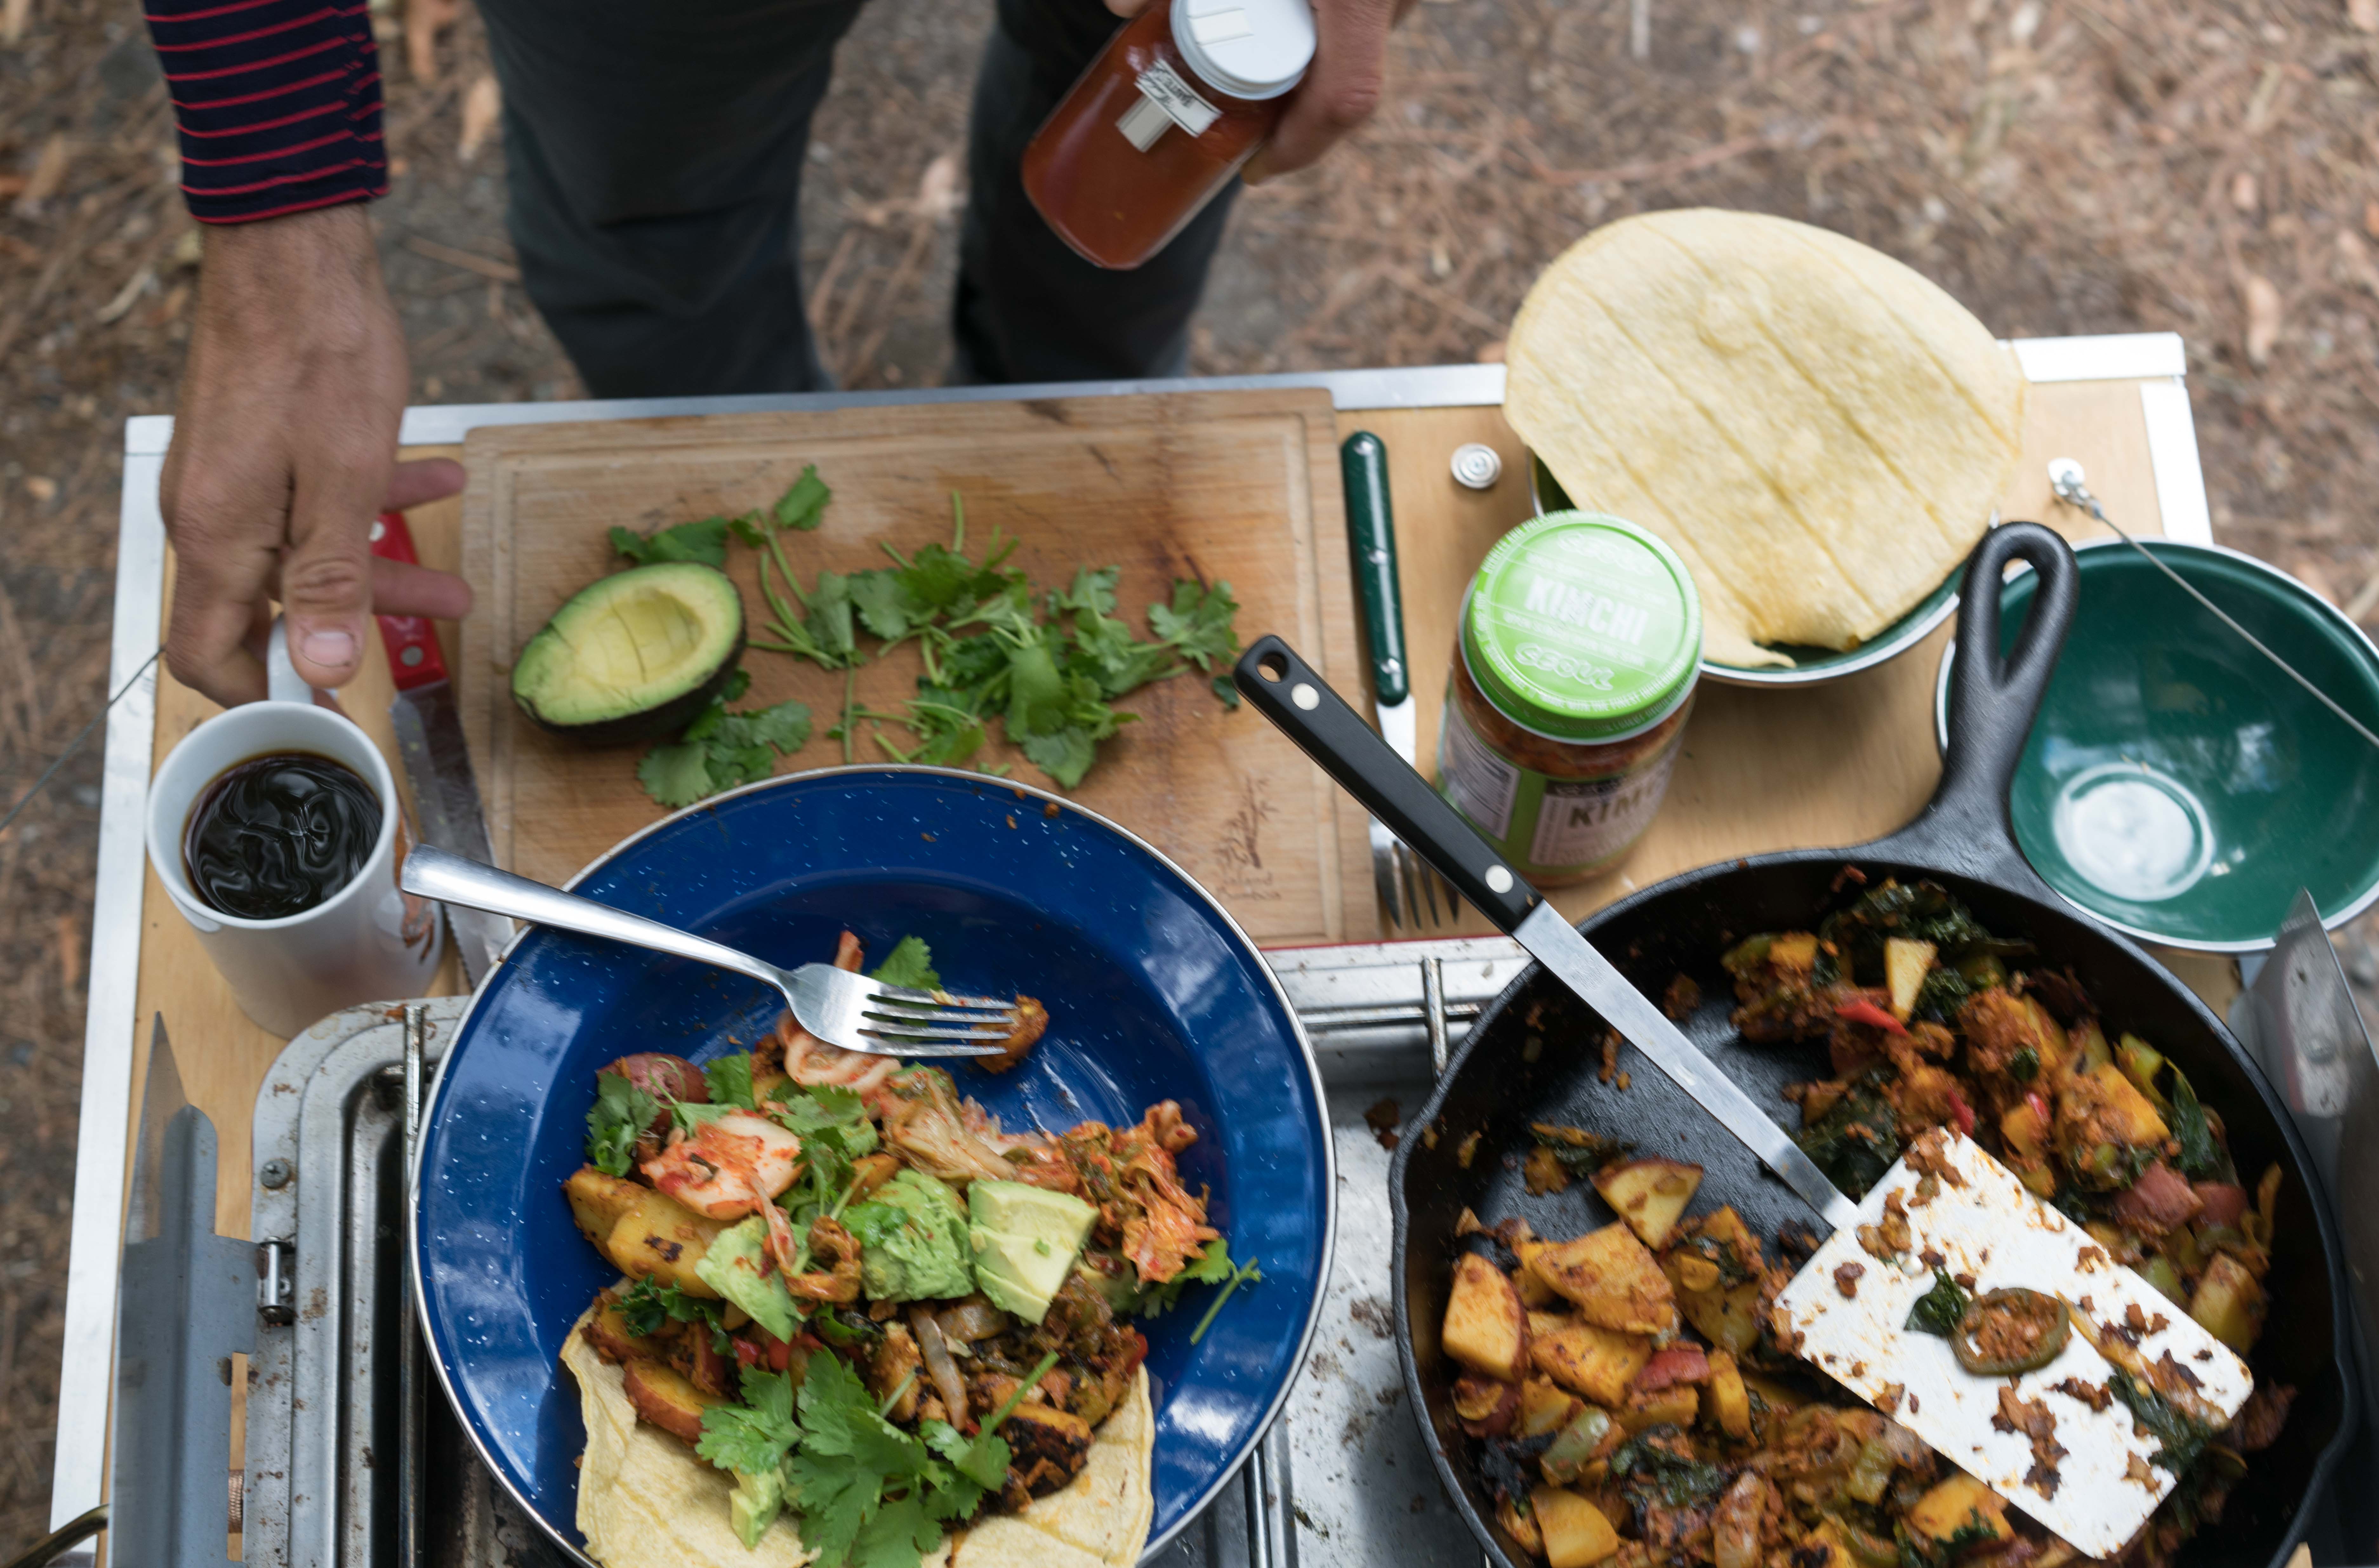
Breakfast a la side table!
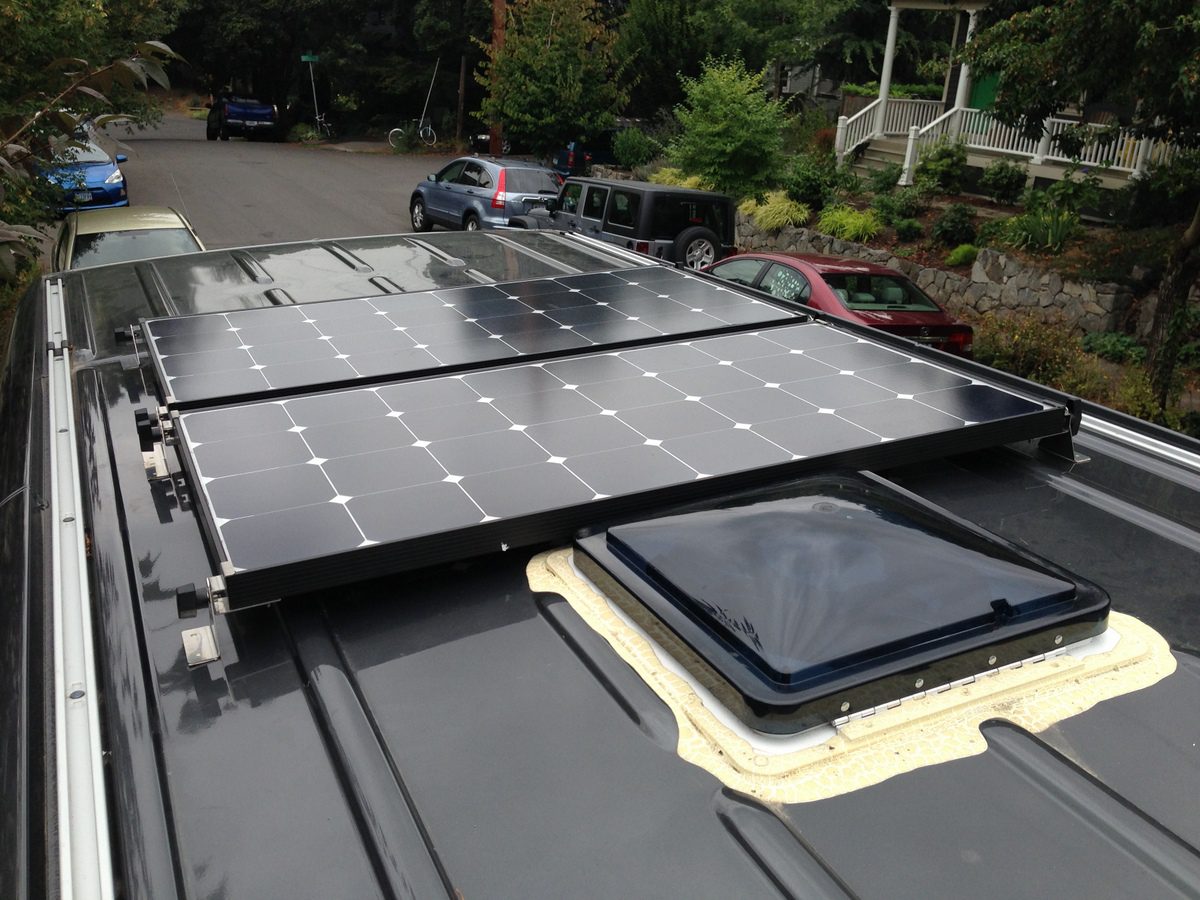
Solar: not mandatory if your batteries charge while driving, but still handy. Given how cheap they are now, putting solar panels on a van is practically a no-brainer these days!
WeBoost wifi extender: if you work while you travel, this handy device is destined to be your best buddy. It’s not a magic device that turns No Service into LTE bars, but often allows me to stay parked way out in nature and still get enough of a signal to check email without driving somewhere. We have the WeBoost Drive 4G-X, which ain’t cheap, but it’s worth it for us!
Propane hot water shower: I wish I’d done this earlier! For $100 and two hours of plumbing, a hot water shower off the back of the van is an easy upgrade totally worth doing. I bought an Eccotemp L5 heater as an open-box deal, but they’re on Amazon also if none are available.
Hot water rinse after a long, awesome ride in Oakridge (full ATCA, no shuttle!).
Things I’d Do Differently
There’s all the stuff I’d keep. What would I change? With the benefit of many months traveling in the van, both for short and long trips, I’d make these modifications:
No rear windows: The way our design evolved, only the top section of our rear windows are usable. (Most designs with bikes or outdoor gear under the bed will end up like this.) If I did it again, I’d skip the rear windows and install a small port window above the bed.
More power: related to the next item, instead of ~200 amp-hours of battery power, I’d double it to 400 amp-hours via lithium-ion batteries. Update April 2021: 300 Ah is plenty of power given lithium’s ability to drain to 10%. Full upgrade post here. This provides a week of power with zero driving or solar, which is when a) I’ve eaten all the food and we need to restock or b) it’s time for new horizons (because we’re moving on, not due to police suggestion).
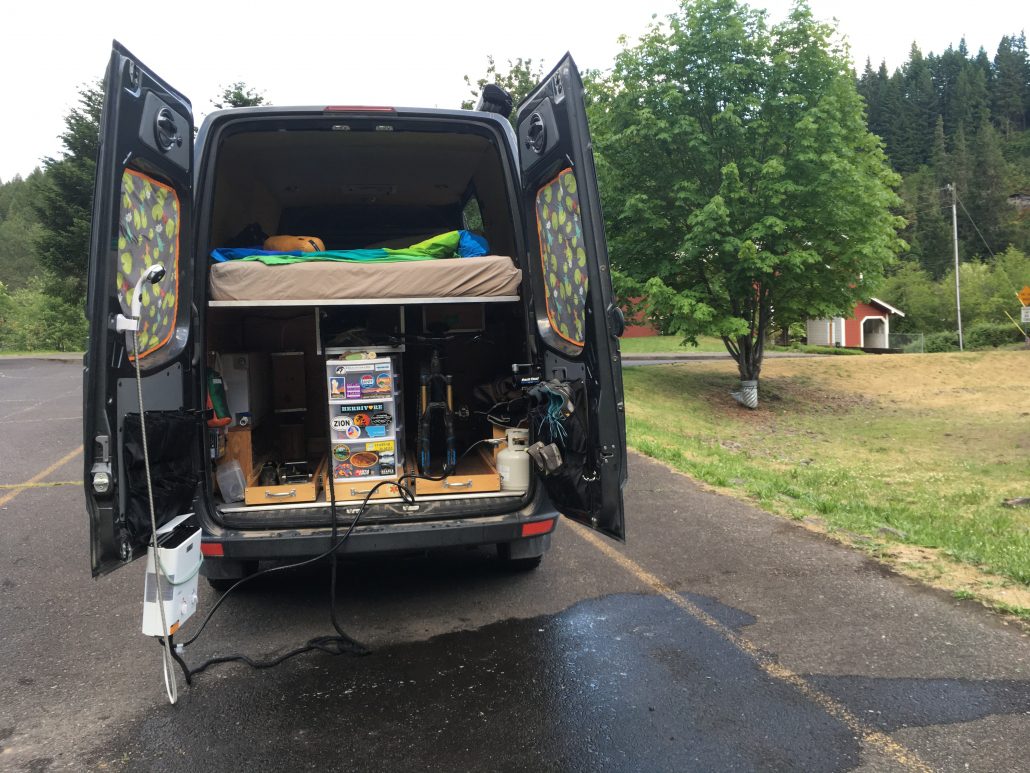
No shore (plug-in) power: In four years of ownership, we’ve only used the shore power a handful of times. I wouldn’t bother next time. With 400 amp-hours of power, you definitely won’t need it unless you’re planning to pay for electrical hookups and run A/C in a KOA campground…which is antithetical to van life, so you may need to just buy an RV or risk community shunning!
No shore power in the free waterfront campgrounds in Hell’s Canyon. Rock climbing just steps away in those hills!
Easily washable floor: Due to time constraints before our trip, we kept the stock floor that came with our van. It’s served us well. Still, I wish we’d had the time to put in a swath of colorful Marmoleum to create a durable, fun, more easily washable floor.
Less sound deadening: The stock Sprinters, ProMasters and Transits suffer from vibration and sound transfer. Bare metal walls create an echo chamber worse than my nephew destroying his drum kit. (Ok, maybe that isn’t possible.)
I’m glad I used sound-absorbent material below the floor to limit road noise. I’m less sure about the vibration damping for the walls and ceiling – after insulation and interior paneling, half as much is probably fine. Thanks to the heavy damping in our sliding door, it is a shoulder-breaker on slight uphills. If I did it again, I’d put pieces of vibration damping in there, but not coat the entire door.
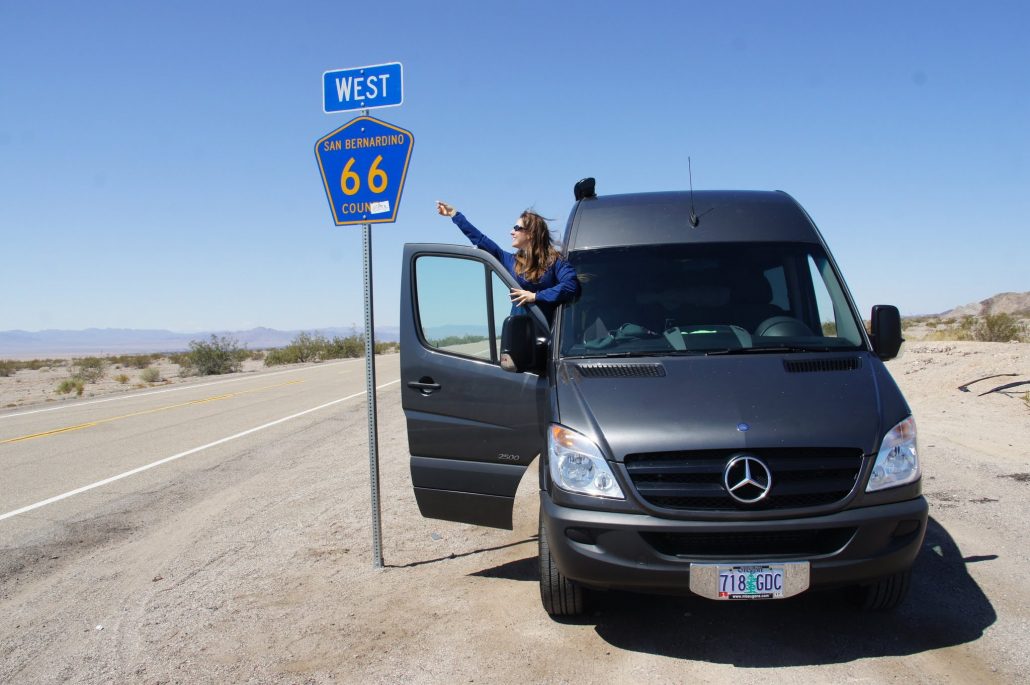
Going wayyy back on Route 66.
Modular storage tray: We don’t always carry four bikes, which means one tray isn’t used or is under-used, especially for shorter trips of 1-4 weeks. I’m planning to make a modular/removable rack for carrying climbing gear, skis, paddles, or whaaatever.
Design for fitting skis: We weren’t skiers in 2013, so the separation wall between the storage and the living area doesn’t allow for long skis. Some simple mods to cabinets would allow this.
Wire/plumb initially: Not knowing exactly how we’d use our van, we didn’t plumb or wire before most of the interior was installed. I put in overhead lights halfway down the CA coast, and sink plumbing didn’t happen until 2.5 years of traveling in our van. (Chelsea is tough!)
If you have the time and confidence in how you’ll use your van, map out as much of this stuff as possible. Given the in-depth resources, floor plans, and designs now kicking around the ‘nets, this is way easier now.
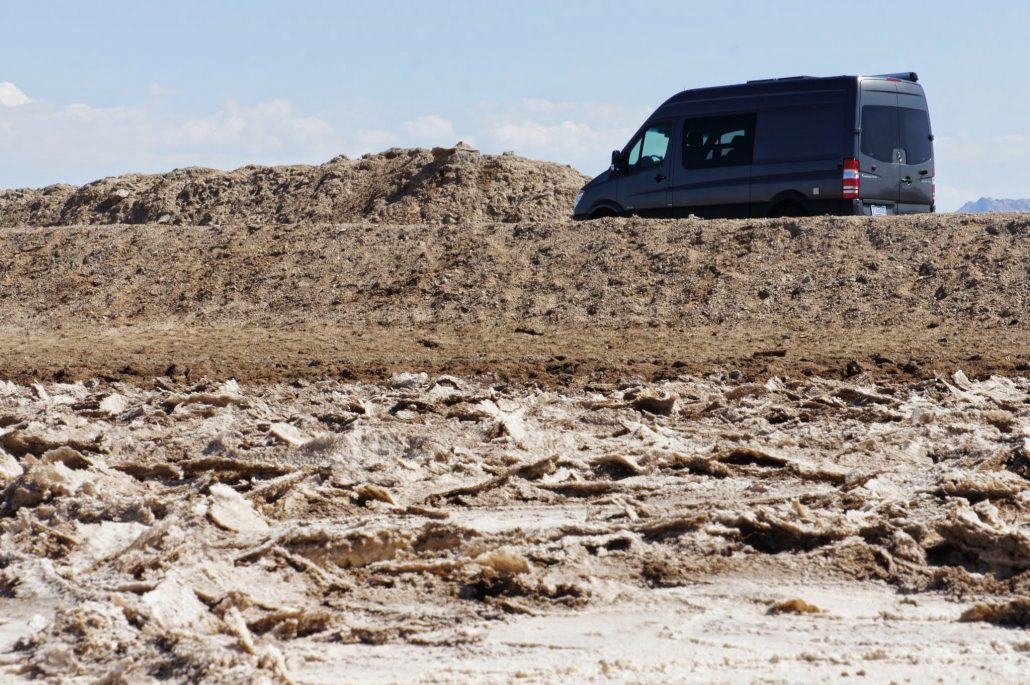
Good to have extra water when you’re in the Mojave!
Backup camera: I can parallel park the van like a boss. However, the visibility is limited and stress levels are lower in crowded parking lots or kids playgrounds if you’ve got a backup camera. I’ve only bumped a stealth motorcycle behind us once (it didn’t tip over). Update fall 2019: I bought a cheap license plate surround backup camera and it’s been great!Insulated blackout curtain: New desire: an insulated curtain that snaps up to seal off the cab from the main living compartment for insulation and easy light blocking. It’s also a good way to look innocent while stealth camping, if we ever did that…
Skip the awning: This one came as a surprise. I pictured sunny afternoons lounging under an awning, fizzy water from the Sodastream in one hand and a book in the other. It rarely worked out that way. Usually, there was a tree for shade, or gusting wind turned the awning into a large kite, or we weren’t in one place long enough to set it up. Plus it’s worse for gas mileage. Geez, I might go put it on Craigslist now!
No awning needed during a lunch break in Washington Pass.
Maybe I’d Add These
Here are a few items I’d consider if I was feeling flush with skrilla and planned on living in a van long term:
Flares: One downside to the Sprinter vs. other vans (ProMasters, Transits) is that they taper toward the roof. This results in a width that isn’t sufficient to sleep crosswise. Flares, while still expensive ($2k/each installed), free up space in the van and (maybe) are worth it.
Buy a 4×4: everyone wants a 4×4 these days. While I think this is at least 30-80% because they look bold and badass, there is certainly utility in owning a 4×4 if you spend a lot of time skiing. However, I know tons of folks that ski all over in 2WD rigs with no issues. All in all, I think vans are not meant for rallying and that 4x4s just get you stuck further out.
The rough roads on the way to the start of the Oregon Timber Trail were no problemo in my 2WD mobster van!
Cabinet over our sink: We have tons of storage space in the cabin, but an overhead cabinet would spread things out. The con is that it feels tighter/borderline claustrophobic and Chelsea is a big thumbs down on upper cabinets. Van lifers often comment how open our van feels. Trade-offs! For the shorter trips we’re doing now, upper cabinets don’t feel necessary. For four-season, full-time travel, probably worth it.
Hydronic hot water: I’d give this some serious consideration next time around. From what I’ve heard, the aftermarket hydronic systems are excellent. Still, it’s an expensive, fairly complicated system, and our hot water boiler and propane on-demand shower work great. Maybe someday…
Diesel or induction cooktop: The magic of flipping on a burner without having to setup the stove is not overrated. (Weird, it’s like amenities from home are nice to have in a van!) However, it’s great to have the flexibility to cook inside, on the slider door dropdown table, or on a picnic table.
What it’s all about! (Well, other than the outdoor adventures, exploring awesome places, meeting new people…)
No Matter What You Do, Vans Are Awesome
All that said, if there’s anything I’ve learned in five years involved in the world of van life, it’s this: a basic setup is all you need. Put a bed (or sleeping pad!, plastic lantern, cooler and outdoor gear in ANY vehicle and you’re equipped to experience all the stuff folks in $100k van builds do.
Case in point: Today an employee at a local bike shop told me she spent $72 on zipties and crates for her van build. Then she went dreamy-eyed and talked about a recent, amazing five-month trip. This past weekend at a van meetup, a dude named Andrew showed me his basic setup that allows him to roam the United States working as an artist.
Don’t feel like an expensive build is the only way to go; there are many ways to explore the world. Power in simplicity!
All you van owners out there – what would you add to this list? Every van and its use are different, so it’s always fun to hear what folks think. Drop a line in the comments!
Van life meetup last week in Bend with a big crew. Always fun hanging with blog readers!
Any old vehicle works as an adventure rig… Suspension is a bit rough on this beast, but it gets the job done.
https://www.traipsingabout.com/wp-content/uploads/2018/10/Van-life-Hells-Canyon.jpg6831024Dakotahttps://www.traipsingabout.com/wp-content/uploads/2018/03/Traipsing-About-logo-white-background-450x156.pngDakota2018-10-25 06:09:112023-05-06 15:17:29What I'd Change If I Built Out a New Camper Van
We’re on the road! After a stint at home in Oregon, we’ve headed out for the summer with a fresh set of tenants renting our house. Four weeks in Iceland awaits, followed by outdoor adventures in the Canadian Rockies through the fall.
Before I come at y’all in waterfall photos from the Arctic Circle, let’s wrap up van upgrade season. A couple dozen hours of effort resulted in a litany of improvements that I’m excited to use. Houdini’s ghost would envy my contortionist skills as I wriggled beneath cabinets and into the gear garage getting them done.
Update: to streamline things, I’ve added all these upgrades to the first upgrades post. These are the smaller upgrades, so I won’t go into as much detail. Still, I’ve found that the tiniest tweaks are often the most helpful, so here they are! If you have questions, I’m just an email away.
Fantastic Vent upgrade
When we first bought our van, we wanted the rain sensor and variable speed vent fan. Too bad I ordered the wrong one… The rain sensor isn’t such a big deal, but only having 3 speed settings – tempest, tornado, and hurricane – created some serious drafts even on the lowest setting.
Luckily, there’s an upgrade kit that replaces the old kit. Pop out a few screws on the original, disconnect some wires, swap wires around until the sparking stops, and *presto* you’ve got a new fan. This is a 30 minute project that I’m glad I did.
The one thing that threw me (not mentioned in the instructions) is that it’s necessary to sync the fan and remote control. Here’s the instructions on that.
Pffft, who wants to see a picture of a vent fan? Here’s a waterfall in Oregon instead.
Isotherm fridge efficiency enhancer
This cool upgrade improves the efficiency of our Isotherm fridge, our van’s biggest power draw. (Thanks for the tip, Jon.) The claim is that it’s 30-50% more efficient; I’ll update this later when I have hard data. (Why, I’d like to know, doesn’t Isotherm just install this as a standard item in their fridges?)
At first glance, this project was slightly intimidating. Turns out it’s simply drilling one hole through your fridge and rewiring a few things. Two things the 44 page instruction manual didn’t mention: 1) If you have an original thermostat with a light, it’s easier to simply reuse the housing and install the new guts in that to keep the light. 2) The thermostat in our fridge was connected to a temperature sensor in the freezer compartment. I didn’t know what to do with this and wound up just snipping the tube. It gave off a hiss, but nobody died.
Watch this Youtube video that some kind soul created if you’d like step by step instructions. I didn’t bother watching/reading anything and it worked out ok!
All-Terrain Tires
4×4 Sprinters are badass. I’d argue that most people don’t need one, however. Who wants to rally their home over stuff better traversed by a Jeep Wrangler?
Our 2013 van is the 2WD option and we’ve driven 30,000 miles on the smooth stock tires. From gnarly access roads in Gooseberry Mesa in Utah to steep fire roads, we’ve covered a ton of ground and only gotten (briefly) stuck once.
Still, there are times when some extra traction would help. When our tires started looking frayed, I researched options. Wildcountry, Toyo, BF Goodrich, and others were all on the table.
In the end, I went for the ones that practically every Sprinter owner uses – the BFG 245/75/16 T/A KO2s. After all, no need to get creative when Sprinter Van Diaries and others can drive gnarly South American roads on their BFGs. I bought mine from 4WD.com and got $50 off on a set of 4, but any tire store has them, as does Amazon.
After rumbling about on fire roads around Oregon the last month, I can attest that these tires are 1) grippier 2) give a better, softer ride and 3) are slightly noisier. Mileage after two tanks of fuel has us between 19-20 mpg, within 5% of our previous mileage. Worth it for increased badassity and peace of mind.
Look at those gnarly beast monsters!
Warmer interior lights and gear garage light
Our interior LED lights from West Marine work great. I dig having them individually switched and they look clean. The downside is that their color temperature is cold – around 3,500-4,000 Kelvin.
A nice, warm light is around 2,700K, which is a much friendlier tone (and also what Chelsea wants). Since my aim is always to keep my awesome wife happy, I searched…and searched…and couldn’t find exactly what I wanted.
Enter LED filters used for photography! I found this $7 sheet of photo paper from B&H Photo, cut out a few circles to insert between the LED bulb and the clear light cover, and we are now bathed in a warm yellow-orange glow in our cozy space. Huge improvement!
LED light bar for gear garage
I also added this 12V LED lightbar on a switch to the rear storage garage. It was hard to find what I wanted with a switch, but this bar from superbrightleds.com is awesome.
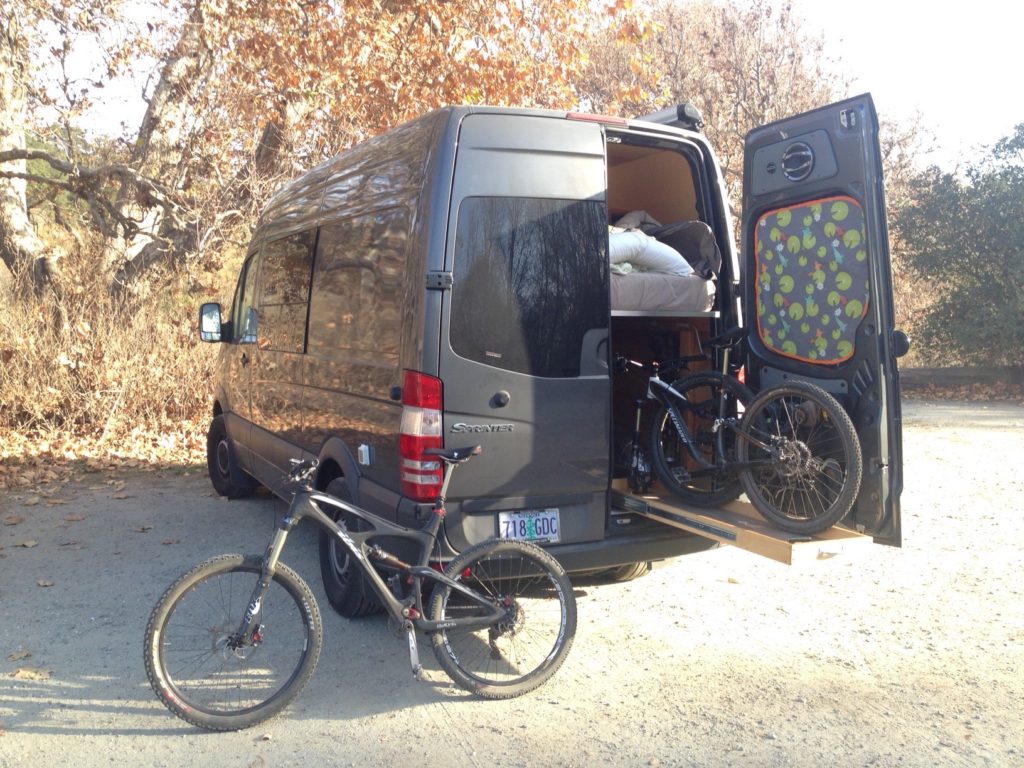
The light bar doing its job. All four bikes loaded up last night before heading out!
Increased/improved storage for gear garage
Our gear garage holds our four bikes, but it also contains a ton of stuff for backpacking, climbing, and around camp (hammock, chairs, slackline). To make things super easy to access and maximize the storage space, I added a number of cabinets and structures.
-U-shaped platform over the right rear wheel well to support two camp chairs. It’s 8”x12.5”x36” and I screwed two L-brackets to the top to hold the chairs in place. Wasted space, used!
-For our camp stove, I opted to copy Sprinter Van Diaries. All I did was build a little alcove (accessed from inside) that took unused space from above the mountain bikes. We’ll continue to cook outside on the drop-down side table.
-Cabinet over the center sliding drawer behind the bike handle bars (see above shot).
-Another cabinet behind the center, slide-out storage array. This is easily accessed from inside the van and is where we’ll store our backpacking, bike touring, and climbing gear, plus another big area for miscellaneous items.
Ah, cheesy pictures rock. Here we are hanging with our buddies Nikki and Jakob from Sprinter Van Diaries on their way through town.
Remote switch for inverter
Our inverter is tucked at the back of a cabinet. With some recent additions, accessing it was a bit tougher, so I bought this remote switch. Cut a 2” hole, plug in a telephone jack wire between the two, and you’re done. $20 well spent!
Odds and Ends
-Sliding carriage bolts to hold rear sliding drawers in place. Under acceleration uphill, they’d sometimes break free from the ball catches I used in the past. No more!
-Two 12V USB chargers by the bed for charging phones and other devices without running the inverter
-Magnets to hold countertop storage boxes in place
***
And with that, I declare our van ready for a big summer road trip.
If you’re in NW Montana or from Banff west to Whistler and want to hang out, drop me a line! Maybe we can meet up in August or September for some outdoor shenanigans. Onward into the summer!
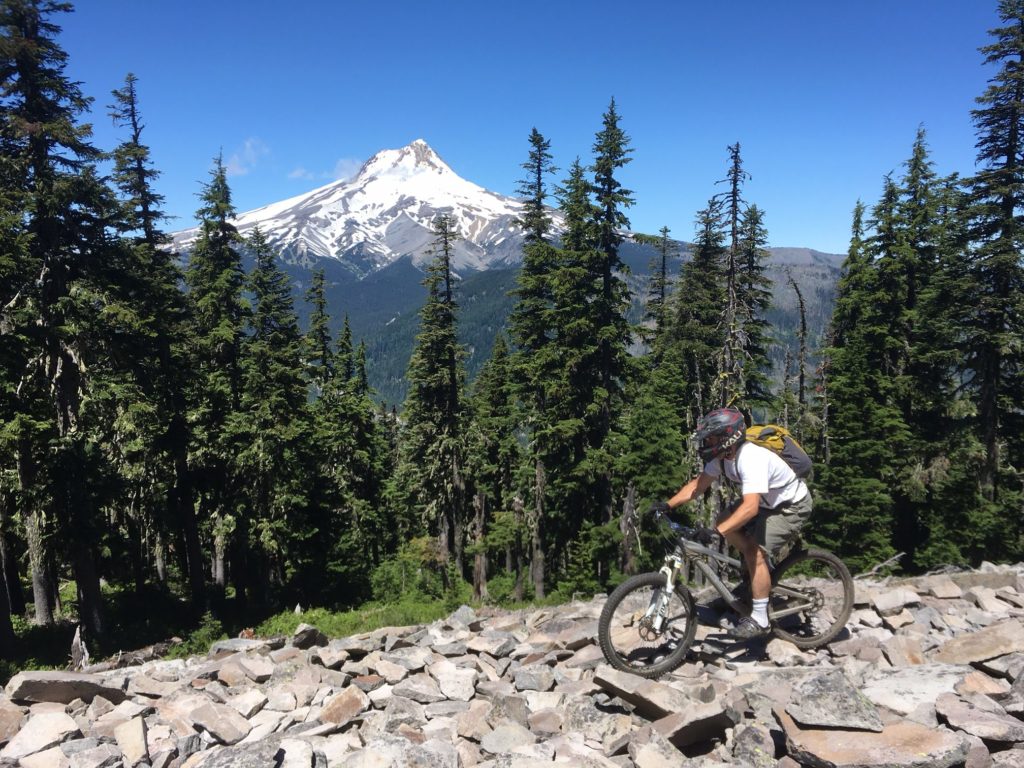
An excellent alpine day in the sun last weekend on Gunsight near Mt. Hood. Here’s to many more days outside this summer! (This is my buddy Tony cranking through a rock garden.)
https://www.traipsingabout.com/wp-content/uploads/2016/07/Starry-night-Sprinter-van-Oregon.jpg8001200Dakotahttps://www.traipsingabout.com/wp-content/uploads/2018/03/Traipsing-About-logo-white-background-450x156.pngDakota2016-07-07 01:04:202018-09-07 13:58:12Van Upgrade Season Concludes and a Summer Trip Launches
Hanging with folks at Sprinterfest in June 2016. It was awesome to meet a bunch of blog readers in person!
As we’ve traveled in our Sprinter van the last few years, we’ve made a list of upgrades to make. This post details recent favorites that I’ve finally had the wherewithal to complete since we landed in Portland in late April.
I considered my initial van buildout effort in 2013 a prototype design. Our goal was to use the van for a few months to nail down specifics, be it water usage or storage for my chia pet collection. After many months on the road, we loved some things – I’d sell a kidney to keep the sliding bike drawers – and other things needed improvement.
Without further ado, here are recent upgrades/additions I’d highly recommend incorporating into your camper van buildout. Happy van building, y’all.
The Upgrades
Sink and water system
The sink cranking out running water!
Favorite item first! We finally leapfrogged pre-Mesopotamian civilization and officially have running water. It only took us a few years to pull the trigger…
Why didn’t we do a sink right away? Our rationale was two-fold: 1) Before investing in a water system, we wanted to see how much water we used and 2) The idea of drinking from a plastic water tank made my cancer radar ping like crazy.
For 2.5 years, we simply used four 1-gallon glass jugs as our water source. It worked fairly well, but capacity was obviously limited and doing dishes wasn’t very fun. (Ok, it sucked!)
In a burst of vanspiration, I bought all the components for a water system from the folks at Van Specialties. Then I took 17 trips to the hardware store and *presto* running water!
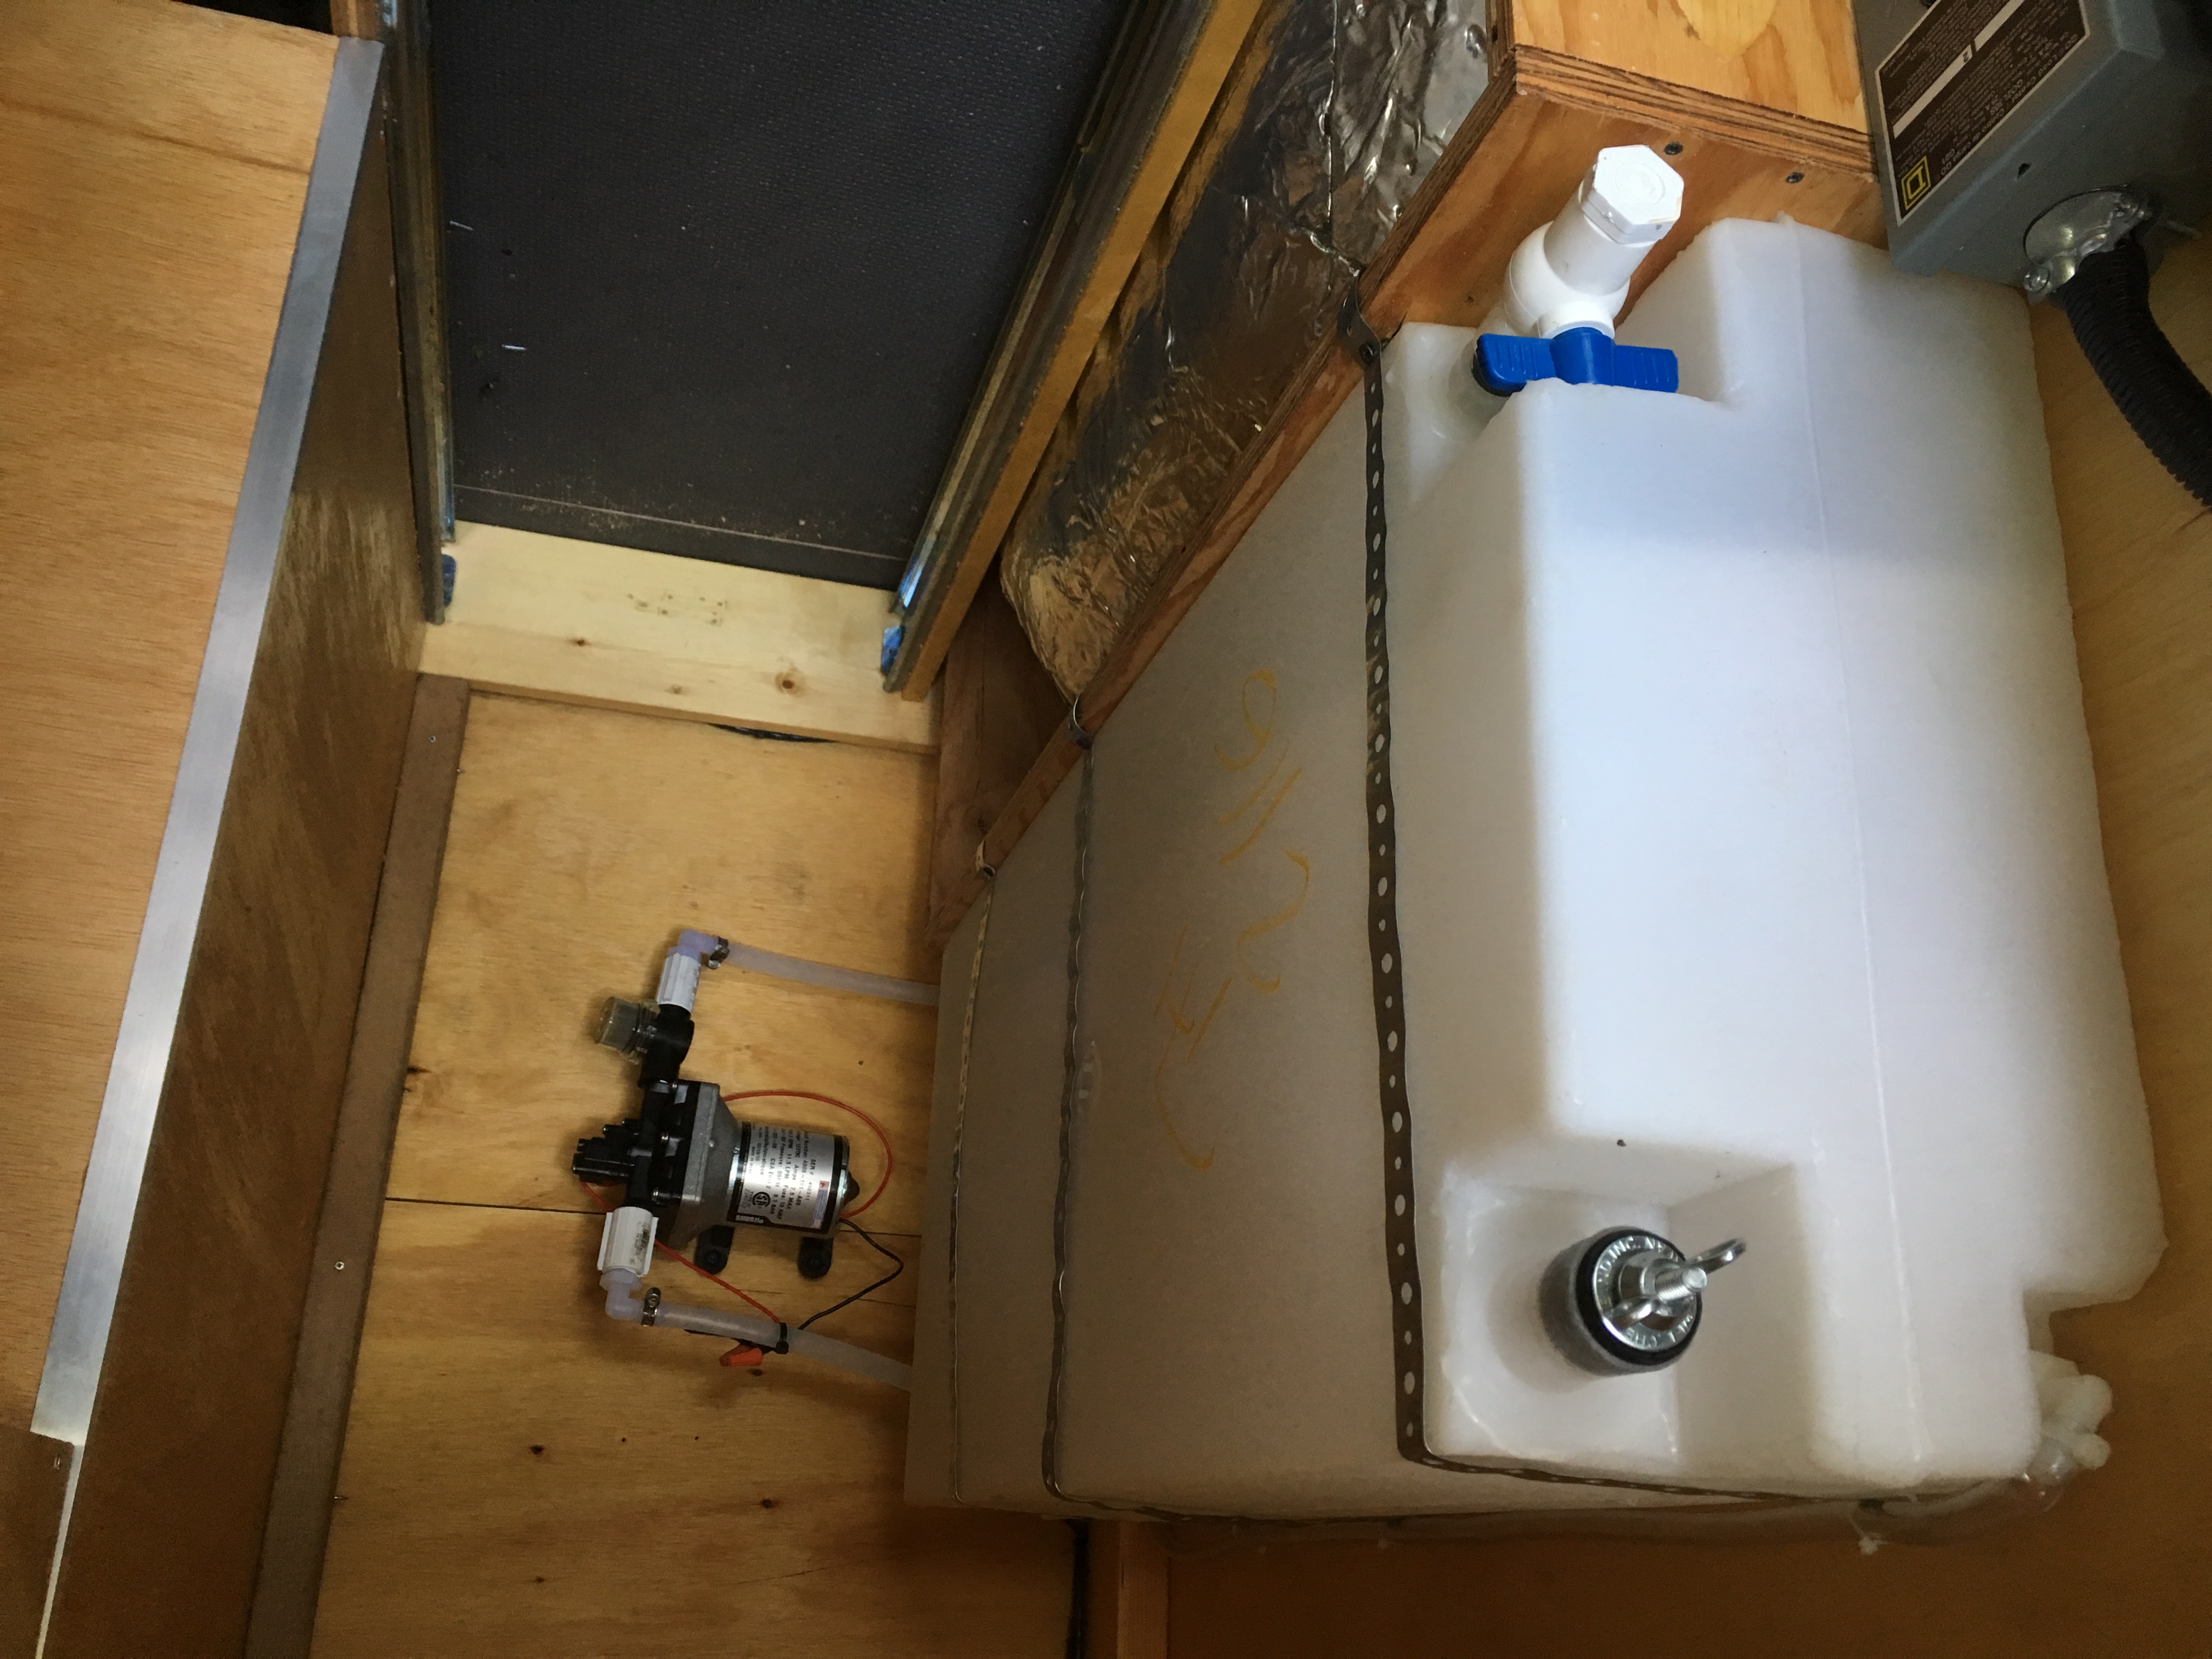
Water tank installed. The top line is a 3/8″ vent line through the floor; the top fill nozzle plug is a 1″ plumber test valve that expands when the wing nut is twisted. The bottom drain has a hose attachment when needed.
There are lots of full posts out there about how to install a water system, but here are the basics. If you don’t have a local camper van store, I’ve linked to the same items online.
Dometic folding-lid sink
25 gallon freshwater tank mounted over the rear wheel well using metal plumbing strapping. Many people use jugs under the sink, but this takes up valuable storage space inside the main living area. I simply drilled three holes (fill, drain, and line to pump) and used 1/2″ fittings. Super easy! Note: I chose to fill the tank by opening the rear doors rather than cutting another hole in the van. It’s easy to fill with a 25′ expandable hose like this, and the fill hole is sealed with a 1.125″ “plumber test valve.”
3 GPM Shurflo pump wired to 12V power with a $7.50 switch in between. A smaller pump would work fine as well!
Gray water is currently routed to 2.5 gallon holding jug that we empty each night. After 2 months traveling with it, there’s no stink and it’s easy to empty anywhere. Do the polite thing and don’t drain your water onto the ground through a hole in the floor.
Drinking water from the original 1-gallon glass jugs (just say no to buying bottled water!)
I’ll end with this: put in a sink and running water. Just do it. Stop pretending you like doing dishes squatting over a bin and join the all the fancy people with their high-tech running water.
Hot Water Propane Shower
Upping the hygiene game with hot showers!
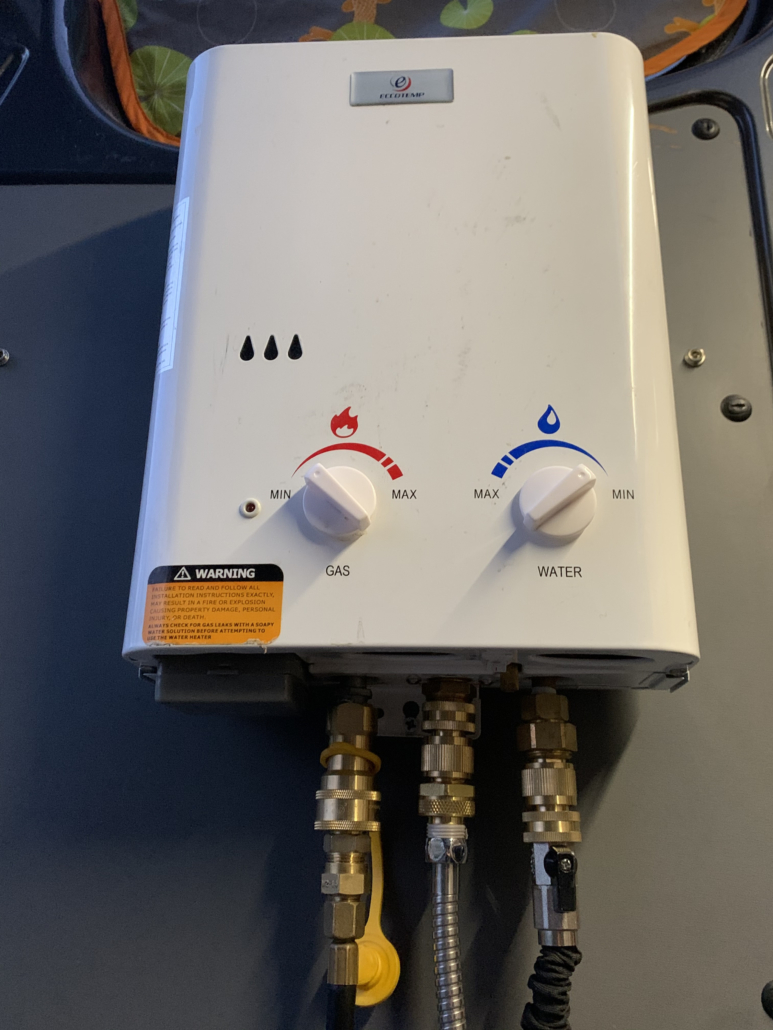
As an additional upgrade, I added an Eccotemp L5 propane shower to the back door of the van. For ~$100, the inconceivable luxury of a hot shower entered our lives. (Hot showers rule! We should have hot showers at home!)
I didn’t want a hooked-up shower all of the time though. Enter quick-connect fittings. Using an array of them from Amazon, I created a system that takes 30 seconds to set up, but doesn’t leave the back of the van a mess the rest of the time.
If you already have the Eccotemp shower, a propane tank with regulator hose, and a water hose, below are all the quick connect fittings you’ll need. Enjoy those hot showers!
By the way, dig these kinds of posts? Sign up for the free 2x/month Traipsing About newsletter for van talk, outdoor adventures, and life hacks.
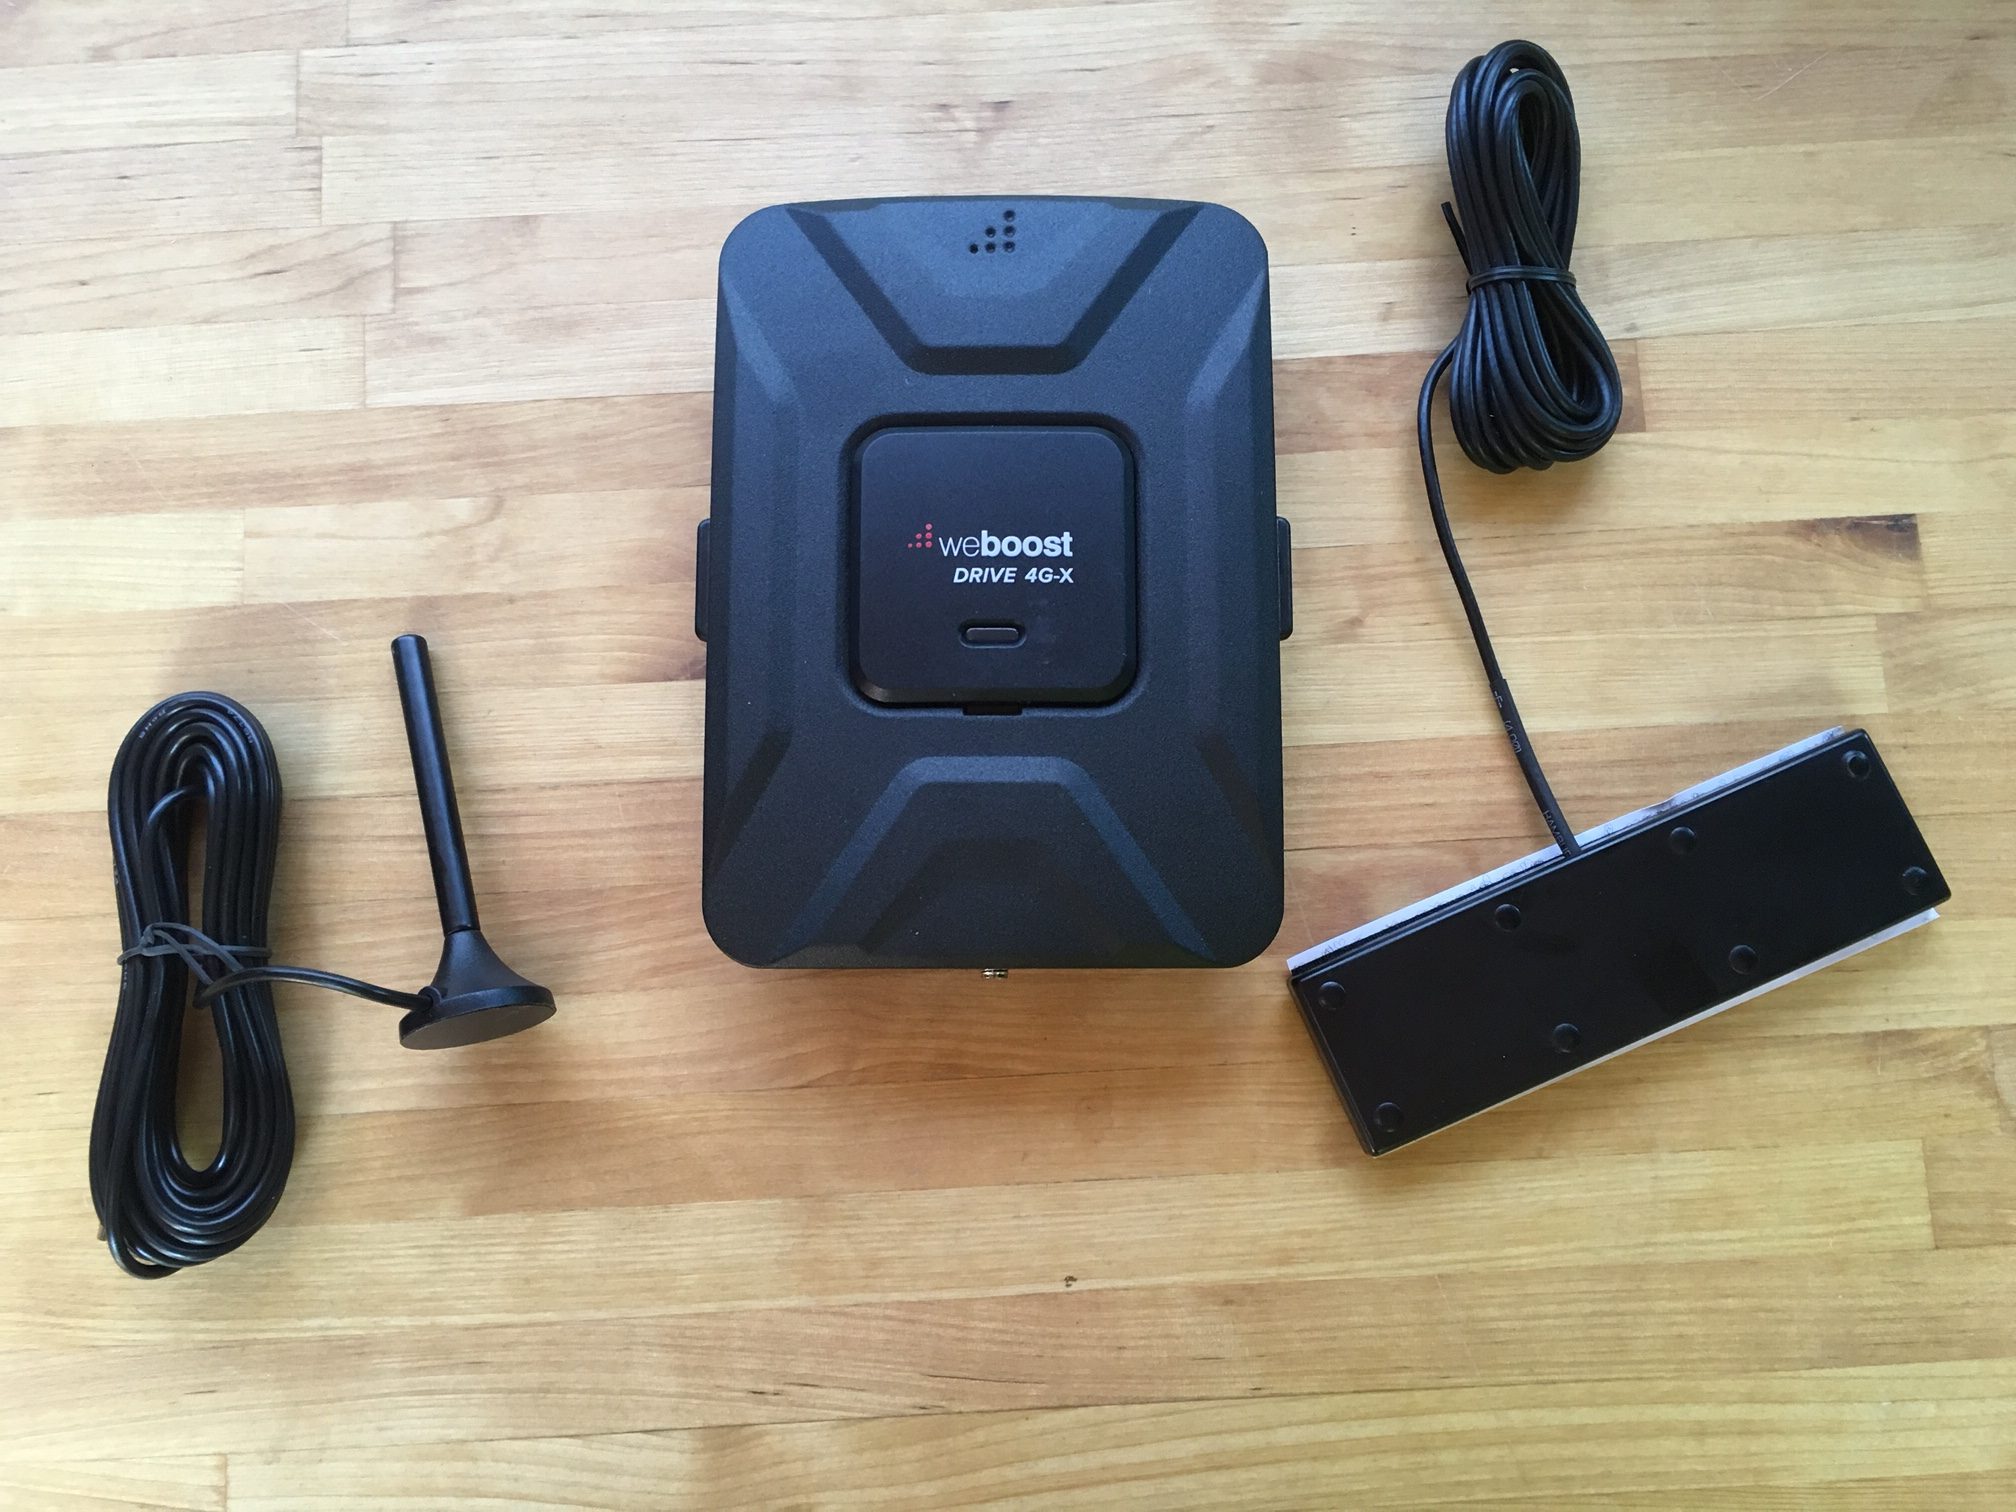
Cell Phone Signal Booster
The weBoost and internal/external antenna. It’s about 6″x8″.
Some people are lucky enough to completely disconnect from the world while they travel. Our double-edged sword is that while we can travel long-term, I’m still working at least a little bit most days.
It sucks to watch a fading cell signal right when I need it most, and that’s where the weBoost comes into play. It’s not for everyone, but if you are working remotely and don’t want to be tethered to wifi at a coffee shop, this is what you need. I got the Drive 4G-X, but there are other models as well. They work for all cell phone networks and will also boost wifi hotsports if you use one of those. (I’ve switched to only using data from my cell phone for simplicity.)
This handy device allows us to camp in remote places where 1 bar of Edge trickles in from somewhere over a ridge. The weBoost will turn that into a few bars of 3G, enough to send emails without praying to the internet gods that your communiques are being delivered. (Ok, you caught me – I only need this so I can post fake yoga poses at sunset on Instagram.)
The install was incredibly easy and didn’t even require drilling any holes. Just a magnetic antenna on the roof and a quick wire splice to wire to 12V power. Cancer-fearing person that I am, I put our booster on a switch so that I only turn it on when I need to check in on work.
One caveat regarding its performance is that it doesn’t create cell signals out of thin air. If you’re in the bottom of some canyon where all signals are dead, you’re done.
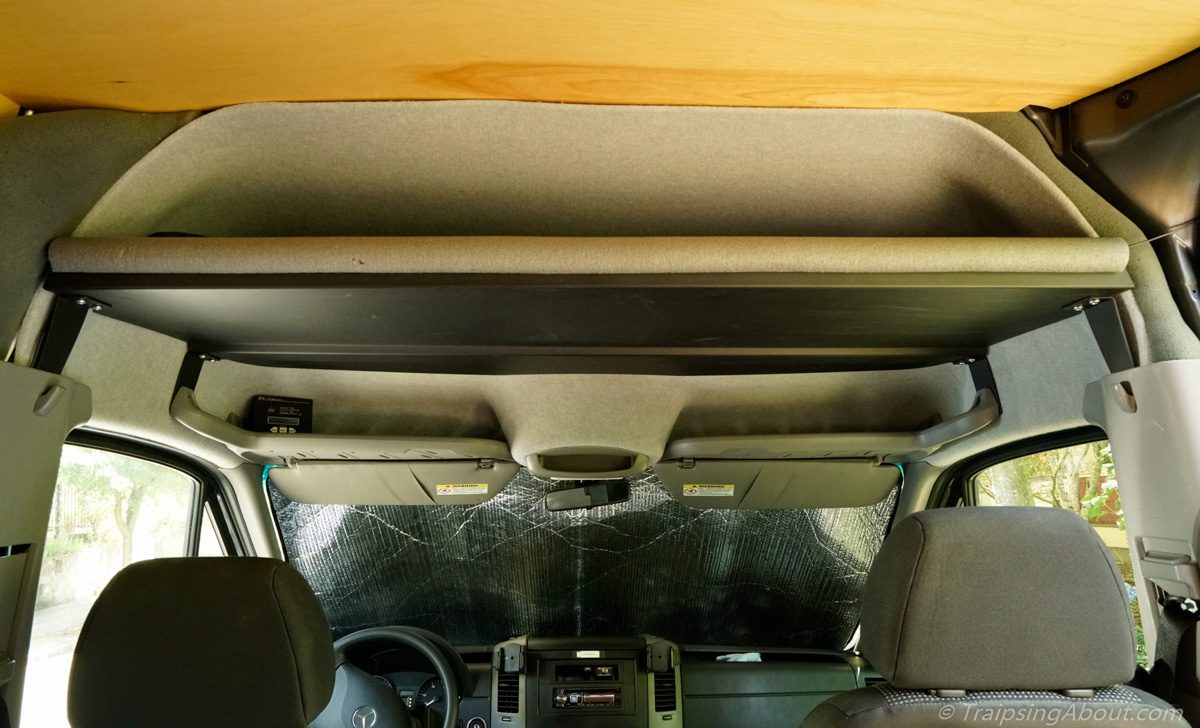
Storage shelf above the front seats
Headliner half shelf in final installed position.
If you have the high roof Sprinter like us, you’re wasting a shit ton of space. RB Components, which fabricates many high-quality aftermarket Sprinter parts, has a solution. Sure, I could build my own with hours of effort, but the need to manufacture brackets, pull out the headliner, and deal with a weird shape sounded terrible. So I bought one.
Update: These days, I would use the wayyyy cheaper kit that my buddy Sean created. For a little legwork on your part, it’ll save you hundreds of dollars on an otherwise very expensive shelf.
The shelf is awesome! Others agree. Last weekend we went to Sprinterfest, a big gathering of Sprinter owners near Portland, and the shelf was the biggest hit in our van. Do yourself a favor and buy one. We’re planning to store camera equipment, physical therapy gear (foam rollers, etc), and at least three watermelons up there.
If you want to drop some coin, RB Components has two options: a full shelf that mounts at visor level and a “half shelf” that mounts six inches higher. I opted to keep some head room and go with the half shelf.
If there’s a downside, it’s that the shelf is exactly forehead height if you’re 5’10”. Chelsea forced me to install pipe insulation on the edge to avoid knocking myself out. My forehead thanks her already.
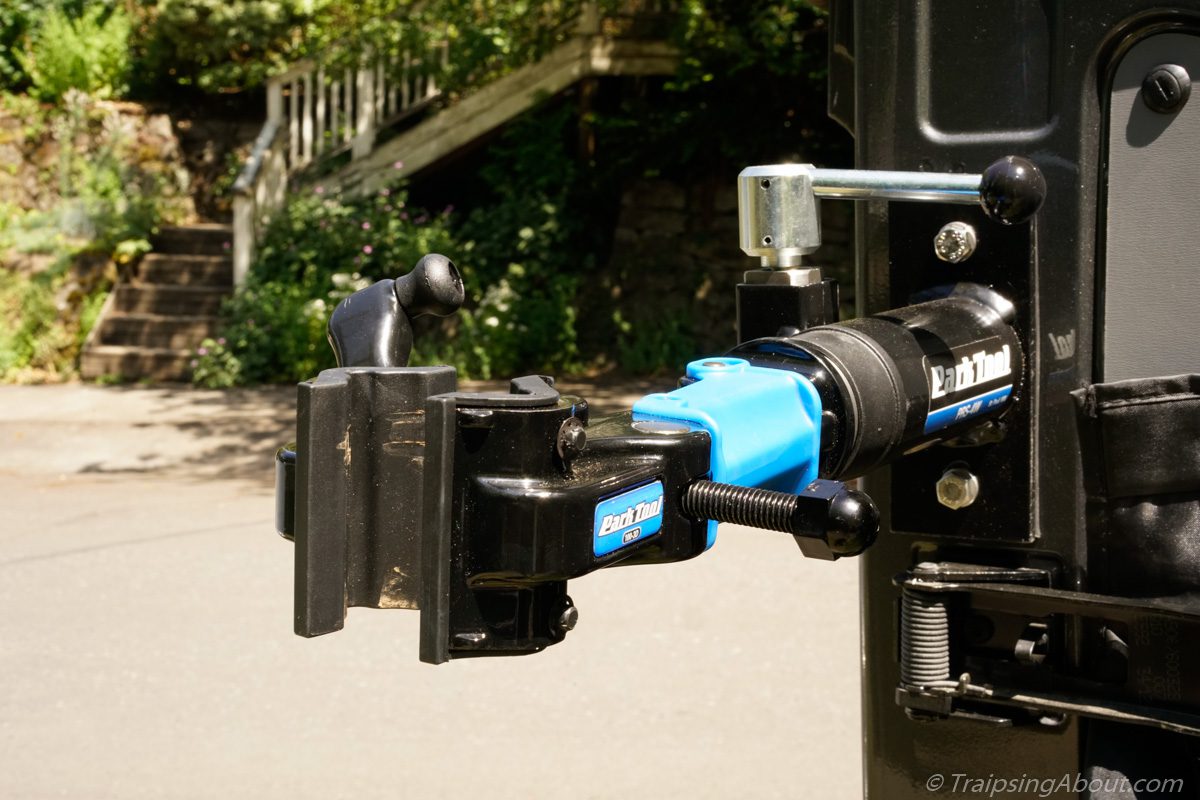
Bike repair stand attached to van
Close up of the bike repair stand install.
How many times have I worked on my bike with it leaned against a rock, tree, or dog? Too many to count.
Well, NO MORE! I bought this Park Tool bike stand and installed it on the right rear door near the hinge. The door can still swing 270 degrees and also clear our awning when it’s out, but I don’t have to open all the rear doors to work on a bike.
To mount the stand, I drilled a couple holes and installed two 3/8″ rivet nuts. Whammo, I’m officially a mobile bike repair business!
Bike repair stand and side table showing their utility after a MTB ride.
If you travel in a van and ride bikes a lot, I insist that you immediately do this too. If not, men with straitjackets will descend upon you very, very soon. You’ve been warned.
For the record, I stole this brilliant idea (among others) fair and square from my friends Jon and Pamela, the Roaming Robos.
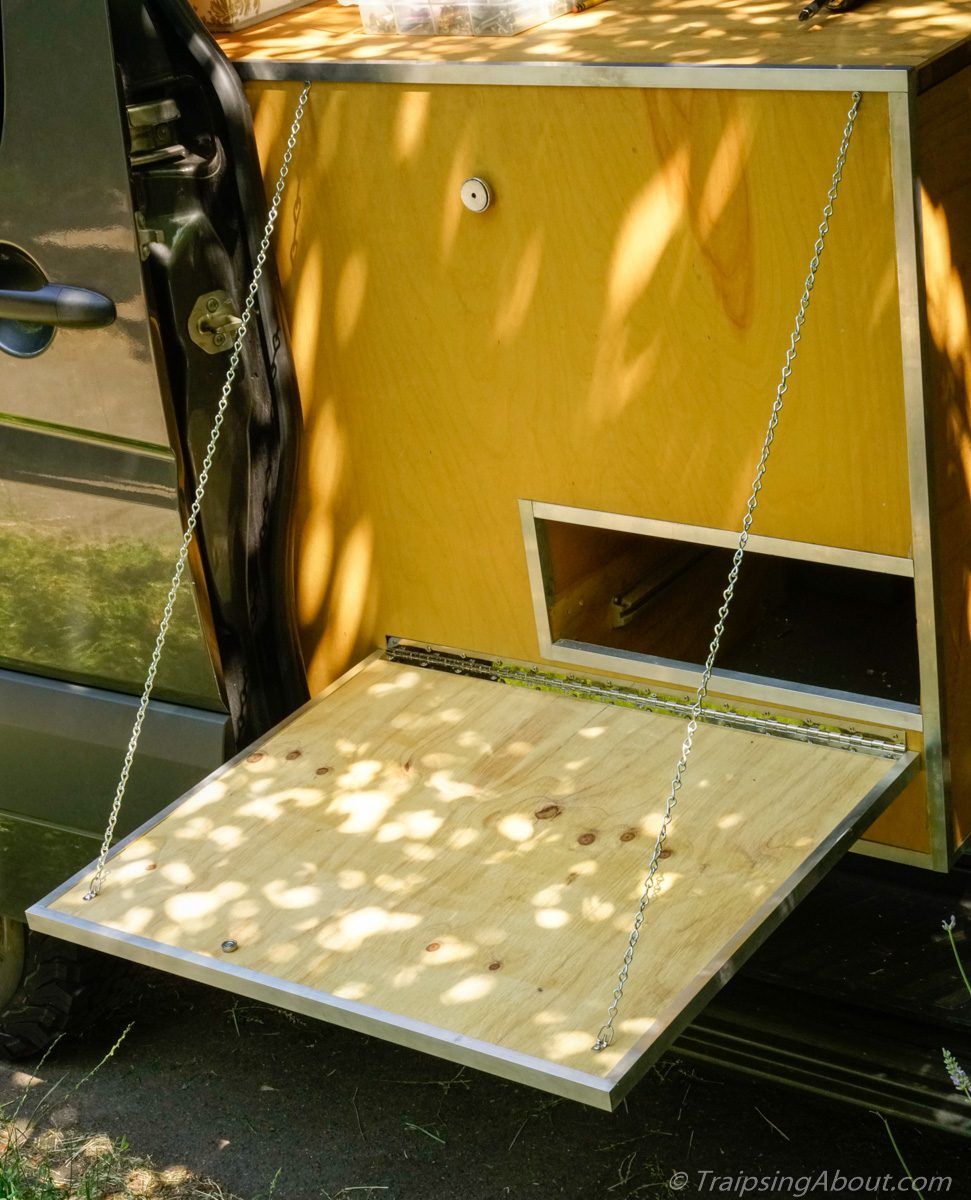
Drop-down table from side cabinet
Table dropped down. The cut-out is for stove access.
In an attempt to not stink up the van like a rolling chuckwagon, we mostly cook outside using our portable camp stove. Sometimes this is on picnic tables, but often we are in the middle of nowhere without a table.
Our initial cook table was a pull-out shelf with the camp stove on it. This worked well but was a bit small to hold anything except the stove. With upgrades in full swing, I decided to build a drop-down side table, as inspired by my buddy Michael.
The table is 24” x 28” and is supported by a piano hinge attached to the cabinet. A magnet holds the table vertically and two small chains support the outside edge when in use. Some aluminum trim and it looks pro! Or at least usable.
Table in vertical position with magnet holding it in place.
Detail of the table in horizontal position.
A less powerful blender
This may sound random, but we also replaced our travel blender. The trusty Vitamix now stays home and we roll with a Ninja blender. Why?
Our Vitamix pulls 1,650W. With our 12V/210 A/H battery system, anything <80% charge while trying to use the blender would make the 2000W inverter error out. I decided a lower wattage appliance made more sense. At 1000W, the Ninja is perfect and is already facilitating iced smoothies after long rides in the summer heat. Update: after upgrading to lithium batteries, we’re good to GO.
Fantastic Vent upgrade
When we first bought our van, we wanted the rain sensor and variable speed vent fan. Too bad I ordered the wrong one… The rain sensor isn’t such a big deal, but only having 3 speed settings – tempest, tornado, and hurricane – created some serious drafts even on the lowest setting.
Luckily, there’s an upgrade kit that replaces the old kit. Pop out a few screws on the original, disconnect some wires, swap wires around until the sparking stops, and *presto* you’ve got a new fan. This is a 30 minute project that I’m glad I did.
The one thing that threw me (not mentioned in the instructions) is that it’s necessary to sync the fan and remote control. Here’s the instructions on that.
Pffft, who wants to see a picture of a vent fan? Here’s a waterfall in Oregon instead.
Isotherm fridge efficiency enhancer
This cool upgrade improves the efficiency of our Isotherm fridge, our van’s biggest power draw. The claim is that it’s 30-50% more efficient; I’ll update this later when I have hard data. (Why, I’d like to know, doesn’t Isotherm just install this as a standard item in their fridges?)
At first glance, this project was slightly intimidating. Turns out it’s simply drilling one hole through your fridge and rewiring a few things. Two things the 44 page instruction manual didn’t mention: 1) If you have an original thermostat with a light, it’s easier to simply reuse the housing and install the new guts in that to keep the light. 2) The thermostat in our fridge was connected to a temperature sensor in the freezer compartment. I didn’t know what to do with this and wound up just snipping the tube. It gave off a hiss, but nobody died.
Watch this Youtube video that some kind soul created if you’d like step by step instructions. I didn’t bother watching/reading anything and it worked out ok!
All-Terrain Tires
4×4 Sprinters are badass. I’d argue that most people don’t need one, however. Who wants to rally their home over stuff better traversed by a Jeep Wrangler?
Our 2013 van is the 2WD option and we’ve driven 30,000 miles on the smooth stock tires. From gnarly access roads in Gooseberry Mesa in Utah to steep fire roads, we’ve covered a ton of ground with no issues.
Still, there are times when some extra traction would help. When our tires started looking frayed, I researched options. Wildcountry, Toyo, BF Goodrich, and others were all on the table.
In the end, I went for the ones that practically every Sprinter owner uses – the BFG 245/75/16 T/A KO2s. After all, no need to get creative when Sprinter Van Diaries and others can drive gnarly South American roads on their BFGs.
After rumbling about for a couple months on them, I can attest that these tires are 1) grippier 2) give a better, softer ride and 3) are slightly noisier. Mileage after two tanks of fuel has us between 19-20 mpg, within 5% of our previous mileage. Worth it for increased badassity and peace of mind.
Note: I also used black Plasti-Dip to “murder out” (see how hip to the jive I am with lingo?) the rims and front/rear Mercedes logo. This was purely aesthetic and I LOVE IT. Don’t listen to the internet claims that it takes 5+ cans to do this . You’ll need two and you’ll have enough to spray the neighbor’s mailbox and kid to boot.
Admit it – the rig looks way more badass like this! (Camped in the Bob Marshall in NW Montana.)
Warmer interior lights and gear garage light
Our interior LED lights from West Marine work great. I dig having them individually switched and they look clean. The downside is that their color temperature is cold – around 3,500-4,000 Kelvin.
A nice, warm light is around 2,700K, which is a much friendlier tone (and also what Chelsea wants). Since my aim is always to keep my awesome wife happy, I searched…and searched…and couldn’t find exactly what I wanted.
Enter LED filters used for photography! I found this $7 sheet of photo paper from B&H Photo, cut out a few circles to insert between the LED bulb and the clear light cover, and we are now bathed in a warm yellow-orange glow in our cozy space. Huge improvement!
Trailer hitch for rear-mount bike rack
Our bikes all fit inside the van, but sometimes I’m traveling or doing a day ride with buddies whose bikes are different sizes. (Or I want to haul 6 bikes!) I typically don’t leave the bike rack on the back, but this easy install hitch is cheap and requires zero drilling. I installed it in less than 15 minutes with a minimum amount of cursing. Recruit a friend to help!
LED light bar for gear garage
I also added this 12V LED lightbar on a switch to the rear storage garage. It was hard to find what I wanted with a switch, but this bar from superbrightleds.com is awesome.
The light bar doing its job. All four bikes loaded up last night before heading out!
Increased/improved storage for gear garage
Our gear garage holds our four bikes, but it also contains a ton of stuff for backpacking, climbing, and around camp (hammock, chairs, slackline). To make things super easy to access and maximize the storage space, I added a number of cabinets and structures.
-U-shaped platform over the right rear wheel well to support two camp chairs. It’s 8”x12.5”x36” and I screwed two L-brackets to the top to hold the chairs in place. Wasted space, used! -For cooking, these days we use a sweet little microwave and an Instantpot! Lithium batteries rule. -Cabinet over the center sliding drawer behind the bike handle bars (see above shot). -Another cabinet behind the center, slide-out storage array. This is easily accessed from inside the van and is where we’ll store our backpacking, bike touring, and climbing gear, plus another big area for miscellaneous items.
Ah, cheesy pictures rock. Here we are hanging with our buddies Nikki and Jakob from Sprinter Van Diaries on their way through town.
Remote switch for inverter
Our inverter is tucked at the back of a cabinet. With some recent additions, accessing it was a bit tougher, so I bought this remote switch. Cut a 2” hole, plug in a telephone jack wire between the two, and you’re done. $20 well spent!
Mini-microwave
Can’t believe how much I love this thing! No longer can I pull the lazy card after a ride – “ohhh, I can’t be bothered to pull out the stove and heat up burrito ingredients.” My days of cold meals are over!
For the install, I simply added an outlet in a storage cubby below our bed. Then I slid a 0.5 CF Whirlpool microwave in and WHAMMO, life was simpler.
Odds and Ends
Sliding carriage bolts to hold rear sliding drawers in place. Under acceleration uphill, they’d sometimes break free from the ball catches I used in the past. No more!
Two 12V USB chargers by the bed for charging phones and other devices without running the inverter
Magnets to hold countertop storage boxes in place
***
That’s a wrap! I’ll update this post with other mods as I do them, but I have no plans for any more at this time. Just lots of traveling in the van and mountain biking my legs off!
What favorite van upgrades would you add to this list?
Don’t worry, I don’t spend ALL my time working on the van. Here’s a shot of my buddy Nate enjoying a view of the Cascades during a bike trip to McKenzie River.
https://www.traipsingabout.com/wp-content/uploads/2016/06/Sprinterfest.jpg8121024Dakotahttps://www.traipsingabout.com/wp-content/uploads/2018/03/Traipsing-About-logo-white-background-450x156.pngDakota2016-06-07 16:10:132023-05-06 15:01:23Favorite Upgrades to Our Sprinter Camper Van Buildout
This post covers the DIY buildout I did for our Mercedes Sprinter to turn it into a bike-hauling adventure mobile. The goal was simple: create a functional, comfortable travel rig…without spending half my life creating it. (I’d rather mountain bike.)
Our build took about three months of occasional effort, plus one big three-week push. The result is a physical manifestation of fun and freedom that fired us up for an amazing three-year trip, with many more months since. (Careful, van travel is addicting.)
The Sprinter van is what we use to carry two mountain bikes and two touring bikes, plus climbing and backpacking gear, on a variety of adventures. Hopefully it motivates you to get your own van or helps buildout ideas. Buen suerte!
Just Getting Started?
Thanks to remote work and COVID, van life is hot the hottest thing ever and the amount of online information regarding DIY van buildouts is crazy. When we started, I spent hours searching sites and forums or trolling Pinterest.
To help sift through build options and save time, I recommend picking up this Sprinter conversion ebook. It’s a comprehensive guide to DIY Sprinter vans and saved me a ton of time. The ideas and suggestions combine insights and featured buildouts.
Shortcuts to All Van Posts
For shortcuts to any van posts I’ve written, here you go! For details of our build, read on below this list. This post is a brain dump of many basics for our DIY van.
Favorite van upgrades I did after a year road tripping.
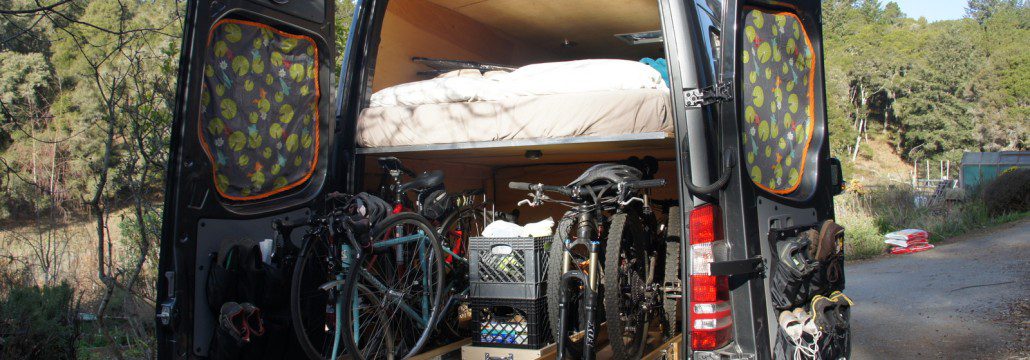
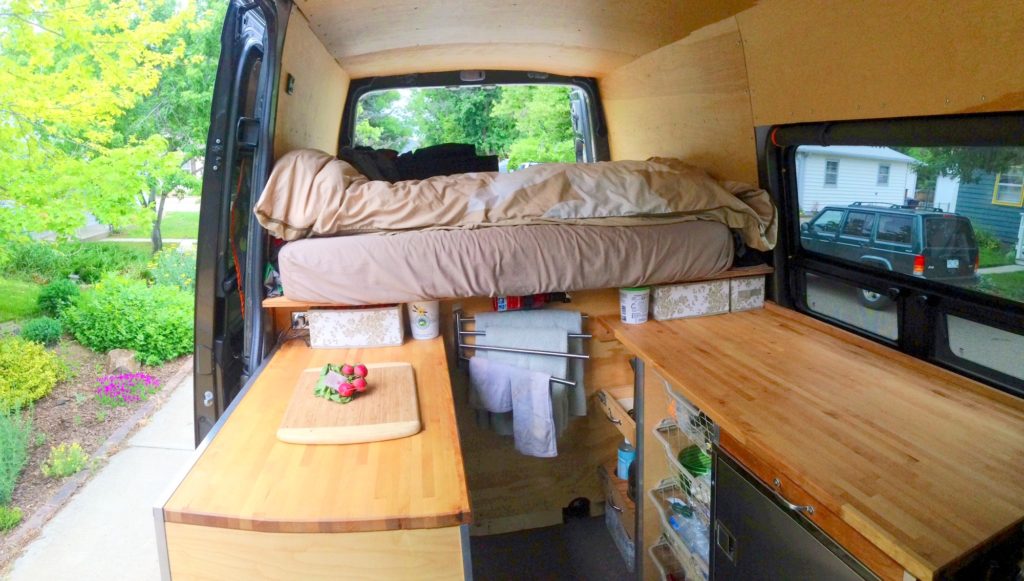
Sprinter van bike and gear garage. The drawers on the left/right pull out 4′ and hold two road touring bikes and two mountain bikes. In the center is a big pullout storage drawer system on 3′ slides for miscellaneous equipment for road tripping. The doors have pockets (Ikea!) that work great for organizing shoes.View in Sprinter van sitting in front swivel seat looking back. Ikea countertops on either side, utility drawer over fridge on drivers side, and storage with wire baskets underneath the countertops.Bike repair stand and side table showing their utility after a MTB ride.
Buildout Details for Our Sprinter
I’ve got a few building skills acquired from working on houses with my dad growing up. That got me about 50% of what I needed to know to do this. The rest happened through over-confidence thanks to my (completely unrelated) engineering degree and extreme optimism, plus a dose of insanity.
Below are our main design criteria (and a lot of detail), plus links and info to help find specific parts and components. For our build, I ordered a huge amount of stuff from Amazon and many van supply companies continue to warehouse products there. Nothing like overnight shipping for free, right?!
By the way, dig these kinds of posts? Sign up for my free, 2x/month Traipsing About newsletter to level up your life around travel, creativity, and yup, van upgrades. After all, why bother building one out if it sits at home?!
Van size and model
We went with the 144″ high-roof model. The length allows us to park in almost any parking spot and navigate cities like San Francisco mid-week as well as remote fire “roads” without getting stuck.
The high-top is a must have because it allows a 6’2″ standing height inside. Sure, you can do a pop-top Vanagon/Sportsmobile style, but if you pop the top in a city then you’re going to be super obvious, and those things can get drafty. Oh, and if you don’t like working on cars or getting to know VW mechanics, Vanagons may not be your cup of tea.
The 4×4 model wasn’t out when we bought our van, but we would still stick with the 2wd model now. We drive lots of fire roads and solid tires like the all-terrain BFG T/A KO2s (245 series) take us everywhere I want to go. If people can drive through South America 2wd, we’ll be fine. Just my opinion, and of course the 4×4 looks badass!
Note: bigger is not always better. A few Sprinter-owning friends with the 170″ van mentioned they wish they had the shorter version. Ask yourself what your hobbies are, whether you need more space for kids, and what kind of gear you’ll be hauling.
BedDesign
This needed to be super comfortable so we could travel and not be desperate for a real mattress! If you’re traveling long-term in your van, screw sleeping on Thermarests and buy a bed better than your dorm room bunk. We sleep with our heads pointing toward the front on a queen-size latex mattress that I hacked a foot off of with a machete.
Note: No need for posts to support the bed! Just use plywood or wood slats attached at the walls and reinforce those with 6061 C-Channel structural aluminum from somewhere like MetalsDepot.com. To answer an FAQ, the base of our bed platform is mounted 39″ above the stock floor of the van. With dropper posts, I’d go with 36″ next time.
An older shot (prior to drop-down side table) from Big Sur.
Bike racks inside the van
Hauling four bikes (two touring, two mountain) and protecting them from theft, weather and road grime was important for our initial travels. The heavy duty sliders are the 48″ heavy duty version, which are rated far stronger than we need (400 lb) but otherwise you can’t get a 4′ slider (and if you use that drawer for gear, you don’t want a wimpy 200 lb rating anyway!). Yeah, they’re expensive…and I wouldn’t have it any other way!
If you only need ~3′ pull-outs, the 200 lb version has worked well for our center drawer. I used 3/4″ maple plywood to build them and lined the bottom with a clear plastic floor mat to protect the wood, with fork mounts from Universal Cycles. They work great.
Note: I’ve had a few questions about the tray size. The road bike trays are 60″x 13″ x 3″ (outside dimensions) and the mountain bike trays are 60″ x 17″ x 3″.
Ventilation fan
Keep the van cool and aired out with a roof fan. Ours is right behind the front seats and keeps things nice and cool with the side windows cracked.
Why didn’t we do A/C? Because we are scared of RV parks and A/C pulls WAY too much electricity…and I refuse to have a generator in my van. Let the 40′ RV’s do that lameness. We own camper vans, not portable homes! If we can survive a night in Death Valley where it was 100 degrees after sunset, we’ll be fine anywhere.
(Model: Fantastic Vent 6600R rain sensing version. The variable-speed fan in the 6600 is a great feature.)
200W of solar power and the vent fan.
Battery and electrical system with a 2000W inverter
We charge laptops and phones, plus run a fridge. For A/C needs, we have a Ninja blender and a hot water boiler. If you don’t have a dedicated 12V USB charging, these outlets are rad. They charge two USB devices and have two A/C grounded plugs as well.
Note: I highly recommend splitting the van alternator and battery circuit like this so that they are charged while you drive. (Update 2021: lithium batteries need a DC-DC charger like this.) This keeps things topped off even if it’s cloudy or rainy. We also have shore power, which we rarely use.
Update February 2021: I recently swapped out our old-and-toasted AGM batteries for two mega-powerful Ohmmu batteries. These babies pack 300 amp-hours into the same space, weigh half as much, and have a lower life-cycle cost than AGMs. Ohmmu makes Tesla batteries and cranks out about 1.5x the capacity of Battleborn or other mainstream batteries (for the same price!). Here’s the full writeup of my DIY upgrade.
Here’s the full write-up I did on our install, a 12v DC system fed by two 100W panels. Since I installed ours, prices on kits dropped dramatically and now I wouldn’t go with AM Solar. Renogy is SO cost-effective; here’s their 200W setup, enough for most vans.
(Model: Grape Solar 2 x 100w with full system – GS 100 – from AM Solar in Oregon.)
Diesel Heater
Espar D2 diesel-fueled heater that runs off the main vehicle tank (see full description of installation to save some headaches). No propane tanks or extra fuel to carry around, and fewer things to break.
Update November 2020: After eight years of using ours, we’ve had zero issues with it. If you camp consistently at 8,000+ feet, get the high altitude kit. It’s built into many units these days.
This is an addition we did in San Diego to stop the door from sliding all the way open every time we opened the passenger sliding door. If you didn’t order it as a stock add, there’s an expensive kit that Mercedes offers (PFFFFFT). We absolutely love this and I bet you will too. Rather than a long description, read more here if you’re interested in the solution I came up with my brother-in-law. He has sold dozens of these to satisfied customers and people are even writing testimonials about them.
26 degrees in the Alvord Desert? No worries with a heater!
Swivel seats for the driver and passenger
180-degree rotation to convert the cab into seating and my desk. Note that this raises the seat height a couple inches.
(Model: Purchased from Sprinter Store in Tualatin, Oregon)
Cooking
Originally, we went with a portable propane stove that practically everyone I know owns. With updated batteries (LITHIIIIUM, BABY), now we have a mini-microwave and an Instantpot to handle cooking.
Fridge
As big as possible so we can bring plenty of grub for extended stays away from civilization. 12V DC, and far more efficient than a typical dorm fridge. It pulls about 2.5 amps running at full blast (though they spec 5 amps for startup amp pull), which means we have four days of battery life if it ran all the time. Adding an efficiency increaser I added as an upgrade cut energy usage by 50%
Gotta say, this is one of our favorite things in the van, and I can’t even remember the days of coolers and ice. Popsicles after a bike ride in the desert=living large! Do yourself a favor and get a fridge… I will say that the workmanship on the Isotherm CR-130 fridge isn’t amazing and we’ve had similar issues to what this writeup says.
(Model: 4.6 CF stainless steel Isotherm CR-130 purchased from West Marine.)
Water system
After 2.5 years of just water in jugs, I installed a Dometic sink, a cheap 12v electric pump (basically any will do), and 25 gallon water tank in the van. Check out the first item in this van upgrades post for some pics and links to what we used if you’re interested. Glass jugs of water (to avoid chemicals leaching into our water) are still our go-to for drinking water.
The sink cranking out running water!
Cabinets
Friends have sacrificed their relationships and well-being to create complicated cabinets. It’s not necessary!
Ours are maple and birch plywood attached to the floor with L-brackets with $10 wire baskets from Ikea that are tough and light for the majority of drawers to keep weight down. There are also a few slide out drawers to hold appliances (hot water boiler and blender) and the four water jugs. This has worked great. Birch countertops to top things off – thanks again Ikea!
Side windows
Mercedes doesn’t provide stock side-panel windows that open. We went with a window that many Sprinter converters use, the CR Lawrence tilt-outs, and they’ve been great.
With the aforementioned vent fan, it’s fantastic to be able to open the windows (which are screened) and have airflow through the van without 1,237 blood-sucking mosquitoes joining in.
Note: I had these professionally installed by Van Specialties near Portland because cutting a couple giant holes in my brand-new van made me want to puke.
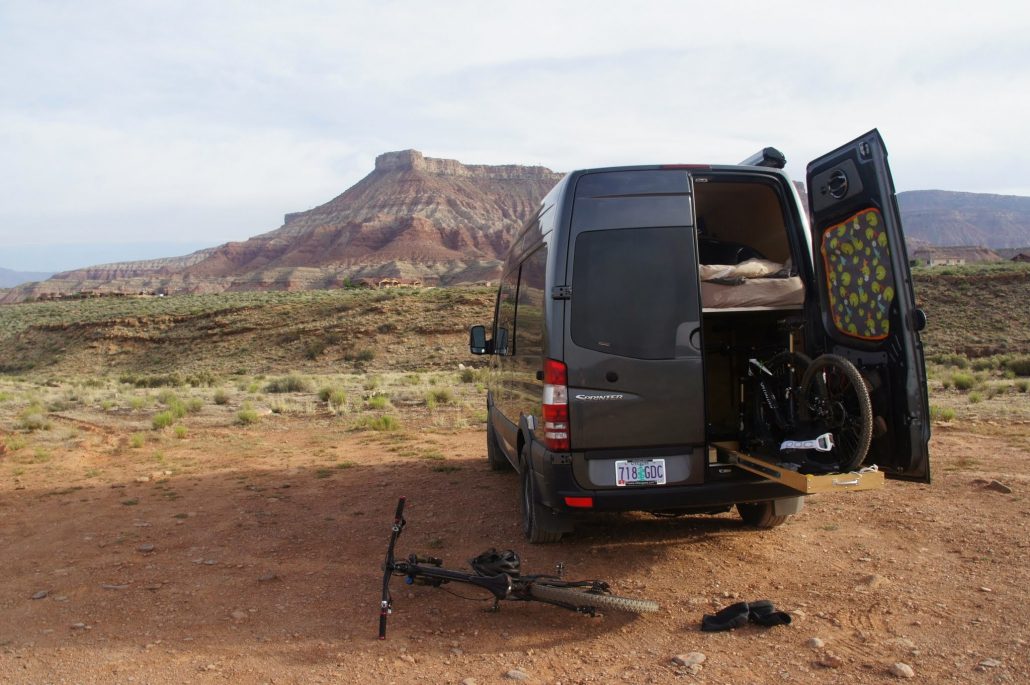
Enjoying breakfast with a view in the Utah desert
Interior
Sound deadening to mitigate road noise, plus insulation (open-faced denim insulation for walls and denim water-heater blanket from Amazon for ceiling), plus a thin, light-colored wood veneer so we feel like we’re on a boat. (There is also the ready-made RB Components interior or a less expensive one from Van Specialties.)
In the buildout pictures gallery, you can see some details of my interior build. I used silver pan-head, self-tapping screws that were ~1.25″ long. For the wall panels, I just screwed directly into the metal frame of the van. For the ceiling, I ran five strips of plywood first (see pictures gallery) to make mounting/finagling the ceiling panels into place easier.
Note: I played around with Rivnuts and decided they were HUGE overkill for attaching 1/8″ plywood. Save yourself 57 hours and skip them. I did use Rivnuts to mount the bed to the wall.
Awning
Double our living space off the side of the van. Easy to crank out to the side, no whistling from wind while driving or noticeable reduction in mileage, and installation was *cough* a breeze solo on a tippy ladder. (Recruit a friend!) The awning isn’t good in strong wind, but keeps the rain off and certainly the sun when wind gusts stay under about 20 mph. Given how little we use it, I might not buy one again.
(Model: Fiamma F65s, perfect for the 144″ Sprinter. Purchased from the Sprinter Store.)
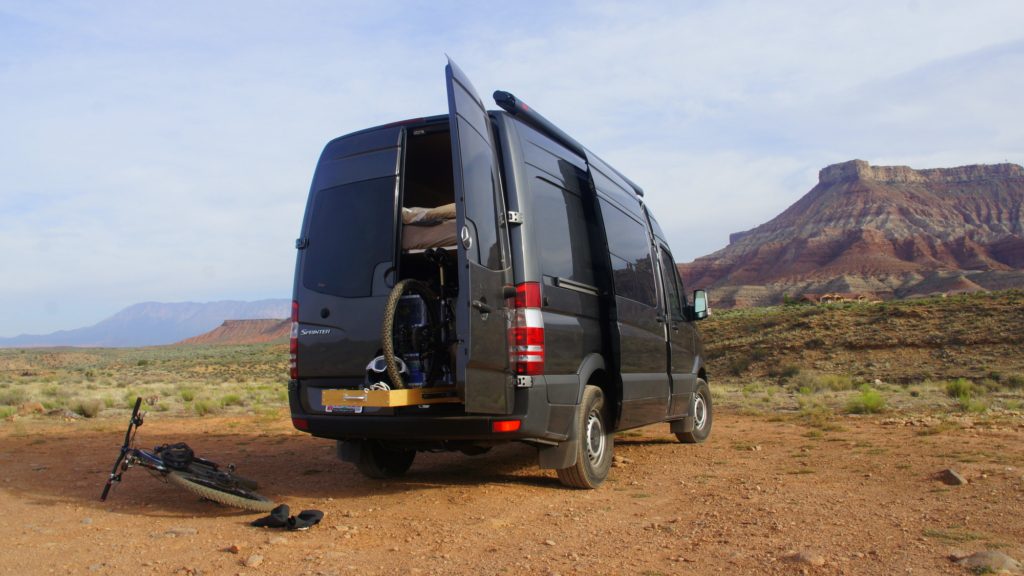
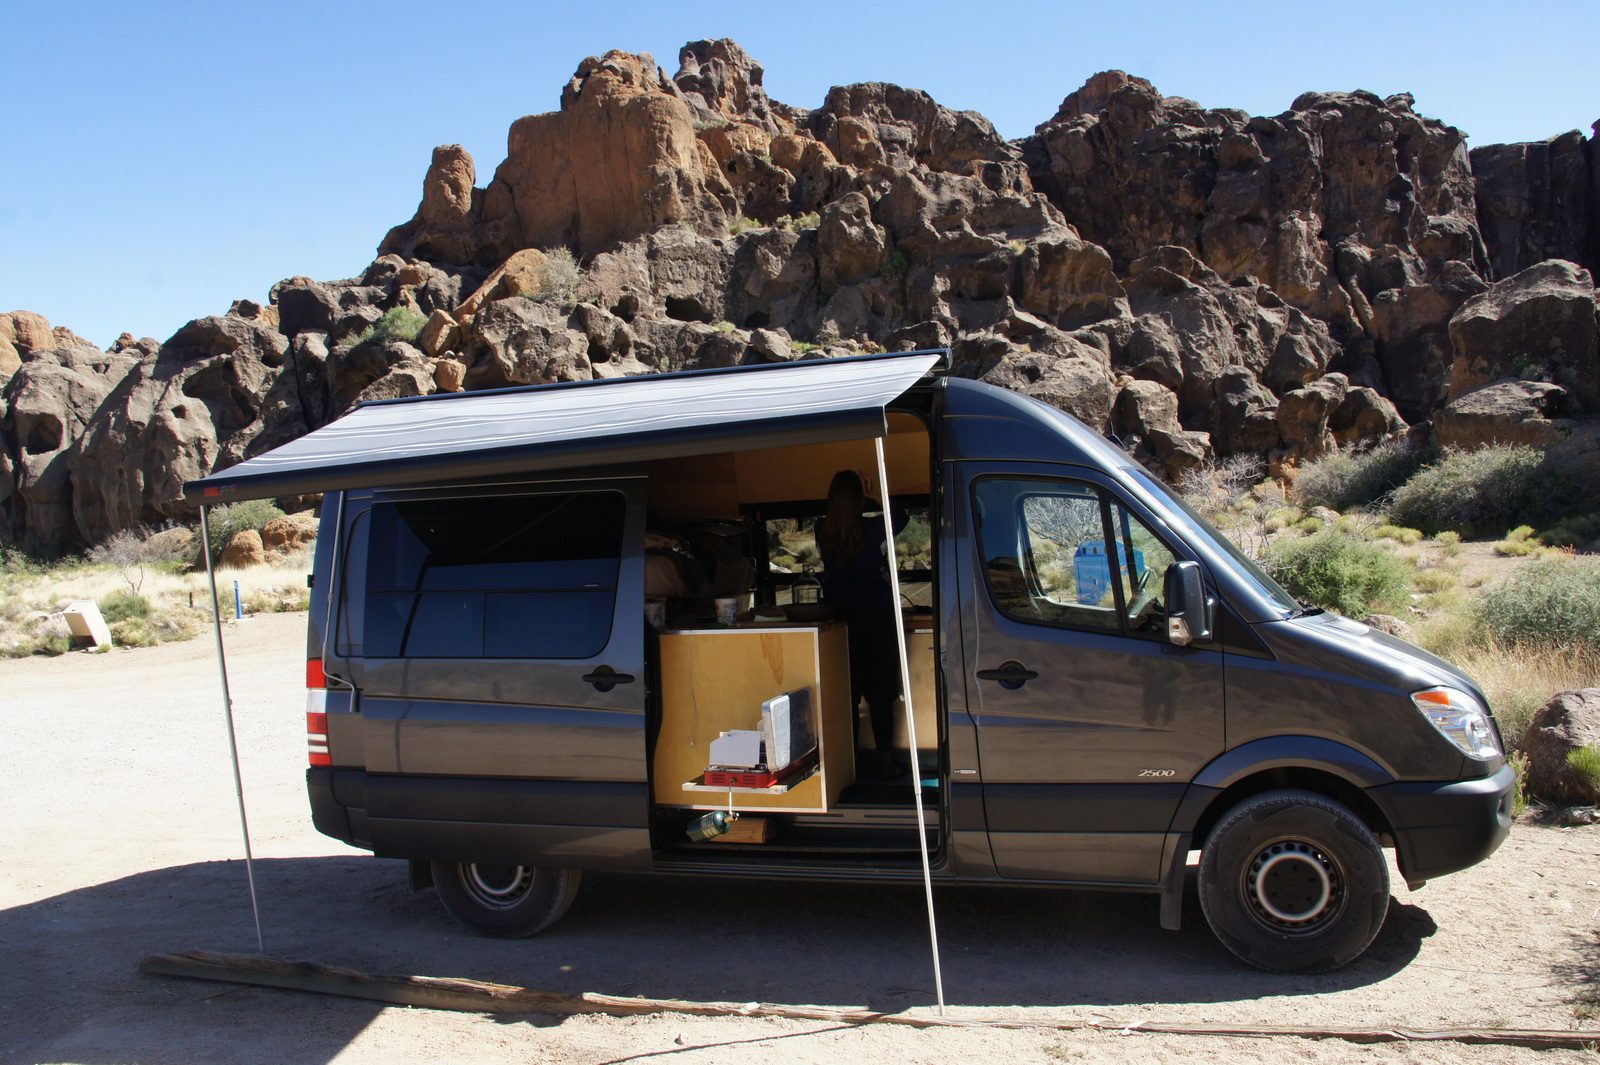
The Sprinter in action in the Mojave National Preserve. Awning and stove out while cooking a meal and enjoying the view.
Curtains
Occasionally (ok, frequently), we pull into cities along the way and sleep in a quiet neighborhood. Yeah, we could get a hotel, but I paid enough for the damn van and I want the cost-per-use to keep dropping. Blackout curtains make this possible.
Ours are a two-layer black canvas facing out and a colorful design with snaps and magnets that keep it quick, clean and easy. These were the first time I’d ever used a sewing machine and turned out quite well. For the front windshield and passenger/driver windows, we went with a cab insulator kit, also from the Sprinter Store. Using these, we’ve stealth camped at least 100 nights in cities and never had anyone bother us.
Lights
12V LED lights that we installed two months into the trip in Santa Cruz. A MUST have, in retrospect. We have one diffuse (wide-spread) light a foot back from the headliner and another two spotlights over the countertops. Having fairy lights or mood lighting is a great addition as well.
Get the lowest temperature (warmer light) model that you can.Around 3,000 Kelvin seems to be what people like the most.
Note: I retrofitted our lights with photo filter paper from B&H and now we have a warm orange glow. I also installed a 12v LED light bar in the gear garage – both written about in this upgrade post.
Stereo system
Last but certainly not least, the High School Dream System that I couldn’t afford when I was 18. I suspect we bump Macklemore more than most teenagers in Seattle.
For those putting in a subwoofer, ours is in a custom-built box in the space under the passenger seat down-firing toward the floor. Works great!
Note: with the most-excellent Alpine deck we installed, I can connect via Bluetooth from my laptop and watch movies with some serious bass and surround sound action. It’s fantastic!
(Models: Alpine Bluetooth deck, 4 Hertz 6.5″ mid/high speakers, ID 10″ subwoofer, Helix 5 channel amp.)
Bike racks in action in Andrew Molera State Park in Big Sur.
Things I Learned Doing Our Buildout
Turns out building out a Sprinter is like building a house. Same decisions on finishes, same design dilemmas. Which isn’t my favorite thing, by a long shot.
The saving grace? That this “house” had an engine and could give us access to nature and new places. That said, there were absolutely moments that I wanted to (and did) scream in frustration on a sunny Saturday when I was insulating it instead of shredding perfect mountain biking trails. Patience – the shredding happened later, and lots of it.
Drilling holes in a new Mercedes gets progressively easier as you make more of them.
Nothing in the entire vehicle is straight. Curved walls, floors, windows.
A full shop would have made this far easier. Almost everything was done on two sawhorses in our backyard with a circular or jig saw and an abacus for calculations.
DIY=prototype. Sometimes a permanent one, but in my mind, it was always “Wow, learned a good lesson there! I’ll take advantage of that newly-earned skill next time I (insert incredibly frustrating, tweaky building activity).”
I could have been a contortionist given the small, awkward spaces I was able to cram myself into while building the interior.
Put the heater in the van BEFORE you go to Idaho in the winter to shiver in 20 degree weather and slither around on the frozen ground underneath the van routing fuel and electrical lines.
The process of building an adventure rig is immensely satisfying. I look at the completed Sprinter these days like a proud parent at graduation and am stoked (and surprised) that it turned out so well. Also, perhaps not like a parent (you tell me!), I pretend I don’t see the little things I’d like to improve. In my day job there ain’t much in the way of a finished, physical product, and so it was really rewarding to see something concrete come together.
Enough words. Time to start building your van!
If you read this entire post, plus comments, and can’t figure something out, drop me a line. Maybe I can save you 12 hours of pain or at least throw a snide comment your way about how suffering builds character.
Happy van building!
Whoa, you read this entire post?! If you survived (or even enjoyed?) all the bad jokes, you’ll probably enjoy my free 2x/month Traipsing About newsletter.
Once your buildout is done, you get to hit the road to places like this!
https://www.traipsingabout.com/wp-content/uploads/2013/11/DSC08841.jpg6821024Dakotahttps://www.traipsingabout.com/wp-content/uploads/2018/03/Traipsing-About-logo-white-background-450x156.pngDakota2013-11-27 14:33:322023-05-06 14:33:59The Adventure Mobile - Our DIY Sprinter Camper Van Bicycle Hauler