Favorite Upgrades to Our Sprinter Camper Van Buildout

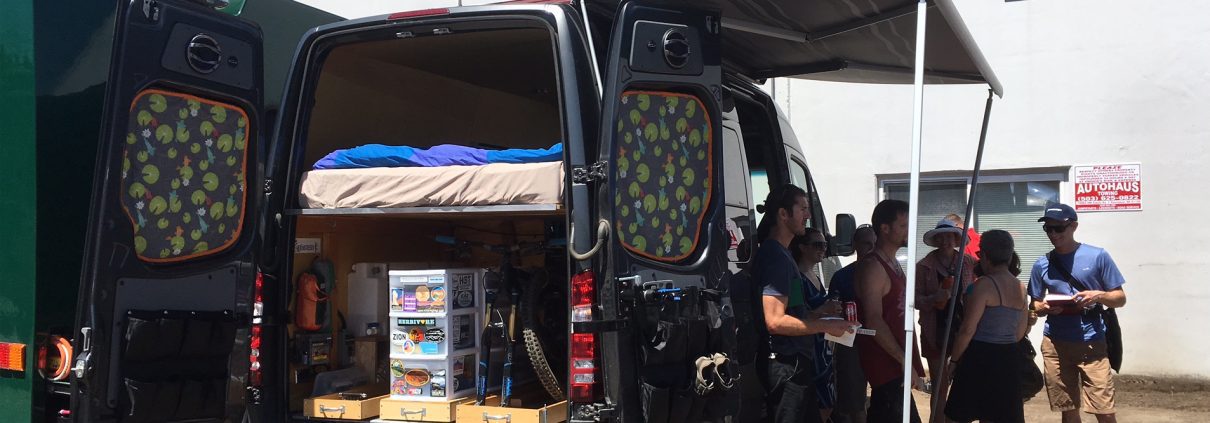
Hanging with folks at Sprinterfest in June 2016. It was awesome to meet a bunch of blog readers in person!
As we’ve traveled in our Sprinter van the last few years, we’ve made a list of upgrades to make. This post details recent favorites that I’ve finally had the wherewithal to complete since we landed in Portland in late April.
I considered my initial van buildout effort in 2013 a prototype design. Our goal was to use the van for a few months to nail down specifics, be it water usage or storage for my chia pet collection. After many months on the road, we loved some things – I’d sell a kidney to keep the sliding bike drawers – and other things needed improvement.
Without further ado, here are recent upgrades/additions I’d highly recommend incorporating into your camper van buildout. Happy van building, y’all.
The Upgrades
Sink and water system

The sink cranking out running water!
Favorite item first! We finally leapfrogged pre-Mesopotamian civilization and officially have running water. It only took us a few years to pull the trigger…
Why didn’t we do a sink right away? Our rationale was two-fold: 1) Before investing in a water system, we wanted to see how much water we used and 2) The idea of drinking from a plastic water tank made my cancer radar ping like crazy.
For 2.5 years, we simply used four 1-gallon glass jugs as our water source. It worked fairly well, but capacity was obviously limited and doing dishes wasn’t very fun. (Ok, it sucked!)
In a burst of vanspiration, I bought all the components for a water system from the folks at Van Specialties. Then I took 17 trips to the hardware store and *presto* running water!
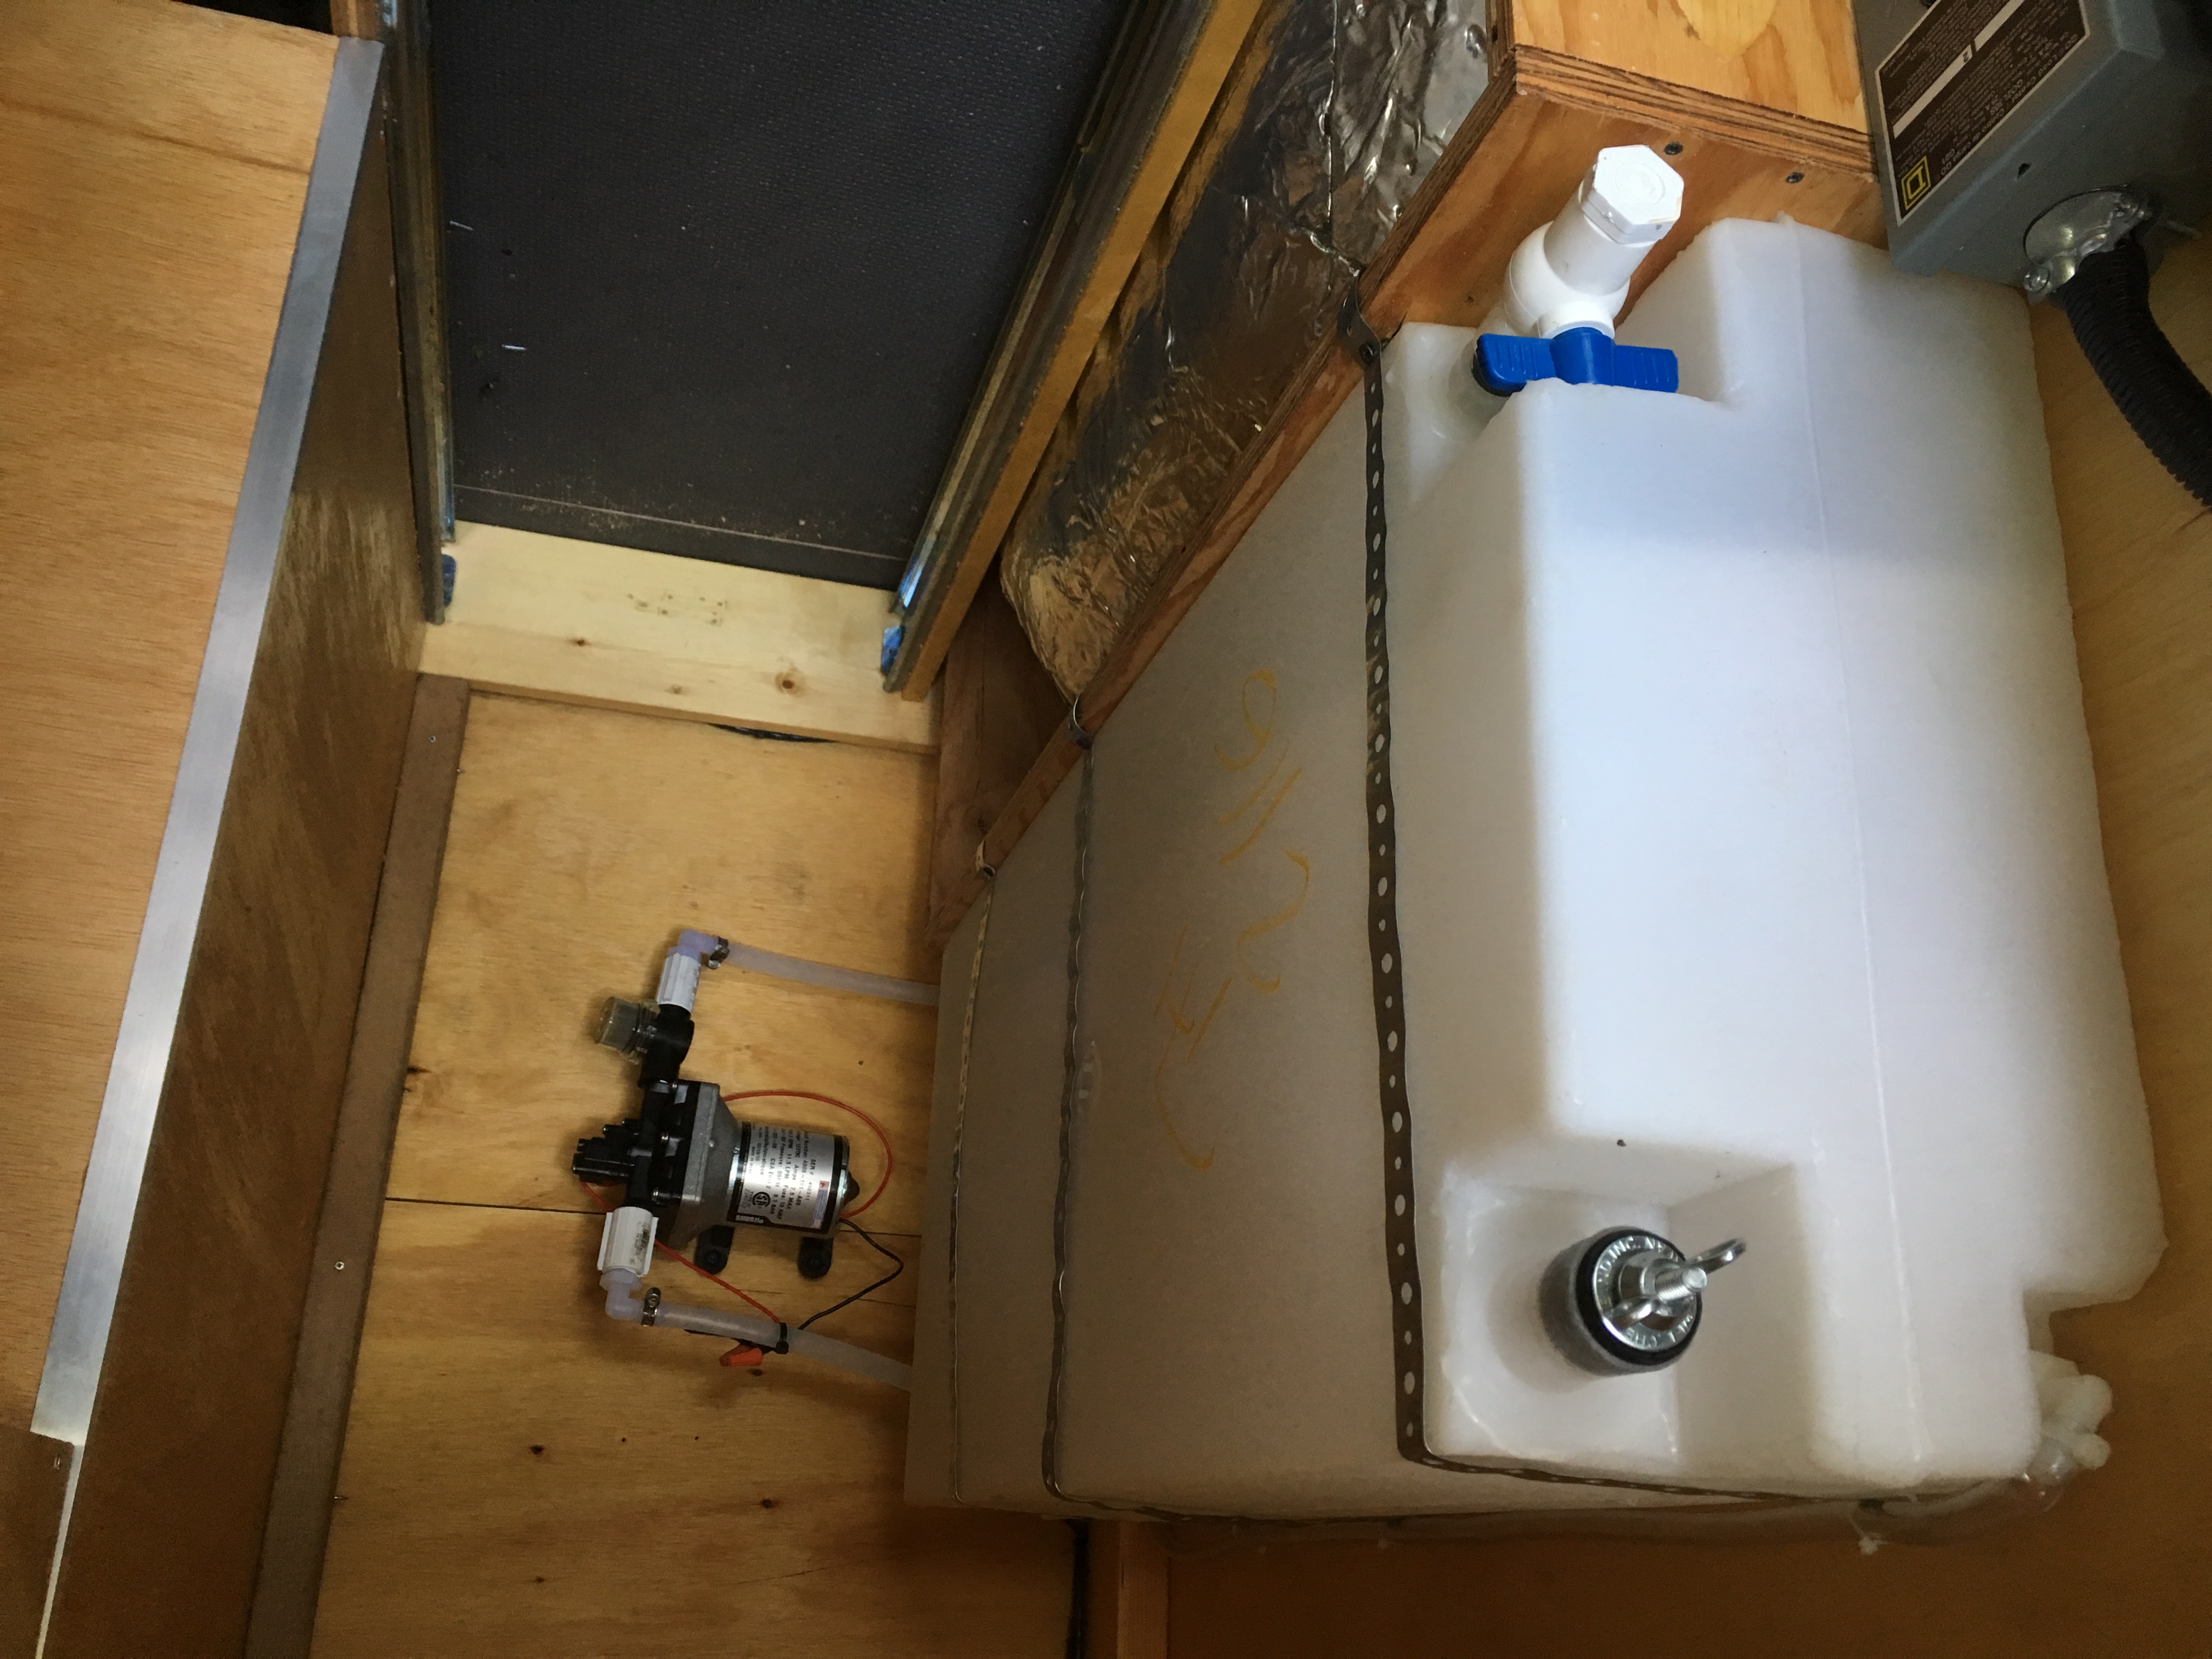
Water tank installed. The top line is a 3/8″ vent line through the floor; the top fill nozzle plug is a 1″ plumber test valve that expands when the wing nut is twisted. The bottom drain has a hose attachment when needed.
There are lots of full posts out there about how to install a water system, but here are the basics. If you don’t have a local camper van store, I’ve linked to the same items online.
- Dometic folding-lid sink
- 25 gallon freshwater tank mounted over the rear wheel well using metal plumbing strapping. Many people use jugs under the sink, but this takes up valuable storage space inside the main living area. I simply drilled three holes (fill, drain, and line to pump) and used 1/2″ fittings. Super easy!
Note: I chose to fill the tank by opening the rear doors rather than cutting another hole in the van. It’s easy to fill with a 25′ expandable hose like this, and the fill hole is sealed with a 1.125″ “plumber test valve.” - 3 GPM Shurflo pump wired to 12V power with a $7.50 switch in between. A smaller pump would work fine as well!
- Gray water is currently routed to 2.5 gallon holding jug that we empty each night. After 2 months traveling with it, there’s no stink and it’s easy to empty anywhere. Do the polite thing and don’t drain your water onto the ground through a hole in the floor.
- Drinking water from the original 1-gallon glass jugs (just say no to buying bottled water!)
I’ll end with this: put in a sink and running water. Just do it. Stop pretending you like doing dishes squatting over a bin and join the all the fancy people with their high-tech running water.
Hot Water Propane Shower
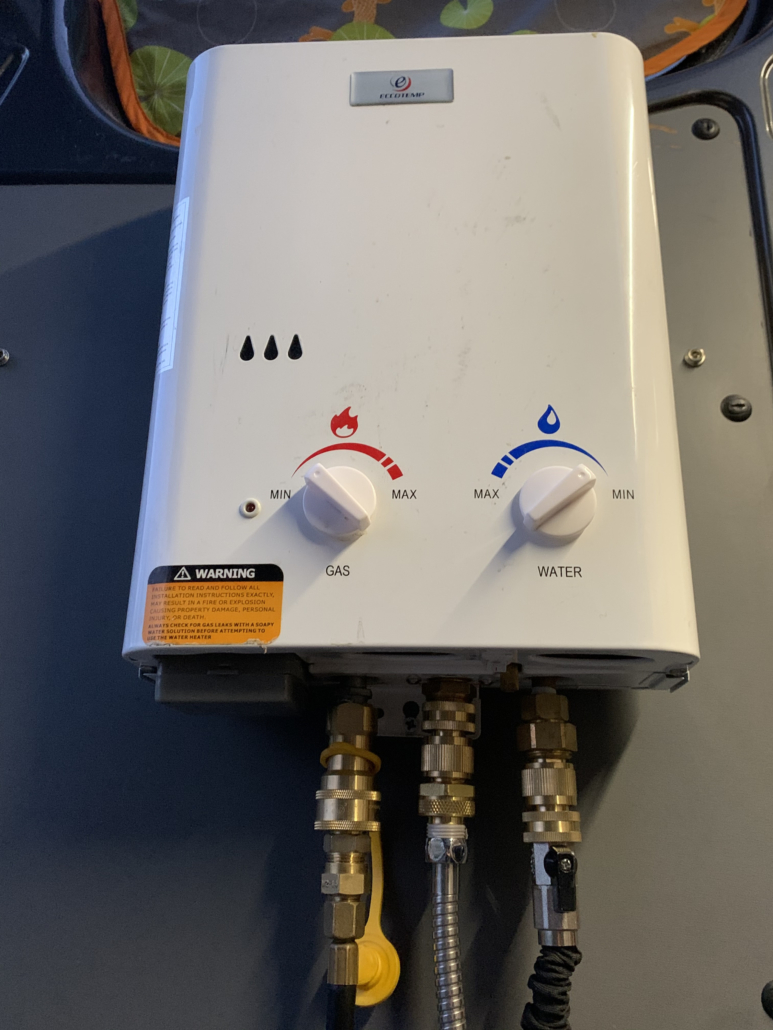
Upping the hygiene game with hot showers!
As an additional upgrade, I added an Eccotemp L5 propane shower to the back door of the van. For ~$100, the inconceivable luxury of a hot shower entered our lives. (Hot showers rule! We should have hot showers at home!)
I didn’t want a hooked-up shower all of the time though. Enter quick-connect fittings. Using an array of them from Amazon, I created a system that takes 30 seconds to set up, but doesn’t leave the back of the van a mess the rest of the time.
If you already have the Eccotemp shower, a propane tank with regulator hose, and a water hose, below are all the quick connect fittings you’ll need. Enjoy those hot showers!
- Reducing Valve & Coupling
- Garden Hose Quick Connect (contains 2 sets)
- Gas Quick Connect Disconnect Connector
- Brass Reducing Hex Bushing
By the way, dig these kinds of posts? Sign up for the free 2x/month Traipsing About newsletter for van talk, outdoor adventures, and life hacks.
Cell Phone Signal Booster
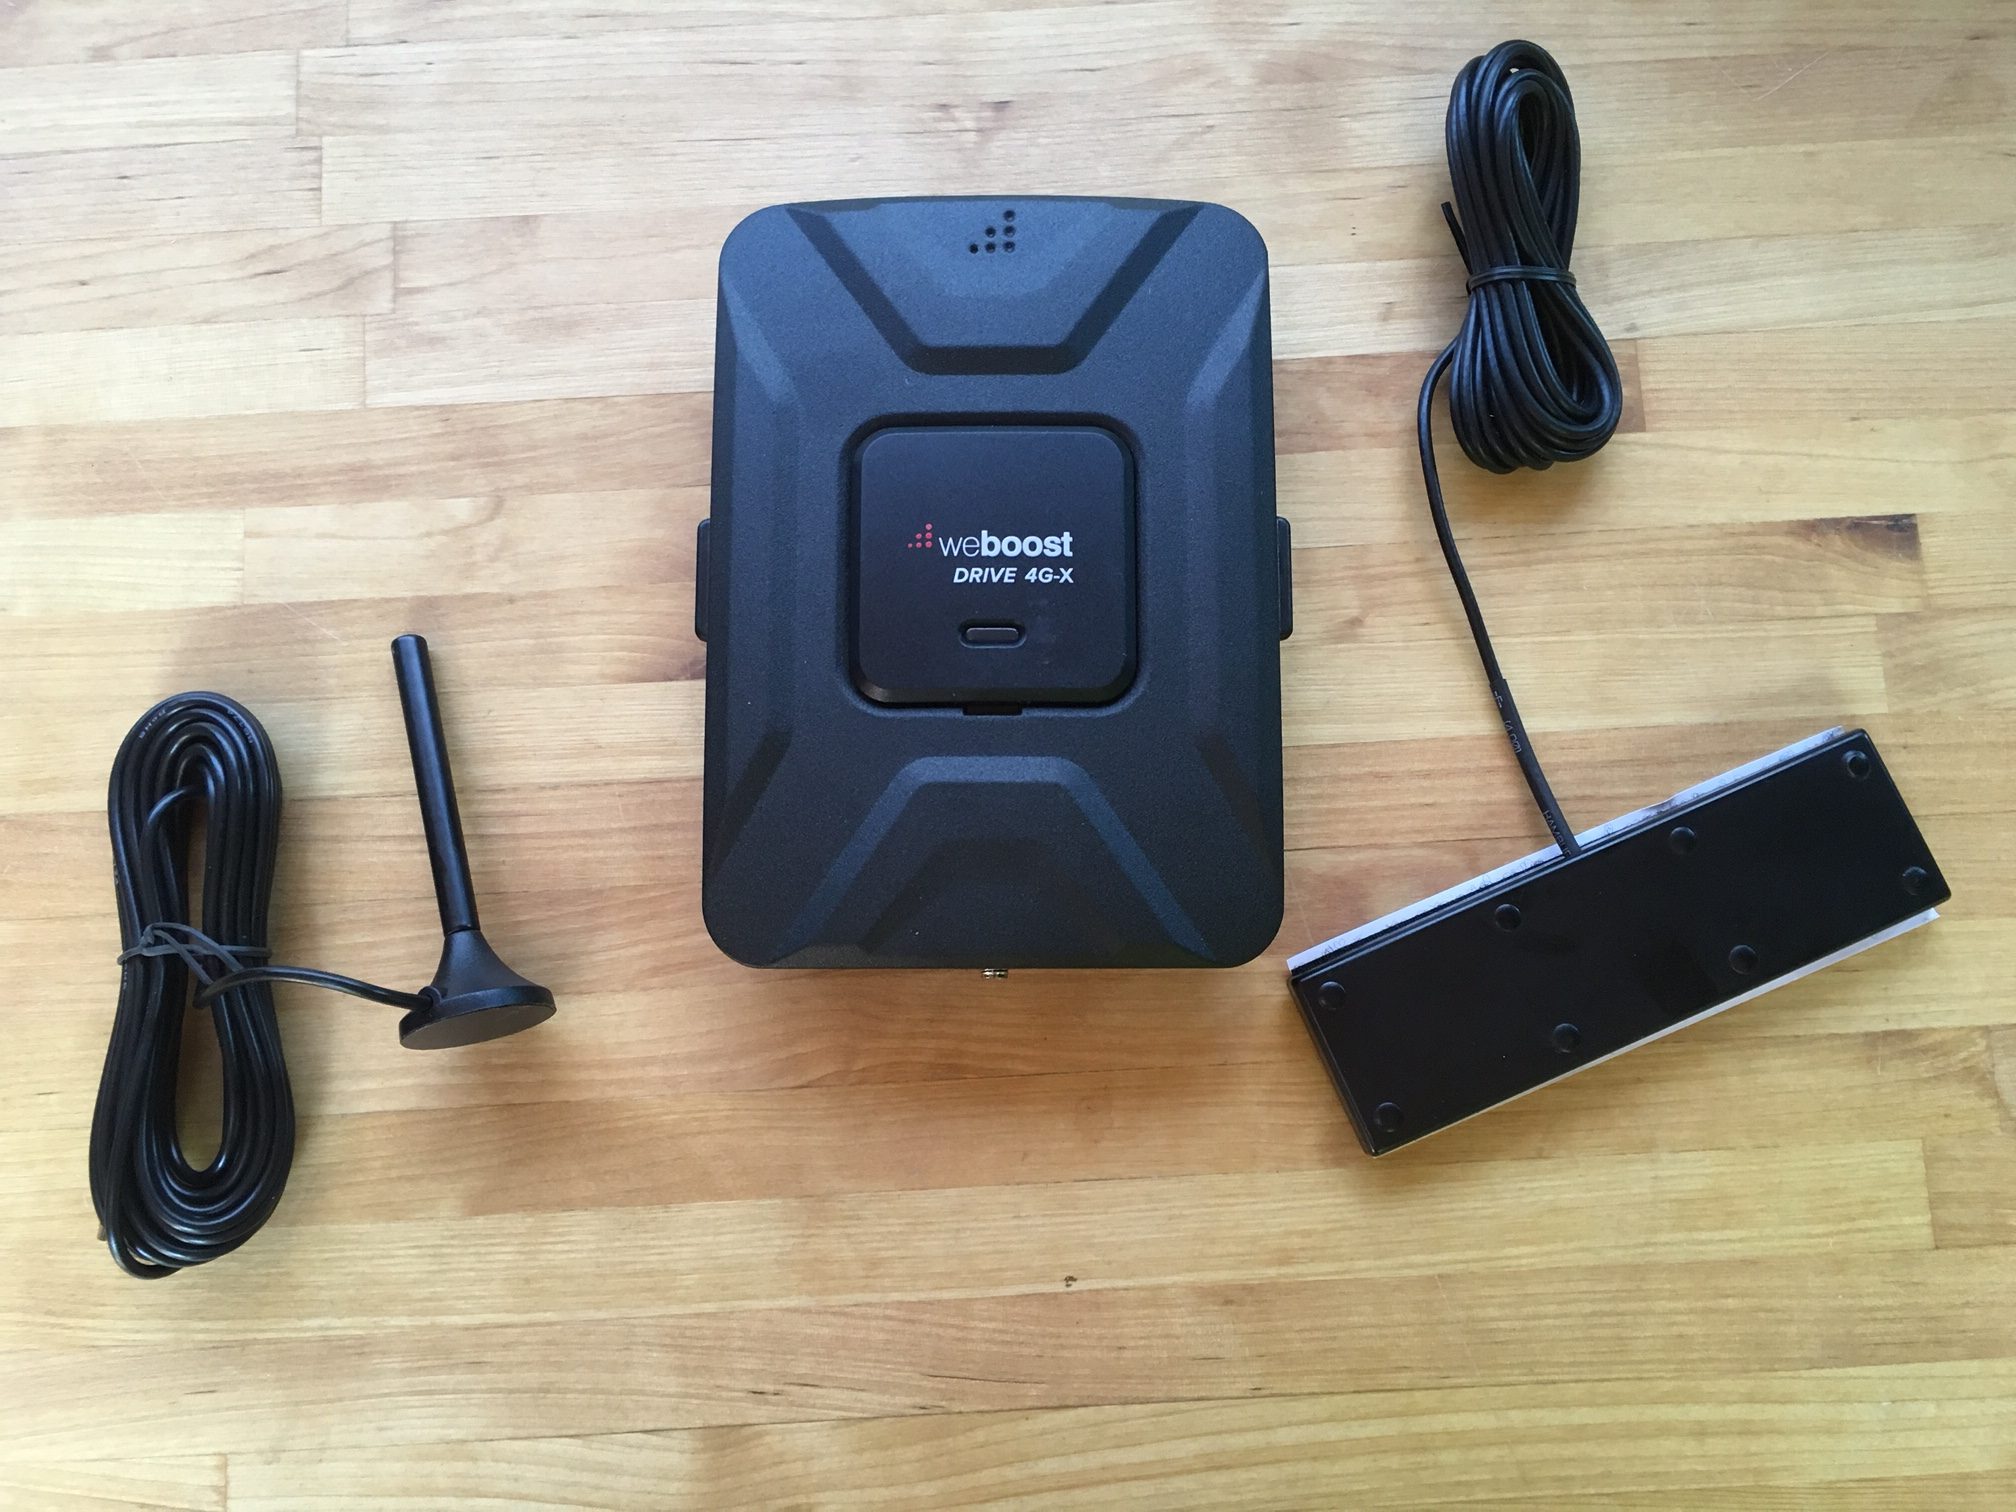
The weBoost and internal/external antenna. It’s about 6″x8″.
Some people are lucky enough to completely disconnect from the world while they travel. Our double-edged sword is that while we can travel long-term, I’m still working at least a little bit most days.
It sucks to watch a fading cell signal right when I need it most, and that’s where the weBoost comes into play. It’s not for everyone, but if you are working remotely and don’t want to be tethered to wifi at a coffee shop, this is what you need. I got the Drive 4G-X, but there are other models as well. They work for all cell phone networks and will also boost wifi hotsports if you use one of those. (I’ve switched to only using data from my cell phone for simplicity.)
This handy device allows us to camp in remote places where 1 bar of Edge trickles in from somewhere over a ridge. The weBoost will turn that into a few bars of 3G, enough to send emails without praying to the internet gods that your communiques are being delivered. (Ok, you caught me – I only need this so I can post fake yoga poses at sunset on Instagram.)
The install was incredibly easy and didn’t even require drilling any holes. Just a magnetic antenna on the roof and a quick wire splice to wire to 12V power. Cancer-fearing person that I am, I put our booster on a switch so that I only turn it on when I need to check in on work.
One caveat regarding its performance is that it doesn’t create cell signals out of thin air. If you’re in the bottom of some canyon where all signals are dead, you’re done.
Storage shelf above the front seats
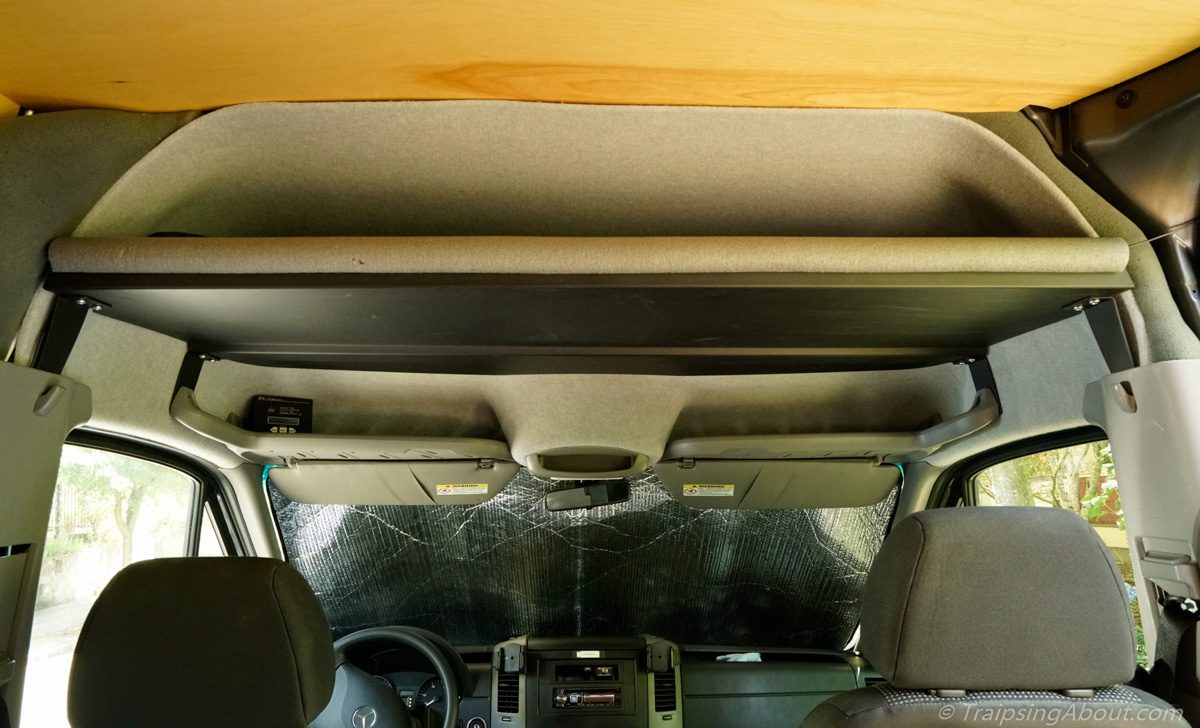
Headliner half shelf in final installed position.
If you have the high roof Sprinter like us, you’re wasting a shit ton of space. RB Components, which fabricates many high-quality aftermarket Sprinter parts, has a solution. Sure, I could build my own with hours of effort, but the need to manufacture brackets, pull out the headliner, and deal with a weird shape sounded terrible. So I bought one.
Update: These days, I would use the wayyyy cheaper kit that my buddy Sean created. For a little legwork on your part, it’ll save you hundreds of dollars on an otherwise very expensive shelf.
The shelf is awesome! Others agree. Last weekend we went to Sprinterfest, a big gathering of Sprinter owners near Portland, and the shelf was the biggest hit in our van. Do yourself a favor and buy one. We’re planning to store camera equipment, physical therapy gear (foam rollers, etc), and at least three watermelons up there.
If you want to drop some coin, RB Components has two options: a full shelf that mounts at visor level and a “half shelf” that mounts six inches higher. I opted to keep some head room and go with the half shelf.
If there’s a downside, it’s that the shelf is exactly forehead height if you’re 5’10”. Chelsea forced me to install pipe insulation on the edge to avoid knocking myself out. My forehead thanks her already.
Bike repair stand attached to van
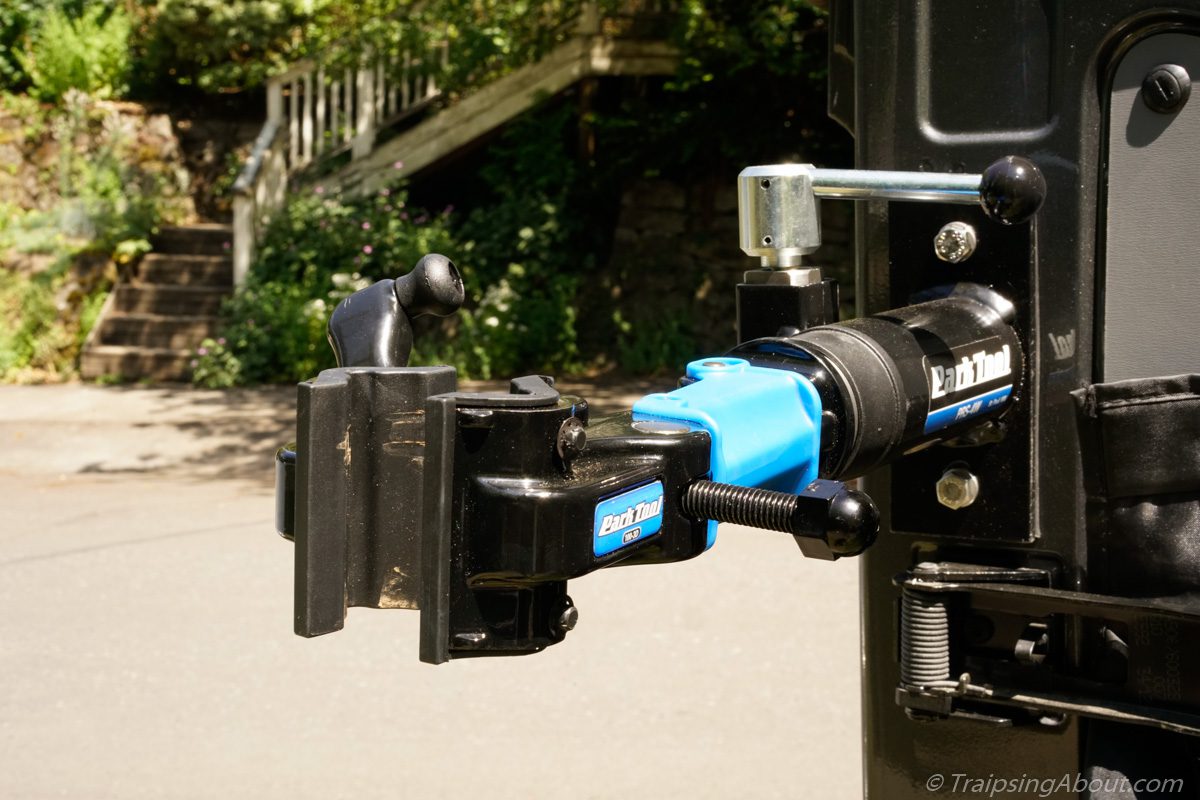
Close up of the bike repair stand install.
How many times have I worked on my bike with it leaned against a rock, tree, or dog? Too many to count.
Well, NO MORE! I bought this Park Tool bike stand and installed it on the right rear door near the hinge. The door can still swing 270 degrees and also clear our awning when it’s out, but I don’t have to open all the rear doors to work on a bike.
To mount the stand, I drilled a couple holes and installed two 3/8″ rivet nuts. Whammo, I’m officially a mobile bike repair business!

Bike repair stand and side table showing their utility after a MTB ride.
If you travel in a van and ride bikes a lot, I insist that you immediately do this too. If not, men with straitjackets will descend upon you very, very soon. You’ve been warned.
For the record, I stole this brilliant idea (among others) fair and square from my friends Jon and Pamela, the Roaming Robos.
Drop-down table from side cabinet
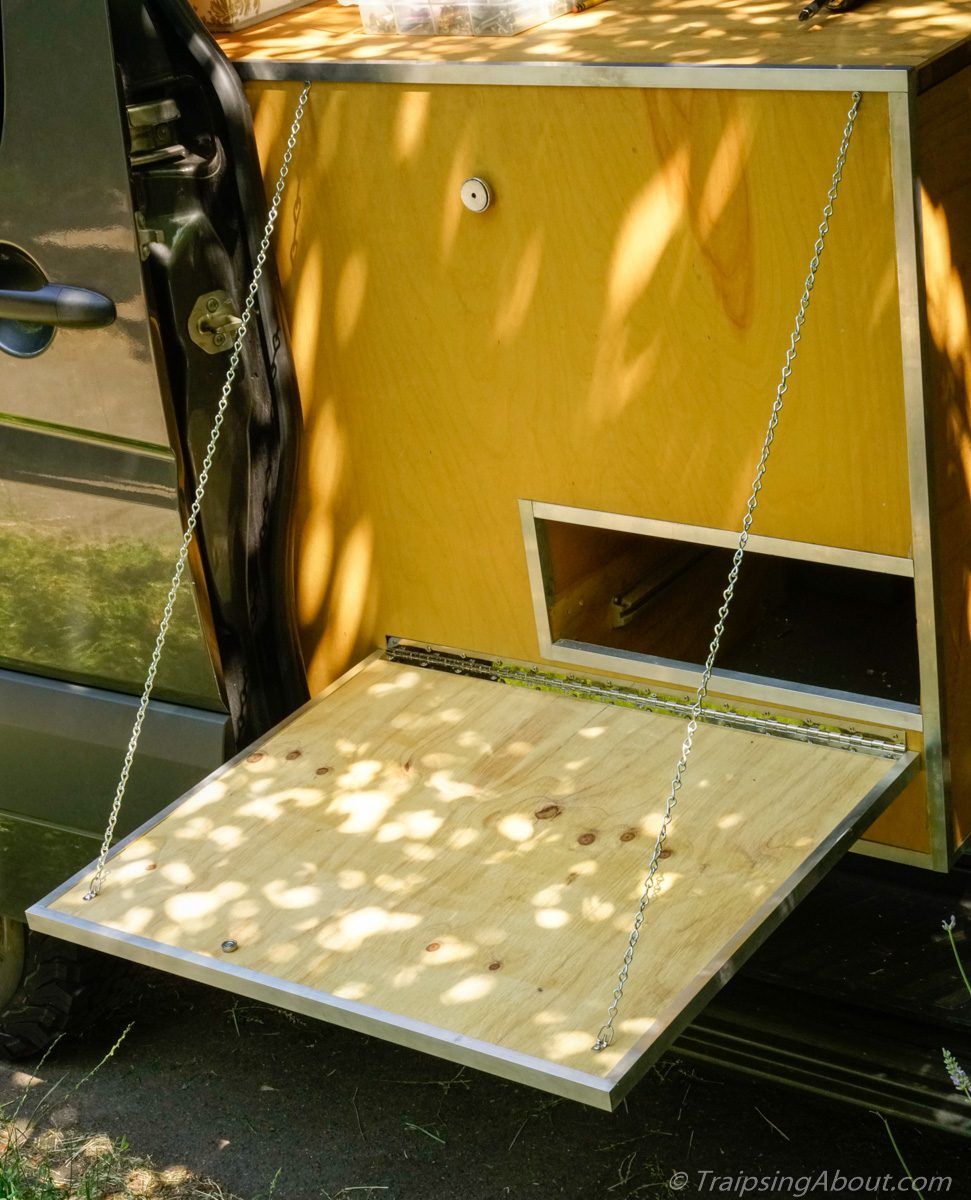
Table dropped down. The cut-out is for stove access.
In an attempt to not stink up the van like a rolling chuckwagon, we mostly cook outside using our portable camp stove. Sometimes this is on picnic tables, but often we are in the middle of nowhere without a table.
Our initial cook table was a pull-out shelf with the camp stove on it. This worked well but was a bit small to hold anything except the stove. With upgrades in full swing, I decided to build a drop-down side table, as inspired by my buddy Michael.
The table is 24” x 28” and is supported by a piano hinge attached to the cabinet. A magnet holds the table vertically and two small chains support the outside edge when in use. Some aluminum trim and it looks pro! Or at least usable.
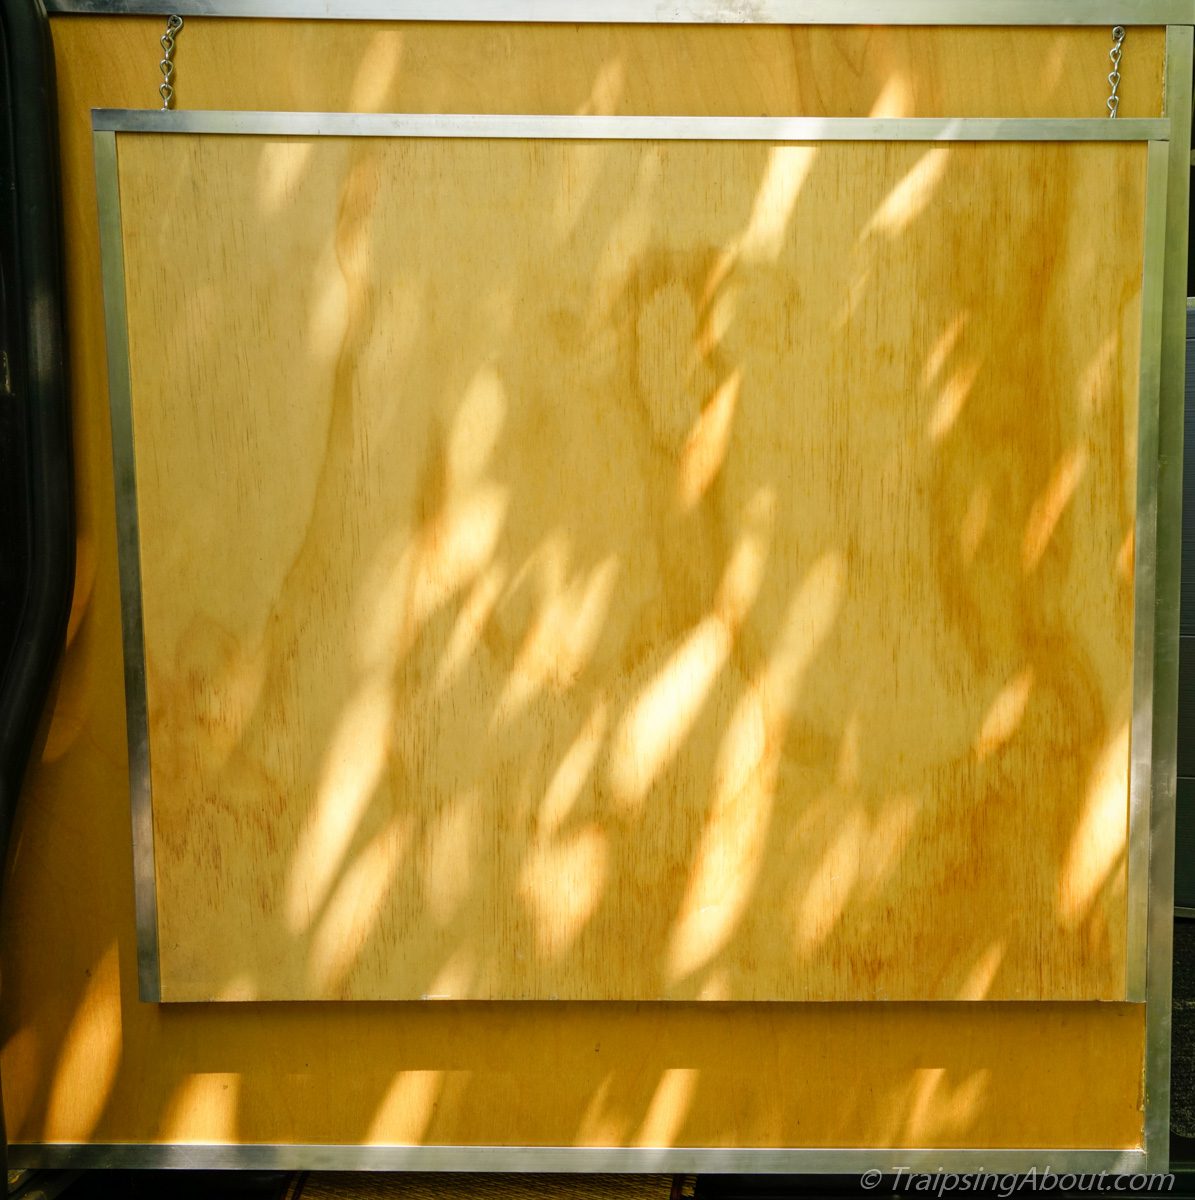
Table in vertical position with magnet holding it in place.

Detail of the table in horizontal position.
A less powerful blender
This may sound random, but we also replaced our travel blender. The trusty Vitamix now stays home and we roll with a Ninja blender. Why?
Our Vitamix pulls 1,650W. With our 12V/210 A/H battery system, anything <80% charge while trying to use the blender would make the 2000W inverter error out. I decided a lower wattage appliance made more sense. At 1000W, the Ninja is perfect and is already facilitating iced smoothies after long rides in the summer heat. Update: after upgrading to lithium batteries, we’re good to GO.
Fantastic Vent upgrade
When we first bought our van, we wanted the rain sensor and variable speed vent fan. Too bad I ordered the wrong one… The rain sensor isn’t such a big deal, but only having 3 speed settings – tempest, tornado, and hurricane – created some serious drafts even on the lowest setting.
Luckily, there’s an upgrade kit that replaces the old kit. Pop out a few screws on the original, disconnect some wires, swap wires around until the sparking stops, and *presto* you’ve got a new fan. This is a 30 minute project that I’m glad I did.
The one thing that threw me (not mentioned in the instructions) is that it’s necessary to sync the fan and remote control. Here’s the instructions on that.

Pffft, who wants to see a picture of a vent fan? Here’s a waterfall in Oregon instead.
Isotherm fridge efficiency enhancer
This cool upgrade improves the efficiency of our Isotherm fridge, our van’s biggest power draw. The claim is that it’s 30-50% more efficient; I’ll update this later when I have hard data. (Why, I’d like to know, doesn’t Isotherm just install this as a standard item in their fridges?)
At first glance, this project was slightly intimidating. Turns out it’s simply drilling one hole through your fridge and rewiring a few things. Two things the 44 page instruction manual didn’t mention: 1) If you have an original thermostat with a light, it’s easier to simply reuse the housing and install the new guts in that to keep the light. 2) The thermostat in our fridge was connected to a temperature sensor in the freezer compartment. I didn’t know what to do with this and wound up just snipping the tube. It gave off a hiss, but nobody died.
Watch this Youtube video that some kind soul created if you’d like step by step instructions. I didn’t bother watching/reading anything and it worked out ok!
All-Terrain Tires
4×4 Sprinters are badass. I’d argue that most people don’t need one, however. Who wants to rally their home over stuff better traversed by a Jeep Wrangler?
Our 2013 van is the 2WD option and we’ve driven 30,000 miles on the smooth stock tires. From gnarly access roads in Gooseberry Mesa in Utah to steep fire roads, we’ve covered a ton of ground with no issues.
Still, there are times when some extra traction would help. When our tires started looking frayed, I researched options. Wildcountry, Toyo, BF Goodrich, and others were all on the table.
In the end, I went for the ones that practically every Sprinter owner uses – the BFG 245/75/16 T/A KO2s. After all, no need to get creative when Sprinter Van Diaries and others can drive gnarly South American roads on their BFGs.
After rumbling about for a couple months on them, I can attest that these tires are 1) grippier 2) give a better, softer ride and 3) are slightly noisier. Mileage after two tanks of fuel has us between 19-20 mpg, within 5% of our previous mileage. Worth it for increased badassity and peace of mind.
Note: I also used black Plasti-Dip to “murder out” (see how hip to the jive I am with lingo?) the rims and front/rear Mercedes logo. This was purely aesthetic and I LOVE IT. Don’t listen to the internet claims that it takes 5+ cans to do this . You’ll need two and you’ll have enough to spray the neighbor’s mailbox and kid to boot.

Admit it – the rig looks way more badass like this! (Camped in the Bob Marshall in NW Montana.)
Warmer interior lights and gear garage light
Our interior LED lights from West Marine work great. I dig having them individually switched and they look clean. The downside is that their color temperature is cold – around 3,500-4,000 Kelvin.
A nice, warm light is around 2,700K, which is a much friendlier tone (and also what Chelsea wants). Since my aim is always to keep my awesome wife happy, I searched…and searched…and couldn’t find exactly what I wanted.
Enter LED filters used for photography! I found this $7 sheet of photo paper from B&H Photo, cut out a few circles to insert between the LED bulb and the clear light cover, and we are now bathed in a warm yellow-orange glow in our cozy space. Huge improvement!
Trailer hitch for rear-mount bike rack
Our bikes all fit inside the van, but sometimes I’m traveling or doing a day ride with buddies whose bikes are different sizes. (Or I want to haul 6 bikes!) I typically don’t leave the bike rack on the back, but this easy install hitch is cheap and requires zero drilling. I installed it in less than 15 minutes with a minimum amount of cursing. Recruit a friend to help!
LED light bar for gear garage
I also added this 12V LED lightbar on a switch to the rear storage garage. It was hard to find what I wanted with a switch, but this bar from superbrightleds.com is awesome.

The light bar doing its job. All four bikes loaded up last night before heading out!
Increased/improved storage for gear garage
Our gear garage holds our four bikes, but it also contains a ton of stuff for backpacking, climbing, and around camp (hammock, chairs, slackline). To make things super easy to access and maximize the storage space, I added a number of cabinets and structures.
-U-shaped platform over the right rear wheel well to support two camp chairs. It’s 8”x12.5”x36” and I screwed two L-brackets to the top to hold the chairs in place. Wasted space, used!
-For cooking, these days we use a sweet little microwave and an Instantpot! Lithium batteries rule.
-Cabinet over the center sliding drawer behind the bike handle bars (see above shot).
-Another cabinet behind the center, slide-out storage array. This is easily accessed from inside the van and is where we’ll store our backpacking, bike touring, and climbing gear, plus another big area for miscellaneous items.

Ah, cheesy pictures rock. Here we are hanging with our buddies Nikki and Jakob from Sprinter Van Diaries on their way through town.
Remote switch for inverter
Our inverter is tucked at the back of a cabinet. With some recent additions, accessing it was a bit tougher, so I bought this remote switch. Cut a 2” hole, plug in a telephone jack wire between the two, and you’re done. $20 well spent!
Mini-microwave
Can’t believe how much I love this thing! No longer can I pull the lazy card after a ride – “ohhh, I can’t be bothered to pull out the stove and heat up burrito ingredients.” My days of cold meals are over!
For the install, I simply added an outlet in a storage cubby below our bed. Then I slid a 0.5 CF Whirlpool microwave in and WHAMMO, life was simpler.
Odds and Ends
- Sliding carriage bolts to hold rear sliding drawers in place. Under acceleration uphill, they’d sometimes break free from the ball catches I used in the past. No more!
- Two 12V USB chargers by the bed for charging phones and other devices without running the inverter
- Magnets to hold countertop storage boxes in place
***
That’s a wrap! I’ll update this post with other mods as I do them, but I have no plans for any more at this time. Just lots of traveling in the van and mountain biking my legs off!
What favorite van upgrades would you add to this list?
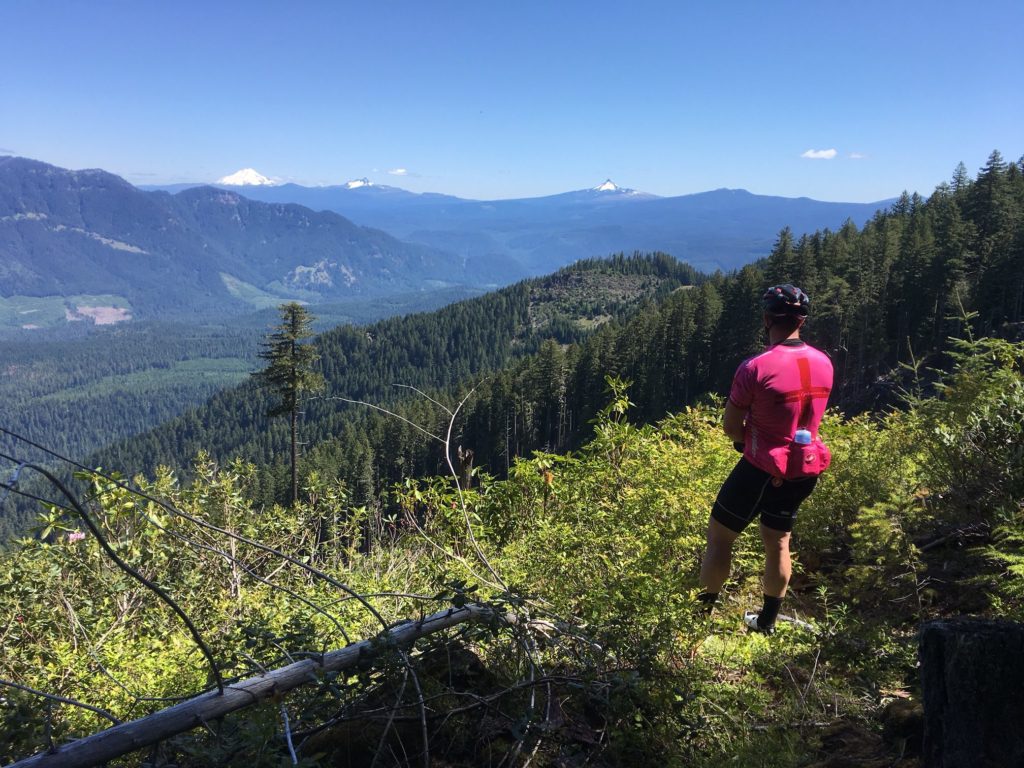
Don’t worry, I don’t spend ALL my time working on the van. Here’s a shot of my buddy Nate enjoying a view of the Cascades during a bike trip to McKenzie River.