Posts

A Rugged Adventure Bikepacking in the Chilcotin Mountains

Call it mountain bike amnesia, but I’m already forgetting the hard work necessary to bikepack in the Chilcotin Mountains. Sweaty hike-a-bikes up mountain passes drift away, replaced by stunning vistas and brake-melting descents, a goofy grin plastered across my face.

Our simple trip goals: pedal bikes laden with six days of food into the backcountry of British Columbia. Keep the plan flexible. Make decisions knowing that help won’t arrive for a looong time if we mess up.

And, lastly, the most difficult and important goal: Don’t eat all the good snacks on day one.

Loaded with six days of food and not out of snacks (yet!).

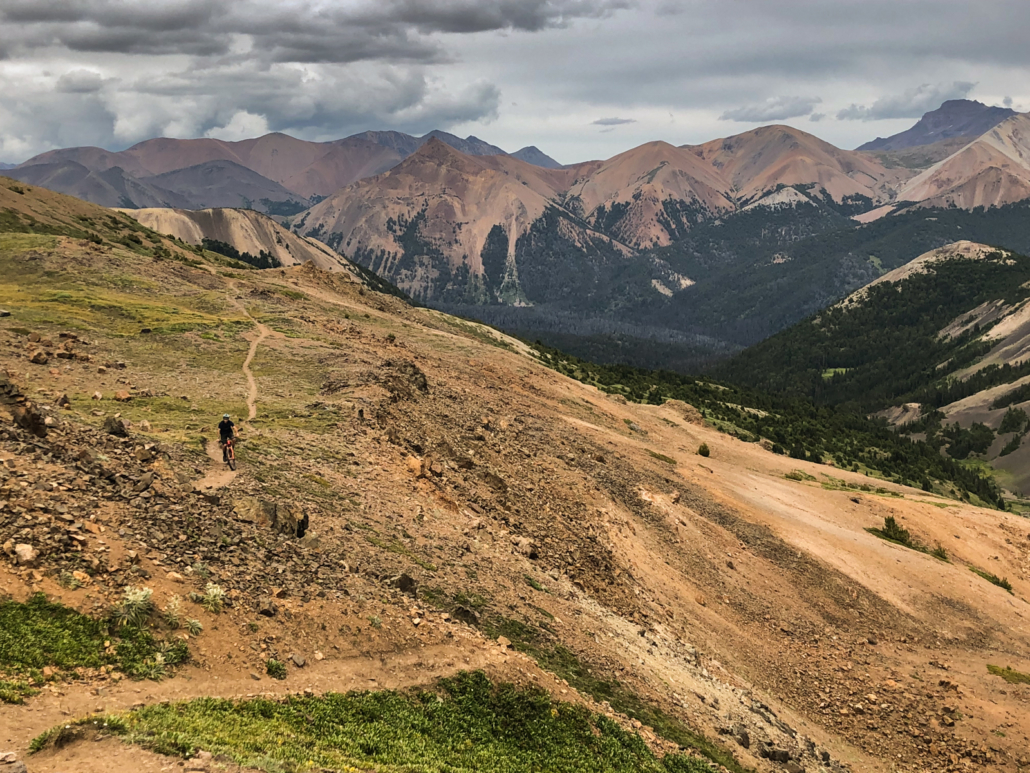
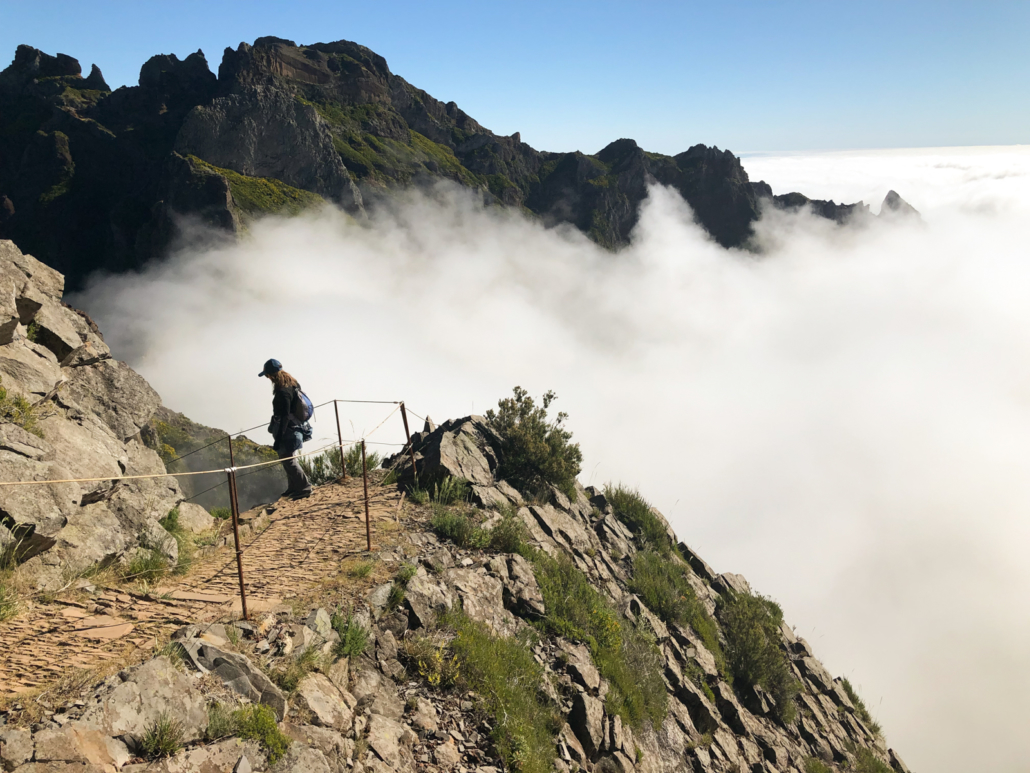
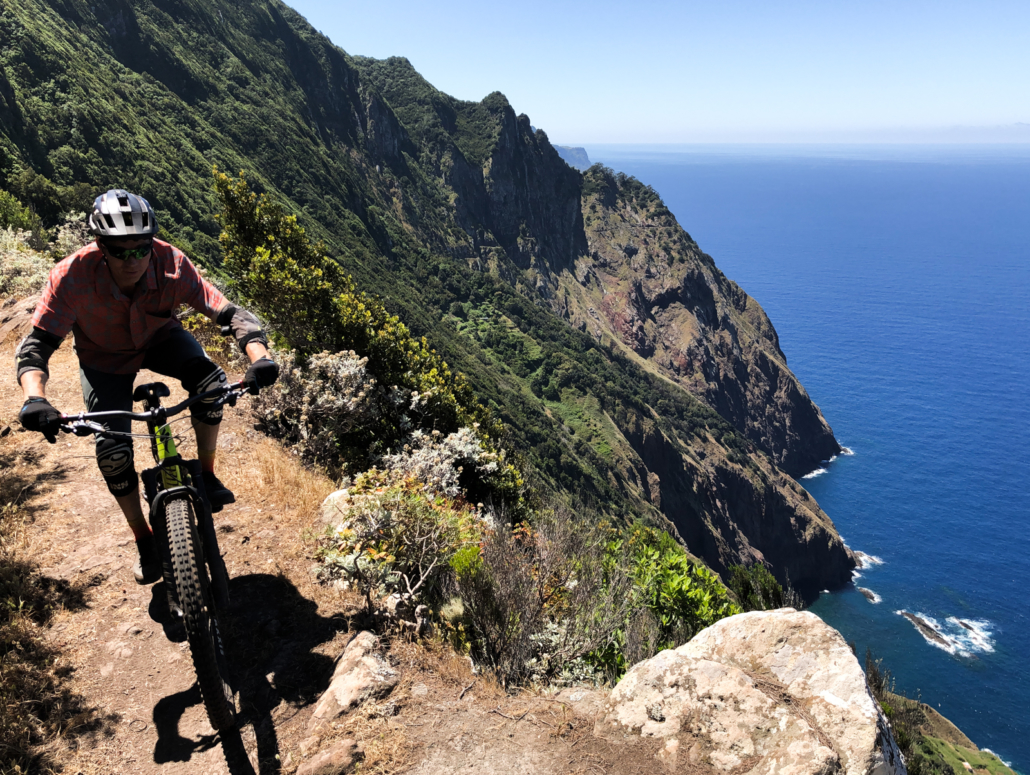
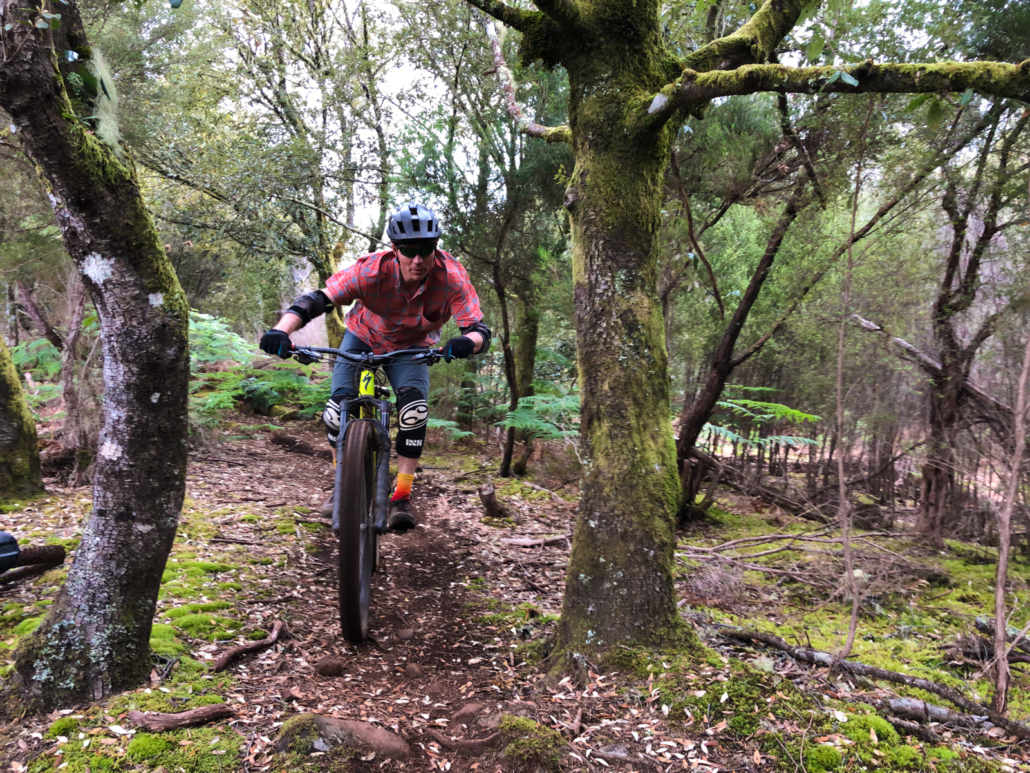
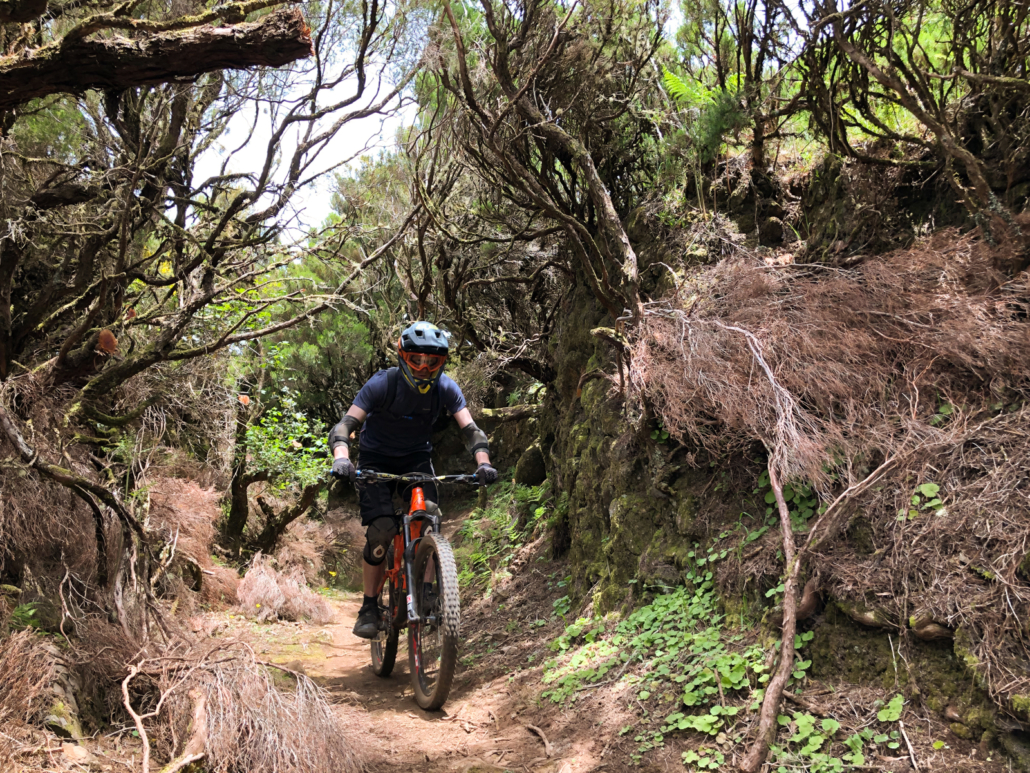
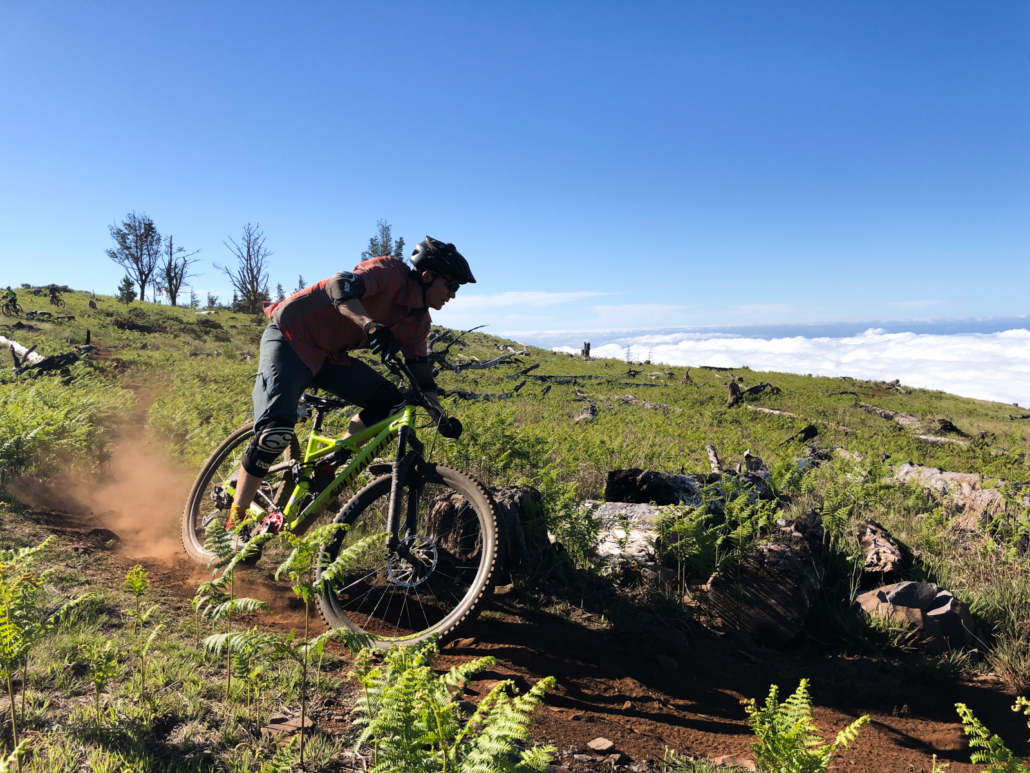
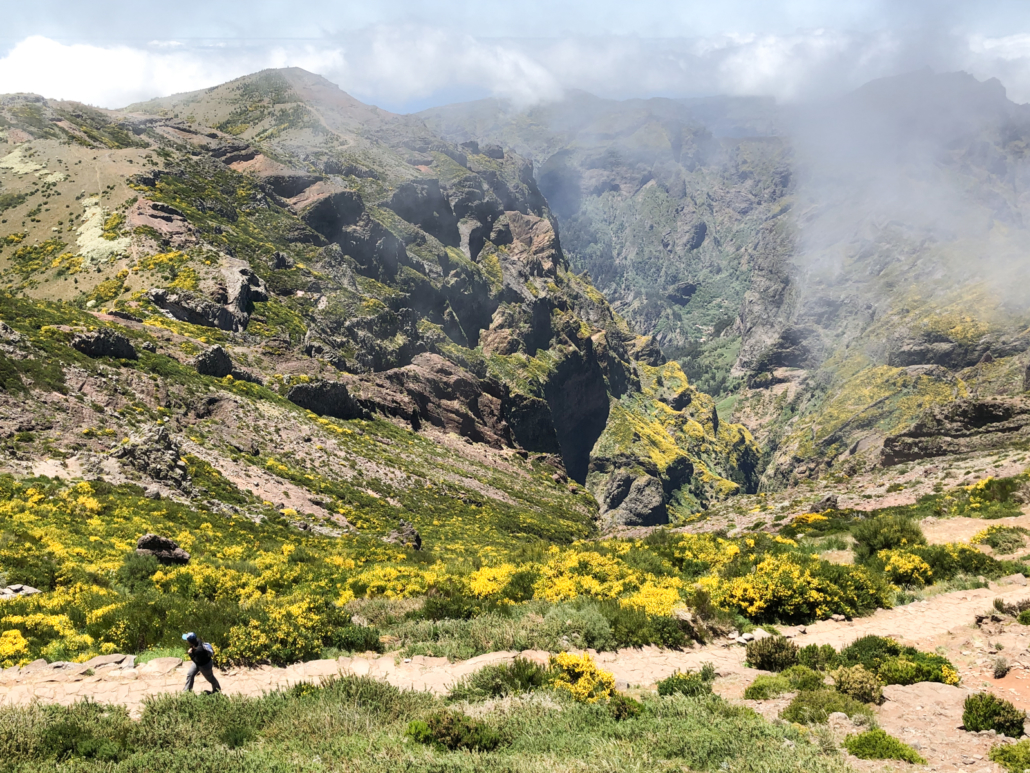
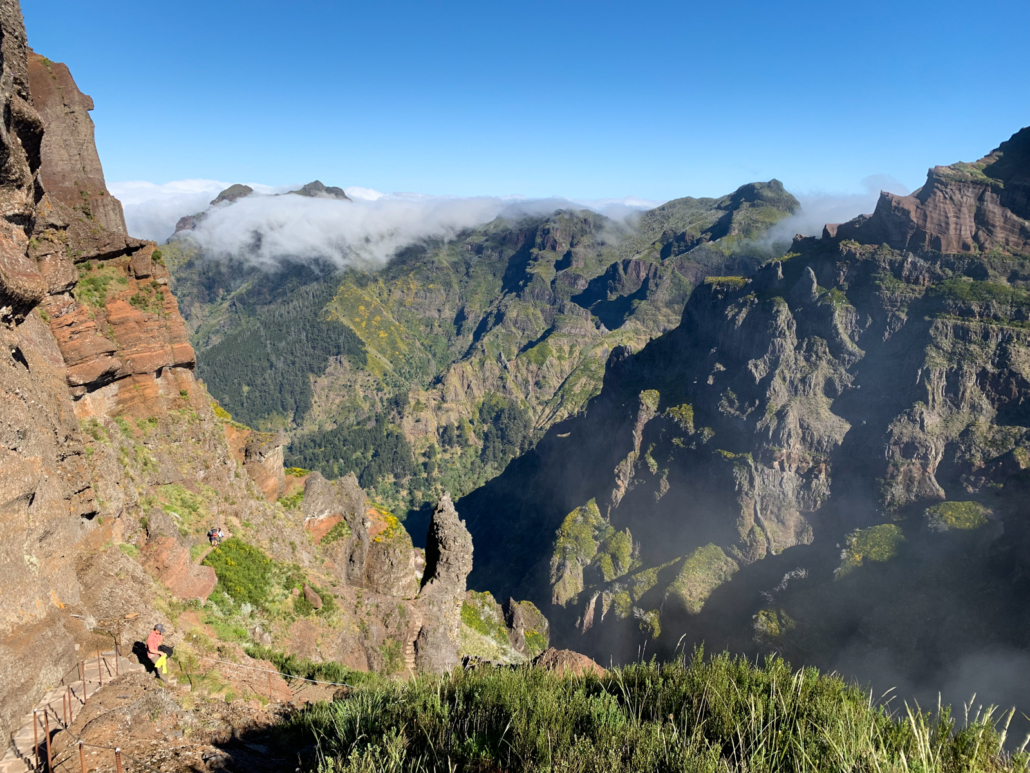
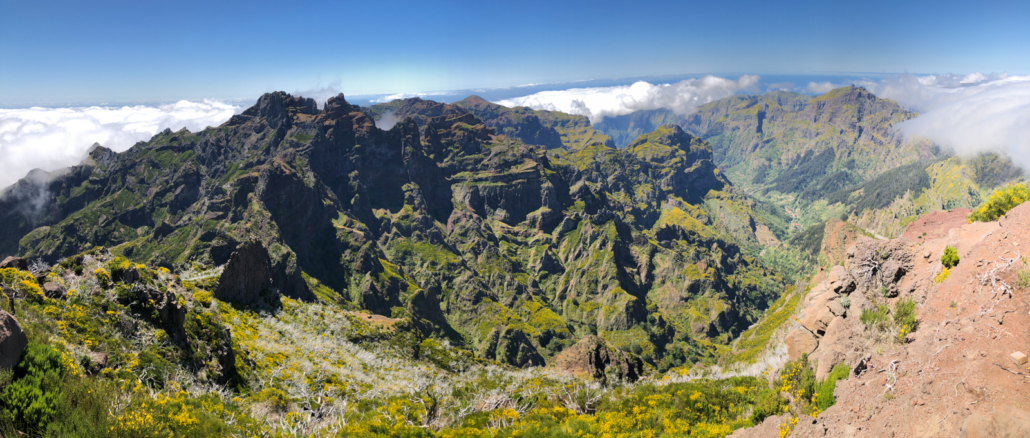
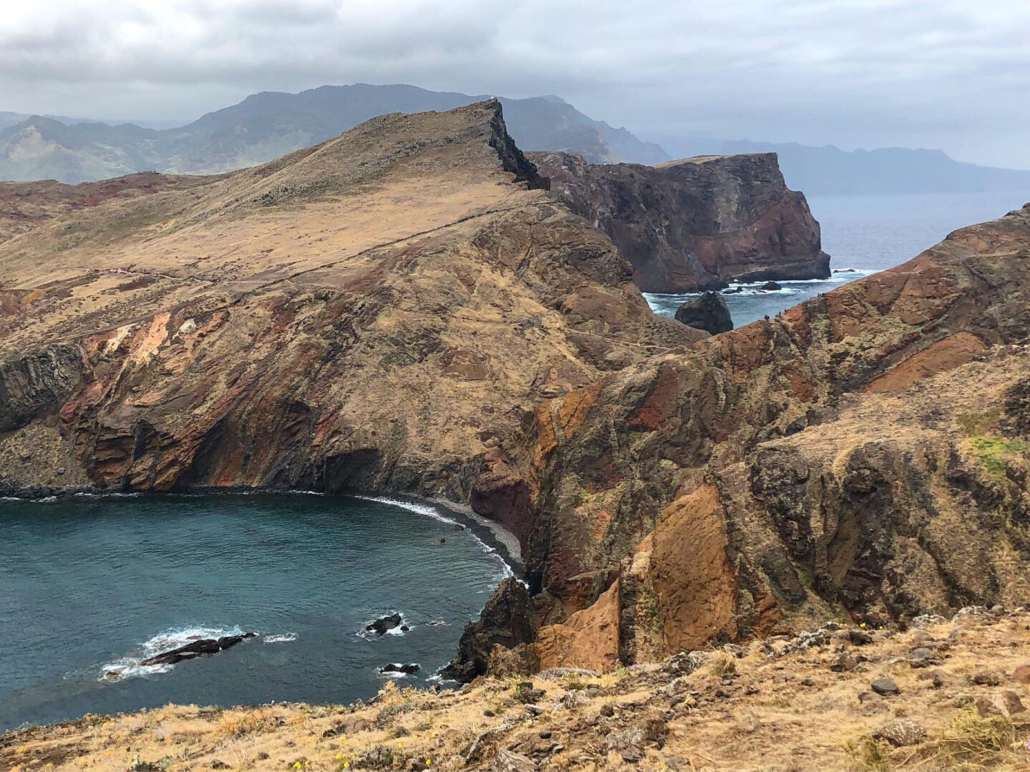
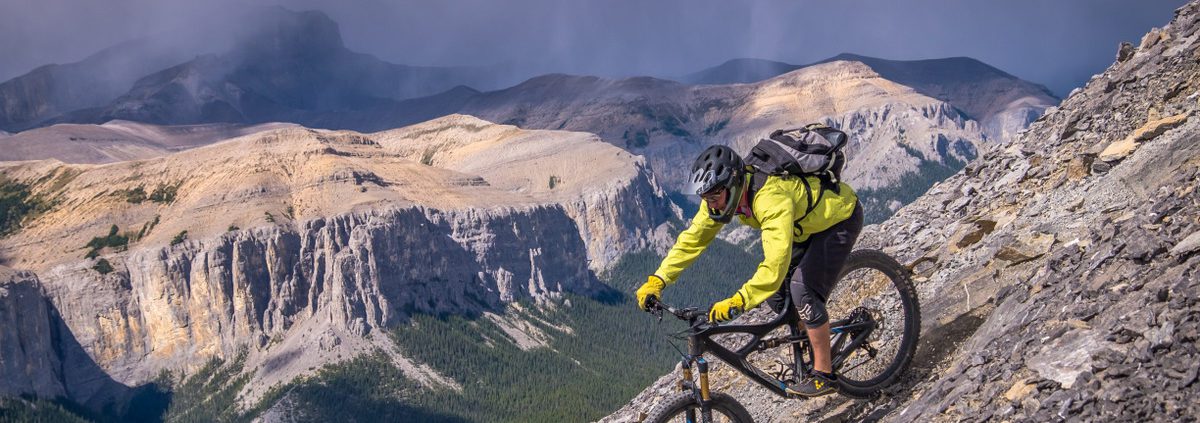
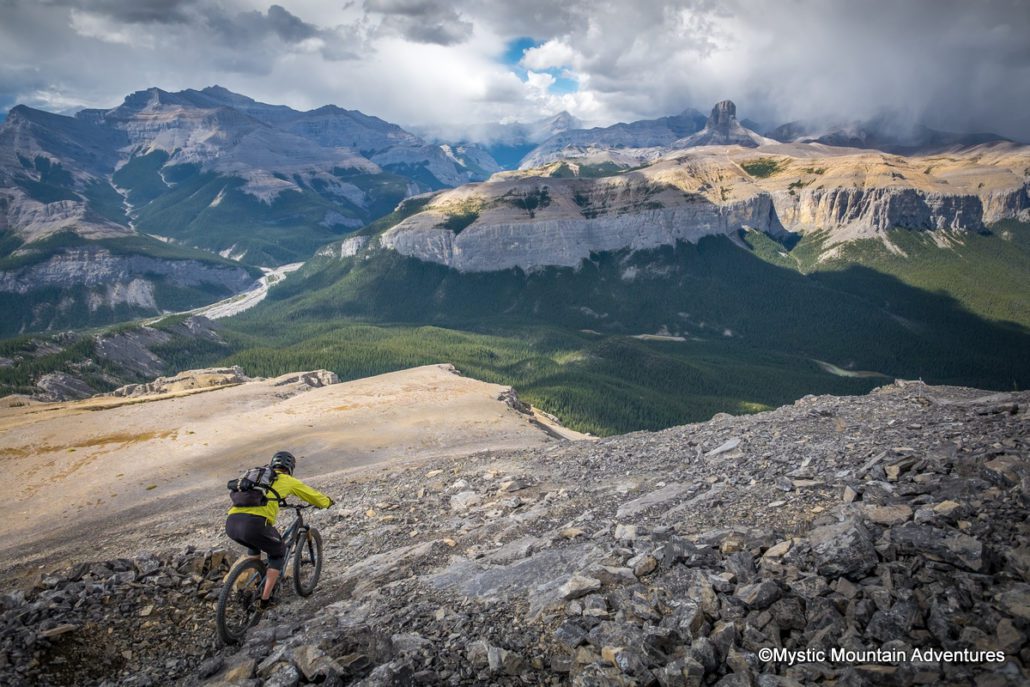
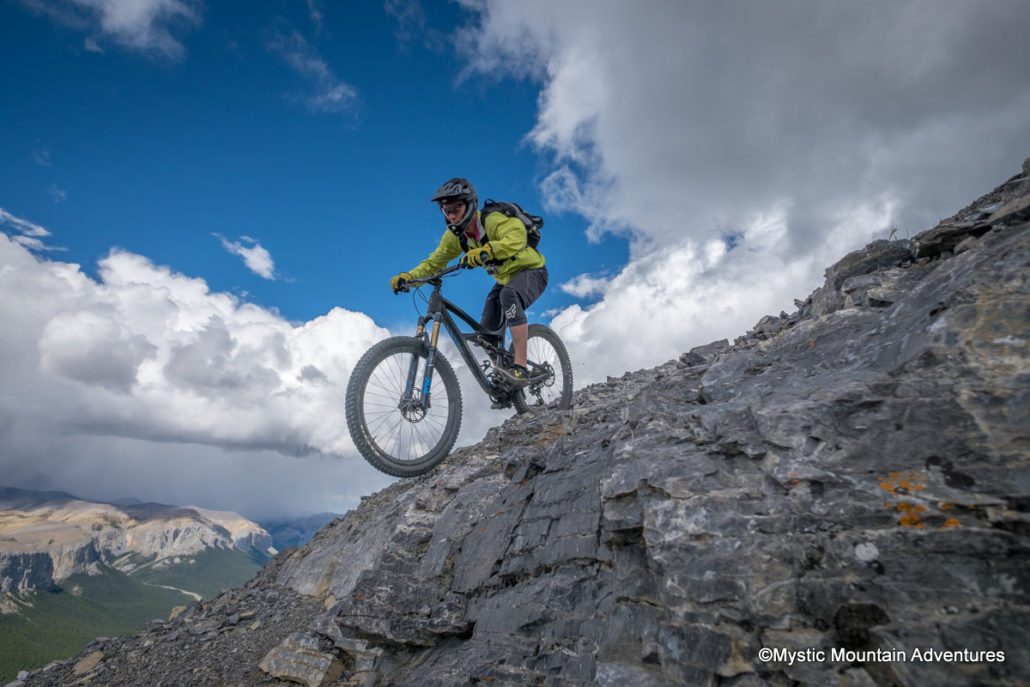
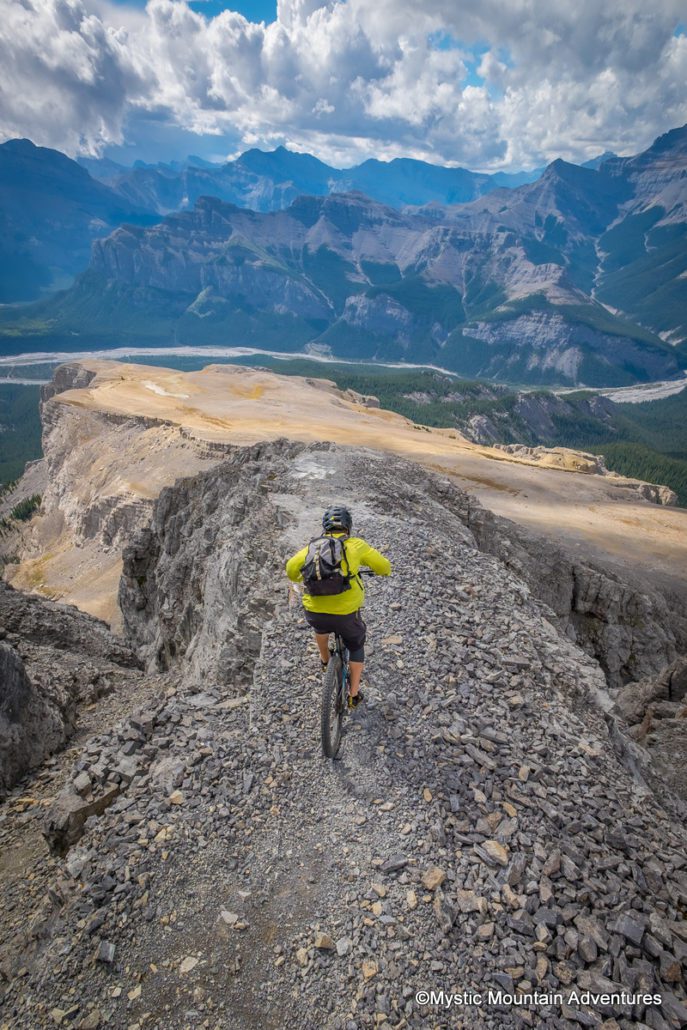
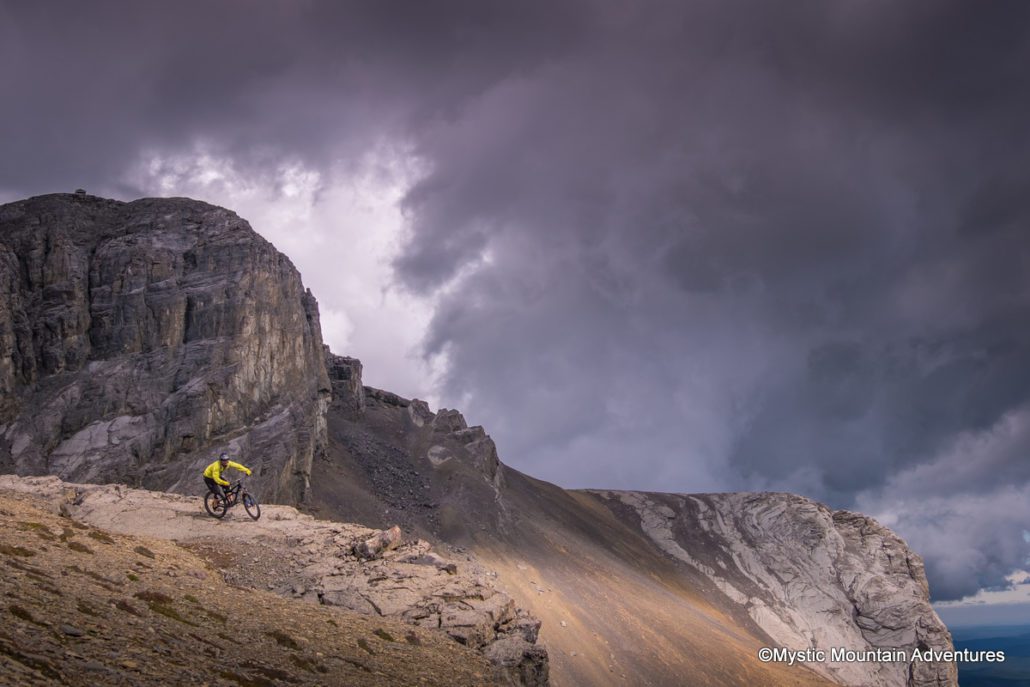
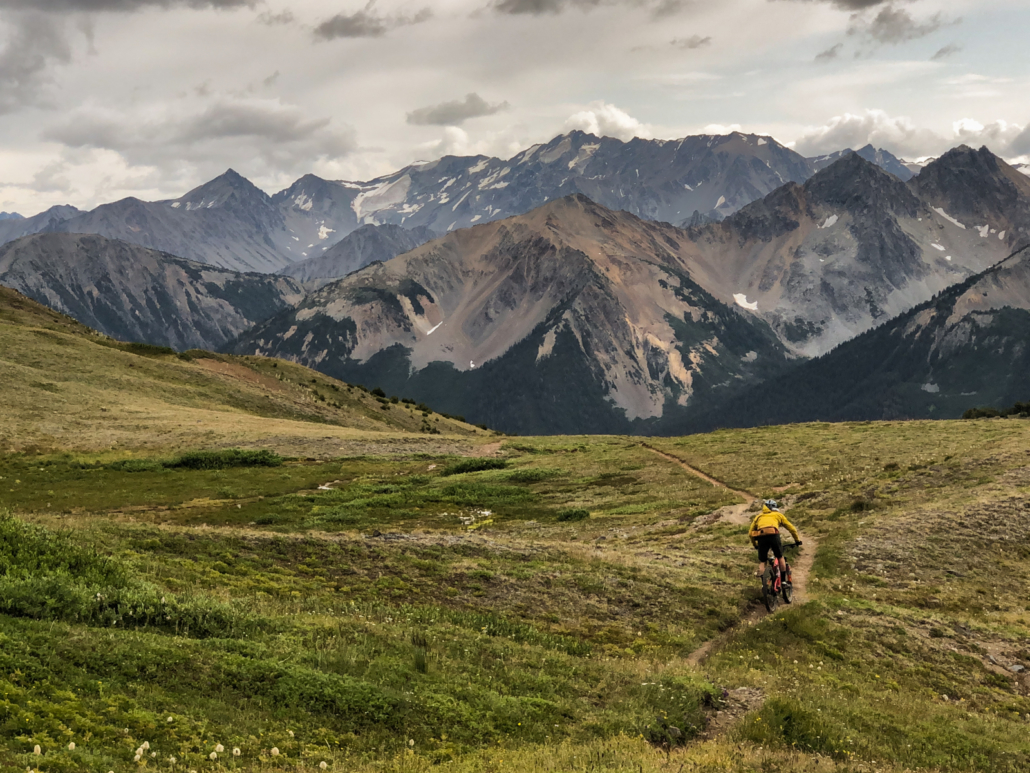
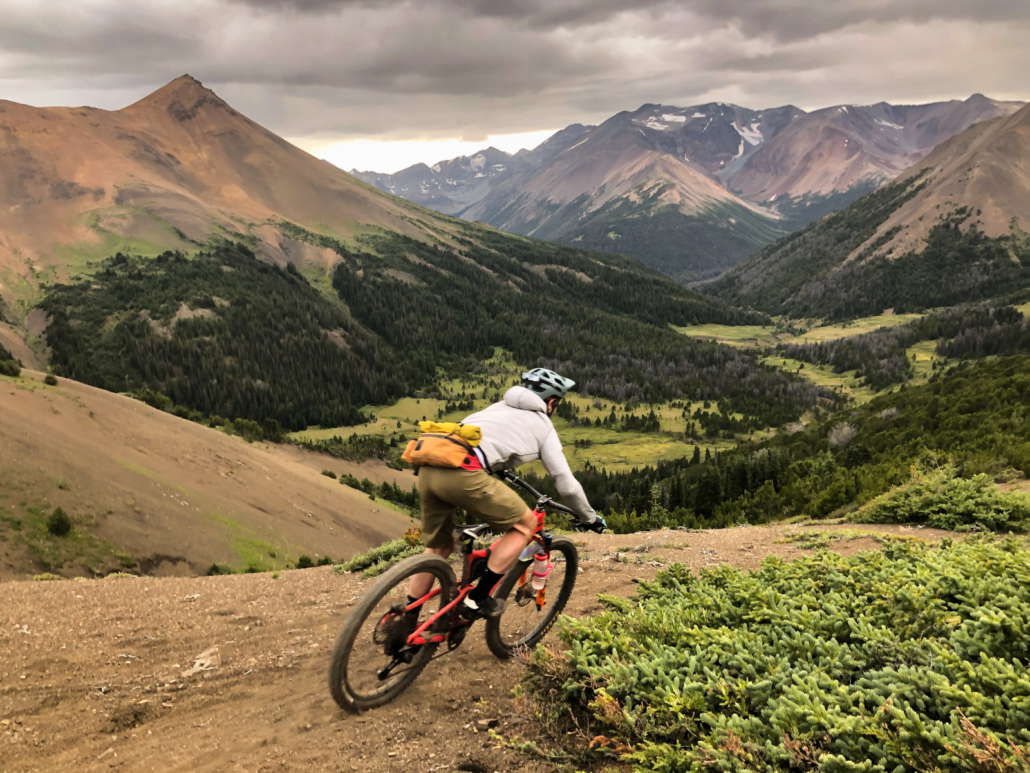
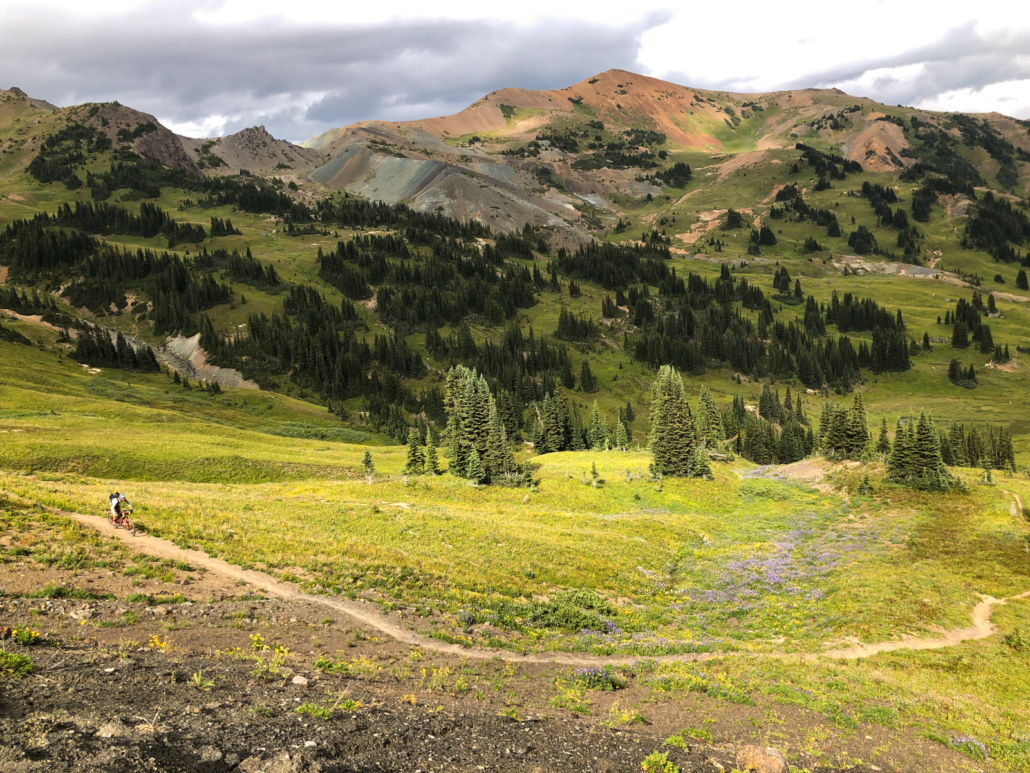
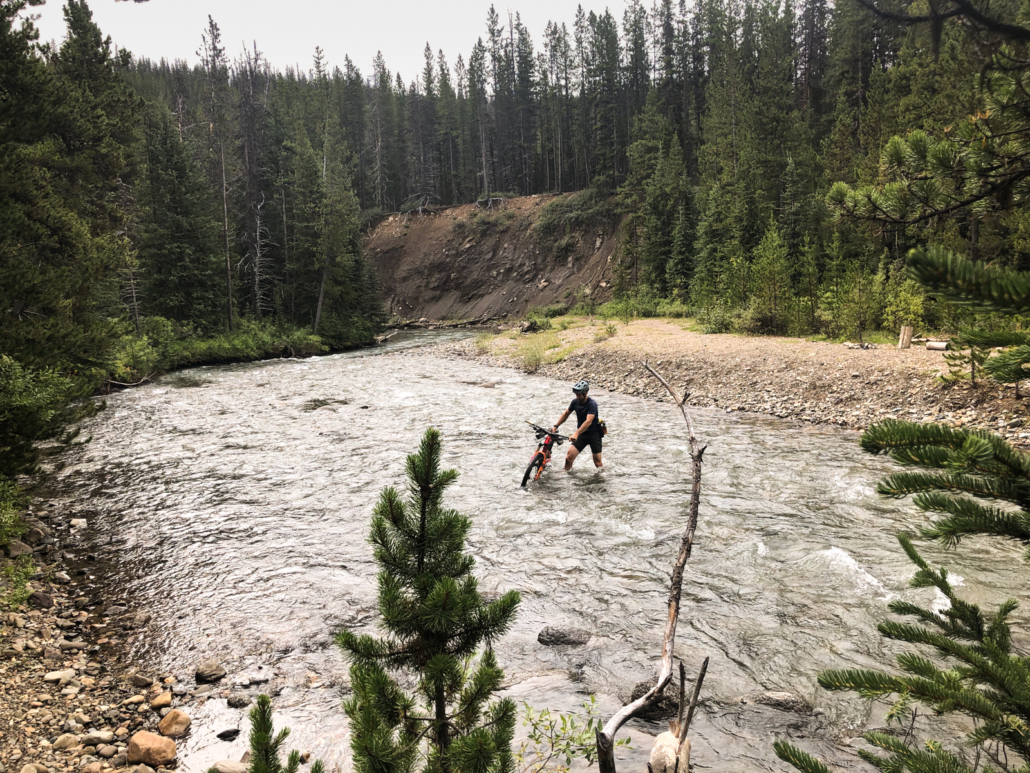
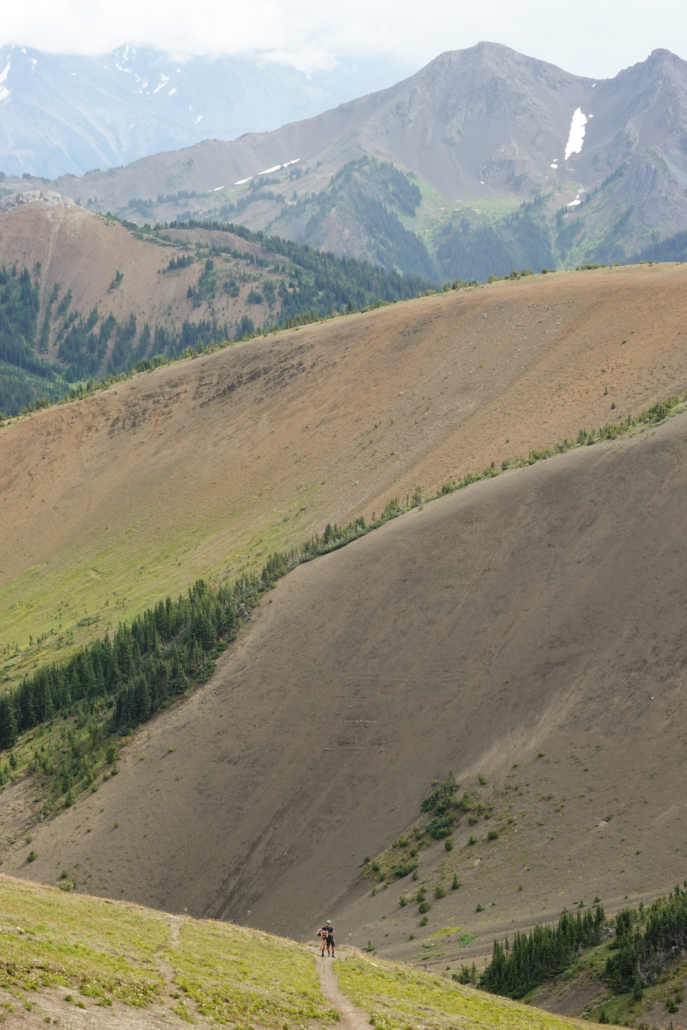
The verdict: WHOA. The Chilcotins are as beautiful and physically challenging as we’d heard. The terrain looks like a love child of Iceland and the Pacific NW, ranging from tree-lined lakes to icy creek crossings to alpine passes to scree traverses

This remote zone contains all the ingredients for a delightful backcountry adventure. All you need is food, maps, pedal power, and ear plugs to ignore the large bears chipmunks stomping around all night.

Map check on top of Windy Pass.

Wait, I’ve Never Heard of the Chilcotins!

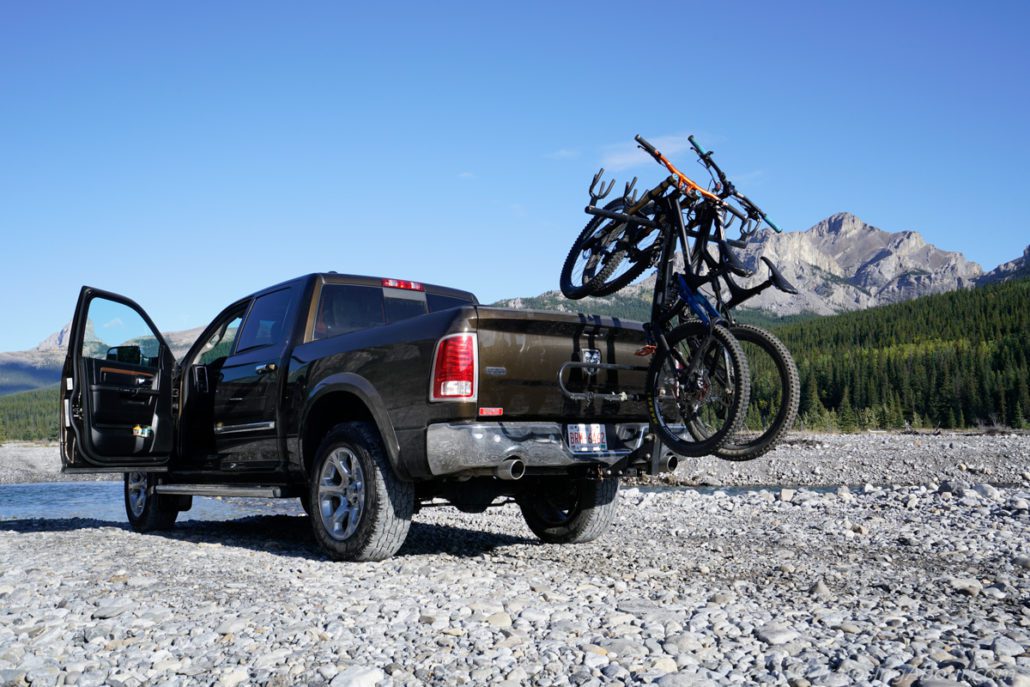
To reach the South Chilcotin Mountains, drive north of Whistler, B.C. WAY north. There are two options: the tire-eating beast of a fire road called The Hurley, or via Lillooet, town motto Guaranteed Rugged.

Either way, it’s over two hours heading north off the grid while wondering if you’ll end up in Alaska.

A moody evening in the Chilcotins with my trusty Why Cycles steed in the foreground.

Most people who visit the Chilcotins use a float plane from Tyax Adventures that ferries people and/or gear in and out. While enticing, parting with hundreds of dollars to avoid a little sweat seemed unnecessary at best…and irresponsible at worst. We hauled all our stuff, including bear spray for encounters with the REAL locals, grizzly bears, then set up two different base camps for unloaded riding.

I wasn’t expecting an all-fun trip. (Excellent adventures never are, right?) Hard work sharpens enjoyment’s edge, which is why chocolate tastes so damn good on top of a mountain pass.

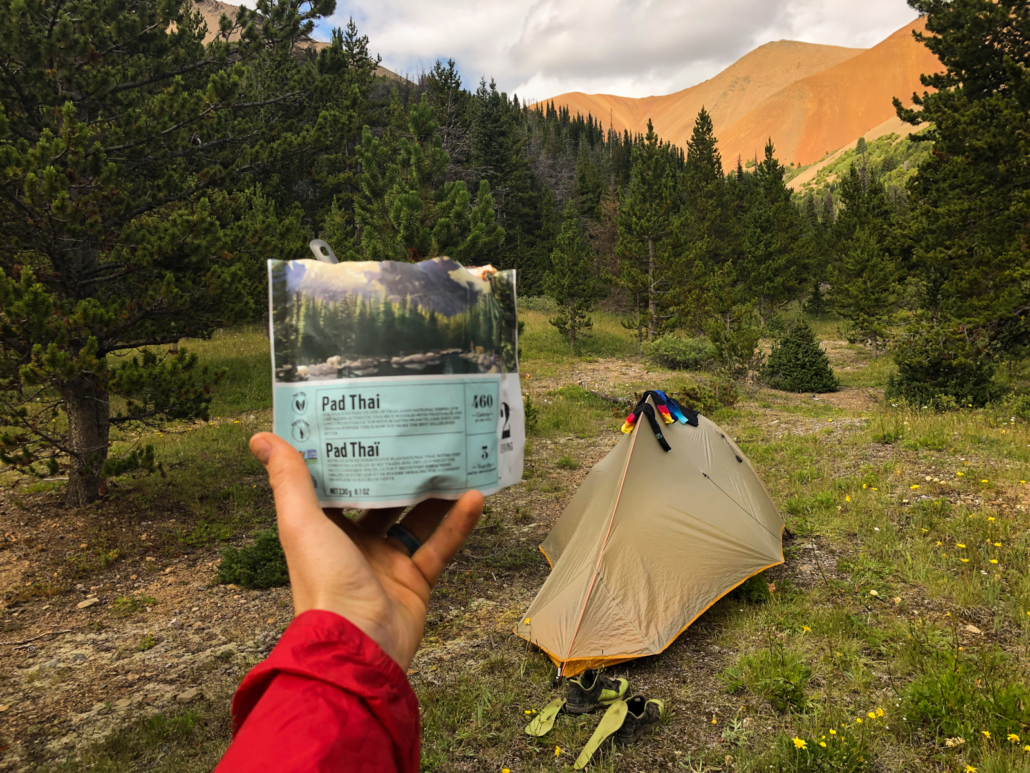
Honestly, the trip wasn’t too bad. Even with my bags stuffed with 11 freeze-dried meals and a jar of peanut butter, sweeping views were my appetizers and staring at mountains while eating pad thai was a double-whammy dinner.


By the way, dig these kinds of posts? Sign up for the free 2x/month Traipsing About newsletter for more tales from the mountains and creative challenges like drawing and piano when I’m off the bike.

It ain’t a fancy restaurant, but I’ll take this view any day!

The Experience

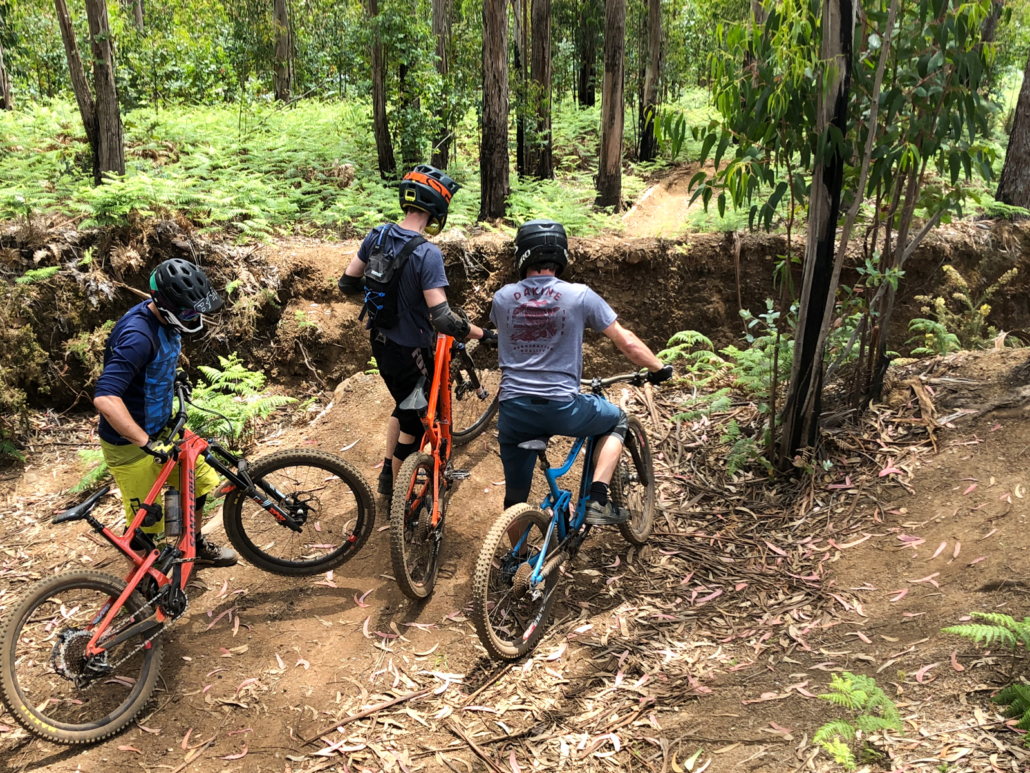
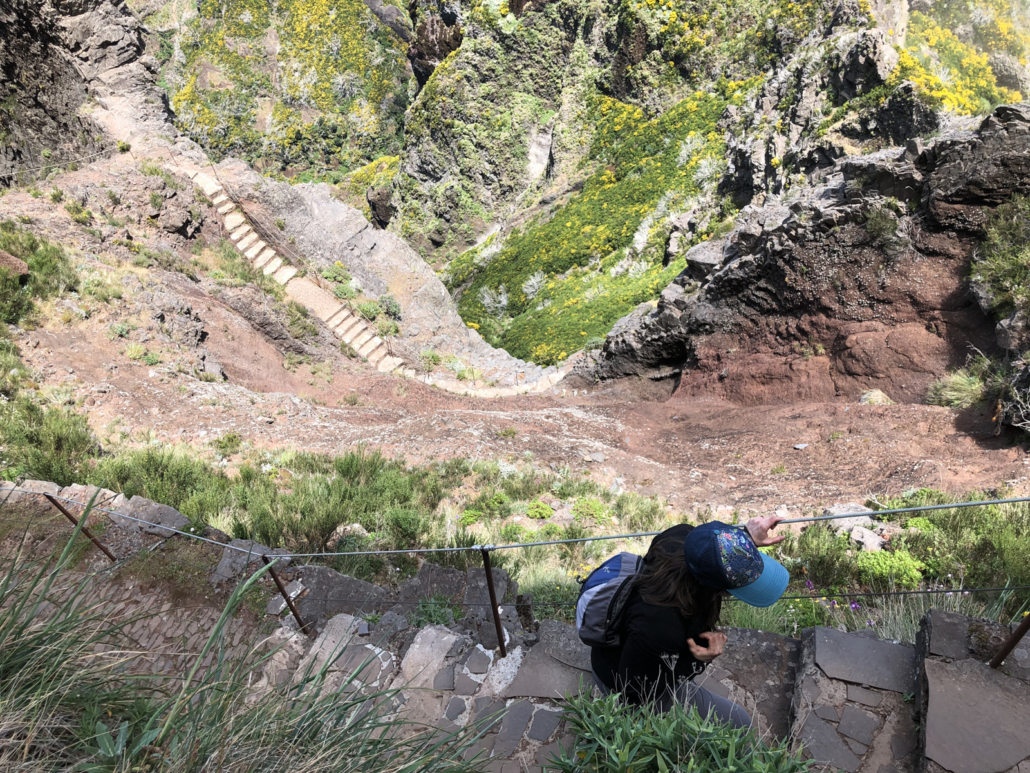
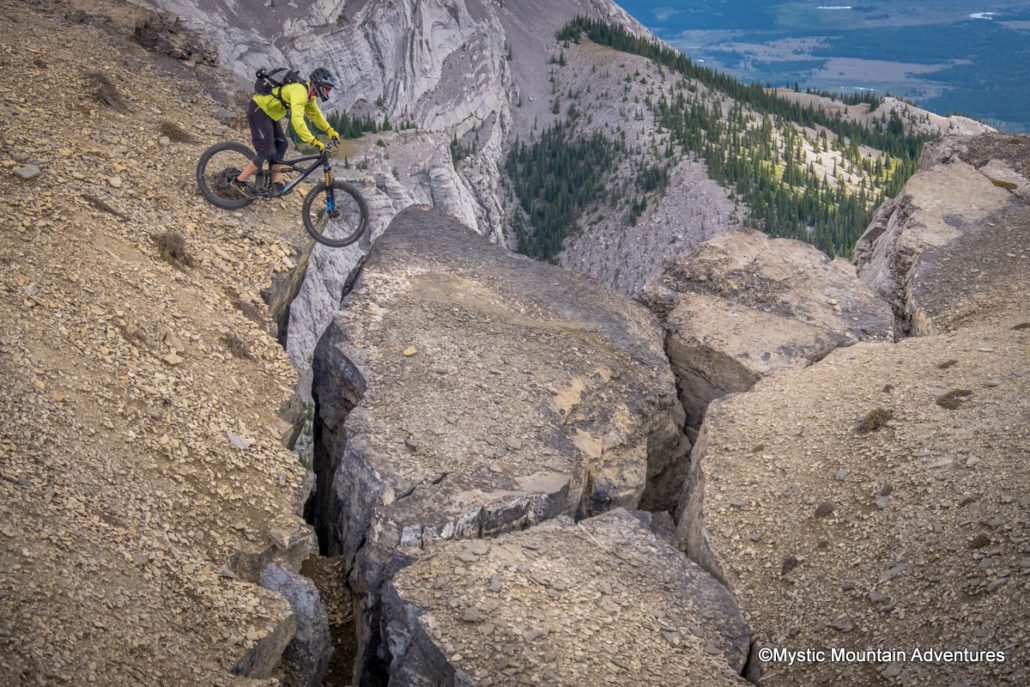
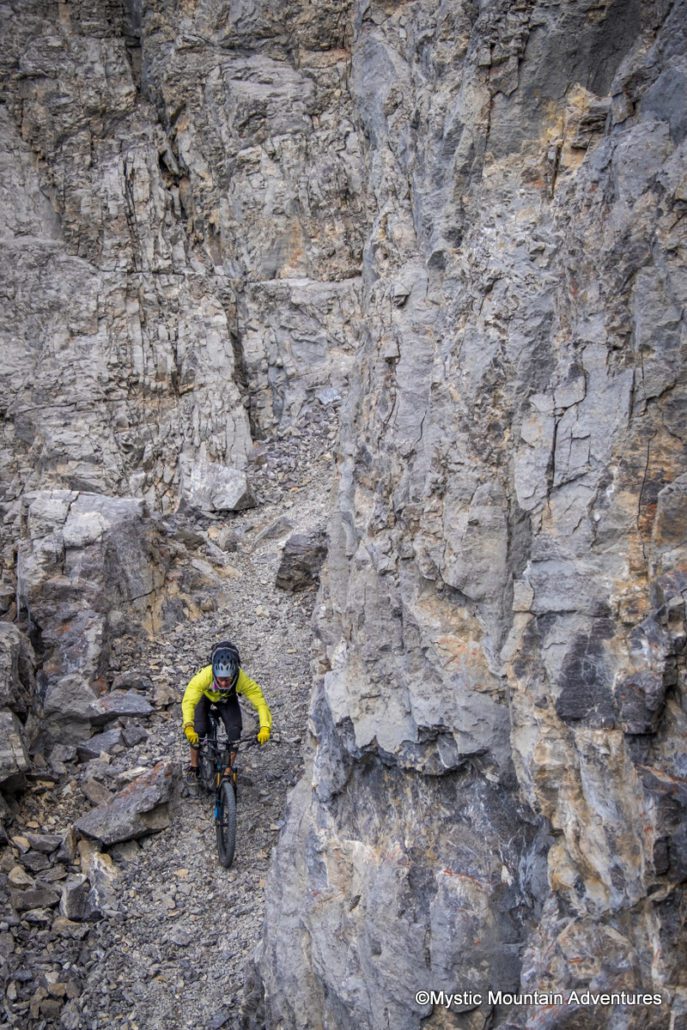
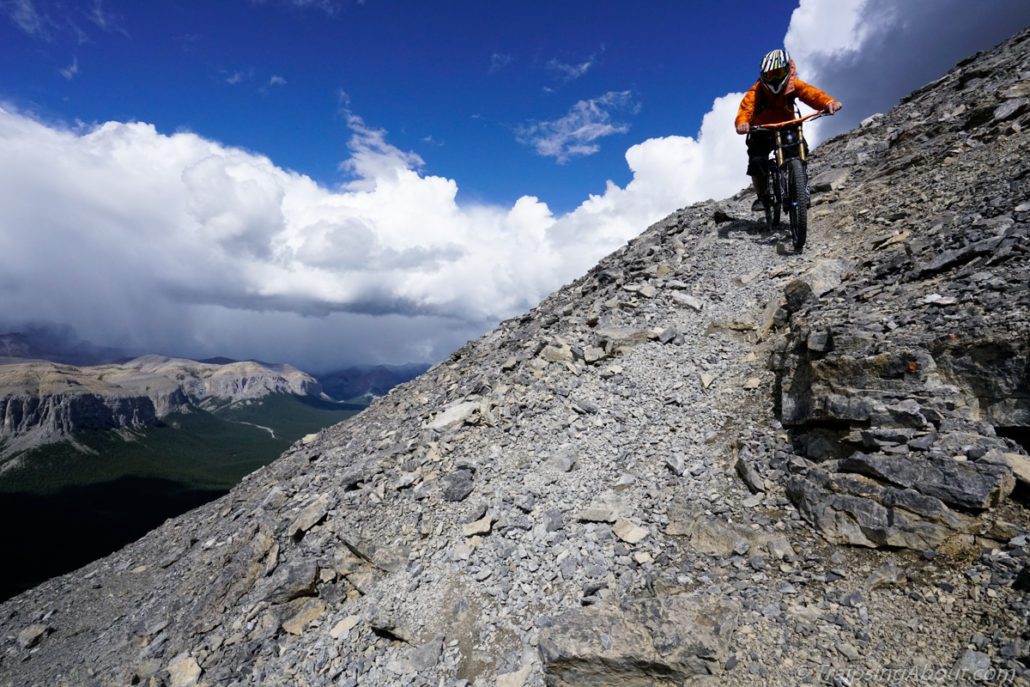
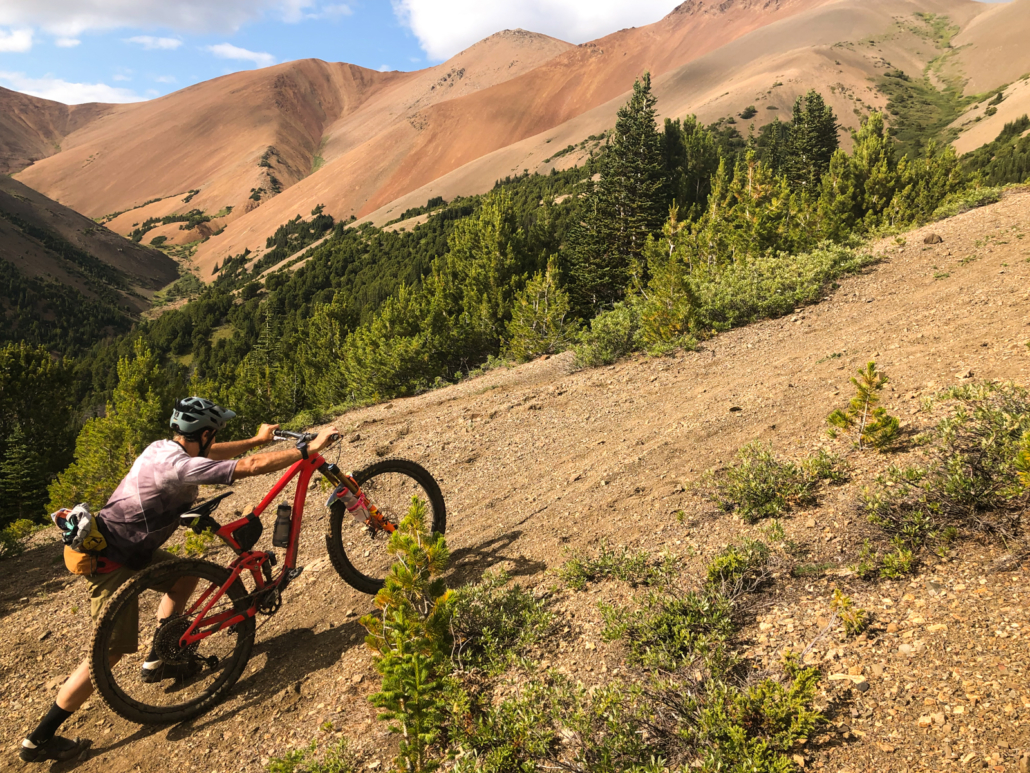
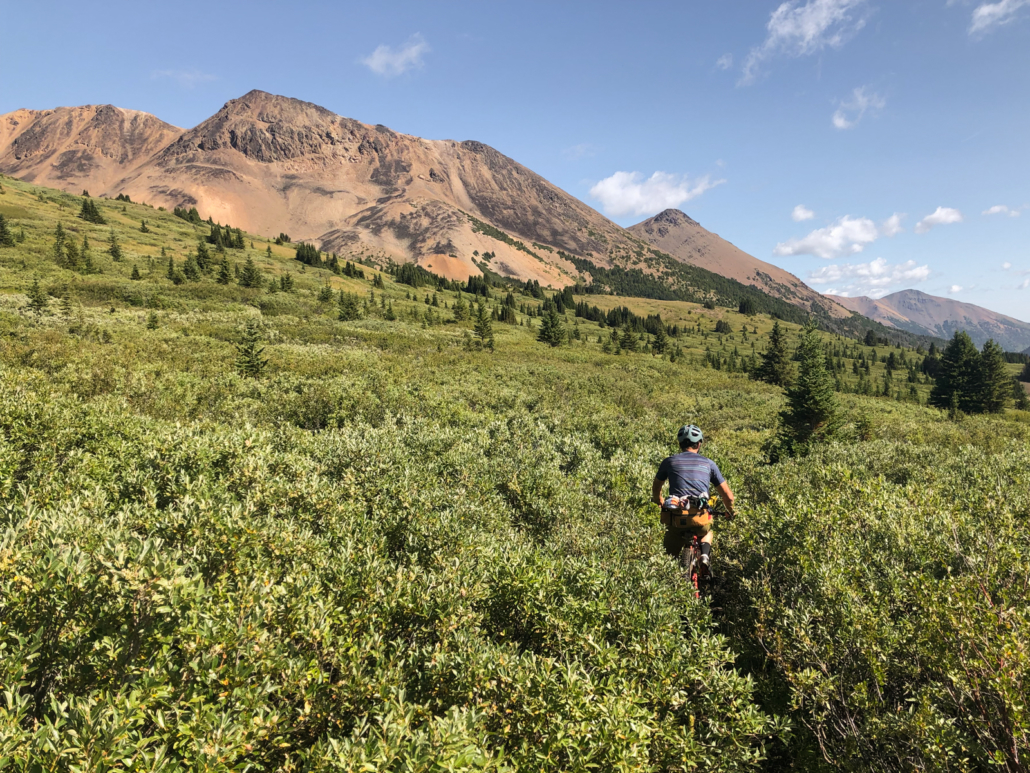
Friends warned us about the push required to get into the Chilcotins. Horse hooves created the backbone for these mountain trails, so they are A) steep as hell, and B) rugged. Many times pedaling simply didn’t make sense and we’d hike-a-bike, leaning into the bars. Some sections are so steep that pushing a loaded bike isn’t possible. The routine was step, push up with the bike, lock brakes, move feet, push up, repeat. Isn’t bikepacking FUN?

Manson Col means “gawwwd my calves hurt” in British Columbian.

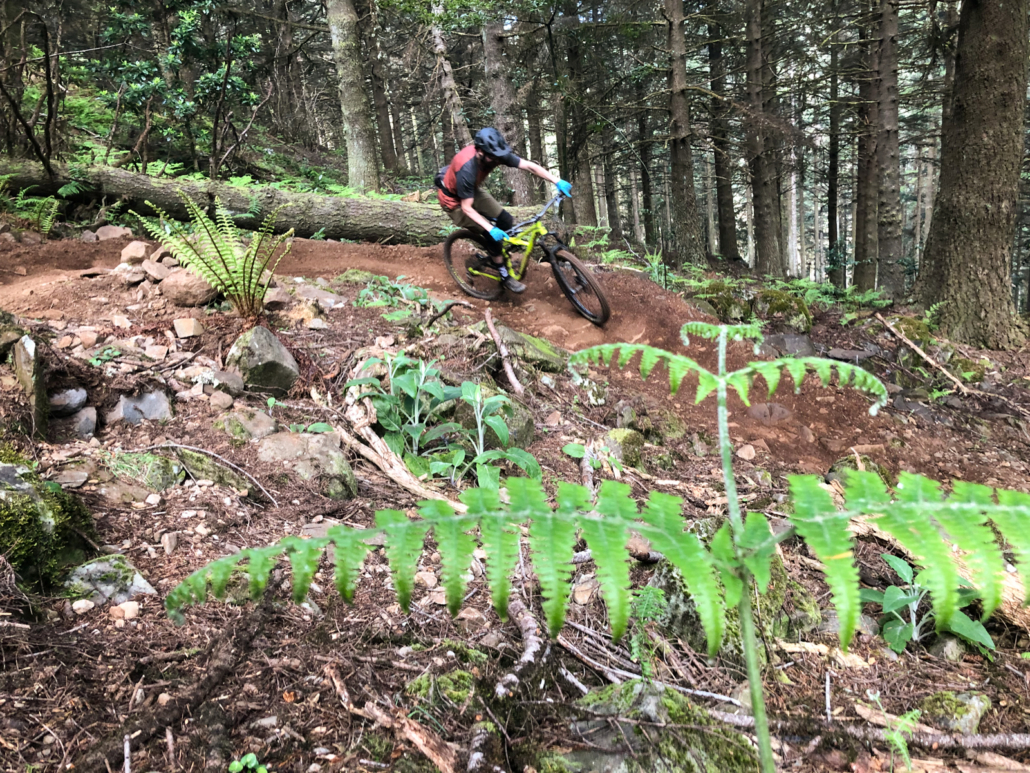
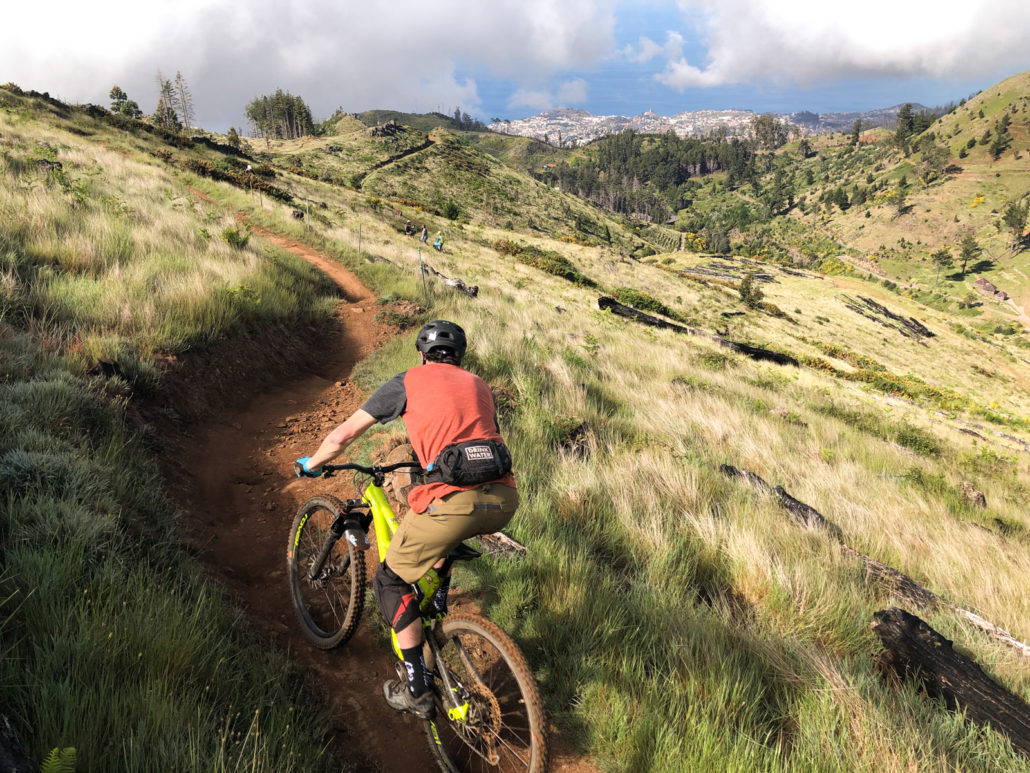
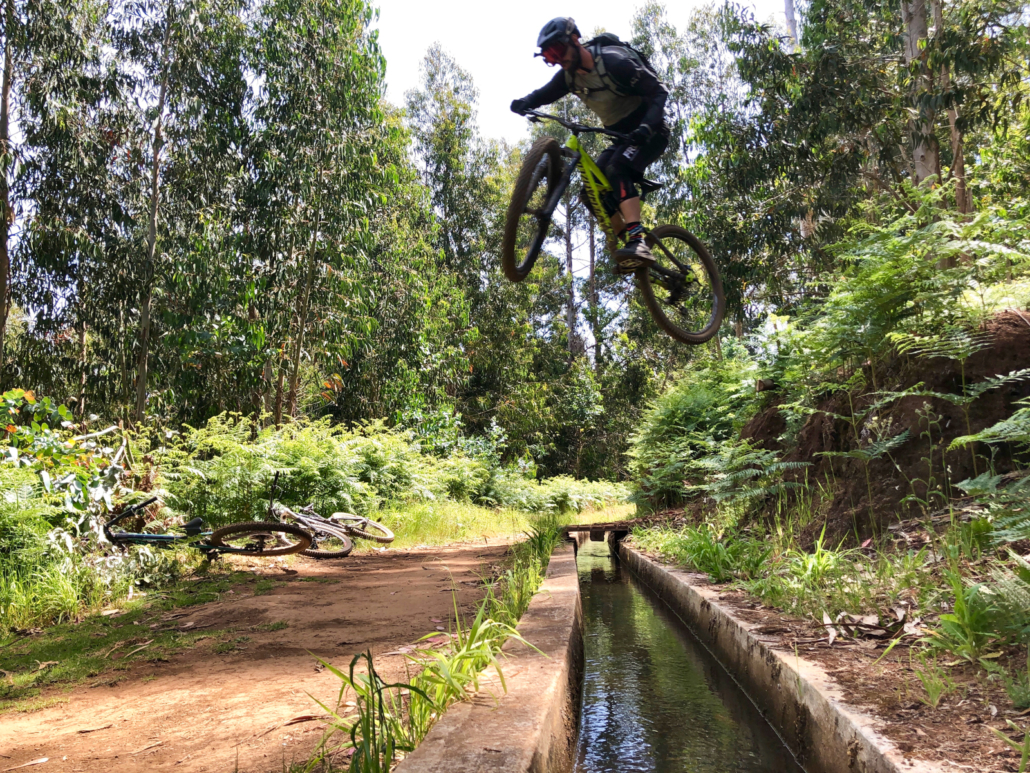
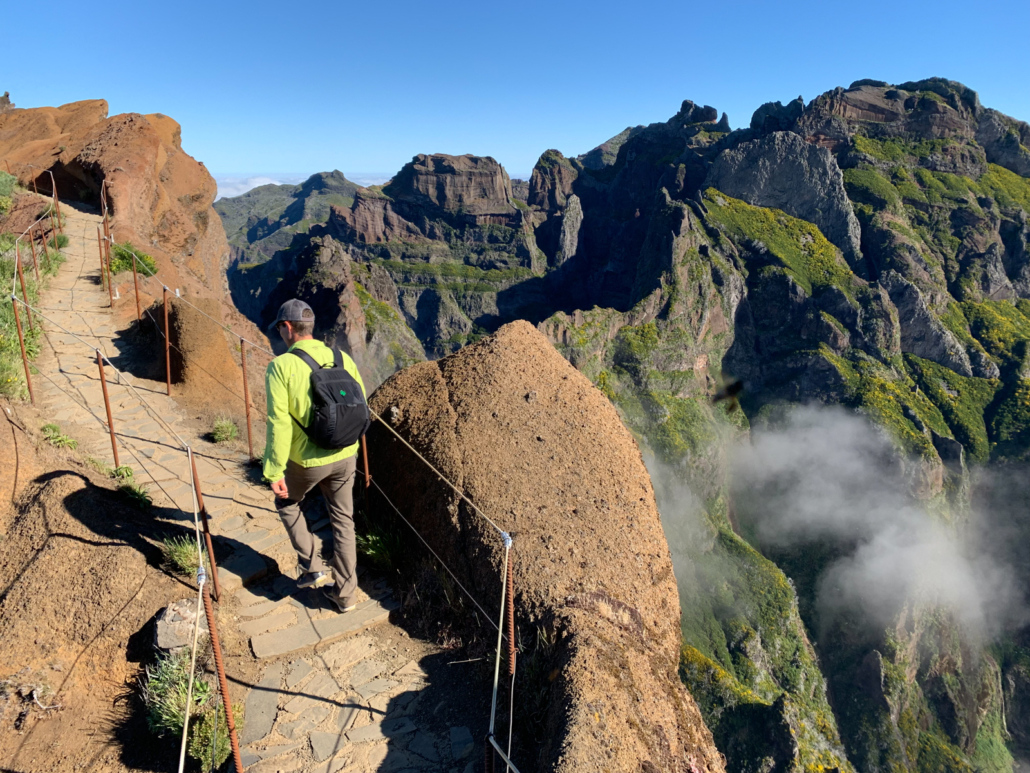
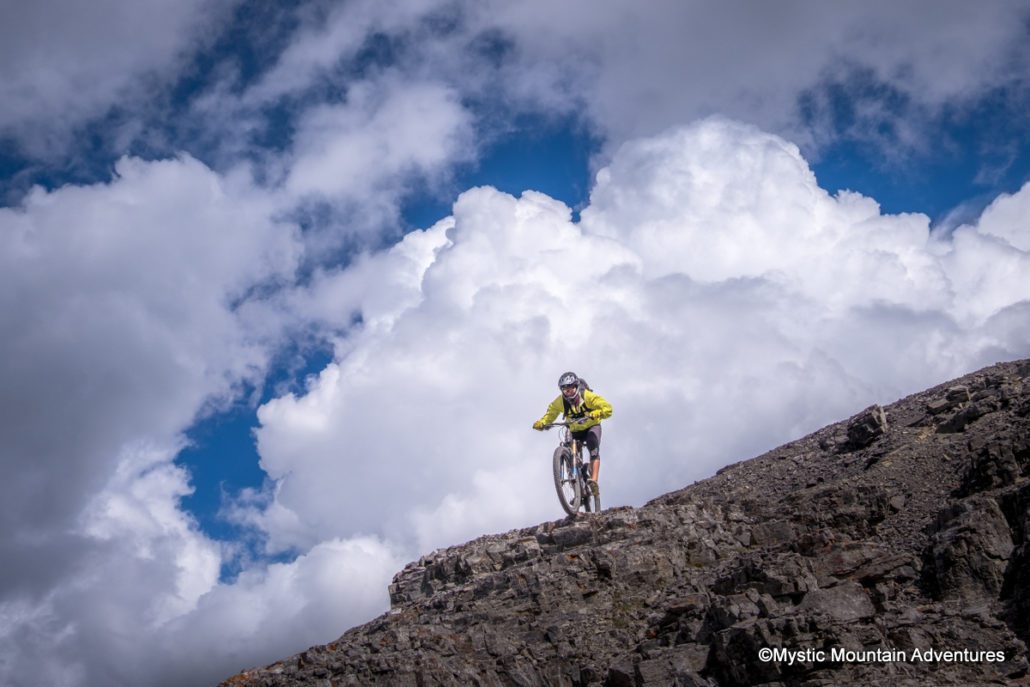
The upside to pushing: unlike with a headwind, there’s always fun to be had on the other side of a hard effort uphill. The reward is solitude on mountain passes and the adrenaline fairy dishing out large helpings of excitement on the downhills.

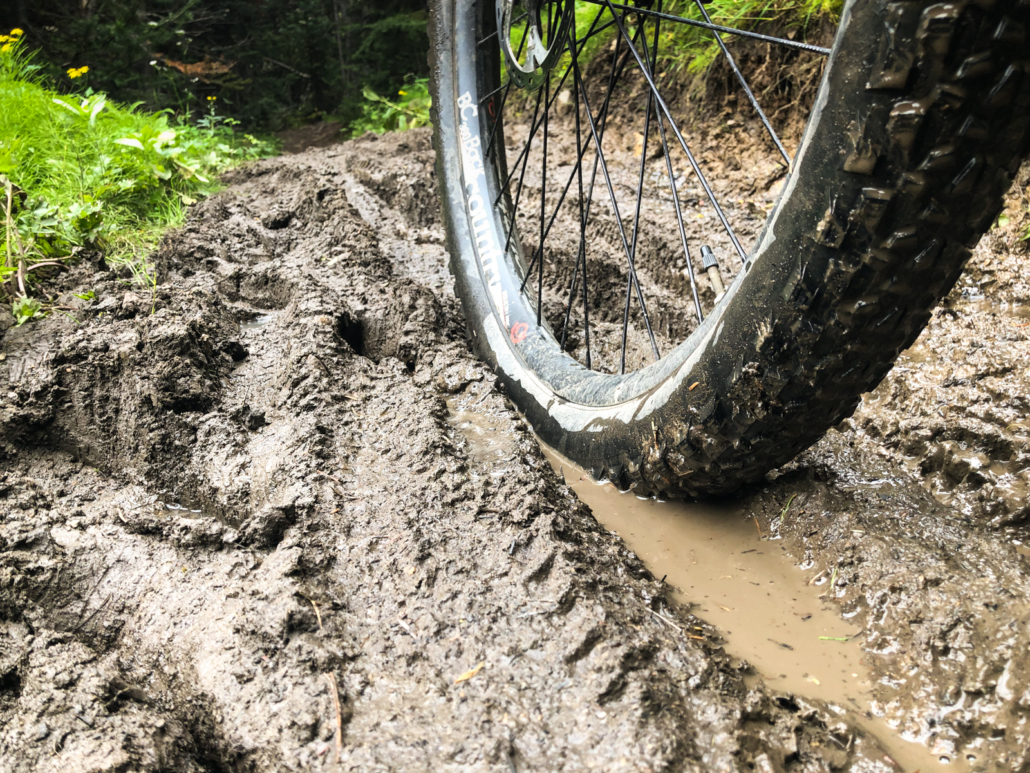
Another thing we quickly learned was the “Chilcotins Pace”. By that, I mean SLOW: In an eight-hour day, we could cover about 20 miles. Creek crossings abounded, as did swampy/muddy sections, mountain passes, and rooty/rocky riding.

Every time we’d get cocky, we’d get smacked upside the head by reality. This was an experience, not simply a mountain bike ride.

Mid Tyaughton trail wasn’t silky smooth singletrack…
The reward for mud and hike-a-bikes!

It’s All Worth It

Yeah, it’s hard work in dem mountains. Whatever. That’s the price to entry for bikepacking the Chilcotins.

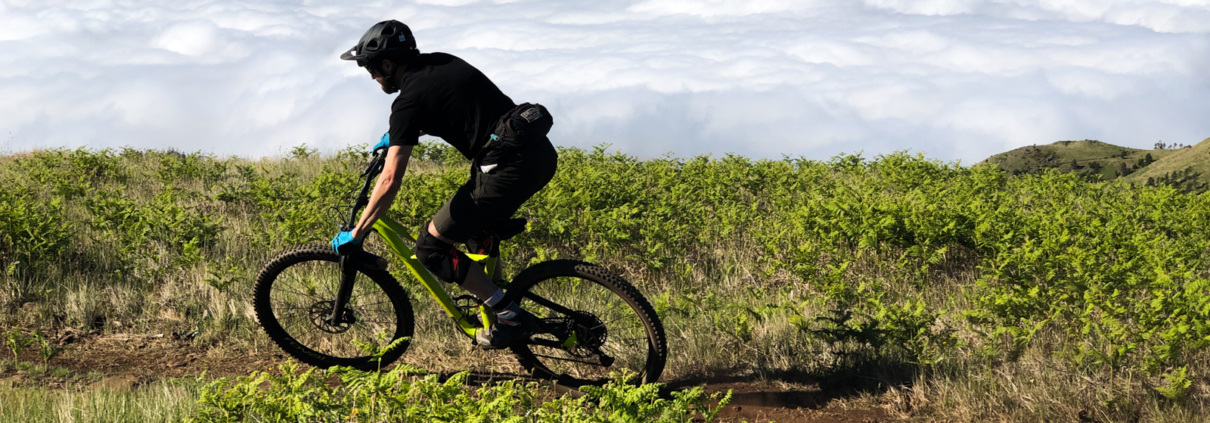
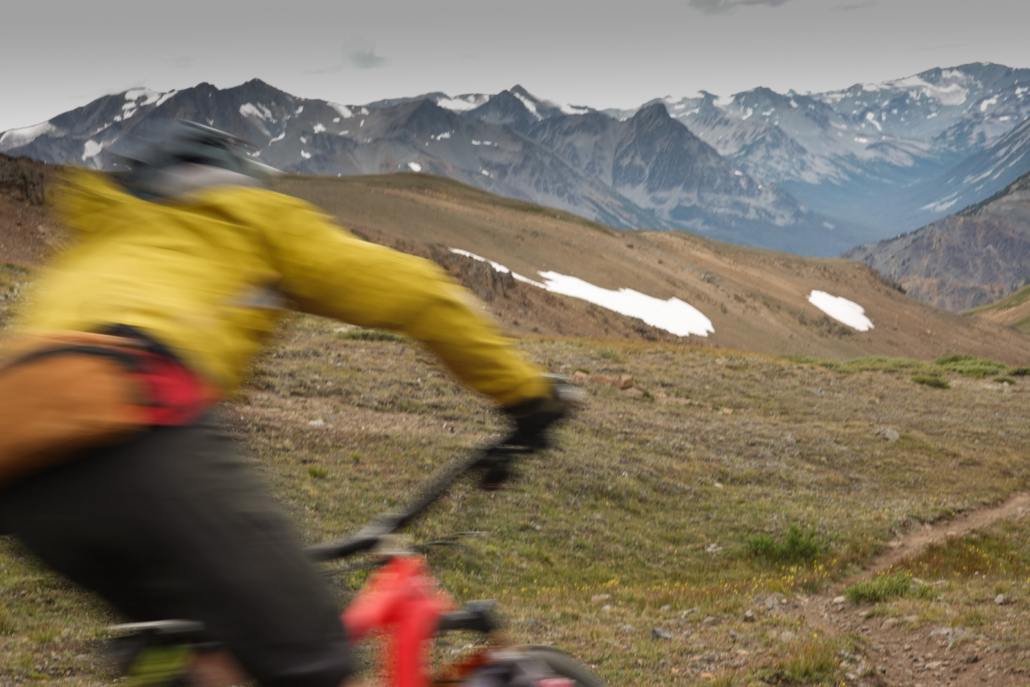
But that’s not the reason to go there. It’s possible to melt brakes riding downhill ALL day with zero work at Whistler Bike Park, after all.

Heading out on High Trail on our final day.

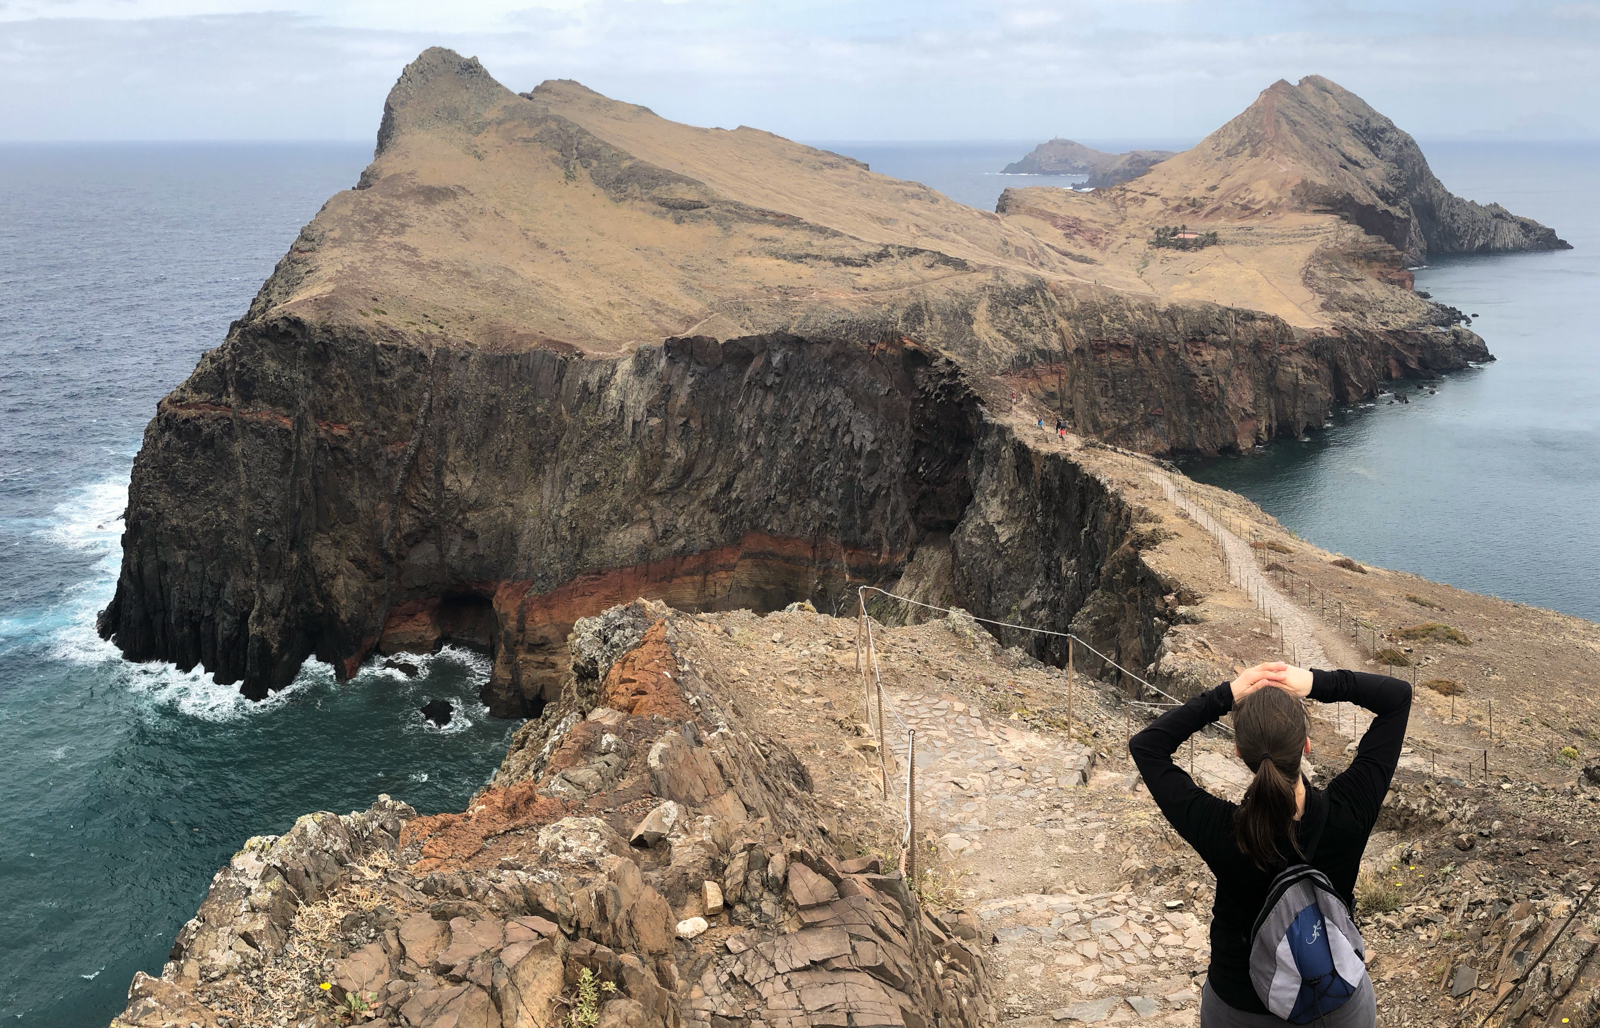
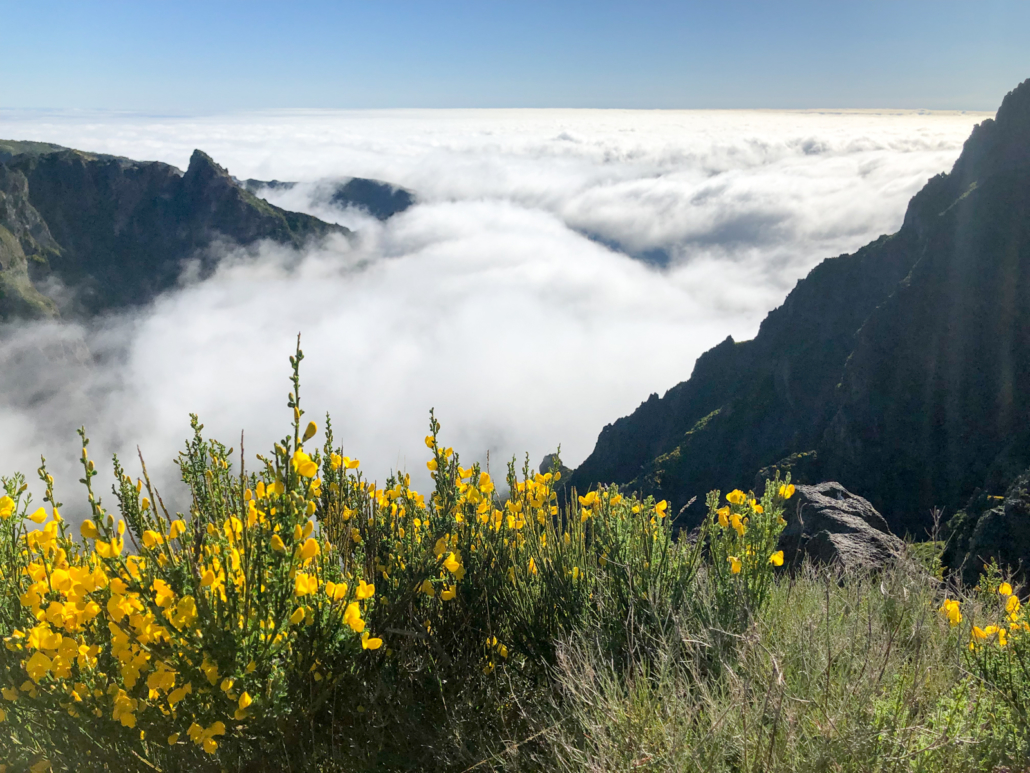
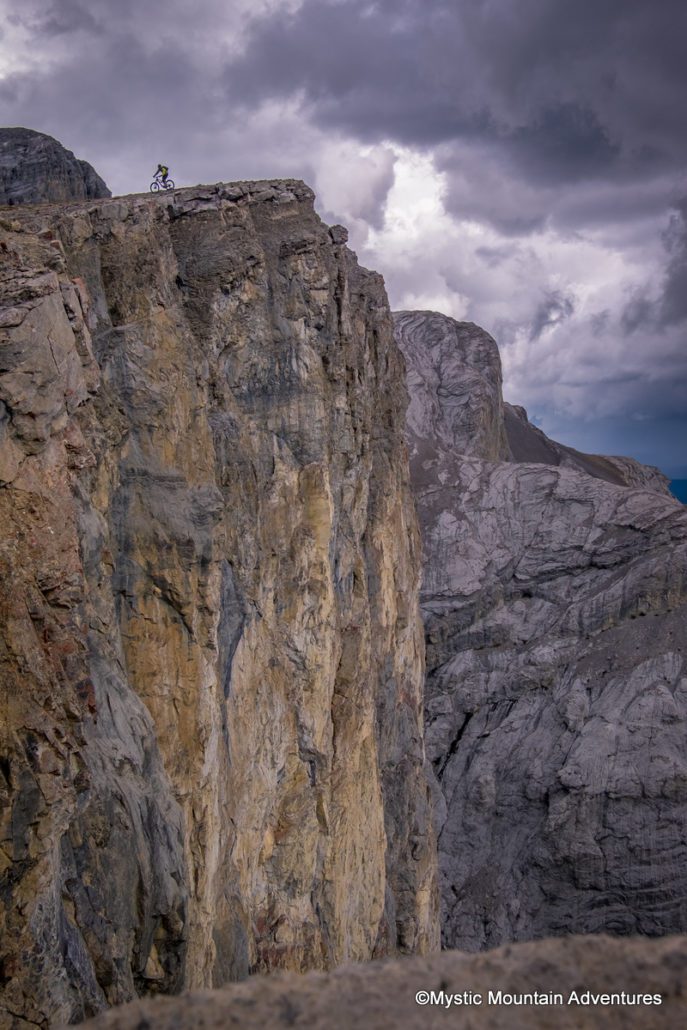
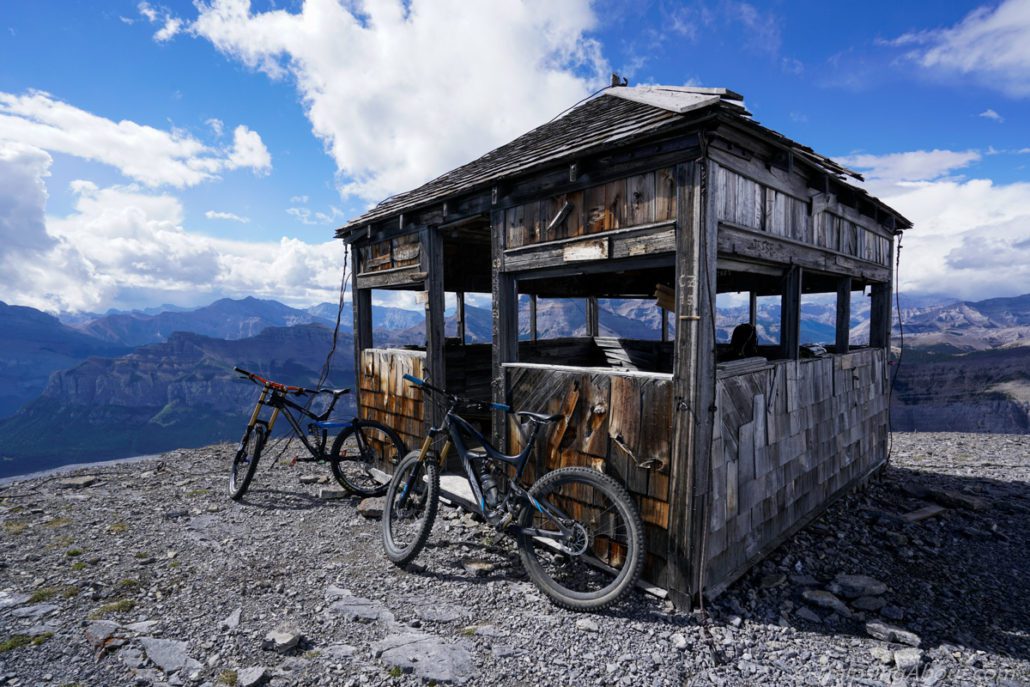
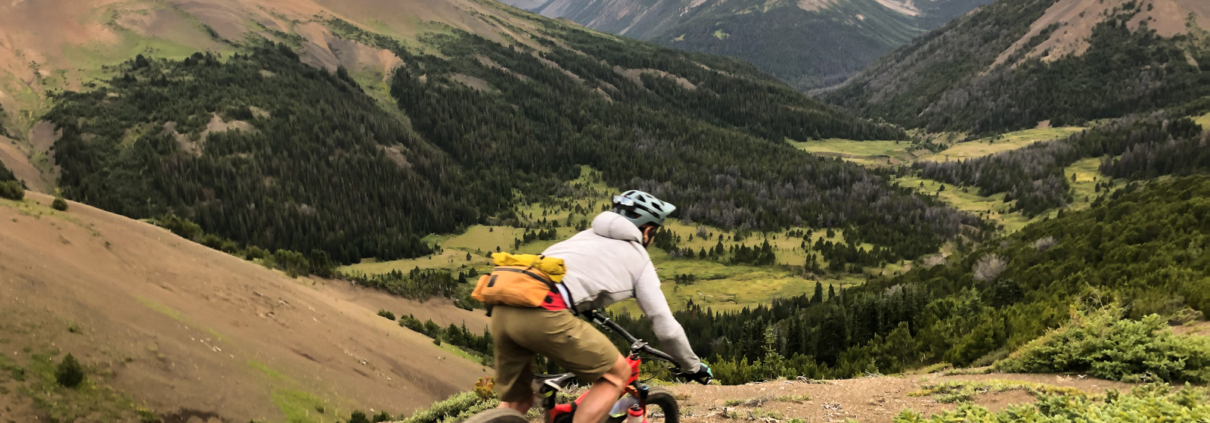
Beyond all the amazing riding, our time included camping by a quiet, beautiful lake. Sunsets over mountains. A burbling creek by our second camp. Solitude in the alpine listening to marmots whistle. Starry skies to make our eyes sing. A sense of adventure tough to find on manicured, purpose-built trails.

Perhaps best of all, we didn’t have to use any bear spray.
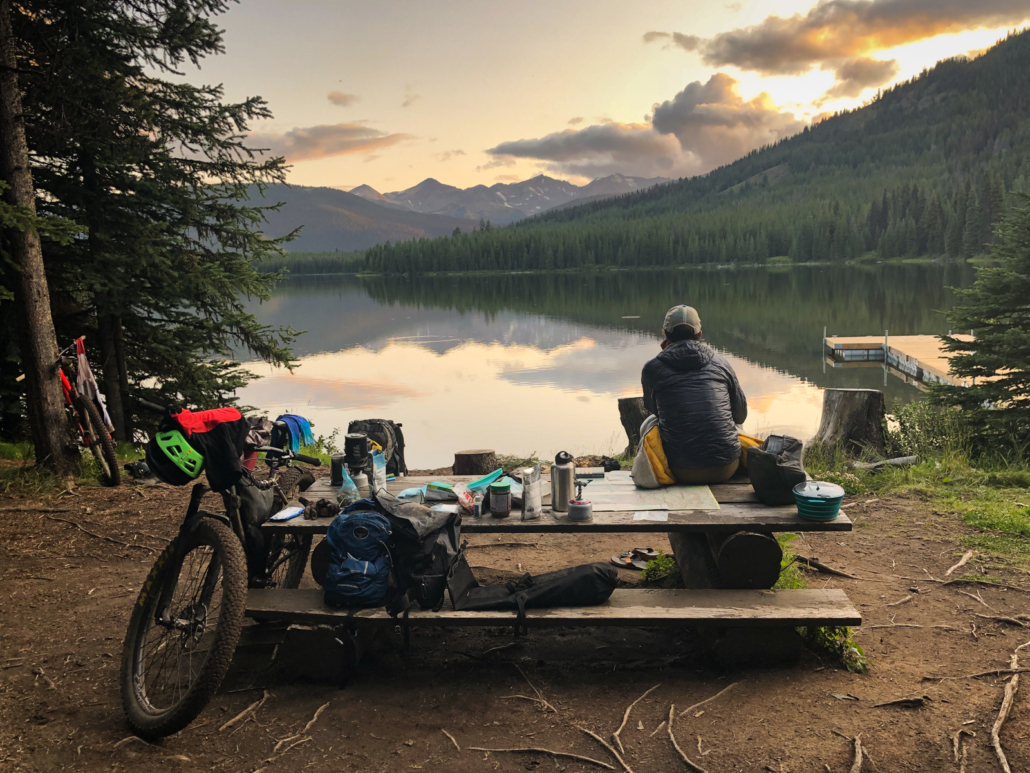
Paul in sunset reverie on Spruce Lake.

Photo Gallery!

Logistics and Details for Bikepacking the Chilcotins

Looking to skip the float plane from Tyax Adventures and pedal in yourself? Here are a few logistical tips:

  • Bring spare brake pads! Loaded touring + steep passes = toasted pads.
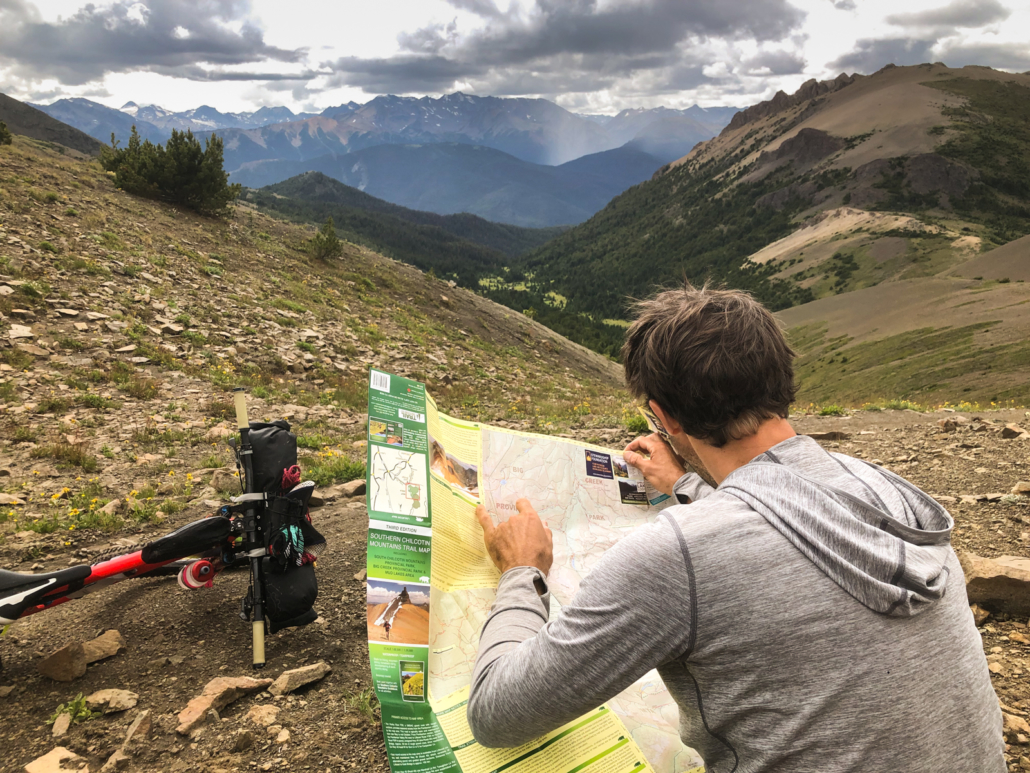
  • Buy a hardcopy map of the area or at least the Gaia one. Navigation via just Trailforks is possible, but hardcopy in case things go wrong is a good idea.
  • Go in the summer. Our mid-August trip featured perfect temps, few mosquitoes, and minimal rain.
  • Water is plentiful. This ain’t the desert: you’ll only need to carry one full water bottle except maybe over the passes.
  • Respect the Chilcotins Pace. We found that planning to go 20 miles in an 8 hour day out was a good estimate. (On a typical ride in most places, I move 3-4x faster.)
Flip flops were great for the many creek crossings (~20 total during our trip).
  • This is bear country. Bring bear spray! Spruce Lake and Lorna Lake have bear boxes to stash food in. You’ll need to hang food in trees if you camp elsewhere, so bring some rope for that.
  • There are two primary ways to pedal in: a relatively easy route up Gun Creek Trail or a burly climb over Windy Pass. If you’re looking for alpine terrain like we were, take Windy Pass.
  • Basecamping treated us well as a way to explore on an unloaded bike for a few days. Our camps: two nights at Spruce Lake and two below Manson Col.
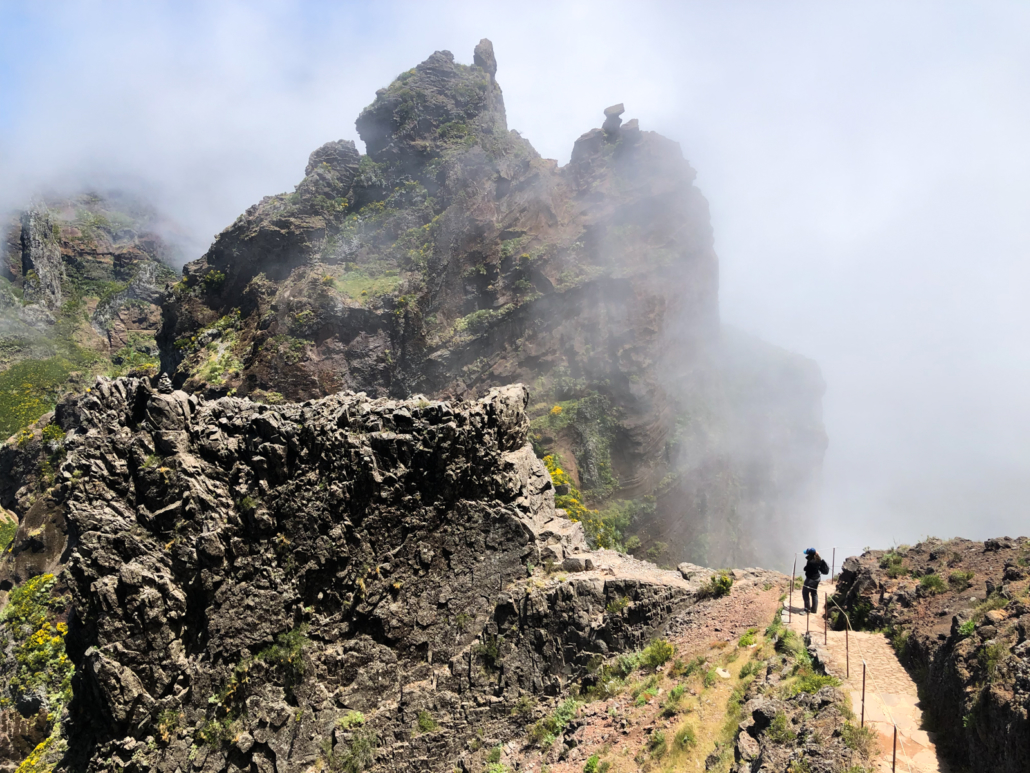
  • Layer up! The weather is fickle and moves in fast on mountain passes.
Surf’s up! Drifting scree up high.

Ride Stats

Here are each day’s details as recorded on Strava. I suspect moving times should be higher, but my GPS thought I wasn’t moving on some of the steeper uphill hike-a-bikes… Apparently “glacial pace” isn’t a Garmin option?

  • Day 1: Tyax Lodge to Spruce Lake via Windy Pass on Tyaughton Creek Trail. Relatively fast going and mostly rideable except Windy Pass. Stats: 20 miles, 4.5 hrs moving time, 5300′ climbing.
  • Day 2: Deer Pass loop (CCW) from Spruce Lake via Mid Tyaughton Creek Trail with return Upper Gun Creek Trail. Slow going on Mid-Ty Creek, almost 100% hike-a-bike over the pass, and rideable from there. Stats: 25 miles, 5.25 hrs moving, 5000′ climbing (unloaded)
Overgrown adventure riding on Little Paradise trail.
  • Day 3: Moving base camp to sub-alpine camp on Manson Creek, then unloaded riding/pushing up to Manson Col. *This is a lesser known, RAD zone. Stats: 17 miles, 4.5 hrs moving, 4300′ climbing
  • Day 4: A big CCW up Manson Col, Little Paradise, Little Graveyard, Big Creek, and Lorna Pass. Fair warning that Little Graveyard and Big Creek are muddy, frustratingly slow trails if it rained recently. Stats: 22 miles, 5.25 hrs moving, 4400′ climbing (unloaded)
  • Day 5: Up, over and out! Down Manson and Mid Tyaughton Creeks, up Windy Pass (get ready for barely doable hike a bike) and then back to Tyax Lodge via High Trail and Molly Dog and Pepper Dog trails. Stats: 30 miles, 5.75 hrs moving, 5000′ climbing
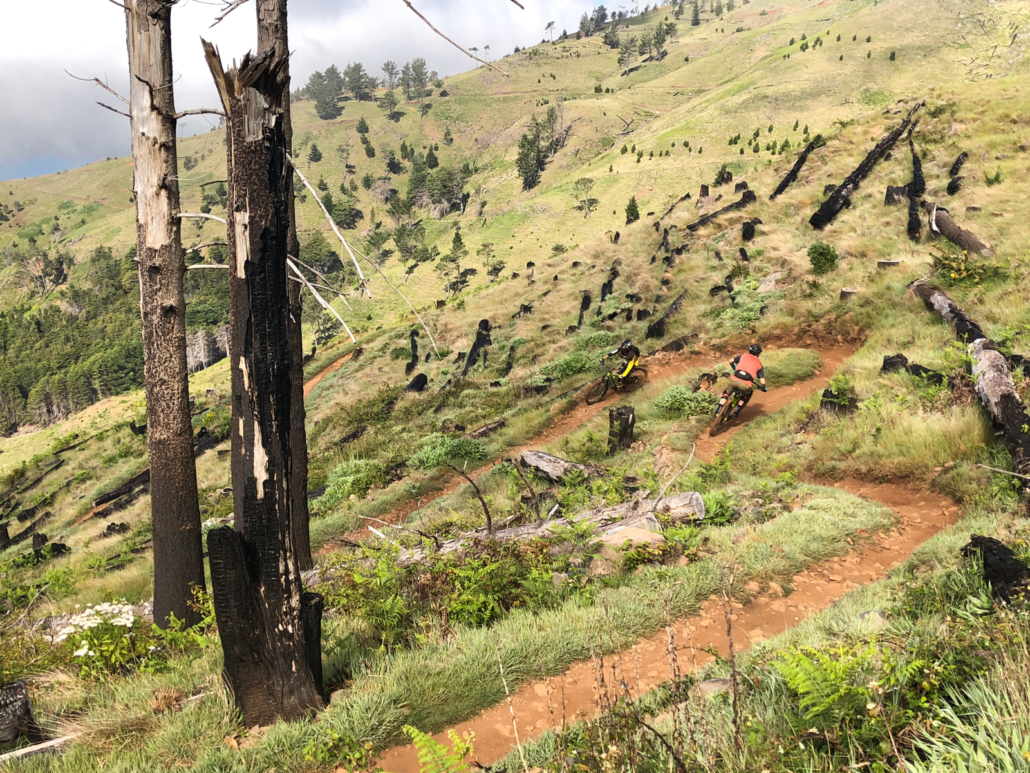
Me contemplating 2,000′ of face-punch uphill hike-a-bike on the way out over Windy Pass. Paul’s comment when he got to the top: 45 minute break, NOW!

Favorite Trails

The downhill ones, DUH. Specifically Lorna Pass ridden south, Deer Pass ridden west, Windy Pass ridden either way, and Manson Col/Creek ridden with gravity on your side! You can’t go wrong. The traverse trails in the valley were muddy for us, but were still entertaining in their own right. (Except for the bogs of Little Graveyard, that is.)

Paul at Mach Fun down Deer Pass!

The Gear

Packing all the food and gear the night before. Except the van – that doesn’t fit in my bike bags.

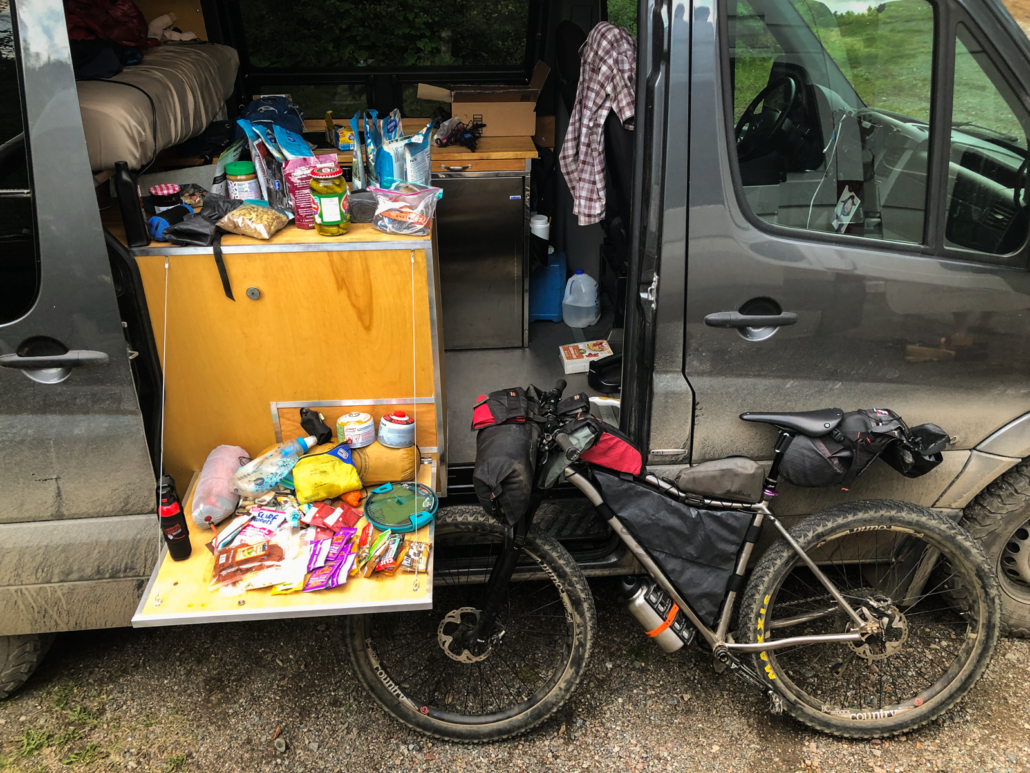
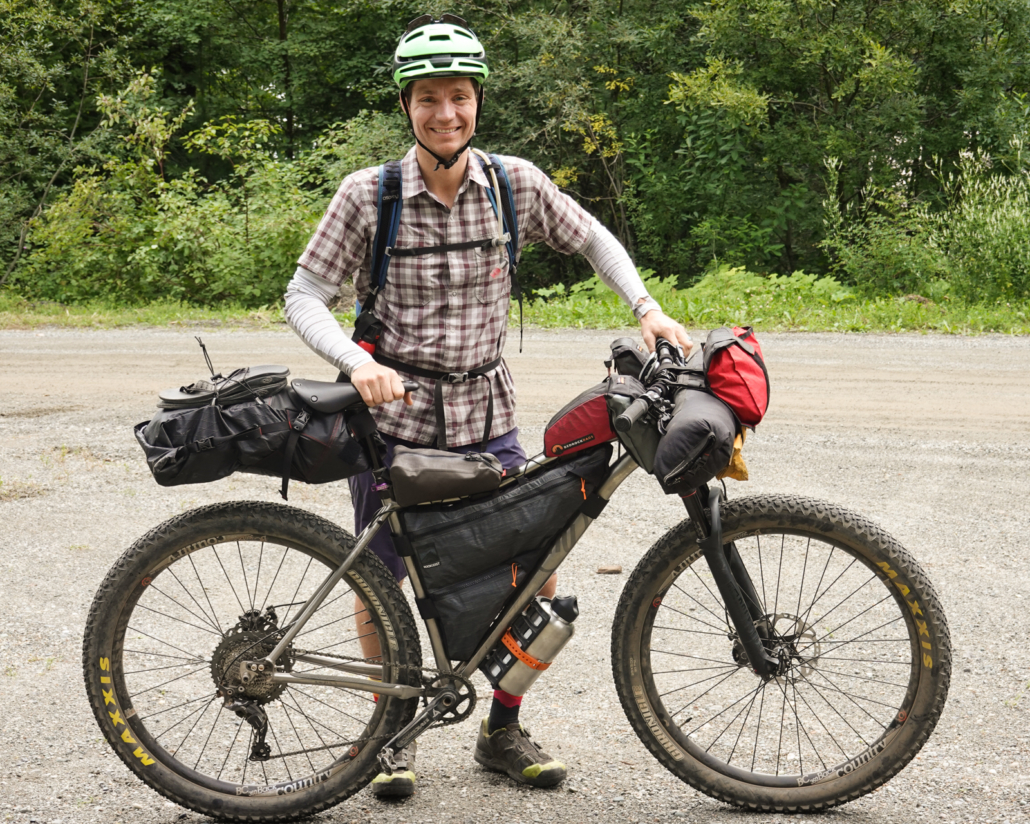
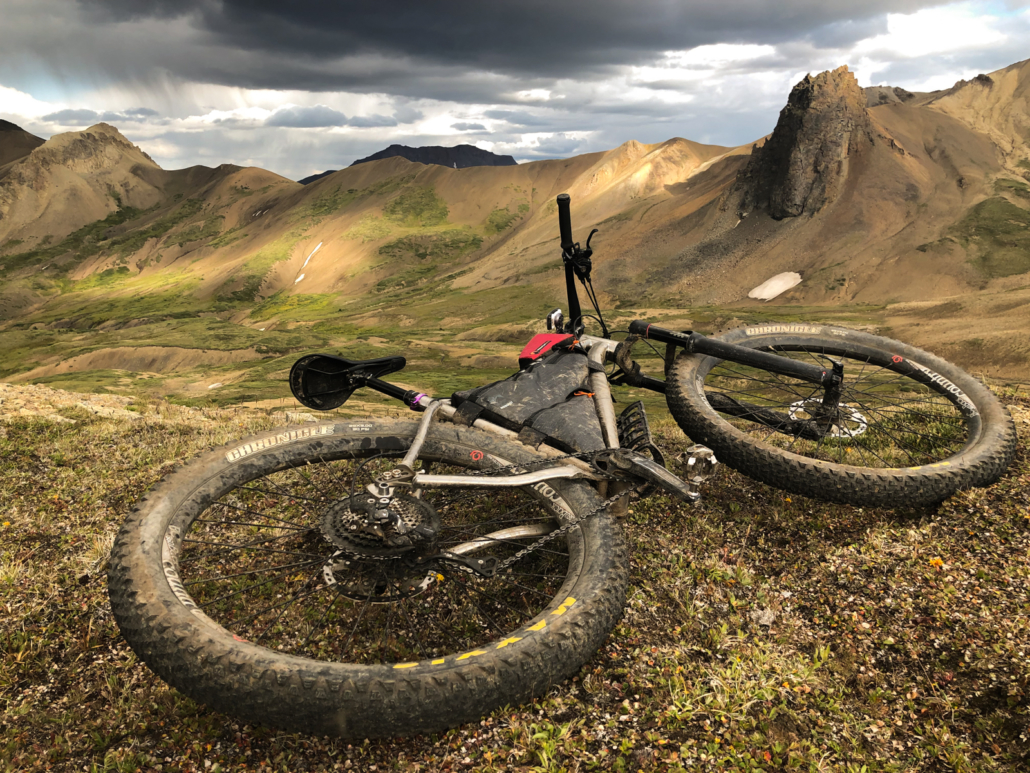
I rode a Why Cycles Wayward hardtail with a standard bikepacking setup similar to my Oregon Timber Trail setup. Here’s the spreadsheet for my Chilcotins packing list for those who want to get in the weeds!

  • Max gear weight (bike, bags, food for entire trip, 64 oz of water, gear I wore): ~80 lbs. No wonder those passes were hard, that’s almost half my body weight!
  • Bike weight + unloaded bags: 37 lbs
  • Gear (sleeping, cooking, clothing, tech): 20 lbs
  • Max food weight: 14 lbs

Allow to me geek out… Weight matters, but adding a few pounds doesn’t change much. My reasoning: if my bike plus me weighs 250 lbs, even adding 5 lbs of weight is only 2% more overall. I could have doubled my food for only 5% extra weight. I doubt it would have slowed me down much

My takeaway: Unless you’re racing, that extra chocolate bar and warm layer is TOTALLY worth it!

Big country! Paul pushing his fully loaded bike up the long Windy Pass on the way in.

Trip Food

If you’re aiming to do a bikepacking trip like this, you probably know what your body needs. If it helps, here’s what I brought:

~20,000 calories, or about ~3,500/day. (This will obviously vary depending on the person.) Enough to keep the fire hot without towing a trailer! Dense calories is the name of the game, with a few luxuries.

Dinner, night one! Soy curls with homemade fajita mix plus a luxury avocado. Remember your hot sauce!

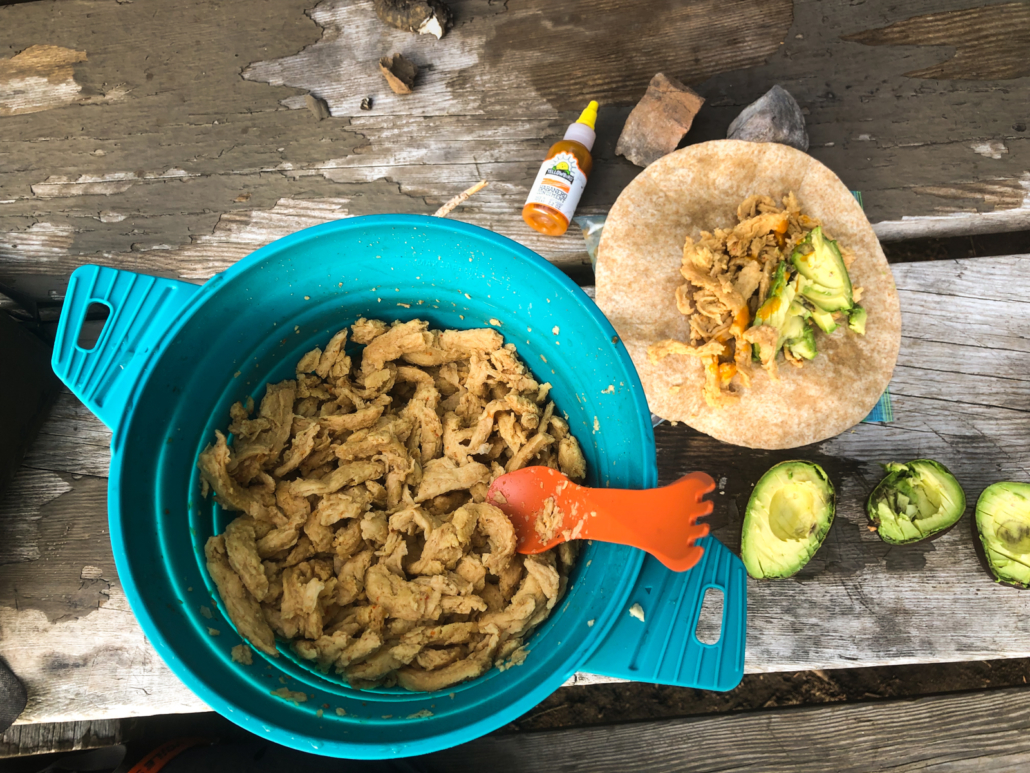
All the Grub (I’m vegan, so it’s all plant-based)

  • 11 freeze-dried meals. Backpacker’s Pantry pad thai is my favorite, with Kathmandu curry and other vegan options. One for dinner and another that I’d make in the morning and eat by noon each day…or 10 am, heh.
  • Dried soy curls pre-mixed with a custom fajita mix for delicious tacos night one. Pro tip: bring hot sauce.
  • Oatmeal. Two packets per morning
  • 10 tortillas
  • A (plastic) jar of peanut butter and jam that I pre-mixed for trail burritos or for adding to oatmeal
  • 2 bars per day. Picky Bars are my favorite. Pro Bars are a calorie-dense option as well.
  • Trail mix to eat/add to oatmeal and trail burritos
  • Pickles (carried sans juice in a plastic bag). Zero calories, heavy, and a divine gift from the gods at the top of a mountain pass. Totally worth it.
  • Olives (transferred to a plastic baggie). All part of my attempt to not ONLY have sweet treats. Great for adding to freeze-dried meals or eaten alone.
  • Gummies (Annie’s)
  • Dried fruit (pineapple, mango, dates)
  • 2 chocolate bars

That’s all I’ve got, folks. Drop a line in the comments or via email if you’re heading out to bikepack the Chilcotins and need more information. Happy pedaling…err pushing!

Thanks Chilcotins! Some of the coolest, most remote terrain I’ve ever had the pleasure of exploring on a bicycle!

Adrenaline and Beauty in Madeira (If You Survive the Flight!)

The wind-swept eastern peninsula of Madeira. (Vereda da Ponta de Sao Lourenço)

Don’t let the flight into Madeira and the island’s treacherous roads scare you off. Once your knees stop shaking, you’re in for a magical time on this outdoor oasis off the coast of Portugal!

For a week, we hiked and mountain biked from Madeira’s mist-shrouded peaks to cliffs overlooking the ocean. It’s one of the coolest places I’ve traveled.

To keep it interesting, Madeira’s airport is Europe’s most dangerous and pilots need special training to land there. Picture intense crosswinds, a short runway, and mountains and ocean as constraints.

Our flight landed as gusting wind slapped our plane updownsideways like a malevolent hand of God. Terrified passengers shrieked, then clapped and cheered when the plane landed.

Next step: revving our tiny rental car on the twisty roads, jousting with the “laid back” locals who drive like their cars are engulfed in flames. Grades I wouldn’t even consider walking up (30+%!) are a feature on any drive into the mountains. I’ve never driven in 1st gear so much. (Make sure you can drive a manual if you rent a car.)

Ah, but those treacherous roads are worth it!

If you can handle that…

Oh. Yes. Madeira is sweet. A nugget of fun and beauty sparkling in the Atlantic. Coming from bike touring to the island was a shift from adventure to pure vacation. We embraced it!

I alternated days hiking with Chelsea and mountain biking, whereas she hiked every day. ​If our days apart were a video cutting between me and Chelsea:
.
BAMBAMBAM downhill rocky mega testosterone mtb madness
.
CUT to Chelsea: twittering birds, fields, flowers, smiling farmers, and pretty views
.
CUT jumps, fist bumps, roots, dust, woot wooting, high fives.
.
CUT quiet sugarcane fields, mama cat with nursing kittens, lizards, more flowers to smell…

Thus passed our magical days in Madeira. Simplicity and complexity need one another, right?

Chelsea disappearing into the looking glass during a lavada hike through laurel forest.
Don’t worry Mom, I wasn’t going (too) fast! #contrast

Mountain Biking in Madeira

Two days before our flight from Porto, I couldn’t have placed Madeira on a map. The island pinged my radar thanks to mountain biking.

Since our visit to Madeira was a trip pivot from bike touring, I needed to rent a mountain bike. Enter Freeride Madeira. This small local company has created a top-notch mountain bike destination that brought the Enduro World Series to the island twice. They offer well-priced guiding and shuttling services that make exploring the trail systems easy.

The trails aren’t ragged, overgrown hiking trails. Since a solid chunk of Freeride’s revenue goes to trail building, everything is custom-built for mountain biking. No need to wear a bell on your bike: hikers steer clear and the trails only point one way: DOWNHILL.

To prevent eye-rolling, I won’t go all BroDuro on you describing jumps, berms, and rocks. YAWN. I’ll skip the word shred and gnar too. (I for SURE won’t say braaap.)

Know that trails in Madeira vary widely, from flowy to steep roots and rocks, and that you’ll encounter all kinds of terrain. If you’re a mountain biker who likes enduro riding in beautiful places, you’ll dig Madeira!


Hiking in Madeira

Everything on Madeira is steep!

Don’t let wanna-be bros like me scare you off if you aren’t a mountain biker. The hiking in Madeira draws people from all over Europe as well. For good reason: it’s varied, beautiful, challenging, and easily accessible.

From the popular wind-swept peninsula at the eastern end of the island with falcons soaring above to peak to peak hiking above the clouds to lush, moody laurel forest to traversing irrigation canals through terraced fields, you can’t go wrong.

Speaking of fields, Madeira grows so.much.food and was almost entirely self-supporting for centuries. (It was discovered uninhabited only 600 years ago by Portugal.)

“Lavadas” or irrigation channels carry water in a network across the island and their access paths are the backbones for much of the hiking. We saw ox-strong old men hauling food and farming equipment just as their grandfathers did.

All you need to navigate ALL the hikes: the excellent WalkMe app. For $5, it guided our hiking efforts for our stay.

Hiking PR1: Pico do Arieiro and Pico Ruivo

Misty mountains and me descending some stairs on the PR1 hike.

There are plenty of blogs talking about favorite hikes in Madeira, so I’ll only describe my favorite, PR1: hiking above the clouds between Pico do Arieiro and Pico Ruivo, the two tallest peaks in Madeira. It’s a destination-worthy hike and one that attracts serious hikers kitted out in their finest gear with carbon trekking poles.

To get there, we drove straight up from sea level to 6,000’ on roads that felt like walls. Roaring along in 1st gear, our car felt like it might flip over backward if the road got any steeper. Chelsea gouged finger marks in the door panel she was so excited to get to the hike. (There’s a less-direct, well-graded option that we took on the way back.)

In the ten miles of hiking out-and-back, the trail features a dozen tunnels, thousands of stairs, and enough exposure to send people with vertigo into lockdown. To the north, a giant bank of clouds hovered below us; to the south, steep mountains dropped away to the ocean. A hike to remember.

A Destination Worth Visiting

In short, Madeira is SO COOL. The hiking. The mountain biking. The views of sunsets while sitting on a balcony overlooking the ocean. The stories about terrifying roads and plane landings… What else do you need for a magical trip?

View from the top of Pico Arieiro before heading back to Pico Ruivo. Such a cool hike!

Resources We Used:

My wise-and-awesome guide, Pedro. He’s taking a break from electrical engineering to guide awhile. Smart man!

This post ain’t sponsored, so the below is simply a reflection of the services we used:

  • Flying: Unless you’ve got a teleporter or a yacht (or can stomach a cruise ship), you’ve got to fly to Madeira. The landing is going to suck (I surveyed other tourists and 100% agreed), so steel yourself for that. There are lots of cheap flights from the European mainland.
  • Driving: We rented from Insular Car and they were awesome! Our car (a Clio) was billed as underpowered, but I found it to be a fun little rocketship. Second reminder: make sure you are SOLID at driving a manual transmission or driving will be a nightmare vs just entertaining. Lots of buses and shuttle services are available.
  • Lodging: Great deals abound. Lots of apartments in the $50-75/night range on Airbnb and tons of options on Booking.com.
  • Mountain bike guiding services: Look no further than Freeride Madeira. The guys are all cheery, friendly, helpful and excellent riders. Can’t go wrong with their services in my experience!
  • Finding Trails: Trailforks has many (but not all) of the mountain biking trails. The WalkMe app has all the hikes.

Once you get to Madeira, you’re in for a treat. HAVE FUN!

The coastline of Madeira seen while hiking Vereda da Ponta de Sao Lourenço.

An Alpine Adventure in the Canadian Rockies

alpine-mtb-in-the-rockies

The text message read, “You interested in an alpine adventure?” Having no idea what that meant, I (of course) said yes.

My guide was Jake, a local from Canmore I met through Instagram who offered to show me around. Our destination was Black Rock Mountain, a peak in the Canadian Rockies near Canmore, Alberta.

A bit of exposure on the way down...

A bit of exposure on the way down…

Biiiig cliff, tiny little biker.

Biiiig cliff, tiny little biker.

Jake’s truck easily bombed through gnarly 4×4 roads and river crossings to the bottom of the mountain. We were ready to rumble.

Well, almost: For the first time in my life, I forgot my cycling shoes, making a great impression on my new friend. Nothing like downhill mountain biking on SPD pedals while wearing thin, flexible barefoot shoes. Sigh. I’m sure he wondered whether this total noob was going to survive the day.

We pushed and carried our bikes 3,000 feet up steep rock chutes, scree slopes, and other “holy crap, this is unrideable terrain” and finally arrived at a fire lookout. Peering down the 45 degree slope, I admit to having a questioning moment. However, I sure as hell wasn’t going to carry my bike back DOWN the mountain.

Nothing but downhill and views!

Nothing but downhill and views!

Jake leads the way down a narrow ridge line.

Jake leads the way down a narrow ridge line.

Up next was one of the gnarliest, scenic, fast, and exhilarating mountain bike rides of my life. Words don’t do it justice, so check out the video I made and Jake’s incredible pics of our descent (see below).

For reference, he’s in the orange jacket, I’m in yellow. Follow him on Instagram for more amazing alpine shots. Unlike me, he does this all the time!

Enjoy.

P.S. Don’t worry, mom, this isn’t my typical kind of ride! There were no wrecks and I only used up one of my nine lives (and one carbon rim).

Me dropping through a steep rocky chute.

Me dropping through a steep rocky chute.

River crossing on the way in, Black Rock Mtn in the background.

River crossing on the way in, Black Rock Mtn in the background.

Top of Black Rock at the decommissioned fire lookout.

Top of Black Rock at the decommissioned fire lookout.

black-rock-mountain-biking-drop

Dropping down a narrow ridge near the top of Black Rock Mtn

Dropping down a narrow ridge near the top of Black Rock Mtn

black-rock-mountain-biking-downhill-on-ridge

Running from the thunder clouds.

Running from the thunder clouds.

black-rock-mountain-biking-cliff-edge