This post is also featured here on Bikepacking.com.
It struck me recently that I’ve bikepacked or bike toured for over a year of my life. Starting in 2014, I’ve pedaled across states, countries, and mountain ranges, over a thousand hours of exertion and 10,000 miles.
Along the way, I’ve burnt a few calories.
I fueled all 10,000 of those miles following a plant-based diet. And since I couldn’t find a comprehensive blog post talking about this, I decided to write this post!
My goal is to provide concrete, actionable information about trying a plant-based (or plant-leaning) diet for your next bike trip. I cover the following (click to skip ahead):
First off, I want to say this: food is personal. I’m not a doctor or a nutritionist and I’m DEFINITELY not here to tell you how to eat. But if you’re interested in leaning more plant-based on bike trips, you’re in the right place.
Let’s jump into it.
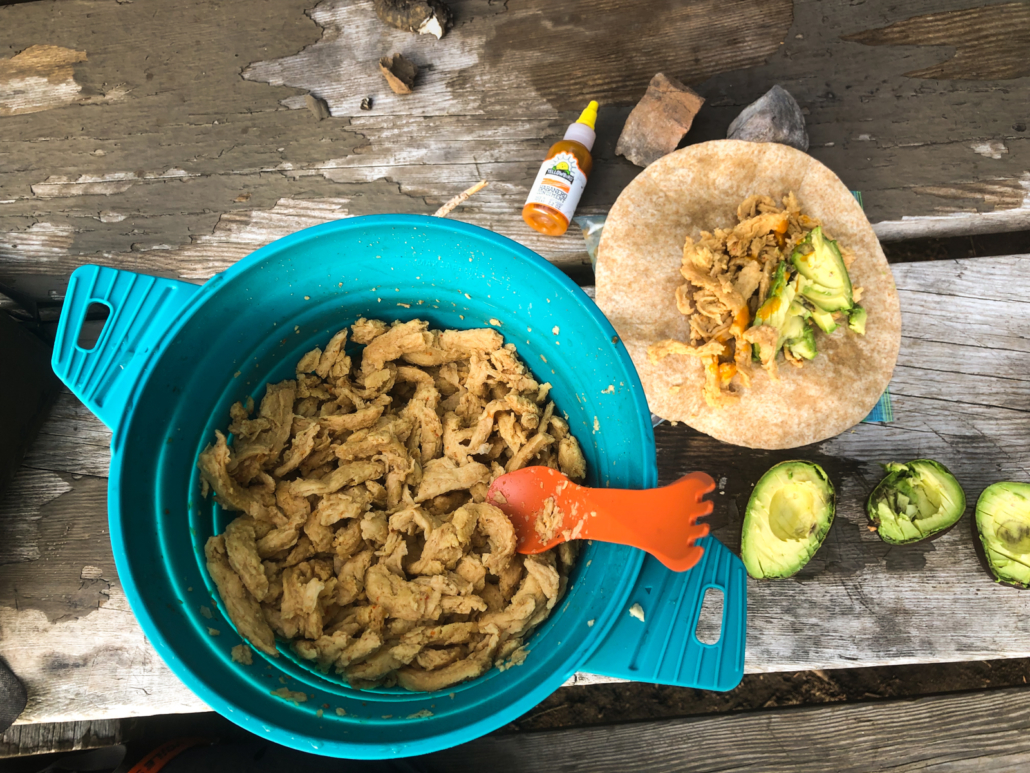
Mason whipping up an amazing tempeh/cheese/avocado wrap during a thunderstorm break on the Colorado Trail.
My Experience with Plant-Based Bike Travel:
After almost a decade of pedaling on plant power, here is what I’ve discovered:
Bikepacking on a plant-based diet is totally doable: I’ve found that plenty of calories, balanced nutrients, and a high energy level were the norm.
There’s never been a better time to live and travel as a plant-based person. From rural restaurants to big city dining, I’ve found and enjoyed plant-based food options.
In foreign countries, the grocery store and restaurant treasure hunt is an enjoyable part of the travel experience.
If I’m kind and clear with my requests, people return the kindness and help get me what I need.
Staying true to my values during a trip is empowering. I enjoy the opportunity to be an ambassador for plant-based eating.
What’s the Difference Between Bike Touring and Bikepacking?
For me, bike touring means paved roads and hence more amenities like grocery stores most days, along with restaurant and hotel options. Our trips biking across the U.S.. or Europe on small highways, back roads or car-free paths are a perfect example of touring.
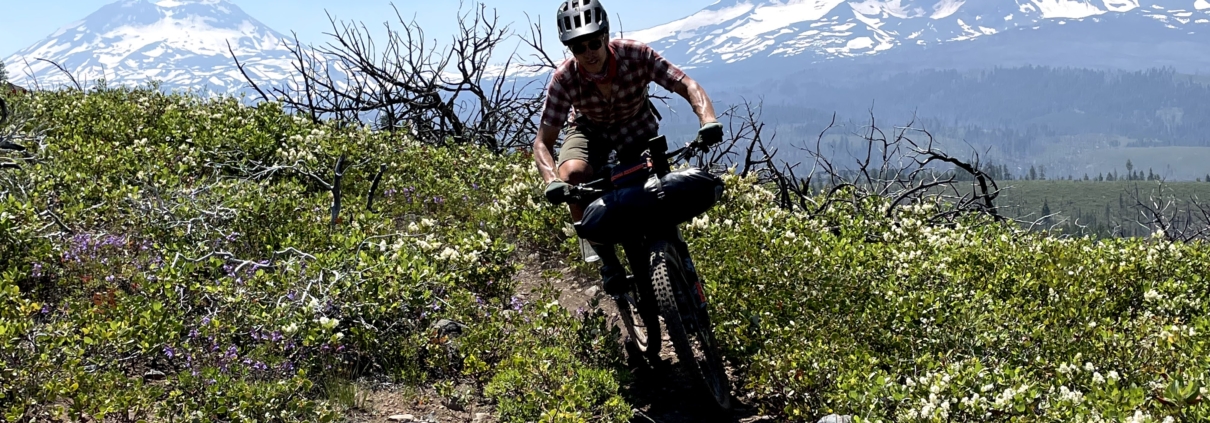
Bikepacking is off-road on gravel roads or dirt trails. It’s typically more remote traveling with fewer resupply options and less carrying capacity on the bike, e.g. Bikepacking the Colorado Trail or Oregon Big Country. It might be multiple days without any resupply options.
I think both are fantastic ways to travel and I will continue to do both. That said, I’m skerrred of cars and Tiktokking Teens behind the wheel, so I avoid paved roads whenever possible.
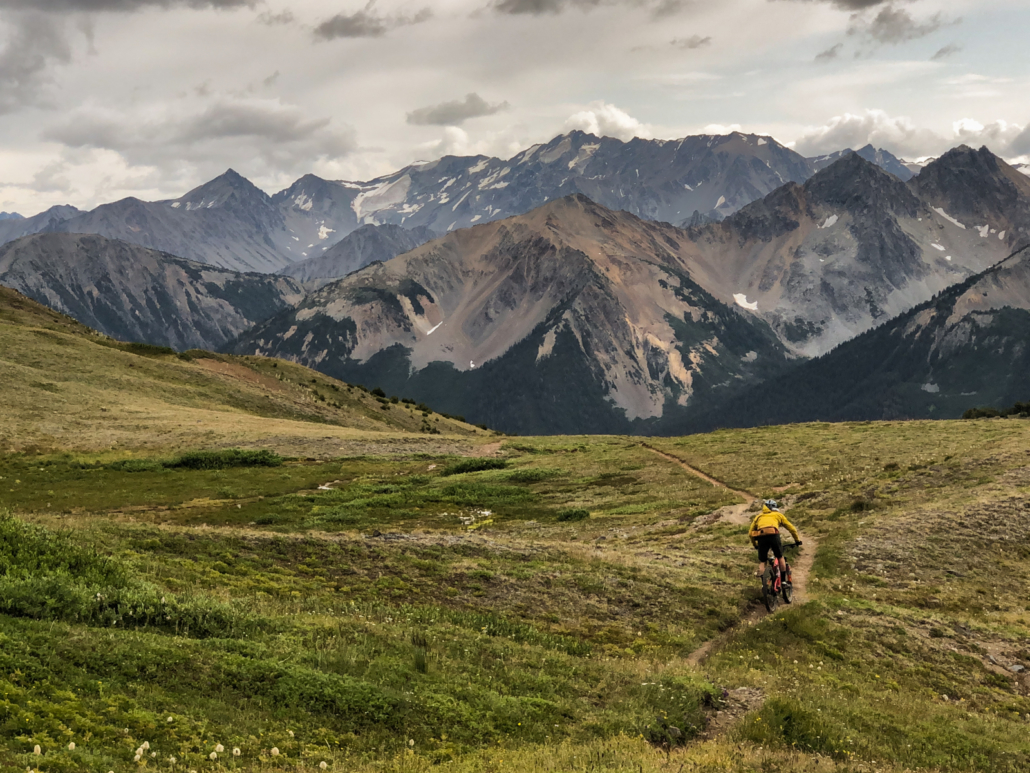
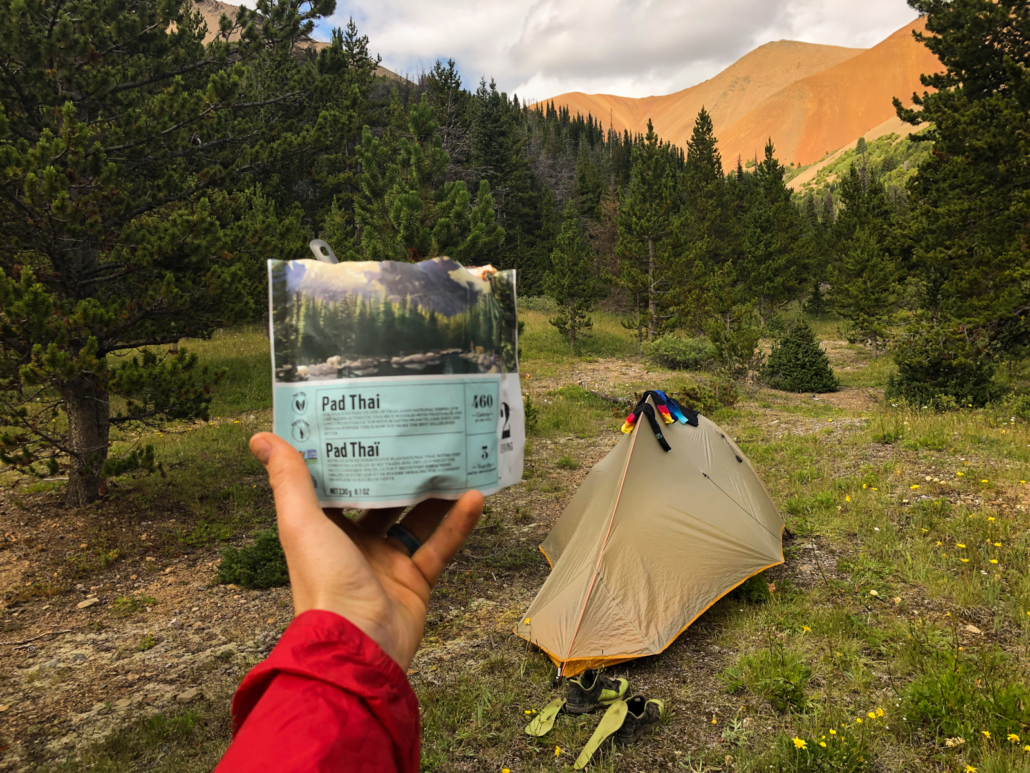
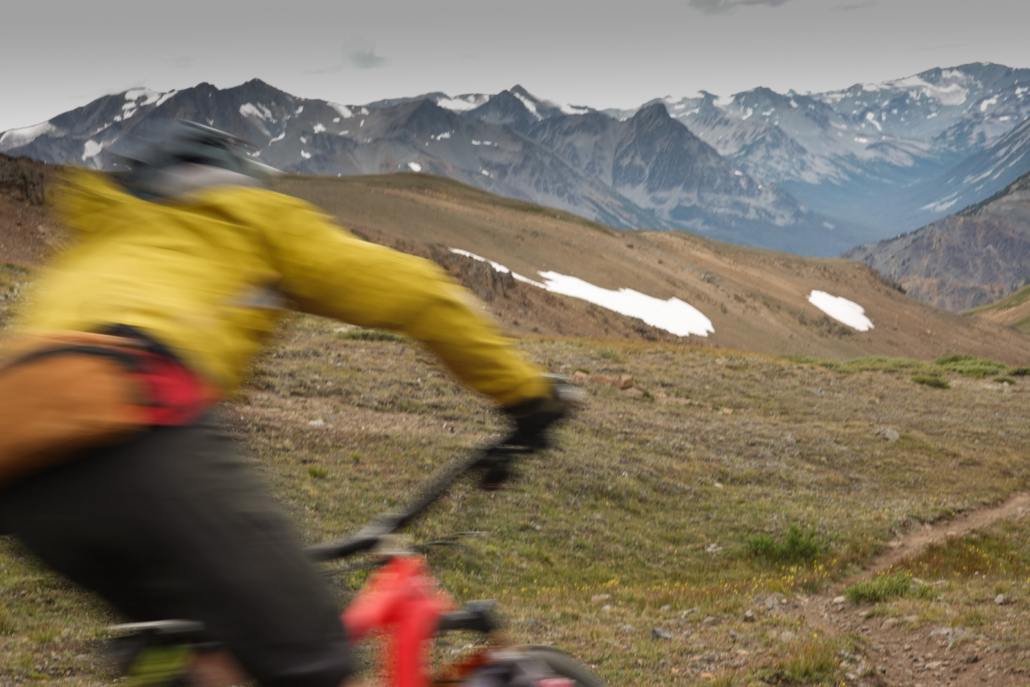
Freeze-dried pad thai during a bikepacking trip in the Chilcotins in Canada.
Quick Credibility Builder
Here’s a rundown of some of the bigger bike touring and bikepacking trips I’ve done on a plant-based diet. I bring these up to illustrate that big, physically-demanding trips are entirely possible powered entirely on plants.
You’ll note that my trips are limited to North America and Europe (for now!). However, plant-based friends have pedaled E. Europe and S. America, Nepal, and other regions around the world and done juuuust fine.
Dig this kind of post? Check out my 2x/month Traipsing About newsletter!
Chowing down while touring through Montana in 2014. OMG, I’m carrying so much stuff!
The Mindset
My shift to plant-based in 2013 simply required commitment and just owning it. Most people understood and supported me. Even if people didn’t understand why I was making the choice, if I was clear and kind with my requests, they helped me get what I wanted.
I’ve discovered that eating plant-based is like any other boundary that we set to build our ideal life. If we have a preference and we’re crystal clear about it, then if somebody responds poorly, that’s great feedback to moooove along.
EVERYone these days knows somebody with a standard American diet. (I recall a server in a small-town diner in Nebraska who had a cousin who ate plant-based.) A keto brother, a gluten-free roommate, a vegetarian aunt…people will understand.
On the health side, I’ve always prioritized my personal health, but my blood work at 40 years old is better than it was in my 20s! I’m able to do all the cycling I did before (actually, now I do a lot more…). In fact, many badass professional athletes are plant-based, as documented in the movie The Game Changers.
Also, plant-based diets help people optimize body composition, oftentimes dramatically dropping fat. Bike travel is hard enough, so shaving a few pounds never hurts. It’s certainly cheaper to eat plants than it is to buy carbon wheels.
Given the positive results and empowering feeling that my choices are better for the planet, animals, and me, I can’t endorse a plant-based lifestyle enough.
Enough background. Let’s talk about what I eat on bike tours.
Mason and I digging into pizza in Frisco during the Colorado Trail.
Food for Bikepacking vs. Bike Touring
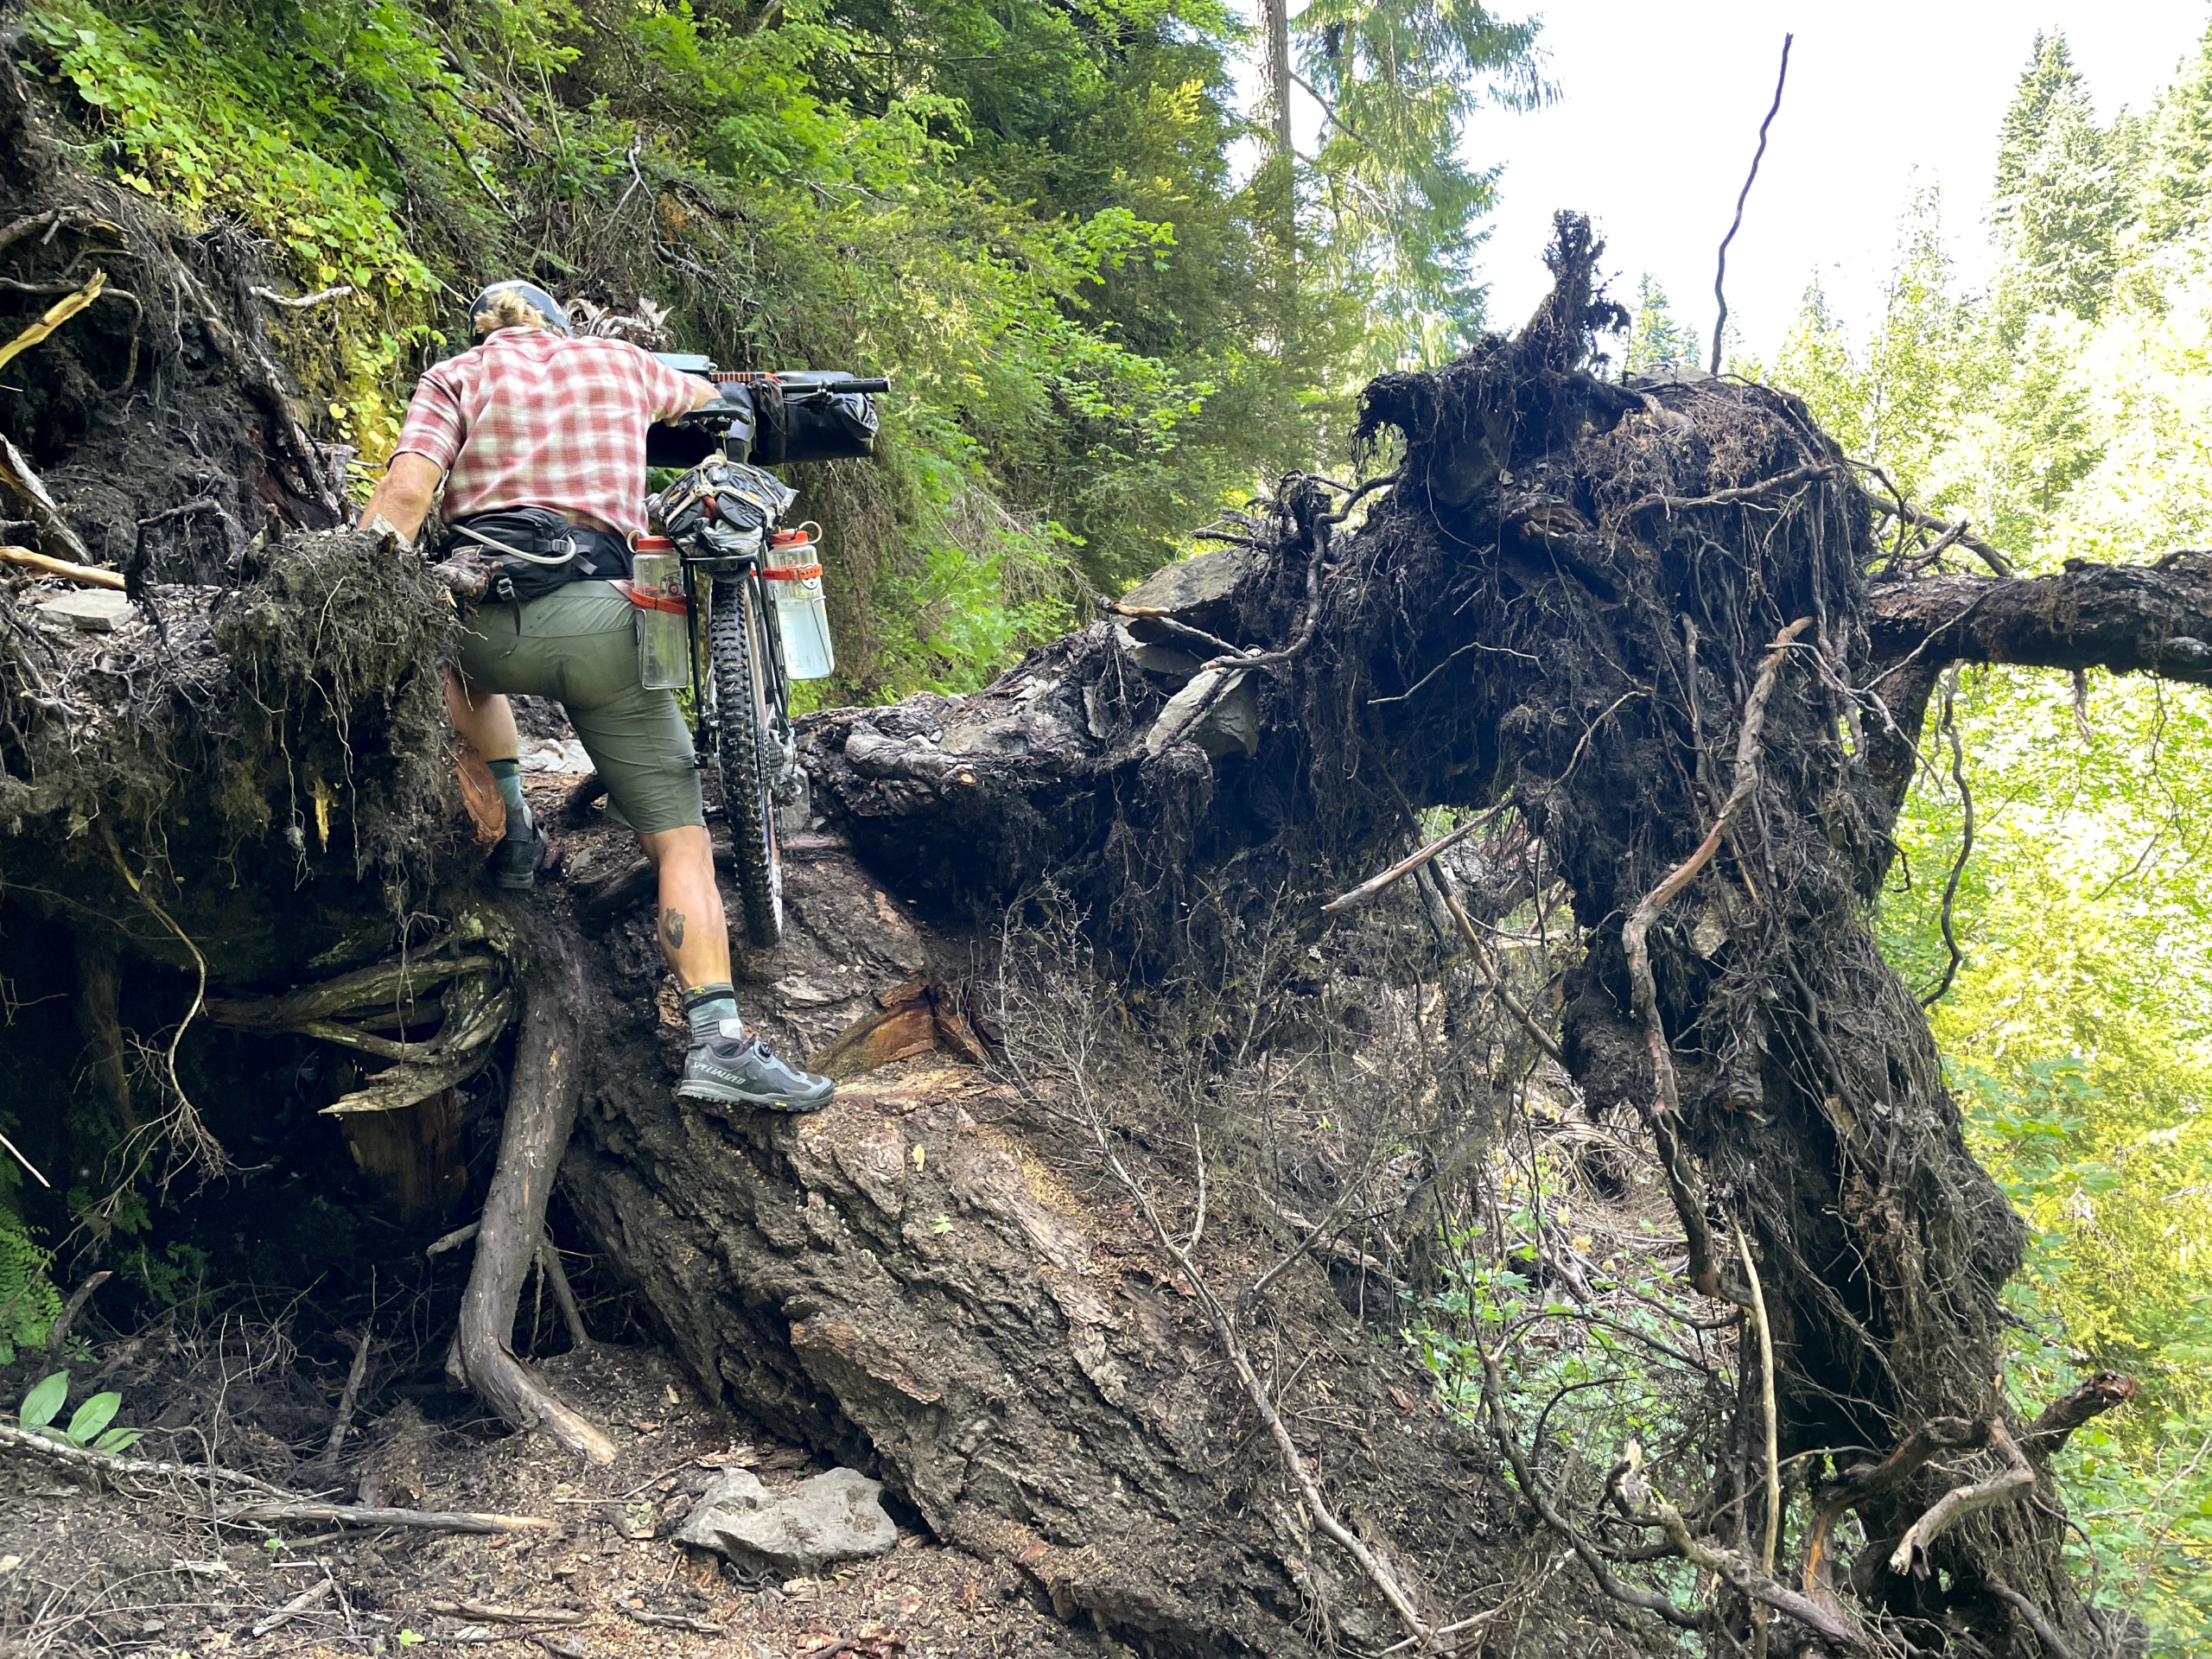
In my experience, bikepacking tends to involve steeper, more challenging terrain. Keeping bike (and human) weight to a minimum matters more when I’m lifting my bike over 200 downed trees.
Loaded up with food and gear while road touring, I just downshift and go slower. On a trail, I curse downed trees and wish I’d done more pullups for trip prep.
Space is also more at a premium on a bikepacking setup. Without spacious panniers, options for storing food are limited. On a road bike tour, I’ve carried crazy amounts of grub: half a watermelon, cans of beans and jars of olives… Whatever! An extra 10 pounds of food barely slows me down. Spin up those hills!
But can I lift that bike over a tree or power through a steep move on a trail? Hellll no.
As such, I make different decisions.
General Tips for Bike Travel
Whether I’m bikepacking remote mountains or bike touring through places like Europe, some things I do hold true:
I usually carry a small stove (a Jetboil), but I also like to cold-soak my overnight oats so it’s ready first thing. I do the same with some freeze-dried meals so they’re ready when I’m hungry vs. woefully staring at the cold package and considering attacking my companions to commandeer their food.
For really remote trips (e.g. the Oregon Big Country), I mail food ahead! It’s easy: I simply find a post office in the area I’m passing through and send a package to myself marked general delivery. For $10-15 bucks in shipping, I can have exactly what I want. One caveat: check the hours for the post offices, because sometimes they are limited in small towns.
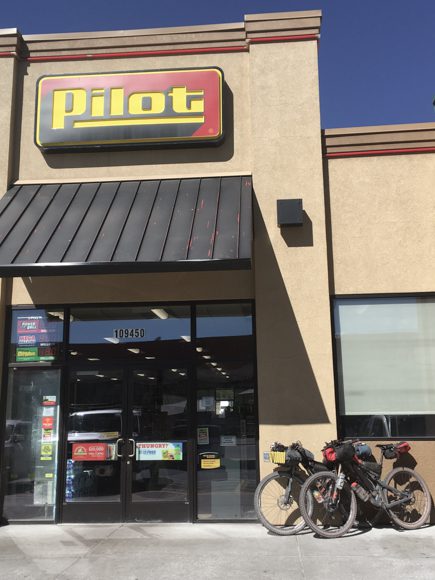
Gas stations/convenience stores exist in every.single.town and contain tons of plant-based options. (Maybe not the most healthy, but whatever. Fritos, mmm.) Here’s a list of plant-based foods available in convenience stores—so many! Yup, Oreos make that list. And Nutter Butters, for which I’ll trade a spare arm during a hungry moment.
Bike travel makes me HUNGRY and sometimes it’s tough to carry enough calories to make up for full days of biking. To combat that, I backfill the calorie deficit by eating all the heavy, calorie-dense, yummy stuff while I’m at a restaurant or outside a grocery store, bakery, convenience store…anywhere. I also load up on nutrients via seaweed salads, salad bar items, oranges. And watermelons, obv.
I almost always order two portions at a restaurant, eat one there and one to go. For road tours, I’ll bring a watertight container that can take leftovers to get a few hours later.
When I’m grocery shopping, I divide my haul into two portions: The stuff to load onto my bike and the stuff I wolf down to refuel on the spot.
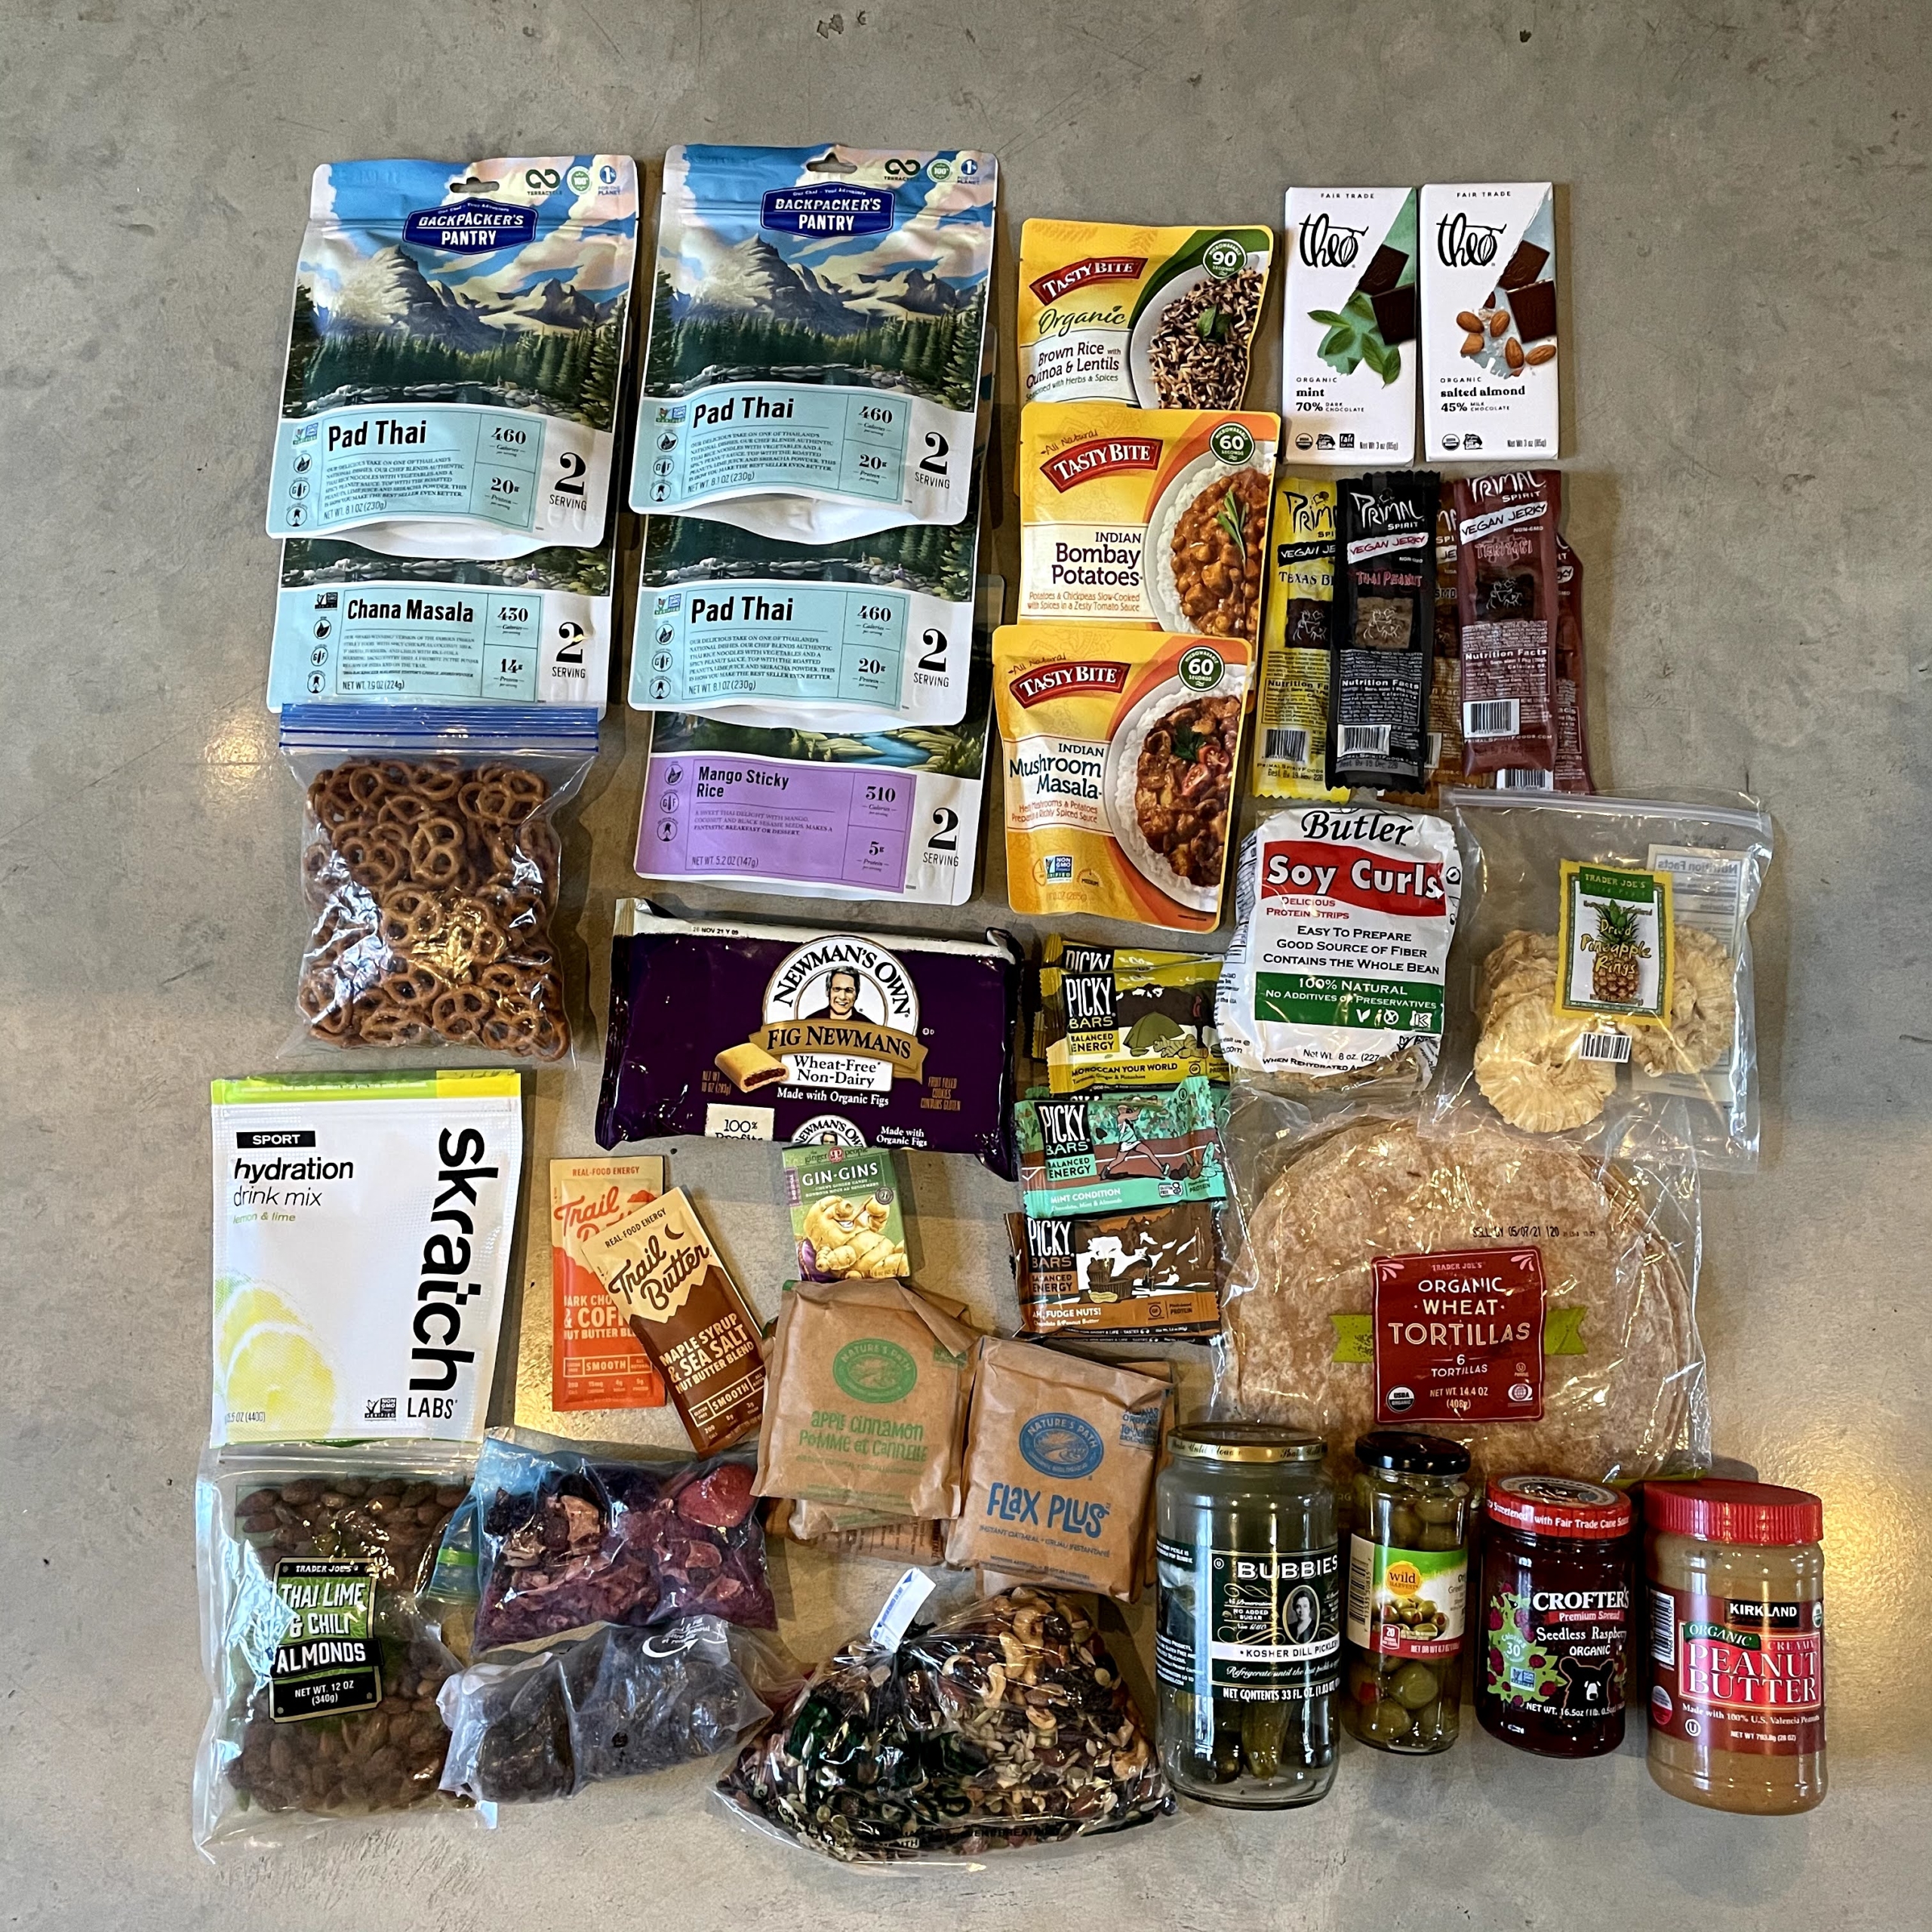
Bikepacking on a Plant-Based Diet: Food for the Trail
Below is a list of my go-to bikepacking food. I aim for as little processed food as possible, though that falls apart if I’m starving and find Sour Patch Kids in a gas station.
Regarding freeze-dried meals, some people make their own, but I’ve never wanted to spend the time. If you watch for year-end sales, you can get meals quite cheap. Plus, hey, you’re sleeping on the ground, so if finances allow, treat yourself!
In general, focus on calorie-dense foods. You’re not trying to lose weight on tour, you’re trying to fuel your engine. Stuff as many calories in your face as possible. (e.g. burritos.)
A giant meal in Leadville during the Colorado Trail.
Breakfast:
Oatmeal. For shorter trips, I premix a bag with nuts, dried fruit, ground chia, and other additions. For longer trips, I simply buy oatmeal packets along the way and mix with calorie-dense additions like trail mix or peanut butter.
Lunch:
Tortillas – PBJ trail burritos or make a freeze-dried meal into a wrap.
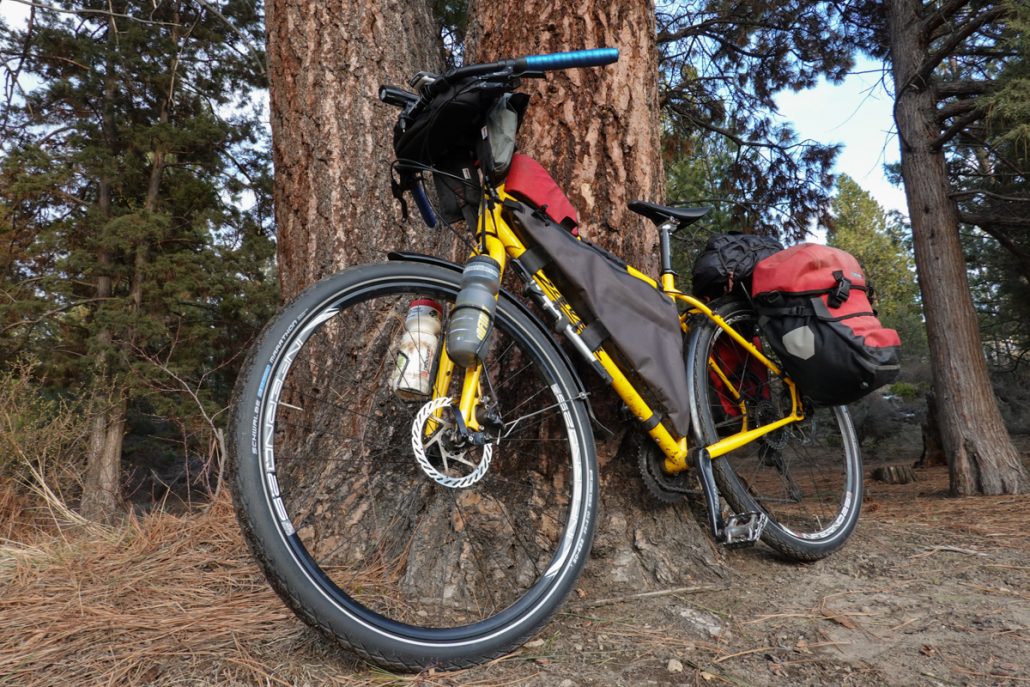
A (plastic) jar of peanut butter and jam that I pre-mix for trail burritos or for adding to oatmeal. PBJs are clean-burning FUEL.
Energy bars: Picky Bars are my favorite. Pro Bars are a calorie-dense option as well, with PB Chocolate my fav.
Trail mix to eat/add to oatmeal and trail burritos—available in every grocery or convenience store.
Pickles (carried sans juice in a plastic bag). Zero calories, heavy, and yet a divine gift from the gods at the top of a mountain pass when I’m craving salt.
Olives (transferred to a plastic baggie). All part of my attempt to not only eat sweet treats. Great for adding to freeze-dried meals or eaten alone like a crazed animal.
Dried fruit (pineapple, mango, dates, raisins) or gobbling fresh fruit if I’m restocking at a store. Raisins with salt provide the same boost as Sports Jelly Beans and are au natural.
Lupini beans – salty, flavorful, with some moisture. A favorite.
Fig newtons. Mmmm, figgies. Just typing that makes me want to go buy some.
Some kind of salt/electrolyte tablet and powder. LMNT is like an IV drip to your piehole. It can overcome any electrolyte deficit.
Coconut water is a delicious treat.
Dinner:
Freeze-dried meals. There are a ton of options. Backpacker’s Pantry pad thai is an affordable, excellent option, along with Kathmandu curry and other plant-based options. One for dinner and another that I’d make in the morning and eat by noon each day…or 10 am, heh. If you’re traveling through cities, most outdoor stores will have these.
Pro tip: Use the tortillas as a wrap for freeze-dried meals. Extra calories!
Restaurants! Nothing like a 1,500 calorie mega-burrito from a Mexican restaurant or a Subway sandwich to offset hours of biking. A fav move is to grab a burrito to go and keep pedaling, then eat it down the road.
Loading up a giant burrito during the Oregon Outback. I skipped the beer.
A few tips for bikepacking:
I usually carry a small stove (a Jetboil), I also like to cold-soak my overnight oats so it’s ready first thing. I do the same with some freeze-dried meals so they’re ready when I’m hungry vs. woefully staring at the cold package and considering attacking my companions to commandeer their food.
For really remote trips (e.g. the Oregon Big Country), mail food ahead! Simply find a post office in an area you’re passing through and send a package to yourself marked general delivery with your name on it. For $10-15 bucks in shipping, you can have exactly what you want. One caveat: check the hours for the post offices, because sometimes they are limited in small towns.
Gas stations/convenience stores exist in every.single.town and contain tons of plant-based options. (Maybe not the most healthy, but whatever. Fritos, mmm.) Traipsing About reader, badass cyclist and fitness coach Lauren Costantini put together a list of foods for clients who were racing the Great Divide from Canada to Mexico. Yup, Oreos make that list! And Nutter Butters, for which I’ll trade a spare arm during a hungry moment on the trail.
Never roll up on the Monarch Crest general store while hungry…junk food overload!
What to eat in Rural Towns
Nobody likes staring at a menu in a small-town diner and thinking, “Ruh roh, I’m going to starve.” Fear not! There are plenty of calories to be had. You just need to ask for what you want!
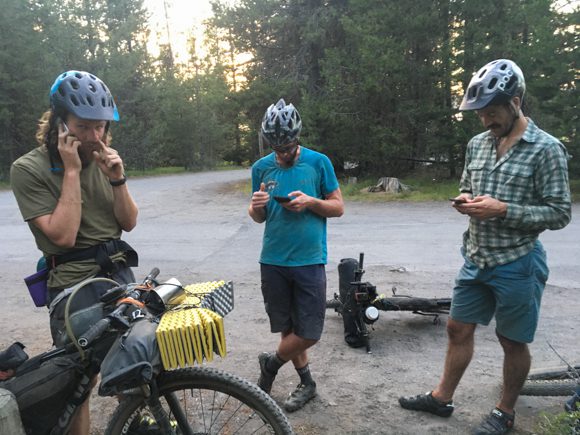
For example, during my Oregon Timber Trail journey, my friends and I pedaled like hell into Chemult to beat the 9 pm closing of Lori’s Diner. We were famished after a huge, challenging day of carrying bikes over downed trees. (See above section on traveling light…)
Magically, Lori’s had veggie burgers available! Did I eat two of them and wish I’d ordered three? Yep!
The next morning, we were back for breakfast. Everything on the menu contained animal products, but I deployed my secret weapon: asking for what I wanted.
“Hey, can the cook throw together something for me? Just take hashbrowns and load any vegetables you’ve got into it. Maybe some veggie burger too?”
The result? A mouth-watering, satisfying breakfast! Even better, when the cook came out and asked how it was, I got to tell him so. He responded that he’d enjoyed cooking something different.
This illustrates an important point: you aren’t necessarily inconveniencing someone by asking for what you want. With potatoes, rice, pasta, beans, vegetables and a random veggie burger (or not), a delicious meal is possible. These staples exist everywhere.
Ask and you shall receive. Be friendly, but not apologetic. You’re a paying customer. Plus, you showed up on a bike, so you’re obviously crazy already.
(Side note: You’ll notice I didn’t worry about the grill being used for cooking meat. For me, this lifestyle isn’t about perfection, but about best efforts. Perfectionism—in ANYTHING—is simply a recipe for giving up and doing nothing.)
Stuffing my face outside a grocery store in Germany.
Food for Bike Touring
Bike touring meals can of course include the exact same stuff as bikepacking. However, it’s easier to live a fancier—and healthier—life when you’re touring on the roads. More frequent, higher-end restaurants are a great example.
In Europe, it’s even easier. Restaurants and grocery stores feature tons of plant-based options and we’ve found even the smallest little B&Bs and restaurants offer something plant-based. The Bios (the name for organic shops) offer fantastic options as well. Organic produce is also less expensive in Europe.
Outside of big cities or when I’m camping, I opt to make my own meals with food from grocery stores. Big salads (I’m talking LOADED with calories), simple burritos or wraps, pasta. It’s not home-cooked deliciousness, but after biking all day, it doesn’t matter— food just tastes better.
Half of a huge dinner salad in Portugal. I basically added a ton of the stuff on the list below!
Here are a few staples I grab in grocery stores or restaurants while road touring. Refrigeration isn’t necessary since it’s down the hatch quickly!
Olives
Beans
Tofu or tempeh: get the marinated stuff for max flavor
Nuts (with beans, tofu/tempeh, and seeds, we easily get enough protein on tour)
Plant-based meats, cheeses, yogurts and milks.
Granola or oatmeal
Salad dressing
Hummus
Any and all vegetables
Avocados and guacamole
All the fruit: apples, cherries, GRAPES (the best). While we typically don’t carry watermelon, we’ve eaten dozens of them while sitting outside grocery stores. In Europe and the U.S., we load up on fruit at farmer’s markets.
Pizzas sans cheese. (“We’ve never had anyone order that,” said one lady with a smile at Casey’s convenience store in Illinois. Pizzas for $10 that we ate like Velociraptors.)
Carbs! Bread, tortillas, plant-based pastries if we could find them…fuel those miles.
Canned chili, baked beans or lentil soup (Amy’s is a go-to brand of mine)
So. Many. Options. Enjoy that bike touring luxury!
Our favorite plant-based blogger, Isa Chandra, happened to open a new restaurant in Omaha the day we biked through. We ate SO much amazing food that day.
Putting Rubber to the Road
Time to hit the road! All that’s left to do is buy a bunch of grub and load your bike up. Before you do, here are a few additional tips to dial in a positive mindset:
Add, don’t subtract. Rather than thinking about things you can’t eat, simply substitute plant options. e.g. get that veggie burger at a restaurant, buy plant-based lunch meat or chili.
It’s not all or nothing. A substantial and meaningful diet shift is best accomplished slowly, piece by piece. You might be surprised how easy it is to eat 75% plant-based with little dislocation to your eating habits. Experiment with plant-based options.
Treat it as a treasure hunt. Enjoying the challenge of seeking out plant-based options is like not buying shitty tomatoes out of season at the grocery store: it’s a bigger reward when you find that special, tasty item. (Coconut Bliss ice cream in a small grocery store in the Midwest comes immediately to mind!)
Feel good knowing you’re helping your health, the environment, and animals. It’s an easy way to have less impact, one bite at a time.
You’re ready to roll! Pick a route, pack your bags, order that grub, and get out there.
For further reading, check out a few of my related bike touring or bikepacking posts:
Lastly, here are a bunch more photos of delicious plant-based food that has fueled me along the way. Just flipping through my trips and seeing this stuff got me excited (and hungry) for the next adventure!
Dig this post? Check out my 2x/month Traipsing About newsletter for trip reports, other bikepacking tips, and other ways to level up your life.
Photo Gallery
Every diner has hashbrowns!
A grocery cart haul on tour
Pad thai during a Chilcotins bikepacking trip
Chelsea and I made plant-based enchiladas for our friends in Colmar during a tour.
European grocery stores sure have a ton of plant-based options.
The meat section in Germany during a tour.
Enjoying a hearty dinner salad while on tour.
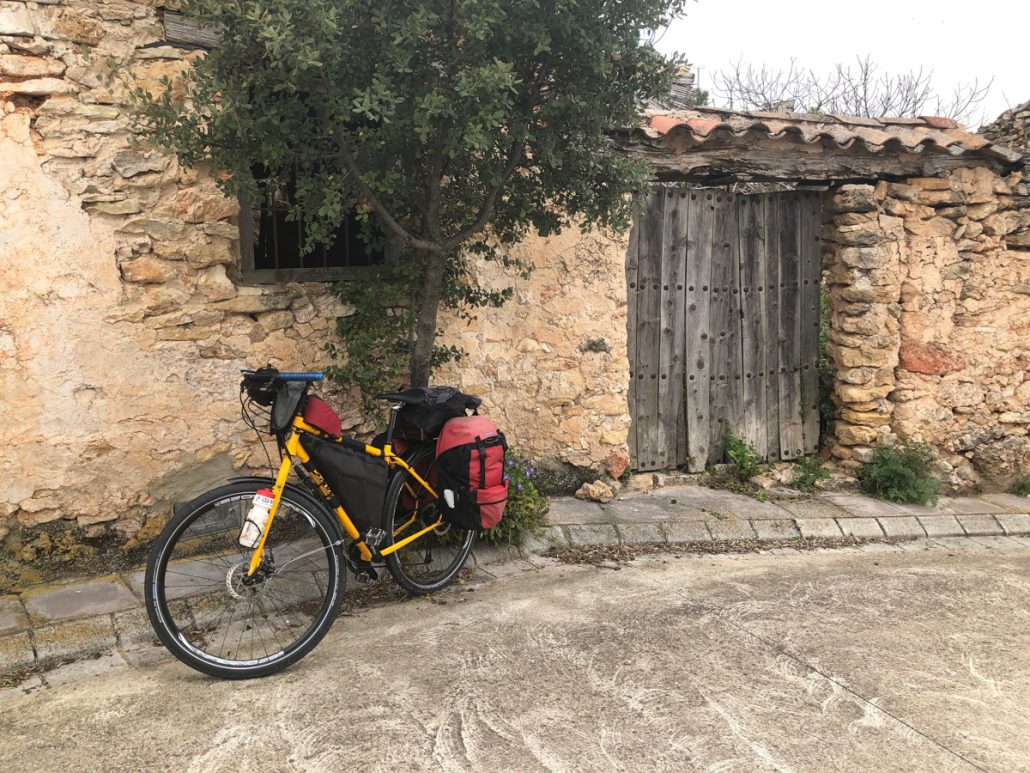
Bike touring grub in Spain.
This meal in Belgium was deeelicious.
Dinner alla fresca during a US tour.
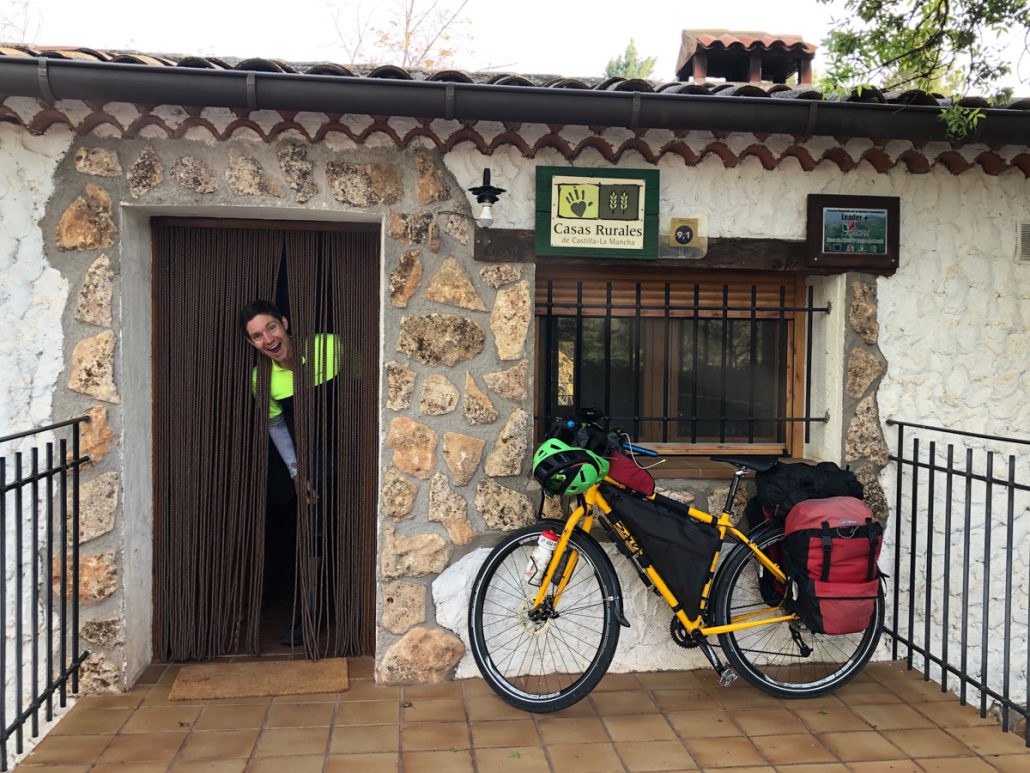
We met these two plant-based bike tourers at a restaurant in Valencia, Spain. They were biking from Gibraltar to the tip of Sweden!
Dinner on bike tour with friends in Croatia.
Part of a delicious breakfast at a BnB while touring France.
Bike tour grub in Germany!
Tasty plant-based dinner at a bike bnb in Germany.
Tasty breakfast at an Airbnb in Belgium
Plant-based pizza during our last night touring across the US.
Nothing like loading up on grapes and stuffing them in my face!
When it's 95 degrees in the Midwest, there's nothing like watermelon.
A tasty plant-based meal at a saloon outside of Glacier National Park.
Appetizers and dip while touring Montana.
Lunch break while touring Montana in 2014.
Enjoying a veg Subway sub during the Oregon Timber Trail. Not sure why this table was in the lake!
Yup, junk food too! Zach enjoying Pringles on the Oregon Timber Trail.
Our favorite plant-based blogger, Isa Chandra, happened to open a new restaurant in Omaha the day we biked through. We ate SO much amazing food.
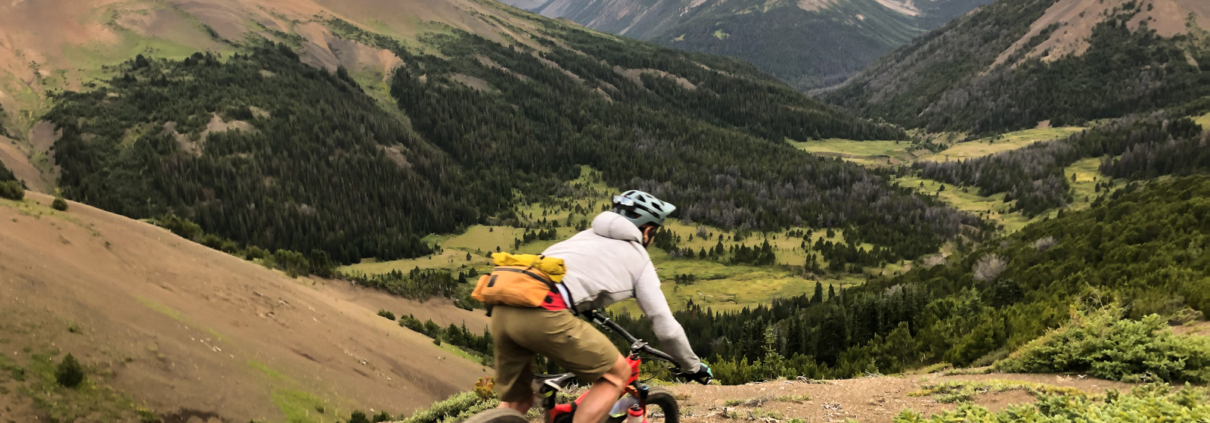
Pausing mid-climb to suck down some plant-based calories (Odyssey of the VOG)
A massive dinner salad at The Breadboard restaurant (Odyssey of the VOG)
Ohhh watermelon, how I love thee.
Mason knows how to make a mean veg trail wrap.
What happens when two bike tourists find an all-you-can eat veg buffet in Portugal?
Loading up a giant burrito on the Oregon Outback. (I didn't buy any beer.)
Grub for the Oregon Outback.
Loading up on watermelon during the Odyssey of the VOG.
Tyler and Brady know how to share breakfast biscuits and gravy.
Where's all this stuff gonna go?!
Loaded up in Portugal
Enjoying breakfast in Portugal.
Snatt's in Spain. So good.
I'll just have the hazelnut spread.
Yup, plant-based cake is damn good.
We ate a lot of Pisto tradicional during our Spain tour!
Jono digs into a late afternoon burrito during the Oregon Outback.
Lots of veg food in Spain!
These Spanish open-faced sandwiches are delicious.
Carbs in Spain.
Loading up on grub at Monarch Crest.
Fresh bread and pisto tradicional in Spain.
Amy's frozen burritos are a great score on bikepacking trips!
Good to have a spare can of these when you're on tour in Spain!
Scoring this on a long day in Spain was amaaazing.
The best.
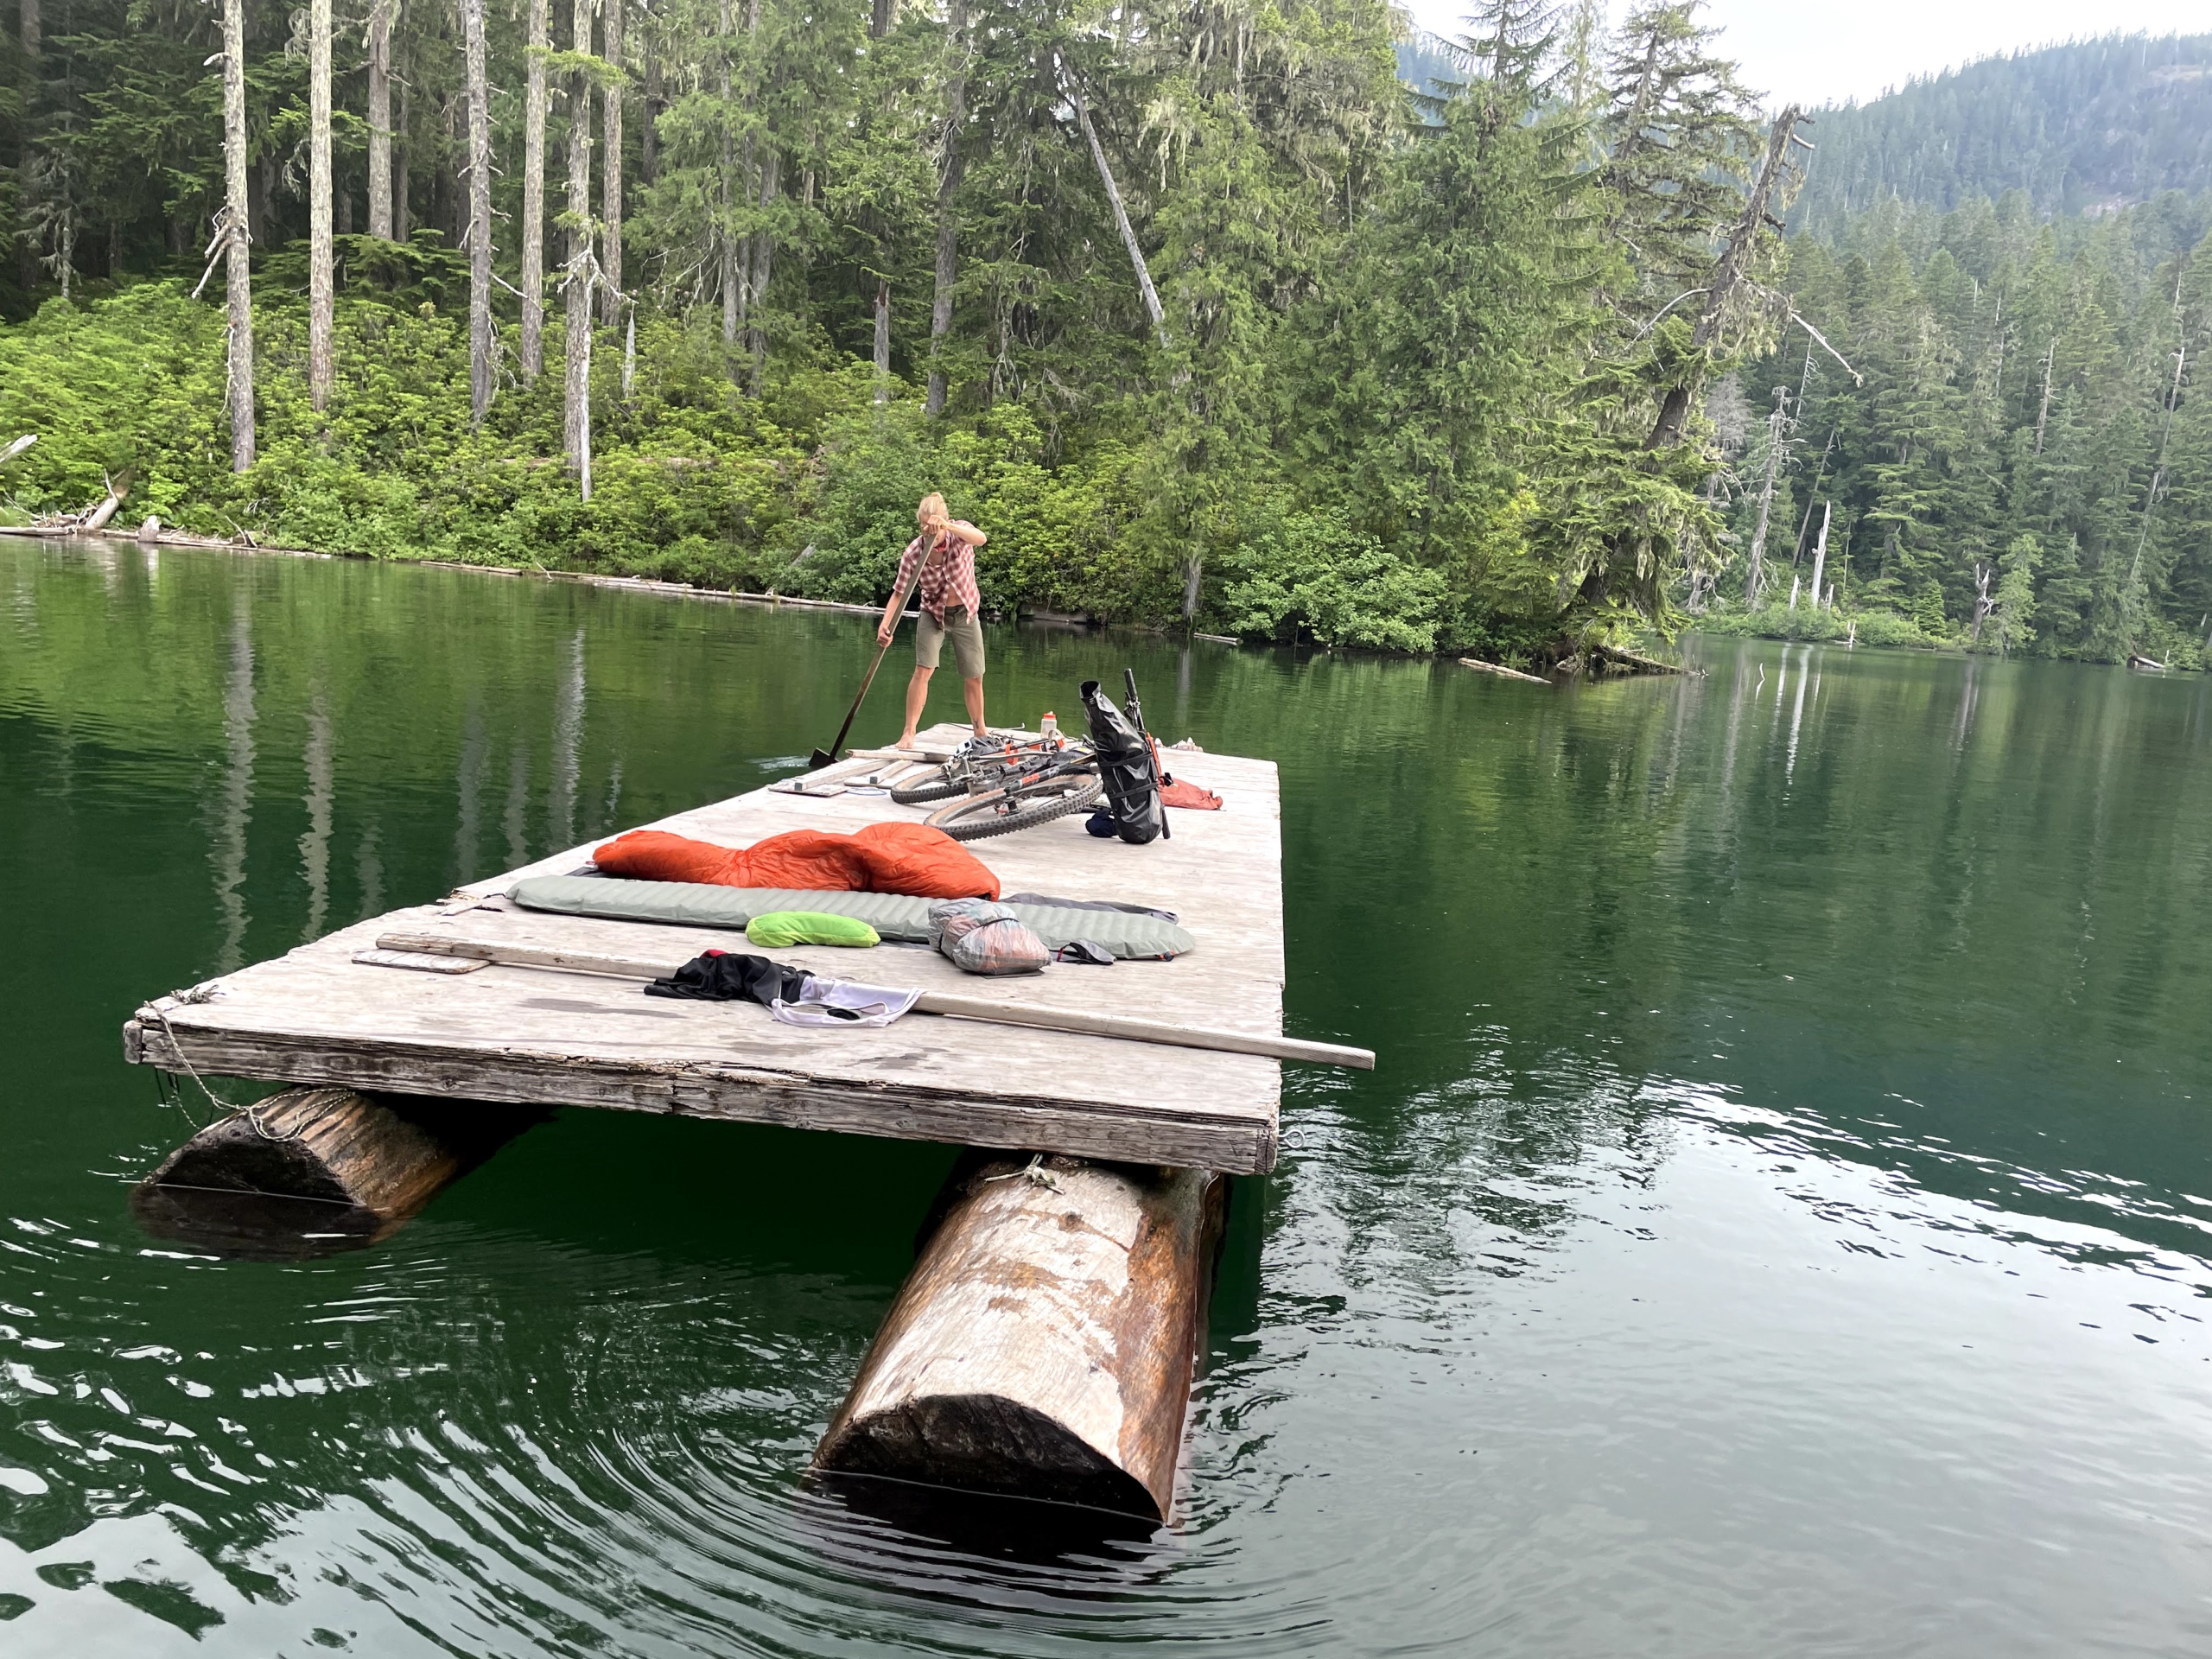
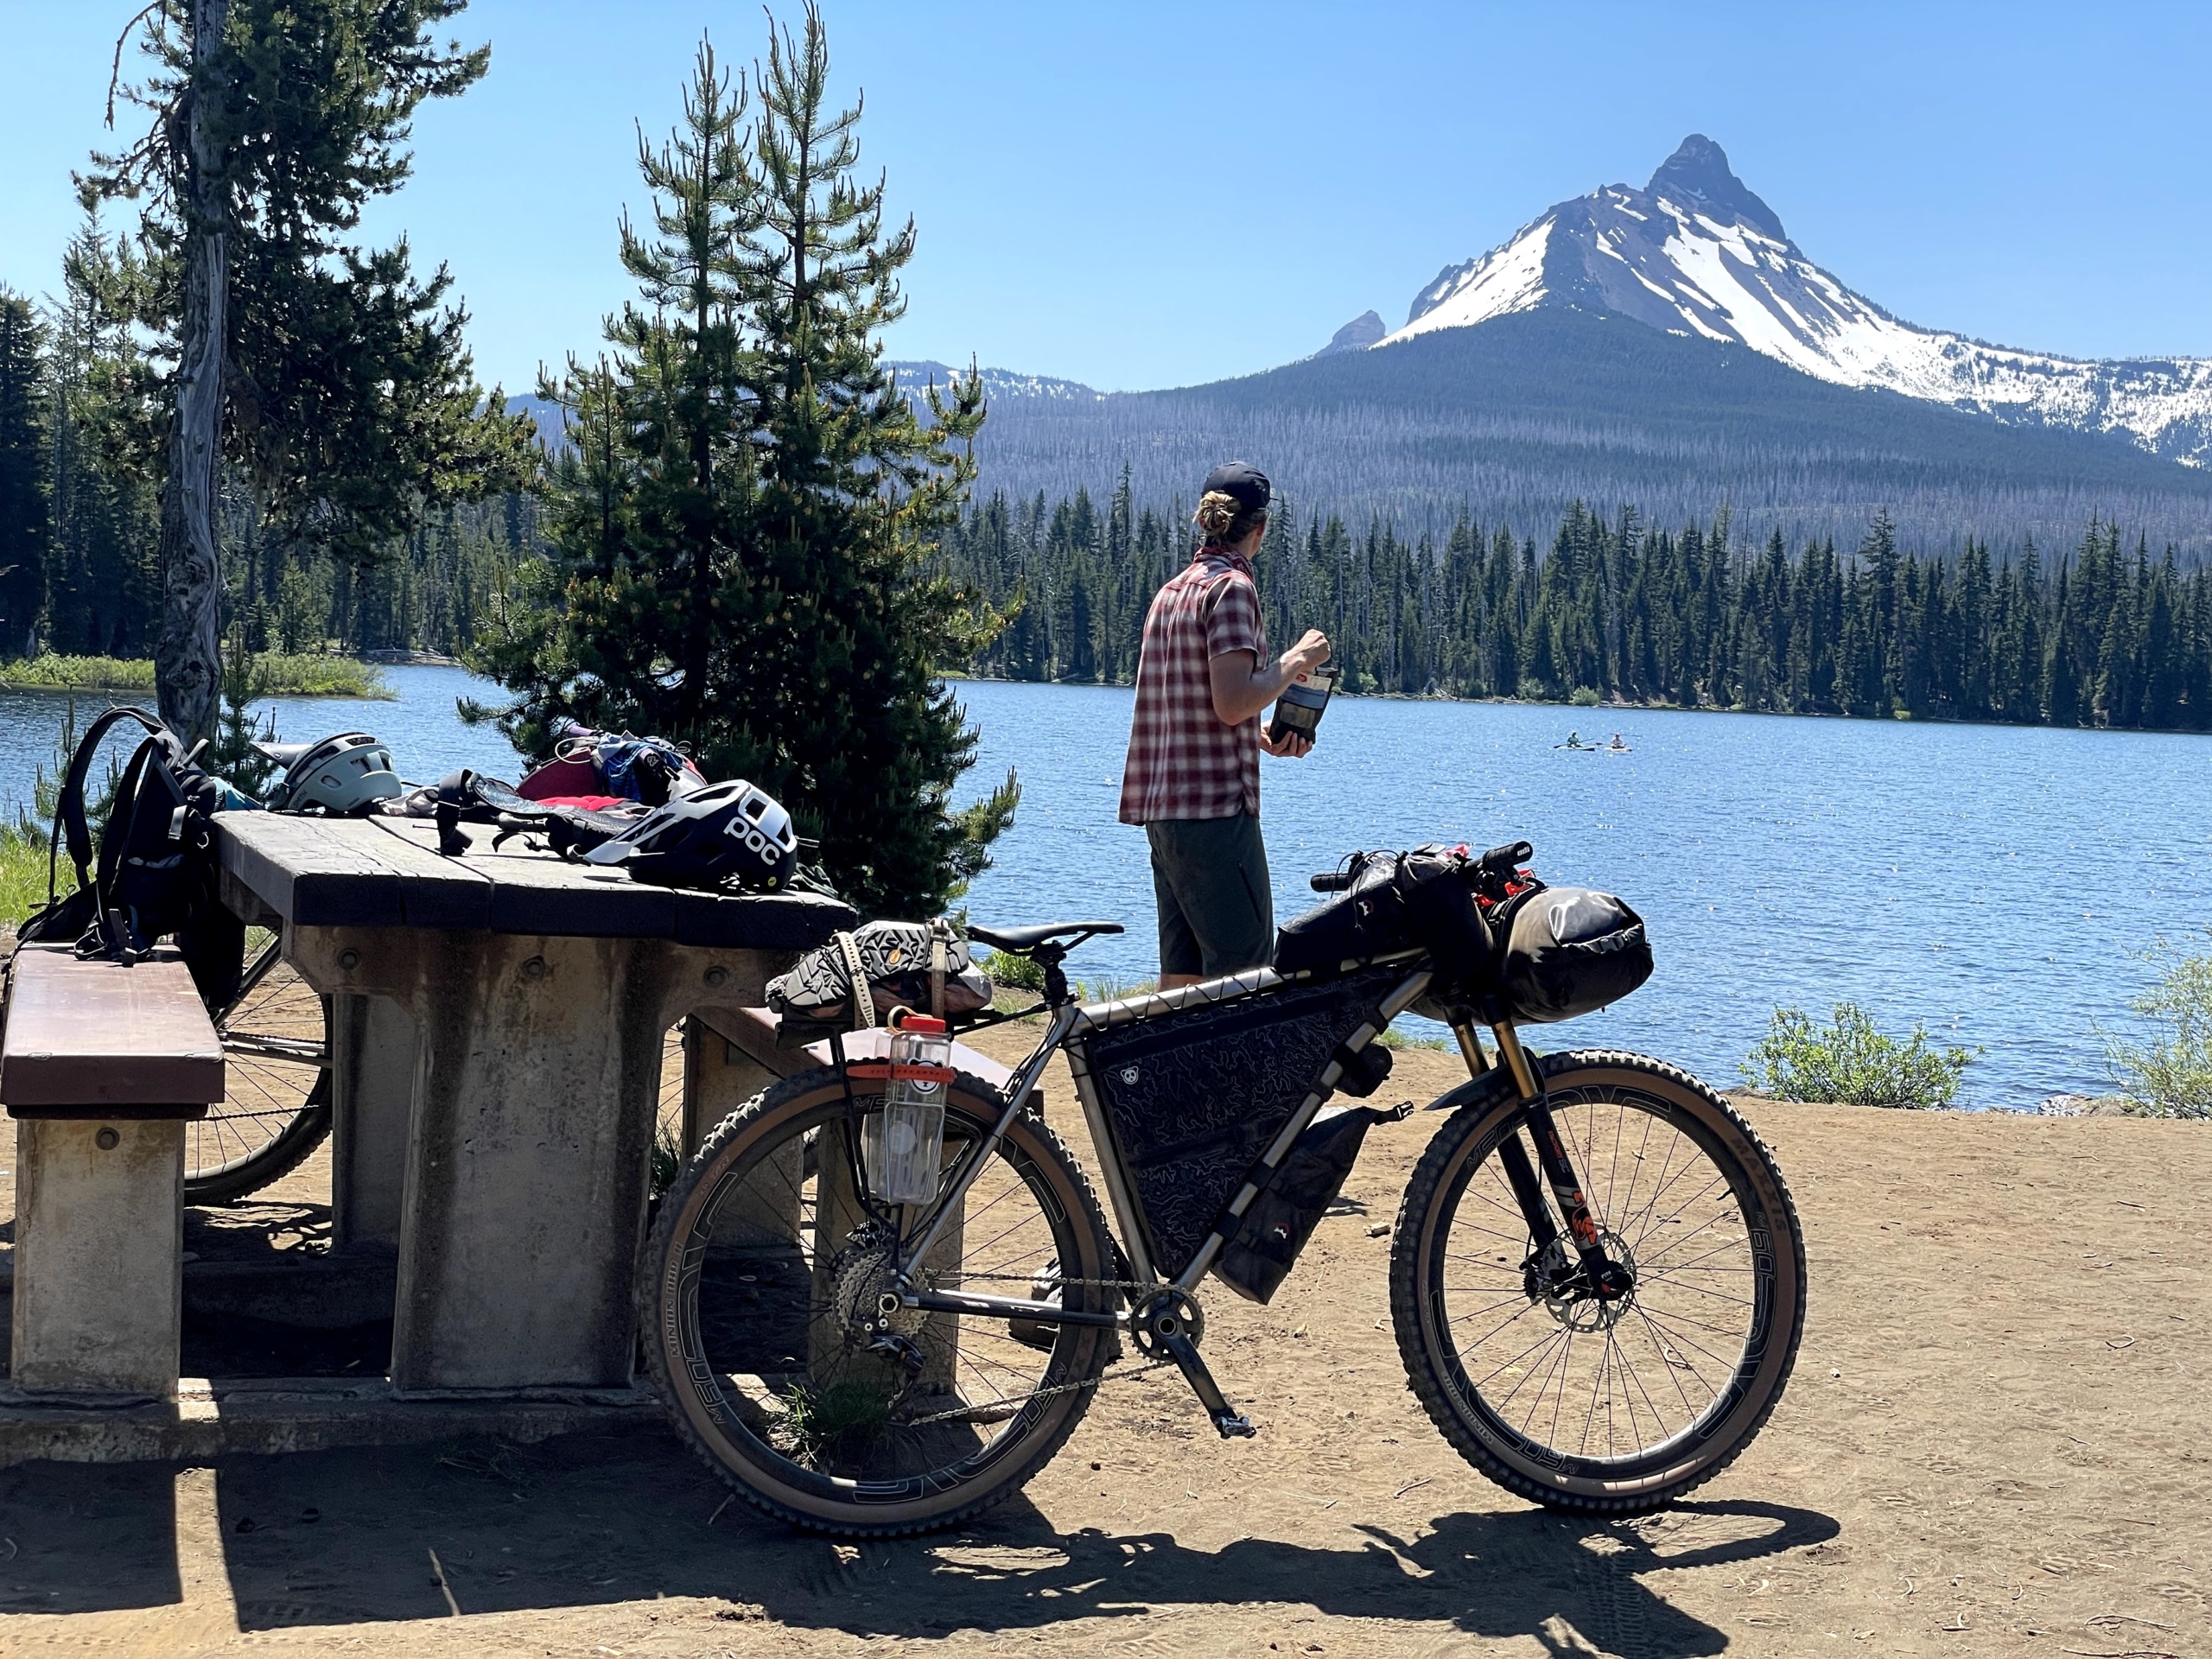
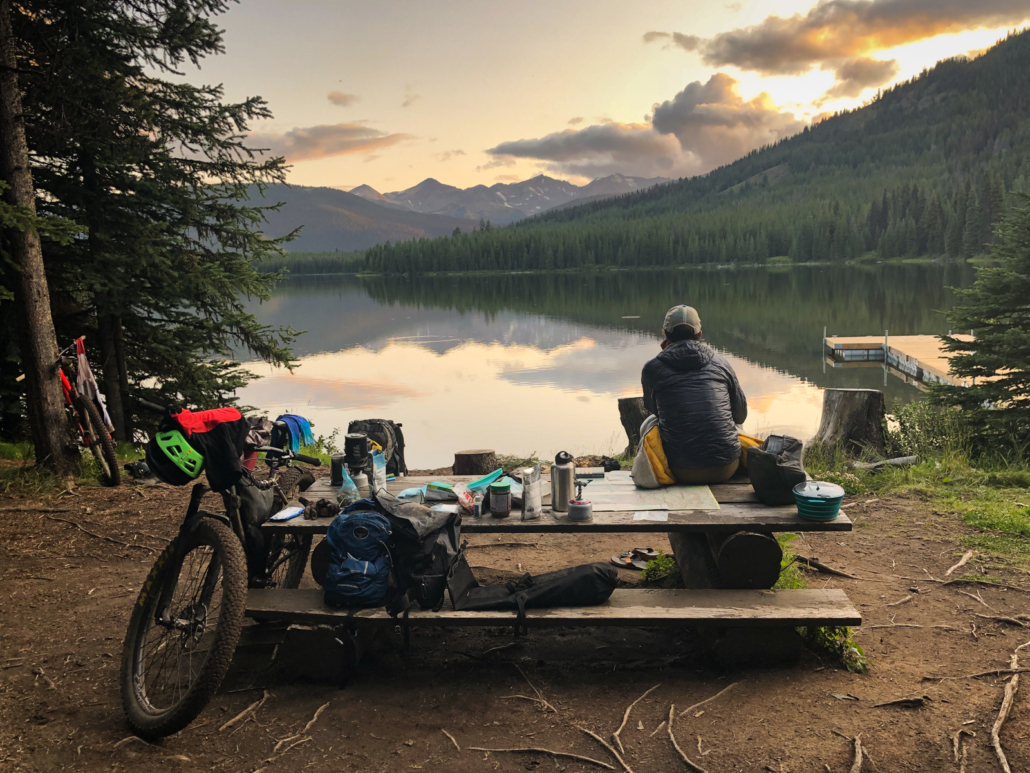
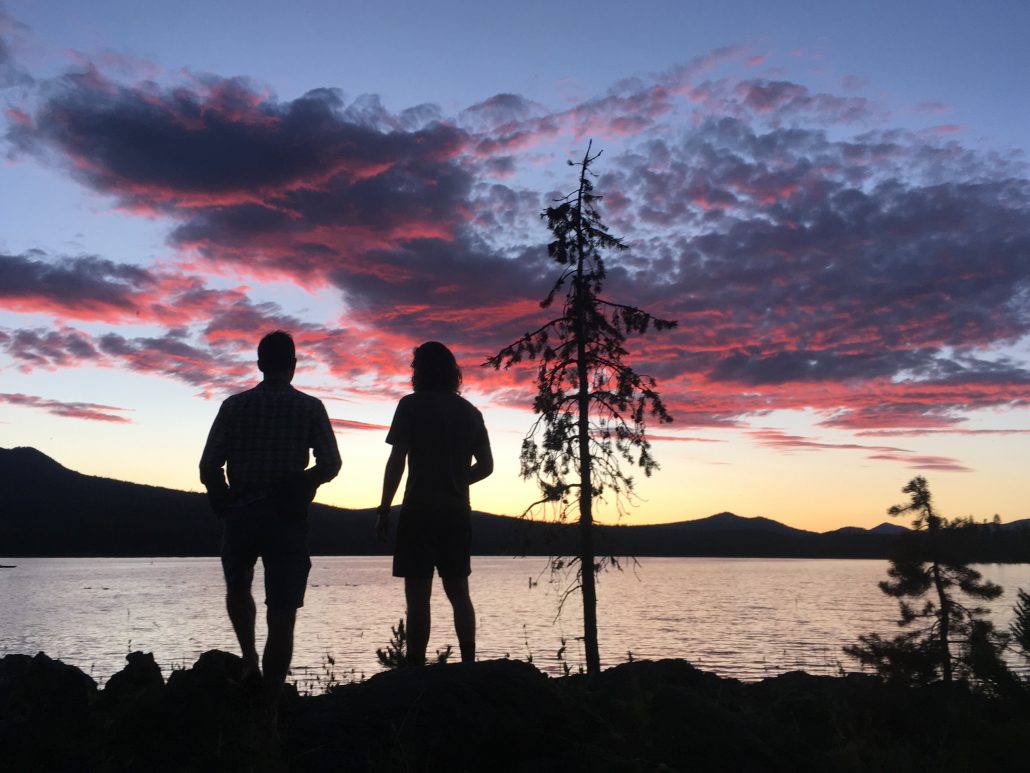
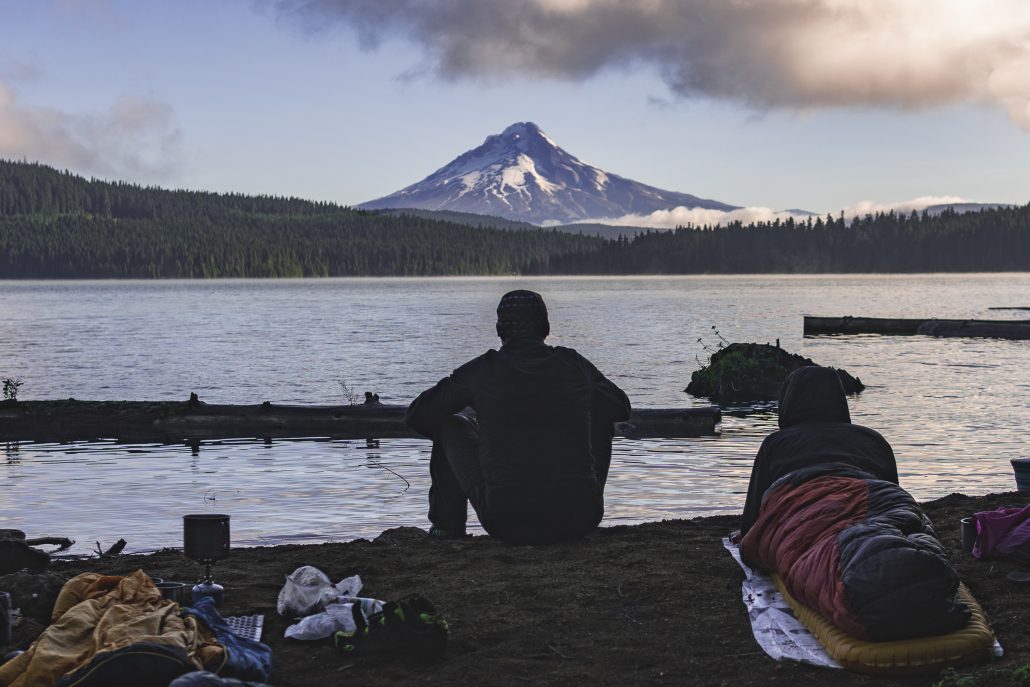
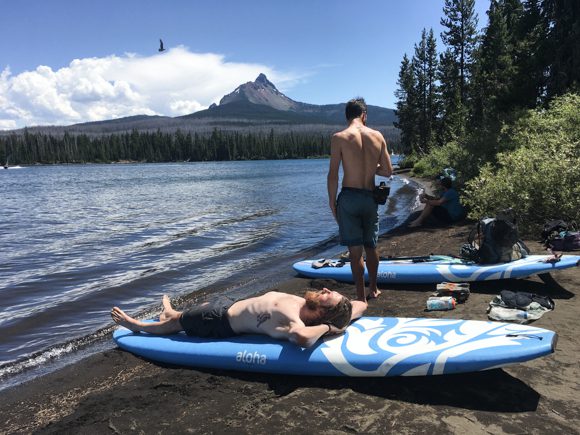
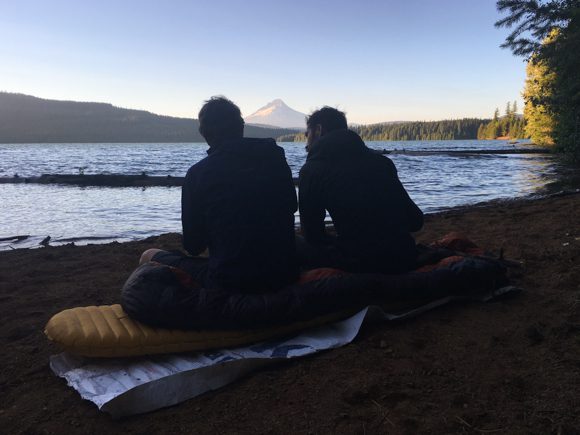
Mason enjoying dinner on a raft on Hidden Lake in Oregon.
All the plant-based foodz
Ohhhh this fresh OJ was so good in Spain.
If you carry enough cherries, you can hand them out to hungry folks...like this fruitarian on the Colorado Trail!
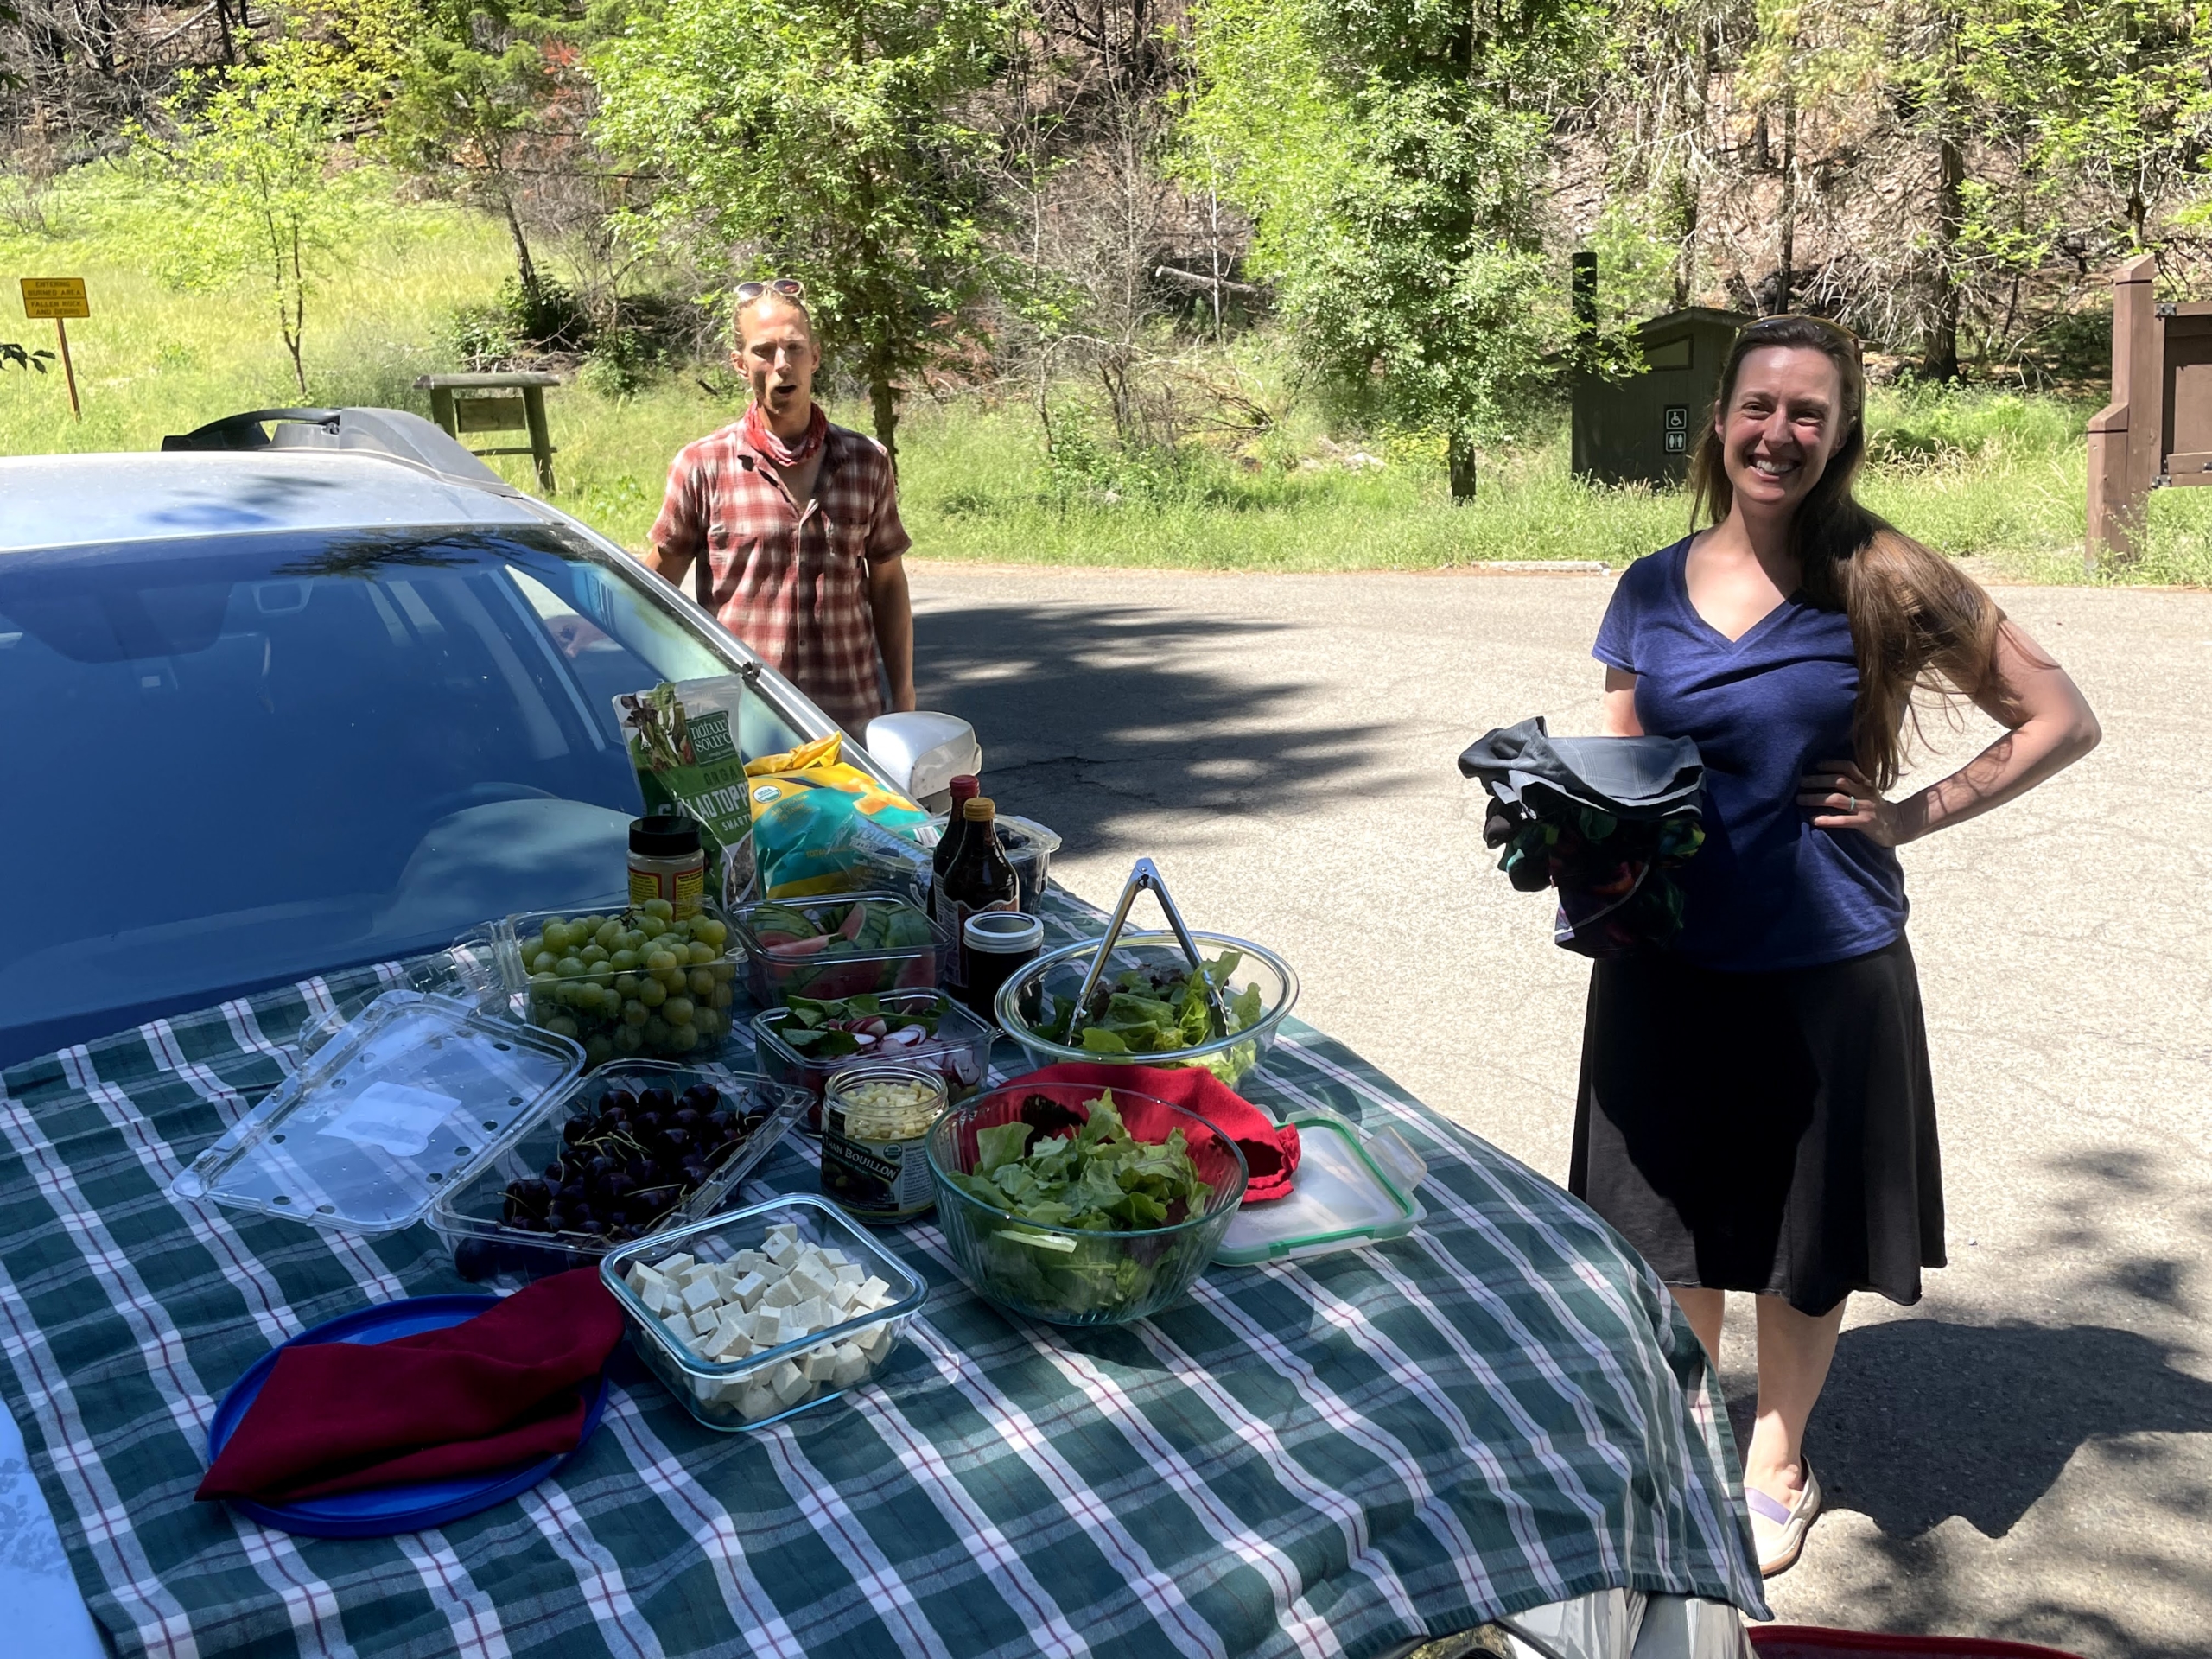
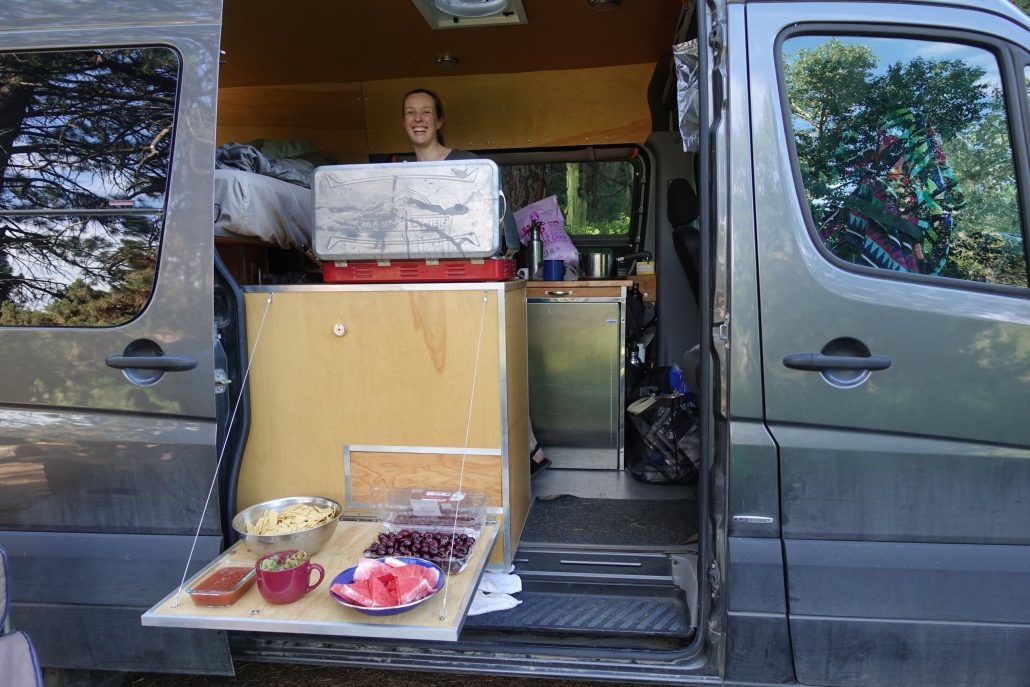
Chelsea rolled up with exactly what we needed at the end of the Three Sisters, Three Rivers trip.
A giant meal in Leadville during the Colorado Trail.
Scored this in Frisco on the Colorado Trail.
A huge dinner salad in Portugal.
Dinner with a view on the CT.
I can't tell you how flayed I was before recharging with this wrap (and another meal) in Silverton on the CT.
Mason and I digging into pizza in Frisco during the Colorado Trail.
OMG was this veg sushi delicious.
We scored a lot of these on tour in Valencia.
Never roll up on the Monarch Crest general store when you're hungry!
Mason whipping up an amazing wrap during a thunderstorm break on the Colorado Trail.
Another amazing trail wrap.
Plant-based yogurt and all the fixings in Ronda, Spain.
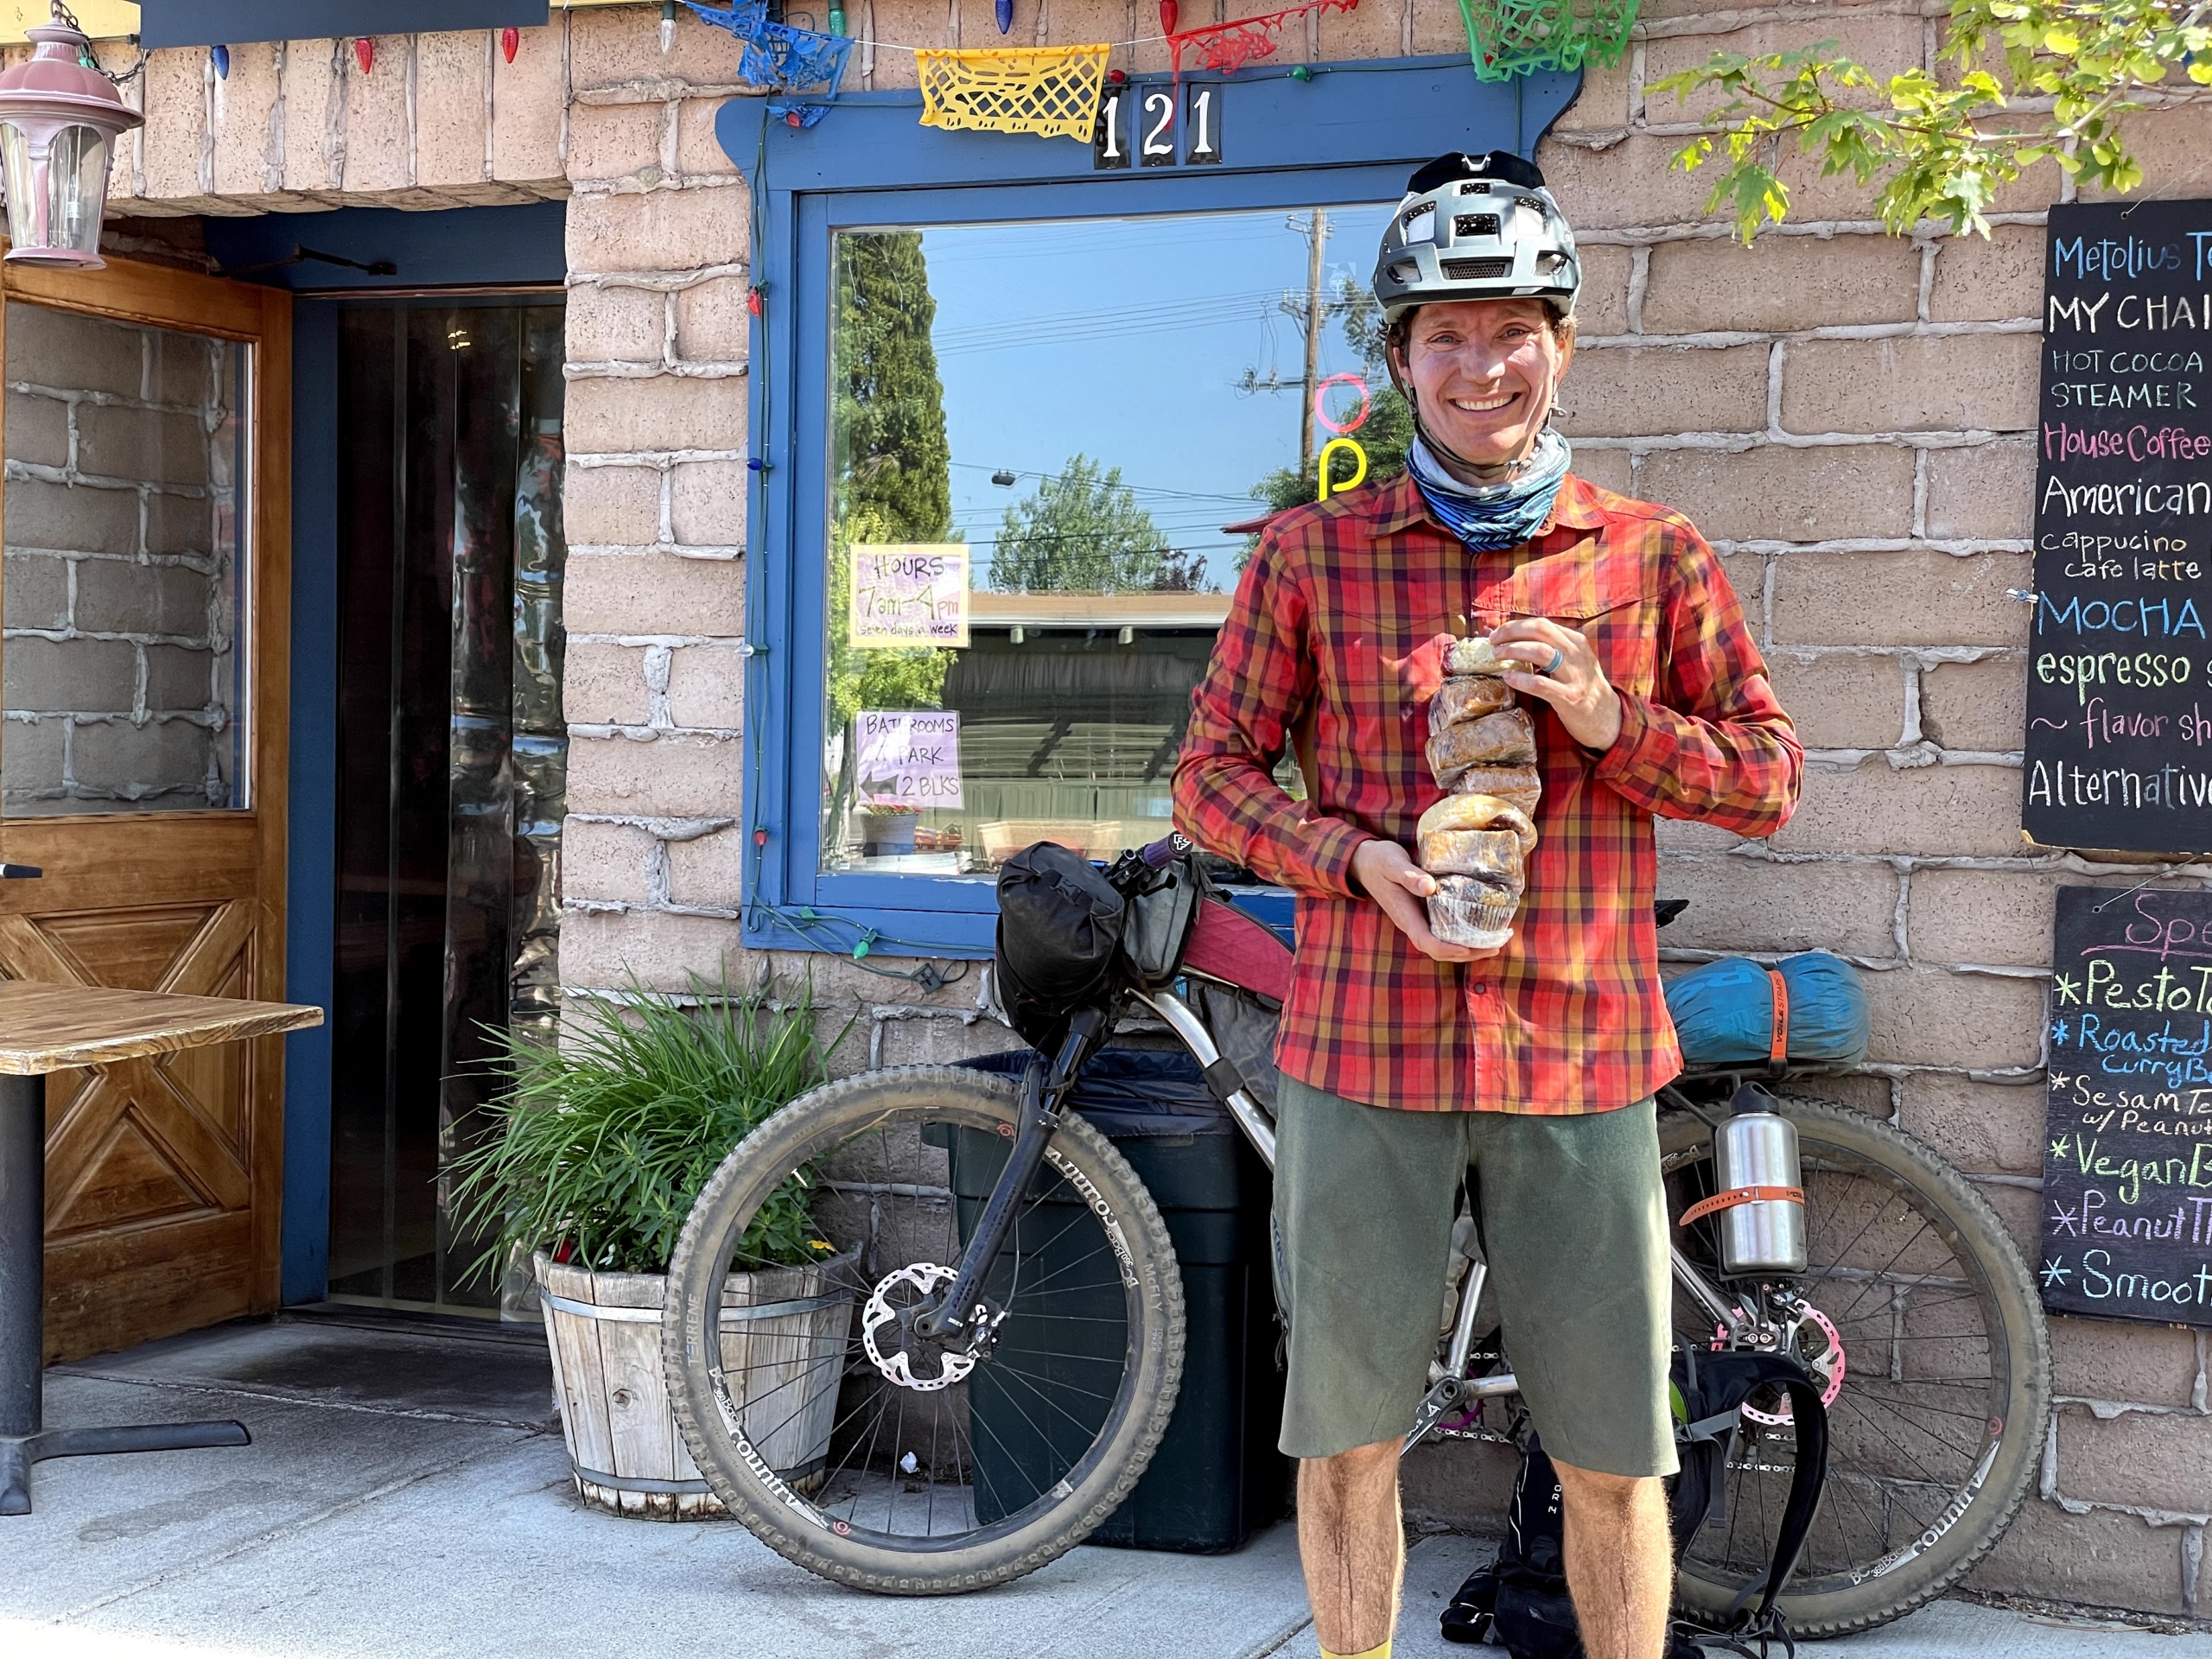
Did I buy 7 and wish I'd bought 10? Yup. (Angelina's in Sisters, OR)
Sometimes shopping hungry can go awry
Trail burrito deep in the Chilcotin Mountains in Canada.
Simply delicious.
Not my fav, but baked beans are always good in a pinch!
Stuffing my face outside a Bio grocery store in Germany.
MY pizza.
An Amish grocery in the Midwest.
Don't forget that plant-based milk! Soja milk is served eveeeerywhere
British breakfast on tour.
Celebrating with a waffle at the end of our US bike tour.
Casey's convenience stores were the best during our US tours.
Enjoying general store provisions during the Odyssey of the VOG. Mmm, fried potato wedges.
https://www.traipsingabout.com/wp-content/uploads/2023/03/vegan-bikepacking-bike-touring-food-38-scaled.jpg7681024Dakotahttps://www.traipsingabout.com/wp-content/uploads/2018/03/Traipsing-About-logo-white-background-450x156.pngDakota2023-03-29 18:03:062023-05-06 14:36:12How to Bikepack on a Plant-Based Diet
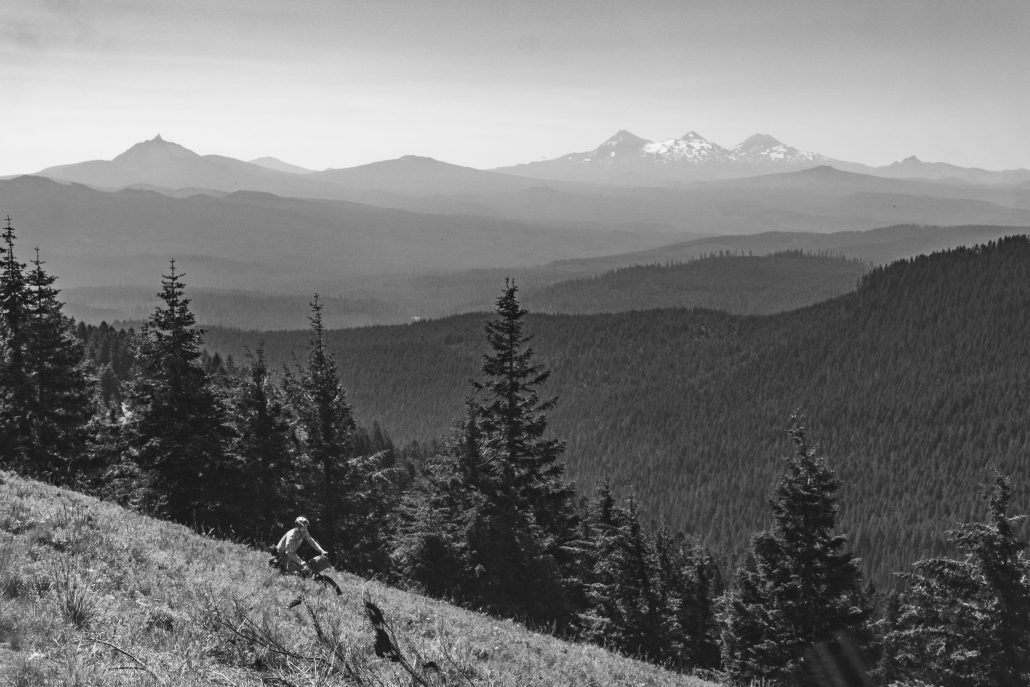
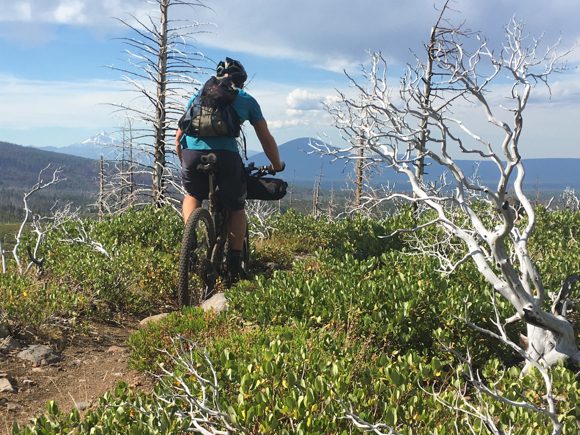
I’d eyed bikepacking in the Oregon coast range quite awhile, so I wasn’t TOO sad to pivot from a fall bikepacking plan from Idaho after a forest fire messed up plans.
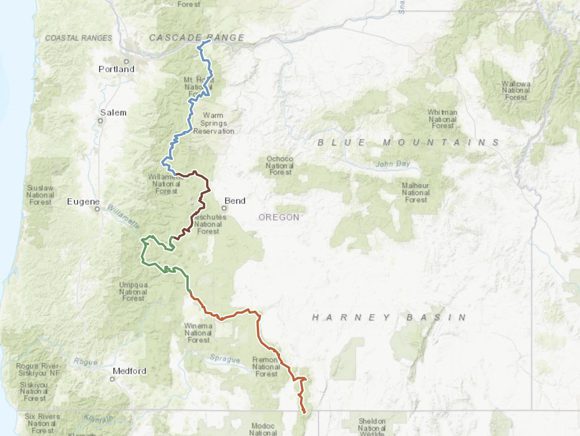
The VOG it was! My friends Brady, Tyler and I changed plans and met in Salem, Oregon to pedal out to the coast and back via some steep forest roads. With no research except downloading the GPS route, we were off.
Overall, it was an excellent voyage starting in the hot summer of the Willamette Valley, crossing over the coast range to cool, misty coast weather up the Oregon Coast, and then reversing it. Nicely planned, Ben! (Also, thanks for hosting us the night before.)
Below is my trip report for bikepacking the Odyssey of the VOG. I wrote this as a resource for folks looking to bikepack this route, so free to skip to the specific sections below.
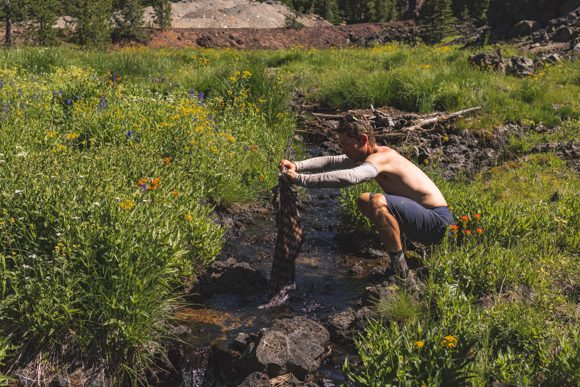
Nothing like break midday to soak in a cold creek. (Photo Brady Lawrence.)
Bikepacking Route Description
We spent six days wheeling in a clockwise loop from Salem to Pacific City on the coast and back. The route covers a mix of pavement and dirt logging roads.
Fair warning that the logging roads are STEEP. We frequently ground up 15%+ grades. Pack light (I didn’t) and gear down (I did). My quads were pissed that I didn’t warn them in advance, although Brady and Tyler are unstoppable on a bike and were unfazed.
Also, those logging roads are used to, well, log. Oregon has a long history of clearcutting and we rode through our fair share of them. They aren’t serene forests, but I’m fine with seeing the reality of where wood comes from, and it further reminded me that clearcutting is so.incredibly.destructive.
Clearcuts suck.
Caveat: We diverged from the route at mile 236 to head straight to Salem because a) Tyler’s derailleur blew up under the force from his blunderbuss legs, forcing him to cut the trip short and hitchhike to Portland, and b) while we were still having fun, we were ready to have other fun. We’ve all toured so much that perfectionism ain’t the name of the game!
Instead, Brady and I headed straight south from Yamhill 50 miles to Salem on cruisy back roads. This cut out Hagg Lake and the final section through the foothills of the coast range.
The shift in landscapes: farmland, coast range, ocean. From Willamette Valley farmland to the forested coast range with plenty of icy streams to the Pacific Ocean and back.
Eating at The Breadboard in Fall City! Amazing food, friendly, cheery owners and patrons. “Welcome to the gay Alps!” said the proprietor, something you nevereverever hear in a small rural logging town.
Somehow we each wound up doing a (totally sober) catwalk in front of a crowd of cheering people at The Breadboard.
Remoteness! Other than the coast and restocking in town, we saw basically no one.
Hiking through the Valley of the Giants. (Tip: leave your bike at the top and hike down. Ask Brady how he knows.)
Restocking at American Market near Grande Ronde. Mmm, junk food.
The smooth, silky road north of Grande Ronde (offset by the grinder climb in the heat up to Lifesaver Lake, as I just renamed it).
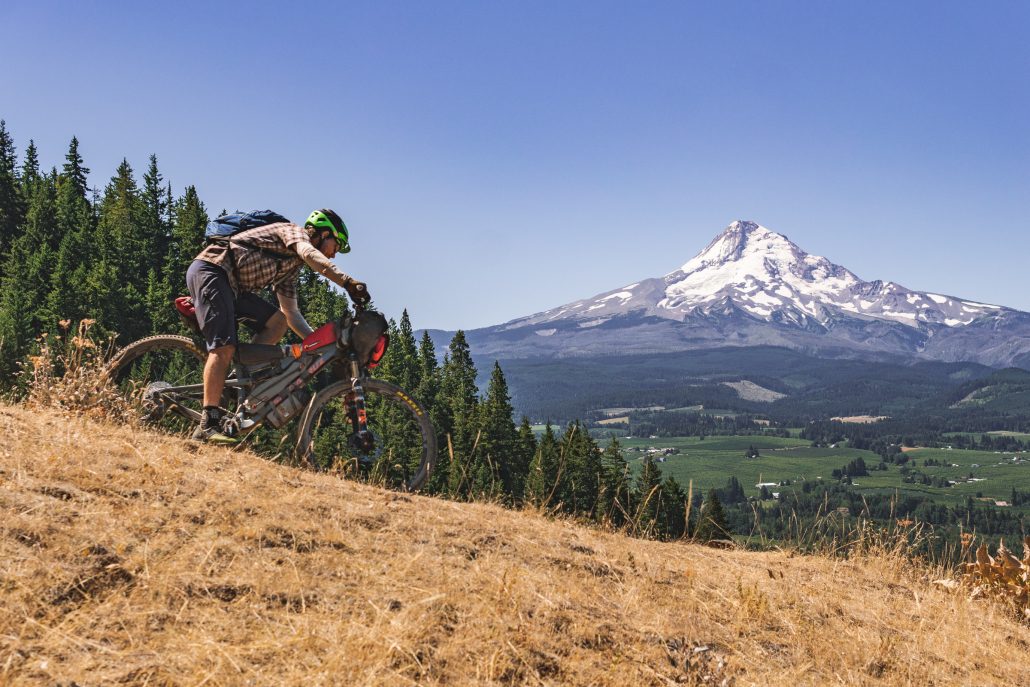
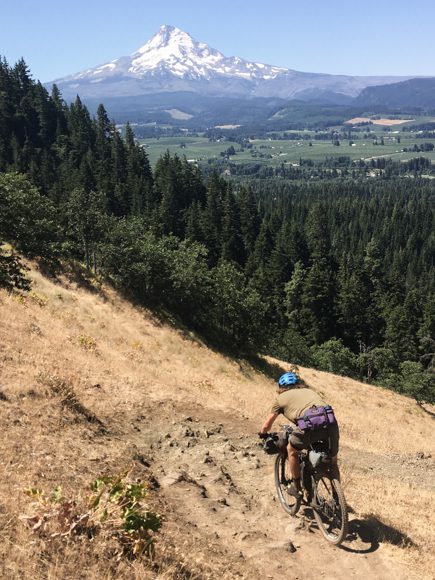
The OMG-biking-is-wonderful descent from Mt. Hebo over the top of the coast range. From 95 degrees to 60 in 20 minutes of swooping descending, grins plastered on our faces.
Finding a still-burning beach fire in Pacific City and enjoying a misty fireside chat.
Pedaling up the coast with ocean views the entire way…and not too much traffic!
The small things: Watermelon. Fried potato wedges at a gas station. Coconut water. Conversation about science, photography, and how to live well. Uproarious laughter.
Surviving a hike-a-bike in 97 degrees up the world’s steepest fire road with water running low. One of those “is this worth it?” moments for me.
Brady enjoying the death hike-a-bike.
Kind strangers, always. The guy who came over just to show us his intricately carved walking sticks. The party-goers at The Breadboard in Fall City recommending places to camp. A goateed dude with two knee replacements who loves his ebike. The hunter who saved us with a gallon of water.
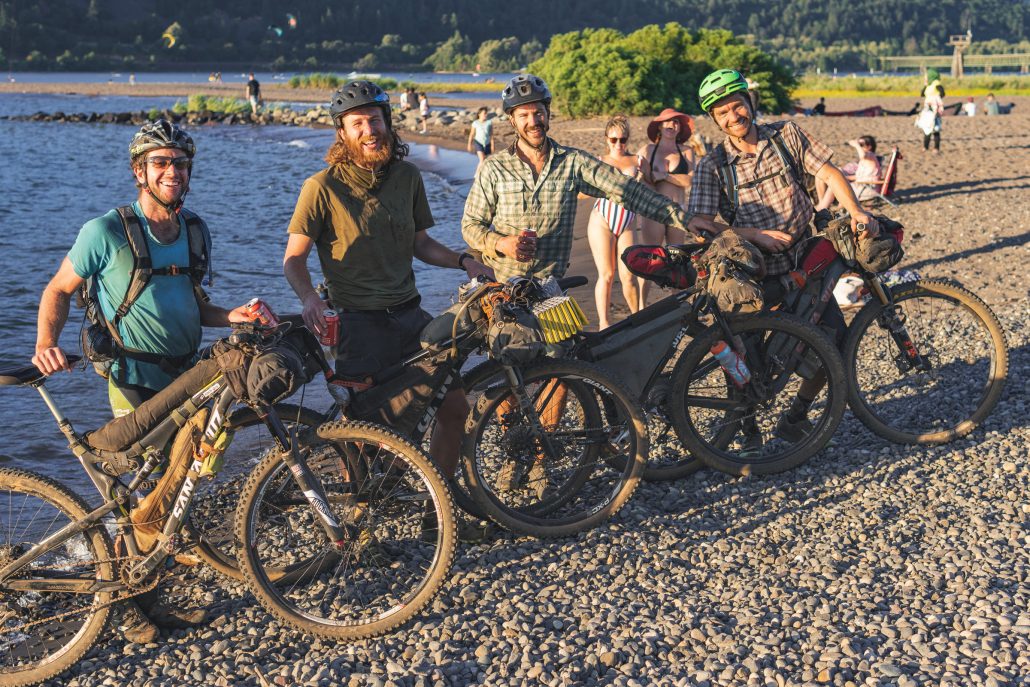
Easygoing comradeship with Brady and Tyler, two excellent travel companions!
Another injury-free, successful trip.
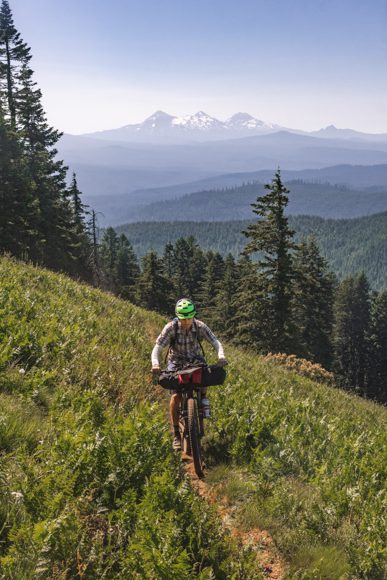
Lots of punchy uphill on this trip, but it sure made for smiles on the way down. (Photo Brady Lawrence.)
Dig this post and want more like it? Check out my free 2x/month newsletter for trip reports and much more.
Photo Gallery
Here are some of my favorite photos from the trip. Brady’s eye and skills are fabulous. Click on a thumbnail and scroll through to see them uncropped and larger.
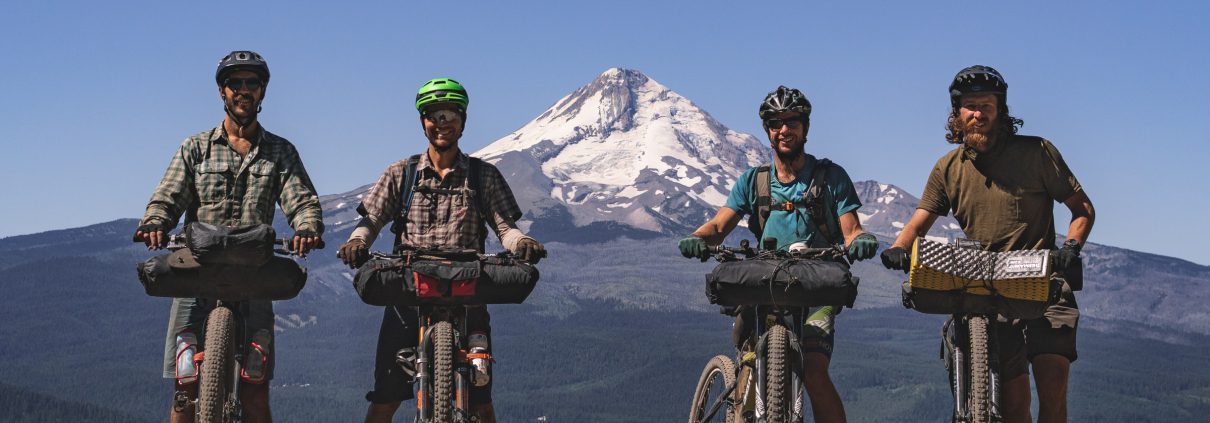
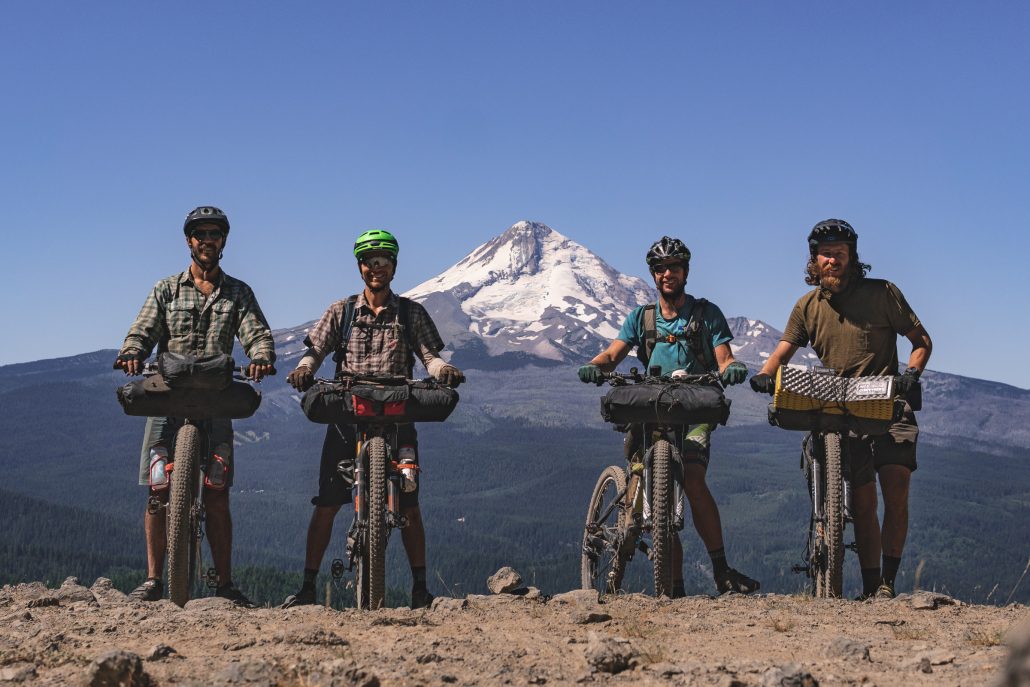
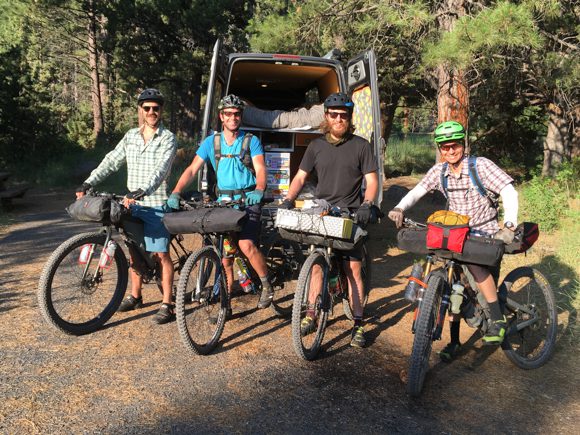
The crew.
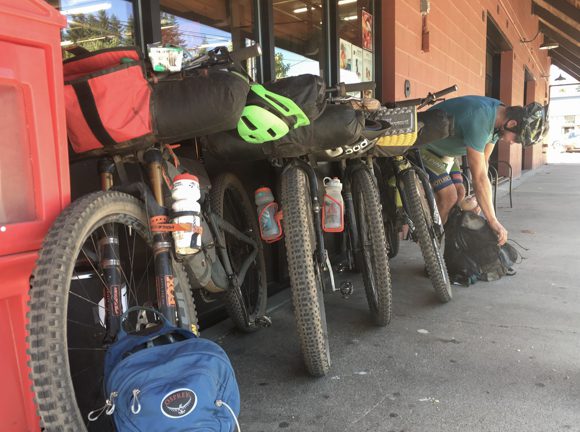
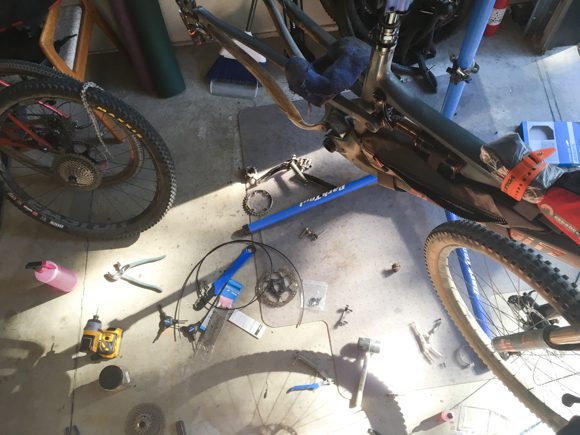
The packing chaos in Ben's garage before the storm.
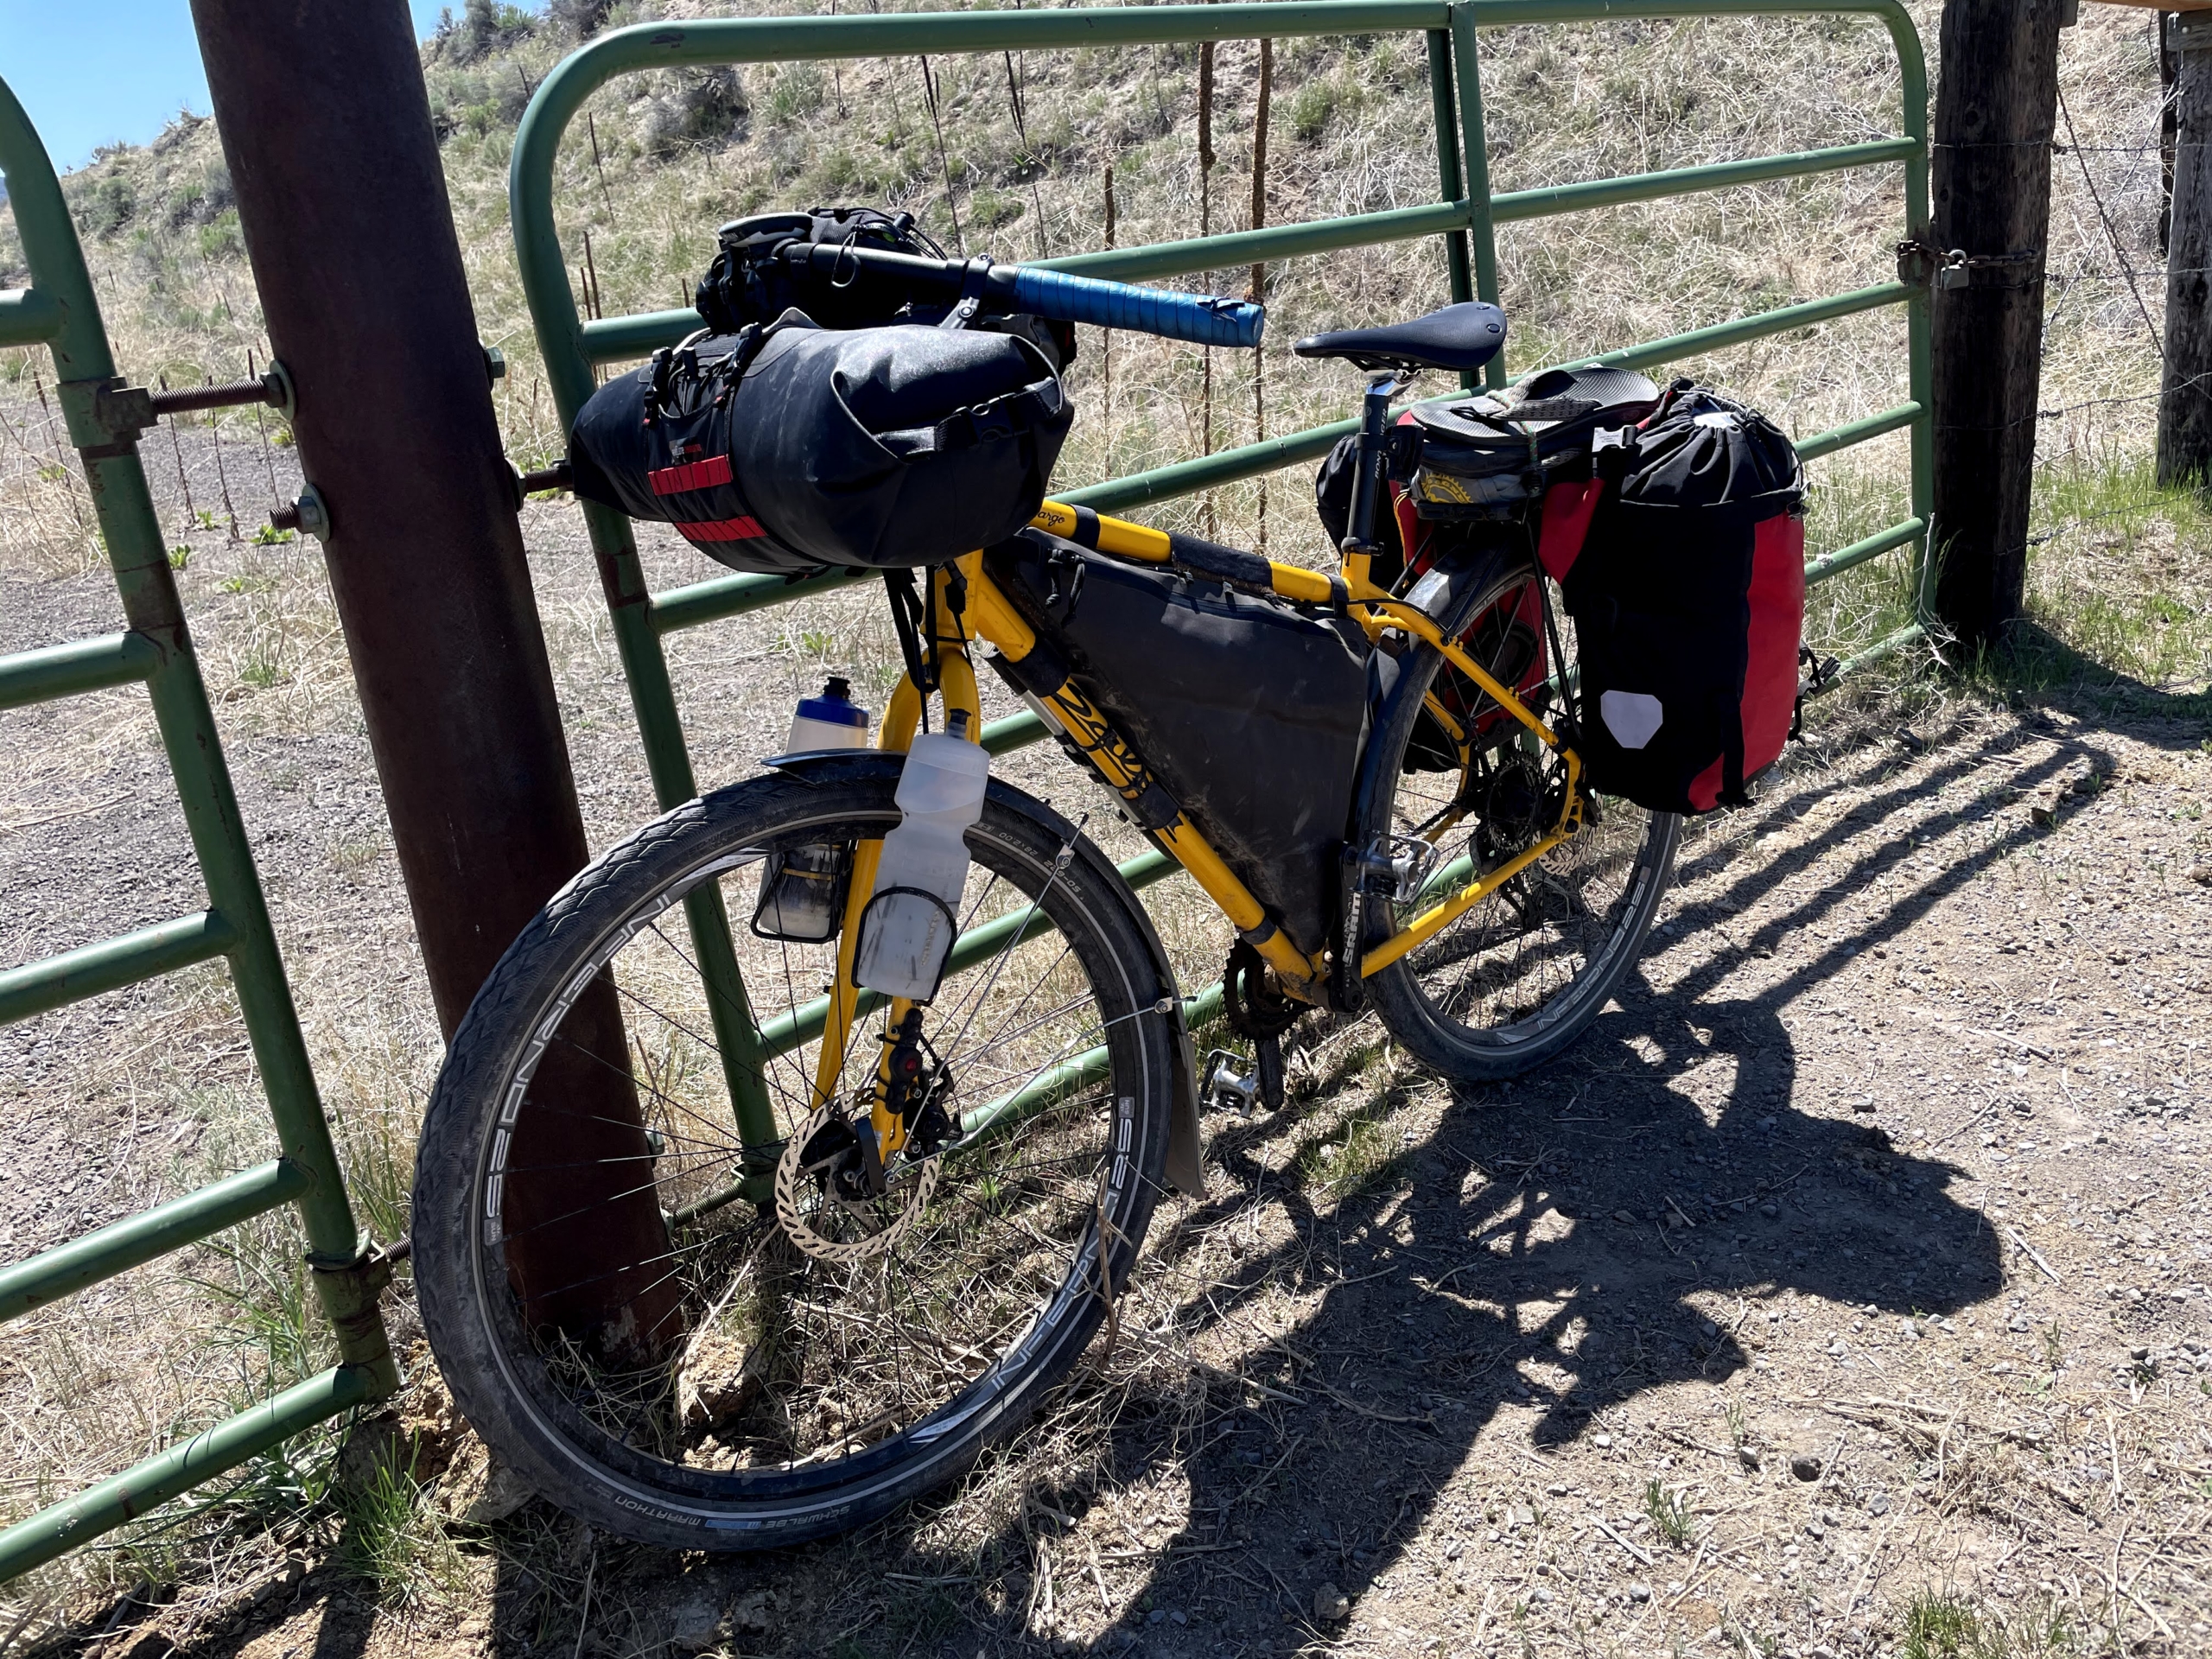
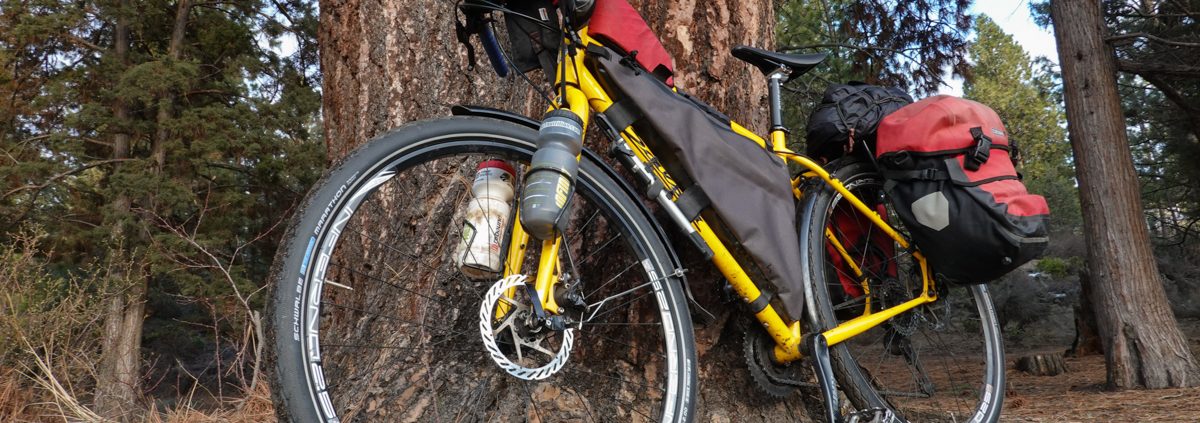
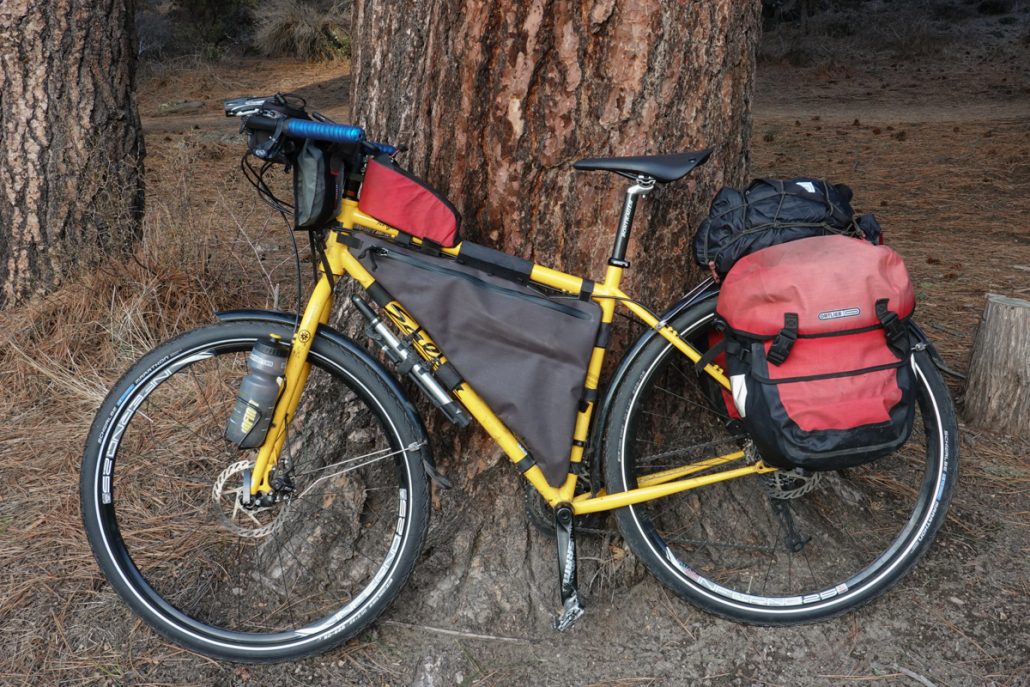
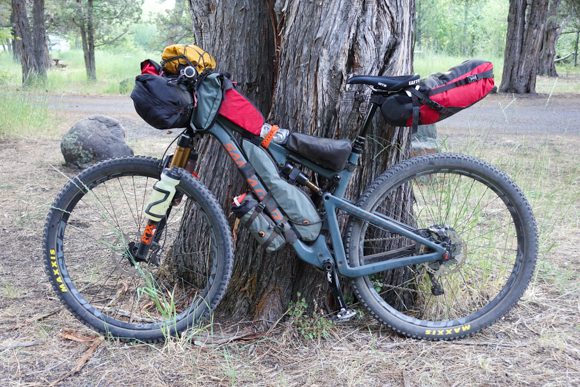
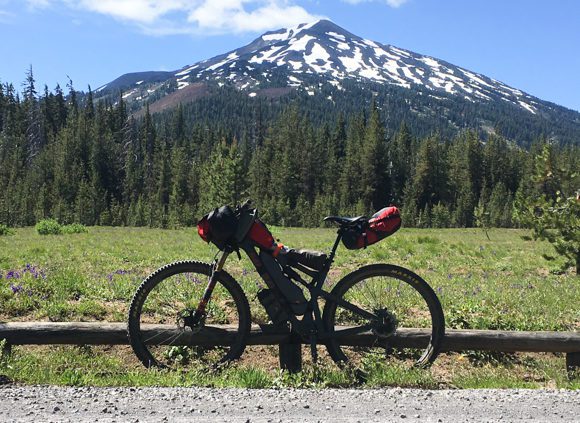
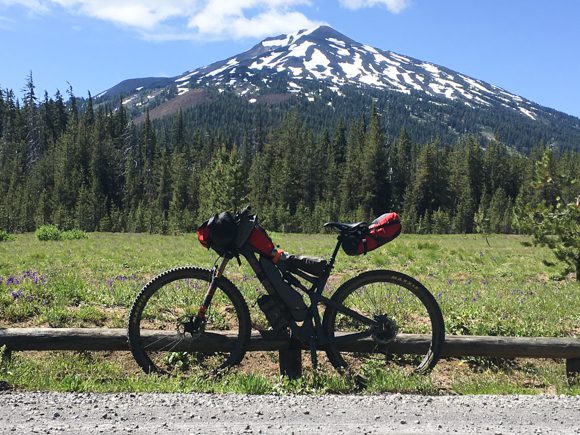
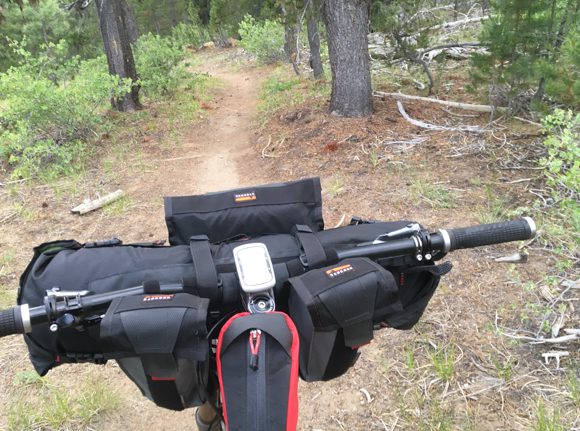
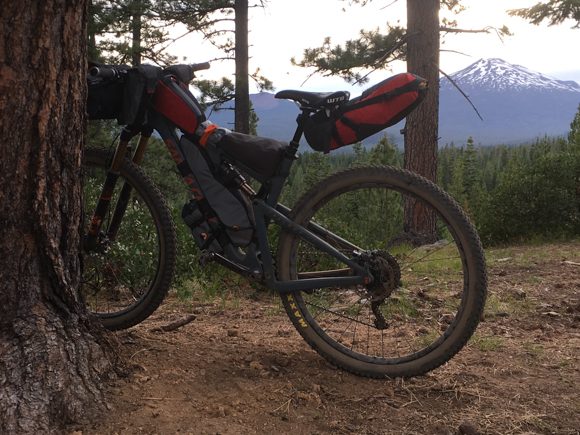
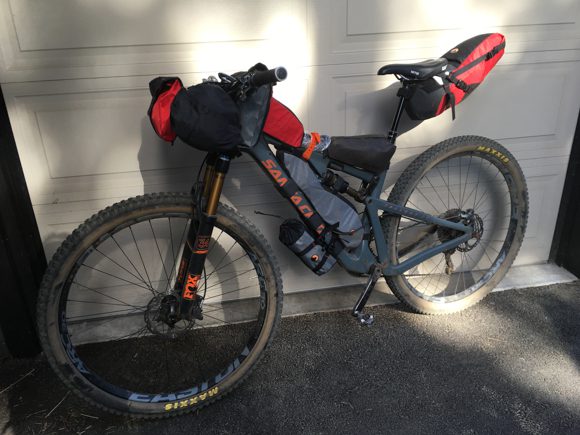
My bike setup for the VOG. Went a biiit heavy on the food to start!
Too. Much. Food. Chuck Waaaagon!
Nothing better after a long day of riding.
Very sad to see Food for the Sole go out of business recently 🙁
Grins.
Bonus to the heat: it makes the cold water feel even better.
Me pretending to send it.
This guy came over to show us the walking sticks he carves.
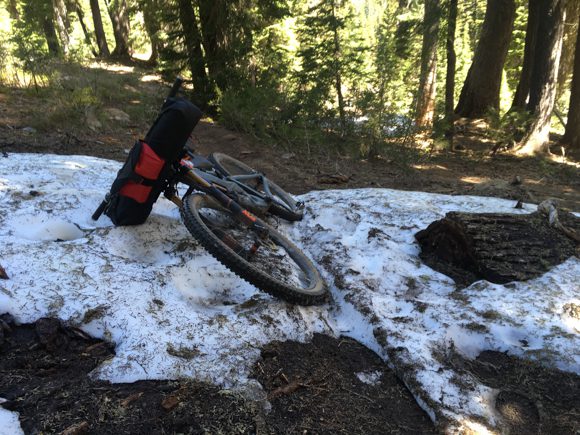
Road's out. Surprisingly hard to push a bike up a steep, loose embankment!
Nothing like break midday to soak in a cold creek.
End of day 2 near VOG.
Hiking in the Valley of Giants. Worth stopping there...when will you ever be back??
Valley of the Giants. That is a BIG Doug fir.
Brady and Tyler getting dinner together, campsite day 2.
Up up up.
Grinding up a coast range climb.
Clearcut land.
Clearcuts suck.
We earned these turns.
Greenery at the coast.
Refueling at American Market. A real winner of a convenience store!
Target practice.
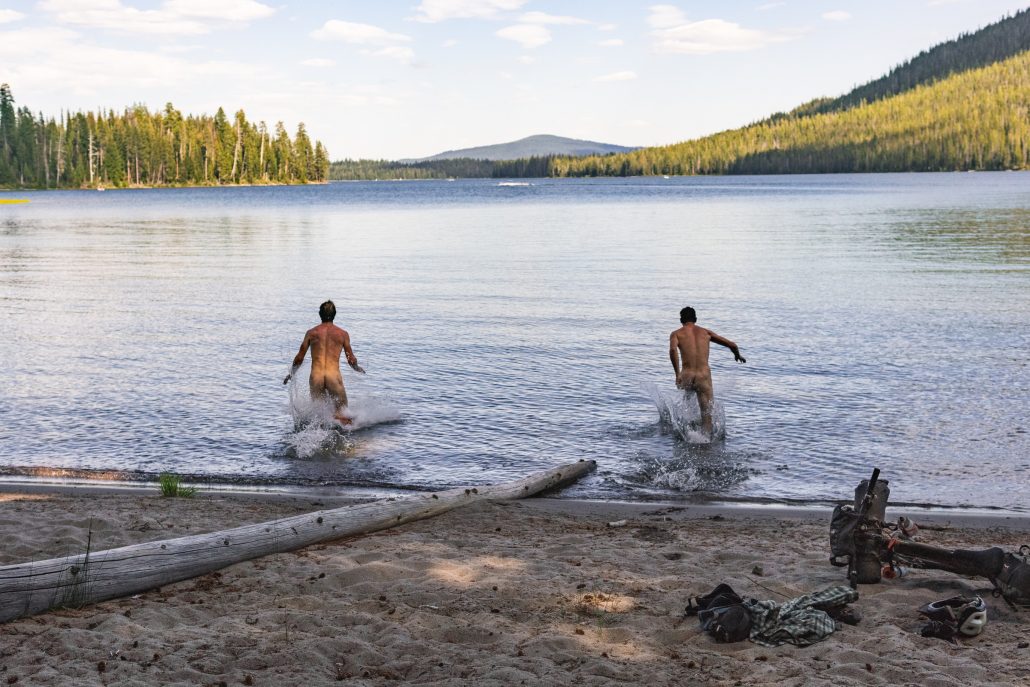
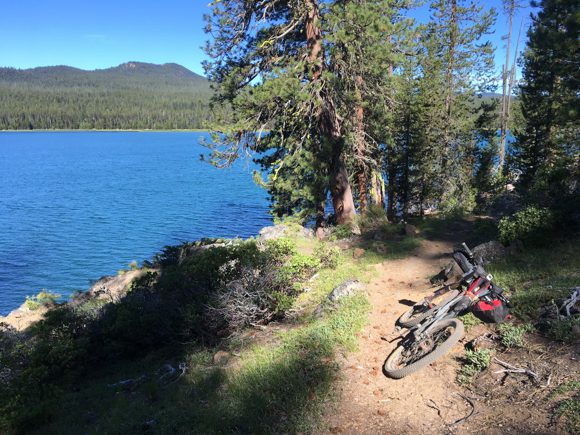
We jumped in juuuust about every body of water we encountered.
Top of Mt. Hebo.
Brady with the photographers eye!
Screaming down Mt. Hebo.
The old Hebo Hotel near the coast.
Fueling up at the Hebo Market. Super nice staff there!
Yours truly.
Tyler, ever-cheery and awesome.
Brady, the man behind the lens.
Checking out the beach in Pacific City.
Mark, a Pacific Coast hiker we shared a campsite with.
We found a still-burning beach fire and hung out for awhile.
Cute bunnies. I didn't actually feed them, but other people clearly do.
Pacific City bunny.
Dinner in Tillamook. We moved the picnic table out of the sun...
Cruising highway 1 on the coast.
Beach views on Highway 1.
Misty coastal magic.
Coast and forest overlay.
Coast views at the lighthouse.
Road out...
Pausing mid-climb to eat.
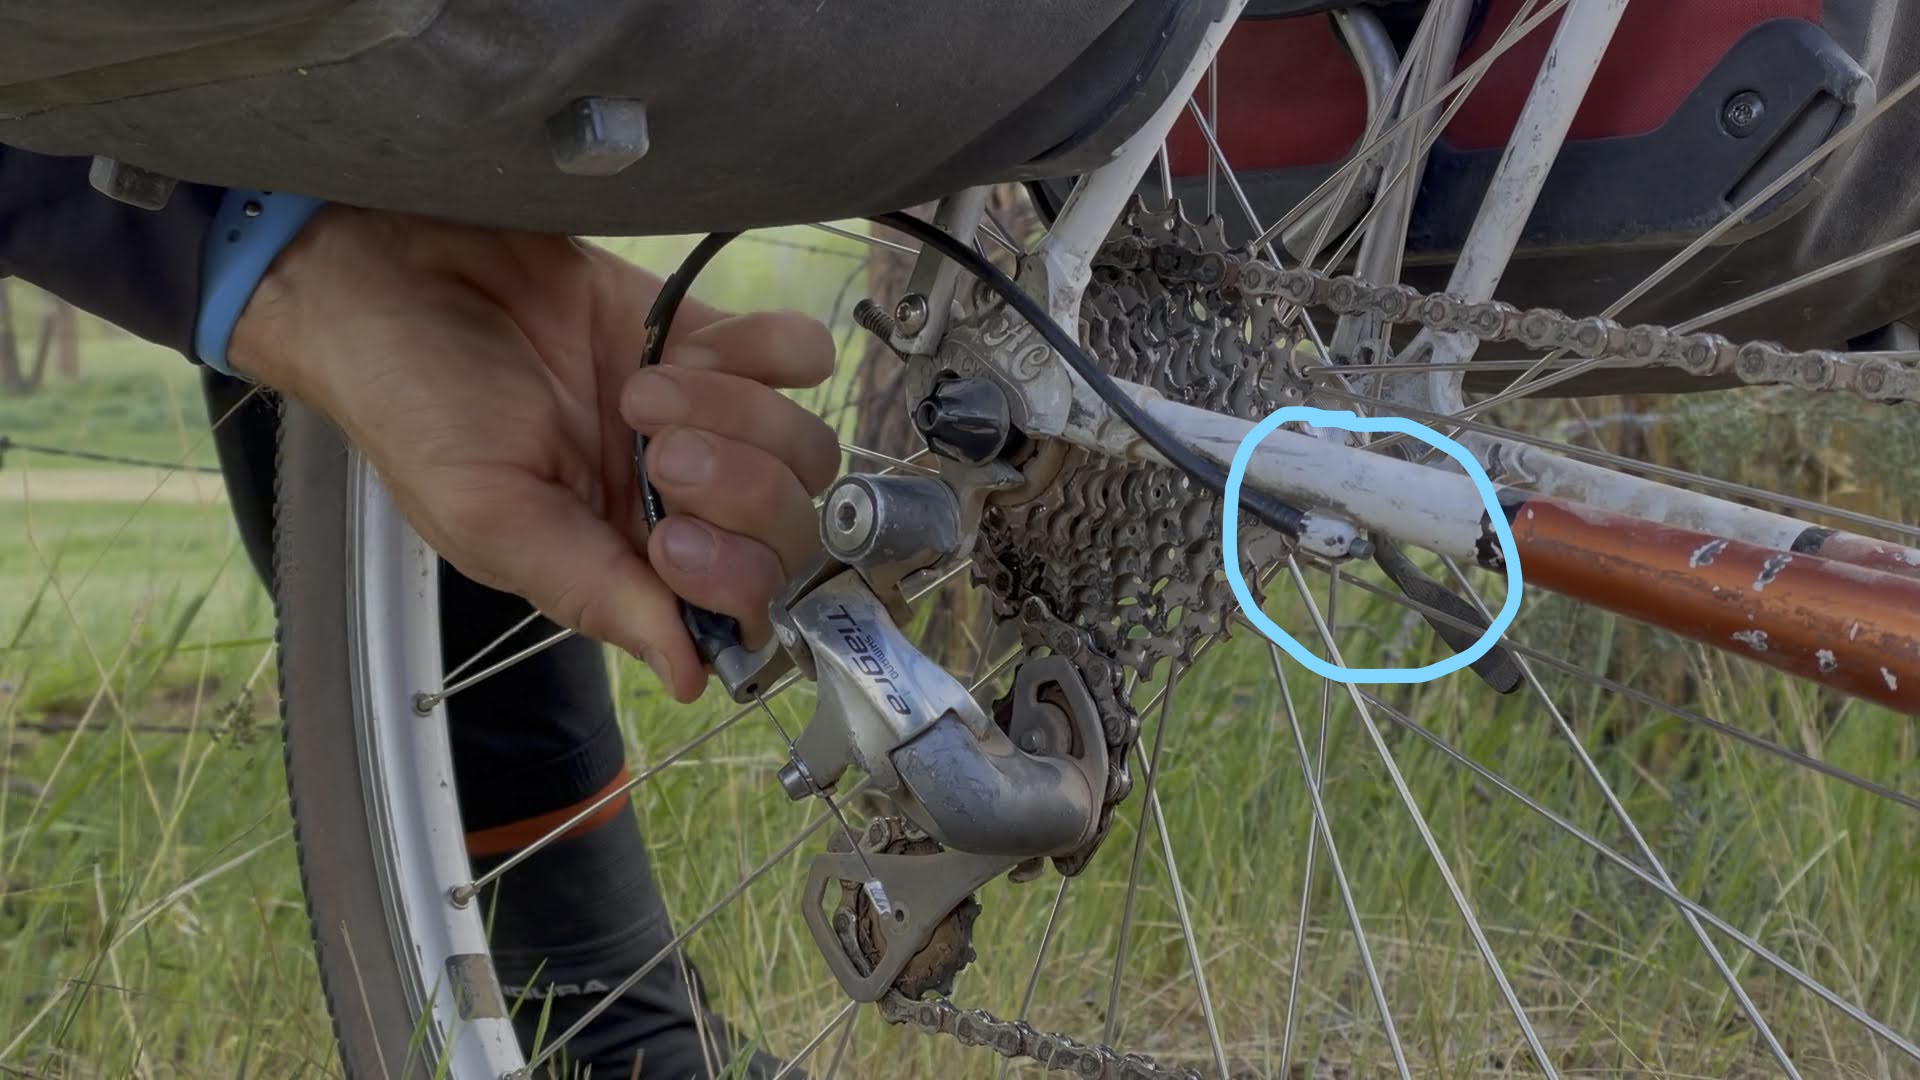
Tyler's massive quads ripping his derailleur right off the bike.
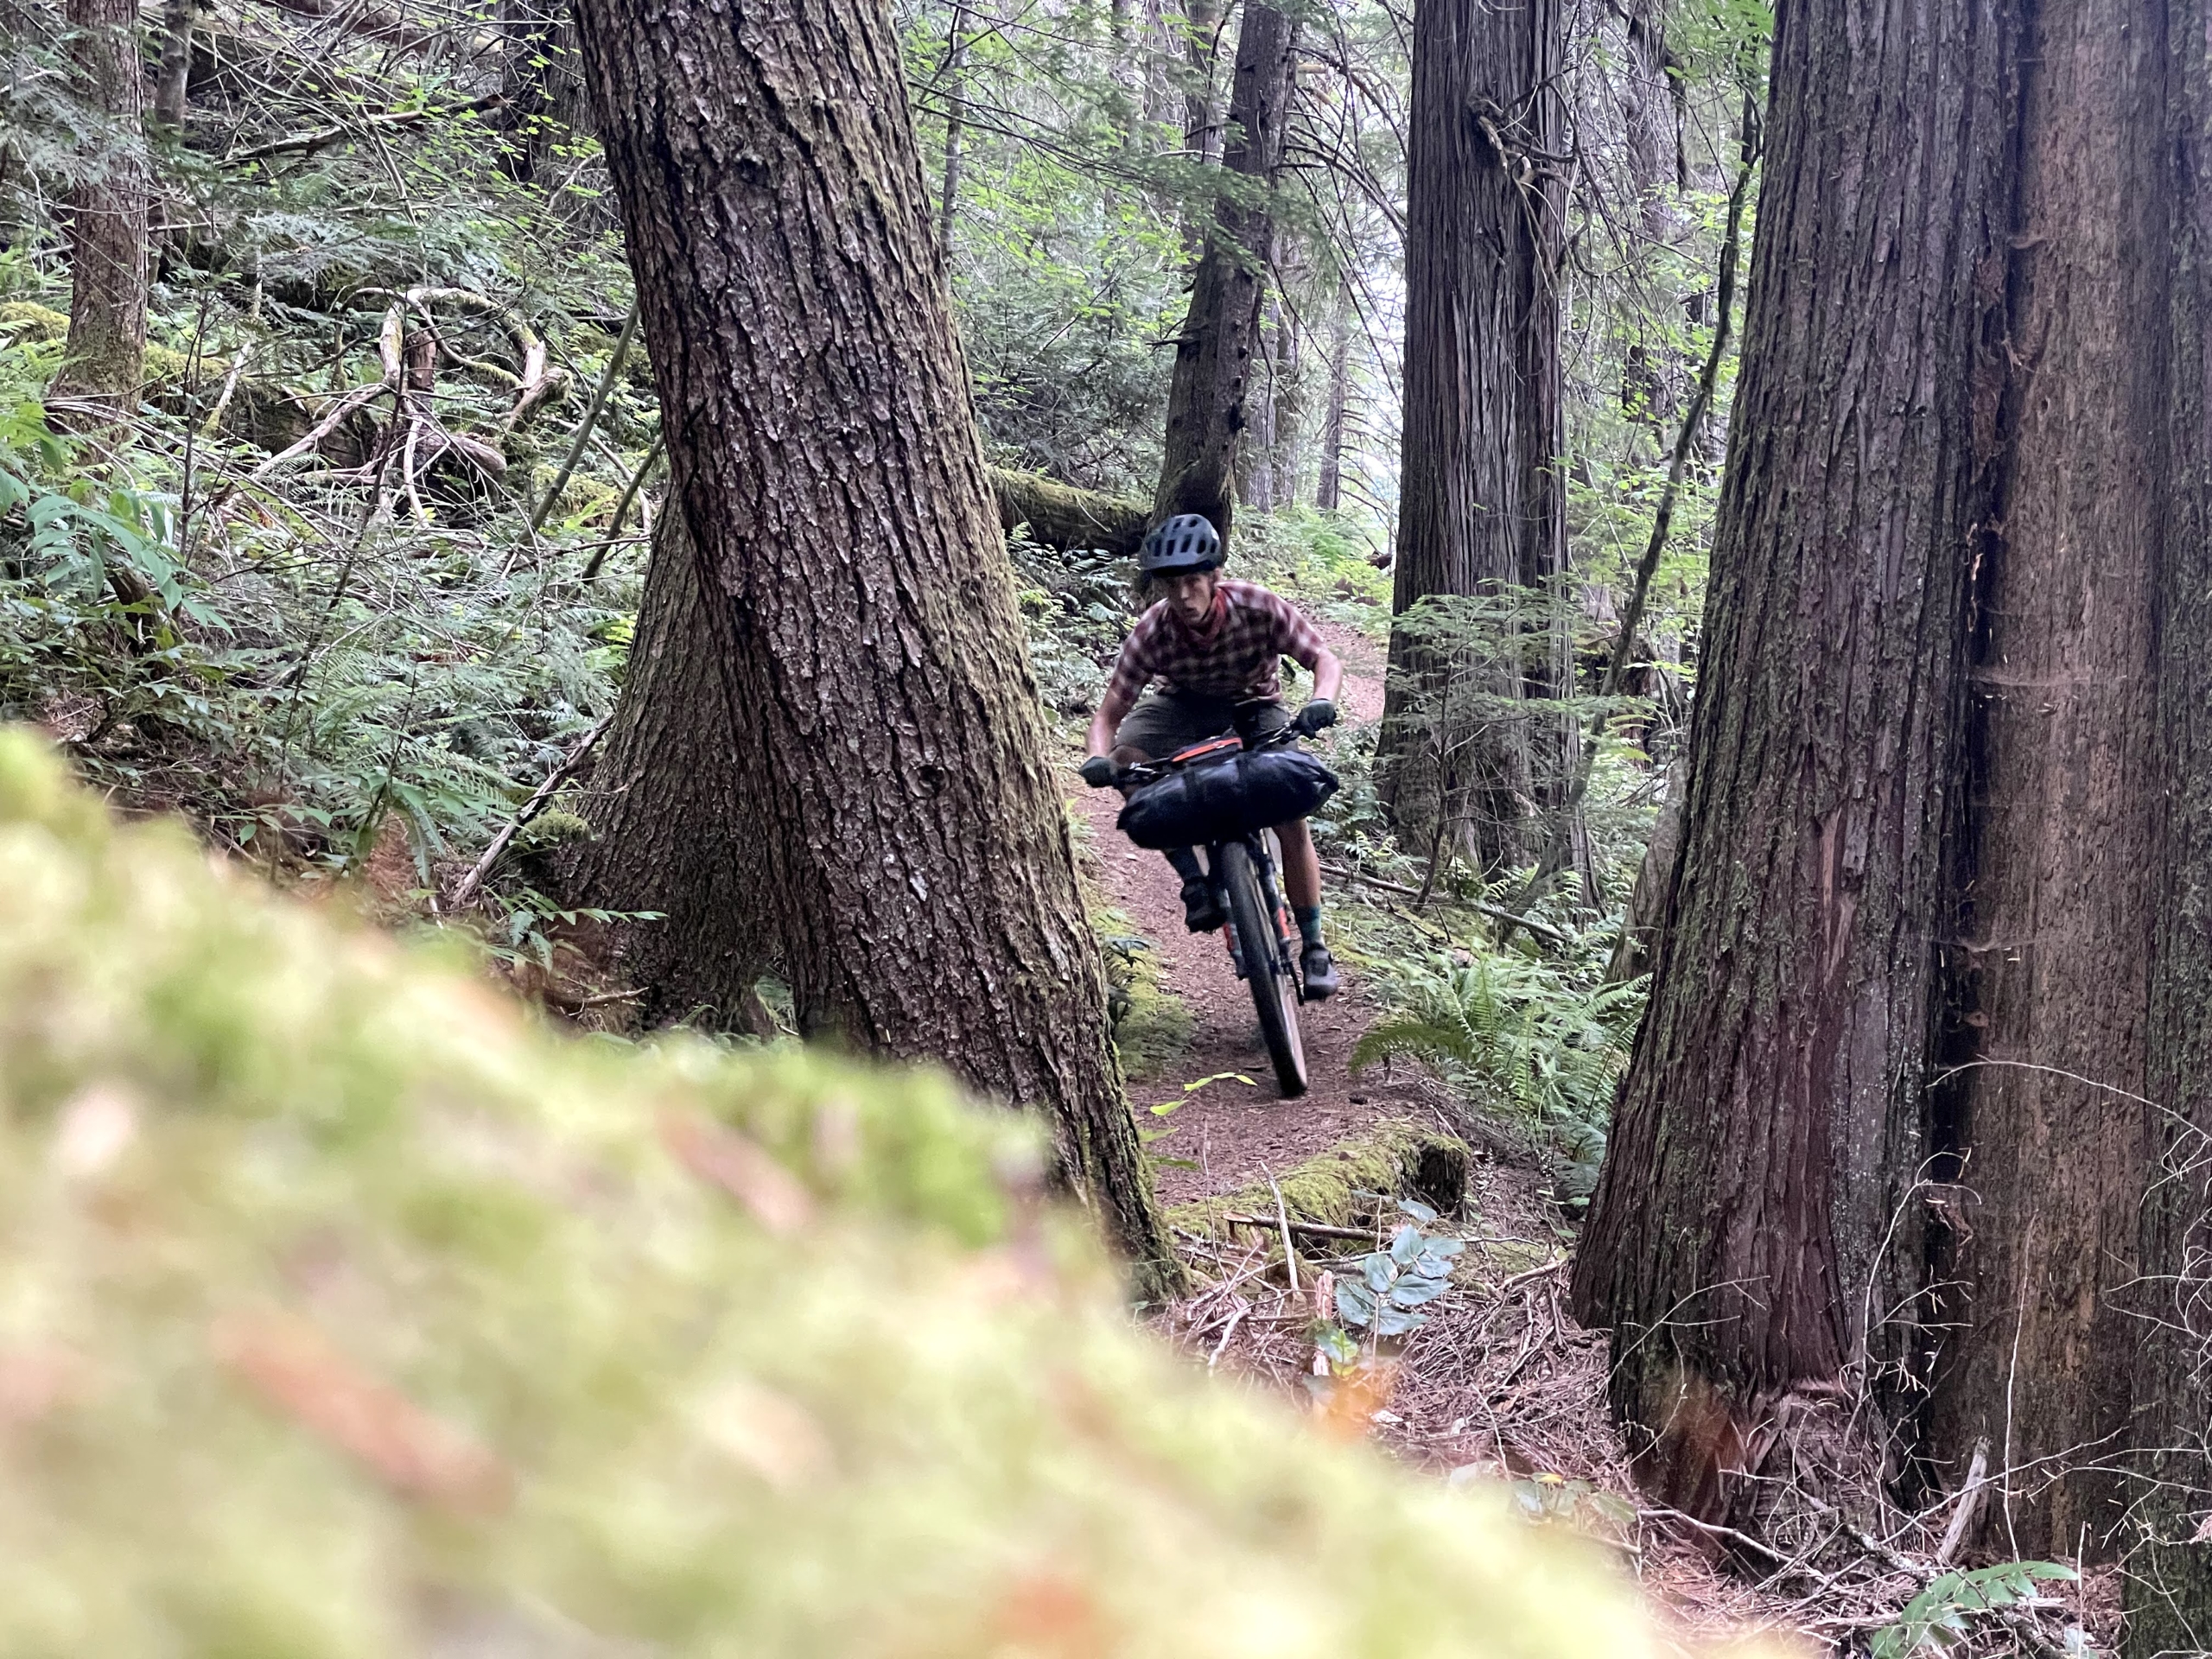
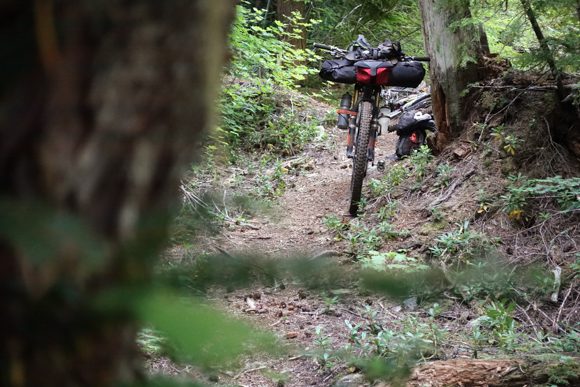
Sneaking some singletrack on the Wilson River Trail.
Wheeeeeee.
Gravity at work.
Sweet relief!
Brady enjoying the death hike-a-bike.
Tyler getting ready to hitchhike to Portland after his derailleur broke.
Classic Coast Range
Views.
End of day 6. I was...rather tired.
Campsite our last night.
How the (wood) sausage gets made.
This generous dude saved me and Brady from a dry night of camping with a gallon of water.
Day 1: Salem to Fall City (53 miles and 4,900’ of climbing).
Day 2: Fall City to a few miles past the Valley of Giants. A short (but punchy!) day with lots of swimming, plus a hike in the VOG. (35 miles, 4,555’ climbing)
Day 3: To the coast at Pacific City! (56 mi, 5,500′ climbing)
Day 4: Pacific City to east of Tillamook (51 mi, 3200’ climbing)
Day 5: Ass kicker of a day: broken derailleur for Tyler, steep af climbs (59 mi, 7,000′ climbing)
Day 6: West of Yamhill back to Salem (56 mi, 2,300’ climbing)
Tips and suggestions for the route
Swim in the rivers and streams whenever possible.
You can camp for free in the city park just outside of Fall City. It’s worth pedaling back up the hill after eating at The Breadboard, which is a must-do.
Bring a blinky tail light for the foggy coastal highway section.
Be friendly when you encounter vehicles/people on private forest land.
Stop at the Valley of the Giants! It’s worth it.
Hiking in the Valley of Giants.
Getting to/from start/finish
Either drive or catch a train to Salem.
Time of year
We rode this around Labor Day of 2022. It was smoking hot, which is obviously just part of the game sometimes. I’d vote late May into June or September to catch cooler weather and avoid rain.
Bonus to the heat: it makes the cold water feel even better. (Photo Brady Lawrence.)
As usual, I rolled on a plant-based diet for this trip…and brought wayyy too much food. I’d planned for a 100% self-supported trip in Idaho and figured what the heck, I’ll bring a ton of grub for this trip.
Which was fine, except those roads are STEEP. And we were in towns every other day, so I did not need all the food. My self-imposed nickname was Chuuuuck Wagoooon (always yelled loudly).
Nothing better after a long day of riding.
Water
Water is quite plentiful with streams or faucets on the coast. I used the Katadyn BeFree filter.
You’ll have a signal up high, but the back roads of Oregon shut down any signal.
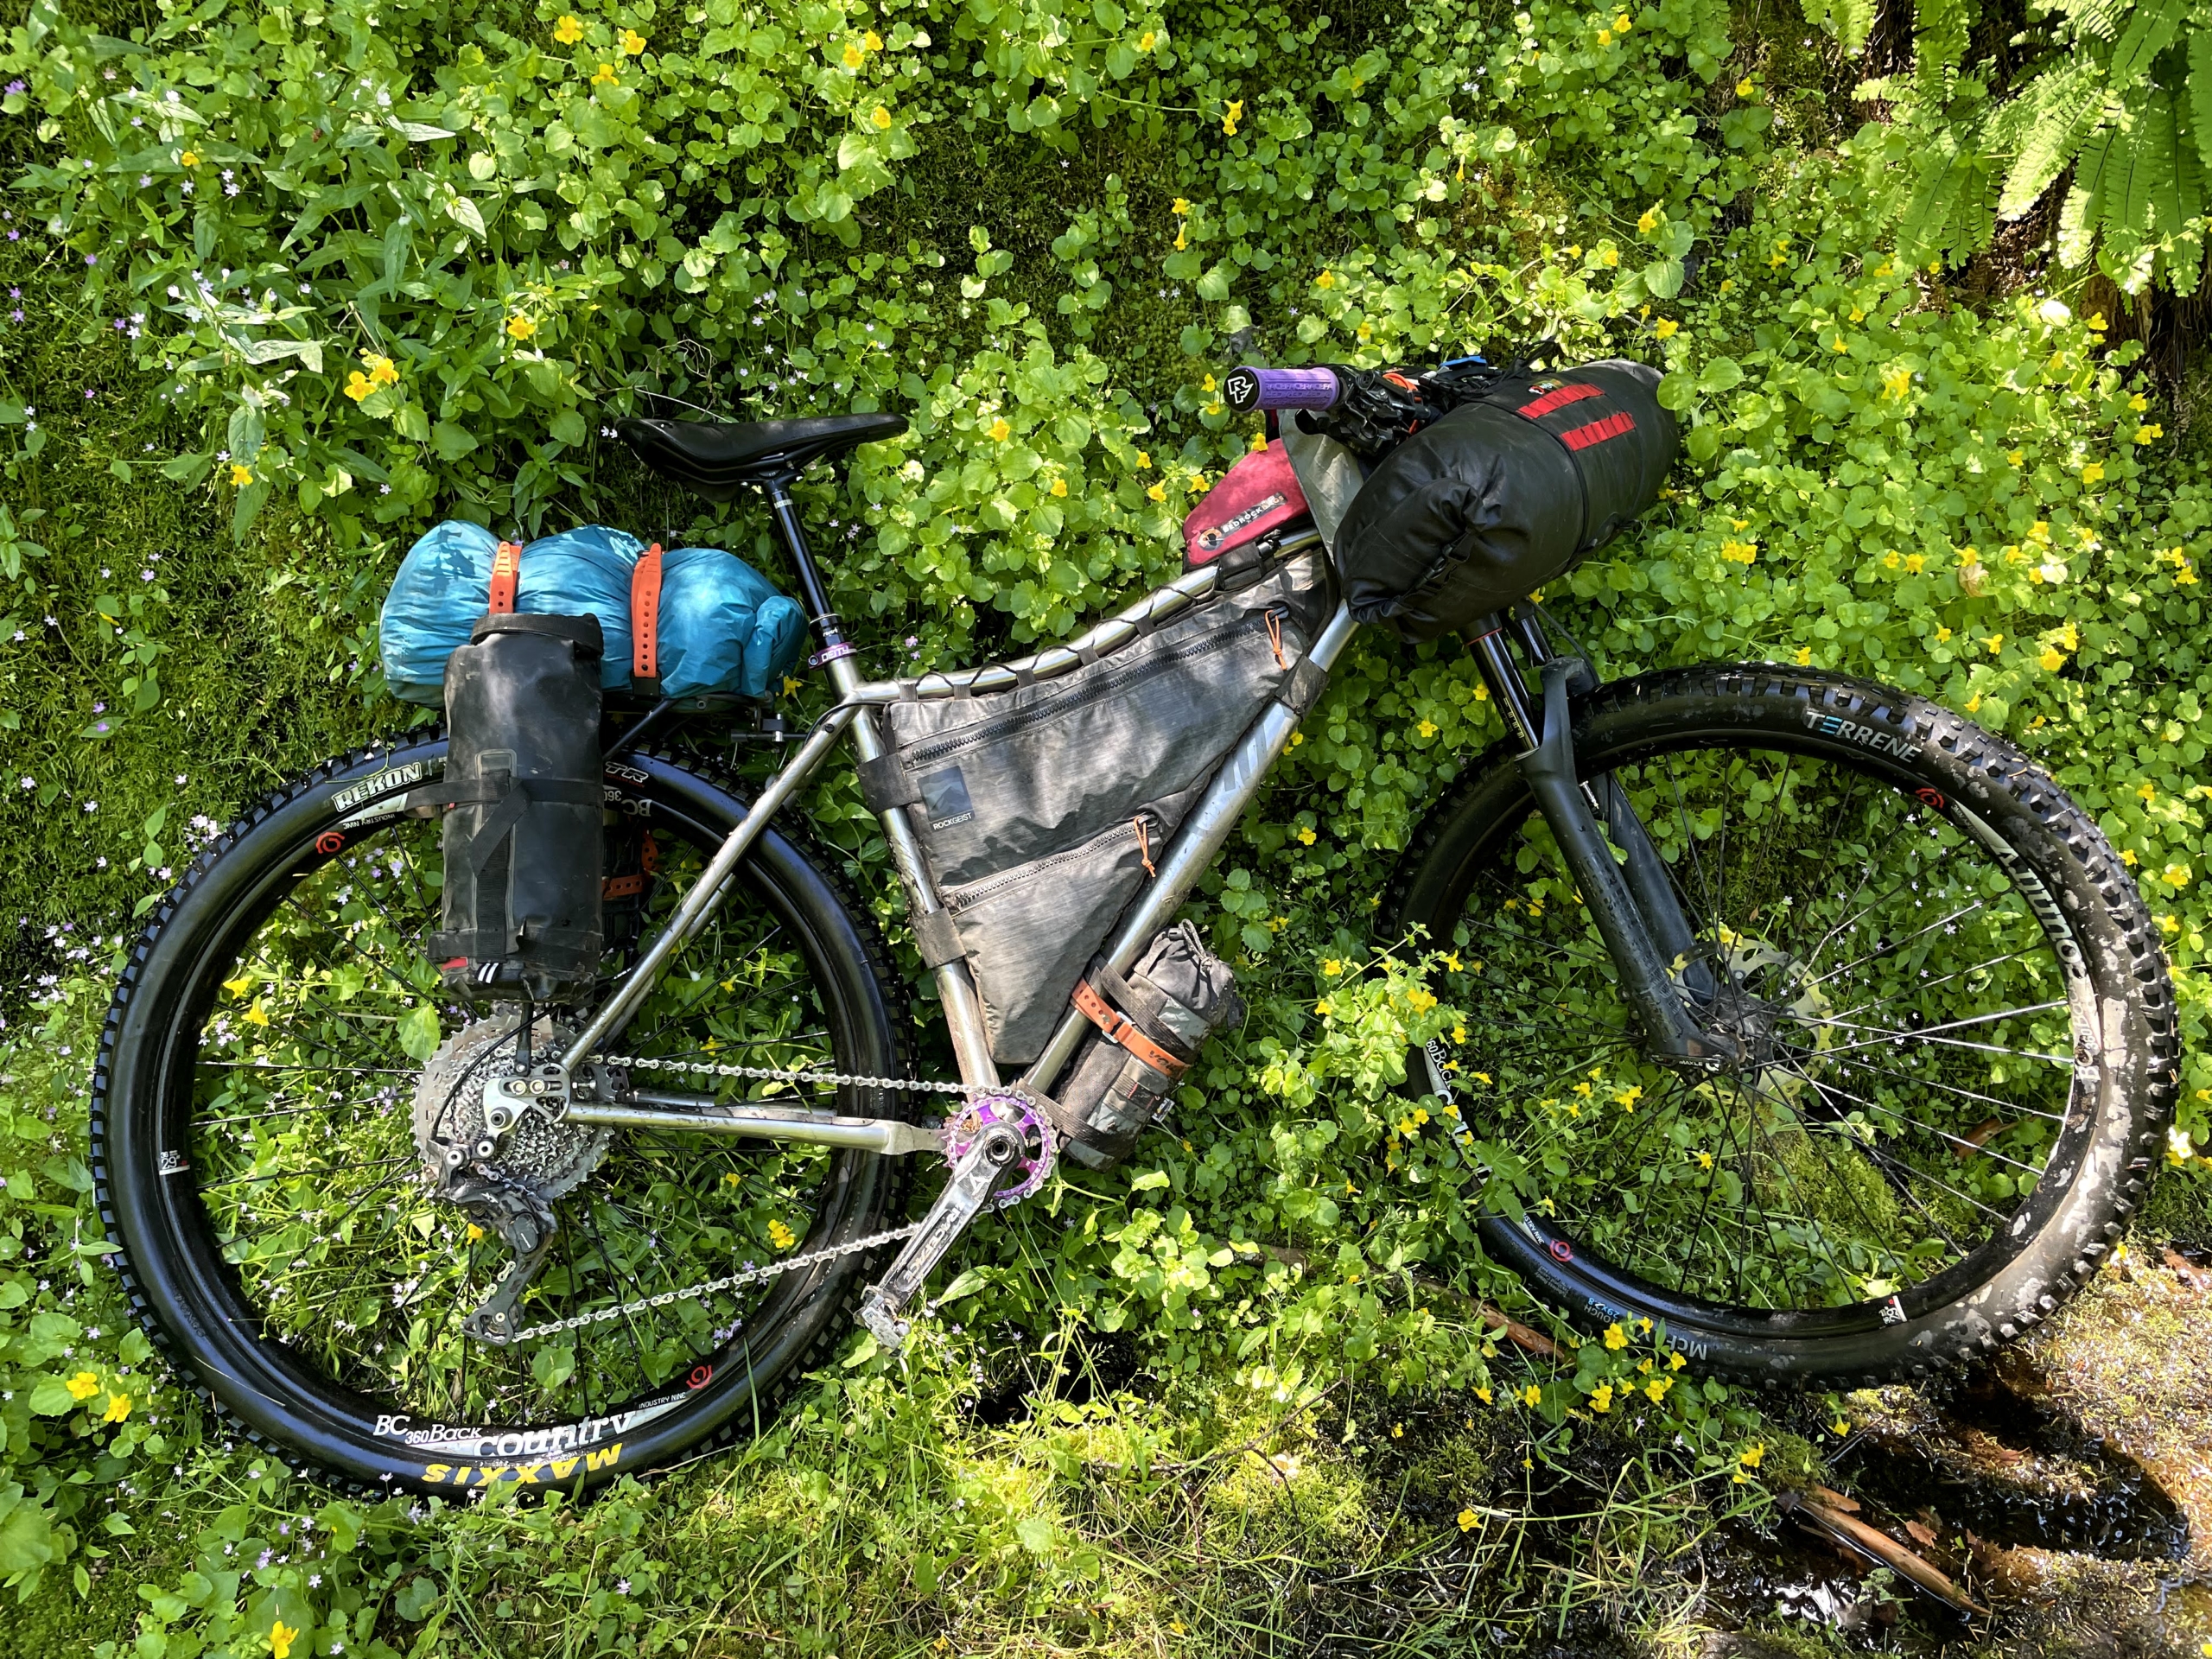
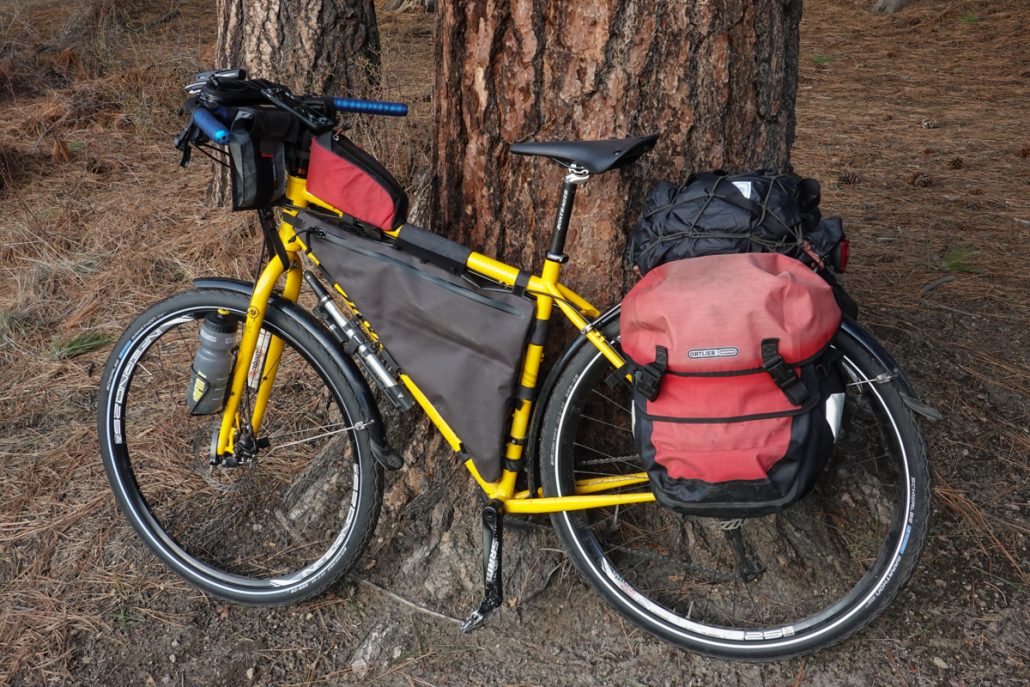
My bike setup for the VOG. Went a biiit heavy on the food to start!
Gear
I rode my 2019 Why Cycles Wayward V.1 set up with Terrene McFly 2.6” front and a 2.6” rear Maxxis. I run a 140mm front fork, which seems to handle most anything I’d want to ride a loaded bike down. It was overkill on this trip, but sections of logging roads were chunky enough that I don’t regret it!
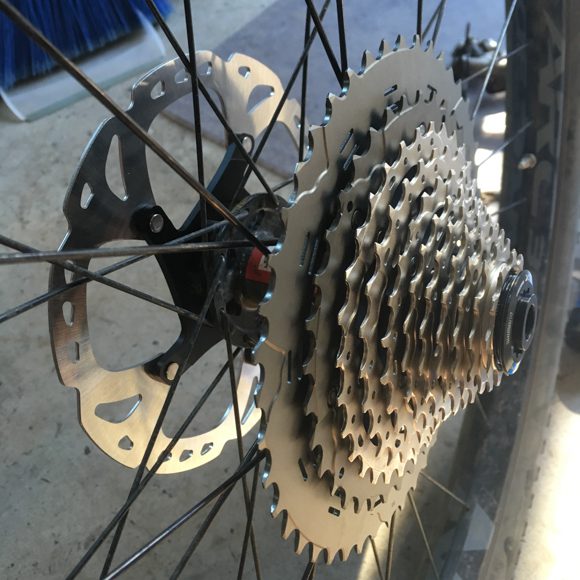
Still loving my 26T chainring on my Wayward to complement the 11-46 Shimano XT setup I’ve got. It’s AWESOME. Spinning is the name of the game while bikepacking! You’ll never mix your taller gears as much as you’ll wish for more climbing range, trust me.
Rounding out my gear was a Revelate front roll bag for sleeping gear and a custom frame bag. I ran a lightweight T-rack from Tumbleweed Bicycles instead of a dropper bag, ski-strapping a dry bag to the rack. The weight is basically the same as a big dropper bag and functions much better. Sure, dropper bags LOOK cool, but are they truly uber-functional? I say racks still have a place.
Two Salsa Anything Cages rounded out the kit, one with my cook kit, another with water…and my REI lightweight chair, which I love having on fire road trips!
And that…is a wrap. Thanks again for setting up the route, Ben.
Grinding up a coast range climb. (Photo Brady Lawrence.)
https://www.traipsingabout.com/wp-content/uploads/2023/01/Lawrence-VOG-115-scaled.jpg6831024Dakotahttps://www.traipsingabout.com/wp-content/uploads/2018/03/Traipsing-About-logo-white-background-450x156.pngDakota2023-01-30 19:08:102023-05-06 14:44:57Bikepacking the Odyssey of the VOG
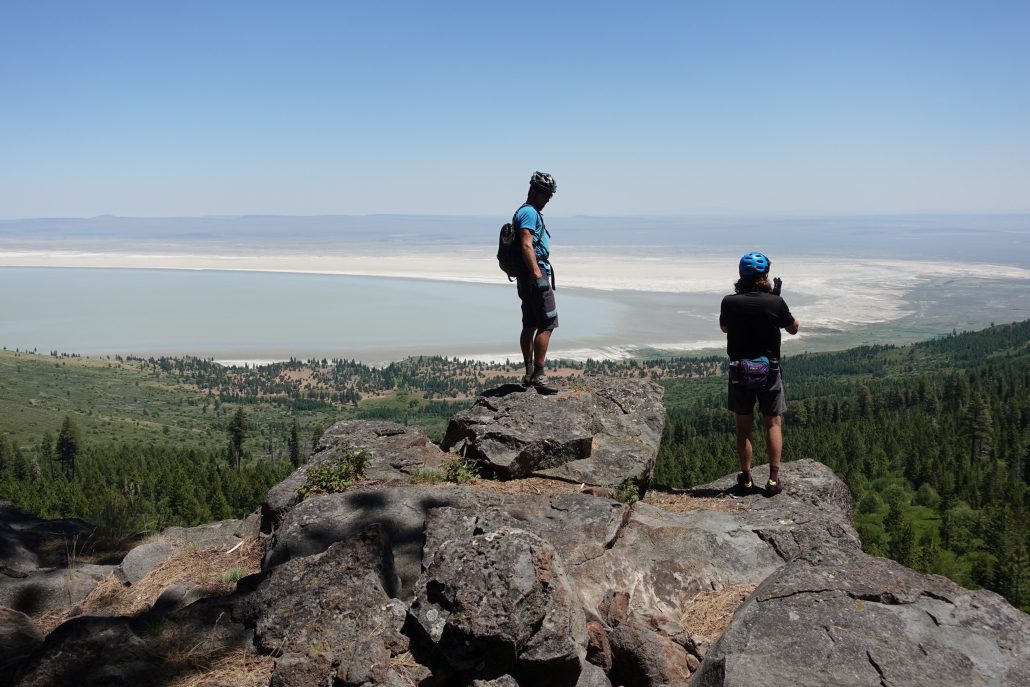
Way out yonder in SE Oregon lies the Oregon Big Country bikepacking route. If you’re looking for a remote desert getaway, you’ve found it.
Overall, I expected cruisy gravel roads, mild vertical gain, and hot springs to soothe bikepacking soreness.
I nailed 1 out of 3: the hot springs were amazing.
In reality, the Big Country route served up a variety plate of different terrain ranging from desert playa up to snowy mountains. I’ve bikepacked and road toured a lot and this trip surprised me with the physical difficulty, remoteness, commitment level, and sheer beauty.
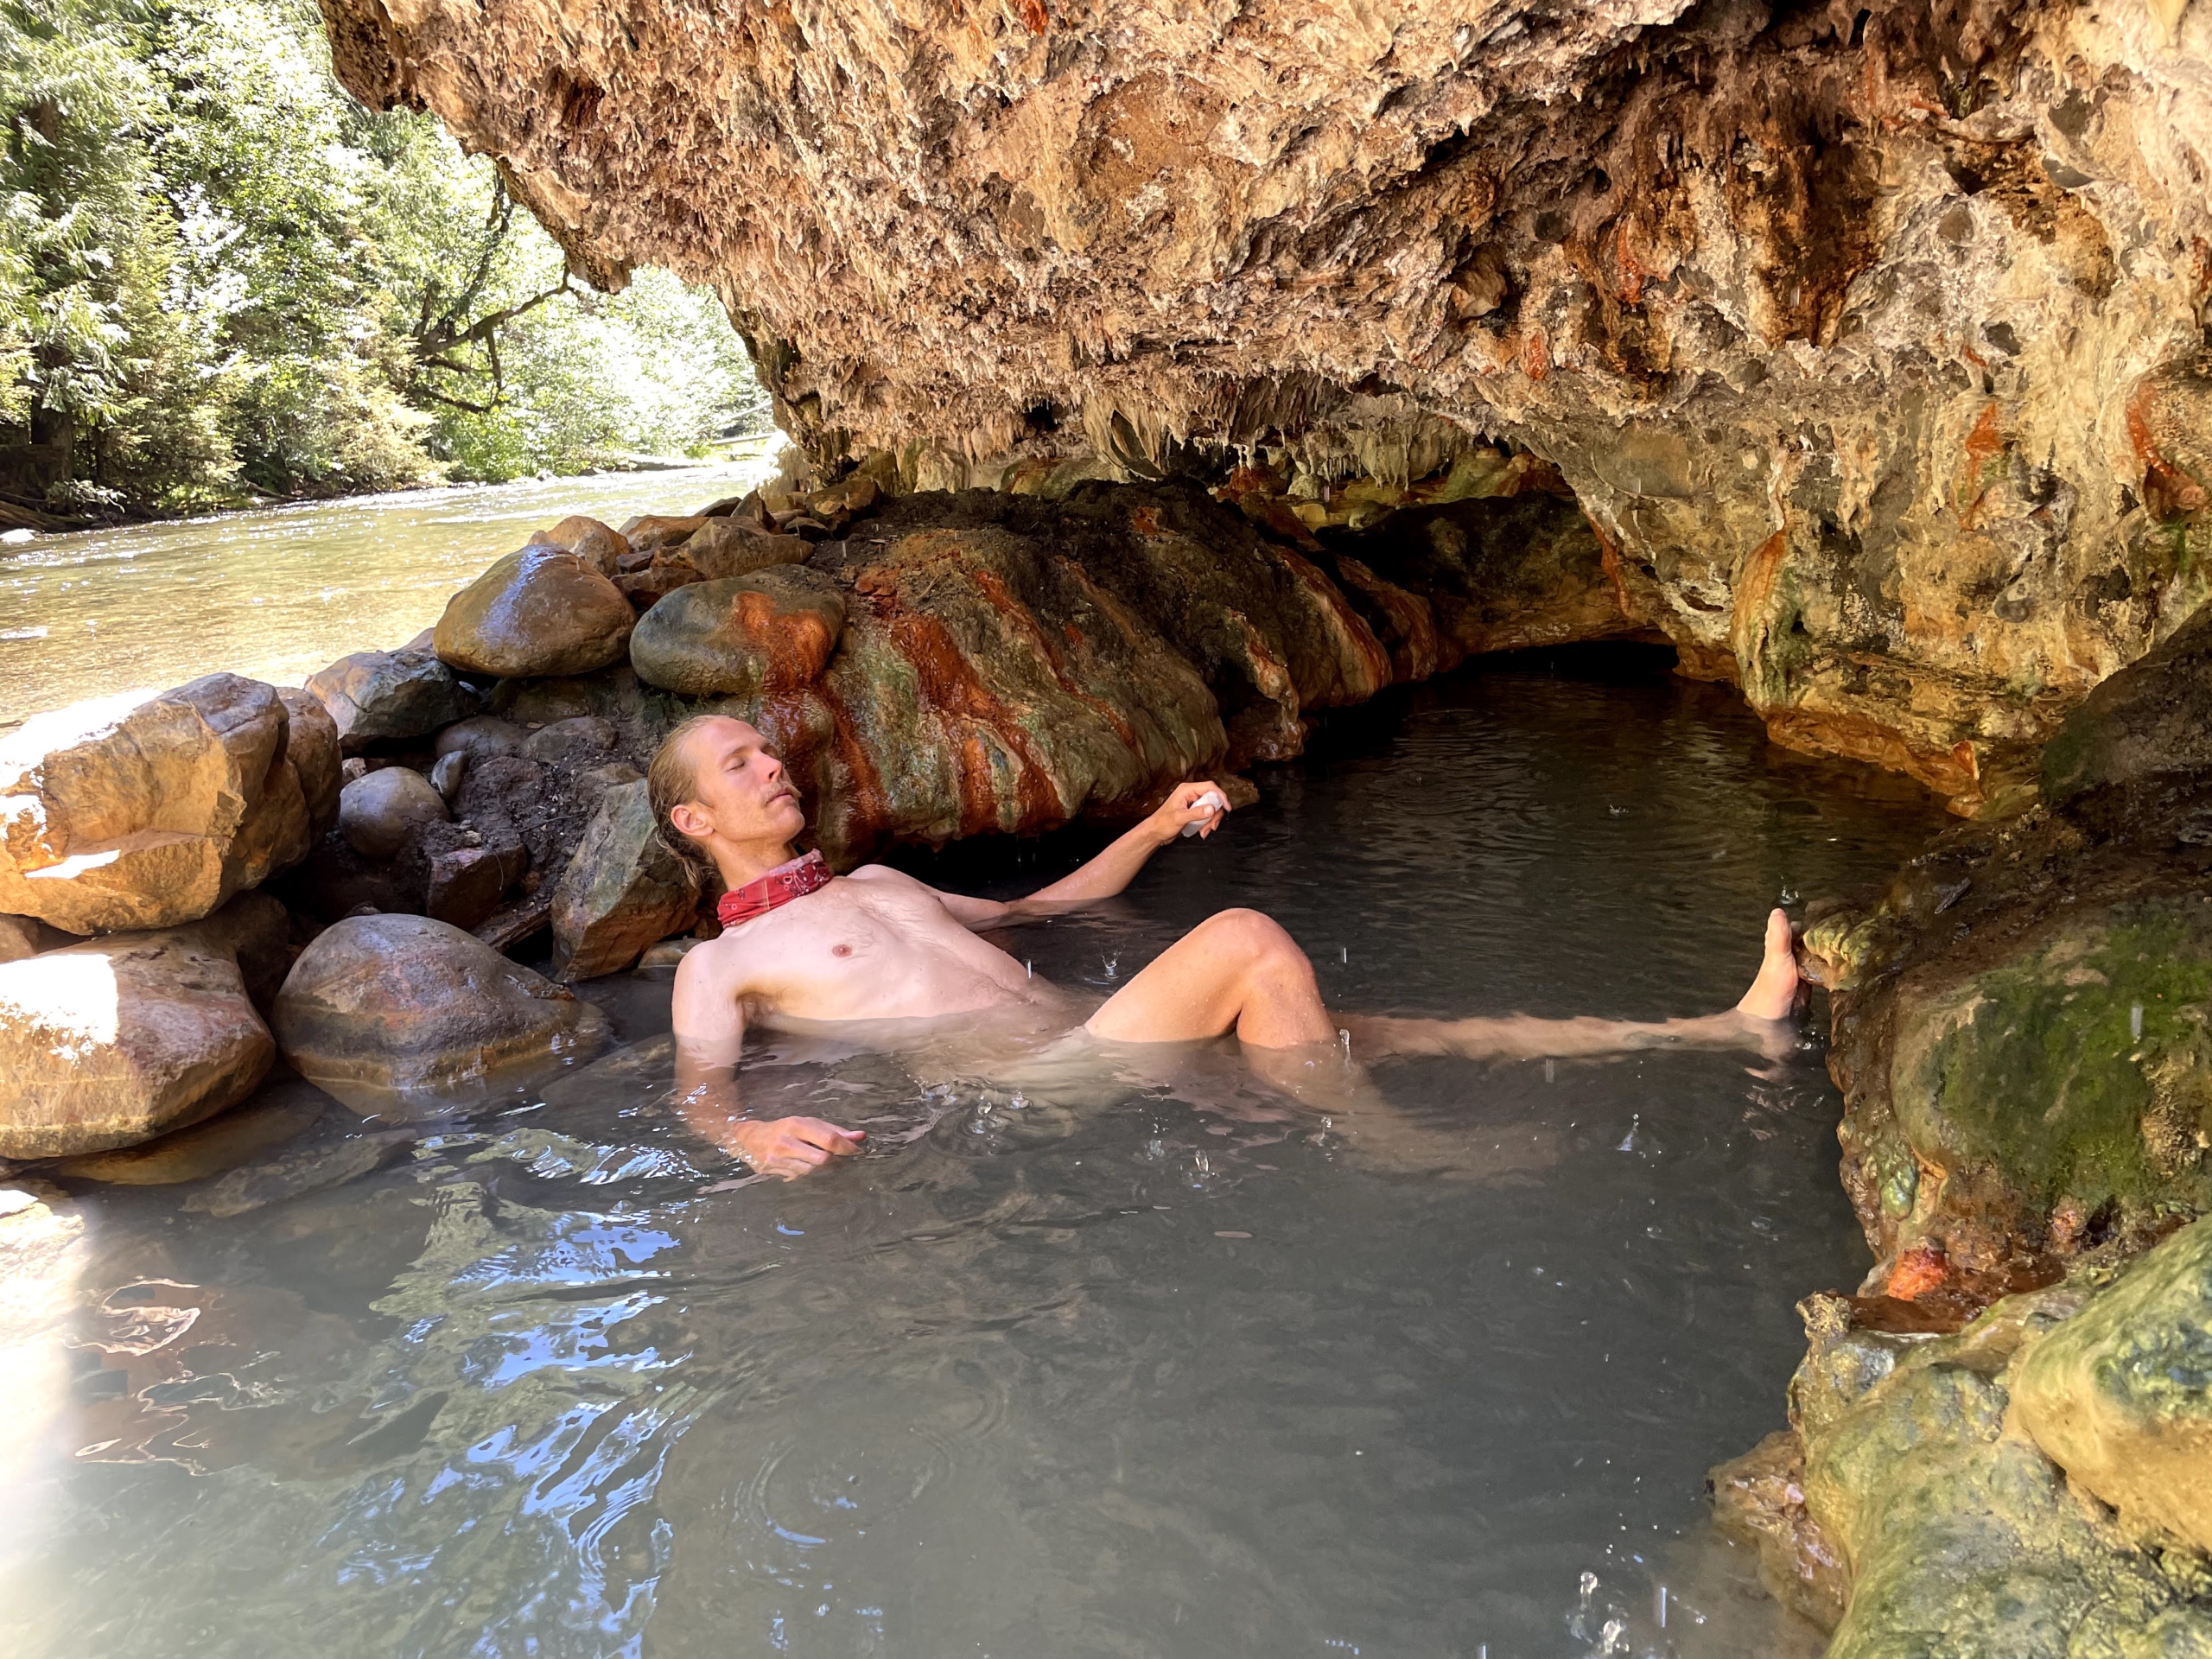
Sean enjoys a morning soak (with coffee) in Bogg Hot Springs.
Shortcuts for Oregon Big Country:
Below I share snippets of my experience bikepacking the Oregon Big Country. I wrote this as a resource for folks looking to bikepack this route, so free to skip to any specific sections below.
The Big Country is a ~360 mile loop starting in French Glen, a tiny town on the west side of the Steens Mountain range in SE Oregon. Terrain varies from gravel to pavement to “where in TARNATION is that 1852 wagon trail?”
You’ll wander down into Nevada, roll across a full-on desert. You’ll find places to fill up on water about as often as you see people: rarely. The fickle weather might shut your trip down entirely if the Dread Mud is activated. The only shade comes from circling vultures (I’ve always wanted to say that).
In other words, it’s the best kind of adventure, chock full of places rarely visited, pronghorn antelope bouncing along, starry skies for days, and a fine tale for the folks back home.
Holy amazing camp sunset, Batman. (Willow Creek Hot Springs)
My experience bikepacking the Oregon Big Country
When I bikepacked the Oregon Timber Trail, I’d routinely complain when we hit fire roads vs. singletrack. What can I say, I like trail riding! (Cough, snob alert.)
Wellll, the Oregon Big Country features exactly zero singletrack, and I still dug it. The Big C served up a tasty cocktail of desert landscapes, remoteness, hot springs, and a chance to immerse myself in a part of Oregon I seldom visit, bermed trails be damned.
Roads? We don’t need no stinkin’ roads.
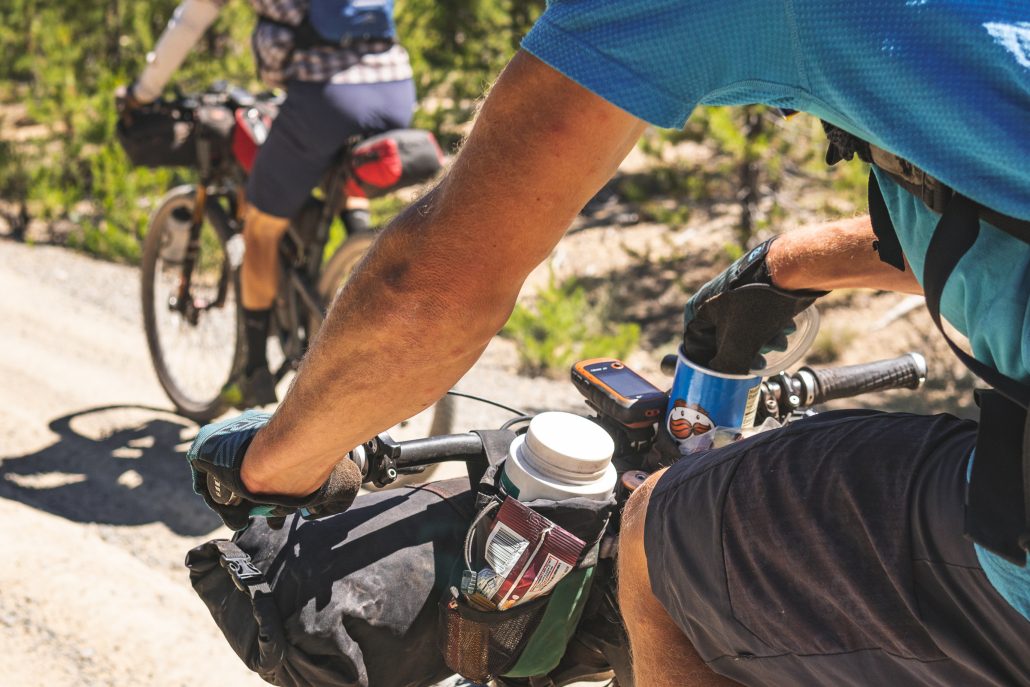
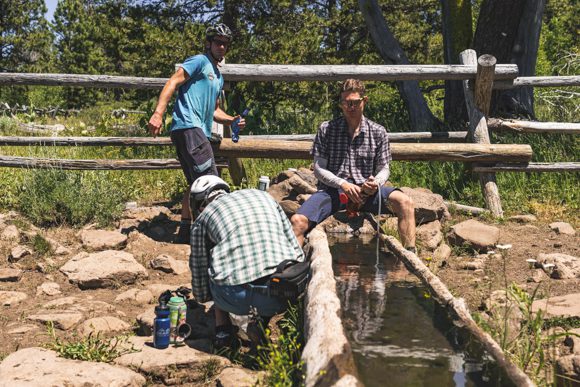
Most of our days on the bike unspooled lazily. We weren’t pushing too hard—and didn’t want to. Ample space for joking around during snack breaks and chatting with overlanders at Bogg Hot Springs or Gatorade-offering bird watchers in Malheur Refuge!
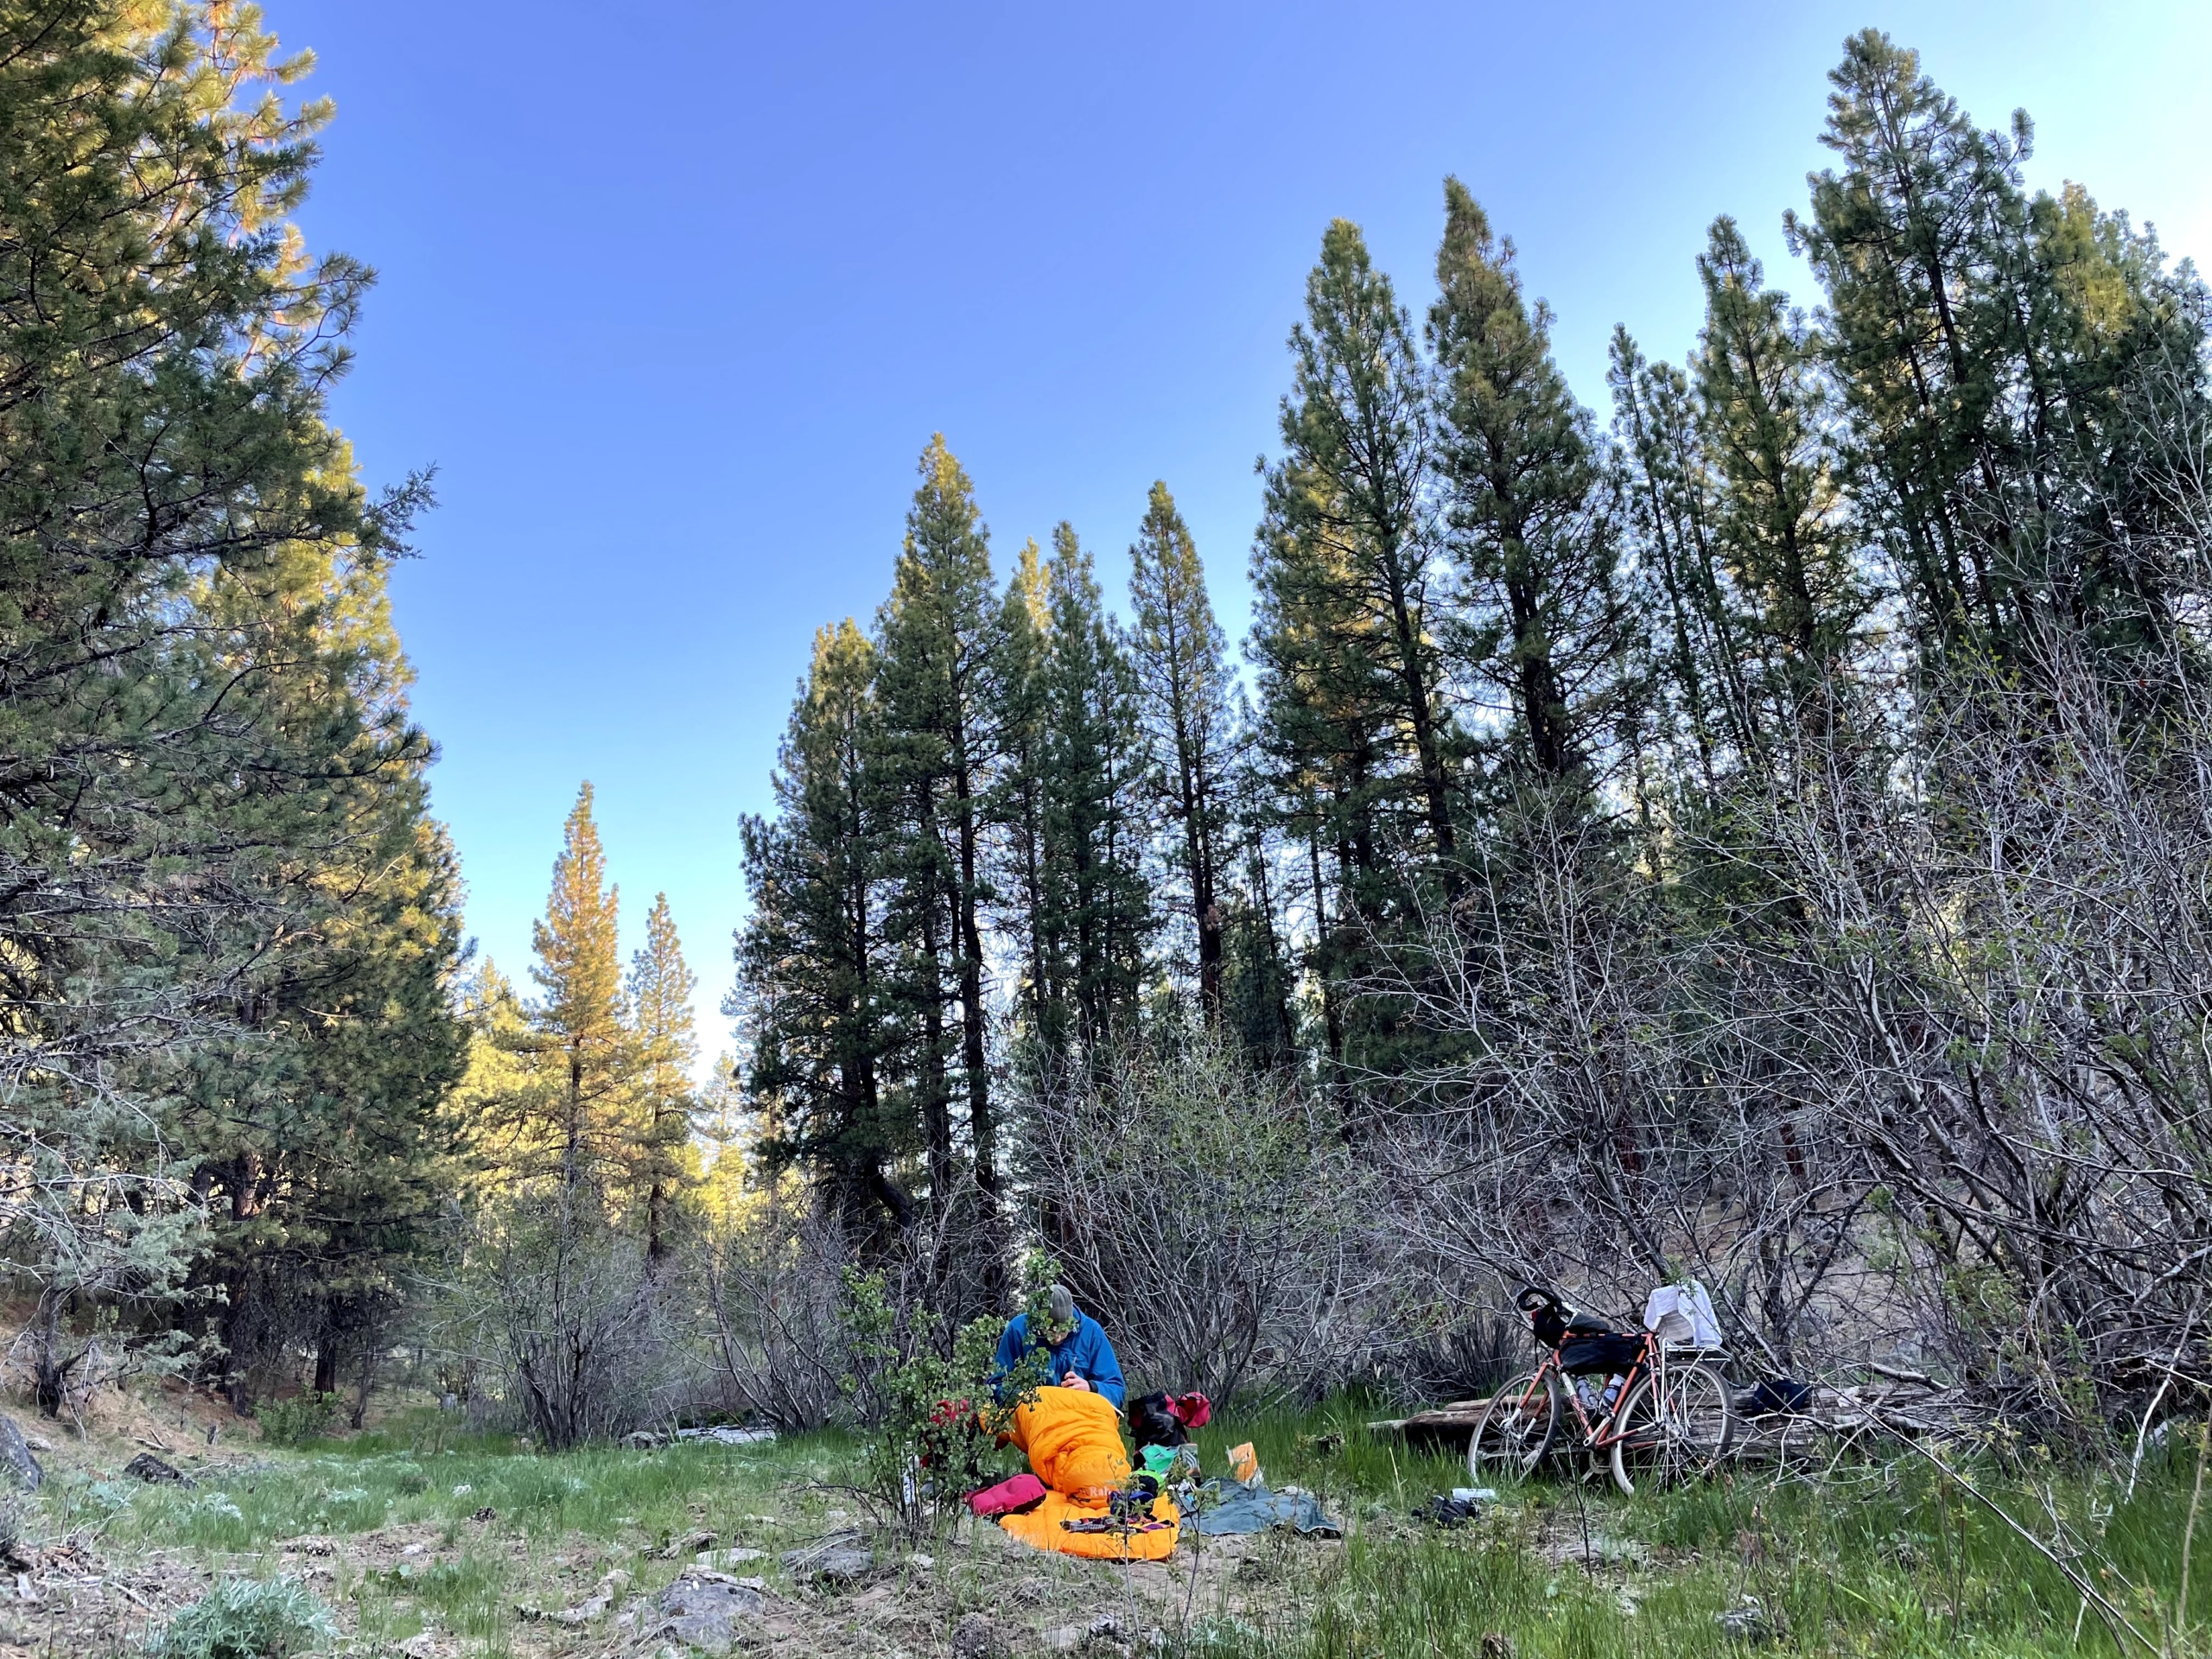
Our first night featured a full moon backed by a symphony of howling coyotes. That yielded to a silent morning campsite where I sipped tea and stared across the mesas thinking “this is what it’s all about.” Following sage and rough ranch doubletrack, we climbed over the Steens to the rowdy and rad Stonehouse Road descent. (May I never ride up it!)
Day 1 campsite, a few miles past Diamond Hotel. No sounds except birds chirping. Divine.
Water is always at a premium during the Big Country. We filtered from trickling streams in cow pastures or boggy reservoirs. A few kind hot springs car-campers saw us doing so and offered up a water donation. “You can’t filter out of that nasty beaver pond! Here, take this jug, we’re leaving tomorrow anyway.” Generally, we tried to camp at water sources, but pickings were slim between those, so we each carried 5-6 liters at a time.
During a late night soak at Alvord Hot Springs, a string of 30 UFOs transfixed us as they streamed across the sky. I was willing to be abducted for a couple gallons of cold spring water, but they were just Elon’s Skylink satellites and offered nothing but fast internet.
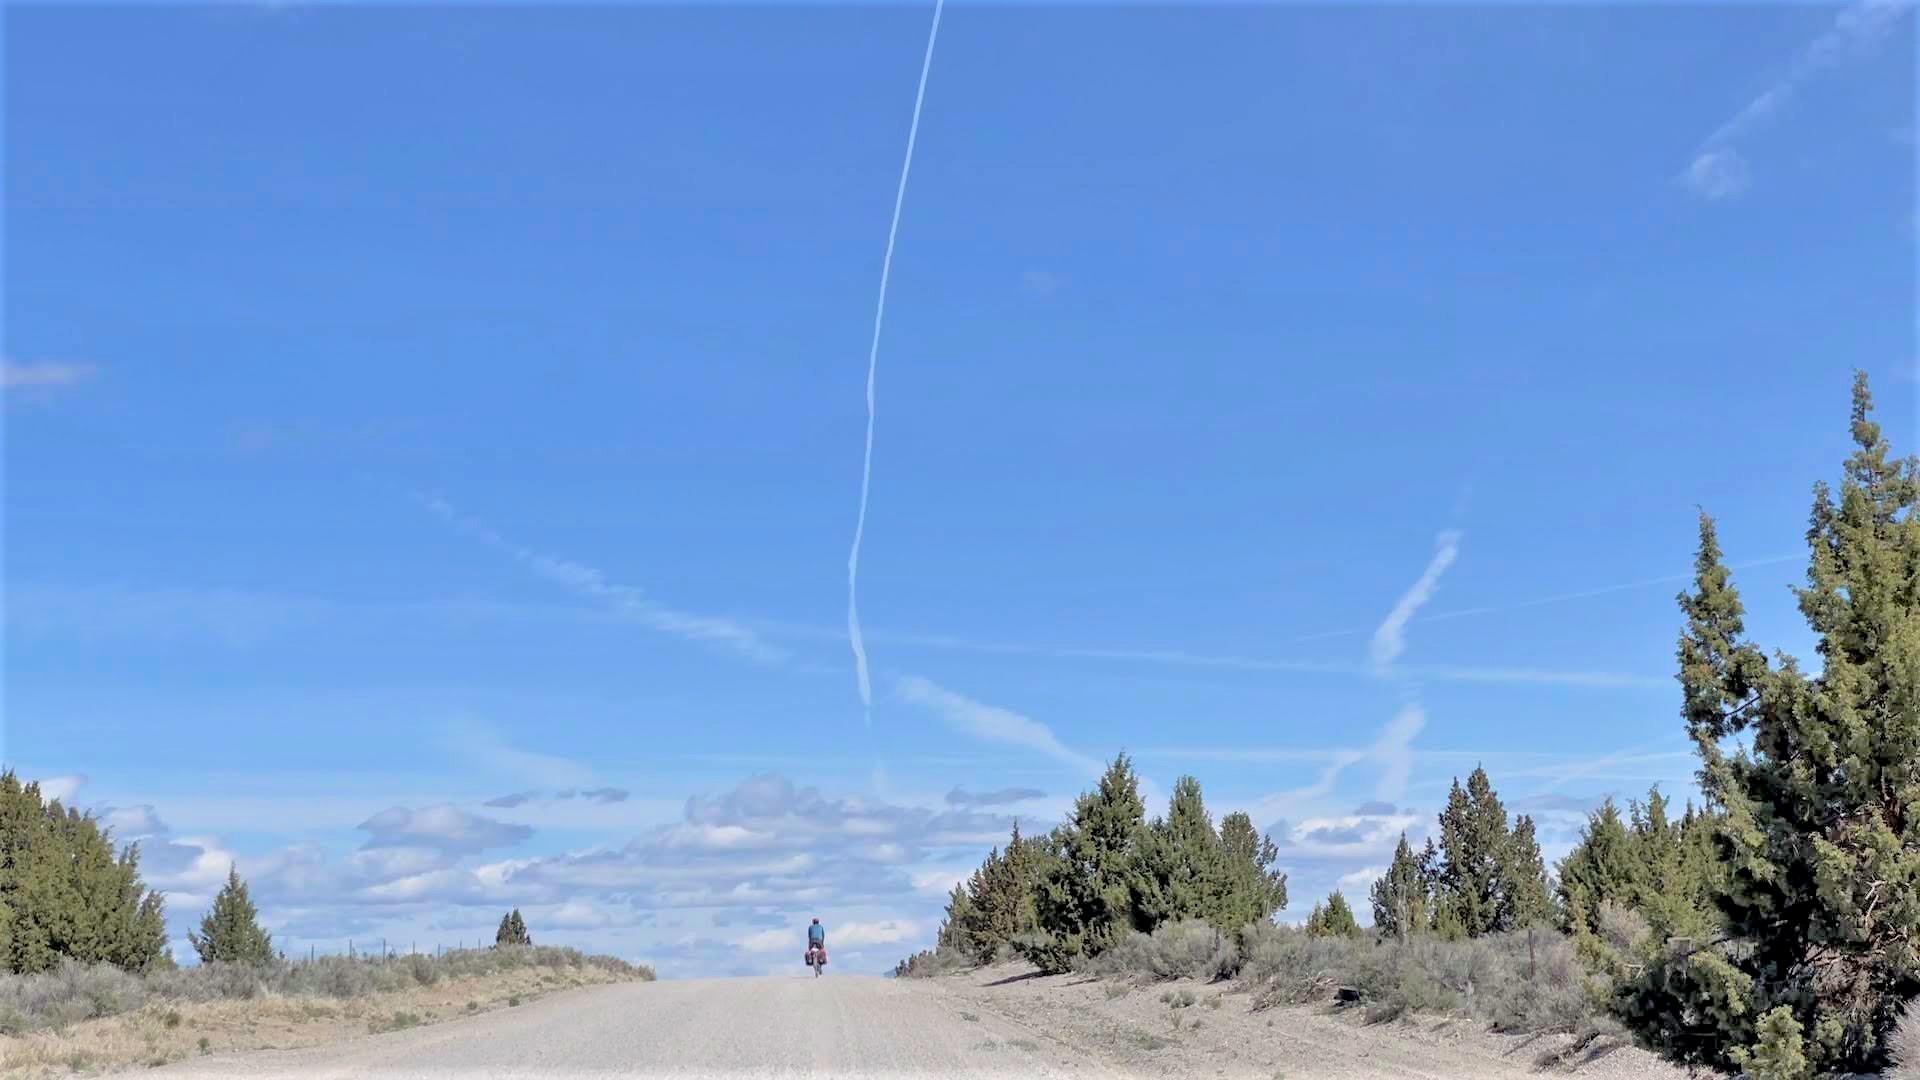
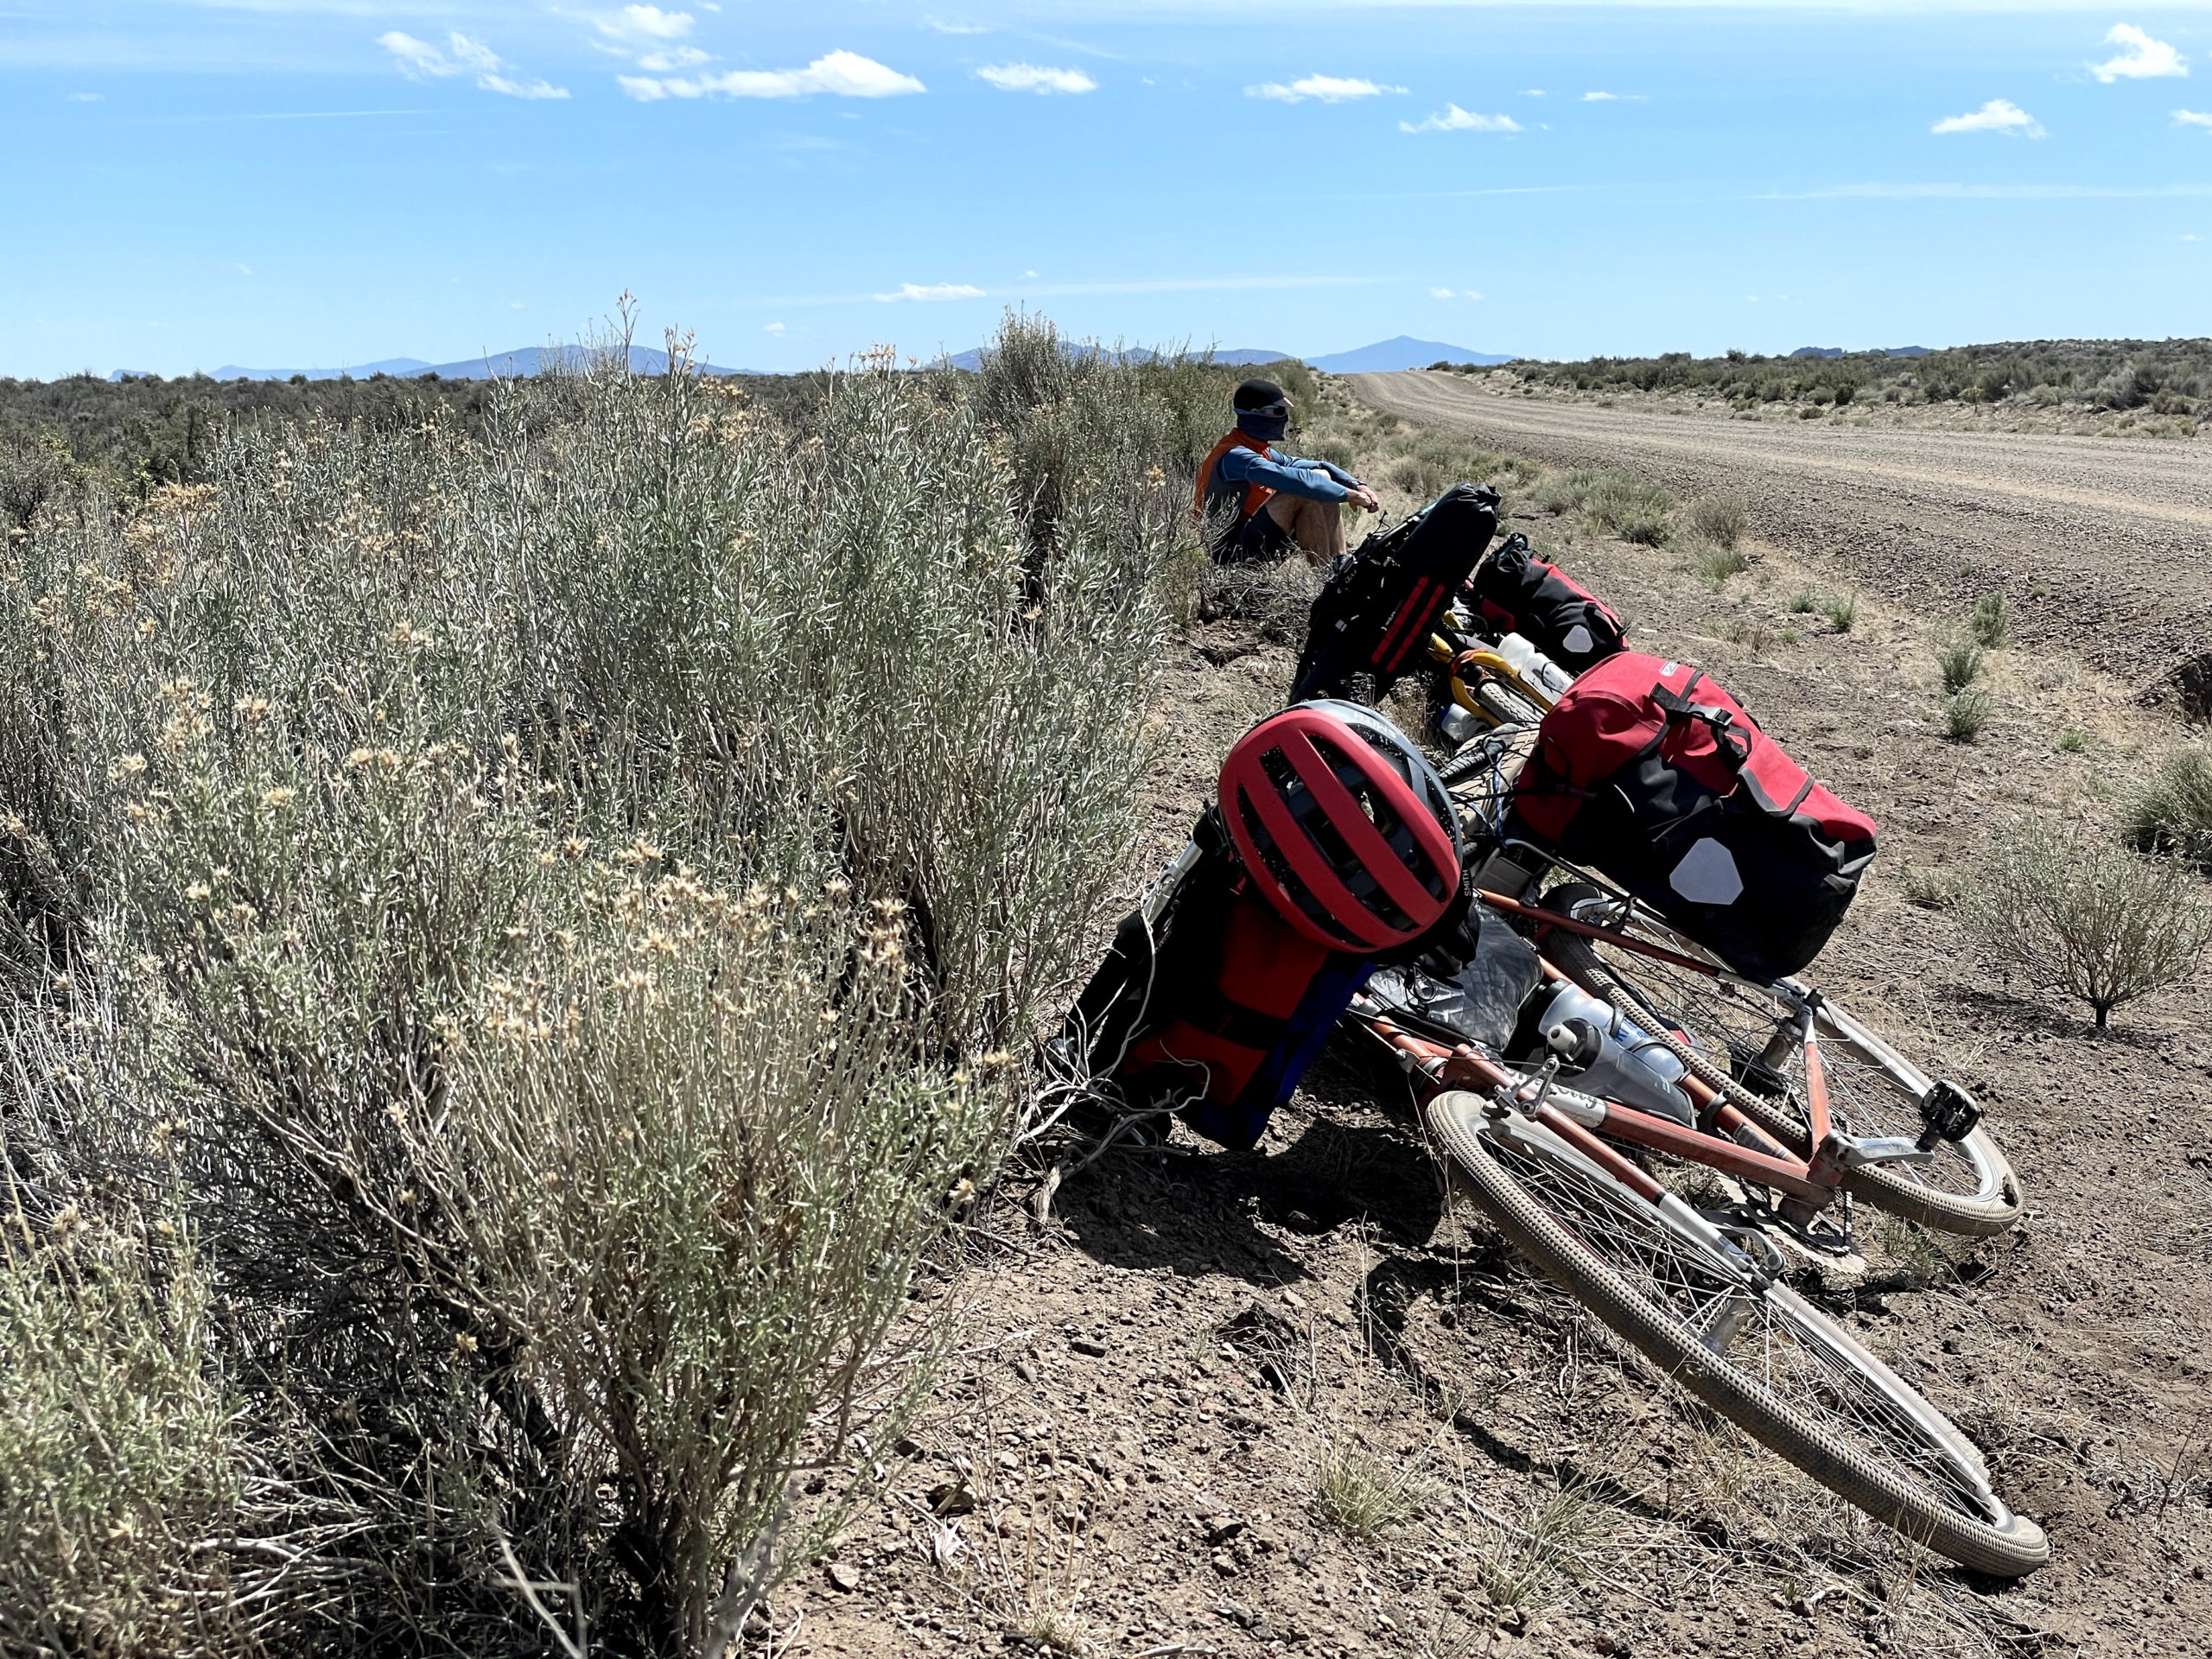
Tailwinds the Phoenicians would have prayed for pushed us across the Alvord Desert, a dry lake bed. Our luck ran out in Big Sand Gap as we hiked in the hot sun, but good humor, lupini beans, and knowing it would end someday got us through it.
By the way, dig these kinds of posts? Sign up for the free 2x/month Traipsing About newsletter for more tales from the trail and creative challenges like drawing and piano when I’m off the bike.
Cruising east across the Alvord Desert. Not pictured: INCREDIBLE TAIL WIND.
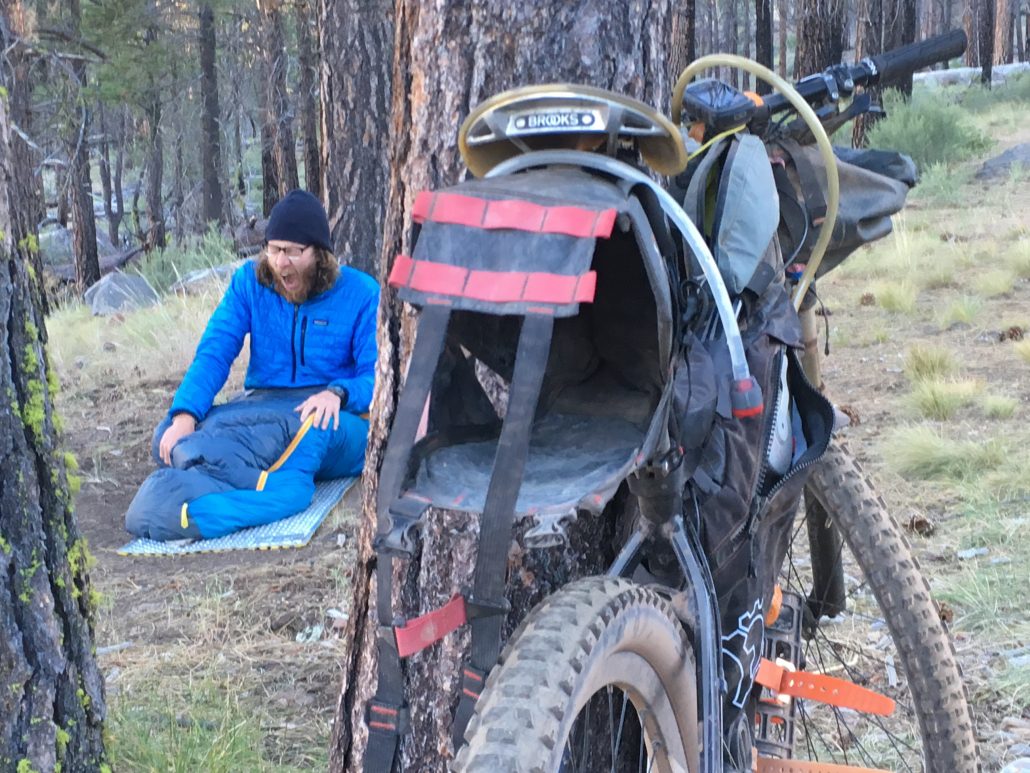
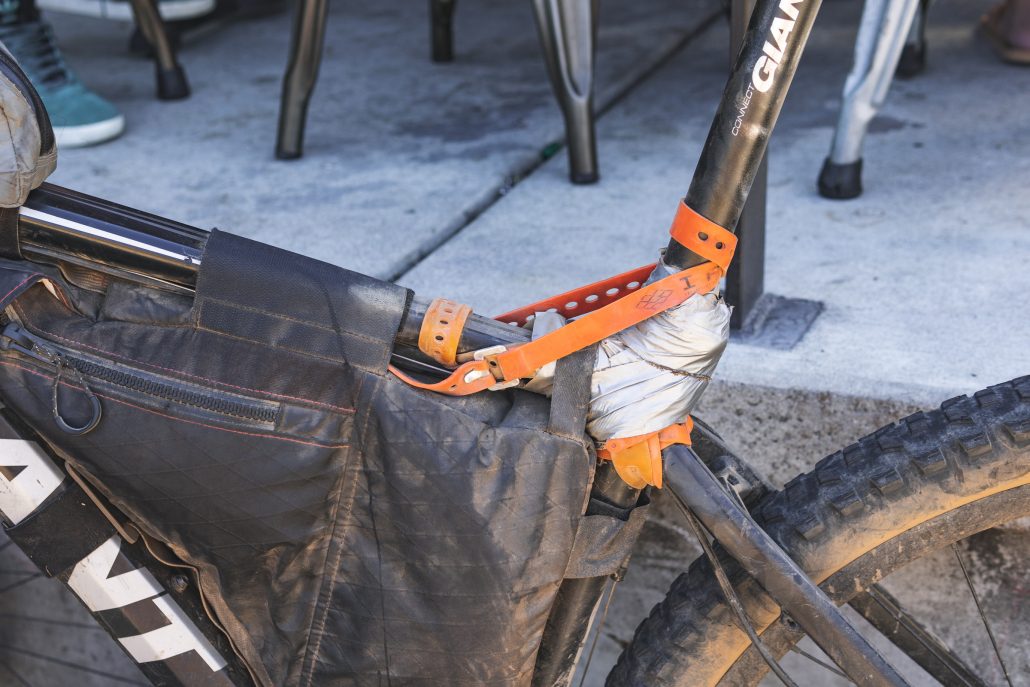
I found a plastic workshop clamp at Alvord, which turned into a game of secretly depositing the clamp on each other for the next four days, trading it back and forth. “NOOO, not the clamp!” Subtle maneuvering and sleight of hand tactics escalated until some near-wrecks convinced us it was time to end the game.
Mason gets clamped.
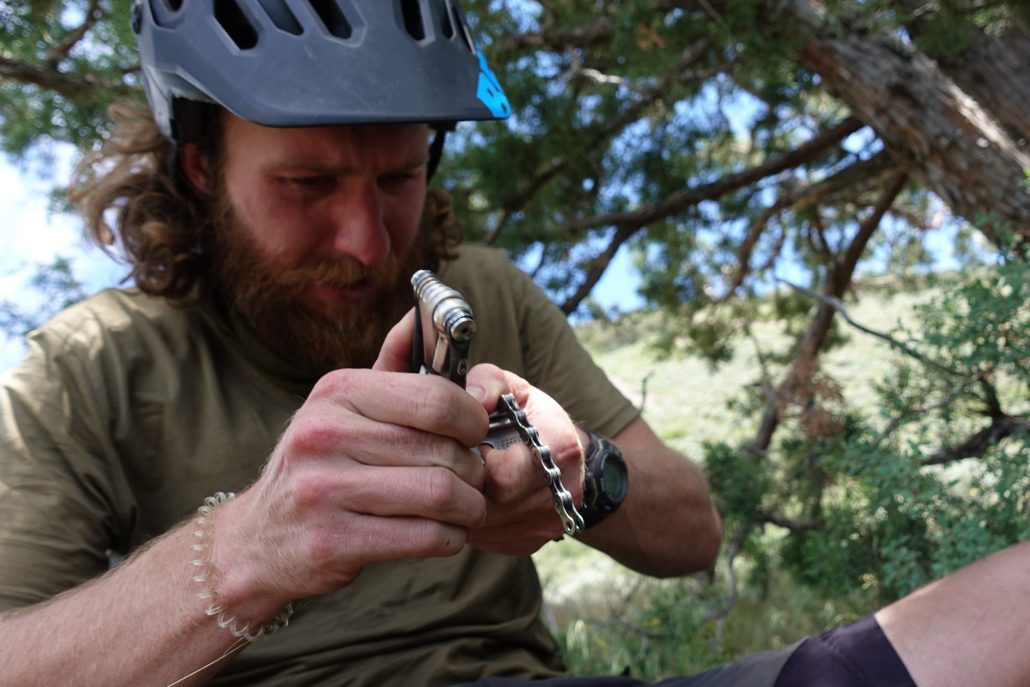
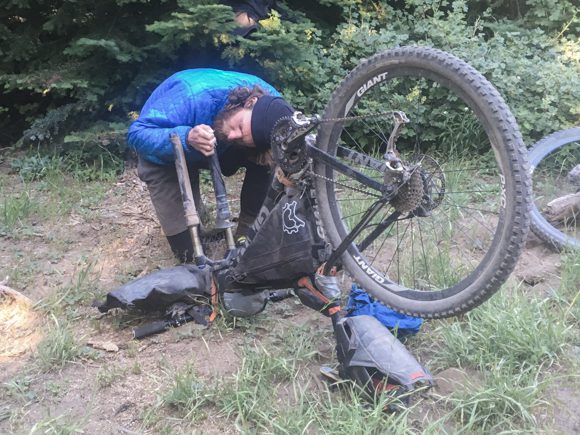
The usual gear-testing (and MacGyver solutions) presented themselves. Chains broke. Bottom brackets loosened. Tires and sleeping pads punctured. My stove fuel failed in the cold. My new Platypus filter bag blew a hole in the side after 10 uses.
We swapped or shared gear, rallied. Mostly, things worked and mishaps were few. Good to have companions on a trip!
Trail repair. Bacon tubeless kits rock!
The Trout Creek Mountains delivered the promised hard work, plus temps dived toward freezing at 8k’. Cooold winds, but minimal snowy hike-a-bike. High on a ridge, wild horses cantered up to Mason.
Things grew more cruisy from the Trout Creek Mountains on day 5 as we hit smoother gravel and some pavement. We refueled our food supplies at Denio Junction Motel via a box I mailed ahead (do it!) and chatted with the gracious owner.
Gravel roads, folks.
After a brilliant afternoon lazing away at Bogg Hot Springs, we spent our last three days traversing endless rolling ranch country in Sheldon and Hart Refuges. Occasionally pronghorn antelope streaked across the open landscape, but mostly we encountered friendly cows. The heat dial stayed turned down (HURRAH), making the hot springs delightful.
A return to aspen marked the final approach to Hart Hot Springs and our last night of the trip. We finished our final climb well past dusk and descended in the dark to camp beside a burbling stream.
A late night and morning hot springs dunk clinched the deal: this is a sweet bikepacking loop. If you like sage, solitude, and soaking after long bike rides, you can’t go wrong on the Oregon Big Country.
Careening down the Trout Creek Mountains at the end of 12 hour day of bikepacking.
Oregon Big Country Photo Gallery
Photos! Click to see full-size images and scroll through. Arranged in sequential order (roughly) by day to get a sense of how the terrain changes.
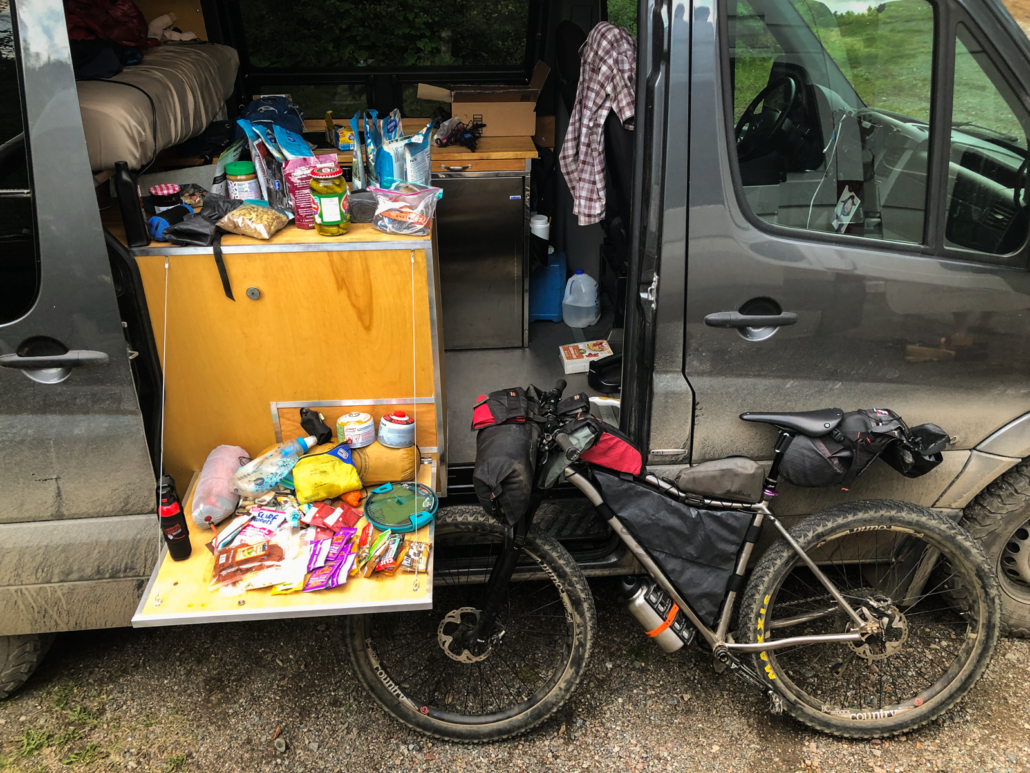
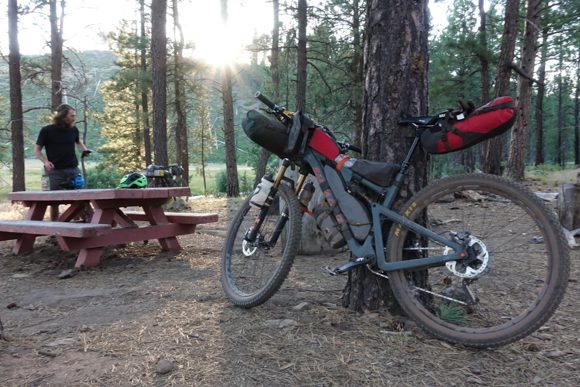
Unloading gear for the trip
Malheur Reserve
Outside Malheur Refuge on smooth rolling pavement.
Sunset pavement, day 1
Day 1 campsite, a few miles past Diamond Hotel. No sounds except birds chirping. Divine.
Ah, the fresh smell of sage
Roads? We don't need no stinkin' roads.
Stagecoach Road: high to low
Can you spot Mason charging down Stagecoach Road?
Zipping down the splendid Stagecoach Road descent.
Wide, smooth gravel enroute to Alvord Hot Springs.
Cruising in the shadow of the Steens at sunset.
Late night at Alvord Hot Springs.
Rolling down toward the Alvord Desert
Mason knows how to stay cool in the desert.
The Alvord Desert lake bed.
Cruising east across the Alvord Desert. Not pictured: INCREDIBLE TAIL WIND.
Sean heading into the mega-fun Big Sand Gap with the Steens and Alvord Desert behind.
East of Big Sand Gap, route finding gets...tougher.
Trail angel! Thanks for saving us from filtering beaver pond water.
Holy amazing camp sunset, Batman. (Willow Creek Hot Springs)
Making friends at Willow Hot Springs.
Willow Hot Springs. #morningtentview
Mason gets clamped.
Sean kicking back, Mason plotting his next Clamp move.
Whoa, we started beyond those mountains?
Hiding from crushing wind during a lunch break. Mmm, salt and vinegar pistachios.
Trail repair. Bacon tubeless kits rock!
Bikes and stuff.
Careening down the Trout Creek Mountains!
Evening in the Trout Creek Mountains
Nevada!
Not too much traffic on the Big Country!
Sean enjoys a morning soak with coffee in Bogg Hot Springs.
Trail repair: leaky thermarest.
Superglue pens from your ER doc friend: don't leave home without them
No bikepacking trip is complete without a few hike-a-bikes. Good for stretching out the legs!
Coffee break looking back at Shelton Refuge.
Final stretch before the climb to Hart Hot Springs.
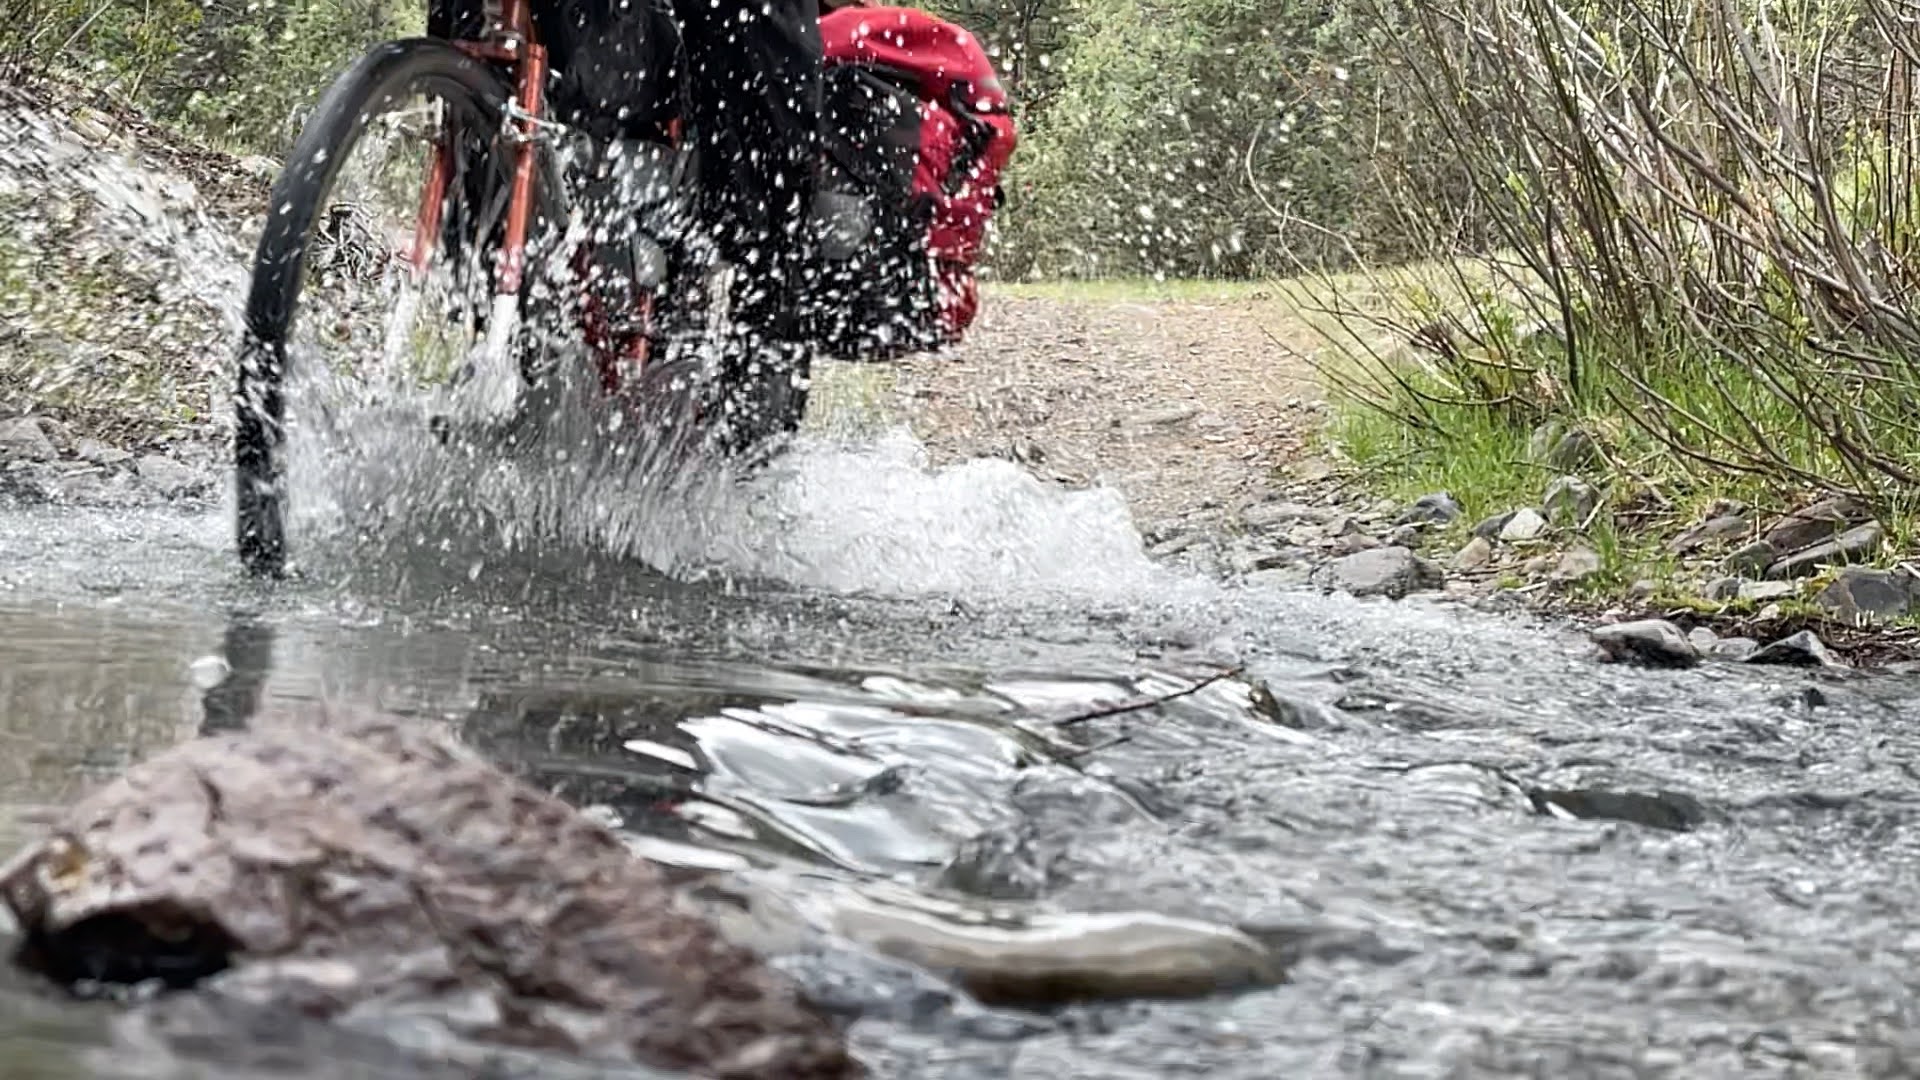
Not too many water crossings on the Big C, all easy.
A night descent into Hart Hot Springs.
The wide, rather boring road from Hart to Frenchglen.
Mason, Captain Dapper
Sean doesn't just ride bikes.
Yup, that's me.
Big Skies, steep roads.
Logistics for bikepacking the Oregon Big Country
Tips and suggestions for the route
-If you want to check snow levels in the Trout Creek Mountains, call the closest ranger station. Call 541-473-3144. They were happy to help. (The Gaia app with snow layers works well too.) We bumped our trip from May 2 to 16th after a late-season week of snow in April.
-Bring as much sun protection as possible. We all wore helmets with a buff pulled up most of the time. Others wear wide brimmed hats or a Da Brim helmet attachment.
Mason knows how to stay cool in the desert. Or just in general.
-Wind protection is quite nice. A buff kept my face from getting whipped raw.
-Mailing a package to the Denio Junction Motel was easy. Tiara and Alex (the new owners as of 2022) are fabulous, friendly people. Call ahead to double check, but they asked that we mail stuff to “Denio Junction Motel care of (your name)”. Restock options at the Motel are very limited, but they are ramping up.
-Big tires are your friend. Suspension is nice, especially the first 150 miles. Anything smaller than 2.4” could either slow you down, punish your body, or straight-up destroy your bike. My friend almost borrowed my old Salsa Fargo for the trip and we thought a half dozen times, “my god, this would be horrible on a Fargo!”
-Supposedly the water near Willow Creek is gross because of the beavers. Filter beforehand or head up really high to where less critters are? Or find some really nice people to give you some of theirs.
-Hart Mountain Trail is closed to vehicles until July 15th. There was no water from Sheldon Reservoir to past all the abandoned ranches. From there, we had plenty of water available to filter.
-The small pool at Hart Hot Springs is warmer vs. the Stone House.
-We took our shoes off for a half dozen water crossings. None of them felt unsafe though.
Not too many water crossings on the Big C, all easy.
Daily summary of trip
We pedaled the loop in 8 days, including a late afternoon departure on day 1 and a half day from Hart to Frenchglen. I’d say 7-8 days is spot on for pacing if you want to experience a hot spring every other night vs. a dehydrating midday soak and continuing to pedal.
Day 1: 33 miles, cruisy gravel roads and pavement from Frenchglen to a brilliant campsite just past Diamond Hotel. We hit the road at 4:30 pm and arrived at dark without pushing too hard.
Day 2: 55 miles up and over the Steens to Alvord Hot Springs. Terrain is lightly used ranch ATV trails with plenty o’ rocks, so going was slooow. Enjoy that descent down Stonehouse Road to the east side, it’s da bomb. (Filter water from the stream on the way down!)
Can you spot Mason charging down Stagecoach Road?
Day 3: About 30 flat miles from Alvord Hot Springs to Willow Creek Hot Springs. A surprise of a day…be prepared for it to take wayyy longer than the mileage and elevation suggest. Roll onto the Alvord and pedal across a straight-up desert. Survive Big Sand Gap. Wander around route finding in the swampy zones. Ford some creeks. Soak away your worries at Willow.
Day 4: Willow Creek to the other side of Trout Creek Mountains. A bruiser of a day. Windy as hell, COLD up high at 8k (below freezing), patches of snowy hike-a-bike…and beautiful. So beautiful. Be prepared for a physically challenging, exposed day of riding. (We did ~40 miles and climbed 6500′.)
Day 5: Trout Creek Mountains to Bogg Hot Springs, 35 miles. Ahhh, almost a day off! Cruisy gravel and paved roads, a stop at the Denio Junction Motel to pick up a box we mailed, and an early arrival at the fantastic hot springs to nap and kick back for the afternoon.
Day 6: Bogg Hot Springs to Sheldon Reserve, 52 miles. Gravel cruising into ATV trails to pavement to gravel for days. Since Virgin Valley Hot Springs was closed, we skipped it and rode the highway over the nearby climb.
Day 7: Sheldon to Hart Hot Springs, 55 miles. A long day out on rarely-used rancher double track. We didn’t see another person the entire day until arriving at the (marvelous) Hart Hot springs.
Day 8: Hart Hot Springs back to Frenchglen, 55 miles. We lazed around all morning at the hot springs, then gunned it for the car on wide, fast, boring gravel roads. (My least favorite kind…)
This is more like it! (Evening in the Trout Creek Mountains.)
Getting to/from start/finish
Frenchglen rhymes with nowhere and is close to nothing, so getting there is up to you and your vehicle. At least the route is a loop! Get in the car and drive, then pedal your way clockwise back to your rig.
The friendly owner of the Frenchglen Hotel is totally cool with people leaving rigs. We donated some cash for parking afterward.
Time of year
There’s no perfect time to ride the Big Country, merely options. We initially planned on May 2nd, but late-season snow forced us to bump our trip to May 16th.
I’m glad we did because we still needed to do some hike-a-bike through snow in the Trout Creek Mountains. To check snow levels beforehand, call the local ranger station at 541-473-3144 or use the Gaia snow layers.
Full jacket mode for a cold descent into Hart Hot Springs.
In mid-May, nights dipped into sub-freezing temperatures. Overall, I’d still vote for that time of year because:
a) days are cooler and there is SO little shade. Pedaling in 90 degrees in low-water terrain = yikes.
b) hot springs feel way better when it’s cold vs. hot.
c) seasonal springs dry up later in the season and water is not plentiful on this route.
Navigation
Navigation was straight-forward thanks to the route GPX from bikepacking.com. As usual, I used Ride with GPS to navigate. There were a few swampy or sandy sections that were tougher to navigate, but generally the track was apparent. Even if it had last been traversed in the 1850s… Thanks to Gabe at Limberlost for putting this together!
East of Big Sand Gap, route finding gets…tougher.
Food
As usual, I rolled on a plant-based diet for this trip, eating freeze-dried meals the entire way.
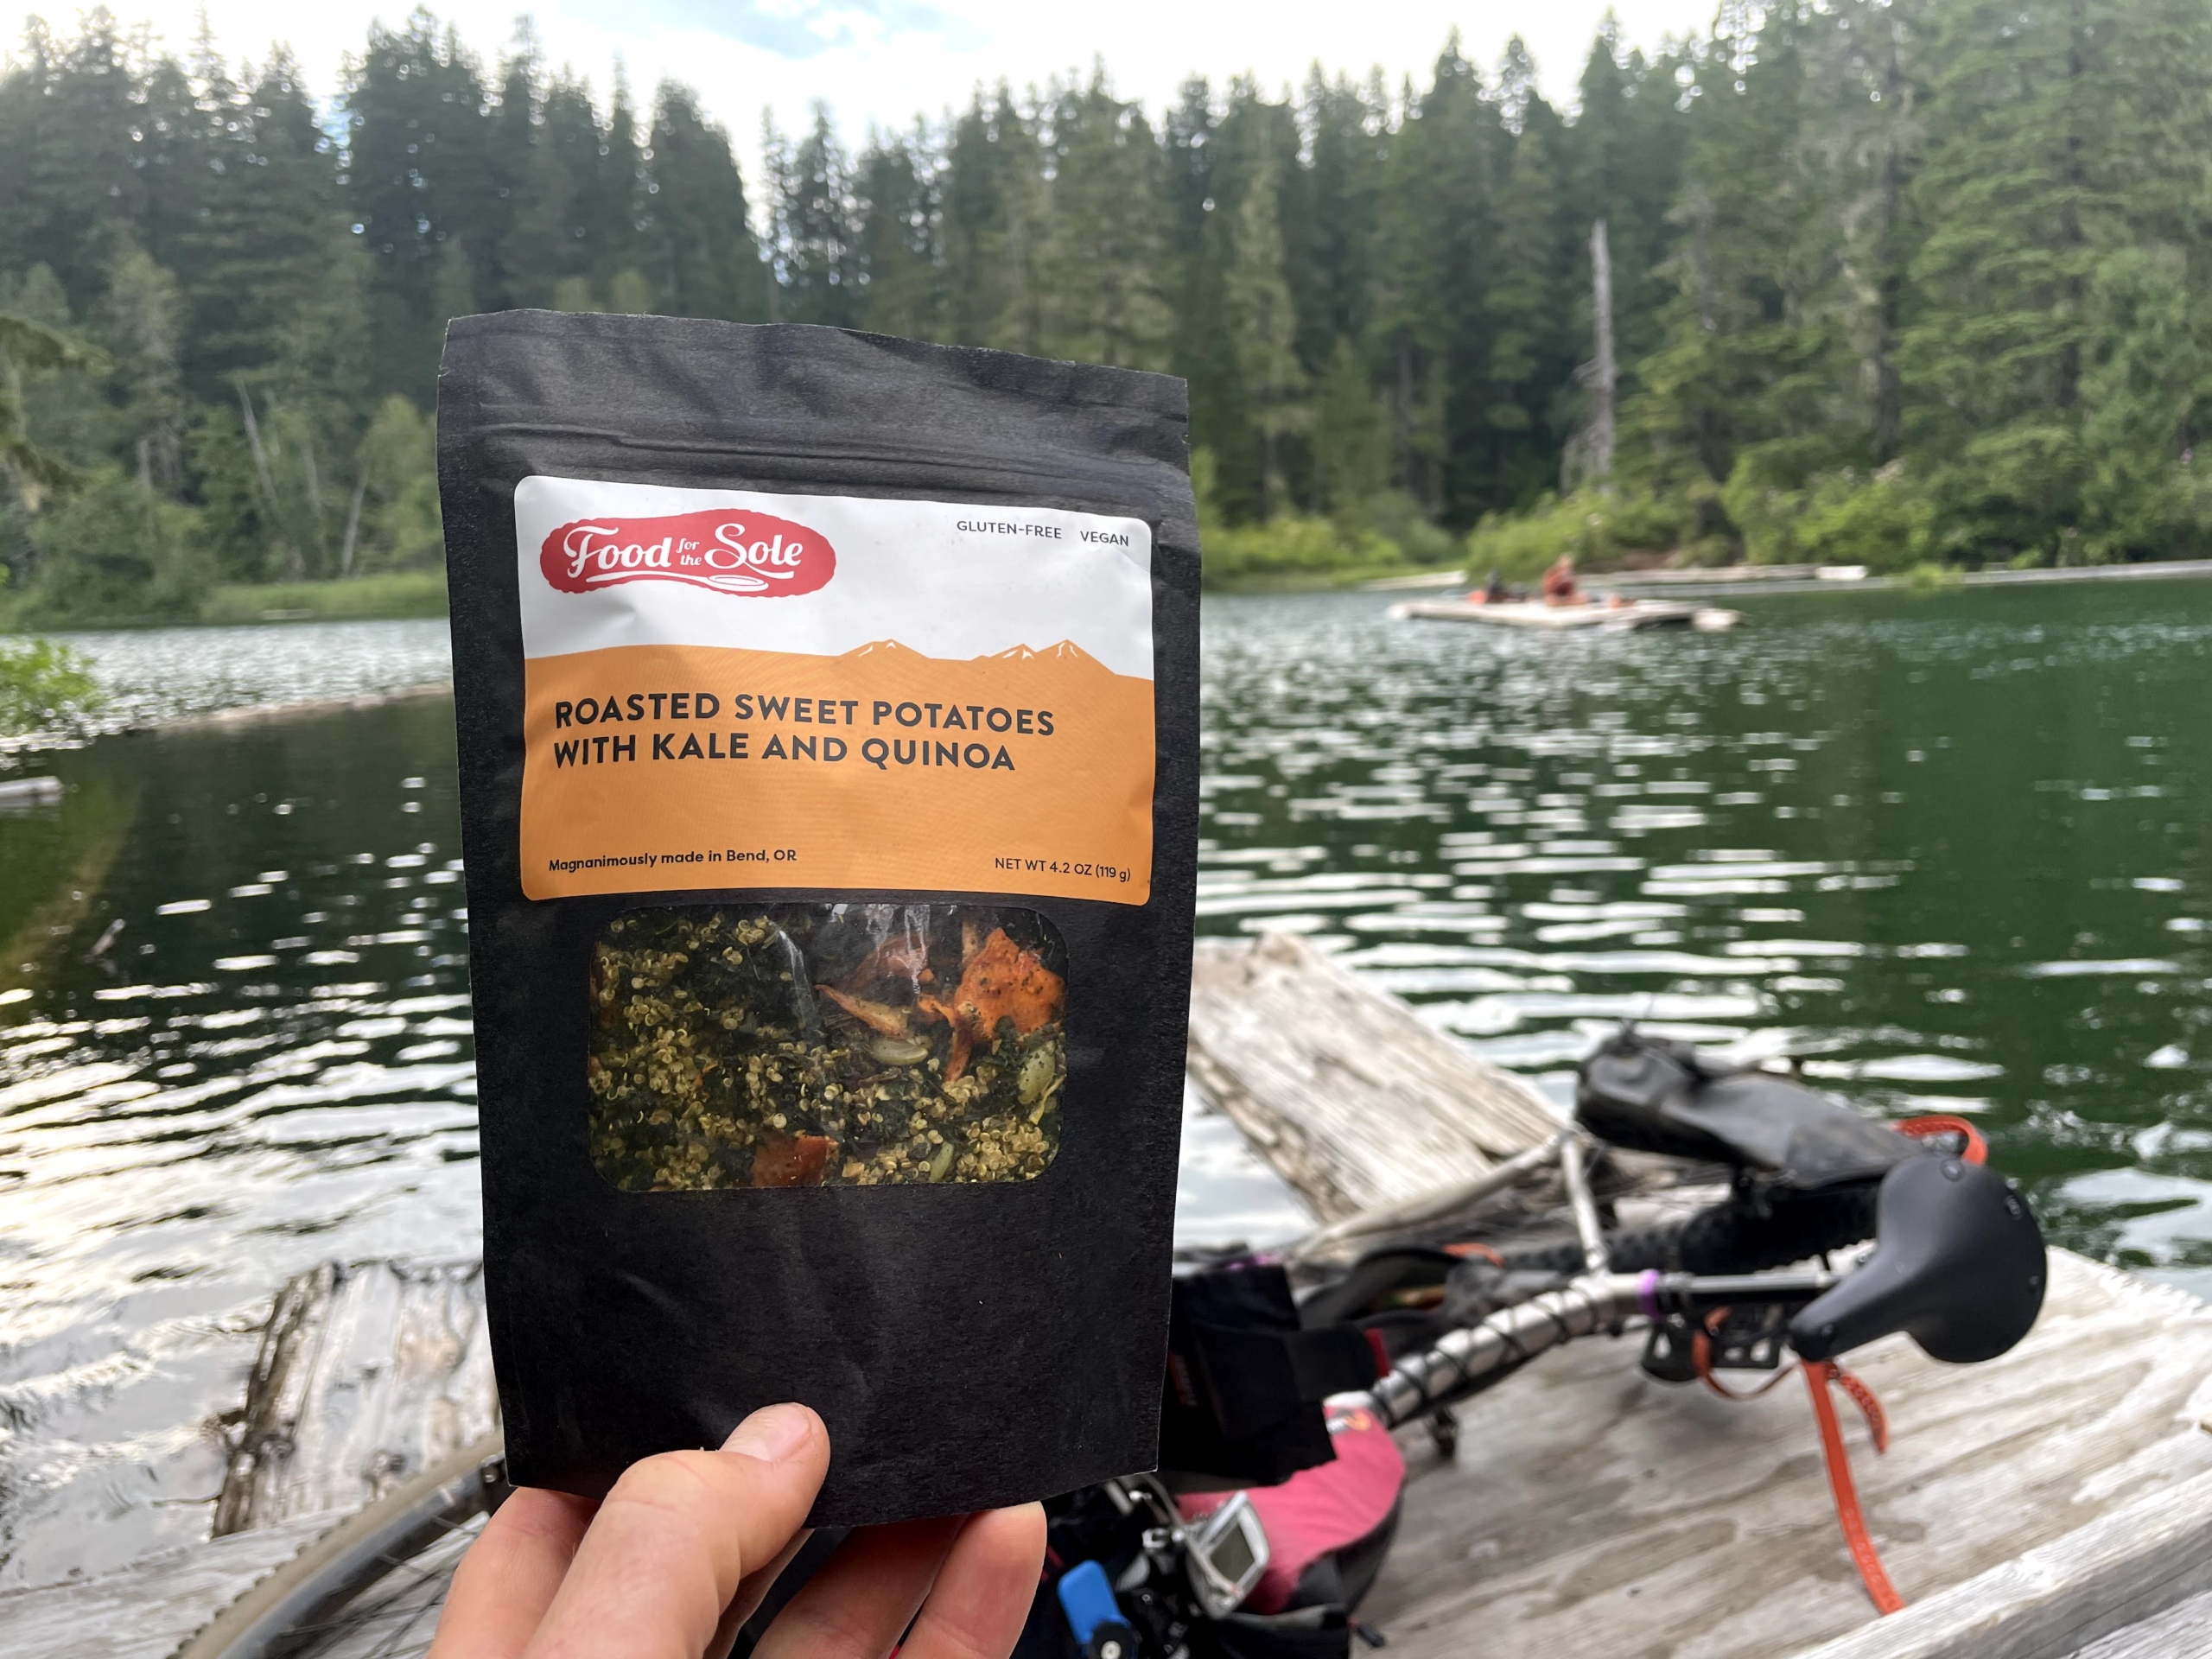
I ate a variety of freeze-dried meals, including delicious Food for the Sole, Backpacker’s Pantry Pad Thai, and the (too spicy!) Good To-Go Bibimbap. Lunches were a mix of freeze-dried options and various snacks.
Overall, I aim for 400 calories an hour without counting calories. I prefer to have an extra meal and bonus snacks in case of a mechanical…or just raging hunger! It’s never perfect and sometimes I screw up and under fuel, but it usually works for me.
Water
Finding reliable, clean water is definitely a thing on the Oregon Big Country. I brought 6 liters of capacity and was glad I did since we dry-camped a few times.
Compared to my previous trips, this outing felt like I was marooned on the planet Dune sans stillsuit. Again, riding this in hot temps would create less-fun situations.
Good plan: If the water looks good, filter it! You aren’t carrying your bike over downed trees or pushing over giant passes, so a couple extra pounds isn’t a big deal. You usually won’t find anything better anyyytime soon in my experience, and we rode right after late-season snow. In June? Yikes.
Trail angel! Thanks for saving us from filtering beaver pond water.
Two of us used Katadyn BeFree filters and I brought a Platypus flter. Even with a pre-filter using a bandana, the water sources weren’t sparkling snow melt and the filters clogged up.
The frustration of doing the boa constrictor squeeze on a filter every time you want water is real! Bring a new filter or clean yours thoroughly before the trip. I’m planning to roll with a gravity filter from now on plus backup water treatment drops.
There is no water faucet at Alvord Hot Springs, so filter water before you arrive. You’ll need to buy water if you don’t filter before arriving, but the store closes fairly early. Ask me how I know…
Other than swamp water, we didn’t see any water from Alvord to Willow Creek. From Willow Creek, we didn’t have water until the other side of the Trout Creek Mountains at the big stream crossing. Fill up there, pickings are slim past it!
Sleeping
We slept under the stars every night on this trip. Camping was easy to find and free except for a few bucks to say at the Alvord Hot Springs.
With Verizon, I had a signal until Willow Creek and around Denio. Otherwise, plan on zero signal.
Gear
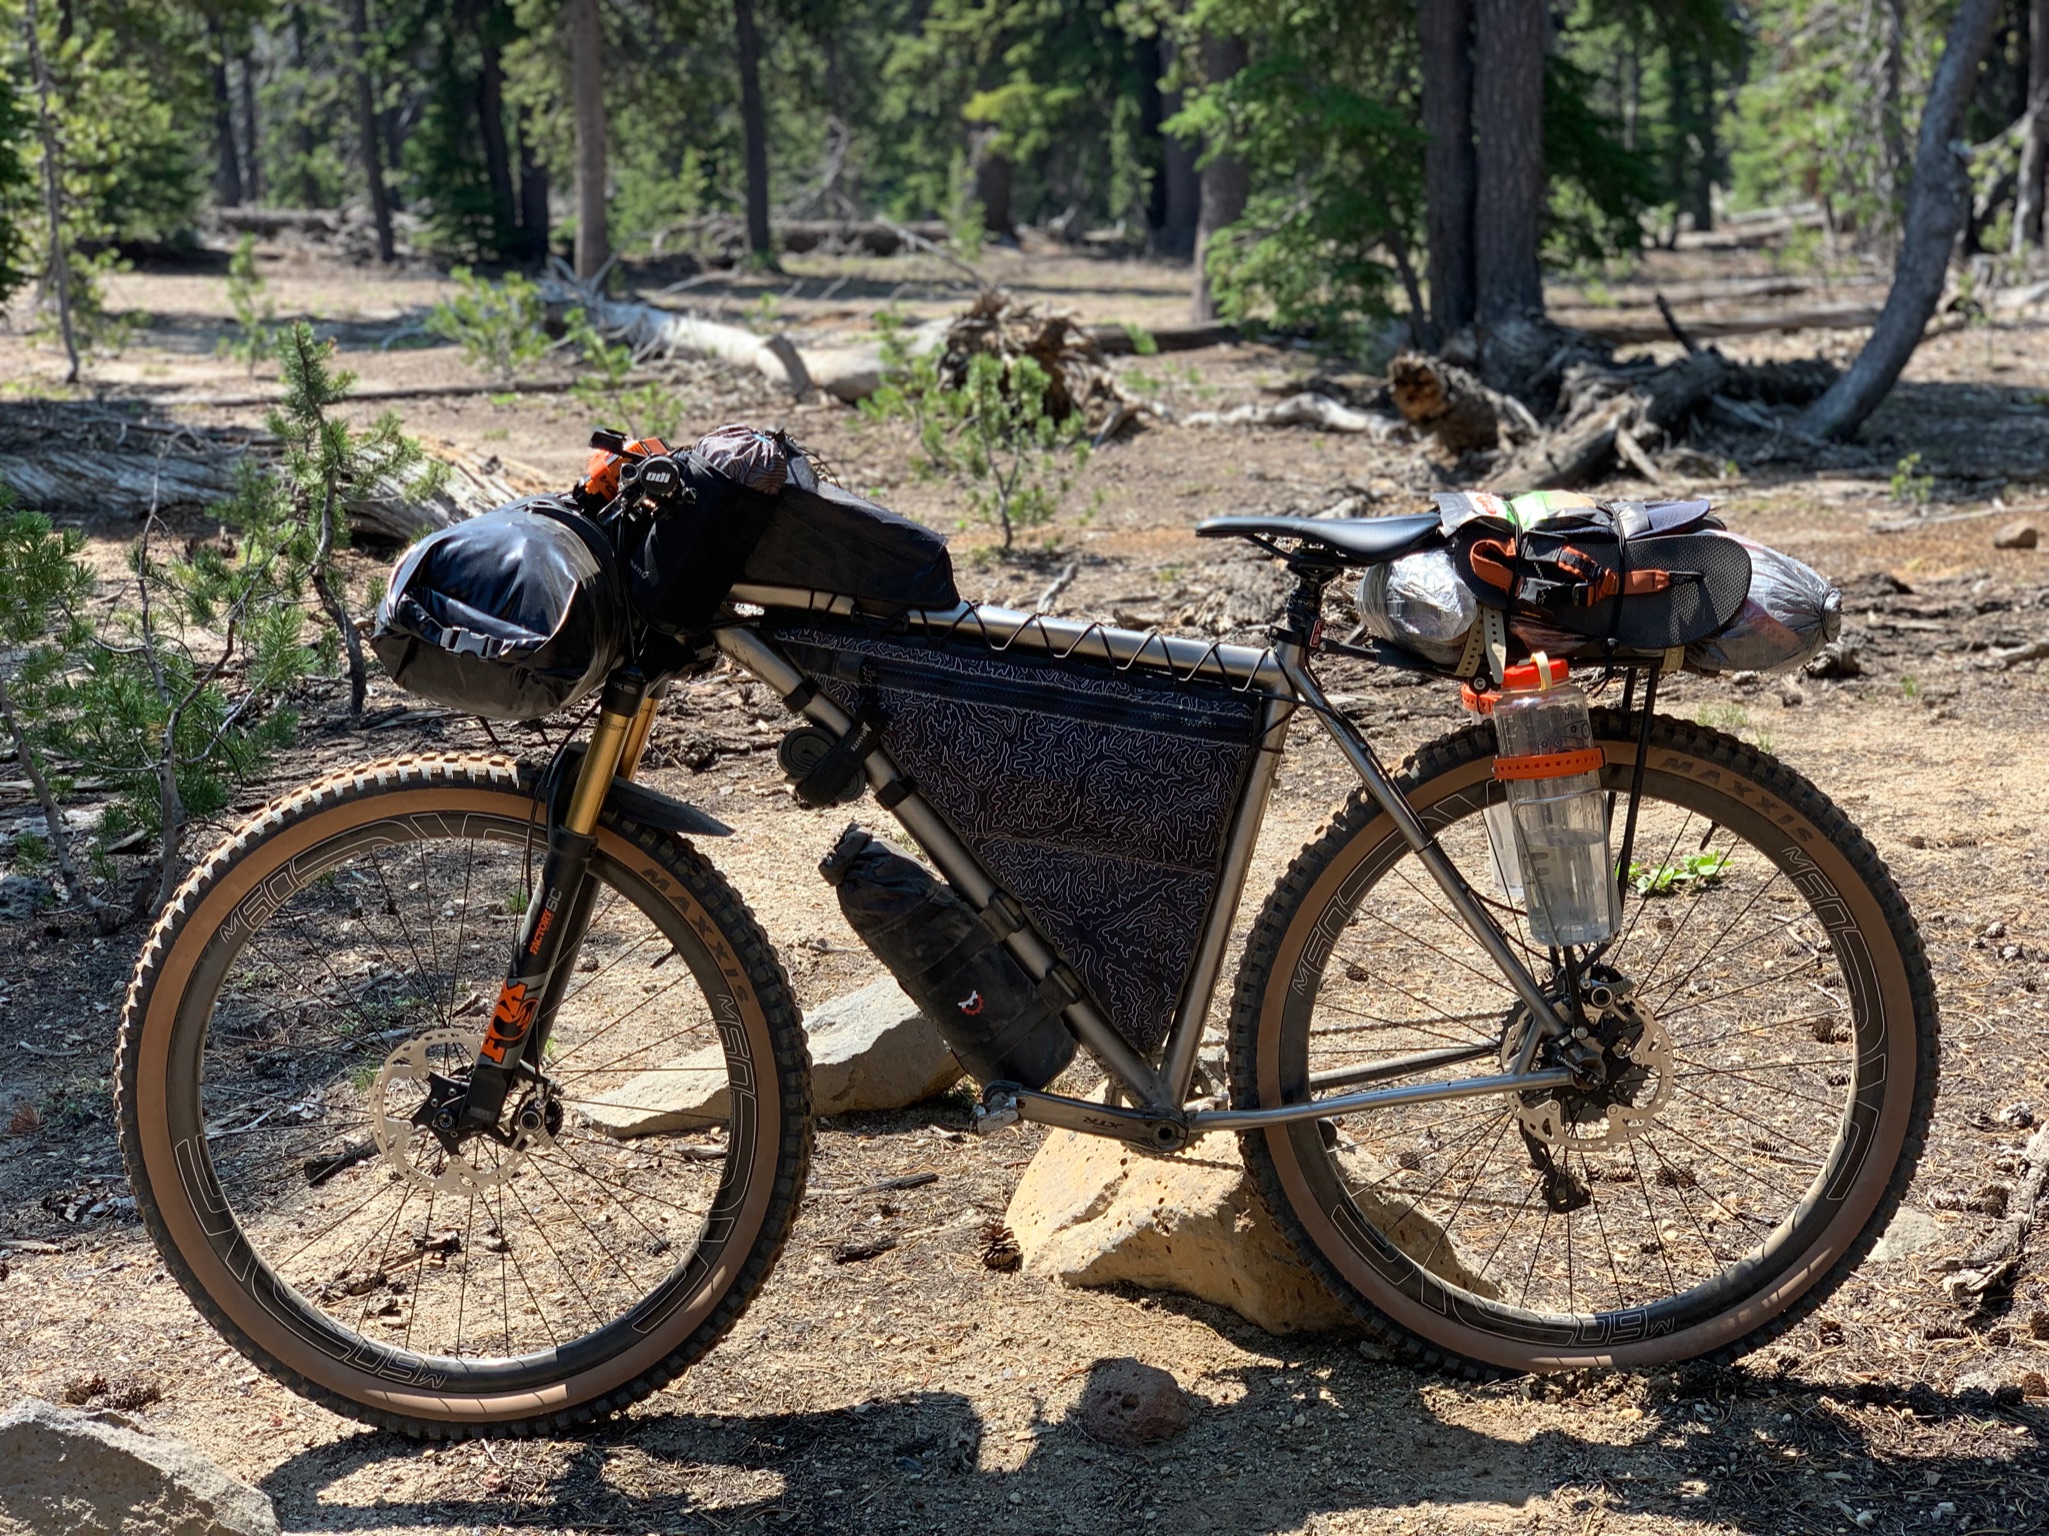
Bikes and stuff.
I rode my 2019 Why Cycles Wayward V.1 set up with a Terrene McFly 2.8” front and Maxxis Rekon 2.6” rear. I run a 140mm front fork, which seems to handle most anything I’d want to ride a loaded bike down. You could do this trip on smaller tires and/or with no suspension, but I loved this setup.
Still digging my 26T chainring on my Wayward paired with my 11-46 Shimano XT rear cassette. Spinning is the name of the game while bikepacking! You’ll never miss your taller gears as much as you’ll wish for more climbing range, trust me.
Rounding out my gear was a Revelate front roll bag for sleeping gear, and a Rockgeist frame bag. To increase water and food carrying capacity, I also ran a Tumbleweed lightweight rear rack with two Salsa Anything Bags and a 20L Sea-to-Summit dry bag, which worked great.
https://www.traipsingabout.com/wp-content/uploads/2022/07/Trout-Creek-Mountains-descent-bikepacking-Oregon-Big-Country.jpg10801920Dakotahttps://www.traipsingabout.com/wp-content/uploads/2018/03/Traipsing-About-logo-white-background-450x156.pngDakota2022-07-13 18:50:292023-05-06 15:08:11Bikepacking the Oregon Big Country route
The Colorado Trail is the big leagues of bikepacking. Get ready for leg-thumping elevation gain, lung-emptying altitude, afternoon thunderstorms tossing lightning and rain at the passes, and remote, rocky terrain with significant consequences.
Oh, AND prepare yourself for a fabulous adventure you’ll never forget.
We experienced no days I can label easy, but for determined bikepackers, it’s not unreasonably difficult. (Well, maybe a couple hours of it…) At our pace of 12 days for the trip, the town resupplies slotted nicely into the program, downed trees weren’t a thing, and perfect trail conditions from rain kept the dust down.
Sure, obstacles appeared. Forest fires from the west tainted the air for the first week. The elevation gain and hike-a-bike are no joke. We fled thunderstoms. My bicycle showed up 2.5 days late with a bonus of a broken dropper post…
But hey— no mosquitoes swarmed us, beautiful vistas assailed our eyeballs, fantastic descents delighted us, dozens of CT backpackers chatted it up, and we had the opportunity to ride through the Colorado mountains on a famous trail. What more can a bikepacker ask for?
Another day on the CT. (Near Kokomo Pass, between Frisco and Leadville.)
Shortcuts for Colorado Trail details
Here’s my experience bikepacking the Colorado Trail. I wrote this as a resource for folks looking to bikepack this route, so free to skip to any specific sections below.
Traveling between Denver and Durango, the Colorado Trail’s originated as a hiking route. Perhaps that’s why so many backpackers stared at us like we’d escaped the loony bin…
Featuring 70,000+ feet of steep climbing in ~550 miles, the bikepacking route bypasses a few wilderness sections on fire roads and pavement. Mostly, it follows singletrack up and down over 10-13k passes. Check out the main Colorado Trail page on Bikepacking.com for a complete write up.
Down down down…sometimes.
The Best-Laid Plans
My plan was simple: fly into Denver and out of Durango with 15 days to complete the trail. About 40 miles each day with space for half-days if thunderstorms whupped our butts or we needed a rest day. No problem.
I live in Oregon, so flying lopped dozens of hours of driving time off the trip. Since airlines love to charge $200 to bring a bike only to dropkick them down ramps, I mailed mine with Bikeflights instead.
Sadly, UPS blew it and my bike arrived 2 days late. Instead of bikepacking, my trip companion Mason and I explored Denver. We broke tested traffic laws on Lyft scooters, toured the Denver Art Museum, bought final trip items, and generally made the best of it. Lesson learned: ship bikes with a bigger time buffer.
My bike finally arrived at 5 p.m on Monday. We reassembled it in a chandeliered banquet hall, caught mass transit to Littleton, and pedaled 10 miles to the CT start at Waterton Canyon. We arrived riiiight at sunset—spirits high, visibility low. Trips ideally start at 8 p.m., right?
No matter. Mason and I enjoyed an easy cruise up the canyon and camped near the start of the singletrack, poised to leap into the adventure the next morning.
Here’s the tl;dr for our Colorado Trail trip: up at 6-7 am, on trail after a cold-soak breakfast of oatmeal with nuts and berries. Go uphill (pedaling or hike-a-bike). Go downhill (mountain bike amnesia! Hard climb forgotten!).
Stop pedaling around sunset. Aim for days to end at the bottom of a descent to reset spirits and cleanse the mind. Better for morale.
Repeat.
In between, eat as much as possible, listen to audiobooks when the hike-a-bike gets soul-crushing, stop and talk with as many thru-hikers as possible, and keep eating (always).
Want the real details? Read on.
By the way, dig these kinds of posts? Sign up for the free 2x/month Traipsing About newsletter for more tales from the mountains and creative challenges like drawing and piano when I’m off the bike.
(Real) Day 1: Waterton
Unless you’re already a mountain goat or already live at elevation, your lungs will hurt out of the gate on the Colorado Trail.
Our first two days climb from Denver at 5k’ to 12.5k’ above Frisco. We enjoy occasional downhill moments and plateaus, but generally, we work. I’m immediately glad I swapped my front chain ring out to 26T—unless you have thunder cannons for quads, do it! Loaded bikes are heavy, treat your knees nicely.
My first Colorado Trail surprise is the sheer number of thru-hikers. We pass SO many. The Colorado Trail Foundation estimates 600 hikers will complete it in 2021, 4x the usual.
Chatting with people, we learn the backpackers span all ages and distance traveled per day. Everyone on their own journey, with different experiences and fitness and goals. The majority of hikers are college-age or retired, taking 30-45 days. Compared to bikepacking, it’s another world, a solid chunk of summer spent on trail with rest days and trail families. If it weren’t for so much walking, I might be into it.
My second surprise is my recently-serviced seat dropper post. It worked fine before I put it in the box in Oregon, but refuses to pop back up on trail. *sigh* I finagle a solution to keep it fixed in place.
First descent! End of segment 1 heading down to the S. Platte River.
Our inaugural thunderstorm booms overhead when we meet Jay, a Colorado Trail racer. He’s looking rough thanks to a wreck, blood seeping through bandages. Sounds like the CTR racers got their butts kicked with three days straight of pounding rain out of Durango. We trade beta and commiserate, three guys in the woods looking for adventure. We’ve got it, in some form at least.
At our first bypass around wilderness, we chat with another CTR racer who sounds ready to sell his bike and embrace playing Fortnite instead. “Seven major thunderstorms, I counted.”
The Lost Creek detour proves to be an undulating, soft fire road. Rain spits from the gray sky, but the Bikepacking Gods keep the intensity dial below pouring.
To celebrate our first day on the Colorado Trail, Mason loses his phone at the end of a lonnnng descent. Dark:30 is incoming, plus we’re tired and low on water. I convince him to pedal back up and he miraculously finds the phone.
It’s almost dark and I’m shivering, body heat gone. We descend a mile and YES there’s a random stream with a perfect camping spot. I don all my clothing, pitch the tent, chug water, gobble down a freeze-dried meal, and get in my sleeping bag RIGHT before the skies open up. We drift off to raindrops smacking the tent.
Traversing a plateau on day 1 west of the S. Platte River.
Day 2, Tarryall detour to Kenosha Pass
We rise to soaked gear, but at least the rain has stopped. It’s a fresh day and more bicycling awaits!
Turns out the Tarryall traverse is steep climbs and descents, repeated forever. A couple miles in, we pass a father-son duo about to kick off day 3. They’ve under-estimated the trail and are bailing. “We’re playing golf in Breckenridge tomorrow. This trail is HARD.”
At Goose Creek campground, we chat with the friendly camp hosts as their giant tom cat plays in the brush. Our lunch wrap is vegan Violife cheese, Primal jerky, hot sauce and spinach. We’re living the good life out here!
The wide open views of the Tarryall Road detour.
And yet (small) wheels are threatening to come off: while drying my wet socks, I lose one on a descent. NOOOO. Rookie mistake. Second issue: my water filter is already slowing down to a trickle. WTF, it worked at home.
We hit pavement and push on into a headwind. Hours later, Mason’s enthusiasm jumps back to 10/10 when we reach the Stagecoach Saloon, which features a solid selection of snacks. We restock on super healthy options junk food. Stagecoach is our only food stop for the 150 miles between Denver and Frisco.
Another hour of fire road climbing and we’re back on the Colorado Trail. Always-Strong Mason pushes up the final climb as sunset sparks to the west. Over the top, mountain bike amnesia strikes as I descend through waving aspen.
We crash out at Kenosha Pass campground. Two Ibuprofen and ear plugs = blissful sleep.
Wrapping up day 2 at sunset, just before the descent to Kenosha Pass.
Day 3, Kenosha Pass to Frisco
We kick things off with a smoky morning climb through sun-dappled aspens. We’d considered bailing on the trip, but an AQI of 175 is only a couple hundred cigarettes per day.
All’s going well, minus the giant hand squeezing my lungs on the long approach to Georgia Pass. Altitude is real and I can’t take deep breaths! We’ve climbed from 5k to 11.8k in 30 hours, so it makes sense.
The descent off the pass is initially fantastic, then devolves into rocky madness near the bottom. I’m a fan of rocky terrain, but this tests me and my loaded bike, especially with a broken dropper post..
Break-your-bike rocky on the Georgia Pass descent.
Halfway down, we catch a hiker who plods along with headphones in. They must be noise-cancelling because we yell like psychos for two minutes until he hits a switchback and yelps in surprise. Hikers and bikers: one earbud while recreating, please.
Mason and I soak our shirts in a cold creek and chat with a backpacker from Florida. He torched his knees out of the gate with big days and may need to bail on his trip. The CT’s elevation gain is hard on a bike, but I can’t fathom hiking all that downhill. Brutal.
Up and over another steep pass with about 12 seconds of pedaling. Podcast and hike a bike, go! Especially at elevation as our lungs adjust, hiking feels far better than gasping.
MOUNTAIN BIKE AMNESIA. The descent is fast, smooth, all the funzies.
However, we hit Breckenridge and realize it’s NINE miles out of the way to Frisco. All paved bike path, but I quickly decide retracing our route the next day will damage my psyche.
In Frisco, we swing by the post office for a restock that Mason mailed ahead. I pull my favorite trick: not eating enough on days finishing in towns. My energy flat-lines and I barely can drag myself around Whole Foods.
WE FOUND FOOD.
We pass the evening in repose in a hotel, cooking ravioli in the room, eating grapes and cherries, and laughing until we cry at the Coffin Floppers comedy sketch.
The only bad (?) news: Mason’s phone is torched from when he dropped it. He’ll spend the rest of the trip without one, probably the longest period of his life sans-phone.
Day 4, Frisco to past Leadville
We kick things off by fulfilling my goal to not be a purist. Gold Hill segment? Nah. We skip it and pedal the sweet bike path from Frisco to Copper Mountain. Between losing two days to my bike delay and the ominous weather forecast, it makes sense. I’d probably do it anyway.
I’m loaded down with a large bag of cherries, which I donate to the first backpackers I see. It totally makes the day of a fruitarian named Jay.
Jay and his cherries! I don’t see any tears of joy in his eyes, but I’m sure they were there.
The usual pass protocol: pedal interspersed with hike-a-bike. I’m huffing my way uphill when another fun moment occurs: “Hey, are you Dakota? I follow your newsletter!” It’s a woman and her husband out for a hike. Small world!
The weather forecast remains true and threatening clouds amass to the west. They aren’t THAT bad though… We push on while keeping an eye on bail-out options in the trees down the slope. Then we’re over the false summit and above the treeline. Keep moving! We move fast and don’t eat enough, but manage to avoid getting zapped.
Halfway down the screamer descent, rain hits. We take advantage and pause to eat trail burritos and animal crackers.
High above Frisco near Kokomo Pass.
It’s a solid push to Leadville, but we arrive in time to mow down giant burrito combo platters. Then we push on, another 10 miles of fire road before crashing for the night by a lovely stream.
Day 5, Twin Lakes to Buena Vista
We rise and immediately ride past a sign proclaiming “no camping within 100’ of water.” Whoops. We were good tenants, don’t worry.
The smoke hangs heavy, toeing 200 AQI. Playing piano is less taxing on the system, methinks. Mason’s bike rebels against the terrible air by jettisoning its chainring. No big deal, it’s only required to pedal. Somehow, he MacGyvers a genius combination of tools to get it tight enough to get to Buena Vista.
Through the aspen…
Hours later, we trade beta with three stoked bikepackers from California northbound on the CT. The exuberant sharing of trail details and what’s to come is a fabulous aspect of any travel, but especially outdoor adventures. They also give us Oreos, so maybe I’m biased.
It’s one of our easiest days, helped by utterly fabulous tailwinds on the pavement into Buena Vista. On a slight downhill slope, we rip along for 20 glorious miles with barely a pedal stroke except to change leg position.
My smirk sums up how I felt not pedaling for 20 miles into Buena Vista. Best tail wind of my life.
Buena (be-oona) Vista is a little town with a chill vibe. The post office is closed, but we planned ahead and scoop up a box we mailed ahead to someone on Warmshowers.
Once again, I make the cardinal error of not eating immediately when getting to a town. Instead, I buy a new, unclogged water filter and get my dropper post fixed at Boneshaker Cycles, a top-notch bike shop. Eventually, I Zombie-stagger my way across the street to get food.
We follow a pro tip on a camp spot and head out of town 10 miles. The smoke hangs heavy in the air and the headwind sucks. Thank god for sleep or bikepacking might feel impossible sometimes. How the ultra-endurance racers push on and on and on is beyond me.
We rinse off in an ice cold creek and crash. Halfway done with the Colorado Trail!
Careful where you step.
Day 6 – Buena Vista to Monarch
A hard day. My memories are mostly steep, unrideable uphills—like, why-is-my-bike-over-my-head steep. Our one big downhill is on pavement into Princeton Hot Springs. Sigh. Can’t win them all.
Mason hates it enough to cut off his shirt sleeves at a lunch stop. He’s officially a punk bikepacker. We channel the anguish and push on.
Getting my heart rate under 250 after the ridiculous hike-a-bike up Chalk Creek. Ouch.
A couple of bikepackers in their late 60’s tell us how they figured out their lackadaisical trip pace. “I don’t have anywhere to be until ski season,” one quips. The retired life!
Sunset approaches and we’re pedaling up the Highway 50 bypass to Monarch Crest. Sunday night traffic suuucks. I’m d-o-n-e. We have no idea where we’re camping and 1.5 more hours of climbing with trucks whipping by sounds suboptimal. Anyone want to buy a cheap bike?
Suddenly, a beacon of hope appears. What is The Butterfly House?! Why, a donation-based respite for weary travelers! The proprietor is out of town—how cool is this place—so we make ourselves at home per the sign on the door. We score showers and do laundry, chat with the handful of backpackers staying there, and feel like humans again.
The quote of the day is from a backpacker named Alex, who asks us, “So, how many times a day do you wreck, 1-2?” HAAAA. If I wreck 1-2 times a year, I’m doing something very wrong. Thru hikers officially think we’re insane.
The Butterfly House! Take the detour up Highway 50 and stay here. Thank me later.
Day 7, Butterfly to Sargants Mesa
We barely peel ourselves away from Butterfly Hostel. A rest day doesn’t sound bad… My legs immediately agree once we resume pedaling up toward Monarch Crest. All good—it’s a beautiful morning, traffic is light, and we’re heading into a fabulous section of the CT.
The Monarch Crest general store revives my spirits with mind-blowing junk food options and cheery employees. Still, when Fritos improve one’s mood, the loony bin isn’t far away.
Monarch Crest trail delivers. Even the uphill pedaling is fun, with views unfolding until the smoky air diffuses them. Pro tip: skip the Ten Mile hike-a-bike and pedal the road. Thank me later.
We descend, climb, the usual. It’s subtly difficult rocky terrain and the elevation is real.
However, we’ve arrived at the most-maligned section of the Colorado Trail, the dreaded Sargent’s Mesa. Descriptions of this zone are either very short or laced with expletives.
Yup, it’s rocky. Unrideable uphills and annoying bumpy flat sections aren’t fun, thought not as bad as expected. The downhills are rowdy as hell, but rideable and fun for us. (Glad I got my dropper post fixed.)
Still, somehow I screw up fueling and my energy feels like dog poo. Too much sugar after the bonanza at Monarch Crest, methinks. I flop on my back on the tent footprint and try to revive my appetite. Each day on the trail is so similar and yet so different, elation easily switching places with, shall we say, less positive emotions.
The result of eating too many Mike and Ike’s and not enough real food.
We push on into sunset, striving for Razor Creek. My energy levels and enthusiasm scrape the depths. Tomorrow, I shall eat less sugar. A descent in the dark, headlamps blazing, brings us to the trickle of water. We pitch the tent in an (almost) flat field and slip downhill into the foot of the tent 25 times an hour that night. It’s not restful.
Day 8, Sargents to Cathedral Cabins
A cold morning wrapped in all our gear, rain pants included. The air is clear and crisp, the nagging smoke moving north for a bit.
Traill magic! Two cheery ladies are cooking pancakes out of their Airstream. “We had 17 people camp in that field last night,” they proudly announce. We roll on with a heads-up that a guy named Eric needs grub—with a restock coming up for us, we give him two freeze-dried meals and pistachios. The backpackers have 10 days between restocks in this section, ouch.
A professional trail angel, Apple, is up next. He leaves broiling Cincinnati every summer to come stay in Gunnison, where he drives out to the CT and sets up a trail angel station from 8-5 every day, chatting away the hours with travelers.
Full-on trail angels! Trail angel, take 2! Apple travels from Ohio to help out hungry hikers all summer.
The fire road bypass around wilderness at mile 361 is long and hot. Maybe I’m just mad because a freeze-dried meal with turmeric spilled in my frame bag and some of my possessions now feature yellow splotches?
We grind out the fire road, up a beautiful valley toward the pass. Sun. More sun. Audiobook territory.
But whatever! A looong descent on the other side erases the hard work from our memory banks and drops us right at our destination for the evening: CATHEDRAL CABINS.
I capitalize CATHEDRAL CABINS because it’s a trip highlight. Cute cabins nestled back in a side valley, moose stomping by in the meadow, a box of food we mailed ahead, and tons of tasty snacks available for purchase. Bikepackers: if you don’t stop here, you’ve made a grave mistake!
We spend a fabulous evening joking around with three other bikepackers and the cheery, friendly owners.
The splendid Cathedral Cabins. For sure stop here even if you don’t stay the night! Food resupply and cool folks in the middle of nowhere.
Day 9, Cathedral past CT high point
Since all nice things must end, we uproot from Cathedral and push on. Low-grade climbing allll morning on a gravel road, friendly ranchers cruising past in their trucks.
Pavement riding isn’t my thing, but Slumgullion Pass is a fantastic name. We aim for the sound barrier on the descent and almost crack 50 mph.
The kindness of strangers on the CT amazes me. We’re eating lunch by the side of the highway when a lady driving a truck slows down to ask if we need anything. She’s got four grungy backpackers in the back. Later we learn that she runs a volunteer shuttle from Lake City all the way up to the trail and back every day to help backpackers with resupplies.
Sadly, there’s no shuttle for the next section, a steep, rocky climb off Spring Creek Pass. We play hopscotch with backpackers, pushing our bikes and even occasionally pedaling. At least the views are stunning—the Colorado Trail’s beauty amplifies as it unfolds from Denver.
Beautiful…and hard work.
At a water stop, we meet a family of four backpacking the CT for three months. The kids are just 8 and 10! What a summer.
Rather than stopping at 5 p.m., we decide to push on (literally) over the CT’s high point. It’s another three hours of hike-a-bike as we ascend to 13,200’. At one point, I’m wrestling my bike up a ridiculous switchback as the sky drips warning rain…and then it clears.
Instead, we’re served a delicious evening dessert of sunset views. The smoke merely deepens the reddish hues. The descent ain’t bad either.
We dry camp at 12k’ overlooking a pretty valley. Another splendid day on the CT, even if we’re face-plant exhausted.
This riiiight here is why we bikepack. (Colorado Trail high point)Best campsite ever, even if we were exhausted afterward from sleeping at 12k!
Day 10, to Silverton
Did I say exhausted? NOW we’re exhausted. We both feel slammed this morning; are we dragging chunks of steel behind our bikes?
Chalk it up to elevation. I haven’t spent much time at 10k+ and spending the night at 12k hurt us.
Thanks to that, we grind. All. Day. Long. Survival mode, a group of hikers with a tour company passing us again and again. Hooray for splendid views because otherwise…dark thoughts.
Tired as can be, but COME ON. How is it so beautiful out here?
Luckily, there are marmots squeaking and skittering about. Their enthusiasm is contagious. Life is good.
We go over three 13k passes, up/down/up/up/up. Yegads the views are good, but clearly I am not cut out to be a high-altitude Sherpa.
The huge descent off Stony Pass is less than smooth, but gravity still works. Somehow, a half dozen masochists are driving up the insane road in beaten vehicles—were they new at the bottom?
SILVERTON. A hotel awaits us, but first we mow vegan pizza, tacos and tofu wraps. Food, life’s panacea. I grab a wrap for the road, Mason fixes a nagging flat tire at the excellent little bike shop.
The final push to Durango is all that remains!
These photos sum up our enthusiasm levels at the end of day 10 in Silverton. High altitude efforts are hard!
Day 11, Silverton to Hotel Draw Road
Two major wins to start the morning: our energy levels are revamped from sleeping at (only) 9k AND our bikes didn’t get stolen from the hotel’s backyard.
We notice immediately that today is different than yesterday…we’re actually pedaling our bikes instead of pushing them. There’s a lovely road climb to Molas Pass, then MORE pedaling on trail. Enthusiasm is high, even if we do spend a few hours pushing our bikes later in the day. (You don’t gain 6800’ in 34 miles just pedaling…)
Good news! You can actually pedal up some of the climbs between Silverton and Durango.
Also, my tofu wrap from yesterday is the best. Always buy extra to-go food in cities!
It’s a fabulous day. Maybe the best one of the trip? We can’t remember more than a day prior at this point—bike, eat, hike, sleep blends together a bit—so who the hell knows.
Two people highlights from the day: at Blackhawk, we joke around with a Boston couple and Mason donates an extra Food for the Sole freeze-dried meal to their cause. Hey, they’re vegan too! There’s almost a spontaneous group hug before COVID awareness stomps the fun.
Another group of backpackers arrives while we’re at the top and compliments us on our passing etiquette. Apparently most bikepackers scare the hell out of hikers? (I’ve done it too.) A reminder to dial it back and be an ambassador out here.
We descend off the pass and stop riding at 6:30 (early for this trip) and lounge about. It’s cool to push to dark, and also rewarding to hang out in a nice campsite and enjoy a little free time.
Top of Blackhawk Pass!
Day 12, Hotel Draw Road to Durango
No rush today, so we sleep in and roll at 8. Just up the trail, some volunteers for a mtb race that day tell us “coming up you’ve got the best 11-12 miles of trail.”
LIARS. It’s mostly uphill and traversing. WTF. Expectation setting sucks! I prefer to be surprised—good or bad—with what’s ahead.
At a water source, we catch a young rider—he looks like a DH racer— from the Midwest who is 32 days in on the CT. He clearly hates bikepacking, but is sticking with it. If I felt as depressed as he looks, I’d sell my bike for scrap and bail immediately.
Wildflowers show off as we climb to Indian Ridge. No passes can faze us at this point, I think…and then hustle like mad to get off the ridge as weather threatens. We learn later that a bunch of the bike racers got stuck in a massive hail storm and bailed.
Our 6,000 descent into Durango is only briefly punctuated by an overgrown hike-a-bike. Otherwise, it’s downhill for days. My arms and wrists are exhausted from the huge quantities climbing and descending in the past 12 days, but hot food and a hotel await us in Durango.
End of the Colorado Trail!
Parting Thoughts
The Colorado Trail is magnificent. Many times during the trip, I’d take in the scenery and think, “Wow, I get to be here.” It’s truly a bikepacking trip of a lifetime.
That said, this is not a trip I’d recommend for a brand-new bikepacker or new mountain biker. The CT is a tough mofo! We met a number of groups who were bailing because they under-estimated the difficulty. A seasoned local we met guessed that only 30% of bikepackers who set out actually complete the entire trail. The altitude is real, the elevation gain is serious, and inclement weather means taking one’s time sometimes isn’t an option given the risks of Bikepacker Flambe on a pass.
I well-know bikepacking contains obstacles and suffering pushing through things are part of it. There were STILL times I questioned what the helllll I was doing with a bicycle on the CT, usually when my bike was above my head on an insane hike-a-bike.
Bikepacking.com says 90% of the trail—time wise—is rideable. I’d peg that closer to 70-80%…and I like technical riding and my bike has a 26T front chainring. TO SUM UP: YOU WILL HIKE YOUR BIKE A LOT. Thank the Bicycle Gods for mtb amnesia, aka forgetting heinous climbs during a fun descent.
Hard work in them hills! (Kokomo Pass)
As any bikepacker knows, it’s not all fun and games. Day rides from my house or camper van aren’t even 100% fun; bikepacking is far from it. It’s all about the spirit of adventure, traversing beautiful landscapes, independence and ingenuity, camaraderie, eating Oreos on a mountain ridge, starry skies and sunrise vistas, and delirious laughter at the end of a hard day. And, sure, going downhill…
My deep thought from bikepacking the CT is this: weather creates half the adventure in outdoor pursuits. Heat, rain, smoke, snow, and wind can conspire to smote a trip upside the head and create insane conditions. Or they might step aside and make for a peaceful outing.
Such is the case with the Colorado Trail. An afternoon of lightning and rain on day one set my mind racing on the dread treadmill. “Will this happen every day?!” My soaked feet and gloves said oh hellll no.
Be prepared to get owned by thunderstorms. Everyone talks about them. We (mostly) got lucky and avoided the Devil’s Dance on alpine ridges, but many trip summaries and friends of mine mentioned fearing for their life at some point. One couple we met dealt with long thunderstorms every.single.day and started riding only at night. (He also got poison ivy so badly that his trip required THREE hospital visits. #cancelmytrip)
That said, the Colorado Trail deserves a slot on every bikepacker’s bucket list. It’s a spectacular chunk of Colorado and will inscribe itself in your memory. Start planning your trip now! Just bring rain gear and an adaptable mindset. Oh, and did I mention hike-a-bike? Pack light.
The Colorado Trail, folks. It’s magic out there.
Photo Gallery
Click on any photo to enlarge and flip through them slideshow style.To get a sense of the trail’s progression, they’re in chronological order.
Mason shreds like a boss on Lyft scooters.
An excellent place to put a big together. Thanks, Holiday Inn Express Denver!
Here we goooooooooo. Look how fresh-faced and innocent we look. We haven't even hiked our bikes yet.
Heading up Waterton Canyon to kick things off.
First descent! End of segment 1 heading down to the S. Platte River.
Traversing a plateau on day 1 west of the S. Platte River.
Mason cooking up some grub during a rain break on day 1 at Wellington Reservoir.
Campsite, day 1. 10 minutes later, it started pouring...so glad we had a tent!
The wide open views of the Tarryall Road detour.
Through the aspens at the end of the Tarryall detour.
Wrapping up day 2 at sunset, just before the descent to Kenosha Pass.
Heading up from Kenosha Pass toward Frisco.
Does red mean it's good to eat?
Break-your-bike rocky on the Georgia Pass descent.
Yup, I love coconut water. Best electrolytes ever.
Heading down toward Frisco.
The grin of someone who just rode 2,000 fun feet downhill.
WE FOUND FOOD.
Pedaling the Frisco to Copper Mountain bike path on a perfect morning.
Jay and his cherries! I don’t see any tears of joy in his eyes, but I’m sure they were there.
High above Frisco near Kokomo Pass.
Hard work in them hills! (Kokomo Pass)
Another day on the CT. (Near Kokomo Pass, between Frisco and Leadville.)
He might look crazy, but Mason makes a meaaaan vegan trail burrito. Spinach, Violife cheese, jerky, and hot sauce...with animal crackers for dessert.
Trail burrito, veg style. I should eat these at home...
Whaaat the...? Oh, just a WWII POW camp for Italian and German prisoners in the middle.of.nowhere near Leadville. Spooky.
Eating a massive quantity of food at Casa Sanchez in Leadville. Yes, I ate more two hours later.
A nice evening listening to the burbling creek...and 12,000 cars from Denver driving by to get an early start on Mt. Elbert. Ear plugs rule!
Hot chocolate to round out a long day.
Through the aspen...
Side view of my Why Cycles Wayward CT setup.
Front view of my Why Cycles Wayward CT setup.
Top view of my Why Cycles Wayward CT setup.
Mason shows off his field repair skills: Leatherman + chain tool to tighten a Cinch chainring!
Errrr, getting a bit hazy, folks... (North of Buena Vista.)
That smirk sums up how I felt not pedaling for 20 miles into Buena Vista. Best tail wind of my life.
Bikepacking grub. Freeze-dried is good, but I always buy additional food in towns when I can.
Careful where you step.
Getting my heart rate under 250 after the ridiculous hike-a-bike up Chalk Creek. Ouch.
The Butterfly House! Take the detour up Highway 50 and stay here. Thank me later.
Restocking at the Monarch Crest general store. All the necessities: Mike and Ike's, pickles, Fritos, and Nutter Butters.
Heading up Monarch Crest trail.
Monarch Crest views. Smoke barely at 175 aqi.
Curious cows on Sargent's Mesa.
The result of eating too many Mike and Ike's and not enough real food.
Late finish on Sargent's Mesa. GPS says elapsed time is 12.5 hrs, 7,100' of climbing, and too many Nutter Butters consumed.
Sunrise on Sargent's Mesa. We use the bikes to stake out the tent fly.
Full-on trail angels! They had 17 people camp by them the night before just to get the morning pancakes.
This trail angel, Apple, comes out from Ohio for the entire summer to help out hungry hikers.
Heading down toward Cathedral Cabins on the detour.
The splendid Cathedral Cabins. For sure stop here even if you don't stay the night! Food resupply and cool folks in the middle of nowhere.
Um, is this a trail? Walking the flat section above Spring Creek Pass. Pro tip: stay on the fire road and skip this BS.
Mason demonstrates an exhausted 1,000 yard stare.
Food for the Sole! I'm not sponsored or anything, but recommend this for anyone who wants real, delicious food in the backcountry.
Food break before the push over the CT high point.
Literally a final push over the CT high point at 13,000+ feet.
The Colorado Trail, folks. It's beautiful.
Over the high point of the CT at sunset.
This riiiight here is why we bikepack. (Colorado Trail high point)
Heading off the CT high point.
Down down down...
Best campsite ever, even if we were exhausted after sleeping at 12k!
Best campsite ever, angle #2. This is west of the CT high point before the next big climb.
This about sums up the climbs for the 35 miles before Silverton.
Above treeline, living the hike-a-bike dream!
The prettiest flat tire repair station I've ever seen.
COME ON. How is it so beautiful out here?
Push uphill, ride downhill! Hard work forgotten. Kinda.
More splendid views east of Silverton.
The terrain up high on the CT showing off yet again.
Oooooh, we get to ride down all of that?!
A perfect day in the San Juans, heading toward Durango.
Good news! You can actually pedal up some of the climbs between Silverton and Durango.
These photos sum up our enthusiasm levels at the end of day 10 in Silverton. Food soon (mostly) revived us. High altitude efforts are hard!
Another day, another pass. (Somewhere north of Durango.)
The San Juan Mountains, folks.
Hiding from an afternoon thunderstorm.
Top of Blackhawk Pass on our 2nd to last day.
A perfect campsite near Hotel Draw Road. Final night on the CT!
More views in the San Juan Mountains near Durango.
The final push to Indian Ridge.
Feeling VERY glad we're 30 minutes ahead of that cloud system on Indian Ridge.
End of the CT!
Logistics for bikepacking the Colorado Trail
Tips and suggestions for the route
Getting to/from start/finish
If you aren’t driving to the start, logistics to get to the trailhead are a little extra. From downtown Denver, catch mass transit to Littleton and then pedal the 10 miles to Waterton Canyon. It’s a nice warm up. Pro tip: your fare out of town is TWO zones, or $6 at the time of this writing.
Time of year
There’s no perfect time to ride the Colorado Trail, merely options. Go in June and risk snow on the passes. Go in July and risk daily monsoon-driven thunderstorms. Go in August and risk heat and/or thunderstorms. Go in September or later and you might get snowed on.
We opted for early August to ideally a) avoid snow b) get ahead of forest fires (sigh) and c) dodge the monsoon season.
We avoided snow and (mostly) dodged monsoon deluges. Forest fires served up shitty air quality for the first week (150+ aqi), but we pushed through it. What’s the equivalent of 200 packs of cigarettes going to do to my lungs anyway?
It was 99F in Denver at the start, but thanks to the high elevation, temps ranged from 45-75F from day 2 onward. Perfection.
May your trip avoid snow, smoke/fires and rain. Or at least two out of three.
Navigation
Navigation was straight-forward—the Colorado Trail is well-marked. I downloaded the route GPX from bikepacking.com and used Ride with GPS a bit, but wound up mostly using the Guthook app because it has more marked water sources. Highly recommend getting it.
My preferred method to save battery is to keep my phone on airplane mode with the volume turned up loud enough to hear the DING when a turn is approaching. There’s also another tone when you miss a turn, which quickly corrects any missteps.
Food
As usual, I rolled on a plant-based diet for this trip. My companion Mason is also vegan, which made things easy.
With the exception of restaurant meals in Frisco, Leadville, Buena, and Silverton, I ate mega-delicious Food for the Sole freeze-dried meals. Lunches were a mix of freeze-dried options and various snacks from restocks along the way. Mason got sick of freeze-dried meals toward the end, but I enjoyed them the entire trip.
Overall, I aim for 400 calories an hour without counting calories. I prefer to have an extra meal and bonus snacks in case of a mechanical…or just raging hunger! It’s never perfect and sometimes I screw up and underfuel, but it usually works for me.
Food for the Sole! I’d recommend this for anyone who wants real, delicious food in the backcountry.
The section from Buena Vista to Silverton is LONG without a restock. Check out the Monarch Crest store and do not miss Cathedral Cabins before Lake City. You can mail a box to them, but they have tons of freeze-dried meal options and piles of delicious snacks for reasonable prices.
Riding on a vegan diet and curious what you can find in convenience stores? Traipsing About reader, badass cyclist and fitness coach Lauren Costantini put together a list of foods for all you plant-based folks.
Water
Tons of water on this route except for the Tarryall bypass and Sargent’s Mesa. You’ll (likely) never need to carry more than 2-3 liters at a time unless you for some reason are dry camping.
We both used Katadyn BeFree filters until mine got so clogged that I bought a Platypus flter in Buena Vista. The frustration of doing the boa constrictor squeeze on a filter every time you want water is not to be underestimated! Bring a new filter or clean yours thoroughly before the trip.
Sleeping
We stayed in hotels for four nights (Frisco, Monarch Crest Butterfly House, Cathedral Cabins, and Silverton). Otherwise, we slept outside.
We brought my Big Agnes Fly Creek UL2 bikepacking tent and split carrying duties between poles and fabric. Given temps, overnight moisture (dew and rain), I was glad to sleep in a tent every night. You’ll have no problem finding places to sleep along the route.
Best campsite ever. This is west of the CT high point before the next big climb.
Cell signal
With Verizon, I had at least a weak signal up high most of the time. To save battery, I mostly kept my phone on airplane mode.
Gear
My Why Cycles Wayward setup for the Colorado Trail.
I rode my 2019 Why Cycles Wayward V.1 set up with a Terrene McFly 2.6” rear and 2.8” front tires. I run a 140mm front fork, which seems to handle most anything I’d want to ride a loaded bike down.
This year I added a 26T chainring on my Wayward to complement the 11-46 Shimano XT setup I’ve got. It was AWESOME. Spinning is the name of the game while bikepacking! You’ll never miss your taller gears as much as you’ll dream of more climbing range, trust me.
Rounding out my gear was a Revelate front roll bag for sleeping gear, a custom Rockgeist frame bag, and a Bedrock Black Dragon dropper bag.
https://www.traipsingabout.com/wp-content/uploads/2021/09/Colorado-Trail-bikepacking-August-2021-66-scaled.jpg19202560Dakotahttps://www.traipsingabout.com/wp-content/uploads/2018/03/Traipsing-About-logo-white-background-450x156.pngDakota2021-09-16 06:00:002023-05-06 15:04:26Bikepacking Magic on the Colorado Trail
If your idea of a fine bicycle trip features tons of swimming, singletrack on two sides of a mountain range, and views aplenty, bikepacking the Three Sisters, Three Rivers might be for you. Sure, you’ll encounter mosquitoes and plenty of hard work, but call them the price of entry for the magic of outdoor experiences.
And magic there was. Rocky ridge riding with magnificent views of the Three Sisters; the primal deliciousness of pastries from Angeline’s Bakery after a hard day of riding; ferny, mossy beauty on the McKenzie River trail; spine-tingling dunks in cold rivers.
Throw in trail angel generosity and hilarious chats with random people, paddling out on log rafts into the middle of Hidden Lake to sleep, and brake-smoking madness down Alpine trail and the recipe for a spectacular trip is complete. The calm quiet of mountains in the evening tops it off.
Here’s my experience doing an unsupported bikepack on the Three Sisters, Three Rivers route. I created this as a resource for folks looking to bikepack it, so feel free to skip to the specific sections listed below as needed.
A favorite moment: loading our bikes onto log rafts at Hidden Lake and paddling out to sleep on them.
Three Sisters, Three Rivers Bikepacking Route Description:
The Three Sisters, Three Rivers route travels 325 miles from dry Central Oregon over the hills to the west side of the Cascade Mountains. From Bend, it’s singletrack most of the way to Sisters, followed by a pedal around the shoulder of Black Butte to Suttle Lake and over the Old Santiam Wagon Road, a historic route for plucky early Oregonians.
The famous McKenzie River trail leads you to the Aufderheide, a snaking road through the hills outside of Oakridge. You’ll peel off the Auferheide and head up steep fire roads to the crest of the mountains, then grin your way downhill on Alpine trail into Oakridge. Regain the vert out of town on the Middle Fork of the Willamette River and back to the crest of the Cascades (and mosquito breeding ground, fair warning).
Then it’s west and down down down (except when you’re pushing your bike up) on the North Umpqua Trail toward Roseburg. This section will test any bikepacker and help you brush up on swearing, but at least there’s respite in the cold river and the Umpqua River hot springs helps revive spirits before the push to the finish.
I’ll also suggest an alternate route to make this route a loop, which simplifies logistics by skipping the N. Umpqua Trail and picking up the Oregon Timber Trail out of Oakridge or from Crescent Lake.
Fun and games on the North Umpqua Trail.
Our Trip Plan
My trip companion this time around is Mason, a stoked guy on his first serious bikepacking trip. For once, there’s some real planning via a shared Google Doc.
Our rough goal for the ride is 8-9 days of pedaling, though we end up doing it in 6.5 days due to closed trail at the end of N. Umpqua Trail and by increasing mileage to avoid a looming heat wave.
Prior to the trip, my angst grows as Mason stacks up huge riding days – “43 miles and 7,000’ of climbing again today!” – while I play piano and pretend to ride. (Good thing I recently rode the Oregon Outback or I’d be researching ebikes.) Many years of endurance riding gives me confidence in my ability to rally survive without extensive training, but training still matters. If I can get 5-8 hours of pedaling per week for the month leading up to a trip, I’m good.
Since I live in Bend, we leave from my front door. I’ve ridden sections of this route before, but linking it all up is satisfying. When I bikepacked the Oregon Timber Trail, connecting the entirety of Oregon purely under my own power unveiled new facets of the state.
By the way, dig these kinds of posts? Sign up for the free 2x/month Traipsing About newsletter for more tales from the mountains and creative challenges like drawing and piano when I’m off the bike.
Mason (left) and me rolling out on the Three Sisters route.
Day-to-Day Experiences on the Three Sisters, Three Rivers
Day 1: Bend to Sisters
We pack up the night before and hit the road by 7:30 am. My legs feel like mush to kick things off. Ah, a good omen. Sadly, there’s smoke in the air from a fire. It’s June 20th – is this the new reality, summer’s mired in a haze?
On the way up the first climb, Mrazek, I chat with a woman with plans to ride part of the Three Sisters with her employees. Bikepacking is increasingly popular and it’s awesome to see people trying it out. There’s plenty of room outside and biking spreads people out. Plus, it’s not my private playground.
Mrazek is a smooth, leisurely pedal out of Bend and a great start to the trip. We refill water at the creek up top, where I realize I accidentally carried an extra half gallon uphill for two hours. Didn’t even notice. Another reminder for me to not to be a weight weenie.
On the fire road connection to Trail 99, we stop and eat lunch. Thanks to Mason, we’ve got different freeze-dried food, a local plant-based Bend company called Food for the Sole. The first cold-soak lunch meal, curried cauliflower, BLOWS MY MIND. It’s exponentially better than PBJ on a tortilla.
My latest realization: I’m over sweet meals on bikepacking trips. Bring on the savory snacks mid-ride.
On the infrequently-ridden Trail 99, we pass through a large burn from 2017. Skeletal trees with panoramic views of the Three Sisters, fun descending and the trail all to ourselves, yeehaw.
It’s a 95 degree day, but we pedal into Sisters feeling fresh(ish). Last trip to Sisters, we stayed in the campground by the highway and I learned accelerating semi trucks aren’t my favorite white noise. I opt for a hotel room for the night. Credit card points are the bomb.
We eat massive burritos at a Mexican place and are in bed by 9:00. Temps are heading to 99 degrees the next day and we don’t want to bake our brains out on Old Santiam Pass.
We make it to Angeline’s Bakery in Sisters right before closing (3 p.m. Mark your calendars, riders!). When I bikepacked the Oregon Timber Trail, I only bought two pastries; this time I buy four. I STILL regret not getting more by the next afternoon.
Day 2: Sisters to Clear Lake
We gobble down cold-soaked instant oatmeal for breakfast. Still learning things: why did I ever bother cooking oatmeal in the morning? I always add a healthy portion of freeze-dried fruit, nuts, and peanut butter to up the ante.
We slip outside into the sunrise, cool air nipping at our grins. Those smiles subside on the steep, sandy traverse around Black Butte, but my audiobook, A Game of Thrones, distracts me from the horse-impacted trail and dusty quagmire.
We cross the frosty Metolius River and head up to Suttle Lake. Finally, the trip is underway: our first skinny dip, . A woman hikes by and we turn away, but she merely yells, “that was me an hour ago!”
Then we’re climbing up Old Santiam Pass. I pause to catch a work call while Mason pushes on toward Big Lake. Like any good relationship, it’s beneficial to have time apart while bikepacking.
Nothing like soaking your head/shirt/entire body when it’s 99 degrees.
People lament the sand on Santiam, but with a 2.6” rear tire and 2.8” front (Mason has 2.4/2.5”), we do zero hike-a-bike. How early Oregonians got over this pass in Model T’s is beyond me. I suspect they swore a LOT and planned for unexpected overnights. They did other things too: dug in the sand, pushed cars, and straight up walked away when their vehicles failed them.
I catch Mason at Big Lake and we enjoy the cool water. He also receives his comeuppance for teasing me about installing my bike rack backwards: his chain install is routed incorrectly and his derailleur guide now has custom grooves. I handle it diplomatically by laughing uproariously and teasing him for an hour.
Thermometers are popping their bulbs when we arrive at Clear Lake. Our energy levels are high, but who the heck wants to pedal further in an oven? The lake is gasp-inducing cold, the best. We jump in repeatedly, hang by a kayak put-in and chat with people, help folks haul their gear out of the water, and generally enjoy ourselves.
A lady whose son is hiking the PCT is excited to be a trail angel and shares some cold bubbly waters with us. Always say yes to offers of hospitality to encourage it in humans! (We do, however, turn down non-vegan mac and cheese with sausages later on. Gotta stick to core values as well.)
We end up camping with a cool crew of folks from Corvallis. One is an ice scientist moving to Tasmania to help them develop their nascent research program. The other guy wears a chess nonprofit shirt, but sadly doesn’t have a board with him. I didn’t need to lose anyway.
The guys ran a juggling club together in college and entertain us with stories of their exploits, plus tales from a multi-month bike tour cut short thanks to a testicular torsion. Google it: you don’t want one.
Luxurious overnight digs at Clear Lake.
Day 3: Clear Lake to Hidden Lake via McKenzie River Trail
I wake up at 5:30 a.m. as morning lights seeps through the trees. My eyes are heavy thanks to staying up late around the (safe!) campfire.
The McKenzie River is as beautiful as always, a crisp blue rushing flow. With a 6 am weekday departure, we have it alllll to ourselves the entire 26 miles except for two guys who we fly past on a descent. Loaded bikes still haul ass downhill, folks.
The 26 miles is a tuck and weave ride through mossy trees and fern-covered undergrowth. The contrast with the east side of the mountains is a cool aspect about this route. And being able to jump in the river, of course.
Mason ripping down McKenzie River Trail.
To streamline things, Mason mails food ahead to the post office in Blue River and Oakridge. Thru-hikers often do this, but I never have. The simplicity of knowing what to expect food-wise, especially following a plant-based diet, proves quite nice. We do the same thing on the Colorado Trail.
I restock snacks at the gas station in McKenzie, eating two cold cans of Amy’s soup right out of the can like a (happy) wild animal. Meanwhile, Mason hammers along the highway to get a resupply package he shipped to Blue River. He’s disheartened it’s 3 miles out of the way, but he’s strong and determined. No biggie, it’s all part of the adventure. I rendezvous with him on the climb out of the valley. Oakridge or bust, tally ho!
This is my first time on the winding Aufderheide, a paved road through the mountains. At the dam, the road is blocked to car traffic and there’s a “No pedestrians” sign. We scarcely glance at each other and keep pedaling. We’re on bikes, after all. (Yes, we’re hardened criminals, but we also encounter zero landslides or reasons to not pedal the road.)
Rolling on the Aufderheide.
The day’s hard work is the long fire road climb up to Hidden Lake, our evening destination. I pop in an earbud and disappear into Game of Thrones again. At 2.25x speed, I can actually finish a 35 hour audiobook on a trip like this.
Hidden Lake is divine, a gem perched in the mountains. The kicker: some creative genius nailed a bunch of plywood to logs and created rafts for paddling around the lake. It’s still early in the afternoon and we both have energy to continue, but why the hell travel by bike if you can’t stop and enjoy a spot like this?
We each paddle a raft over into the shade and spend the afternoon swimming, napping, chatting, and reading. These moments, free of a cell signal or anything pressing to accomplish, often kick off the best conversations. I learn more about Mason in two hours than I’ve learned in the last two years. (And yet still make plans to ride the Colorado Trail with him.)
Nightfall brings out cricket with megaphones. I pop an earplug in and pass out on my gently rocking raft. Later, I wake to the full moon and watch the trees wave in the wind. It’s splendid. The cricket’s serenade drops me back into sleepville.
Hidden Lake. When was the last time your bikepacking trip included log rafting?
Day 4: Hidden Lake to Oakridge
We spend the cool morning hours pedaling straight uphill while waving at gravel trucks working on the road. Why are fire roads in the middle of nowhere maintained to this degree? Deep philosophical questions abound on bike trips.
It’s a long day of pedaling, some 50 miles and 6,000’ of climbing. However, the fire roads feel blissfully easy. After the McKenzie River trail the day before, I appreciate the laid-back enjoyment of a nice road in the middle of nowhere. The views still sparkle and the effort is far less. Variety!
As usual, the view from the top of Alpine trail stretches out for miles. And then I descend into tunnel vision and only see trail for the next seven miles as we roast our brakes downhill. Don’t let anyone tell you loaded bikes aren’t fun: singletrack, especially smooth and fast stuff, is still copious fun on a bikepacking rig.
The classic view at the top of Alpine. It’s still beautiful.
A snide guy at the bottom of the trail levies advice at us and talks up the rides he’s done. It’s strange how some people have a compulsion to one-up when they see people doing something difficult. (I’ve only done it a dozen times to other people!) We hastily bid him adieu so we can get to baking our brains out on the hot pavement for the final five rolling miles to Oakridge.
Sadly, the 3 Legged Crane Pub is closed, so we settle for sitting outside a Thai place in the scorching heat. I chat with a Timber Trail rider from Durango who is WAY stoked on all the swimming in Oregon versus the Colorado Trail and he fires me up for my upcoming trip.
We finish out the day with the A/C cranked at the Best Western. Between delicious cold air and the massive haul of fruit I bought at the store -including a watermelon I carried under my arm – it’s a perfect end to a stellar day of bikepacking.
Day 5: Oakridge to Oldenburg Lake via Middle Fork of the Willamette River
Loaded with grapes and cherries, we head out into the cool morning for a day of uphill. A mile out of town, my cranks wobble and try to fall off my bike. Hmm, odd… My multitool doesn’t have an 8mm, but Mason comes to my rescue. Many benefits to traveling with a companion.
We huff our way up to the dam. At the top, there’s a guy sitting in his car smoking a cigarette. “You guys pedaled up that hill?!” Yup… (And a few hundred others.)
Early in my bike travel days, I’d scoff at how people didn’t understand what we were doing, how “cool” it was, the commitment, etc. Then I realized something: it doesn’t matter. Nobody except psyched cyclists care what I’m doing beyond a “cool you’re out here.”
Post-trip, I’ll sit down for a belated birthday dinner with some friends. Since our last hang, I’d done the Oregon Outback and Three Sisters bikepacking trips. How long do we spend talking about them? About 3.6 minutes. It’s merely another bike trip for Dakota. Let’s move on.
And you know what? It’s freeing, a fine reminder I better be doing these trips because I WANT to, not because it’ll impress people. I’m not sharing the rides on Strava or Instagram, so no one can see the daily distance and elevation. If I’m going to sweat my way up a climb or hike my bike through downed trees, there better be some deep intrinsic motivation or I might as well stay the fuck home!
But that dinner is a week away. Here and now, we both head into audiobook land and grind out the Middle Fork climb, 5,000 of climbing and climbing and climbing. The trail is off to my right, but I see no reason to pedal punchy uphills with a paved, low-traffic road available.
Memories of Alpine help me remember why the uphill is worth it.
At Summit Lake, I’m reminded of 2018 and the Oregon Timber Trail when we came through here. Why? Because the mosquitoes in this cursed place are like the screaming hordes of Genghis Khan, except he took a few prisoners and these rapacious killer bugs do not.
We’ve already ridden 50 miles and kicking back to swim and camp sounds nice. Except it’s only 3 p.m. and sitting here while the bugs attack in rolling waves of fighter jet formations is simply not an option. We push on, straight into the teeth of the assault. Mason abandons all reason and splashes through a deep creek; I pick my way across as the bugs frolic in my eyes, ears, and soul. It’s not too bad, really, assuming you are already a crazy person.
We crest the top of the Cascades (again) and drop down to Oldenburg Lake as the sun dips low. The bugs have disappeared, at least for now. It’s a beautiful summer evening and our post-ride swim feels divine. Pedaling up to remote spots like this for an evening of solitude is why the hard work of bikepacking is worth it.
The mosquitoes return and I try to tough it out. (Mason immediately hops in the tent and watches me deal, gloating smile pasted wide on his face.) Surely they’ll go away when the sun sets… They don’t. *sigh* Into the tent, where we crash out for a solid night’s sleep.
Mason showing the mosquitoes what’s up.
Day 6: Oldenburg to reservoir along North Umpqua Trail
We wake to beady stares from hungry mosquitoes. Breakfast and camp teardown is a brief affair, shall we say.
The climb out of Oldenburg gets our blood moving with water bars and downed trees. Any stops are met with swarms of mosquitoes manning their turret guns. We make good time.
A screamer descent on a fire road brings us to the NUT: the North Umpqua Trail. Relative to the McKenzie River, the NUT is rougher, punchier, and far less traveled. As we discover, it’s not ideal for bikepacking.
We restock with a few salty snacks at the KOA campground before the Dread and Terror section of the NUT. The owner, Jim from Kansas, retired to the Oregon woods and now works his butt off running the establishment. He warns us about the terrifying trail ahead, the narrow cuts between downed trees, and so on.
None of Dread and Terror is too bad. If you can ride a solid blue trail, you’ll be fine. A reminder people who aren’t participating in the same activity rarely have useful insight. “Oh, climbing over the pass isn’t too bad,” they say, comfortably kicked back in their car. Take any advice on the road with a major grain of salt.
Perhaps Dread and Terror isn’t scary, but it kinda sucks for bikepacking after about the first few miles of fun descending. Sure, the Umpque River is a crisp blue and the terrain is beautiful. However, steep, punchy climbs, lots of downed trees, not much flow… It’s a truckload of work for not much reward.
And then the trail gets overgrown and competes with ferns and scratchy brush. Note: if you’re planning to do the Three Sisters route, consider the rerouteI suggest in the logistics/tips section below.
Steep and mucky on the NUT. Beautiful though!
Mason soldiers on without complaint, but his eyes laser cut through the underbrush. I follow, my bike’s crank still getting loose. Mason is out of earshot, so I tighten it with a stick enough to keep riding, repeat. One of those days.
The Umpqua Hot Springs are right along the trail, a naturally occurring series of pools. Air temp is about 98 degrees, not quiiiite ideal soaking temps. Still, we cool off in the freezing Umpqua, which makes the hot springs feel good.
Mason pulls off a tasteful nude in Umpqua Hot Springs. Is this site rated PG-13?
We’ve made great time and plan to finish a couple days earlier than planned thanks to mosquitoes, but also thanks to a historic heat wave: it’ll be brain scorching hot in two days. I’m no climatologist, but 115 seems hot enough to warrant not biking.
A thought strikes me. What if the fire from 2020 messed up the trail? (Yeah yeahhh, I should have checked earlier. At least we have food!.) It doesn’t show as closed on Trailforks, but a call to a local business gets me a quick answer. The last 25 miles of the NUT are closed.
Whoa. We only have 25 miles to go?! We immediately call it a night and wild camp by Tokatee Lake. A dinner of Food for the Sole wrapped in tortillas warms my belly. Life is good, even when the mosquitoes drive us into the tent for our final night.
Day 7: Reservoir to the end
Not much to say about the final day except: wow, it’s hot. Temps head toward 107 degrees as we pedal, push, cajole and threaten our bikes through the final sections. There are picturesque views of the N. Umpqua, but the heat and the overgrown trail tempers my enthusiasm. I’m glad to explore this part of my backyard, and also only plan on returning to the North Umpqua Trail sans bicycle.
We hit Panther Creek by 10:30, but are overheated enough to sit in the icy Umpqua for a solid 15 minutes. Chelsea, continuing her streak as the best wife ever, rolls up with a huge salad fresh-picked from our home garden, plus piles of fruit and good cheer. Another trip in the books!
A sight for sore eyes. Check out Mason’s face as he sees the food.
Parting Thoughts
All in all, I think this is a solid bikepacking route to experience what Oregon has to offer. Plenty of resupply points, lots of singletrack, and reasonable elevation gain make it quite approachable.
My biggest suggestion: unless you reeeeally want to ride the North Umpqua Trail, I’d consider rerouting from either Oakridge or Summit Lake.
Options:
Pick up the Oregon Timber Trail (OTT) from Oakridge and climb up to Waldo Lake and ride back to Bend. A perfect way to streamline logistics and turn this route into a loop.
Follow the Three Sisters route all the way to Summit Lake, then singletrack to Crescent Lake (reverse OTT), and then back west for a short stint on highway 58 to get to Waldo Lake. There are probably ways to do it on fire roads or even over the top of Maiden Peak for an amazing descent to Gold Lake. A bit of a detour, but you get to see more eastside Oregon riding.
Throwing out ideas! The entire Three Sisters route is beautiful and well-worth doing. Know what to expect on the North Umpqua Trail though.
Photo Gallery
Click on the first image and scroll to see full size shots or scope them out in smaller format!
Logistics for bikepacking the Three Sisters, Three Rivers Route
Day 1: Bend to Sisters via Mrazek and Trail 99 (48 mi, 4,400′ climbing)
Easy climbing out of town up Mrazek. Until early July most years, there’s a creek at the top before turning north toward Sisters.
If it’s a hot day, taking a short detour up to Three Creeks Lake for lunch and a dip is well worth it. Good chance it’s the last water until Sisters as well.
Angeline’s Bakery in Sisters closes at 3 p.m. You’ve been warned.
Day 2: Sisters to Clear Lake via Old Santiam Wagon Road (46 mi, 3,800′ climbing)
Easy pedaling to the base of Black Butte. The trail climb around the NE side suuucks. Do yourself a favor and take the fire road. I wish we had.
No need to filter water from Suttle Lake. At the SW corner is a campground with water spigots. Soak your shirt, climbing is coming…
Bigger tires (2.4″+) will make Old Santiam Wagon Road actually fun. The views are great and Big Lake is a must-stop for an afternoon dip.
Not much camping on the north side of Clear Lake, though there’s a spot right by the highway where we stayed when I did the Oregon Timber Trail. Fair warning: the truck noise is BAD there. This time around, I camped in the Clear Lake campground and slept much better.
Lunch at Big Lake on the Old Santiam Wagon road
Day 3: Clear Lake to Hidden Lake via McKenzie River Trail and Aufderheide Road (45 mi, 3,300′ climbing)
Plenty of water down McKenzie River Trail (obviously) and a solid restock option at the general store on the highway in McKenzie Bridge.
Easy road pedaling (with some climbing, sure) all the way to Hidden Lake. The detour is worth it – how often do you get to sleep on a raft?!
Day 4: Hidden Lake to Oakridge via fire roads and Alpine trail (50 mi, 6,200′ climbing)
Plenty of vert on fire roads and not much water past June, so stock up at Hidden Lake. The climbs aren’t too bad past the initial push to the top.
Grab water at the bottom of Alpine to get you to Oakridge. The last five miles was HOT with plenty of climbing.
Make sure to swing by the Oakridge Mercantile bike shop. Great folks!
Day 5: Oakridge to Oldenburg Lake via Middle Fork Willamette and Windy Lakes (59 mi, 6,000′ climbing)
Lots of water all day, so no worries there.
The road next to Middle Fork is quiiiite nice for uphill pedaling. You hard asses out there can ride the trail uphill.
Expect mosquitoes from Timpanogas Lake until you get to the North Umpqua Trail. They will get you. Be ready.
Dinner at Oldenburg Lake.
Day 6: Oldenburg Lake to Tokatee Lake via North Umpqua River Trail (36 mi, 2,400′ of punchy, overgrown climbs)
Restock at the KOA before the NUT. Say howdy to Jim.
Don’t stress about Dread and Terror. It’s a straight-forward blue trail.
Past a few miles, be ready for hike a bike and downed trees and overgrown trail. It’s errrr less fun.
Don’t miss the natural hot springs.
Day 7: Tokatee Lake to Panther Creek trailhead (21.5 mi, 2,900′ climbing)
The upper NUT wasn’t terrible. The section below Tokatee mostly was. Tons of downed trees, zero flow, and close to zero fun. Leave your bikes behind and hike or trail run this section!
Past Panther Creek trailhead, the final 25 miles of trail is closed due to fire damage. I wasn’t sad to call it!
Getting to/from start/finish
Since I live in Bend, I pedaled straight out the door to start the trip. However, there are buses from Portland if you’re flying in.
Getting back from the end of the trail is a bit tougher. My wife picked us up, but if you pedal up the highway to Rogue River, there are bus options to Eugene/Portland and then back to Bend if needed. Cog Wild Shuttles is another resource.
Time of year
This route is clear of snow fairly early since you don’t get much higher than 6k elevation. By mid-June, chances are you’re good to go. One downside to earlier departures is a higher chance trails won’t be cleared of trees, but these are (mostly) popular riding areas and you’ll likely be fine.
Navigation
This route is mostly on long trails like Mrazek, Trail 99, McKenzie River, etc, so navigation was straight-forward. I simply downloaded the route GPX from bikepacking.com and used Ride with GPS to navigate. The app is easy to use and only costs $6 per month.
My preferred method to save battery is to keep my phone on airplane mode with the volume turned up loud enough to hear the DING when a turn is approaching. There’s also another tone when you miss a turn, which quickly corrects any missteps.
Food
As usual, I rolled on a plant-based diet for this trip. My companion Mason is also vegan, which made things easy.
With the exception of a dinner in Sisters and two dinners in Oakridge, I ate mega-delicious Food for the Sole freeze-dried meals. Lunches were a mix of freeze-dried options and various snacks from restocks along the way.
Riding on a vegan diet and curious what you can find in convenience stores? Traipsing About reader, badass cyclist and fitness coach Lauren Costantini put together a list of foods for all you plant-based folks.
Dinner ala raft: Food for the Sole on Hidden Lake.
Water
Tons of water on this route! You’ll (likely) never need to carry more than 2-3 liters at a time unless you for some reason are dry camping. Even the creeks south of Sisters were running in late June. The driest sections are Sisters to Suttle Lake and Hidden Lake to the bottom of Alpine, though we found a running stream at the top of Alpine. Past June, it’s likely gone.
We both used the fantastic Katadyn BeFree filters. Skratch Labs electrolyte powder helped power us when energy levels were low.
Sleeping
We brought my Big Agnes Fly Creek UL2 bikepacking tent and split carrying duties between poles and fabric. Mosquitoes drove us inside the tent on two nights, but otherwise we cowboy camped for free. You’ll have no problem finding places to sleep along the route. Pro tip: DON’T SKIP HIDDEN LAKE!
Cell signal
You’ll have a signal up high most of the time, but the river trails and section south of Oakridge proved sparse with Verizon.
Views from the North Umpqua Trail. And a Verizon signal.
Gear
I rode my 2019 Why Cycles Wayward (version 1) set up with a Terrene McFly 2.6” rear and 2.8” front tires. I run a 140mm front fork, which seems to handle most anything I’d want to ride a loaded bike down.
With the Colorado Trail coming up, I took some sage advice and threw a 26T chainring on my Wayward to complement the 11-46 Shimano XT setup I’ve got. It was AWESOME. Spinning is the name of the game while bikepacking! You’ll never mix your taller gears as much as you’ll wish for more climbing range, trust me.
Rounding out my gear was a Revelate front roll bag for sleeping gear and a custom frame bag. New this trip was a lightweight T-rack from Tumbleweed Bicycles. Rather than a huge dropper bag swinging around behind me and dragging on my tire on descents, I ski-strapped a dry bag to the rack. Two Salsa Anything Cages rounded out the kit, one with my sleeping pad and cook kit, another with a 64oz water bottle.
My Why Cycles Wayward taking a nap on the Umpqua River Trail.Mason’s setup
The weight is basically the same as a big dropper bag and functions much better. Sure, dropper bags LOOK cool, but are they truly uber-functional? I say racks still have a place.
The setup worked great and I plan on using it for future bikepacking trips one exception: hike a bike is a bit ungainly with the Anything Cages. For Colorado, I’m running a light kit with a Bedrock Dragon dropper bag to keep my hips close to the bike. I’ll simply carry a bit more weight on my back.
And that…is the end.
https://www.traipsingabout.com/wp-content/uploads/2021/07/Bikepacking-Three-Sisters-Three-Rivers-Traill-99-view-of-Three-Sisters-scaled.jpg19202560Dakotahttps://www.traipsingabout.com/wp-content/uploads/2018/03/Traipsing-About-logo-white-background-450x156.pngDakota2021-07-28 21:14:062023-05-06 15:09:36Swimming and Singletrack - Bikepacking the Three Sisters, Three Rivers Route
The buzzing on Jono’s bike started shortly after we rolled onto a tooth-rattling section of the OC&E rail trail. The culprit: his Crocs were dragging on the rear tire. “PHEW, glad I didn’t lose those,” he said.
“Hey, wait. Where’s my sleeping pad?”
Losing a sleeping pad a mere 13 miles into one’s first bikepacking trip might sound terrible. However, rarely do the Adventure Gods present such a prime opportunity for an entertaining story.
Me? I sat down to eat a taqueria burrito and watched my friend pedal toward the start in search of his wayward sleeping pad.
Day one of our bikepacking trip on the Oregon Outback was underway!
Jono’s and bike, sleeping pad in place on the OC&E rail trail. For now.
Blog Post Sections
Depending what you’re looking for, you may want to jump around this article. Here are a few links to aid that:
Don’t feel like reading? Watch the five-minute video that Jono put together! If I say so myself, he did a fine job.
The Oregon Outback
The Oregon Outback is a bikepacking route that travels south to north across the state of Oregon. Starting in downtown Klamath Falls near the California border, it follows gravel, dirt and pavement for 360 miles to the Columbia River. Overall, the route is 75% unpaved and 25% asphalt.
The Outback visits lesser-known parts of Oregon and is famous for big desert views, lack of water, and occasionally punishing riding surface conditions. Speaking of the latter, the route features The Red Sauce, a nickname for the loose red soil covering a solid chunk of the first 150 miles.
A less painful section of The Sauce.
The Sauce absorbs pedal strokes like a fat suit in a punching match and makes you sweat like you’re wearing one. At least the colors are fantastic – evergreens line the red road and views through the thin forest are beautiful.
The Outback takes a rider through a few tiny communities (e.g. Ashwood, population 55), plus a pit-stop in Prineville at mile 230. Mostly, you’re on your own for food, water, and bike repair.
Oh, and sleeping pads.
Who needs sleeping pads when you’re living the good life at gas stations?
Onward on the Outback
My trip companion for the Outback, Jono, is the most enthusiastic, positive person I know. He speaks five languages, alpine climbs like a mountain goat, and is game for all manner of exploits.
For example, he bought a beater car in Spain and drove it for six weeks across eastern Europe and Russia to Mongolia. When it broke down in the Mongolian steppes, he traded the car for bus tickets to the Chinese border.
The overlanding, car-trading cyclist.
The Oregon Outback was his first multi-day bike trip and our first trip together, but I felt confident he’d overwhelm any newbie hijinks with his upbeat attitude. He’s slept in a climbing harness high up the wall on El Capitan, so he knows doing hard things is sometimes often the price of admission for outdoor hijinks.
Still, a man needs to sleep, so I grinned in relief when he pedaled back into sight carrying his wayward sleeping pad. Turns out Jono’s pad squirted off his bike a mere ¼ mile from where we noticed it’s departure. Unfortunately, a cyclist headed the other way picked it up and only Jono’s Herculean efforts to catch him reeled in the wayward pad.
Back on the road. Nice to get all the bad luck out of the way early, right? Riiiight.
Want the real details? Read on.
By the way, dig these kinds of posts? Sign up for the free 2x/month Traipsing About newsletter for more tales from the bike plus creative adventures like drawing and piano when I’m off the bike.
No beer for me, but a couple burritos for dinner on night 1? Yes please.
My Experience Riding the Oregon Outback
Day 1: heat, cows and bike paths, Klamath Falls to middle of nowhere
Sleeping pad reunion complete, but parched from the heat after four hours of riding the gravel OC&E rail trail, we pedal into the gas station in tiny Sprague. The employee asks zero questions and clearly couldn’t care less what we are up to. A reminder that most things we personally find intriguing are boring – or insane – to other people.
I soak my head and shirt with the gas station’s garden hose, a sublime moment. Bike trips (and maybe life?) are all about the small moments of joy, the stark contrasts of hunger and food, heat and cold water.
One of the many gates on the OC&E rail trail. Small price to pay for no cars!
A punishing traverse of cow pasture hell pushes us out off the rail trail and onto smooth pavement. There’s no glory in arbitrary suffering, people: if it’s not a race or an FKT attempt and you have a better option, take it!
A tooth-rattling final section on The Red Sauce – mitigated by The Queen’s Gambit audiobook – gets us to the campsite, 68 miles in. Sure, there’s an argument for staying present, but I don’t need to pedal every second of an 8-hour day with angry thoughts pinging around in my head.
A quick rinse in the creek, dinner, cowboy camping under the stars. Day 1, check.
The OC&E Hilton.
Day 2: middle of nowhere to Silver Creek
We warm up by batting large rocks around with our tires on the initial climb. Bike Tennis! We talk about bear attacks as we pedal, a relaxing topic for a camping trip.
The OC&E rail trail ends and I tearfully bid The Red Sauce goodbye (for now). Pavement is delightful sometimes, especially when there’s only a car every hour. We cruise through the Fremont National Forest as the midday heat builds.
When energy levels lag, we take a quick mid-afternoon break…which turns into an hour sitting in the shade and chatting about business ideas. As I tell Jono, we can sit here or we can sit in camp later – what’s the difference? We aren’t racing, let’s enjoy it
Burritos by the side of the road. Jono, a super genius, suggested bringing lightweight camp chairs and they were AWESOME.
Like every day on the Oregon Outback, we are tired by the end of the ride. Algae-filled shallow Silver Creek isn’t particularly enticing, but beats sleeping coated in dust and sweat from a day of pedaling.
Freeze-dried pad thai + soy curls all stuffed in a burrito = dinner. Bikepacker hunger is already setting in! Eight hours of biking will do that to a person.
My biggest takeaway of the day is Jono’s wise advice for outdoor trips: always eat your best food, because then you’re always eating your best food. Simple and brilliant. To hell with delayed gratification! Don’t save the cookie or your best freeze-dried meal for the end of the trip. Eat your best food, now.
Getting rowdy during a creek crossing.
Day 3: Silver Creek to OHV Sand Springs
If I squint extra hard, bike trips are a compressed version of life. Uphill battles, too-short moments coasting downhill, shattered expectations (e.g crushing headwinds on a flat day of pedaling)…and unexpected surprises.
SURPRISE: Jono breaks his rear shifter 20 miles in on day 3, leaving him unable to change gears. Somehow, he remains imperturbably positive and rolls with it. My positive contribution is a nickname, Single-Speed Jono. I’m such a helpful trip companion.
A cool crew of bikepackers from Corvallis. (Jono is fixing a flat tire in the background. Or drinking a beer, it appears.)
On the bright side, a road grader tamed the washboard gravel out of Silver Lake. You better believe we waved at the driver!
A good moment to point something out: when you’re traveling on a bike, be an ambassador. Stop and talk with people. Wave at ranchers and farmers when they slow down to pass. Be courteous and curious. Ask questions about towns, how many other cyclists they see. Pave a smooth path for the next exhausted, dehydrated cyclist.
Case in point: the Silver Lake convenience store has PopTarts (yesss), but no tap water. After some amiable chatting with the proprietor, he lets us refill at his house next door. The same thing happens at the Ft. Rock greasy spoon. However, the waitress tells me cyclists keep using the outside water without asking or buying anything, so they’re closing off those hoses. Be an ambassador, people!
The wall of the general store in Silver Lake.
We pedal on. It’s hot. Windy. Deep red gravel sucks energy from our tired legs. DAMN YOU, RED SAUCE. Spirits crash. These things happen while pedaling 6-8 hours a day and spending all day outside in the elements.
Oh, right, I’m hungry. When my attitude shifts into negative gear, it’s (almost) always food. A few olives and a PopTart revives my spirits.
Our campsite that night is the aptly-named Sand Springs. No water, but we carried enough from Ft. Rock to handle the 100+ water-free miles. Plus, it’s COLD, so who needs water anyway?
Jono warms up by gathering pine needles to pile under his leaky air mattress, which is clearly punishing him for losing it earlier in the trip. He’s a survivor! We both zonk out by 9 p.m.
Pine needles, the original Thermarest.
Day 4: A snowy, windy day from Sand Springs to Prineville
It’s late May, yet we wake up to snow flurries at Sand Springs. It’s cooold. We don all our layers and roll out early with Prineville’s bike shop as the destination. (Single-Speed Jono needs more gears!) How he’s pedaled these rolling hills in sucking gravel without popping a knee or an emotional gasket is beyond me.
Snow may sound miserable, but I’d rather ride in the cold any day vs. scorching heat. Plus, Jono spots some sunscreen on road, which means we are ready for temps over freezing.
A midday break in the middle of nowhere.
A cool highlight: running into Lael Wilcox, a badass Alaskan woman who has won the Trans-American bike race and is well-known in the ultra-endurance cycling community. She’s scoping out the Outback in preparation for a time trial on it.
Her advice for the road ahead is that there’s water in a cow trough 20 miles up. When we pass it, in NO way do I feel like filtering water from it. Besides iron backsides and the ability to pedal forever on zero sleep, ultra-endurance riders like Lael also possess the ability to rough it to an extreme degree. I enjoy some adversity, but draw the line at cow trough water.
Prineville Reservoir is behind me, but this view off the damn dam is prettier.
This day reminds me why I prefer bikepacking on trails to open roads: headwind hell. We push north toward Prineville reservoir through snow flakes and/or furious wind, earning a reprieve with the long, fantastic descent to the reservoir. A nice lunch by the river is followed by brain-scorching wind in the face all the way to Prineville. I put my head down and descend into audiobook land.
Good Bike Co. can’t fix Jono’s shifter. Instead, the mechanic clamps the shifter cable to the chainstay. The shifter is useless, but by twisting the barrel adjuster, Jono can access three gears. We are good to go!
Bike trip hunger sets in. We eat burritos, but they don’t even register as calories. “You still hungry?” Yup. We order two more and head to the Best Western. It’s our lone night sleeping inside on the trip and we take advantage of it, washing out soiled clothing and hitting the hay early.
The shifter fix allowed three gears via the barrel adjuster. Notice that the shifting cable doesn’t go to a shifter?
Day 5: Big climbs and sweet views from Prineville to Antelope
Into the Ochocos! Jono is dragging (for the first time ever?) as we crest the first climb out of town as temps dip toward 30. A snowstorm blows through behind us, but our bike karma is good and we dodge it.
The splendid long descent north of Prineville is steep enough for grinning and freezing enough to warrant using the handwarmers and all the layers we have. We blast through creek crossings and enjoy the area’s remoteness.
In tiny Ashwood, an oasis appears: Frankie’s Pit Stop. Frankie’s is an honor-based fridge with snacks provided by a generous guy. Ahh, the magic of small kindnesses during bike traveling. Far more impactful than typical travel because you’re so exposed on a bike and a $1.00 bag of Fritos can transform a day. Or power the steep climb out of town.
Thanks Frankie!
We burn all the calories from Frankie’s in the next few hours, traversing a rolling ridge with great views. No cars, just wind, distant mountains, and a great afternoon of riding. Weather threatens, retreats. Life is good.
Our day’s destination is tiny Antelope, a town documented in Wild Wild Countryabout the Rajneeshees. We don’t wear red, but I’ve arranged a free lawn to sleep on. When it starts to pour that night, our cowboy camp shifts to underneath the RV stored on the lawn. Dreamy.
The under-RV Hilton. Dry and cozy as the rain comes down.
Day 6: a rainy, windy push to the finish
Rain, ugh. I curl up in my sleeping bag under the RV, avoiding the inevitable. Jono woke up hours ago, as usual, journaling away in the dim morning light.
Luckily, the rain lets up as we climb out of Antelope. A big truck pulling a boat stops in the middle of the road and a grinning guy in a WSU Cougars hat sticks his head out into the drizzle: “You all are awesome!”
The tiny town of Shaniko is quiet and abandoned. Wherrrre is the water we expected? We bail – 2 bottles on a cold day is enough for 70 miles, right? (Spoiler alert: no, it’s not.) We stuff food in our faces and pull onto highway 97, heading north.
Nothing like semis to make you pine for riding through the, er, pines.
Ah, highway touring. We lurch along with semis buffeting us toward the ditch. Just 13 miles… A reminder: avoid road touring, Dakota! We turn onto gravel with a sigh of relief. The end is in sight.
We plop down by a farmer’s field for an excellent lunch of Tasty Bite chana masala. A guy in a farm truck stops and says we can stay, but don’t leave trash anywhere. Do people do that?! Be an ambassador, folks.
The Final Push
Onward. We grunt up steep gravel rolling hills reminiscent of my hometown in the Palouse. A big rattlesnake in the road sends my heart skittering, but he merely watches me huff by.
We’ve pedaled 345 miles and the end is in our sights. From ebullient energy out of Klamath Falls to lost sleeping pads to sunset burritos by the side of the road to cow pastures, through Red Sauce and broken shifters and snow, it feels like a hell of a trip. And yet we’ve only spent six days out here. Time compression, an indicator of a fine excursion!
But we aren’t there yet. A final cliff-steep hill, straining at the limit into a headwind on bumpy gravel to a crest overlooking the Gorge, Mt Hood and Mt. Adams. We’ve got 15 miles of descending as our reward…straight into a furious headwind that owns us, wind turbines merrily celebrating our imminent demise.
Not audible: the sound of Jono’s jersey flapping wildly in the wind. Or my desperately straining quads.
We grind. Grind grind grind. I stop pedaling – on a steep downhill – and the wind blows me practically to a stop. Not much talking. Survival mode. A fitting conclusion to a bike trip, in many ways. I tell Jono the good news: he’s now seen headwinds as bad as any I’ve seen in 10,000 miles of touring.
And then we’re done, Jono’s mom waving as we pedal up. She hands us cold water and I chug a liter, then another. Yup – two bottles for a 70 mile day is not enough. Chelsea meets us in The Dalles with piles of fruit and kombucha and I down blueberries by the handful.
Parting Thoughts on The Outback
Another one in the books. Headwinds aside, the Oregon Outback is a fabulous route!
Compared to road touring, the Outback is more remote and presents more logistics with water and food. However, those added items and ocassionally bumpy roads are more than offset by essentially traffic-free riding the entire time. I think it’s a great bikepacking trip for someone looking to dive into multi-day gravel riding.
I found the Outback to be more physically draining than expected. We rode 6-8 hours every day and no day felt easy. The vertical gain is fairly low, but the headwinds, bumpy terrain, and Red Sauce proved challenging. Don’t take it lightly: there’s hard work in them hills! (FWIW, I’ve toured 10,000 miles on road and trails.)
Beyond that, Jono proved himself a marvelous trip companion, positive and cheery no matter what the Bikepacking Gods threw at him. We’re better friends thanks to conversations about bear attacks and business, love and travel, language learning and the future. By that measure alone, the trip is a success.
Matching outfits and still friends at the end!
It felt good to tick the Outback off my bucket list. I wasn’t left wishing I could pedal more; I was excited to return home to playing piano and other creative projects. The Oregon Outback filled my adventure cup – with an extra pour for Jono – and served up a solid helping of laughs, beautiful views, hard work, self-sufficiency, and teamwork.
I also suspect Jono will enjoy returning to a bed that doesn’t fall off his bike, leak, or crackle like pine needles.
The. End.
Tips and Suggestions for Riding the Oregon Outback
Day 1: Klamath Falls to creek camping on the OC&E Woods Line Trail. (68 miles.)
Mostly cruisy except for occasionally bumpy terrain. Overall, running lower tire pressure will save your wrists, butt and soul a lot of pain. We didn’t go low enough day 1! 30-40 psi on my 29er/2″ tire setup felt good.
If you continue another ½ mile past the gate where the creek appears (roughly mile 68.5 from downtown Klamath Falls), there’s a fantastic camping spot on the west side of the trail with a swimming hole.
NOTE (please heed): unless you enjoy beating your body and bike to death, skip the OC&E trail from Sprague to Beatty. We disregarded a previous rider’s instructions and the result was brutally rocky cow pasture hell. After a few miles, we cut through a field and hopped on siiilky smooth pavement to Beatty. One of the better decisions of our trip!
Day 2: OC&E to Silver Creek (52 miles)
It’s an easy roll on pavement down into the town of Silver Lake, but we wanted to camp in solitude versus a city park, so we opted to stop earlier and enjoy the evening at Silver Creek. There is good camping near the creek.
NOTE: We read there wasn’t any water all day, but plenty of swamps and creeks presented themselves in the first half of the day. We didn’t need any of it, but maybe not necessary to carry a full day’s water out of the gate.
Day 3: Silver Creek to Sand Springs OHV (56 rather hard miles)
A surprisingly tough day, mostly due to road surfaces and a burly headwind. Since camping is limited past Sand Springs, we opted to dry camp there. Leaving Ft. Rock with six liters gave us plenty of water for the day, dinner, and pedaling to Prineville Reservoir the next day to refill.
Save some energy for the soul-sucking Red Sauce and punchy hills north of Ft. Rock!
Day 4: Sand Springs to Prineville (62 miles)
A cruisy, trending-downhill day. Other than waking up in snow and a cold morning of pedaling, all good!
Day 5: Prineville to Antelope (70 miles…and I should mention the 5,500’ climbing)
My favorite day of the trip for the views, remoteness, and variety of terrain. The four creek crossings were no big deal – we rode three and forded one. The descent after the climb out of Prineville is long and the perfect grade. If you’re continuing past Ashwood (and the fantastic honor-system Frankie’s Pit Stop), prepare yourself for a steep climb out of town and about 2.5k more total vert to Antelope.
For camping in Antelope, there’s a 5th wheel trailer on the east side of the road as you pedal into town. Nailed to the tree is a laminated note with Rodney Shank’s phone number. Give him a ring/text and let him know you’re staying and you’ve got a spot for the night!
High on the ridge about to head down to Antelope.
Day 6: Antelope to the finish(70 miles and another 4,000′ of climbing)
A nice warm up out of Antelope, then highway traffic on 97 (blergh) before hitting the gravel again for rolling hills. May the wind be at your back and not blasting you to death the way we experienced. Stunning views of Mt. Hood and Mt. Adams abound as you descend into the Columbia Gorge.
Note: this day would be RAD if it rolled through Maupin and down the Deschutes River Rail trail to the finish. However, there’s currently a couple miles of chunky rock scrambling that would suck on a loaded gravel bike. Hopefully the trail is eventually clear from the Columbia to Maupin!
Logistics for the Oregon Outback
Getting to/from start/finish
We caught a ride with a southbound friend from Bend to Klamath Falls. There’s a train from Portland to Klamath Falls, which seems like a great option.
From The Dalles, there’s a bus (the Columbia Area Transit, CAT) back to Portland. My lovely wife, ever supportive, picked me up at the end.
Time of year
We rode this from May 16-21, 2021. Temps ranged from 85 one day to freezing and snowy another, but I’ll take cold ANY day versus baking heat in the desert. My vote is for riding in the late spring.
Navigation
Navigation felt easy on the Oregon Outback. I simply downloaded the suggested route from bikepacking.com and used Ride with GPS to navigate. The app is easy to use and only costs $6 per month.
My preferred method to save battery is to keep my phone on airplane mode with the volume turned up loud enough to hear the DING when a turn is approaching. There’s also another tone when you miss a turn, which quickly corrects any missteps.
On route with a view of a snowstorm that barely missed us. #winning
Food
As usual, I rolled on a plant-based diet for this trip. Jono joined in and went veg as well.
We brought enough freeze-dried meals to get us through the entire trip, but left Klamath Falls with a few big burritos for dinner the first night. Two big dinners in Prineville got us fueled up quite nicely as well and convenience store stops in Sprague and Silver Lake kept us in PopTarts and other unhealthy-yet-delicious snacks.
Riding on a vegan diet and curious what you can find in convenience stores? Traipsing About reader, badass cyclist and fitness coach Lauren Costantini put together a list of foods for all you plant-based folks.
Food for a week! To be fair, I drained the water from the pickles and olives and put them in a plastic bag. Nothing better on a hot day.
Water
Nooot much water on the Oregon Outback, but there was plenty for us. Except when there wasn’t. All of the water sources we filtered from seemed strong and not at risk of running dry in the summer or fall, but I have no idea if that’s the case.
Follow the advice of the writeup on bikepacking.com and you’ll (likely) be fine. Worst case, just haul 6L of water – the terrain is mostly flat and there is zero hike a bike or downed trees to navigate, so who cares about an extra few pounds?
We both used the Katadyn BeFree filters and they worked great. Skratch Labs electrolyte powder in one bottle and pure water in the other is the ticket.
Sleeping
We brought a Big Agnes Fly Creek UL2 bikepacking tent and split carrying duties between poles and fabric. However, we never used it and just cowboy camped for free every night except the one we spent in a hotel in Prineville. There’s lots of public land for doing so, plus spots in places like Ashwood and Antelope. (See previous note about Antelope camping.) Zero mosquitoes, woot! A silver lining to no lakes for swimming
Cell signal
With the exception of north of Prineville, there was a Verizon signal almost the entire ride.
Gear
My Salsa Fargo loaded with six days of food.
I rode my 2013 Salsa Fargo set up very similarly to how I rode it in Spain/Portugal with Jones bars and panniers plus a Salsa frame bag. This time around, I added a Revelate front roll bag for sleeping gear. It worked great and felt super stable even on bumpy and fast gravel descents. My tires are Schwalbe Marathon 50mm’s and worked great. I don’t run tubeless and have literally never had a flat with those bad boys.
I don’t use panniers for trail bikepacking, but they were totally fine for the terrain on the Outback. There’s zero hike a bike and the route is fairly flat (relative to routes like the Oregon Timber Trail, at least!), so going super light doesn’t matter as much. Hence the camp chairs, my new favorite road/gravel touring kit addition since there often is nowhere to sit when you’re riding wide-open terrain.
Feel free to comment below if you’ve got questions about an upcoming trips. You’ve got this! Have fun, be an ambassador, and enjoy those big skies.
What gravel bikepacking is all about.
https://www.traipsingabout.com/wp-content/uploads/2021/07/Oregon-Outback-bikepacking-open-roads.jpg10801920Dakotahttps://www.traipsingabout.com/wp-content/uploads/2018/03/Traipsing-About-logo-white-background-450x156.pngDakota2021-07-08 20:35:252023-05-06 15:20:05Bikepacking Hijinks on the Oregon Outback
Call it mountain bike amnesia, but I’m already forgetting the hard work necessary to bikepack in the Chilcotin Mountains. Sweaty hike-a-bikes up mountain passes drift away, replaced by stunning vistas and brake-melting descents, a goofy grin plastered across my face.
Our simple trip goals: pedal bikes laden with six days of food into the backcountry of British Columbia. Keep the plan flexible. Make decisions knowing that help won’t arrive for a looong time if we mess up.
And, lastly, the most difficult and important goal: Don’t eat all the good snacks on day one.
Loaded with six days of food and not out of snacks (yet!).
The verdict: WHOA. The Chilcotins are as beautiful and physically challenging as we’d heard. The terrain looks like a love child of Iceland and the Pacific NW, ranging from tree-lined lakes to icy creek crossings to alpine passes to scree traverses
This remote zone contains all the ingredients for a delightful backcountry adventure. All you need is food, maps, pedal power, and ear plugs to ignore the large bears chipmunks stomping around all night.
Map check on top of Windy Pass.
Wait, I’ve Never Heard of the Chilcotins!
To reach the South Chilcotin Mountains, drive north of Whistler, B.C. WAY north. There are two options: the tire-eating beast of a fire road called The Hurley, or via Lillooet, town motto Guaranteed Rugged.
Either way, it’s over two hours heading north off the grid while wondering if you’ll end up in Alaska.
A moody evening in the Chilcotins with my trusty Why Cycles steed in the foreground.
Most people who visit the Chilcotins use a float plane from Tyax Adventures that ferries people and/or gear in and out. While enticing, parting with hundreds of dollars to avoid a little sweat seemed unnecessary at best…and irresponsible at worst. We hauled all our stuff, including bear spray for encounters with the REAL locals, grizzly bears, then set up two different base camps for unloaded riding.
I wasn’t expecting an all-fun trip. (Excellent adventures never are, right?) Hard work sharpens enjoyment’s edge, which is why chocolate tastes so damn good on top of a mountain pass.
Honestly, the trip wasn’t too bad. Even with my bags stuffed with 11 freeze-dried meals and a jar of peanut butter, sweeping views were my appetizers and staring at mountains while eating pad thai was a double-whammy dinner.
By the way, dig these kinds of posts? Sign up for the free 2x/month Traipsing About newsletter for more tales from the mountains and creative challenges like drawing and piano when I’m off the bike.
It ain’t a fancy restaurant, but I’ll take this view any day!
The Experience
Friends warned us about the push required to get into the Chilcotins. Horse hooves created the backbone for these mountain trails, so they are A) steep as hell, and B) rugged. Many times pedaling simply didn’t make sense and we’d hike-a-bike, leaning into the bars. Some sections are so steep that pushing a loaded bike isn’t possible. The routine was step, push up with the bike, lock brakes, move feet, push up, repeat. Isn’t bikepacking FUN?
Manson Col means “gawwwd my calves hurt” in British Columbian.
The upside to pushing: unlike with a headwind, there’s always fun to be had on the other side of a hard effort uphill. The reward is solitude on mountain passes and the adrenaline fairy dishing out large helpings of excitement on the downhills.
Another thing we quickly learned was the “Chilcotins Pace”. By that, I mean SLOW: In an eight-hour day, we could cover about 20 miles. Creek crossings abounded, as did swampy/muddy sections, mountain passes, and rooty/rocky riding.
Every time we’d get cocky, we’d get smacked upside the head by reality. This was an experience, not simply a mountain bike ride.
Mid Tyaughton trail wasn’t silky smooth singletrack…The reward for mud and hike-a-bikes!
It’s All Worth It
Yeah, it’s hard work in dem mountains. Whatever. That’s the price to entry for bikepacking the Chilcotins.
But that’s not the reason to go there. It’s possible to melt brakes riding downhill ALL day with zero work at Whistler Bike Park, after all.
Heading out on High Trail on our final day.
Beyond all the amazing riding, our time included camping by a quiet, beautiful lake. Sunsets over mountains. A burbling creek by our second camp. Solitude in the alpine listening to marmots whistle. Starry skies to make our eyes sing. A sense of adventure tough to find on manicured, purpose-built trails.
Perhaps best of all, we didn’t have to use any bear spray.
Paul in sunset reverie on Spruce Lake.
Photo Gallery!
Logistics and Details for Bikepacking the Chilcotins
Looking to skip the float plane from Tyax Adventures and pedal in yourself? Here are a few logistical tips:
Buy a hardcopy map of the area or at least the Gaia one. Navigation via just Trailforks is possible, but hardcopy in case things go wrong is a good idea.
Go in the summer. Our mid-August trip featured perfect temps, few mosquitoes, and minimal rain.
Water is plentiful. This ain’t the desert: you’ll only need to carry one full water bottle except maybe over the passes.
Respect the Chilcotins Pace. We found that planning to go 20 miles in an 8 hour day out was a good estimate. (On a typical ride in most places, I move 3-4x faster.)
Flip flops were great for the many creek crossings (~20 total during our trip).
This is bear country. Bring bear spray! Spruce Lake and Lorna Lake have bear boxes to stash food in. You’ll need to hang food in trees if you camp elsewhere, so bring some rope for that.
There are two primary ways to pedal in: a relatively easy route up Gun Creek Trail or a burly climb over Windy Pass. If you’re looking for alpine terrain like we were, take Windy Pass.
Basecamping treated us well as a way to explore on an unloaded bike for a few days. Our camps: two nights at Spruce Lake and two below Manson Col.
Layer up! The weather is fickle and moves in fast on mountain passes.
Surf’s up! Drifting scree up high.
Ride Stats
Here are each day’s details as recorded on Strava. I suspect moving times should be higher, but my GPS thought I wasn’t moving on some of the steeper uphill hike-a-bikes… Apparently “glacial pace” isn’t a Garmin option?
Day 1: Tyax Lodge to Spruce Lake via Windy Pass on Tyaughton Creek Trail. Relatively fast going and mostly rideable except Windy Pass. Stats: 20 miles, 4.5 hrs moving time, 5300′ climbing.
Day 2: Deer Pass loop (CCW) from Spruce Lake via Mid Tyaughton Creek Trail with return Upper Gun Creek Trail. Slow going on Mid-Ty Creek, almost 100% hike-a-bike over the pass, and rideable from there. Stats: 25 miles, 5.25 hrs moving, 5000′ climbing (unloaded)
Overgrown adventure riding on Little Paradise trail.
Day 3: Moving base camp to sub-alpine camp on Manson Creek, then unloaded riding/pushing up to Manson Col. *This is a lesser known, RAD zone. Stats: 17 miles, 4.5 hrs moving, 4300′ climbing
Day 4: A big CCW up Manson Col, Little Paradise, Little Graveyard, Big Creek, and Lorna Pass. Fair warning that Little Graveyard and Big Creek are muddy, frustratingly slow trails if it rained recently. Stats: 22 miles, 5.25 hrs moving, 4400′ climbing (unloaded)
Day 5: Up, over and out! Down Manson and Mid Tyaughton Creeks, up Windy Pass (get ready for barely doable hike a bike) and then back to Tyax Lodge via High Trail and Molly Dog and Pepper Dog trails. Stats: 30 miles, 5.75 hrs moving, 5000′ climbing
Me contemplating 2,000′ of face-punch uphill hike-a-bike on the way out over Windy Pass. Paul’s comment when he got to the top: 45 minute break, NOW!
Favorite Trails
The downhill ones, DUH. Specifically Lorna Pass ridden south, Deer Pass ridden west, Windy Pass ridden either way, and Manson Col/Creek ridden with gravity on your side! You can’t go wrong. The traverse trails in the valley were muddy for us, but were still entertaining in their own right. (Except for the bogs of Little Graveyard, that is.)
Paul at Mach Fun down Deer Pass!
The Gear
Packing all the food and gear the night before. Except the van – that doesn’t fit in my bike bags.
Max gear weight (bike, bags, food for entire trip, 64 oz of water, gear I wore): ~80 lbs. No wonder those passes were hard, that’s almost half my body weight!
Bike weight + unloaded bags: 37 lbs
Gear (sleeping, cooking, clothing, tech): 20 lbs
Max food weight: 14 lbs
Allow to me geek out… Weight matters, but adding a few pounds doesn’t change much. My reasoning: if my bike plus me weighs 250 lbs, even adding 5 lbs of weight is only 2% more overall. I could have doubled my food for only 5% extra weight. I doubt it would have slowed me down much
My takeaway: Unless you’re racing, that extra chocolate bar and warm layer is TOTALLY worth it!
Big country! Paul pushing his fully loaded bike up the long Windy Pass on the way in.
Trip Food
If you’re aiming to do a bikepacking trip like this, you probably know what your body needs. If it helps, here’s what I brought:
~20,000 calories, or about ~3,500/day. (This will obviously vary depending on the person.) Enough to keep the fire hot without towing a trailer! Dense calories is the name of the game, with a few luxuries.
Dinner, night one! Soy curls with homemade fajita mix plus a luxury avocado. Remember your hot sauce!
All the Grub (I’m vegan, so it’s all plant-based)
11 freeze-dried meals. Backpacker’s Pantry pad thai is my favorite, with Kathmandu curry and other vegan options. One for dinner and another that I’d make in the morning and eat by noon each day…or 10 am, heh.
A (plastic) jar of peanut butter and jam that I pre-mixed for trail burritos or for adding to oatmeal
2 bars per day. Picky Bars are my favorite. Pro Bars are a calorie-dense option as well.
Trail mix to eat/add to oatmeal and trail burritos
Pickles (carried sans juice in a plastic bag). Zero calories, heavy, and a divine gift from the gods at the top of a mountain pass. Totally worth it.
Olives (transferred to a plastic baggie). All part of my attempt to not ONLY have sweet treats. Great for adding to freeze-dried meals or eaten alone.
Gummies (Annie’s)
Dried fruit (pineapple, mango, dates)
2 chocolate bars
That’s all I’ve got, folks. Drop a line in the comments or via email if you’re heading out to bikepack the Chilcotins and need more information. Happy pedaling…err pushing!
Thanks Chilcotins! Some of the coolest, most remote terrain I’ve ever had the pleasure of exploring on a bicycle!
https://www.traipsingabout.com/wp-content/uploads/2019/10/Manson-Col-descent-Chilcotin-Mountains-bikepacking.jpg12001600Dakotahttps://www.traipsingabout.com/wp-content/uploads/2018/03/Traipsing-About-logo-white-background-450x156.pngDakota2019-10-10 21:12:192023-05-06 15:13:06A Rugged Adventure Bikepacking in the Chilcotin Mountains
Oh, the places you can go on a bicycle… Somewhere in Portugal!
I’ve ridden my Salsa Fargo 10,000 miles over hundreds of hours across the U.S. and Europe. I STILL love it. To make it even better for our April/May bike tour in Spain and Portugal, I added a few hacks from the bikepacking world.
Update July 2021: I’ve since used the same setup – with a Revelate handlebar roll bag for sleeping gear – for gravel bikepacking on the Oregon Outback. Works great!
Since over 3,000 people per month still read my post about the Salso Fargo, I figured a quick update will help some folks out. In that initial post, I talked about how comfortable the Salsa Fargo is. That hasn’t changed! The Fargo isn’t racy, but hot diggity is it a solid long-distance bike for gravel and pavement. I’d still buy a Fargo versus a Salsa Vaya for the versatility and riding position.
During our tour from Valencia, Spain to Porto, Portugal, we logged many miles on gravel and dirt roads. Other than a couple days where bigger tires or front suspension might have saved some wrist damage, the bike worked great! Looking back, lower tire pressure probably would have helped a lot.
Salsa Fargo ready to rip! My setup for Europe in 2019. My Salsa Fargo during the 360-mile Oregon Outback (writeup here). I added a front roll bag for sleeping gear, but otherwise it’s the same setup.
Things I Still Like About the Salsa Fargo:
Position on the bike – so comfortable for all-day pedaling
Mountain gearing (2×10, 24/42, 11-36) – I can charge (ok, grunt) up 16% grade farm roads.
Tons of braise-ons for racks, fenders, and water bottles
Steel is real! No worries about carbon breaking under a loaded bike.
Wide variety of tire sizes – Newer models accommodate even bigger tires and feature the Firestarter fork, which people rave about.
All the necessities: water and a smoothie from a grocery store. (Other water bottle moved temporarily to my handlebar snack bag.)
Recent Upgrades I’m Digging
Jones Bars with a view of the Atlantic.
New Handle Bars (Jones H-Loop Bars) Call me a trend follower, but Jones Bars are HAWT in the bikepacking world. I hemmed and hawed and finally ordered some. So glad I did.
It took a little work in my garage and cost ($150) for new brakes, mtb shifters, and recabling. Whatever – I’m SO happy with the change. So nice when stuff works out. Now my Salsa Fargo looks like a REAL bikepacking bike!
I loved them so much that I bought a pair for Chelsea’s new Co-Motion Pangea too! (For both pairs, I bought the SG Loop bars vs lighter aluminum or carbon bars.)
One downside to wide bars… Oh well, just four flights of these stairs to navigate. See you next time sans bike, Lisbon!
Three Major Things I Like About Jones Bars:
Comfortable body position Frequent mountain biking has heavily biased me against drop bars. Even relative to the Fargo’s relaxed Woodchipper bars, the Jones Bars are more comfortable and upright.
It’s not like a beach cruiser waddling along a boardwalk either. I can still put down power. The bars are swept back at 45 degrees and I mounted them at the recommended 17 degree tilt. The end result puts less pressure on my hands and feels natural.
MTB shifters and brakes On bumpy terrain (or in general), I prefer my hands wrapped solidly around handlebars, not resting on STI/brifter hoods. I’m loving the trigger shifters coupled with my SRAM 2×10 setup: fast, easy to adjust, and cheap. Brifter is a dumb word anyway.
The Salsa wishing it were a real mountain bike.
More mounting space for gear The bar design creates space for lights, GPS, a bell, a framed picture of my mom, and a diorama of my favorite Oregon wildlife. (Kidding. I don’t have pictures on my bike. Sorry, mom.)
New Saddle (Brooks Cambium) For past tours, I used a Selle Anatomica. It worked fine, but I never looooved it. However, for commuting around Bend sans chamois, the slot in the saddle was uncomfortable (no further details).
To address that, I bought a Brooks Cambium saddle. Not only is it comfortable, it’s synthetic, i.e. no need to worry about rain and it aligns with my vegan values. BOOM.
Dig this post and want more like it? Check out my free 2x/month newsletter for bikepacking trip reports, life hacks, and more..
Bikepacking Bags
Cheap real estate in rural Spain…
I added the following to my setup:
Frame Bag (Salsa EXP HT) Designed for the Fargo’s geometry and perfect for infrequently used gear (spare tubes, bike repair kit, med kit, front light, and rain gear). As a bonus, I don’t have to haul it around when I take my panniers off the bike. A must have in my opinion!
Note: Since the frame bag covers the bottle mounts, I moved those to the front fork. I considered using the Salsa Anything Cages, but didn’t need the capacity for this trip.
Another random ride in an elevator with a bike…
Handlebar bag (Surly Personal Affects) Instead of the cavernous Ortlieb I’ve used before, I picked up this sweet number. It mounts neatly in the loop of the Jones Bars and holds a small camera, snacks and other assorted stuff. The elastic webbing on top is perfect for holding a light jacket in on/off weather.
Note: Jones makes a bag specific for the bars. It screams JONES in bright white lettering, costs 1.5x more, and lacks the jacket-holding webbing, so I opted for the Surly bag.
Back roads and byways on the Fargo. Bikepacking bags are so less rattly than my old Ortlieb handlebar bag!
Bedrock Feed Bags (the Tapeats) Mounted on either side of the stem and perfect for for carrying quick-access snacks, a small charger pack for my phone, a bottle of OJ or coconut water, or stashing any small item of gear.
Top-Tube Bag (Dakota Tank) Perfect for frequently accessed stuff like sunscreen, chamois butter, wallet, and so on. Easy access! Plus it’s named the Dakota Tank, so, yeah, had to have it.
Rear view fully loaded. The Dakota Tank is the red/black bag on the top tube.
Panniers (Ortlieb Backrollers) Faded and dirty, these babies were with us for both big tours we’ve done. For the U.S., I had two rear and two smaller front panniers; for Europe in 2015, I only had the two rear. Panniers are great, but on bumpy dirt roads, they flap around like pissed off seagulls.
Setting up my Fargo bikepacking-style makes sense and I considered using just a seatpost bag. Buuuut I work remotely on these trips and need a bag big enough for a laptop and so I rocked panniers again, though not as loaded down. As a plus, I can fit a solid chunk of Chelsea’s gear to even out our pace a bit when we’re riding. I can still take her on the hills 🙂
Sometimes we let the bikes sleep inside, but not here.
Small duffel bag (16L Matador duffel) We love this hack. Rather than loading up panniers with food, which creates an unbalanced load (and probably scoliosis), we put food in a duffel bag on top of the rear rack. When we hit a lunch spot or grocery store for a refill, we grab the duffel and presto, we’ve got all our food. The Matador is light and waterproof, but not super durable.
Bigger Tires (50mm Schwalbe Marathons) I’ve run a variety of tire sizes on the Fargo. I considered going with some 2.2” mtb tires, but decided on on 50mm (2”) Schwalbe Marathons (with tubes). Yeah yeah, they’re heavy, but changing flats sucks and we aren’t throwing down intervals on loaded bikes! Rotational inertia just makes you stronger, ya weight weenie. ZERO flats during this last trip and we rode some rough terrain. Booyah.
Portugal, you wily creature. Gonna need bigger tires for this terrain!
iPhone Mount on Bike (Quadlock Kit) I’ve mastered the dangerous art of looking at phone maps while riding my bike. It’s easy on quiet roads and rather stupid in cities. As a (small) sign that I’m maturing, I bought a Quadlock case for my iPhone plus a mounting bracket for my bike stem.
The phone mounts in both portrait and landscape mode and the release sleeve on the bracket is bomber and ingenious. The matching case is slim, so I can leave it on the phone long-term. SO easy to navigate using Komoot with both hands on the bars. Highly recommended/mandatory!
View from the driver’s seat. Top to bottom: Surly bag in the bar loop (perfect for camera), two Bedrock bags for snacks, my phone with Quadlock case, and the Bedrock “Dakota Tank” bag at the bottom.
There you have it. I think this iteration of my gravel/road touring setup is more comfortable for long days, robust on rough roads, better balanced, and provides a safer, easily accessed front cockpit relative to my past approach. I loved it for this recent tour!
We’d bikepacked a week on the Oregon Timber Trail (OTT) while it hurled curveballs. This latest one seemed insurmountable: Brady’s old aluminum bike sat next to us, top tube fully snapped off. Clearly, his trip was over.
Or was it? Tipsy on margaritas, Zach eyed the bike and declared, “We’re fixing that frame. You’re not quitting this trip.” Suuuure…
Seven days earlier, JT, Brady, Zach and I converged at the starting point on the Oregon/California border. The OTT marked our first trip together. Gear was dialed, spirits were high. A local we joked with brandished a large pistol and yelled BANG to cue our departure. Welcome to rural America!
Stoked, we pedaled off. Two miles in, a stick kicked up and destroyed Brady’s derailleur. Seriously?! He headed back to catch Chelsea (our ride to the trailhead) before she headed home.
A auspicious start, to be sure. Two miles down; only 702 to go!
Will pedal for singletrack descents… Photo credit: Brady Lawrence
Kicking Things Off
Every day on the Timber Trail left me thinking, “All that happened today?” or “We started there?” I’ve road toured thousands of miles, but riding trails on a loaded mountain bike is far more physical and committing. There were few resupplies and lots more potential for things to go awry. (It’s difficult to hitchhike off a singletrack trail.)
As the OTT guide says, the first four days and 200 miles (the Fremont Tier) are the toughest. After Brady broke his derailleur on day 1, Zach, JT and I pedaled onward on the remote Fremont National Scenic trail.
Reflecting at Lava Lake after a day on the OTT.
An expected water source was merely a trickle. Zach, Experienced Bikepacker, brought a syringe, which we used to summon water and fill our bottles.
We eventually popped out to HEY, MY CAMPER VAN. (Brady rendezvoused with Chelsea, fixed his bike in Lakeview, and rejoined us.) The dehydrated meals stay packed, and we get to eat like kings. Fajitas, watermelon, lemonade, ice cream… Brady should break his bike every day.
Dinnertime – thanks Chelsea!
Days on the Trail
All days will unfold in a similar fashion. (Minus Chelsea, who packs up the van and abandons us to the Oregon wild.) Wake up, eat breakfast, stuff sleeping bag and gear in my handlebar bag, smear chamois cream on riding shorts…
It’s a ritual – simple, easy. Bikepacking is straightforward: eat, pedal, drink, eat, look at view, crack jokes, eat, pedal, sleep. Repeat.
Brady waking up on the trail.
We see zero other riders for the first four days, though a couple cars materialize way back on fire roads. (Are you lost?) Maybe we’re just a few hours drive from Bend, but it feels like another state.
Day 2: Some of my favorite riding of the trip from Mills Creek to the Chewaucan River. Ridge trails with big views of the Summer Valley, no downed trees, and a feeling of spaciousness and exploration on new terrain. Brady enjoys a good day and only snaps his chain twice. (We carry Quick Links for an easy fix.) Zach’s suspension pivot bolt is loose, so he fashions a shim from a plastic fuel canister cap. We’re making it happen.
Brady hard at work fixing his chain.
Day 3: Smack down on Winter Rim. Cairns mark our path as babyhead-size rocks punish bike, body and spirit. Thoughts of bailing to ride smooth fire road to Fremont Point arise, but we push through. Are we trail-blazing pioneers or martyrs? Hours into the punishment, it’s not clear…
I wait at a cattle fence. Brady pedals up: “Dude, I just peed blood.” A bicycle seat shot to his nether regions… Luckily, we have a cell signal at Fremont Point. With a stunning view behind us, the internet informs us that Brady will soon hallucinate, bleed out of his ears and eyes, and die. Hmmm. A call to a couple doctors leads Brady to decide to simply monitor the situation. (Stupid internets.)
High on Winter Rim overlooking Summer Lake.
What I Ate (Plant-Powered!)
I followed a vegan diet (as always) for the OTT and found it quite easy!
Breakfast:
-Oatmeal with PB, nuts, and dried fruit
-In towns, I asked cafe chefs to whip up a hashbrown, veggies and veggie burger combo. Delicious!
Snacks:
–Picky Bars (Bend local company, so good!), Pro Bars, Lara Bars, Kind Bars (3-4/day)
–Primal Vegan Jerky (mesquite lime is my favorite)
-Gummies (Annie’s), Sour Patch Kids: plenty of vegan (non-gelatin) options exist at any convenience store. Next trip, I’ll buy less sugary snacks and go with savory as much as possible
-Chex Mix, Trail Mix
-Dark Chocolate
-Pickles!
-Fruit (grapes, cherries) – worth carrying an extra pound.
Zach winning at the snacking game mid-ride. Photo credit: Brady Lawrence
Lunch:
-Snacks from above
-PBJ burritos with nuts and whatever other calories (dried fruit) I could find
Dinner:
-Backpacker’s Pantry freeze-dried dinners (Pad thai and Kathmandu curry are both vegan); many other brands have vegan options as well.
-Tasty Bites dinner pouches
-Big meals in Chemult, Oakridge, Sisters, and Breitenbush. Fuel up!
Other Items:
-Nuun electrolyte tablets in water (1-2 per day) – available in Oakridge and Sisters
-Hammer enduralyte pills (2 a day) – light and small, easy to keep in a small plastic baggy
Campfire vibes.
A Day to Test the Spirit
We kick day 4 off by pushing our bikes uphill through overgrown brush. It’s an omen to come for the hardest day (for me) of the entire trip.
Miles of uphill to the top of Yamsay Mountain follow. This is a new, uncleared addition to the Timber Trail; big downed trees frequent the trail. Summing it up, a joker carved WHY in giant letters on one.
We push/carry/curse our way over ~1,783 trees (who’s counting?). A scifi audiobook entertains me, but JT and Zach push on, cheery and accepting our circumstances. I’m a positive person but I HATE THIS CLIMB.
Usually the up is worth the down… Photo credit: Brady Lawrence
After eight hours and 20 miles (I can crawl faster…), plus gallons of sweat, we summit Yamsay Mountain. The valley unfolds below us and I post “time for the DOWNHILL” on Instagram.
Nope. Sorry, suckers. Miles of downed trees await us on the other side of the mountain, followed by 25 miles of sandy, tire/soul-sucking fire roads. This is a Sisyphean day, a grind to test our will.
Onward. Loree’s Chalet in Chemult rewards our 8:45 pm arrival with hot food. Delicious vegan burgers in a highway diner whaaat? We celebrate by sharing a $59 motel room. It’s cozy.
Reeeeeal cozy.
The wonderful Loree’s Chalet in Chemult. Photo credit: Brady Lawrence
The Price of Admission
I’m not complaining. Really. We expected tough days – it’s the price of adventure, the entry cost to go somewhere most people won’t. I can wax poetic about finding our edge, pushing our spirits, blah blah blah, and (maybe?) some of that is true. However, it’s easy to rationalize difficult physical trials with promise of future toughness, so I guess I’ll continue!
Who knows. Too much time to think on trips like this. I need more audiobooks.
Into the (Mostly) Type-1 Fun Zone
From Chemult, we start the Willamette Tier and lakes and streams appear. Swimming! At first, we’re mildly shy (except for JT, the Nudist). Soon, we’re stripping down with aplomb and racing to the water.
Racing for the water! Photo credit: Brady Lawrence
These are long days, 6-8 hours of pedaling, but there’s plenty of time for cooling off and even kicking back. With temps hitting 95 degrees, a cold shock to the system is a magic reset. As a bonus, soaking our shirts makes us (slightly) less stinky.
Ferocious insects descend at picturesque Timpanogas Lake. Mosquitoes, camper’s bane! A sprint to don full rain gear ramps into building a smoky fire to ward them off. The thought of spending 10 similar days haunts our dreams, but the bike gods smile on us and the rest of the trip is free of bugs.
I’m rolling out the next morning (dodging mosquitos) when Brady shows me a small problem: his top tube is totally snapped at the weld to the seatpost. He skips the huge trees of Middle Fork trail and takes the fire road to Oakridge. His trip is over, or so it seems…
Regrouping on the Metolius-Windigo. Photo credit: Brady Lawrence
Trail Repair 101
Operation Rescue Brady is engaged. Chelsea arrives to scoop him up, but Zach gets a harebrained idea and rolls up his sleeves… We stand back – always respect mad scientists, especially ones wearing underwear covered in cartoon turtles.
TA-DA. Ski straps and duct tape victory. We stand around discussing the situation; Brady is skeptical. I throw a log on ground: “Ride over that to make sure.” (Least effective test ever.)
Peer pressure works: Brady rejoins us and we set off around Waldo Lake. His seat post flexes dramatically and the frame is toast, but he’s a gamer. Magically, held together by enthusiasm, high fives and ski straps, his bike will survive another 350 miles of punishment.
A professional bike fix.
Hitting a Routine
The second week is more straightforward. There’s hard work, lots of it, and we’re tired with sore bodies, but it’s also strangely easy to push on. Having a group of four means if someone is down/tired/slow, they drop back and take it easy, eat some food, then rejoin the team.
After a big 9,000’ day of climbing in the Old Cascades Crest zone, we roll into the the Promised Land: Breitenbush Hot Springs! We descend upon three incredible unguarded buffet meals, returning for 2nds, 3rds… We stuff ourselves and lounge like anacondas after a feeding, napping in the library.
Earning those big meals at Breitenbush on the Old Cascades Crest, Mt. Hood tier. Photo credit: Brady Lawrence
A woman at Breitenbush is impressed with our trip and gushes, “You guys are like a dog pack! Wait, I mean…” Puppy Pack, I quip? The name sticks: we are the Puppy Pack. (Far too goofy to be a wolf pack.)
The Final Push
The last three days are clean and easy, except for the parts that aren’t. Dagnabbit, no day is a cakewalk on this trip! The toughest break is Zach wrecking hard and getting banged up. (After the trip, he discovers cracked ribs and bike frame.)
There’s a fantastic camp spot on Timothy Lake watching the sunset over Mt. Hood. The sky rocks deep purples and oranges and we talk about friendship, adventure, and relationships.
Miles later, the Puppy Pack makes it! A triumphant feeling washes over us as we lay our bikes down by the Columbia in Hood River and jump in. Truly, completing this ride is an accomplishment. We celebrate in style by stealth camping on the beach, dirt bags forever.
End of the Oregon Timber Trail! Just ignore the two ladies behind us…
The Aftermath
Thinking back a month out, I’m left with a “wow, that was fleeting” feeling. Two weeks of regular day-to-day life can feel so humdrum, whereas the OTT condensed a few months of bike rides, hikes, and socializing into an intense stew of awesome.
The Oregon Timber Trail is my most-difficult physical challenge (for now!). To mountain bike for 15 straight days and explore my home state from bottom to top feels good, a feather in my adventure cap. Rather than exhaustion I’m stoked about future bikepacking adventures – this certainly won’t be the last trip.
P.S. A huge shout out to the Oregon Timber Trail crew for their hard work envisioning and executing on this fantastic linkup. I think the OTT will become a destination experience for riders from all over the world.
Racing a thunderstorm (we lost) on the Metolius-Windigo trail. Photo credit: Brady Lawrence
All the Numbers: Trip Totals
15 days, 704 miles, 90 hours pedaling, and 70k of climbing. 47 miles/day average.
Day 1: Cave Lake Campground to Mill Creek TH, 49 miles and 7,000’ climbing. Day 2: Mill Creek to Chewaucan River, 46 miles and 6,300’. Day 3: Chewaucan River up to Winter Rim and finishing at Silver Creek: 55 miles and 4,000’ Day 4: Silver Creek over (tree-strewn) Yamsay Mountain down to Chemult: 59 miles and 5,400’. Day 5: Chemult to Timpanogas Lake (mosquito hell): 48 miles and 3,900’ Day 6: Timpanogas down Middle Fork to Oakridge: 54 miles and 1,800’ Day 7: Oakridge up up up Bunchgrass to Gold Lake: 31 miles and 7,250’ Day 8: Lake city! Gold Lake to Lava Lake with so much swimming. 52 miles and 3,500’ Day 9: Lava Lake to Sisters via Metolius-Windigo Trail: 49.5 miles and 4,070’ Day 10: Sisters to Clear Lake on the Old Santiam Wagon Trail: 46 miles and 2,700’ Day 11: Huge, awesome day! Clear Lake up down up down through Old Cascades Crest to Santiam River: 51 miles and 9,000’ Day 12: Easy day from Santiam River to Breitenbush Hot Springs (so much food is eaten): 18 miles and 3200’ climbing Day 13: Breitenbush to Timothy Lake. Get ready for rocky terrain on Lodgepole Trail near Olallie Lake: 45 miles and 4,850’ Day 14: Timothy Lake to Gunsight Ridge: 46 miles and 6,000’ Day 15: Gunsight down Surveyor’s Ridge to Parkdale, finishing the OTT with Post Canyon: 55 miles and 5,500’
Got beta on the trail or questions? Fire away in the comments below to help out future riders or sort out your trip. Happy pedaling!
https://www.traipsingabout.com/wp-content/uploads/2018/08/The-crew-Oregon-Timber-Trail-Mt-Hood-1.jpg6831024Dakotahttps://www.traipsingabout.com/wp-content/uploads/2018/03/Traipsing-About-logo-white-background-450x156.pngDakota2018-08-30 16:15:472018-11-02 09:20:43Bikepacking the Oregon Timber Trail: Broken Bikes and Other Trials
Ten days ago, we stripped down to our oh-so-dirty riding shorts and entertained three tipsy ladies by diving into the Columbia River. Zach, Brady, JT and I had pedaled across the entire state and reached the end of the Oregon Timber Trail! It was a rowdy 15 days and 700 miles, and a hell of a fine time (<–full story).
Since then, I’ve luxuriated in my comfy bed, taken powerful naps as my body jumped into repair mode, ate (occasionally uncomfortable) quantities of food, and generally relaxed. (Well, Brady and I have mountain biked and ran a half dozen times since…can’t be TOO lazy.)
I’ve fielded many questions about the Oregon Timber Trail (OTT). Since it’s new as of 2017, I want to share the gear and lessons learned that worked well in the hope of making the journey smoother for future riders.
Me and Zach on Gunsight Ridge near Mt. Hood. (Photo: Brady Lawrence)
Overall Approach to Gear
There’s only two ways to carry your gear on a bike trip: on your back or on your bike. The lighter, the better. This was my first bikepacking trip, so I stayed conservative with my gear and aimed for being prepared vs. going ultralight. That said, my total weight (bike/gear/water/food) was far less than what I carry on road tours. It was also WAY more fun rolling light.
I jumped into the Oregon Timber Trail with no experience bikepacking other than a single overnight shakeout trip. That said, I have 7,000 miles of road touring experience in the U.S. and around Europe, plus hundreds of hours of mountain biking under my belt. I scoured the internet for gear lists and felt prepared for tackling such a difficult trail. In the back of my mind, I also knew that if a trip-ending bike mechanical or injury occurred, that was part of the risk.
My full setup with 3 days worth of food for miles 100-200 on the trip. (We wound up doing it in two days.)
If you aren’t sure how your gear will work, test test test! Go on day rides with your gear; sleep in your backyard and see how cold you get. Play around with your GPS, know how to use your maps, and be well-versed with your technical gear. (JT used CalTopo maps and Zach/Brady/I downloaded the Ride with GPS track for our Garmin eTrex.)
Learn some basic bike maintenance. We met one dude 200 miles in who couldn’t tune up his bike’s shifting, which is awkward (at best) when you’re pedaling a remote trail for 700 miles and only can use three gears.
Bare minimum, dial in your bike before you leave – I stripped mine down and replaced the entire drivetrain, put on new tires + sealant, bled the brakes and replaced pads, greased my bottom bracket and all my suspension pivots, trued wheels, and generally tried to anticipate headaches. It worked: I had zero mechanicals the entire trip (part luck, part preparation, I’m sure).
Most of all, don’t overthink it! People have done crazy adventures on old bikes with makeshift gear and had an awesome time. Get out there and have a kickass trip.
General Thoughts and Lessons Learned:
Weight matters more on a mountain bike. While road touring, ten extra pounds isn’t a big deal. Laptop? Extra shoes? Surrrre, throw it in! Not the case for bikepacking, where you’re pedaling steep trails, not to mention lifting bikes over downed trees (one day featured 200+ of them) and intensity is generally higher than on a road tour. Both up and down, a light kit will make your trip considerably more fun. I’ll aim to shave weight next time.
The more you carry, the harder the (already difficult) section can be! We kicked off day 4 with this brushtastic start from Silver Creek. JT was still smiling.
For trips with multiple people, split/share gear. Leathermans, camp stoves, tents, water filters, and so on are all great candidates.
You don’t need fancy bikes or bags. Any mountain bike will work on the Oregon Timber Trail. Dry bags lashed to your bike can carry gear.
Our bike choices varied from fully rigid/no suspension (JT) to hardtail (Brady) to me and Zach on full-suspension bikes. Most important was a tight and well-balanced gear setup. You can have fun out there on a steel Karate Monkey or a carbon shredder, but if your gear is loose and banging around, it’s gonna suck. (My recommendation is to at least have front suspension, but I’m not as tough as JT.)
Limited clothing is the name of the game, with layering absolutely key. Think riding gear and (maybe) a couple alternate items for camp. I went with a lightweight sleeping quilt and wore my jacket to sleep. In general, items that can cross over (e.g. rain pants for bad weather AND as a replacement for thermal bottoms) is a great way to cut back.
Go light on water whenever possible. Know where water sources are, how consistent they tend to be (spring vs. fall varies a lot) and how much water you drink. Chug water at water sources (camel up!) and motor through to the next refill. Other than the first 200 miles, water was plentiful on the OTT, but be ready for 20-40 mile sections with no refills on the Fremont Tier.
Zach’s ultralight setup with some views of Mt. Jefferson and Black Butte on Trail 99 (south of Sisters)
Contrary to the above, more food is better than no food! A pound of food (maybe a spare dehydrated meal or two) won’t wreck your riding experience, but can make you feel reaaaaal good at night.
Be prepared, but not TOO prepared. You can’t plan for everything! See Point #1: you don’t want to have a crazy amount of safety equipment and bike repair gear if it is so heavy that it slows you down. You can always push your bike to a highway and hitchhike if things go totally awry.
Get some medical training. Both Zach and I are Wilderness First Responders, and knowing how to use a first aid kit is always a good move. All of us had some injury on the trip ranging from bruises and scratches to more serious (Brady peed blood after a minor accident; Zach finished the trip with a couple cracked ribs). None required evacuation, but easily could have. Check out a Wilderness First Aid weekend course at the bare minimum.
Deep scratches (healing well) on my arm from a protruding branch on a trail. Brady found me bleeding, cursing, and yelling as I destroyed the offending branch.
Things I Considered Bringing But Left Behind:
Solar panel – These are fairly heavy and we were in/out of shade most of the time without many extended rest breaks for charging. Glad I left it at home.
Folding saw – potentially handy, but most of the trees blocking our way were too big to cut. Past mile 200 (Chemult), there weren’t many downed trees anyway. I’d leave it at home for the OTT.
Big camera/large tripod: My Sony RX100 worked great and is 1/2 the weight of my DSLR camera. A mid-size crop sensor camera like the Sony A6000 series would work great. Leave the giant tripod at home unless you are road touring, Ansel!
Paddleboard break on Big Lake with a view of Mt. Washington! Yep, left the SUPs behind too…
Weight Carried:
For all you people who loooove numbers, I put together a spreadsheet with a full breakdown of my gear weight. Totals for each section are also below for your reading enjoyment. The weight adds up fast.
Gear weight on bike: 24.76 pounds
Gear on body (clothing, backpack): 5.96 pounds (similar to any day ride that I do)
Bike weight with bags: 31 pounds (27 bike, 4 bags/empty water bottles/cages)
Water: varied! My maximum was on the Winter Rim without many water sources where I carried 2.5L (~5.5 pounds), but most of the time it was closer to 1.5L and we’d filter at the frequent streams/lakes.
Food: 2-5 pounds unless I said the hell with it and bought fruit (cherries/grapes) and carried them. The reward vs. extra work ratio in the heat was worth it for me some days. We also ate huge meals every 2-3 days when we’d hit civilization (diners, resort restaurants, and the buffet at Breitenbush Hot Springs yesssss).
Final grocery stop (in Parkdale) on our final day.
Tires: 29” Maxxis Minion DHF EXO 2.3” front, Ikon EXO 2.35” rear, both set up tubeless. Experienced bikepacking friends swear by these and they worked great! The EXO sidewall is a protective weave to help avoid tearing your tire apart. I had zero flats or any issues with tires the entire trip.
Gearing: 30T front chainring, 11-46 rear. This was spot on – when it was steep enough to warrant more climbing range, pushing my bike was a welcome respite to stretch my legs and calm my hammering heart.
Carrying Water: Two fork-mounted water bottles with cages attached using hose clamps, a liter strapped to the downtube and a 2.5L water bladder (rarely filled) in my riding pack. My plastic side-mount bottle cages did NOT work well (I resorted to ski-strapping the bottles on after losing two). Some bikepackers don’t like the change to suspension that happens with fork-mounted water bottles, but I thought it was fine.
An excellent camp spot at Silver Creek on the Fremont Tier.
Bags: Bedrock Bags from Durango, Colorado.
The core of any bikepacking setup is a set of bags to carry gear. Rather than heavy metal racks with chunky panniers like I’ve used on past road tours, soft, lightweight bags are the way to go when riding singletrack (or anything!).
The bags I bought from Bedrock Bags, a small company in Durango, are fantastic. Customer service was incredible, the construction is solid (both zippers and material) and they stayed in place remarkably well the entire trip. I was pleasantly surprised that the rocky, technical terrain we rode was still fun, even with bags on.
If you have any questions about bags, email Bedrock directly. The company has tons of online tutorials and a staff who knows bikepacking and outfits many Colorado Trail racers. They helped me dial in my kit and I’m sure they will do the same for you!
Glad to have dialed bags on the rocky Winter Rim! (Photo: Brady Lawrence)
Handlebar bag: the Entrada. Some bikepackers use a simple dry bag for a handlebar bag, but those can flop around when the riding gets rough. The Entrada, in contrast, has multiple attachment points on the bars, straps to cinch it down, and doesn’t move at ALL.
Even descending chunky, rocky trails, my sleeping kit stayed lashed to the bike like it was part of the frame. There’s also a spacious front pouch as part of the attachment where I stored extra food or quick-access light items.
Top tube bag: The Dakota Tank.
My namesake bag (not) sure is handy! For easy-access snacks, phone, camera or whatever, this nifty number is perfect. It has three attachment points and doesn’t slip sideways off the frame, unlike other top tube bags I’ve used in the past. A must-have.
Me and all my stuff on a cold morning just before Surveyor’s Ridge! (Photo JT Lehman)
Water bottle/Feed bags:Tapeats
Don’t bikepack without these! They are easy to open with one hand while riding, hold a ton of snacks or a big water bottle, and don’t bounce around. Mine were stuffed with bars most of the time. So, so handy.
Custom frame bag:
A downside to doing this trip on a full-suspension bike is that I lose frame space. Ohhh well – worth it for the fun! Bedrock has templates for various bikes, but mine was a newer model.
No problem: I just laid a measuring tape on the bike, snapped a couple pictures, and POOF, two weeks later my custom frame bag showed up. This sweet little number held my repair kit, tech gear, and medkit. I like it so much that I’m leaving it on my bike for day rides as a permanent fixture.
Sinbad Stash Pack:
Strapped to the bottom tube, this handy item is stable is light, stable and holds a full Nalgene water bottle size item. My 29” tires initially rubbed on the bottle when I hit big drops, but that was fairly infrequent and relocating the bag lower on the frame fixed this. Make sure to measure things though!
Dropper Seat Post: the Black Dragon
This is a magic device. I’ve heard/read complaints about swaying, crappy seatpost bags that make riding annoying. Thanks to a dual-pronged metal seat attachment (the RailWing), the bag has zero sway. There’s also a “valais” that clamps onto the seatpost and prevents any chafing on the dropper post. The result is a seat post bag that held all my clothing for the trip and balanced the bike and gear weight.
One thing to consider: if you have a 150mm dropper post, your rear tire will most likely rub on the bag when hitting big jumps or drops. An extra 10-15 psi in the rear shock helped this for me, though I still can’t drop it all the way without rubbing.
Onward to the rest of the STUFF. I’ve linked to the bigger, specific items; some are affiliate links (meaning Amazon kicks me a commission if you buy through it), and some aren’t.
Sleeping: 4.8 pounds
Light is the name of the game! Lots of options out there for 1-person tents, bivy sacks or tarp shelters. Sleeping pads just keep getting lighter (and less durable, curses).
A fine evening cowboy camping on Timothy Lake. One of our best overnight spots for sure.
Tent: Big Agnes Fly Creek 1 or 2 person. This tiny, light tent is easy to set up and use. Brady and I shared the Fly Creek 2, and a bivy or tarp tent works until there are mosquitoes. We cowboy camped under the stars all nights but two, but were glad to have a tent at Timpanogas “Mosquito Den” Lake.
Sleeping bag: EE Revelation Apex 40 degree quilt. This quilt loses the zipper and simply lies over the top of the sleeping pad with straps to secure it. It seems everyone in the outdoors is going to using quilts and I can see why! Sleeping socks were key on cooler nights where it dropped below 40 degrees.
Sleeping pad: Big Agnes Q-Core SL regular. A bit bigger than a Nalgene and 3″ thick. Comfortable, and also bigger than the new Thermarests. It also takes enough air to blow up that I start feeling like I’m hallucinating! I’d get a ¾ length Thermarest Neoair (JT used one and likes it)
Pillow: Sea to Summit inflatable. Yeah yeah, a jacket works…and this is tiny and works BETTER. Hey, a guy needs a little luxury.
Cooking equipment: 2.25 pounds
We split camp stoves and fuel between the four of us. Small stoves worked great for dehydrated food dinners and instant oatmeal for breakfast. Other than the pot, the only other items I brought was a tin cup and a titanium spork. Zach used a compressible 1.4L Sea to Summit X-Pot that I plan on getting.
For water filters, I shared with the team. For time efficiency, next time I plan on bringing the excellent, light filter that JT had, the Katadyn BeFree. Zach carried a syringe to pull water out of shallow or swampy sources and then filter, which was key a few times.
Filtering water from a trough on the Fremont Tier. (Photo: Brady Lawrence)
Clothing worn: 5.96 pounds (including shoes and backpack)
Bike shorts: Dakine Boundary. I love the stretch and fit on these shorts and have ridden in them for years. Chamois: Pearl Izumi, four years old and threadbare but still kickin! Yep, only one for the entire trip – rinse out at night (sometimes) or jump in streams/lakes during the day. Look mom, I’m (almost) clean! Short-sleeve jersey/shirt: Patagonia collared nylon. Since I’m vegan and don’t buy wool, I initially considered a synthetic polypropylene shirt. However, they STINK for day after day use. I picked up this shirt at the local used gear shop the day before the trip and it worked great!
The shirt rinsed out easily, was light and cool, and (the best part) JT had the exact same shirt style. Twinsies! As a bonus, it makes you look slightly less backwoods when you wander into a town or lake resort restaurant to eat all the food.
Convenience store food refill in Chemult, no collared shirt required…
Gloves: lightweight Giro Socks: quick-dry synthetic. Shoes: Specialized 2FO. These are da bomb. Easy adjustment, comfortable, wide(ish) toebox, and lots of protection for banging toes while riding) Helmet: Smith Forefront (Love this helmet for comfort and the custom sunglasses integration on top) Sunglasses: Smith Attack Backpack: Osprey 10L w 2.5L bladder. I rarely filled the bladder with more than .5-1L at a time except for a couple days where water was tough to come by for 6+ hours.
Spare/Warm Clothing: 4.41 pounds
For future trips, I may skip the thermal bottoms and just use rainpants like Zach (Bikepacking Mentor). The thermal top wasn’t necessary, but it was nice to change out of my riding shirt every day. Otherwise, this list worked well.
Brady hiding from a thunderstorm under a tree. Bring your rain gear, even if it’s summer!
Thermal Jacket: Patagonia Nano-Air Rain Jacket: Outdoor Research Rain Pants: Marmot Precip Thermal bottom: Patagonia longjohns Thermal top: Smartwool (I don’t buy new wool items, but this old top keeps on kicking; no reason to throw it away) Waterproof gloves: Black Diamond Beanie Sunsleeves – fantastic for riding in the sun without needing sunscreen
Me haaaangry and tired after a long day on the trail, banged up and yet fajitas soon made everything better! (Photo: Brady Lawrence)
Arm warmers – I never used these, but they’d be handy on chilly mornings, especially at higher elevation. Knee warmers – I used these once and don’t plan on bringing them for future trips. Rain paints will suffice for cold mornings. Extra socks for sleeping or if socks are wet in the morning (I wore the same pair to ride in, though I started with them damp a few days) Underwear: Exofficio quick-dry. Towel – mine was tiny (5”x5”) and next time I’ll go bigger. It was hot enough to air dry most of the time (silver lining for the heat?) Stuff sack – good for clothes and/or extra food to strap to bars Camp shoes: Xero sandals. A cheap pair of light flipflops is so worth having so you don’t need to wear bike shoes for your ENTIRE trip. Mosquito Net
Electronics: 2.89 pounds
Ah, camaraderie on the trail! Isn’t technology great?
Camera: Sony RX100V with 2 spare batteries and charger. Sweet little camera with SO much power for the size. Next time, I may leave the spare batteries/charger behind and charge via USB off the external battery pack
Tripod – small Gorilla pod
iPhone 5SE and headphones – I listened to a few audiobooks on the trip, mostly during long hike-a-bike sections or steep fire road climbs. I’ve suffered enough bike touring to feel ok about distracting myself!
External battery: Anker Powercore 13,000 (it’ll charge my phone 6 times). I prefer this over others because it has two charging cable slots vs just one. Fundamental rule for staying topped up is Zach’s ABC: Always Be Charging. Gas stations, restaurants, motels…fill ‘er up!
Satellite messenger for emergencies: SPOT Gen3 tracker. This is only 1-way communication and you can’t do a monthly-only plan, so I may get Garmin InReach Mini for future trips.
Headlamp: Black Diamond Revolt + spare batteries
GPS: eTrex 30x w/lithium ion batteries – Thanks for loaning me this, Paul! The user interface is weak, but it sips batteries relative to other GPS units so most bikepackers seem to use it. Someone please invent a better one!
Charging/USB cables
Tool, repair and emergency kit: 1.16 pounds
My goal was to have everything I needed for most field repairs for my bike or gear. As it turned out, I didn’t need any of this gear, but I’d carry the same kit next time!
Mid-trip brake pad replacement. Brady’s bike experienced other fun that I’ll talk about later!
-2 Voile ski straps – excellent for many applications ranging from holding bottles on a cage to fixing a broken bike frame
-Multitool
-Patch box w/2 tubes of glue, 9 small patches, 1 large patch, and 2 speed patches
-Spare derailleur hanger
-Spare derailleur cable
-Spare brake pads (2 sets)
-Spare SPD cleats/bolts
-2 chain links
-Quicklink x 3
-4 cable ends in baggy
-FiberFix spoke replacement
-Chain lube in micro dropper bottle (one bottle was good for the entire 15 days)
-6”x10” T-shirt rag for cassette flossing
-Old toothbrush w/cut handle for cleaning drivetrain
-2 plastic tire levers
-4 large zip ties
-4 small zip ties
-4 safety pins
-1” roll of Gorilla Tape
-GoreTex repair tape
-Kleartape universal repair tape
-Sleeping pad repair kit w/one Hot Bond adhesive and 5 patches
-Mini compass All above in a Ziploc bag (a more durable bag could make sense for a longer trip)
Misc: 1.32 pounds
Spare 29er tubes (2) – not a single flat for any of us on the entire trip, but gotta have these! For flat protection, fill the tubes beforehand with Stan’s sealant. Leatherman -must-have for any trip
Water break in the midst of big trees on Middle Fork near Oakridge.
Medical kit: .32 pounds
Taking the Wilderness First Responder class upped my game dramatically for wilderness first aid. The below is similar to what I carry on any day ride. NOLS sells well-equipped medkits.
A fabulous day in the Old Cascades Crest zone on the Mt. Hood tier. (Photo: Brady Lawrence)
-3 2”x 3” non-stick dressings
-4 Band Aid Tough Strips
-10 wound closure strips
-Irrigation syringe (for cleaning out cuts/scrapes)
-Tegaderm in big sheets – can be trimmed to fit smaller scrapes/burns
-4 Neosporin applications
-5-Q tips
-2 tincture of Benzoin applications
-10 Advil, 10 Ibuprofen & 4 Benedryl in flip top container
-Toothbrush/toothpaste and travel-sized Glide floss
-1” camp roll toilet paper and small bottle of hand sanitizer (most people get giardia from dirty hands, not water!)
-Dr. Bronner’s soap in micro dropper bottle
-SPF 30 stick sunscreen
-SPF 15 lip balm
-Chamois Butter – skip the individual wipes and just fill a small container from a big chamois butter like this
-100% DEET insect repellent wipes
Any Questions?
That’s a wrap! Drop me a line with any clarifications, feedback or (constructive) thoughts. Commenting is great because it helps out future readers of this post.
Have fun out there! By no stretch of the imagination is the Oregon Timber Trail easy, but it’s a hell of an adventure and one I won’t forget soon.
Brady descending off Surveyor’s Ridge with Mt. Hood cheering him on.
https://www.traipsingabout.com/wp-content/uploads/2018/08/Gunsight-Ridge-Oregon-Timber-Trail.jpg387580Dakotahttps://www.traipsingabout.com/wp-content/uploads/2018/03/Traipsing-About-logo-white-background-450x156.pngDakota2018-08-02 22:19:442019-03-17 11:54:53Packing List and Lessons Learned from Bikepacking the Oregon Timber Trail
Border to border, the Oregon Timber Trail traverses the state from California to Washington. On Saturday, three friends and I start pedaling all 670 miles of it. (Update: here’s the full trip story!)
Starting down south, Brady, JT, Zach and I will crank north over 16 15 days through terrain ranging from high desert plateaus to dense old growth forest to volcanic lava. For maximum fun/quad punishment, the route wanders back and forth across the Cascade Mountain range.
The terrain ranges wildly: smooth trail, chunky rocks, sandy fire road, trails so steep pushing is the order of the day. At some point, we’ll probably hoist our bikes over downed trees for a few hours.
I fully expect this trip to secure Hardest Physical Accomplishment status for me. Our plan aims at 45 miles and 8 hours per day for two weeks straight on trails. On loaded bikes and riding so much singletrack, that’s far more difficult than my past road tours. With 67,000’ of climbing in total, we’ll be riding uphill over 4,000’ each day on average. (That’s 2.3 sea-to-summit ascents of Everest, for comparison.)
Intense. And so, so rad.
View from the cockpit
What is the Oregon Timber Trail?
The OTT is a scenic combination of singletrack and fire road. Apparently it sports the highest percentage of singletrack (60%+) for a long-distance bikepacking route in the United States. The full linkup blossomed into fruition in 2017 with trail work, initial riders testing the route, and plenty of publicity.
670 miles of fun on the Oregon Timber Trail
The full trail splits into four distinct sections: Fremont, Willamette, Deschutes, and Hood. It traverses the rock-strewn Fremont National Forest, slips through old-growth to Oakridge on the Middle Fork Trail, sneaks around Mount Bachelor near Bend, and finishes on the east side of Mount Hood on scenic Surveyor’s Ridge before rolling downhill into Hood River.
In short, some of my favorite Oregon riding, linked together with a variety of dirt roads, historic thoroughfares like the Old Santiam Wagon road, and remote forest and lake regions I’ve never visited.
Lakes, lakes and more lakes
The OTT’s excellent website says this: “The Oregon Timber Trail is an iconic backcountry mountain bike route spanning Oregon’s diverse landscapes from California to the Columbia River Gorge. It is a world-class bikepacking destination and North America’s premiere long-distance mountain bike route. It runs south to north and travels through a variety of landscapes, communities, ecosystems, terrain, and, most importantly—mountain bike trails.”
The trail linkup is laid out for people who want to ride it on two wheels. This isn’t a hiking trail like the Pacific Crest Trail or one used by hikers and bikers like the Colorado Trail. Only a handful pedaled the full trail last year. It’s a raw, adventurous linkup with route finding, few restock points, and lots of potential hard work. And fun! Did I mention fun?
Still snow in the mountains!
Why Bother? That Sounds Haaaard
There’s magic in a traverse of an entire state. Immersed in nature, this is a chance to disconnect, disappear, and live in the moment.
Wading a frosty-cold stream on the shakeout ride.
I recognize the privilege inherent in the freedom to hop on bikes and go explore for two weeks. I’m grateful for that opportunity.
This adventure trades easy living to strip life to the basics and go adventure. Some Type 2 fun may rear its fanged head, but that makes life at home all the sweeter in contrast when the trip lives on in memory lane.
The simplicity of the experience appeals to me, combining two of my favorite activities (mountain biking and traveling) with a preferred method of exploring the world (bike touring). In the two big road tours Chelsea and I enjoyed across the U.S. and Europe, we sunk into a rhythm: wake, eat, bike, eat, bike, sleep, repeat.
This time I’m checking out of work for the entire two weeks for the first time in 10 years. YES. No calendar appointments, no conference calls…
No cell signal, just mountain views.
The Logistics: Gear, Sleeping, Eating, WILL YOU EVEN SHOWER?!
I’ve mountain biked a ton. Bike toured plenty. Traveled often. Camped enough to know how a sleeping pad works. Linking it all together with a light kit (who needs multiple pairs of riding shorts anyway?) is another story.
I’m planning an entire gear post to share what I’m carrying for my trip. I’ll also talk about doing the trip as a vegan. I’m excited that Brady is game to join me for 100% plant-powered fueling the entire way. Props, man!
Cozy camp on Lava Lake.
Quick logistics summary: we booked zero lodging and our plan is to sleep in the dirt the entire trip. (Unless we can convince Mountain Man JT otherwise.) Lakes shall be our showers; restocking in random small towns along the way our sustenance, though hopefully we can cross paths with Chelsea and a van full of treats at a highway crossing or two.
10:30 pm dinner prep. Pad thai!
Quick gear summary: I’m taking a full-suspension mountain bike (a Santa Cruz Tallboy) with shiny new Bedrock bikepacking bags as the base kit. Here’s a shot of the general setup.
The sexy bikepacking setup. It amazes me that this carries everything I need for the trip!
I dig launching into adventures, and this bikepacking trip is no exception. Our itinerary is loose, though that’s easy when each night’s sleeping arrangements revolve around, “Hey, this lake/creek/mountain looks sweet.”
I haven’t done specific training other than my usual pedaling. For my lone gear test, I pedaled out 30-odd miles, descended a gnarly lava trail (in the dark), and solo camped (in the rain, yeahhh). The return trip of 40 miles around Mt. Bachelor left me grinning with excitement for this upcoming trip. As I love to say to Chelsea (as she shakes her head), it’ll be fiiiiine.
Maybe I didn’t specifically train, but my bike is ready. I basically rebuilt the entire thing preparing for this trip. Great practice for my bike maintenance!
New rear cassette (11-46, if you’re curious) and bigger brake rotors (180mm).
Want to Follow Along?
When we have a signal, I’ll be posting to Instagram here and Brady is @bradylawrencephoto. This marks my return to IG after three blissful months off. Gotta spread the word about Oregon’s awesome new trail!
Post-trip, I’ll blog about the experience and do a breakdown of how gear and plans (the few we have) work out. We’re aiming to make a short film of our time on the trail with Brady’s skills and JT/Zach’s dashing good looks. I’ll provide comic relief.
Without further adieu, onward we go! Catch you on the other side.
Mountains, here I come!
https://www.traipsingabout.com/wp-content/uploads/2018/07/Mt-Bachelor-and-bikepacking-setup.jpg435580Dakotahttps://www.traipsingabout.com/wp-content/uploads/2018/03/Traipsing-About-logo-white-background-450x156.pngDakota2018-07-05 06:05:492018-09-05 08:13:08Launching a Bikepacking Trip on the Oregon Timber Trail
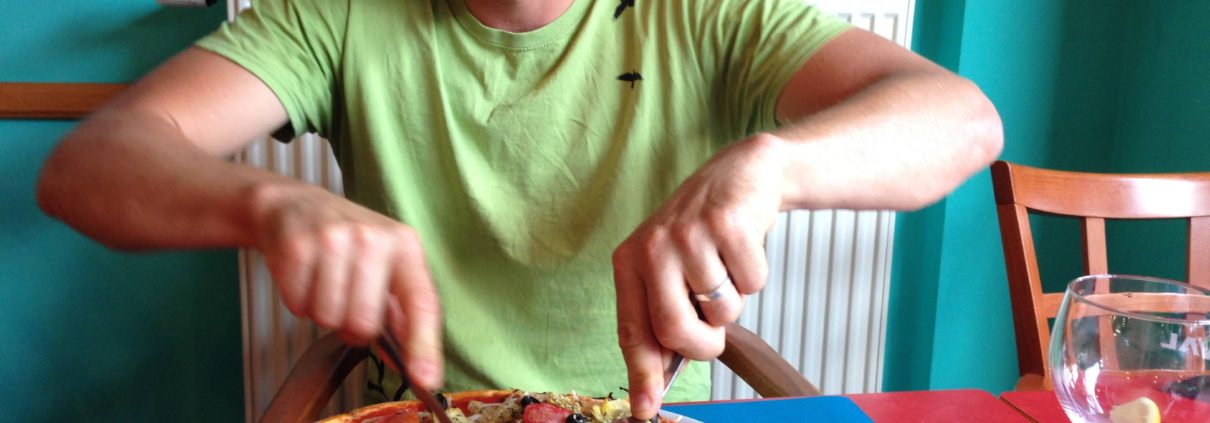
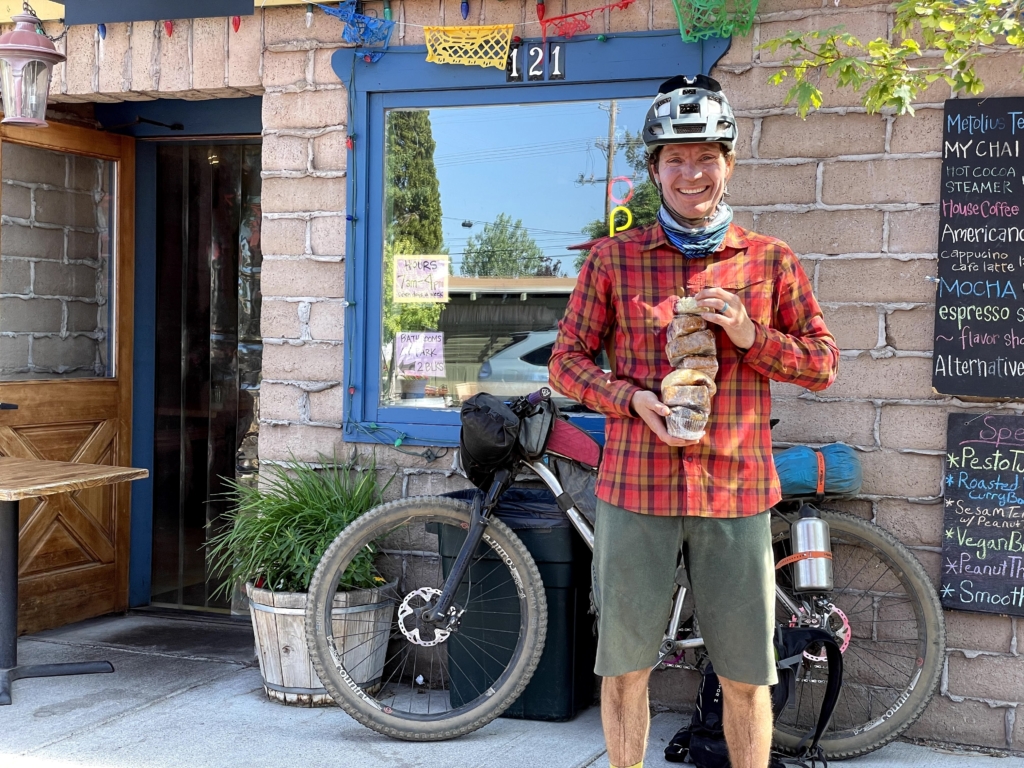
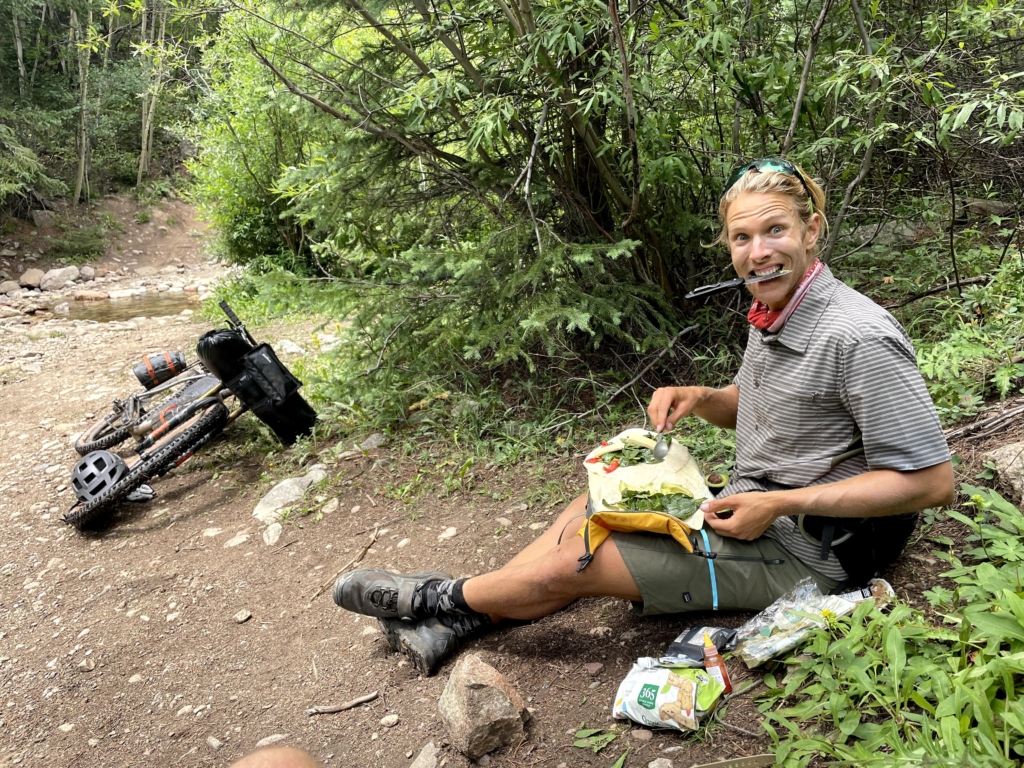
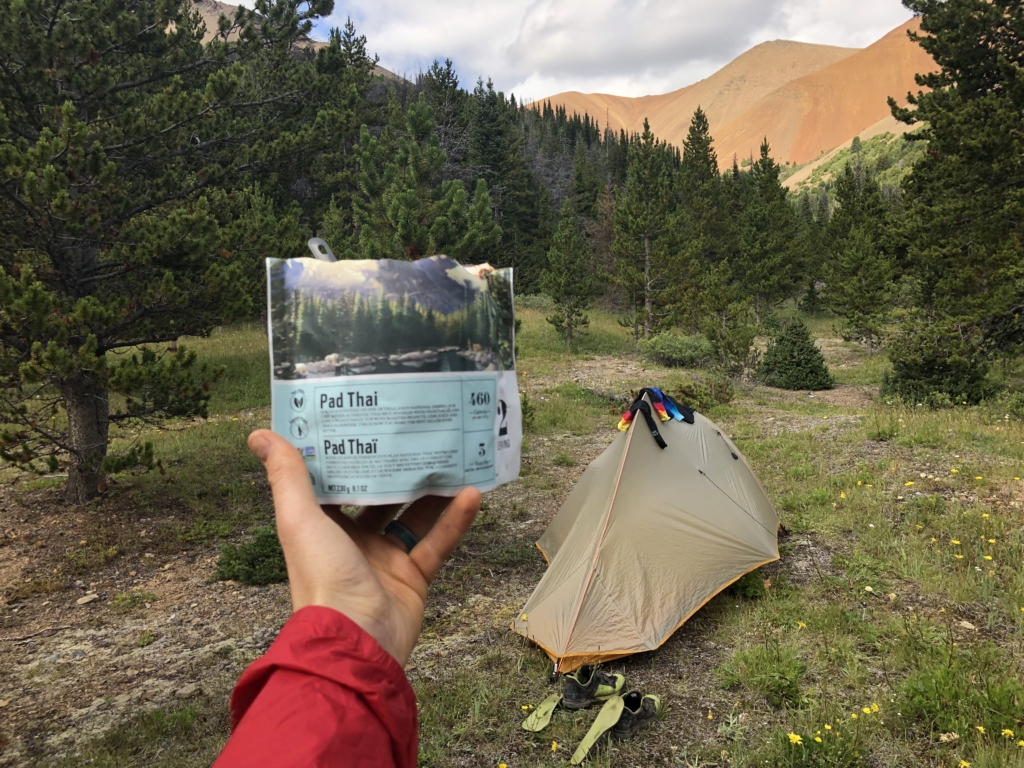
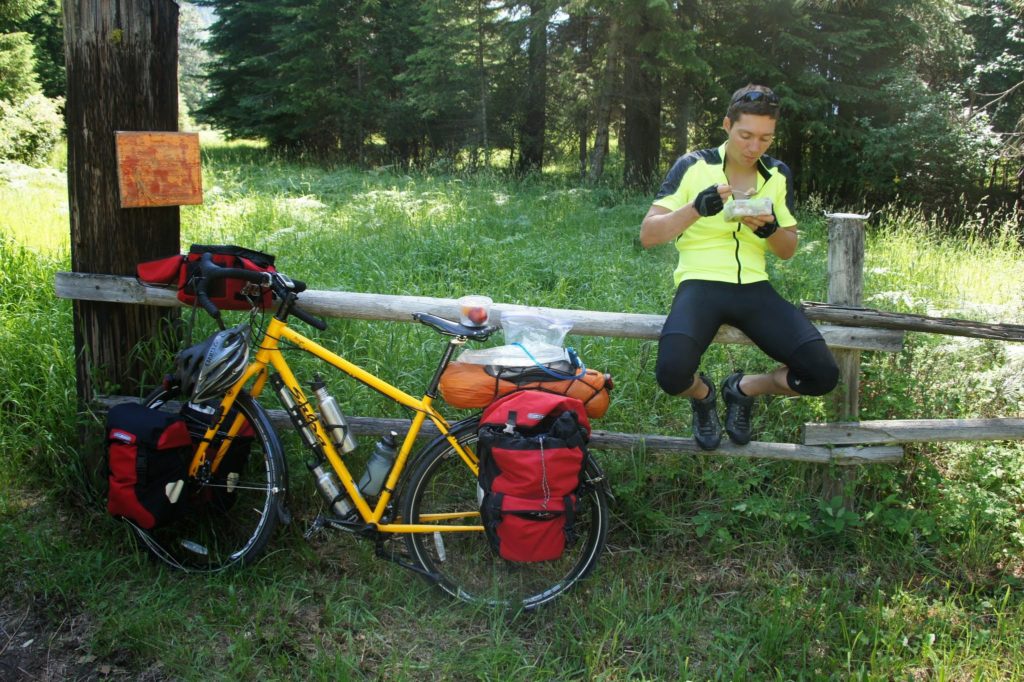

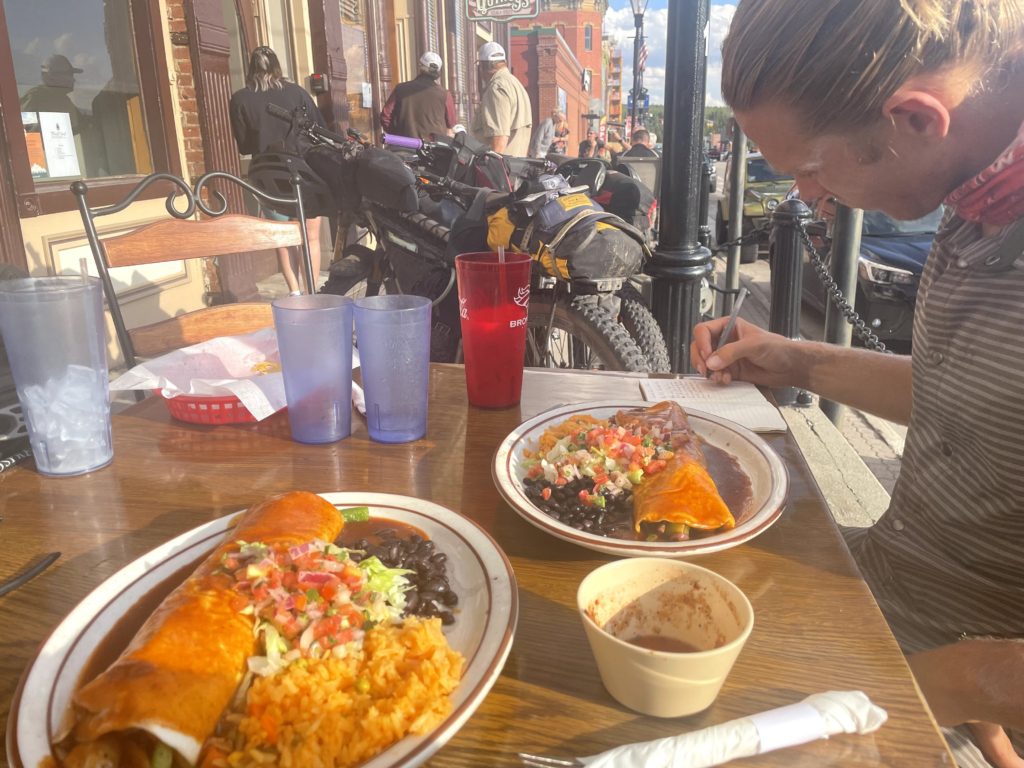
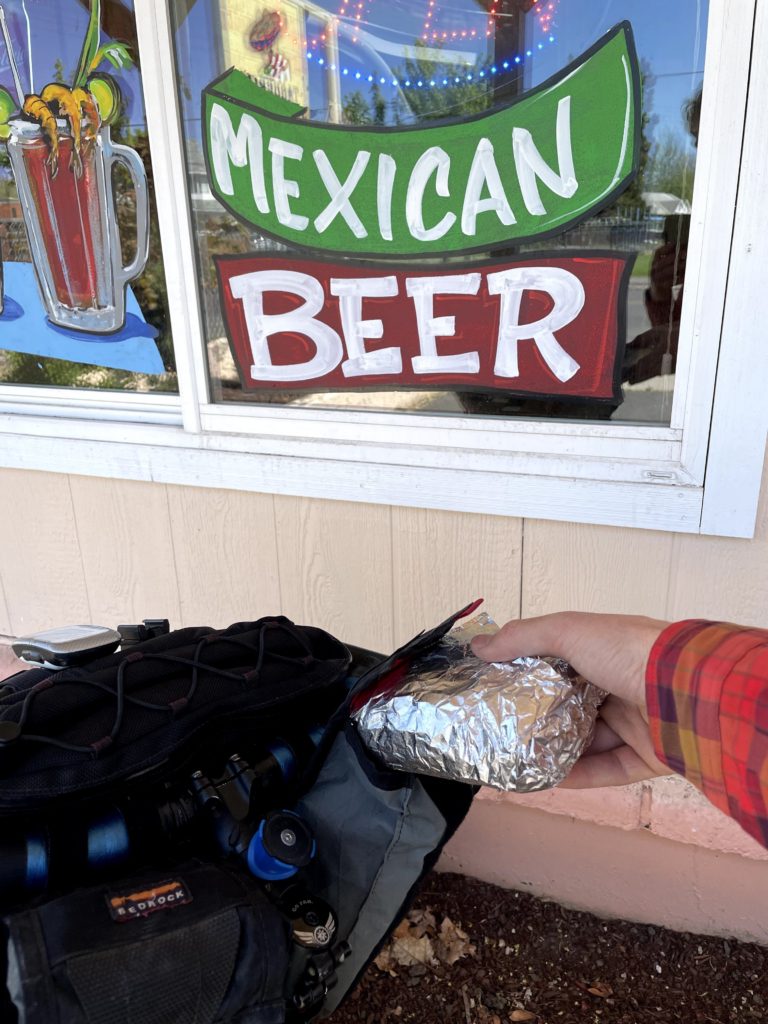


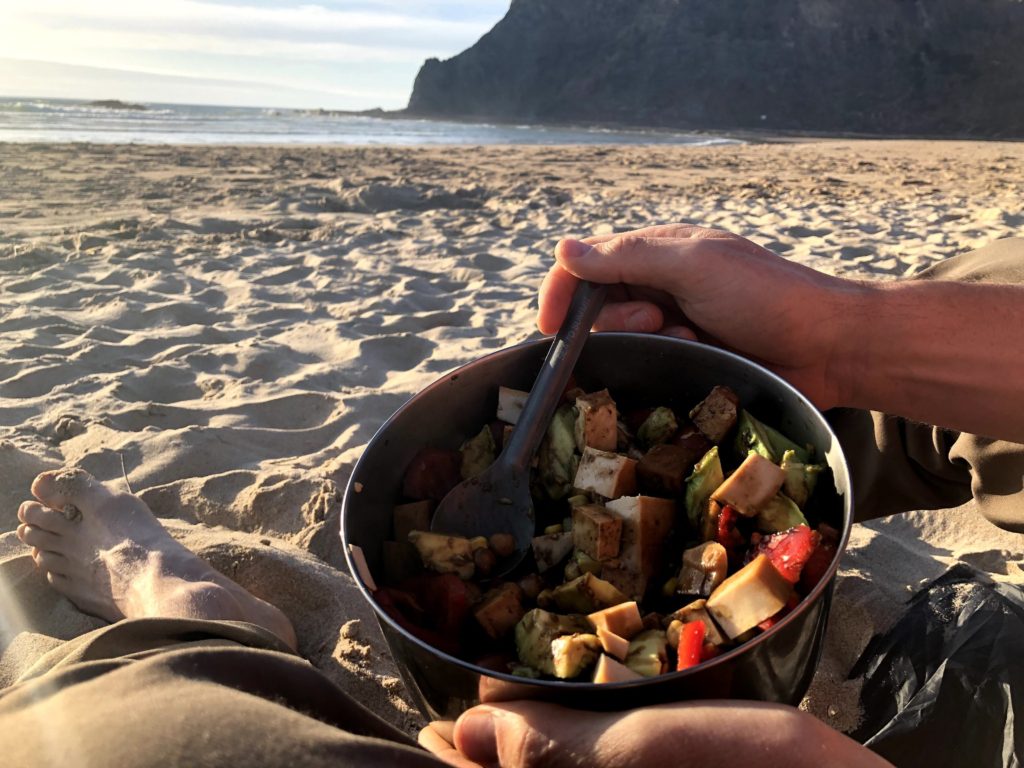


")
")


 in Silverton on the CT.")


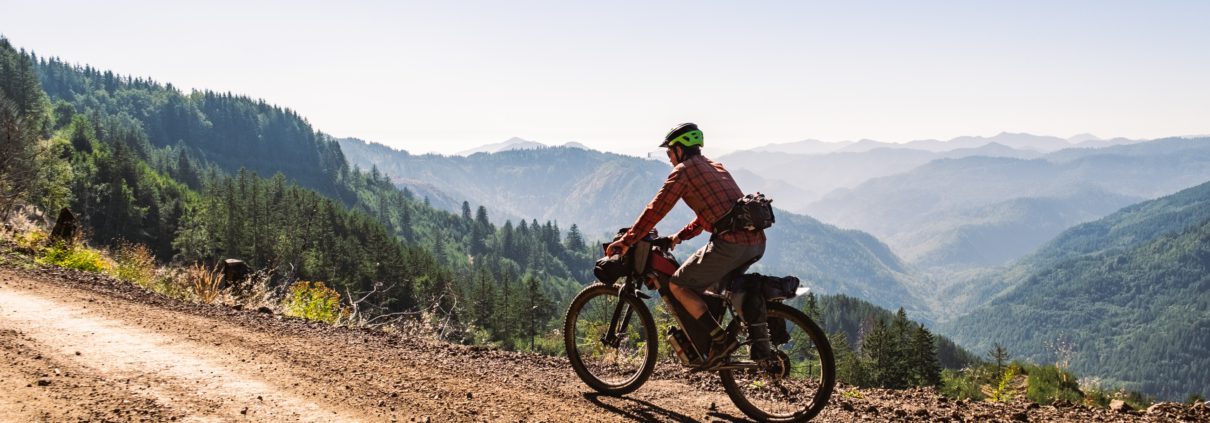
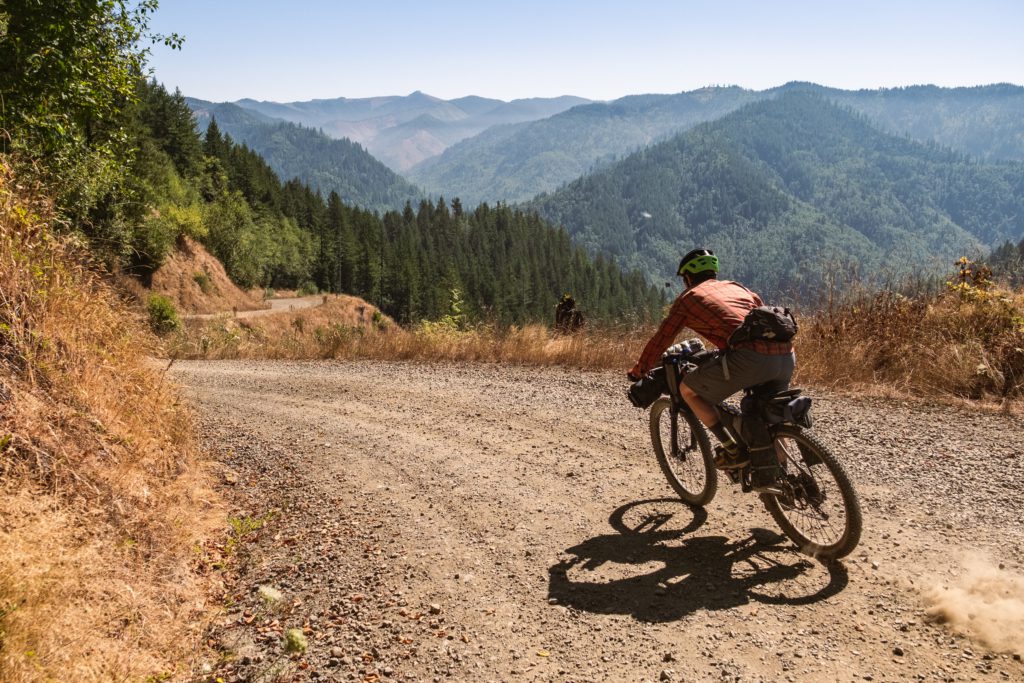
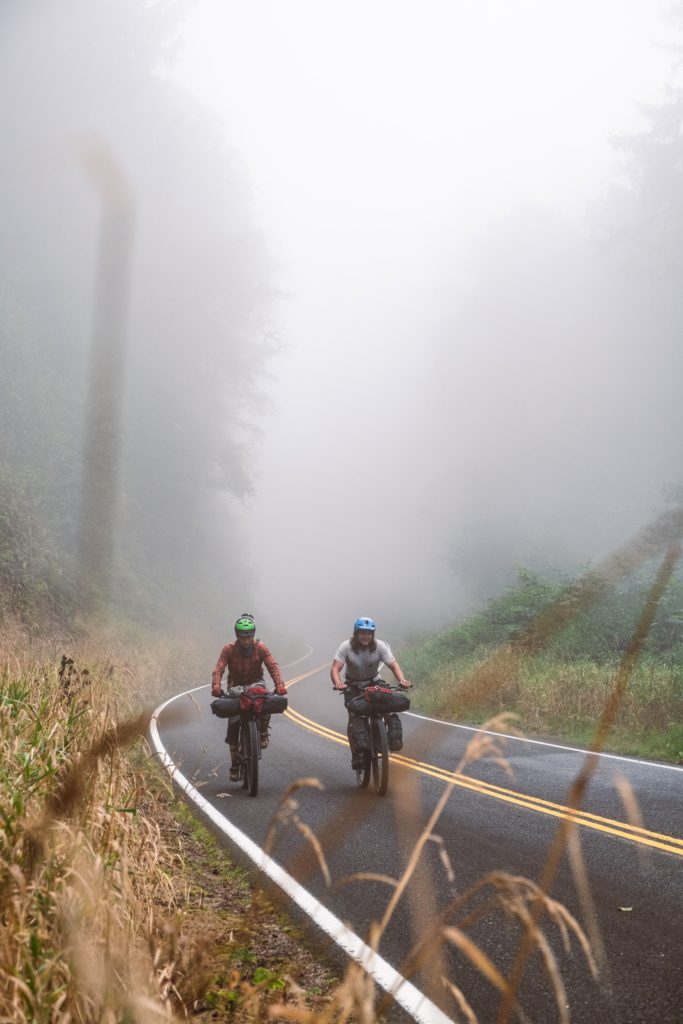
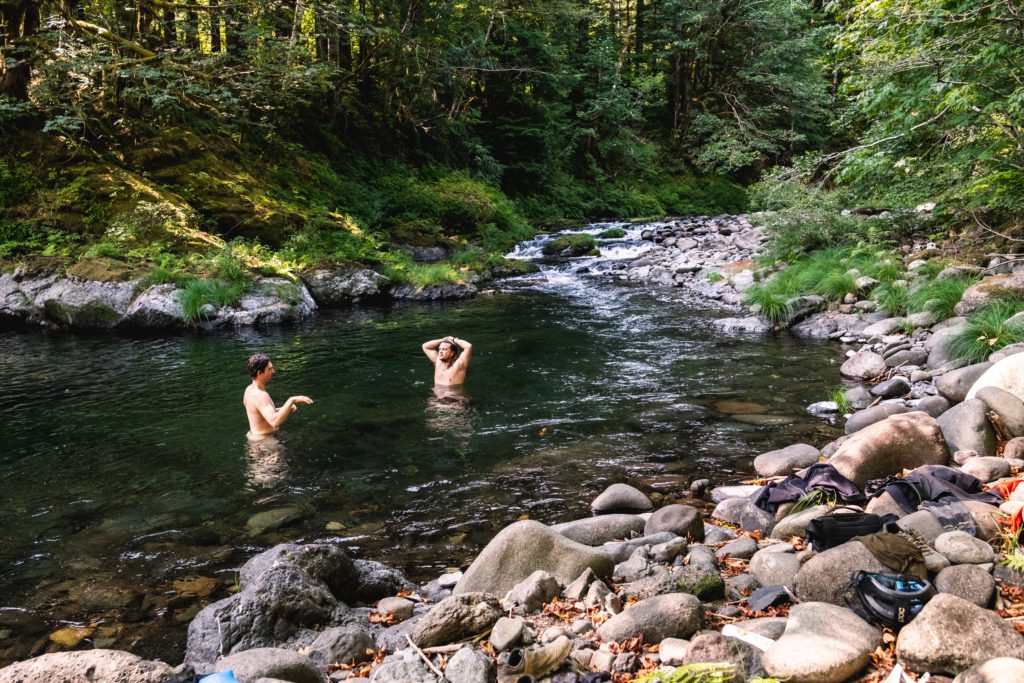
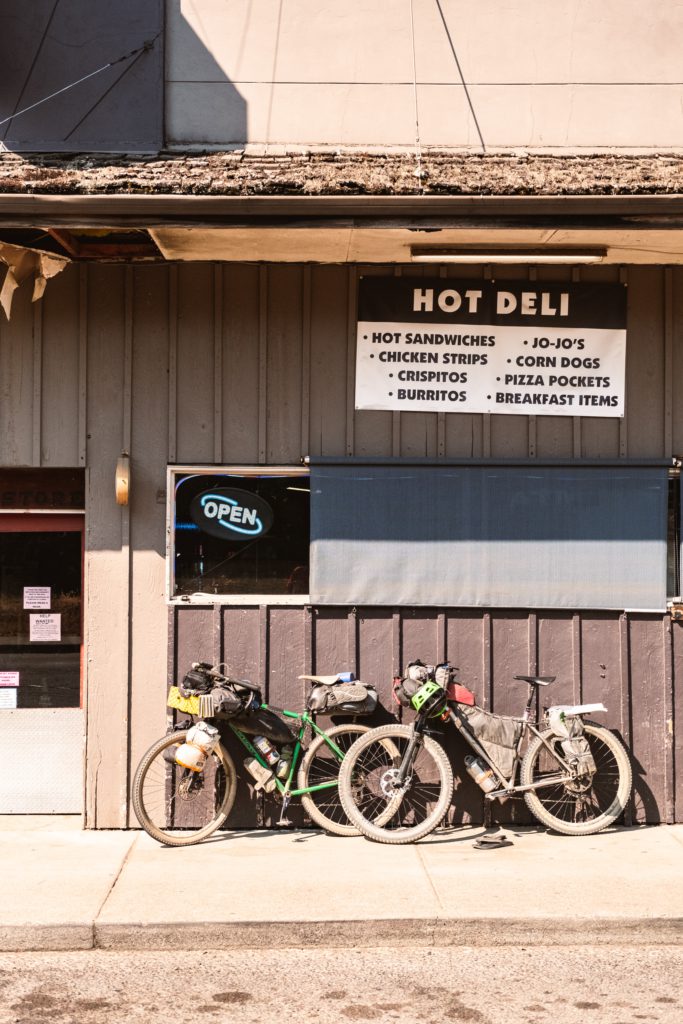


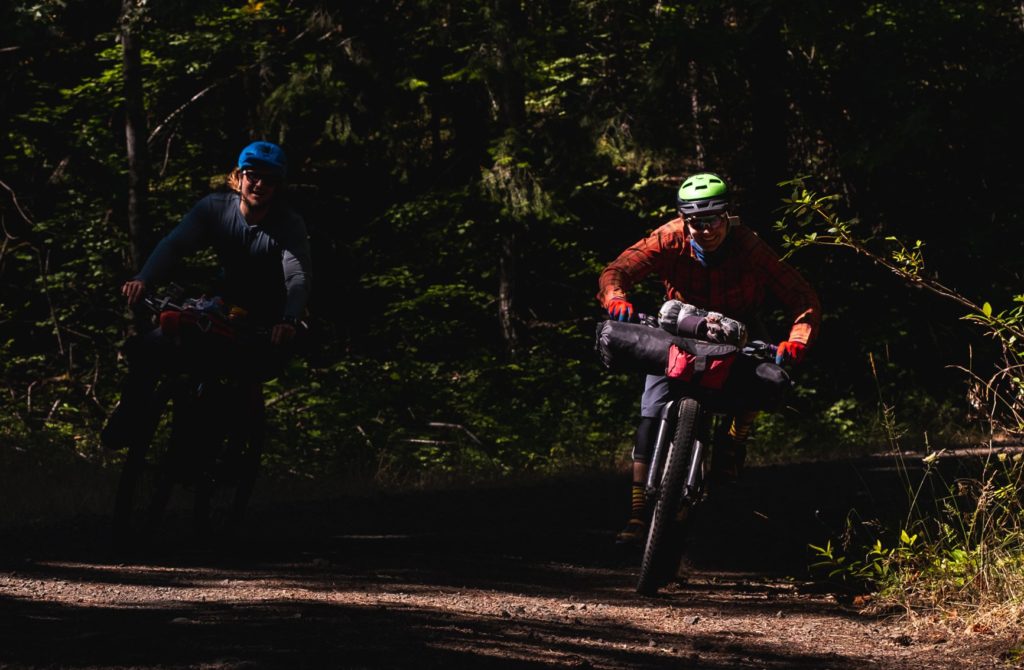


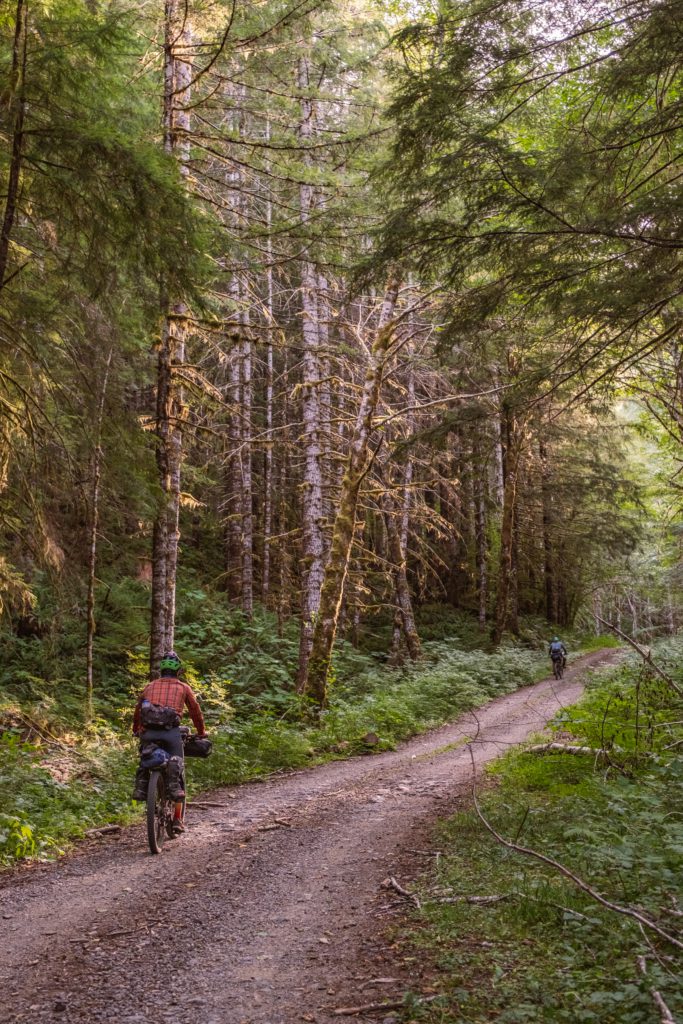

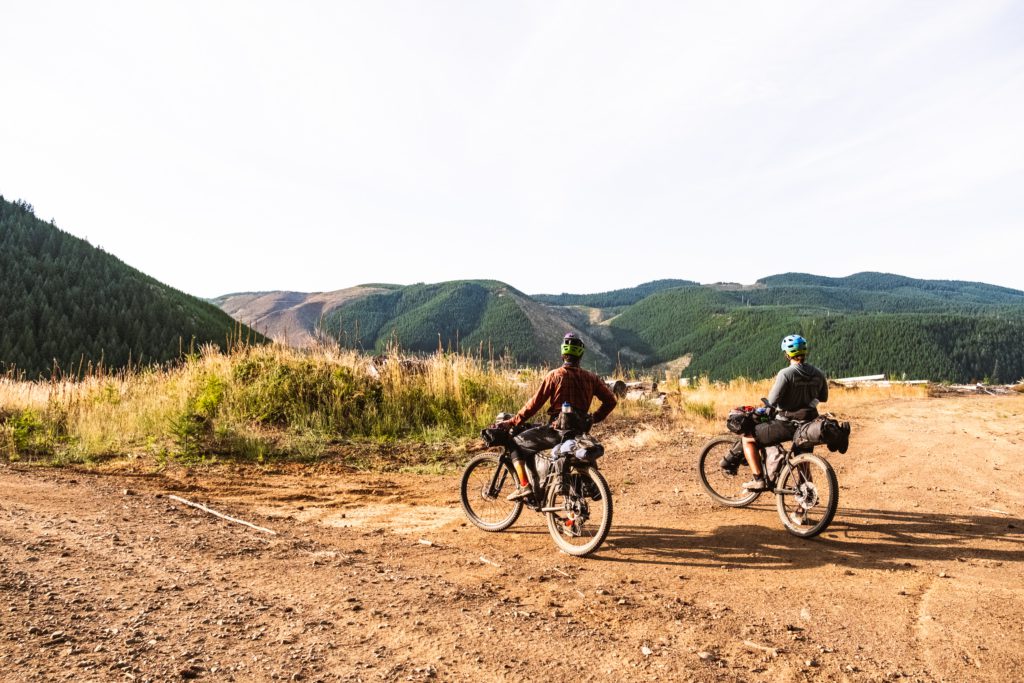


 sausage gets made.")


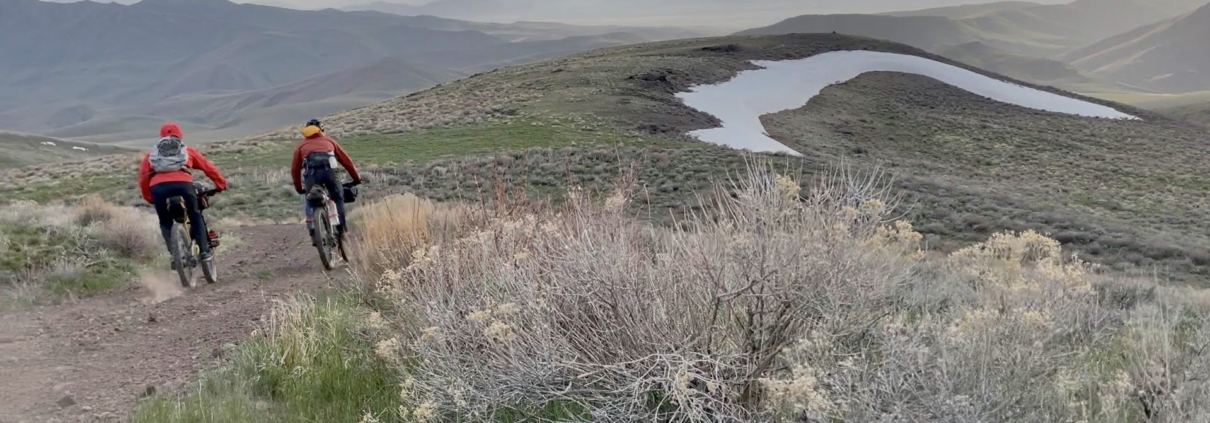
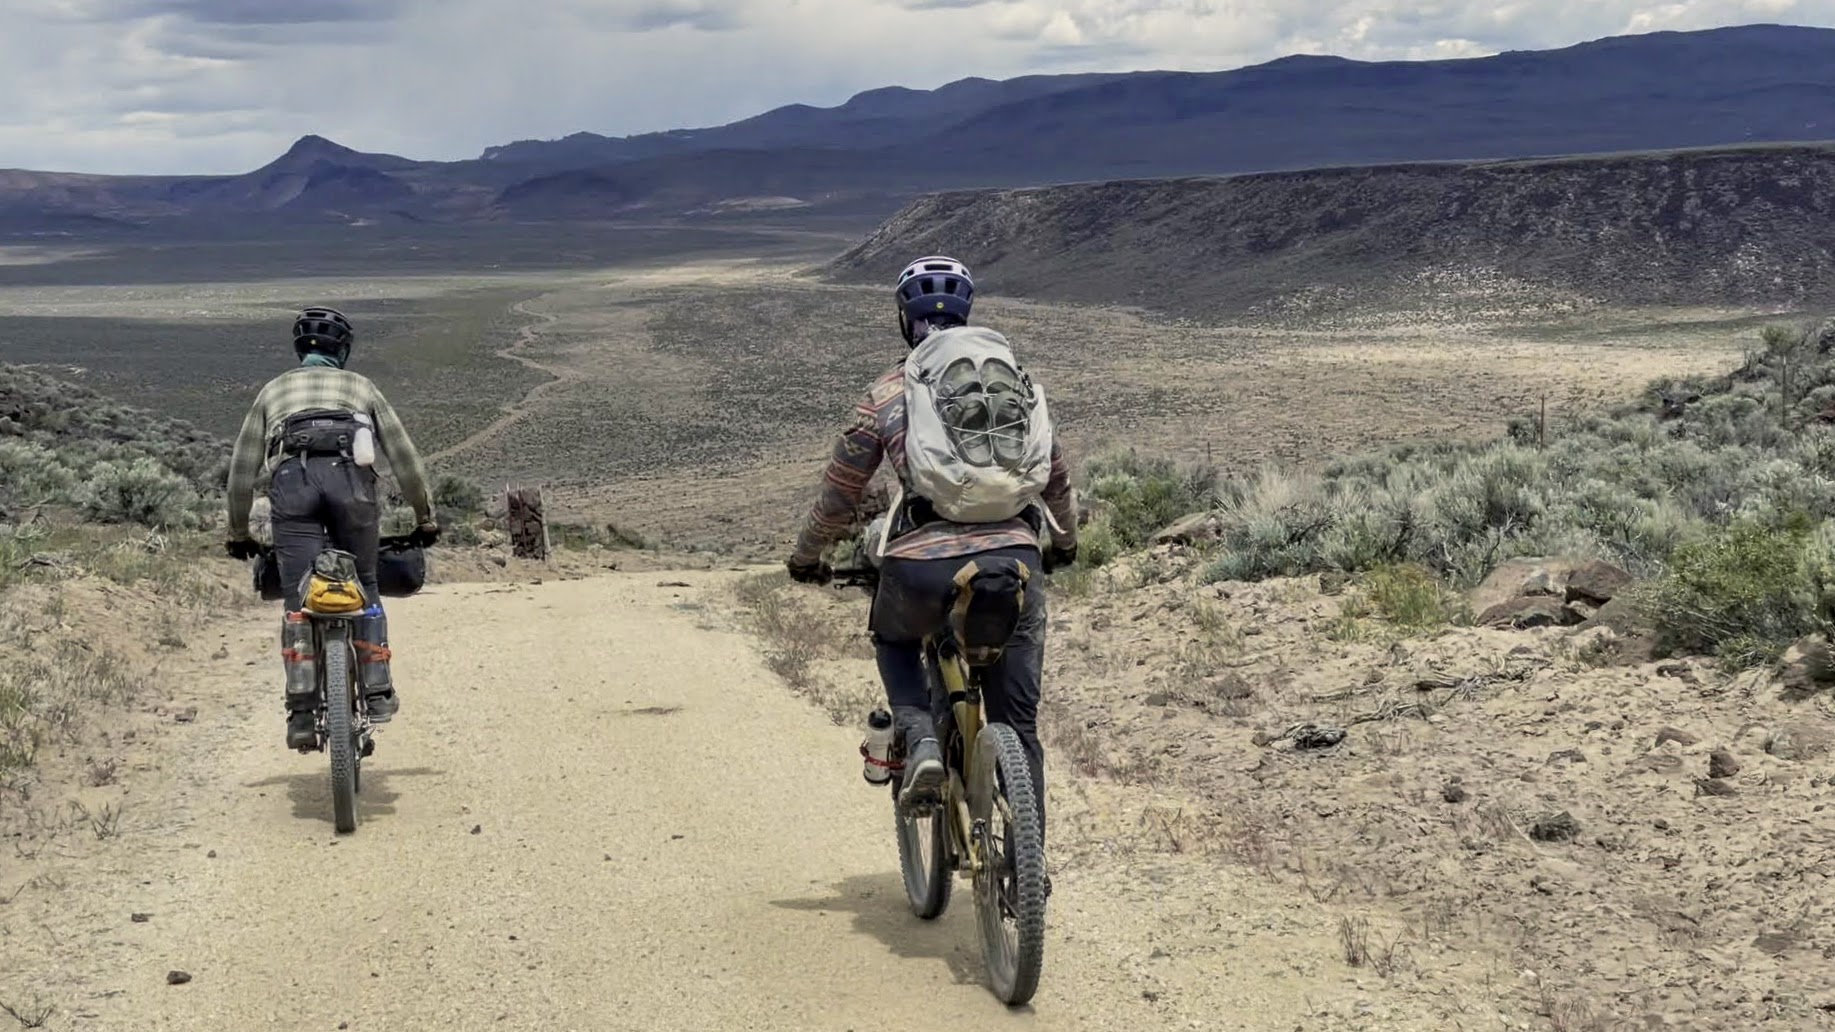

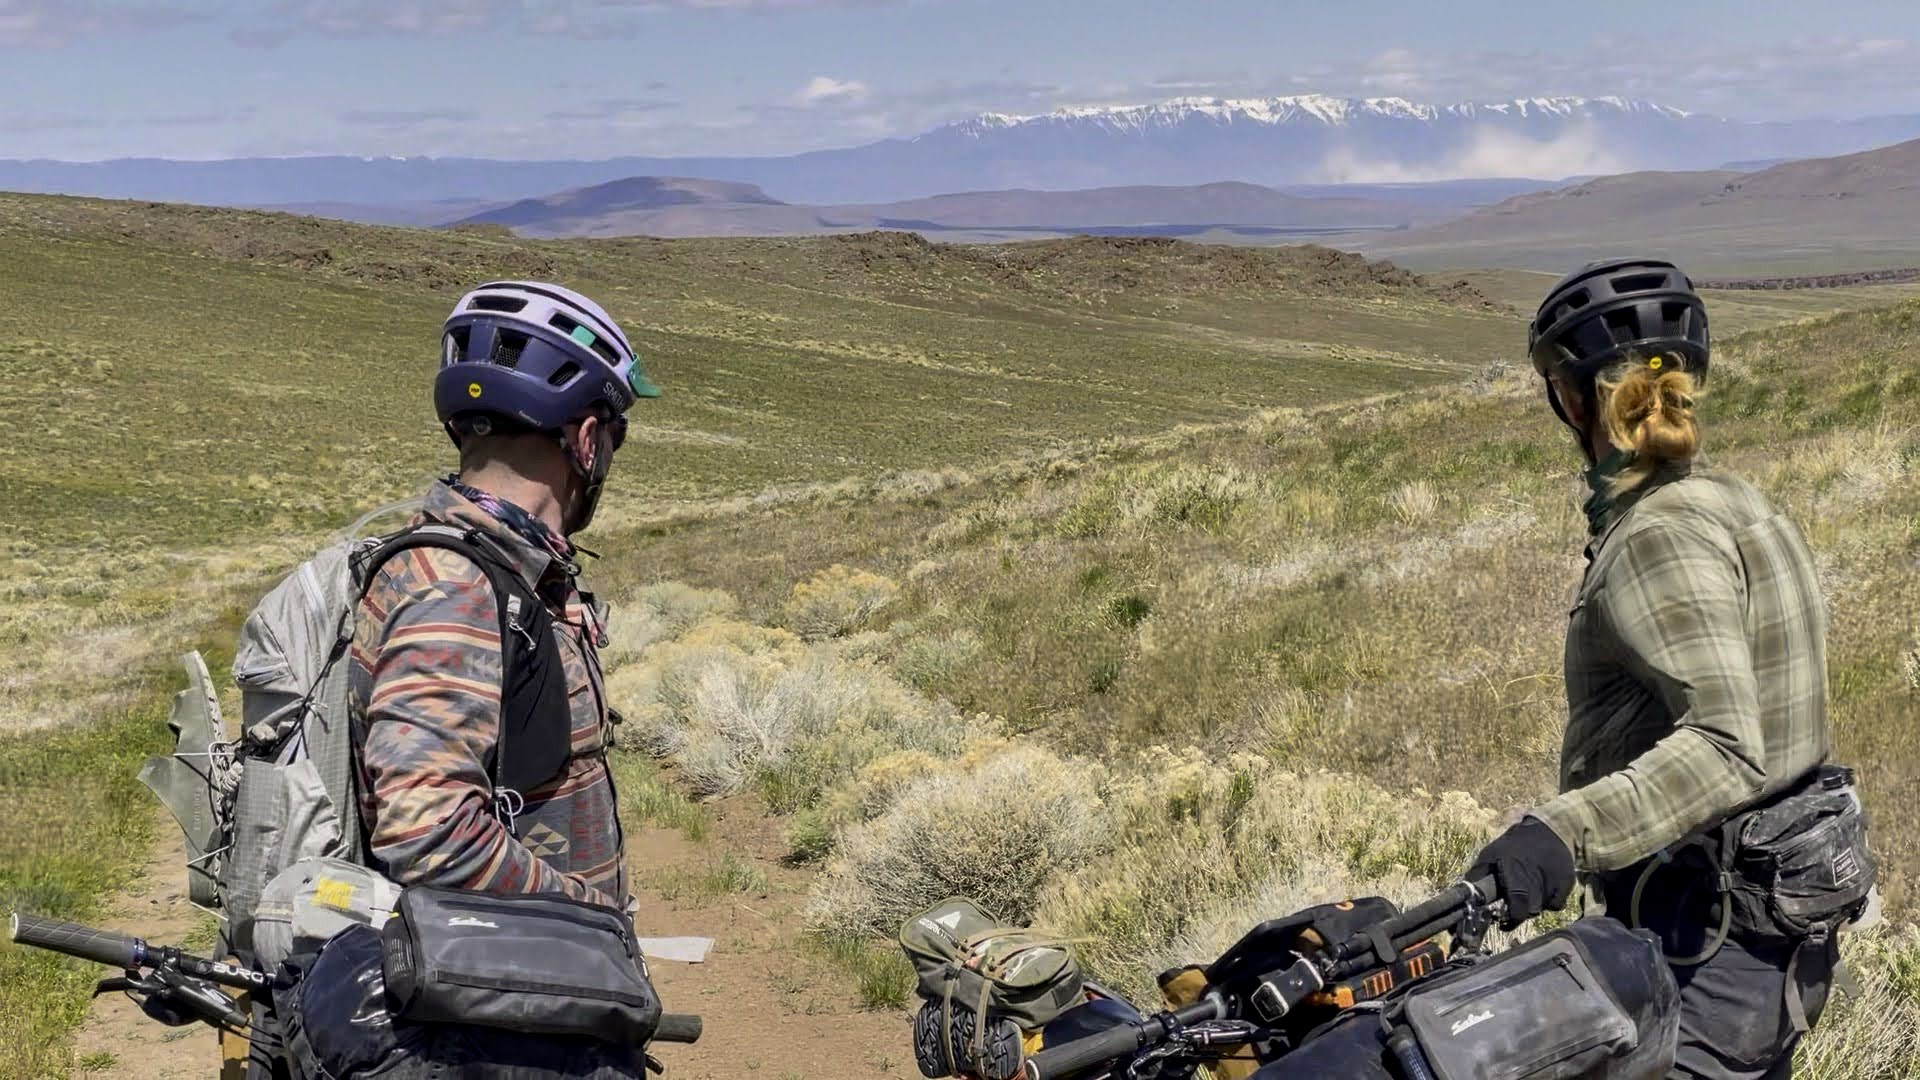
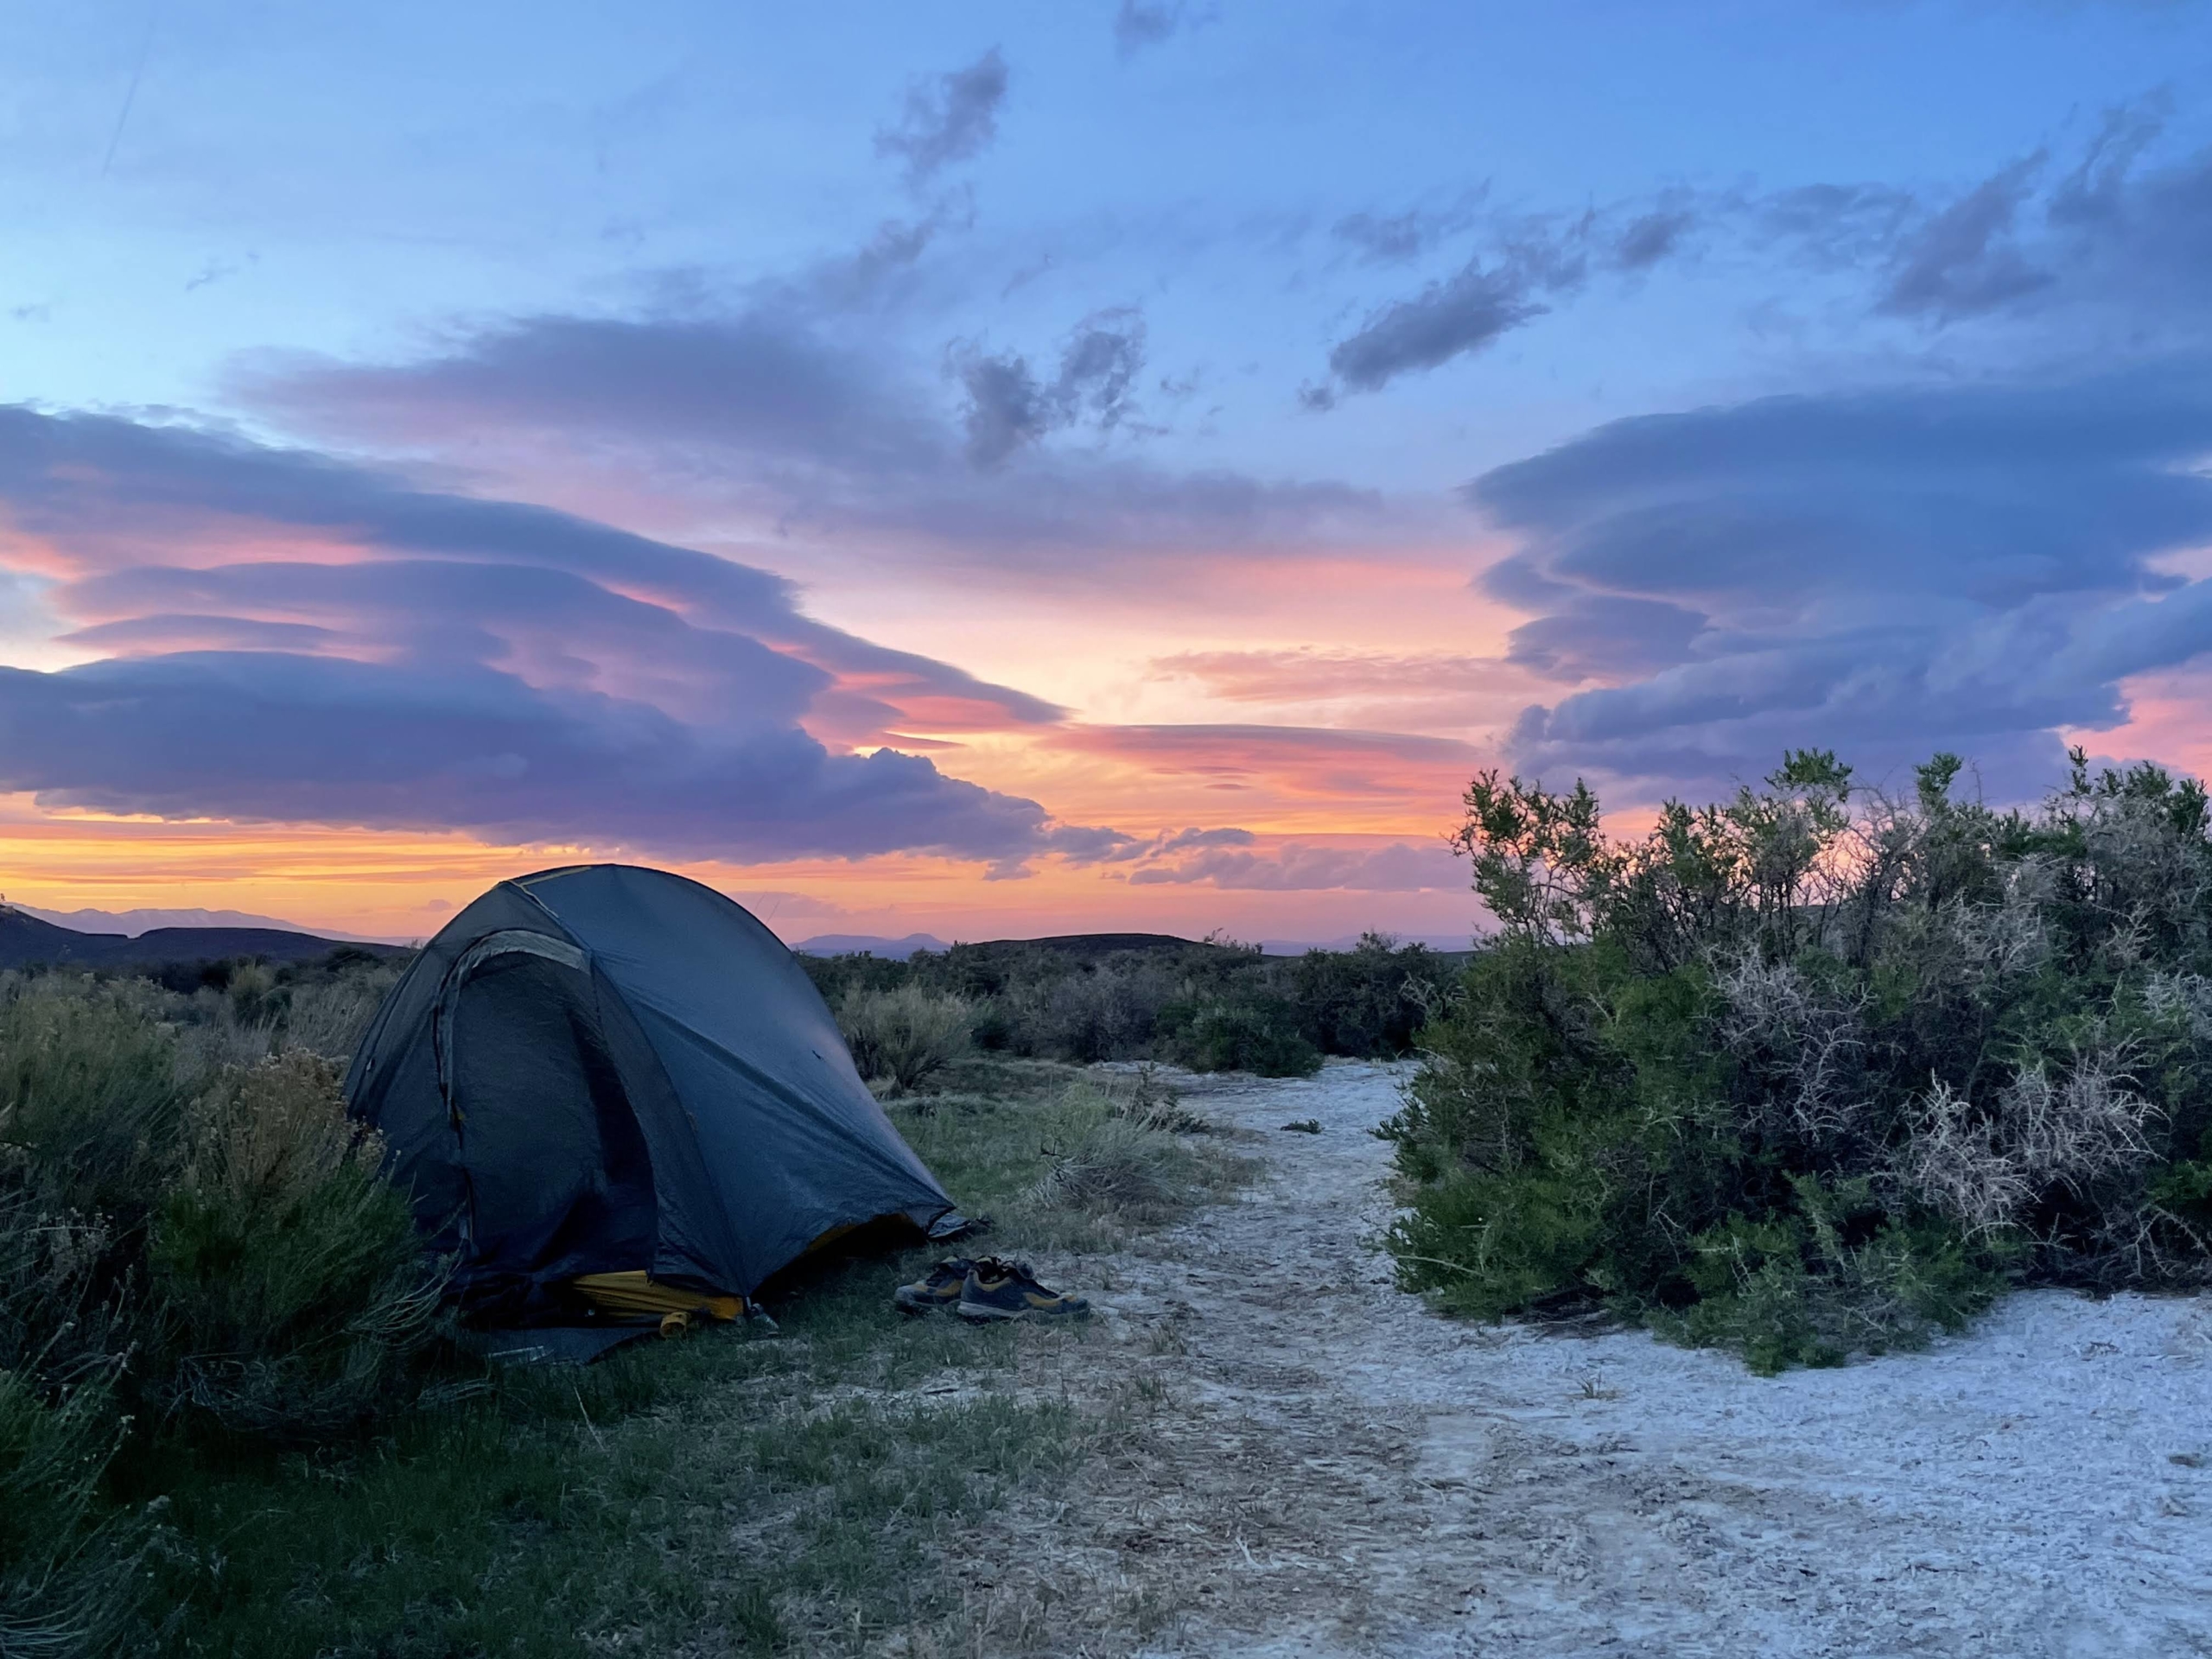
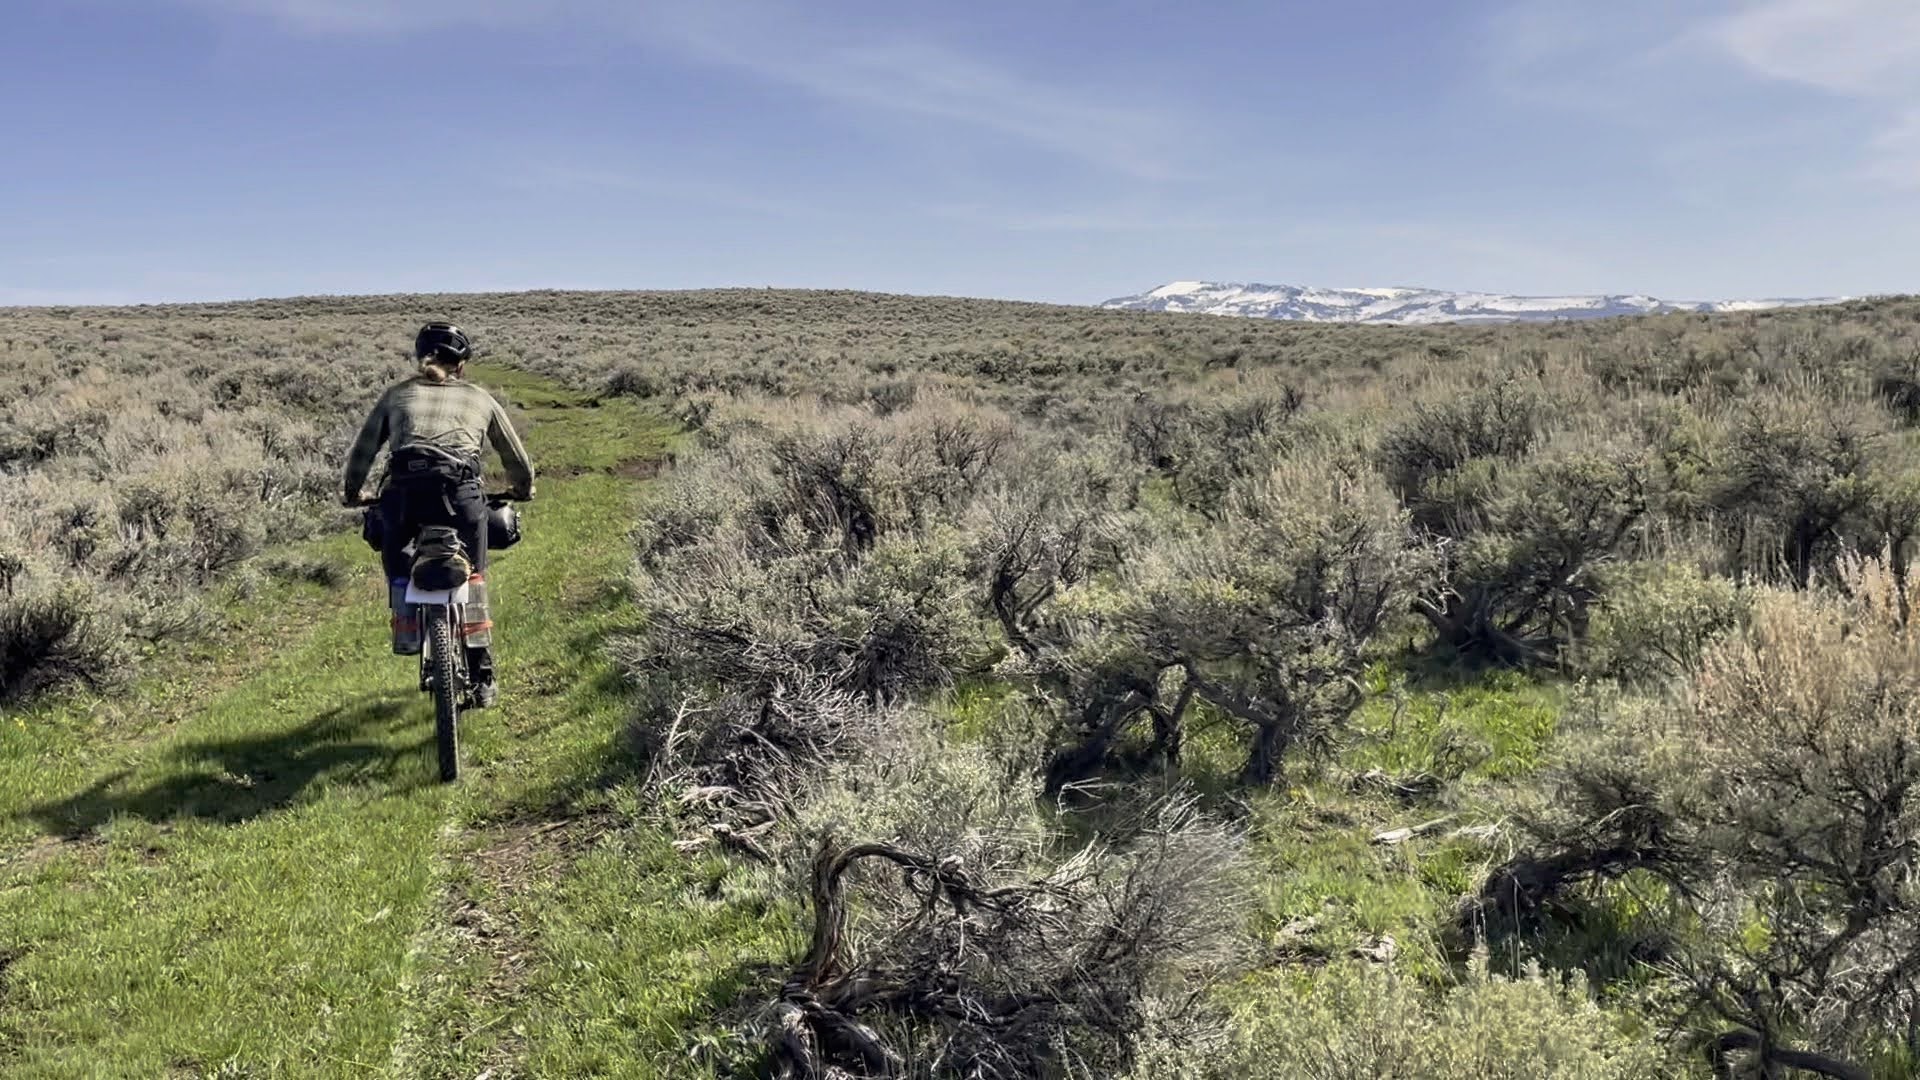
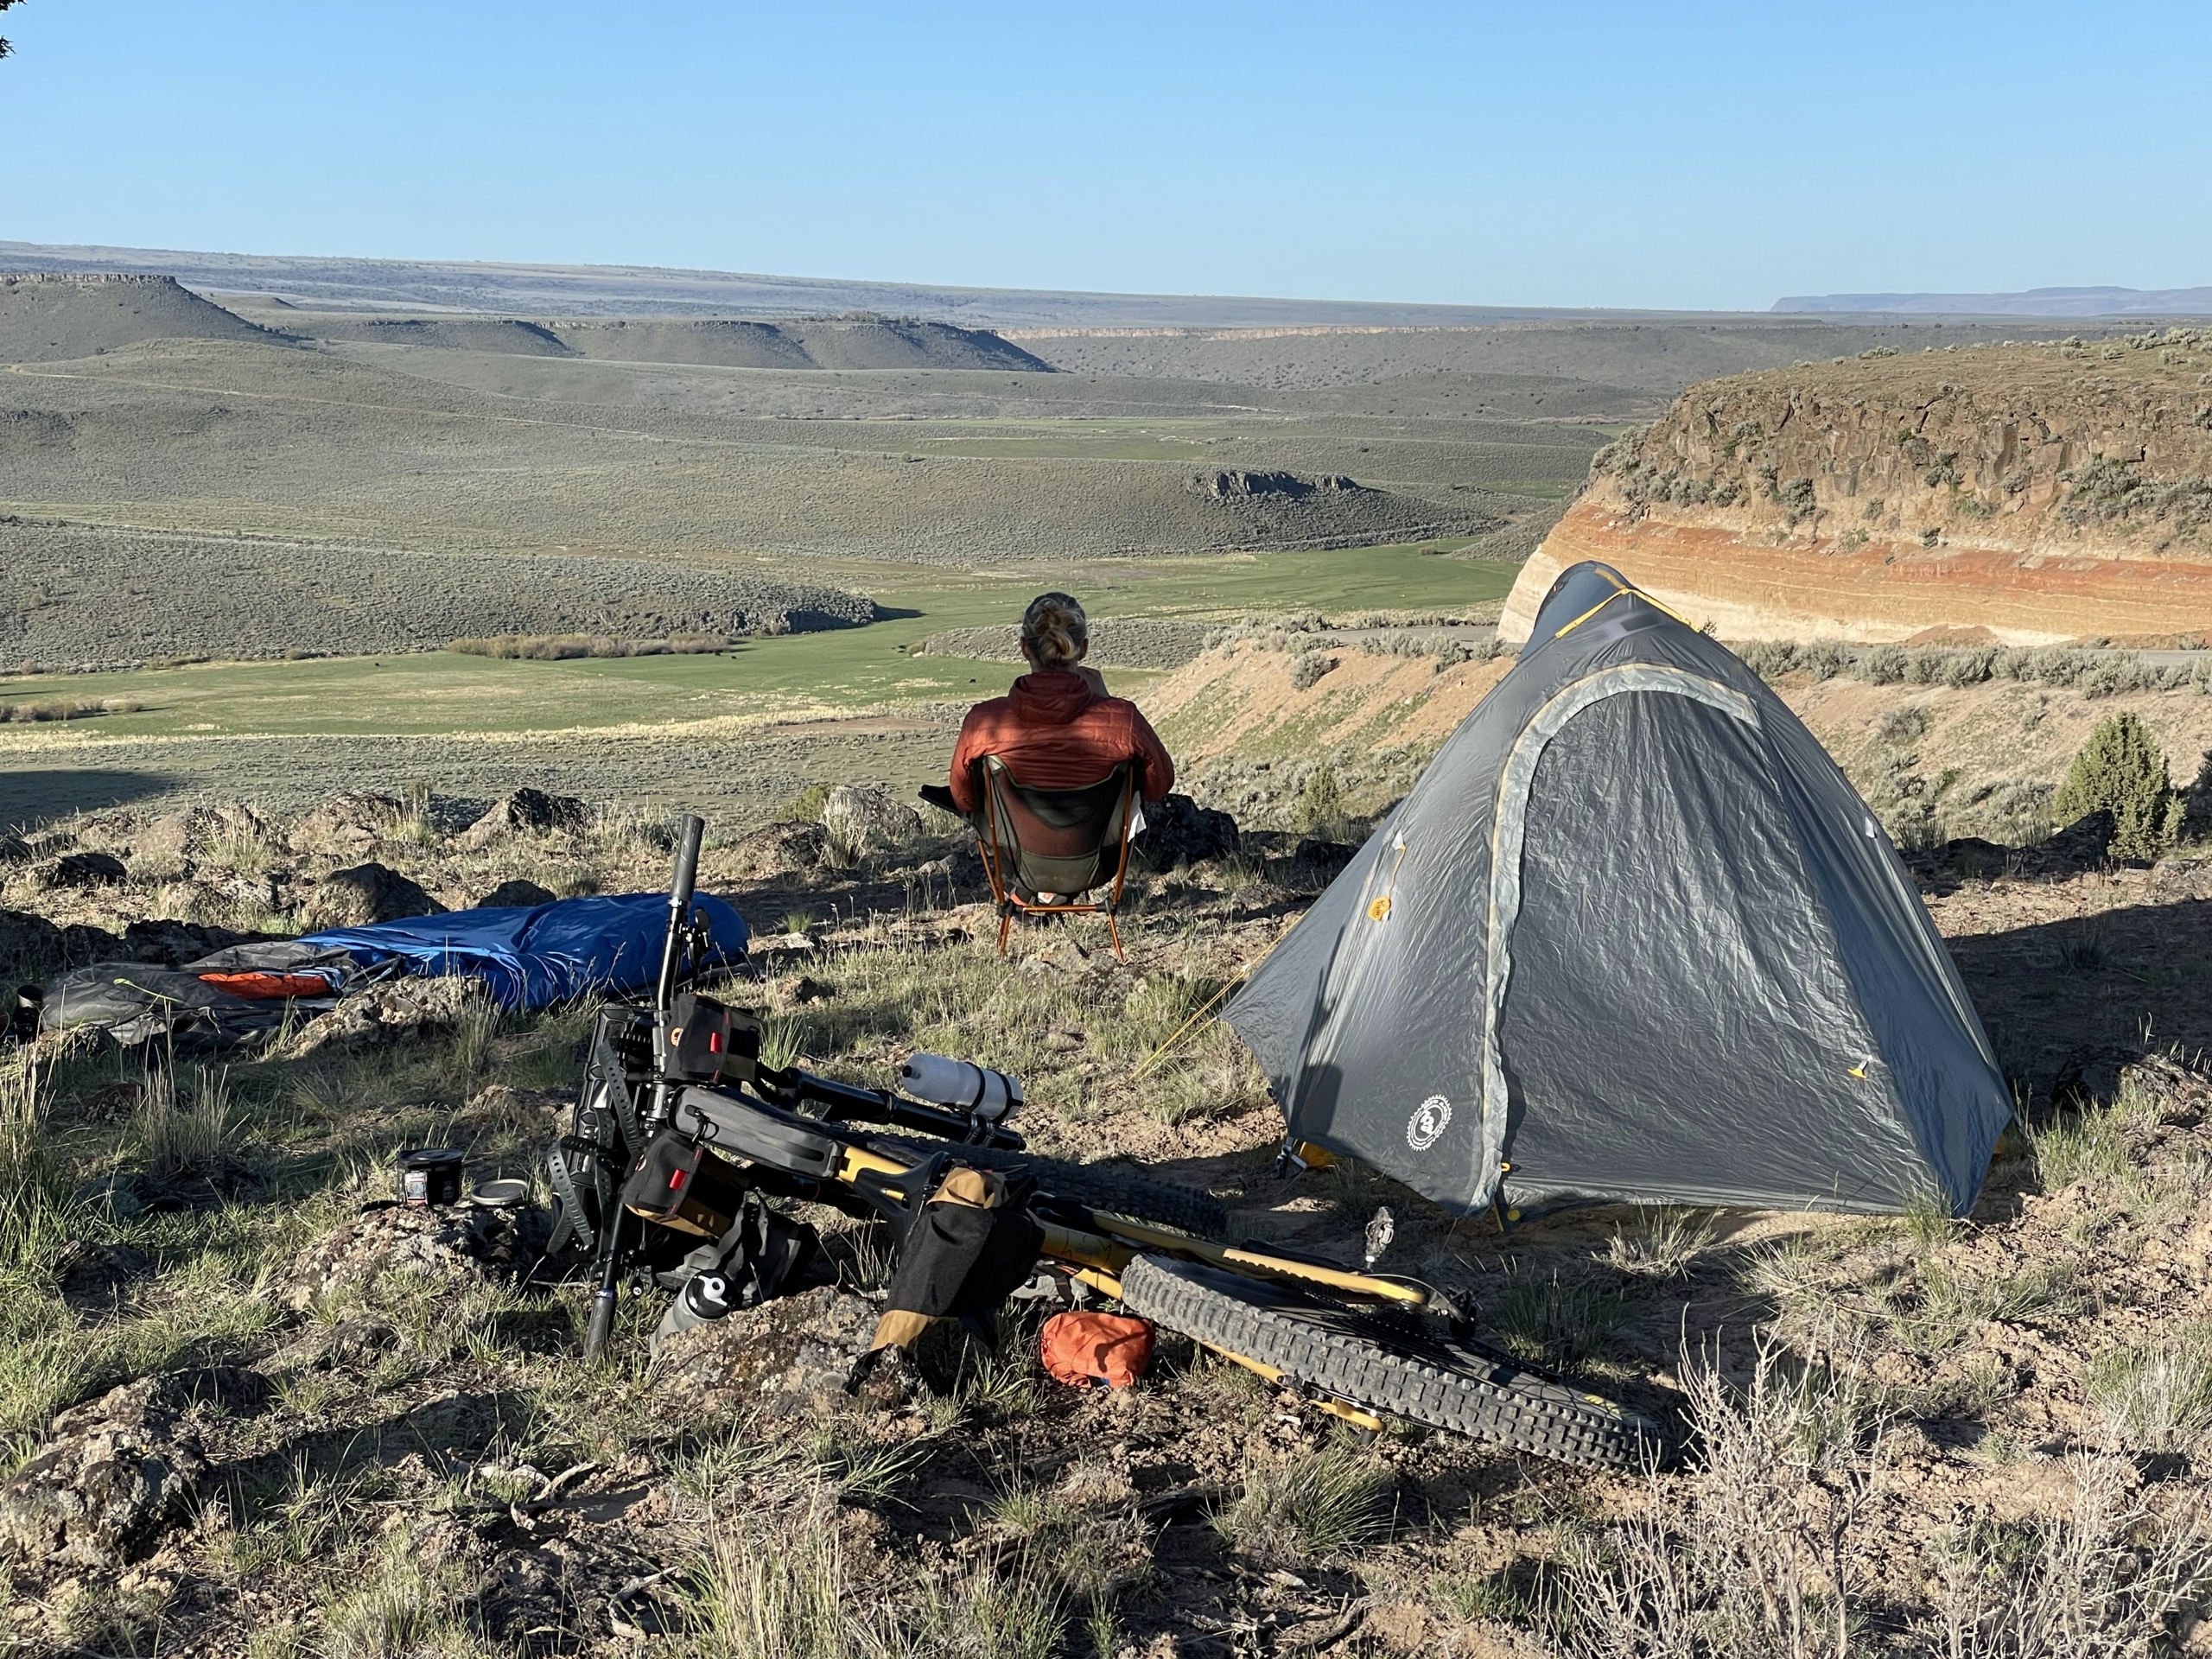
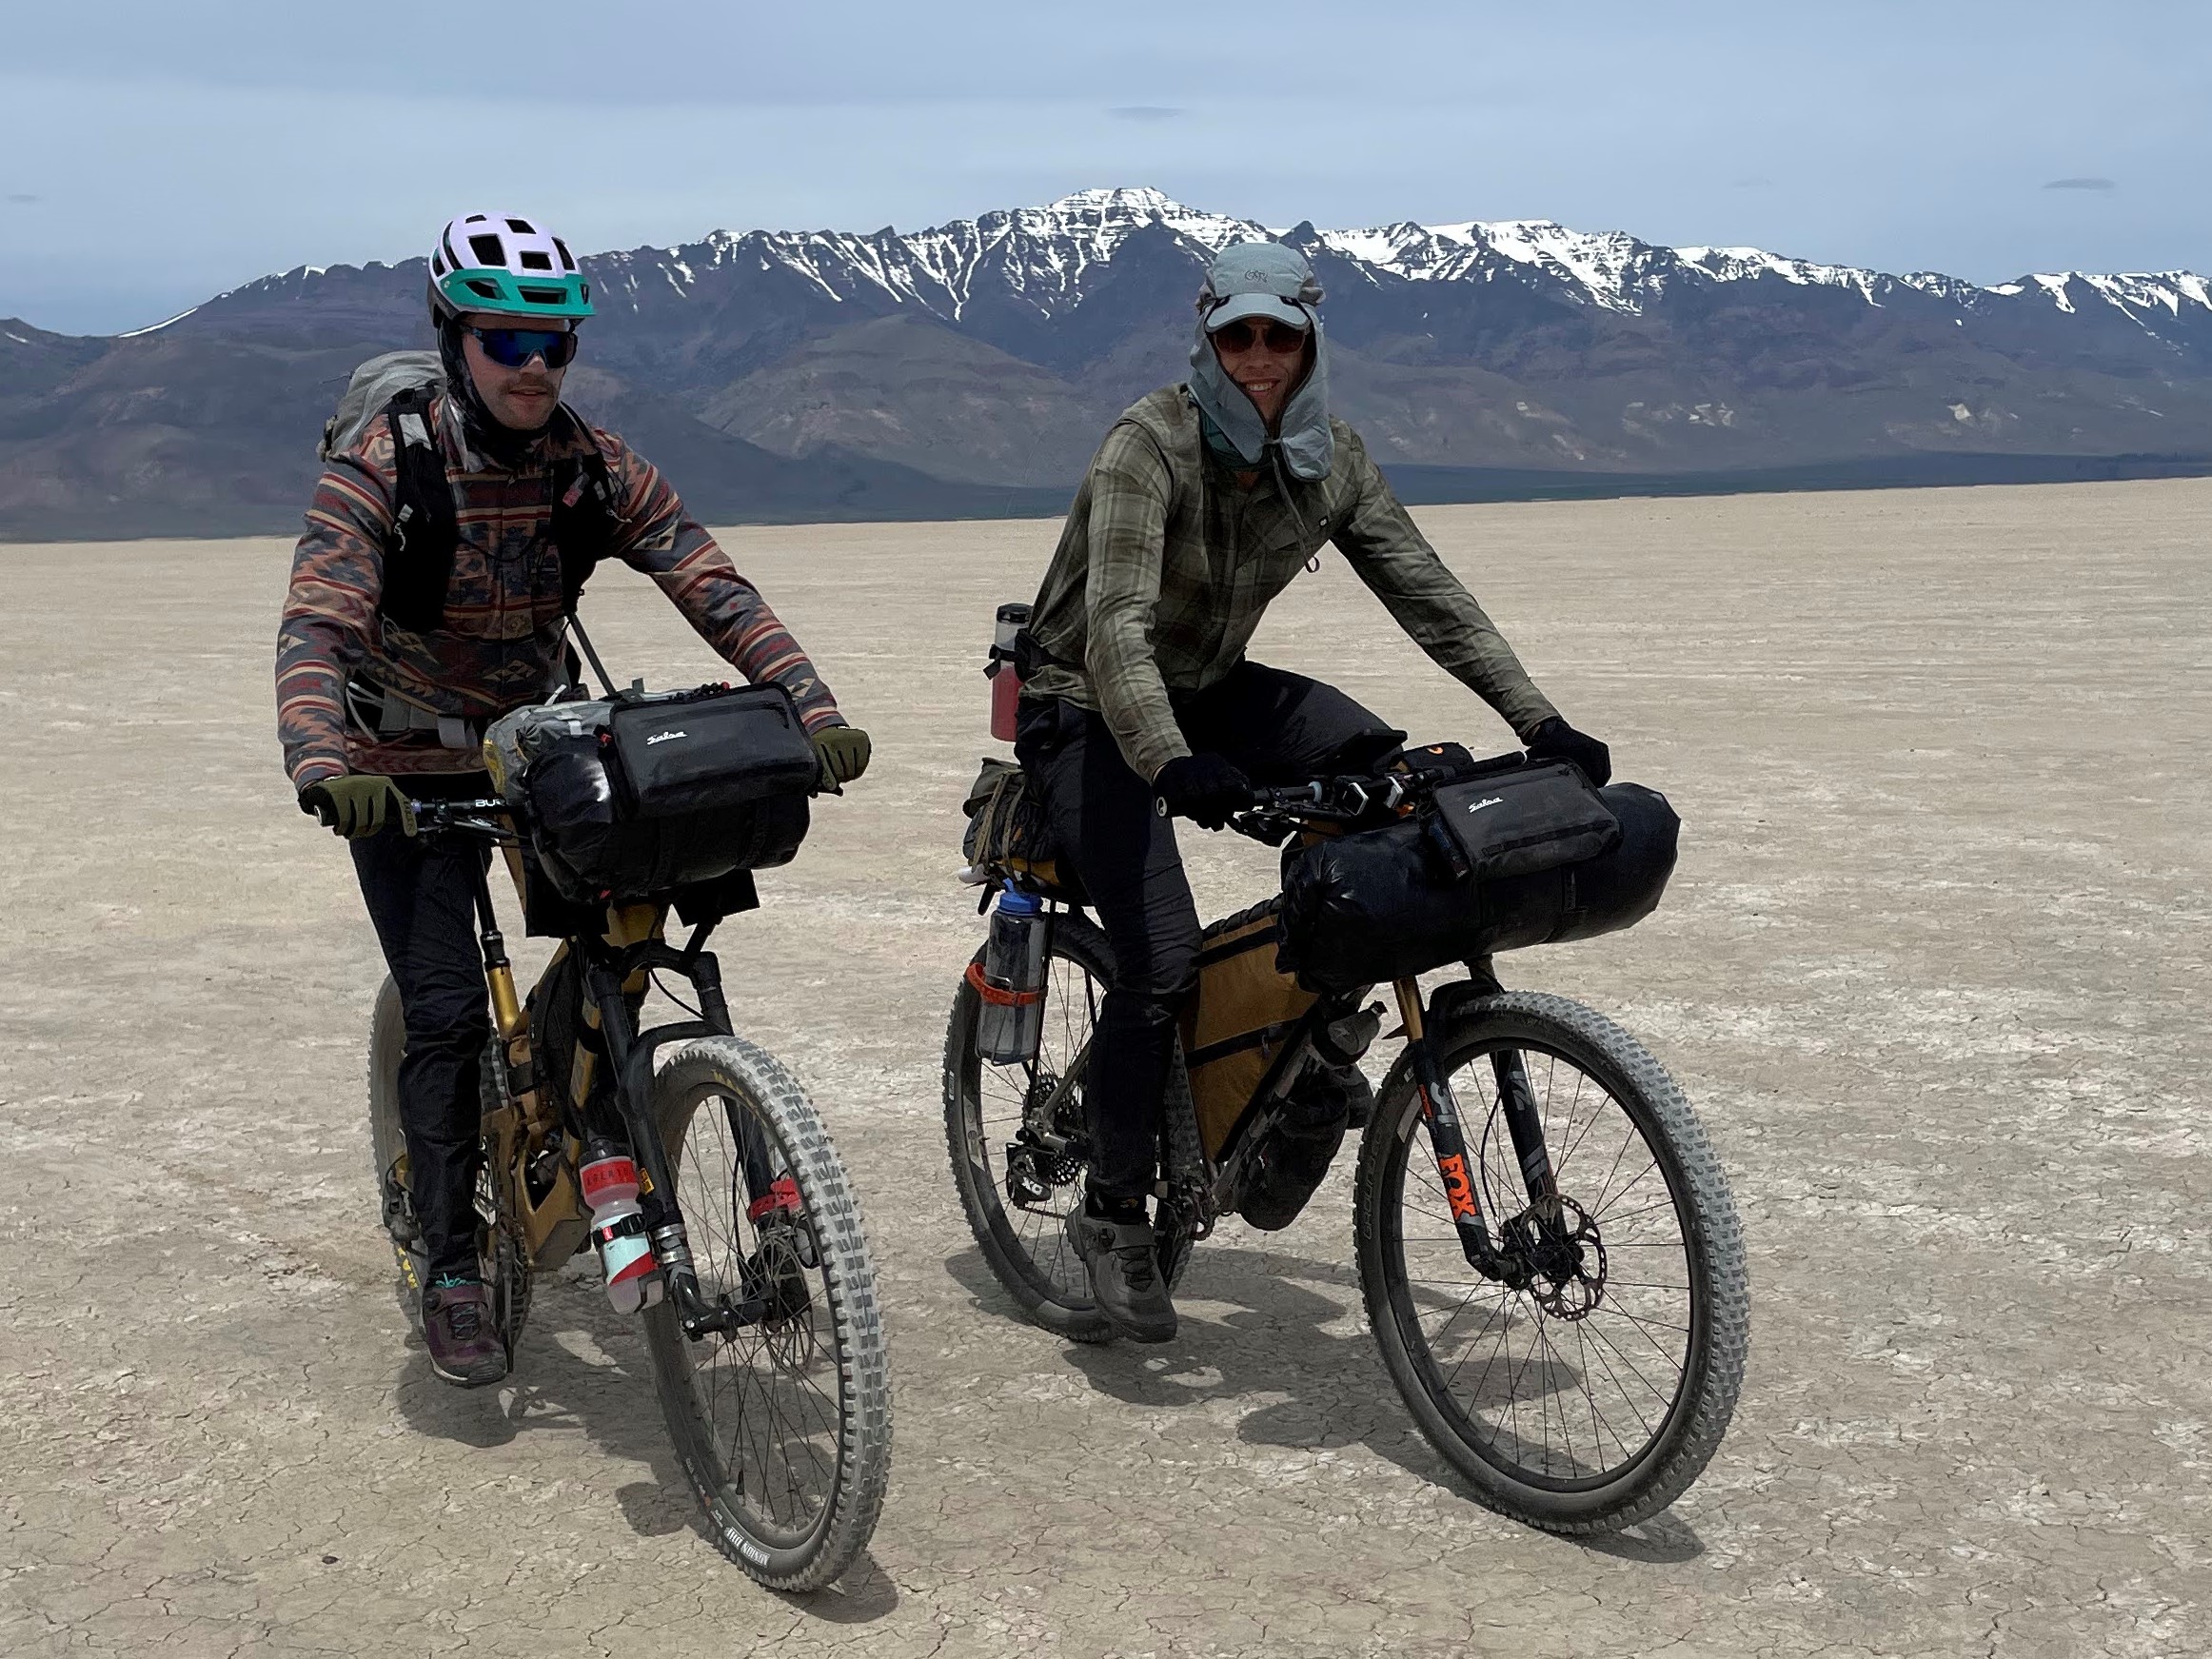
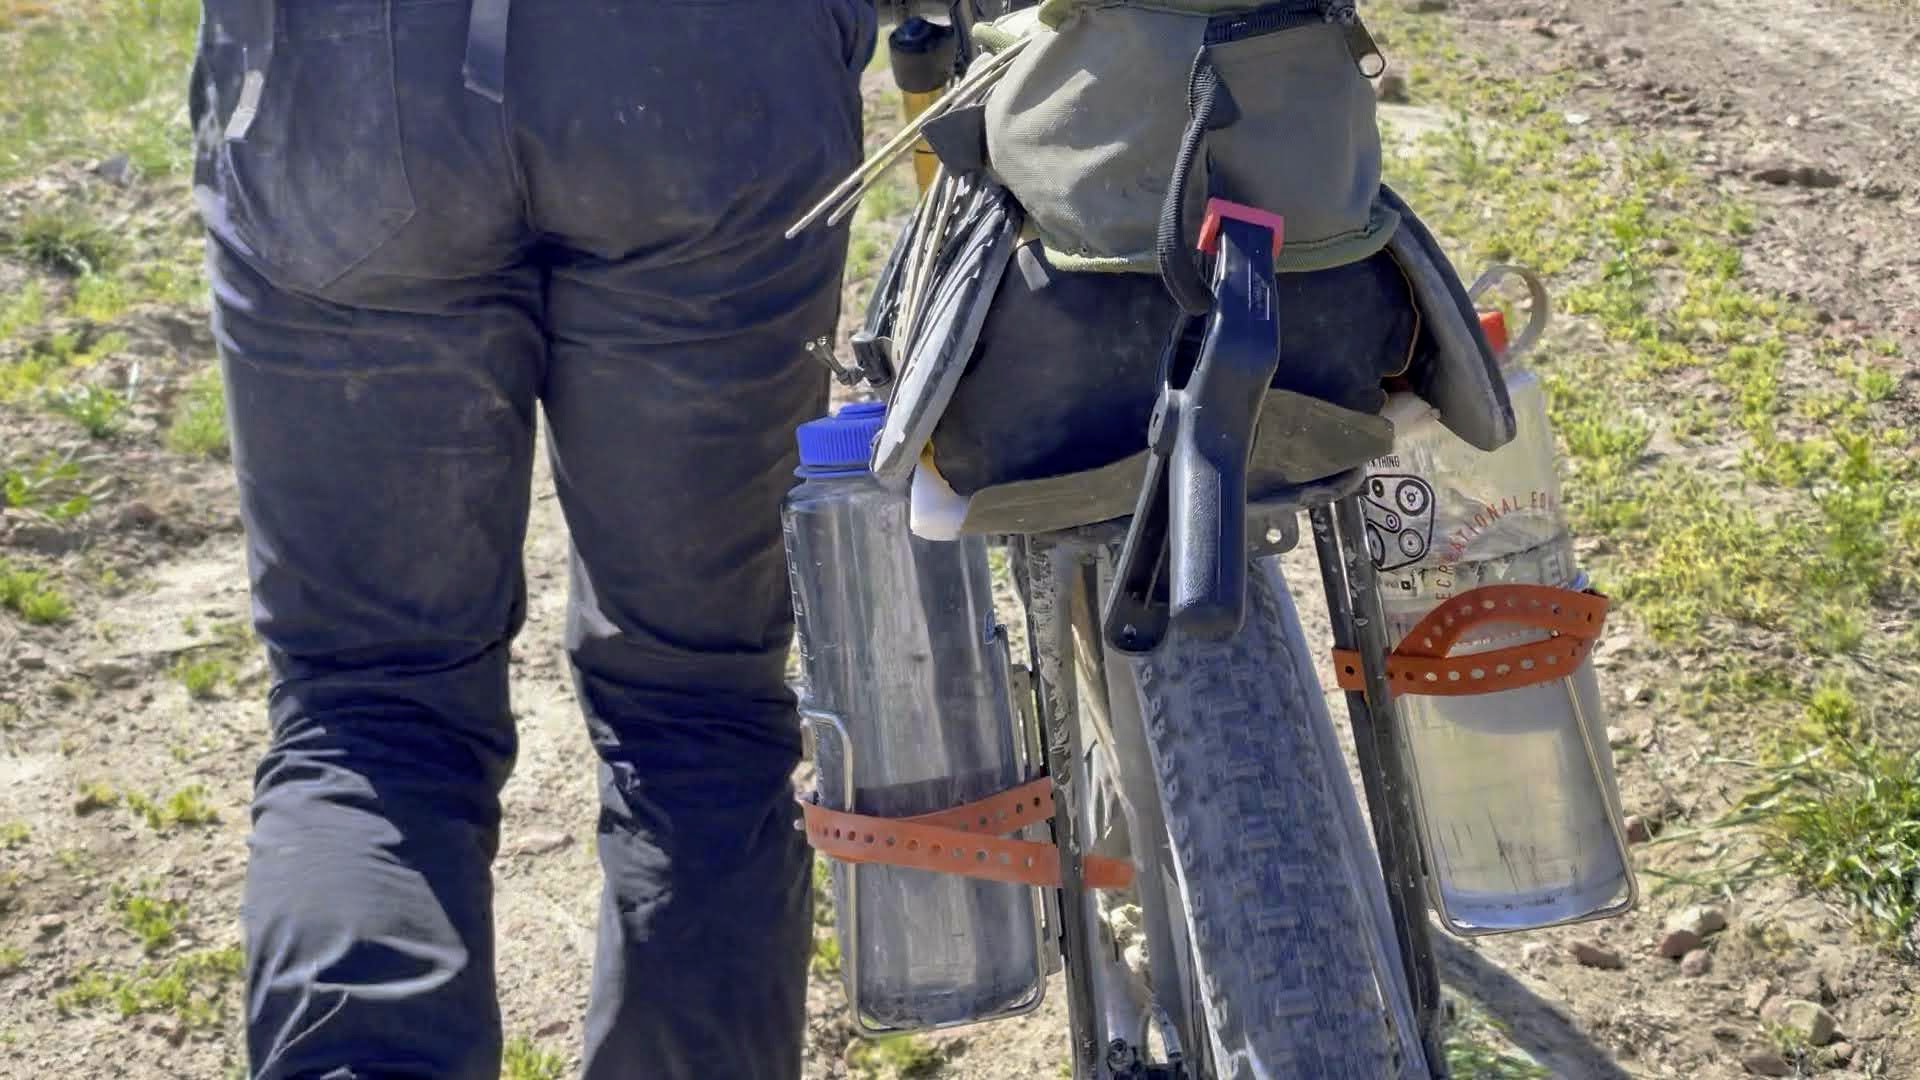

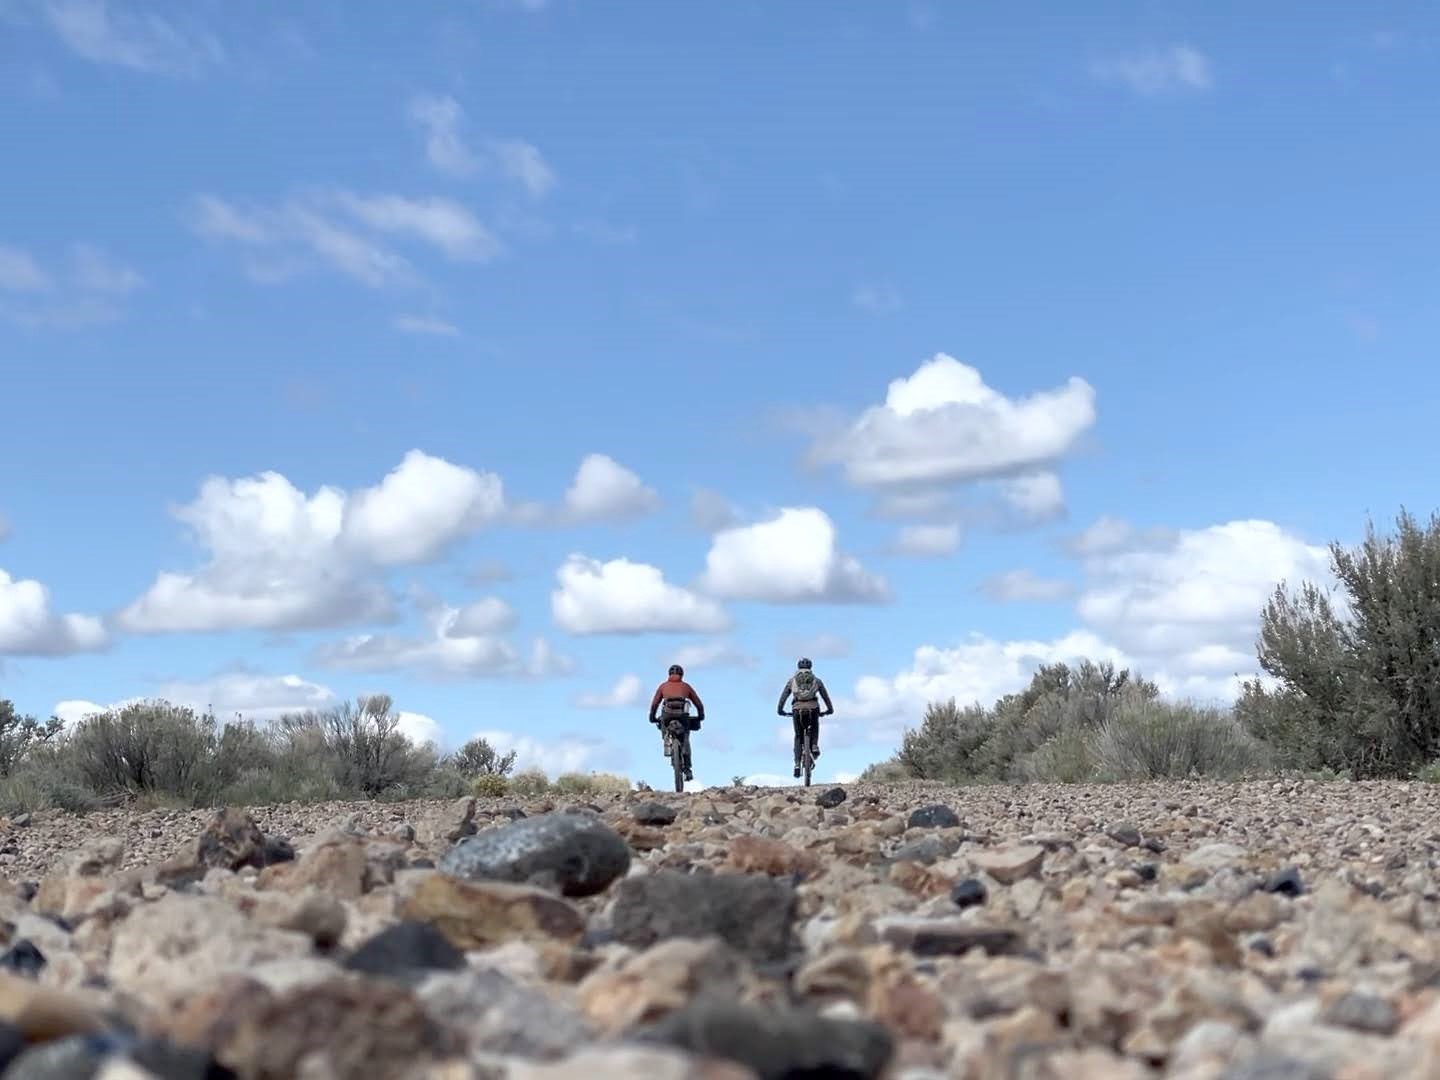
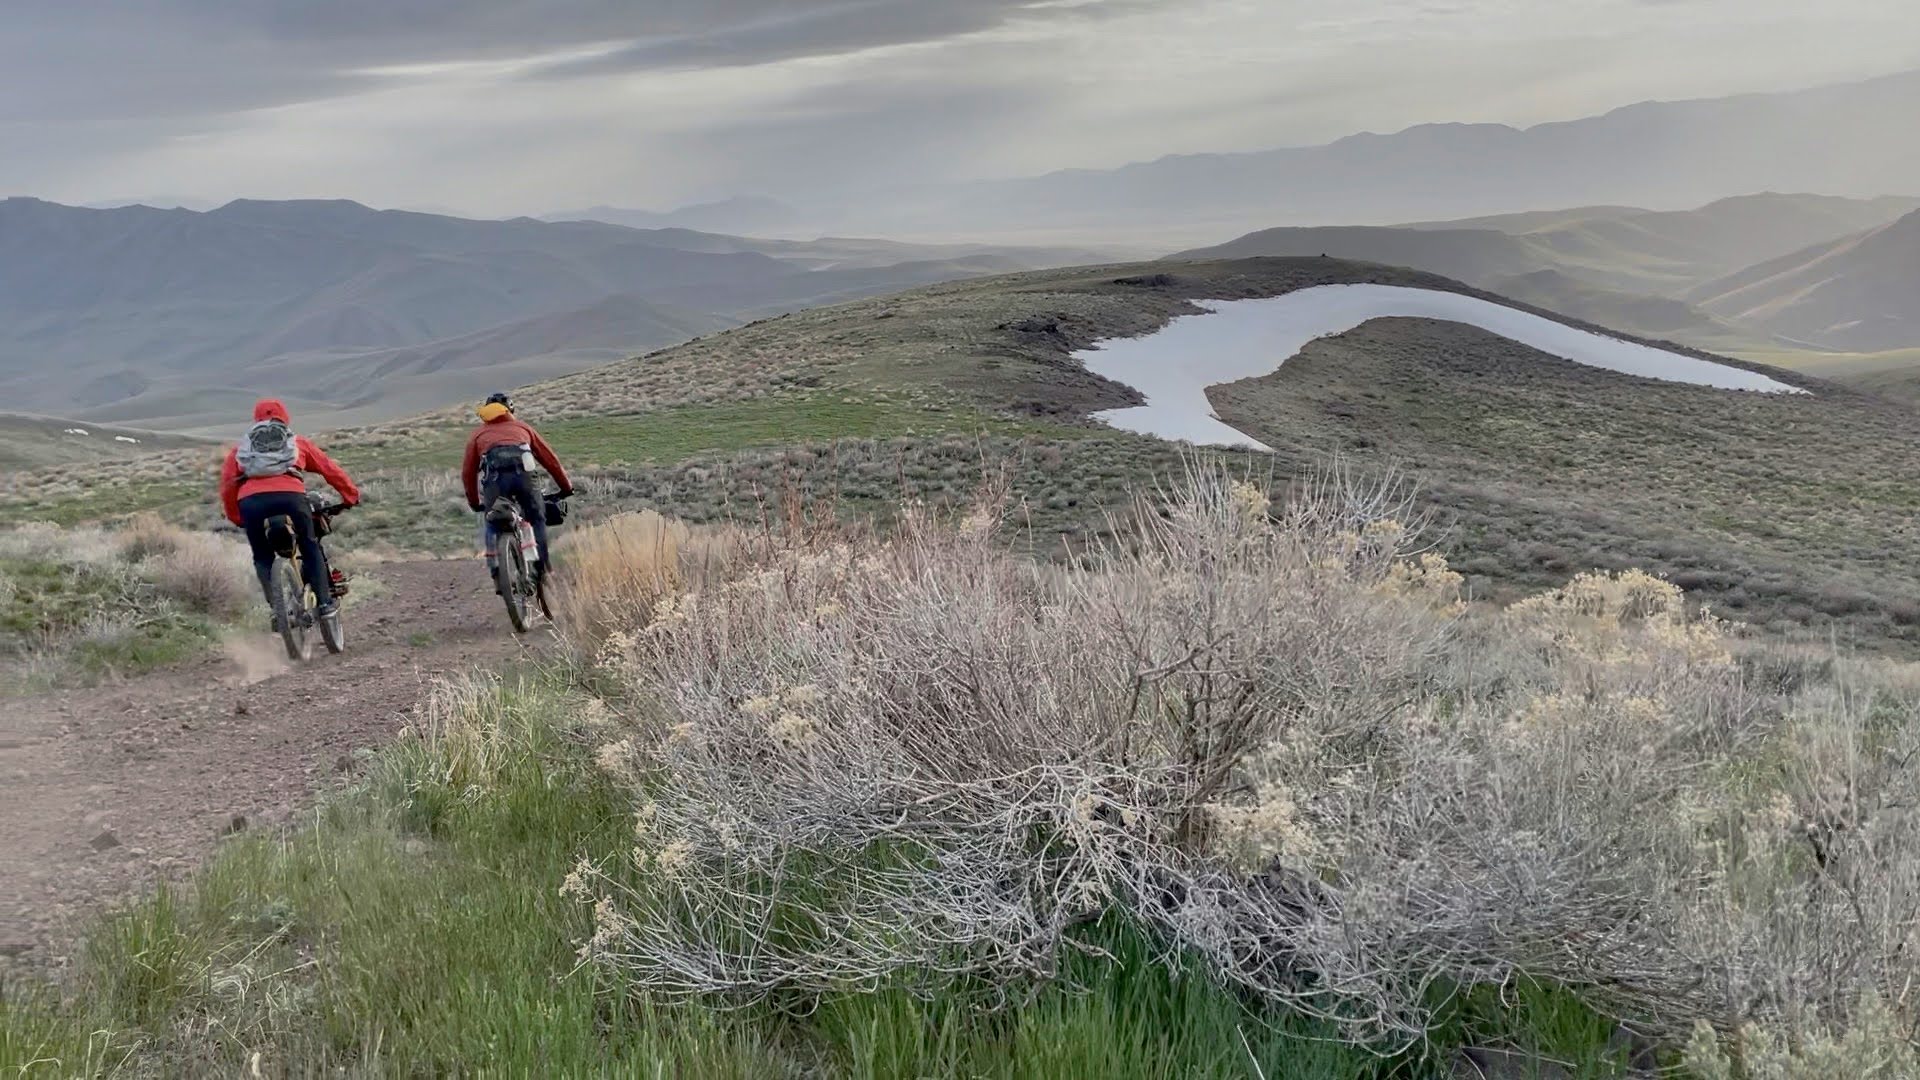


")


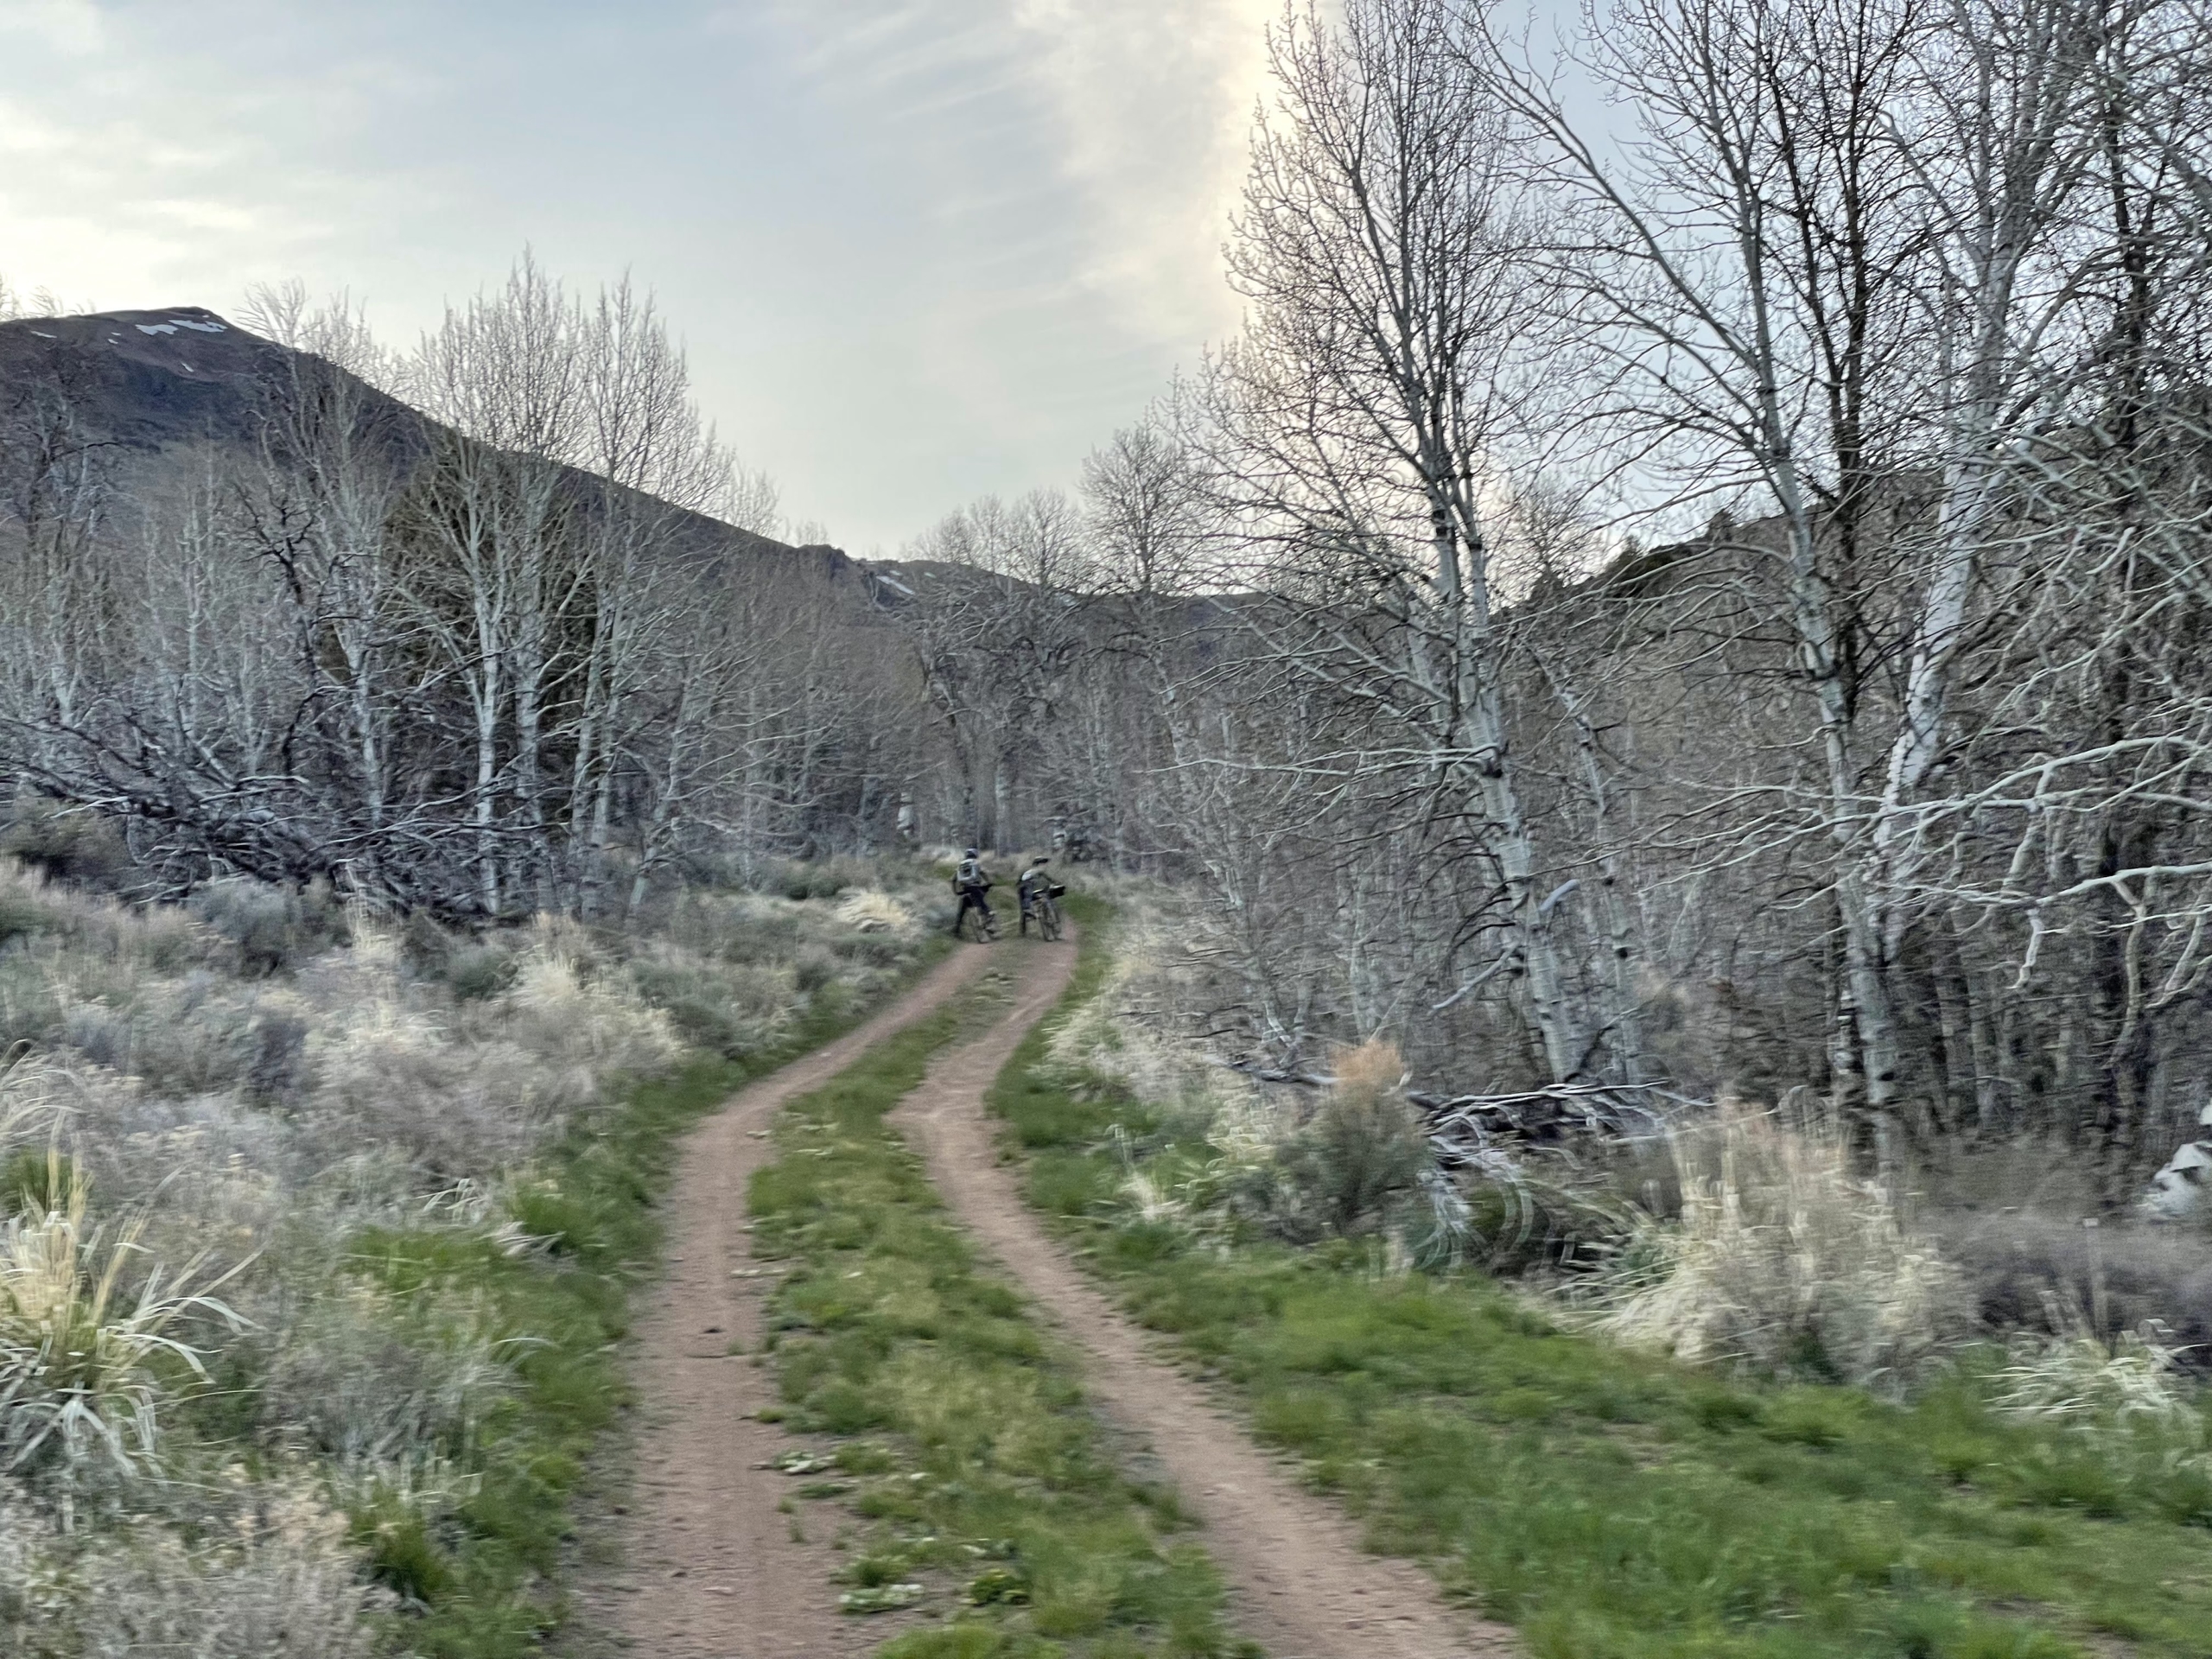


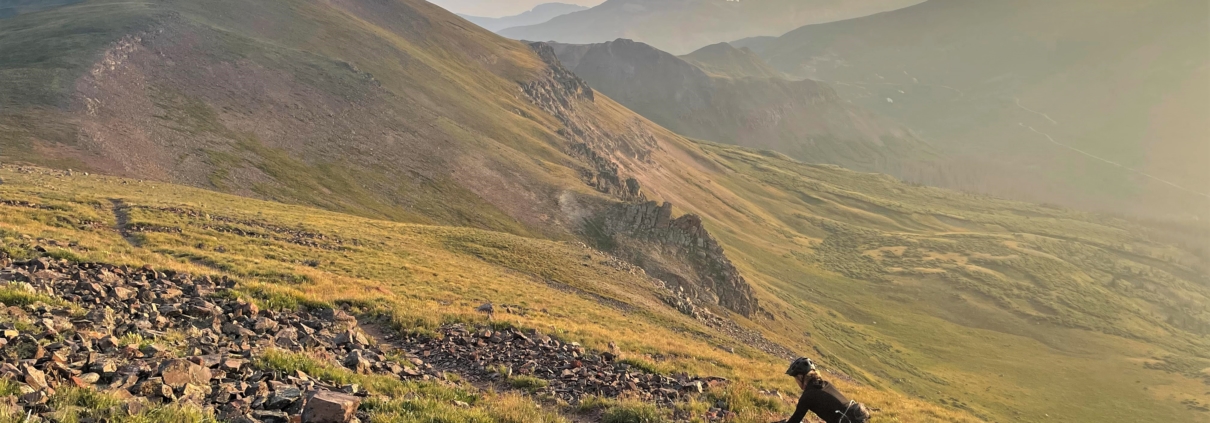
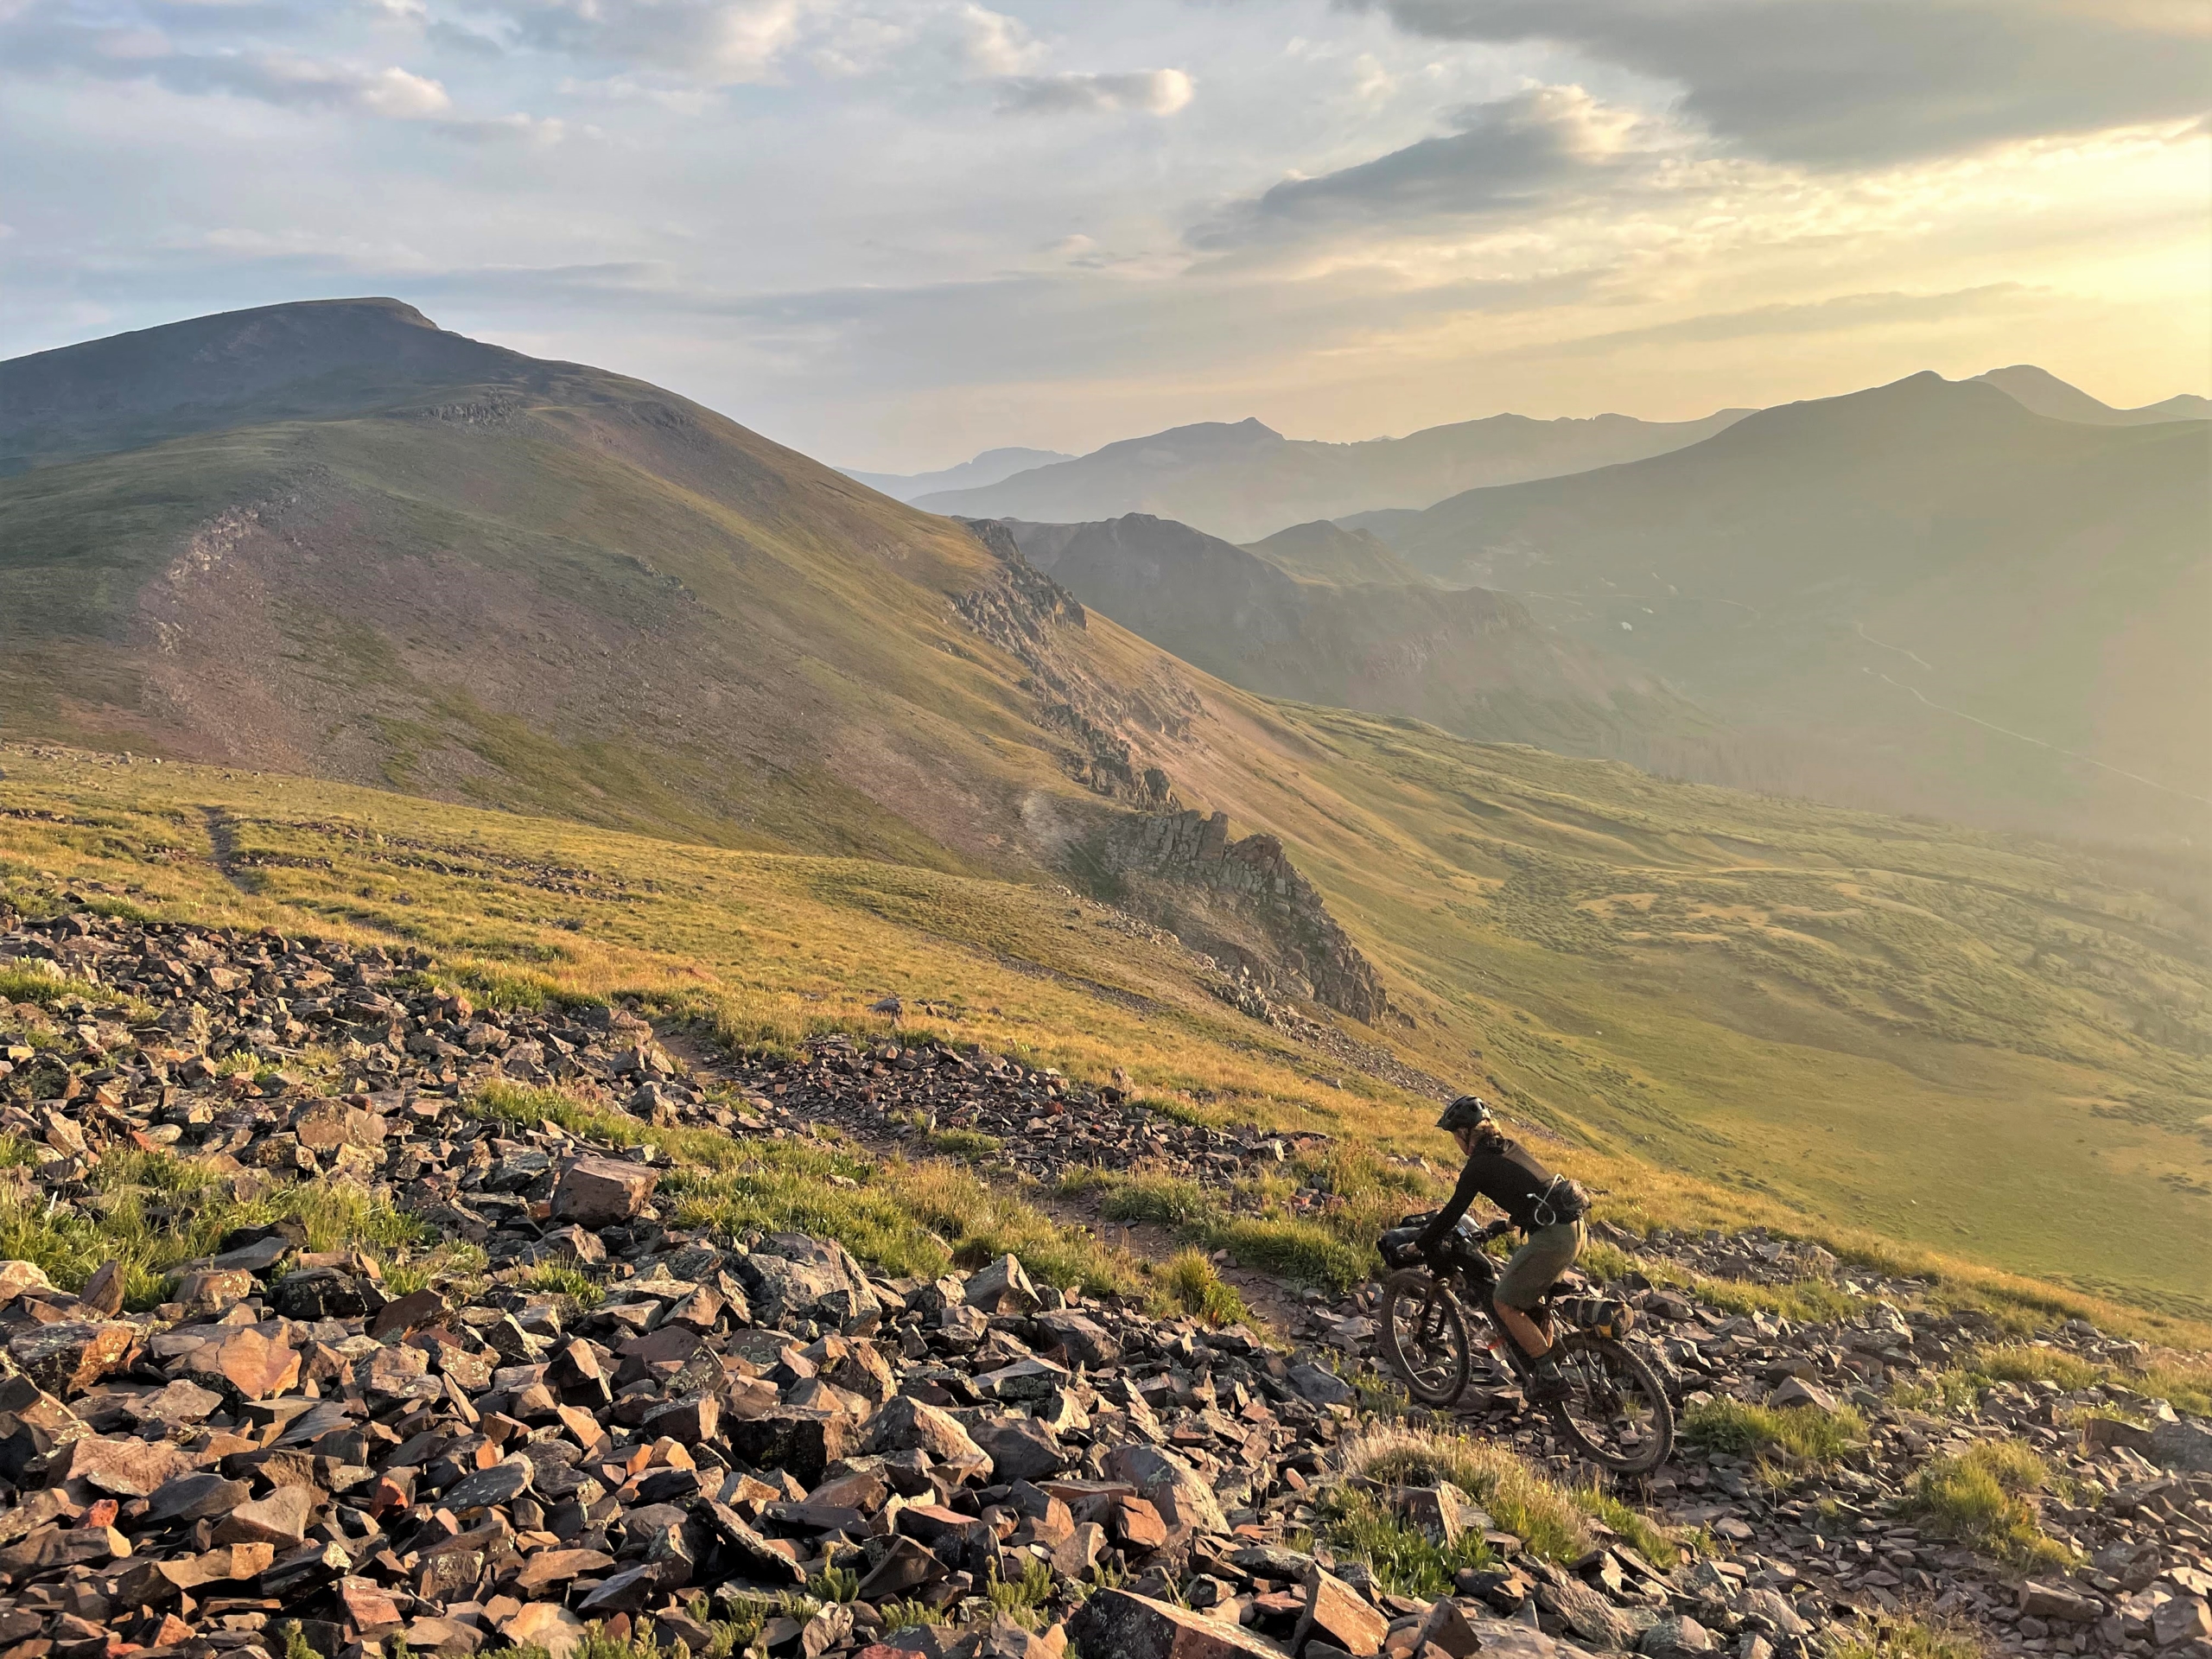
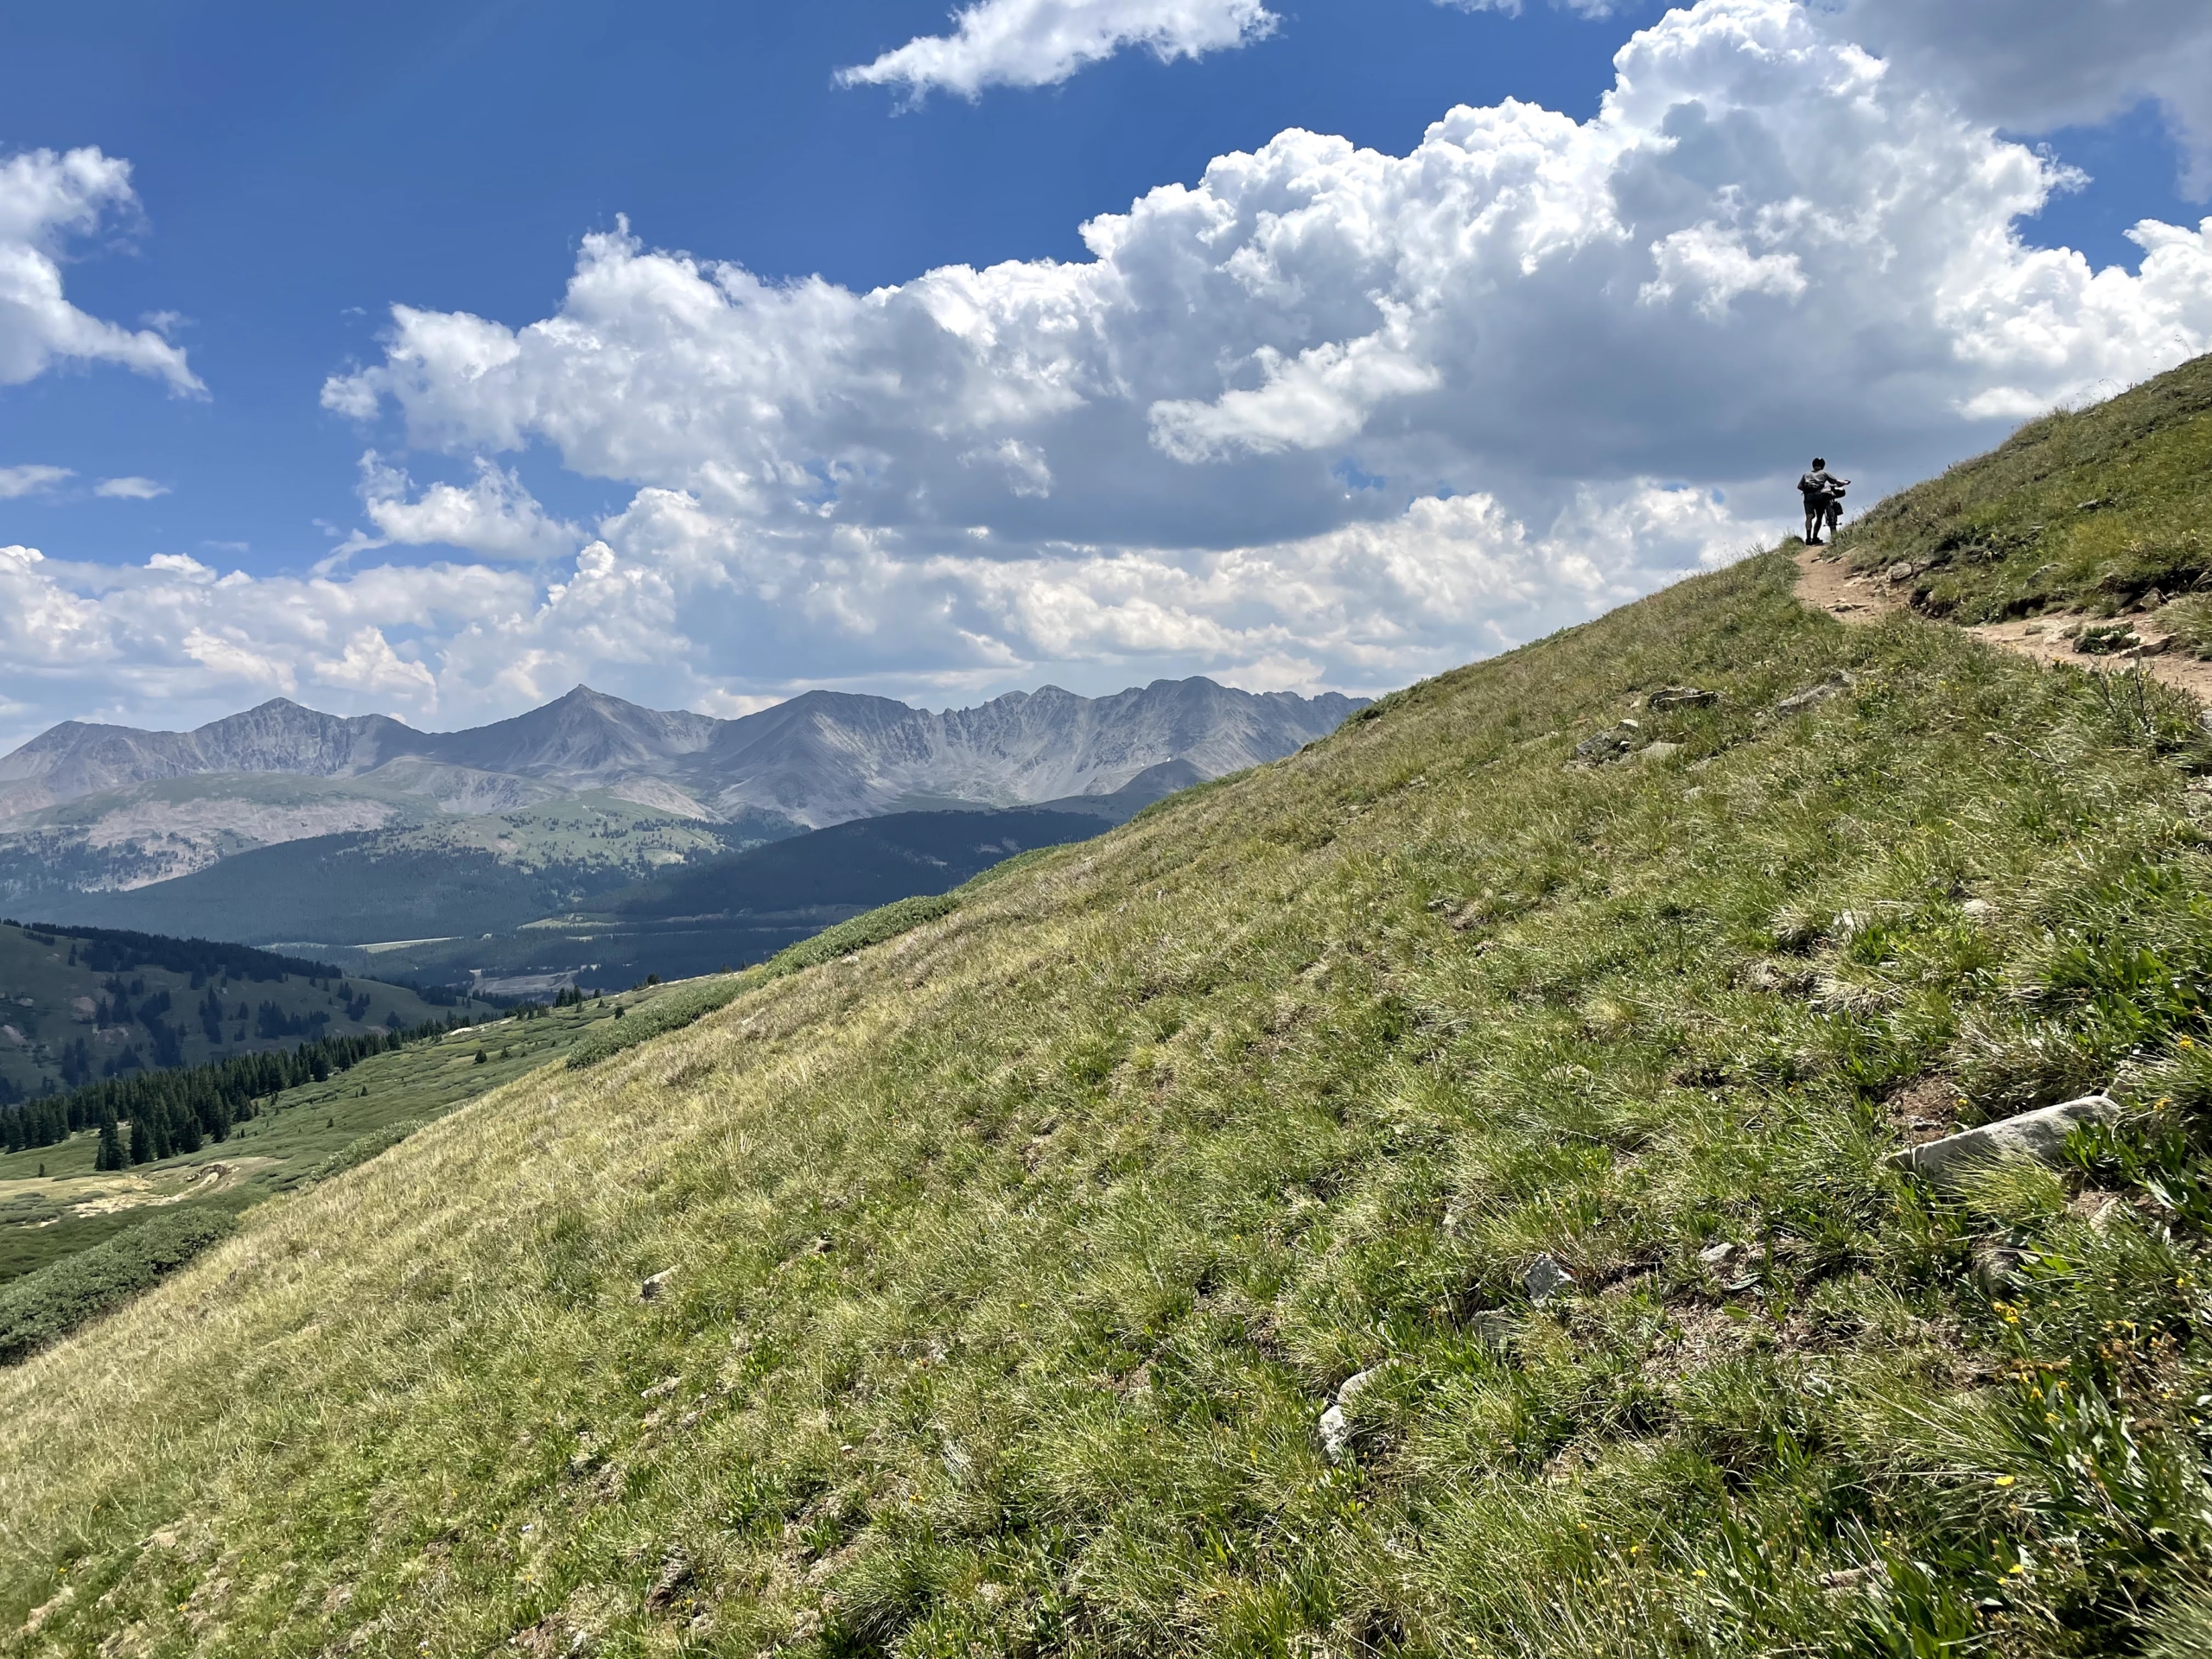
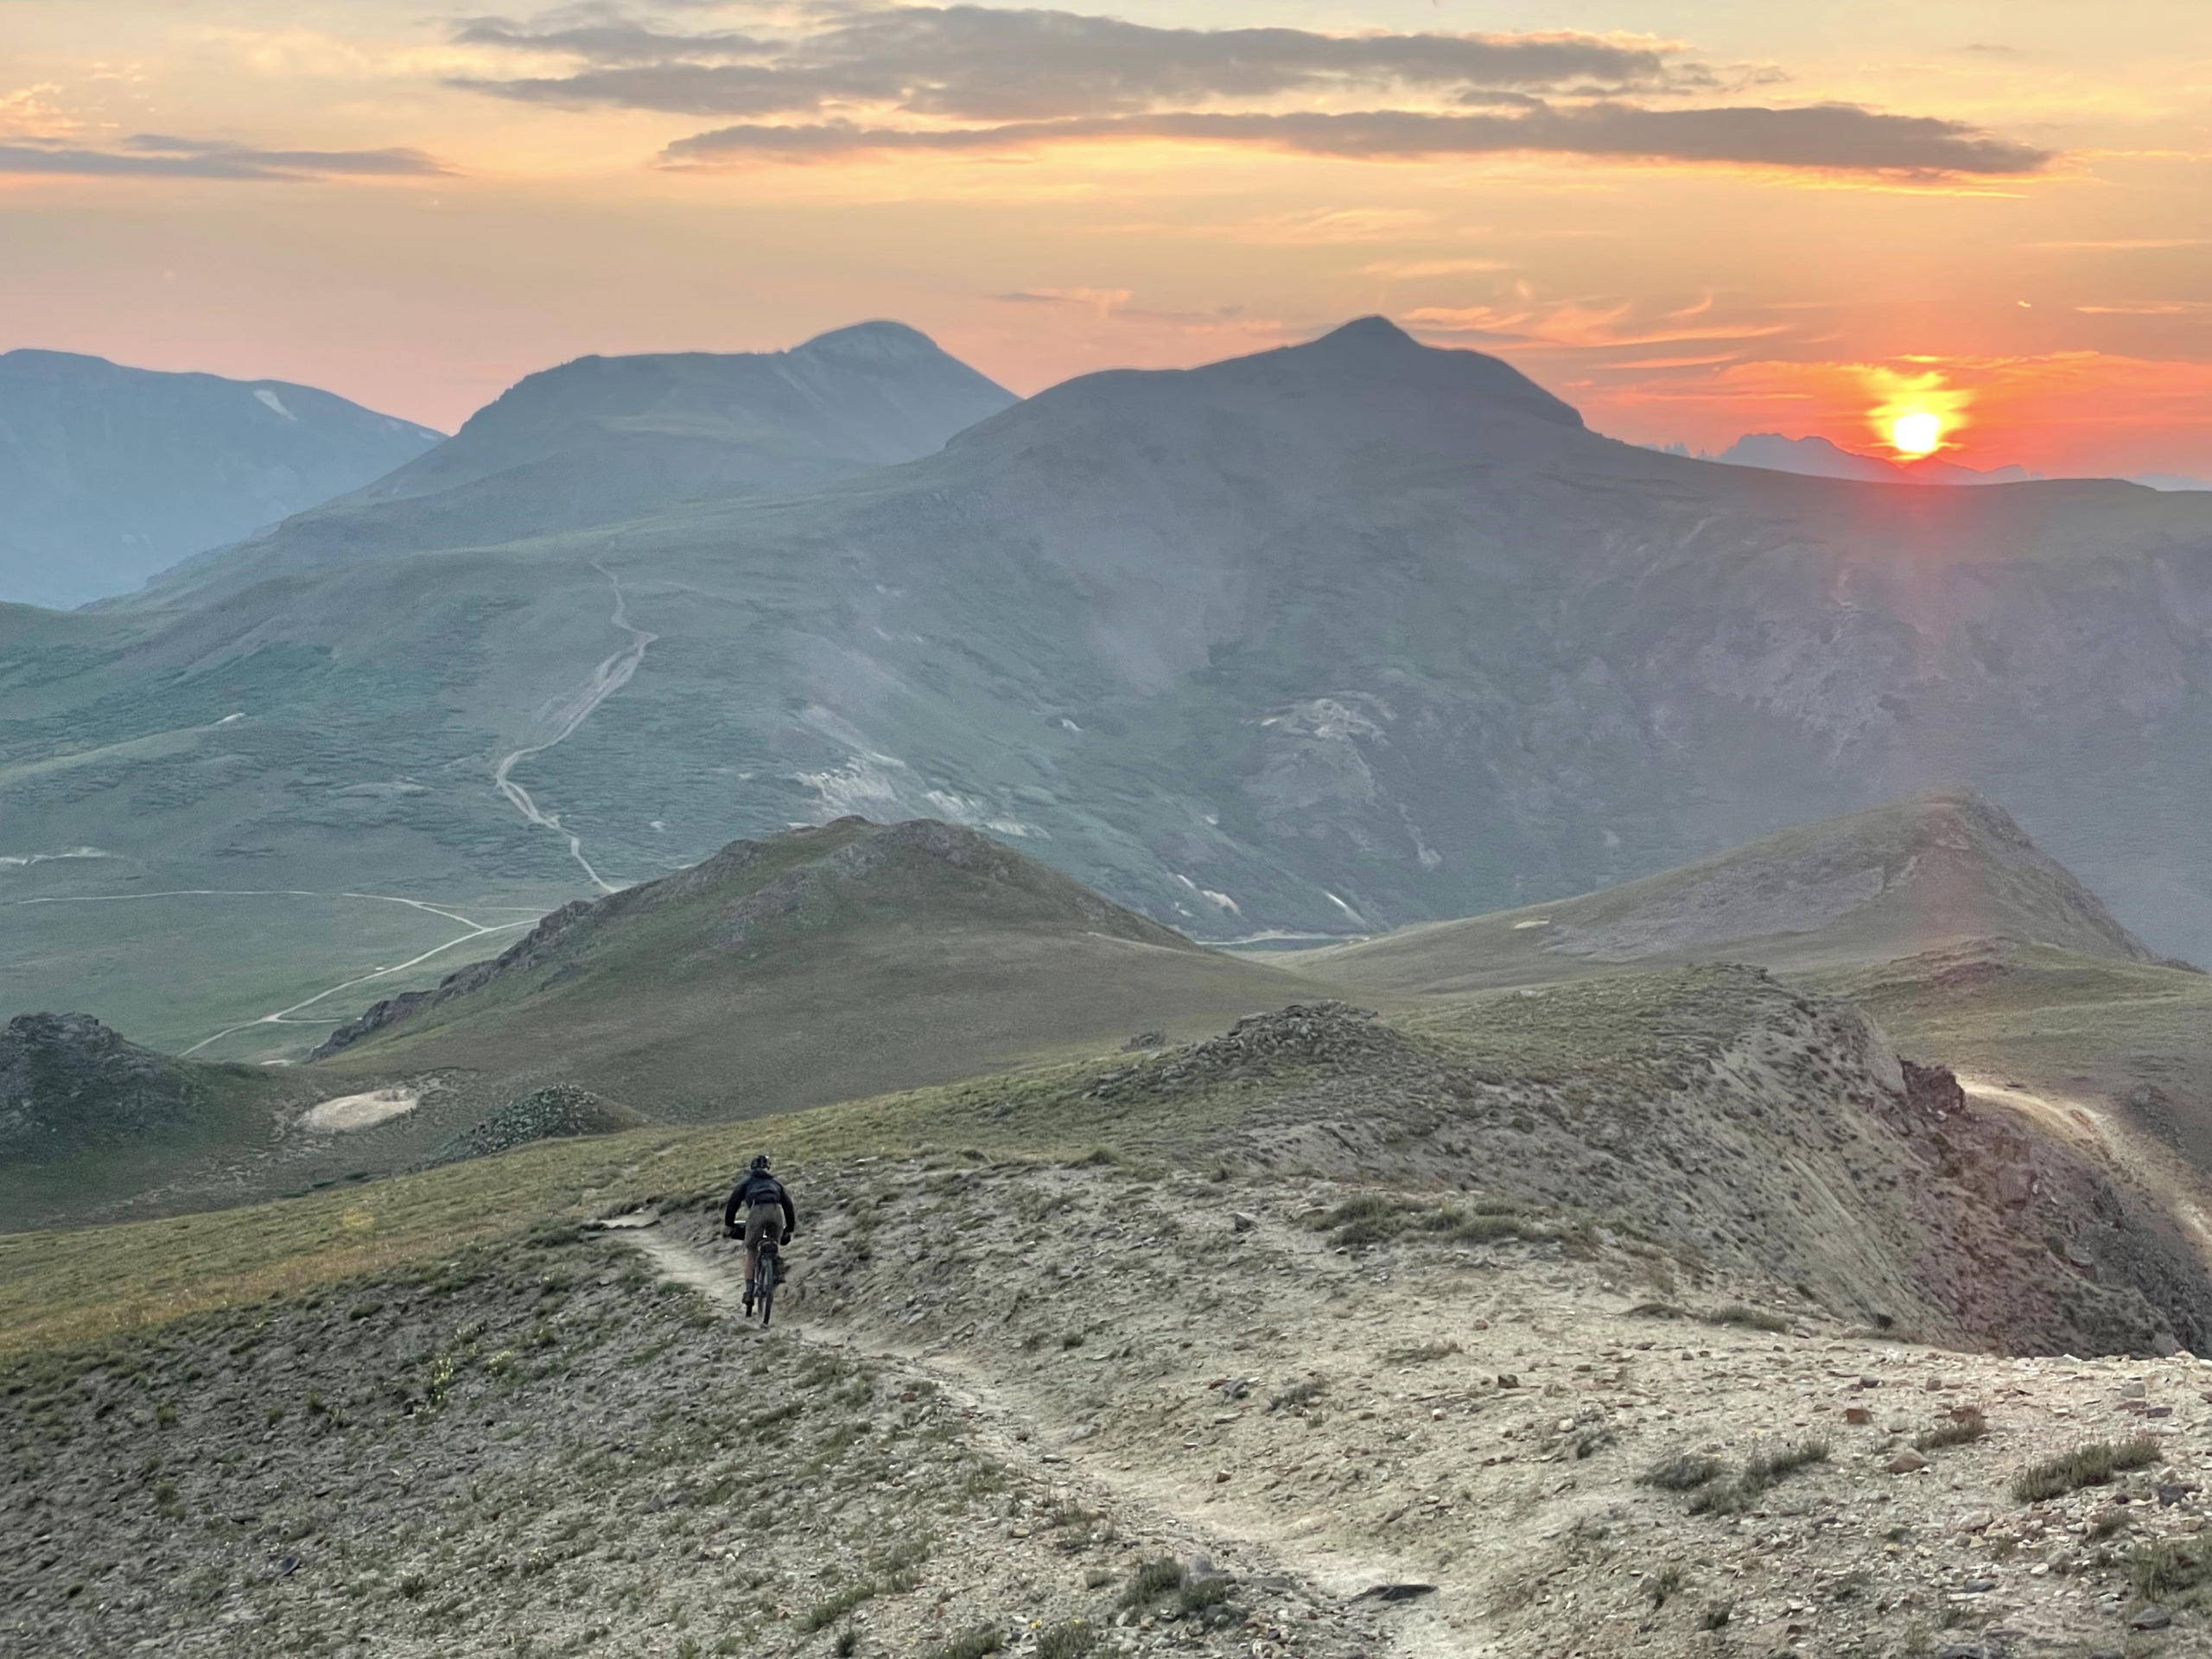
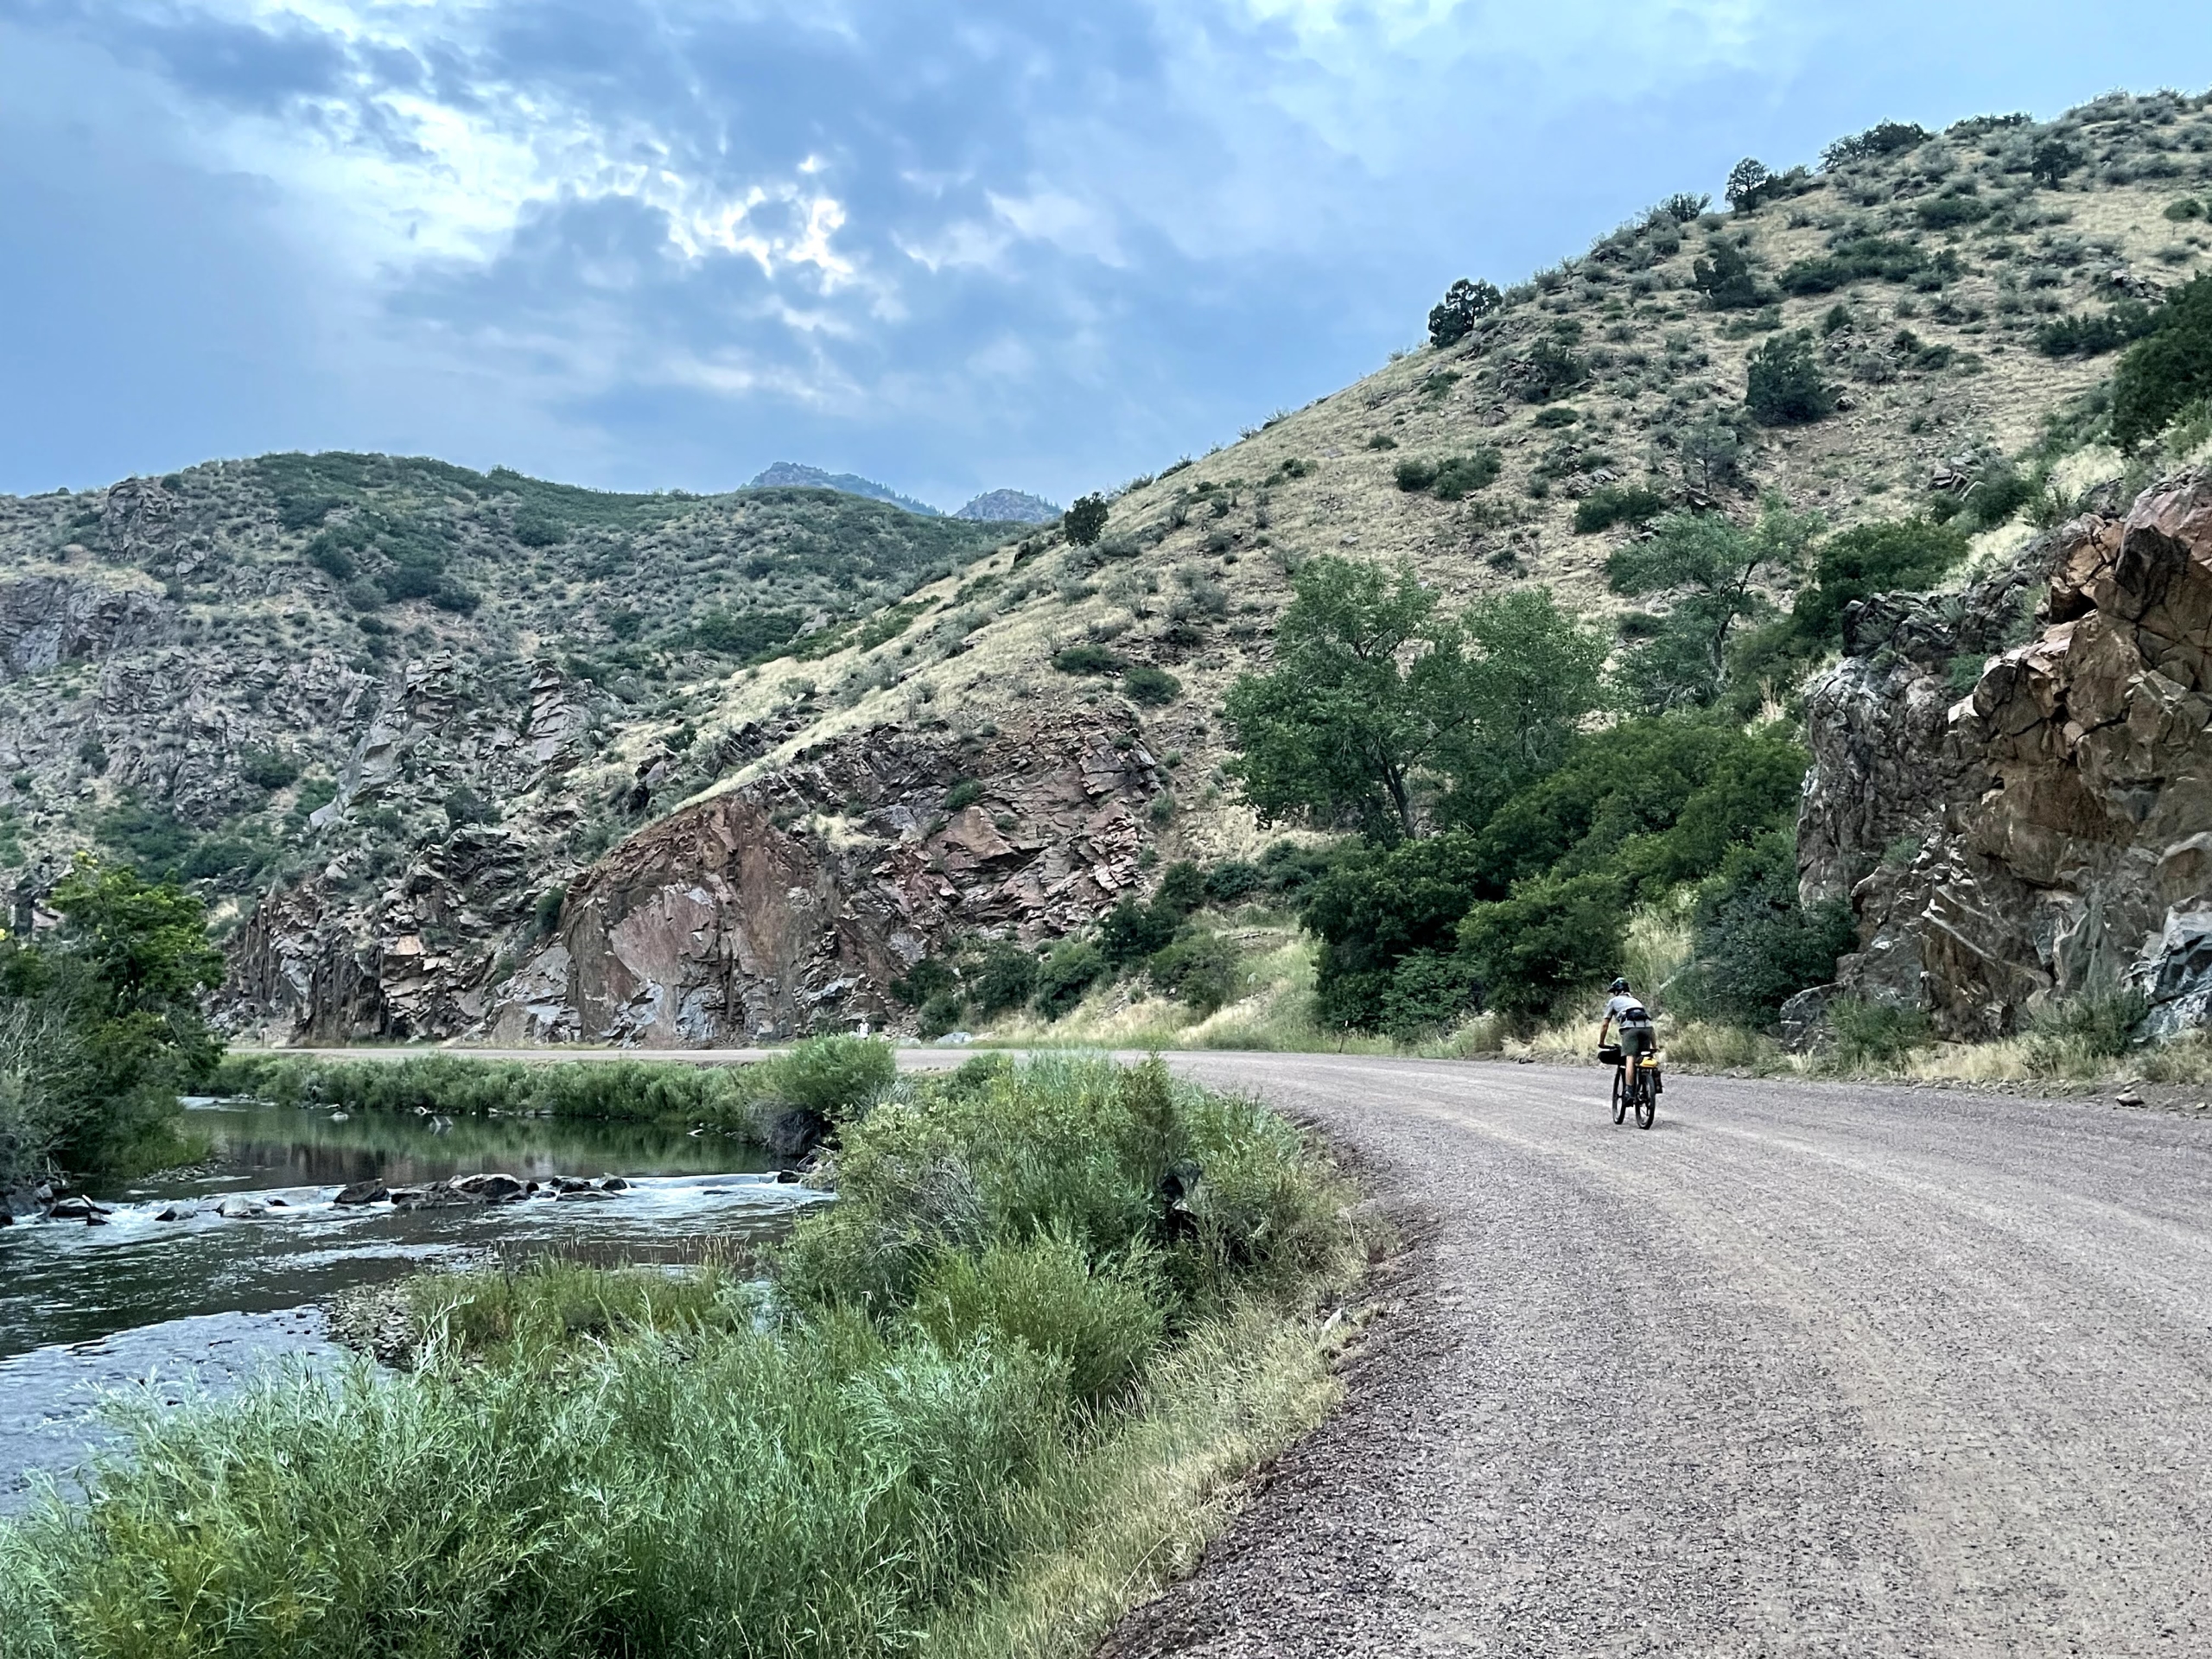

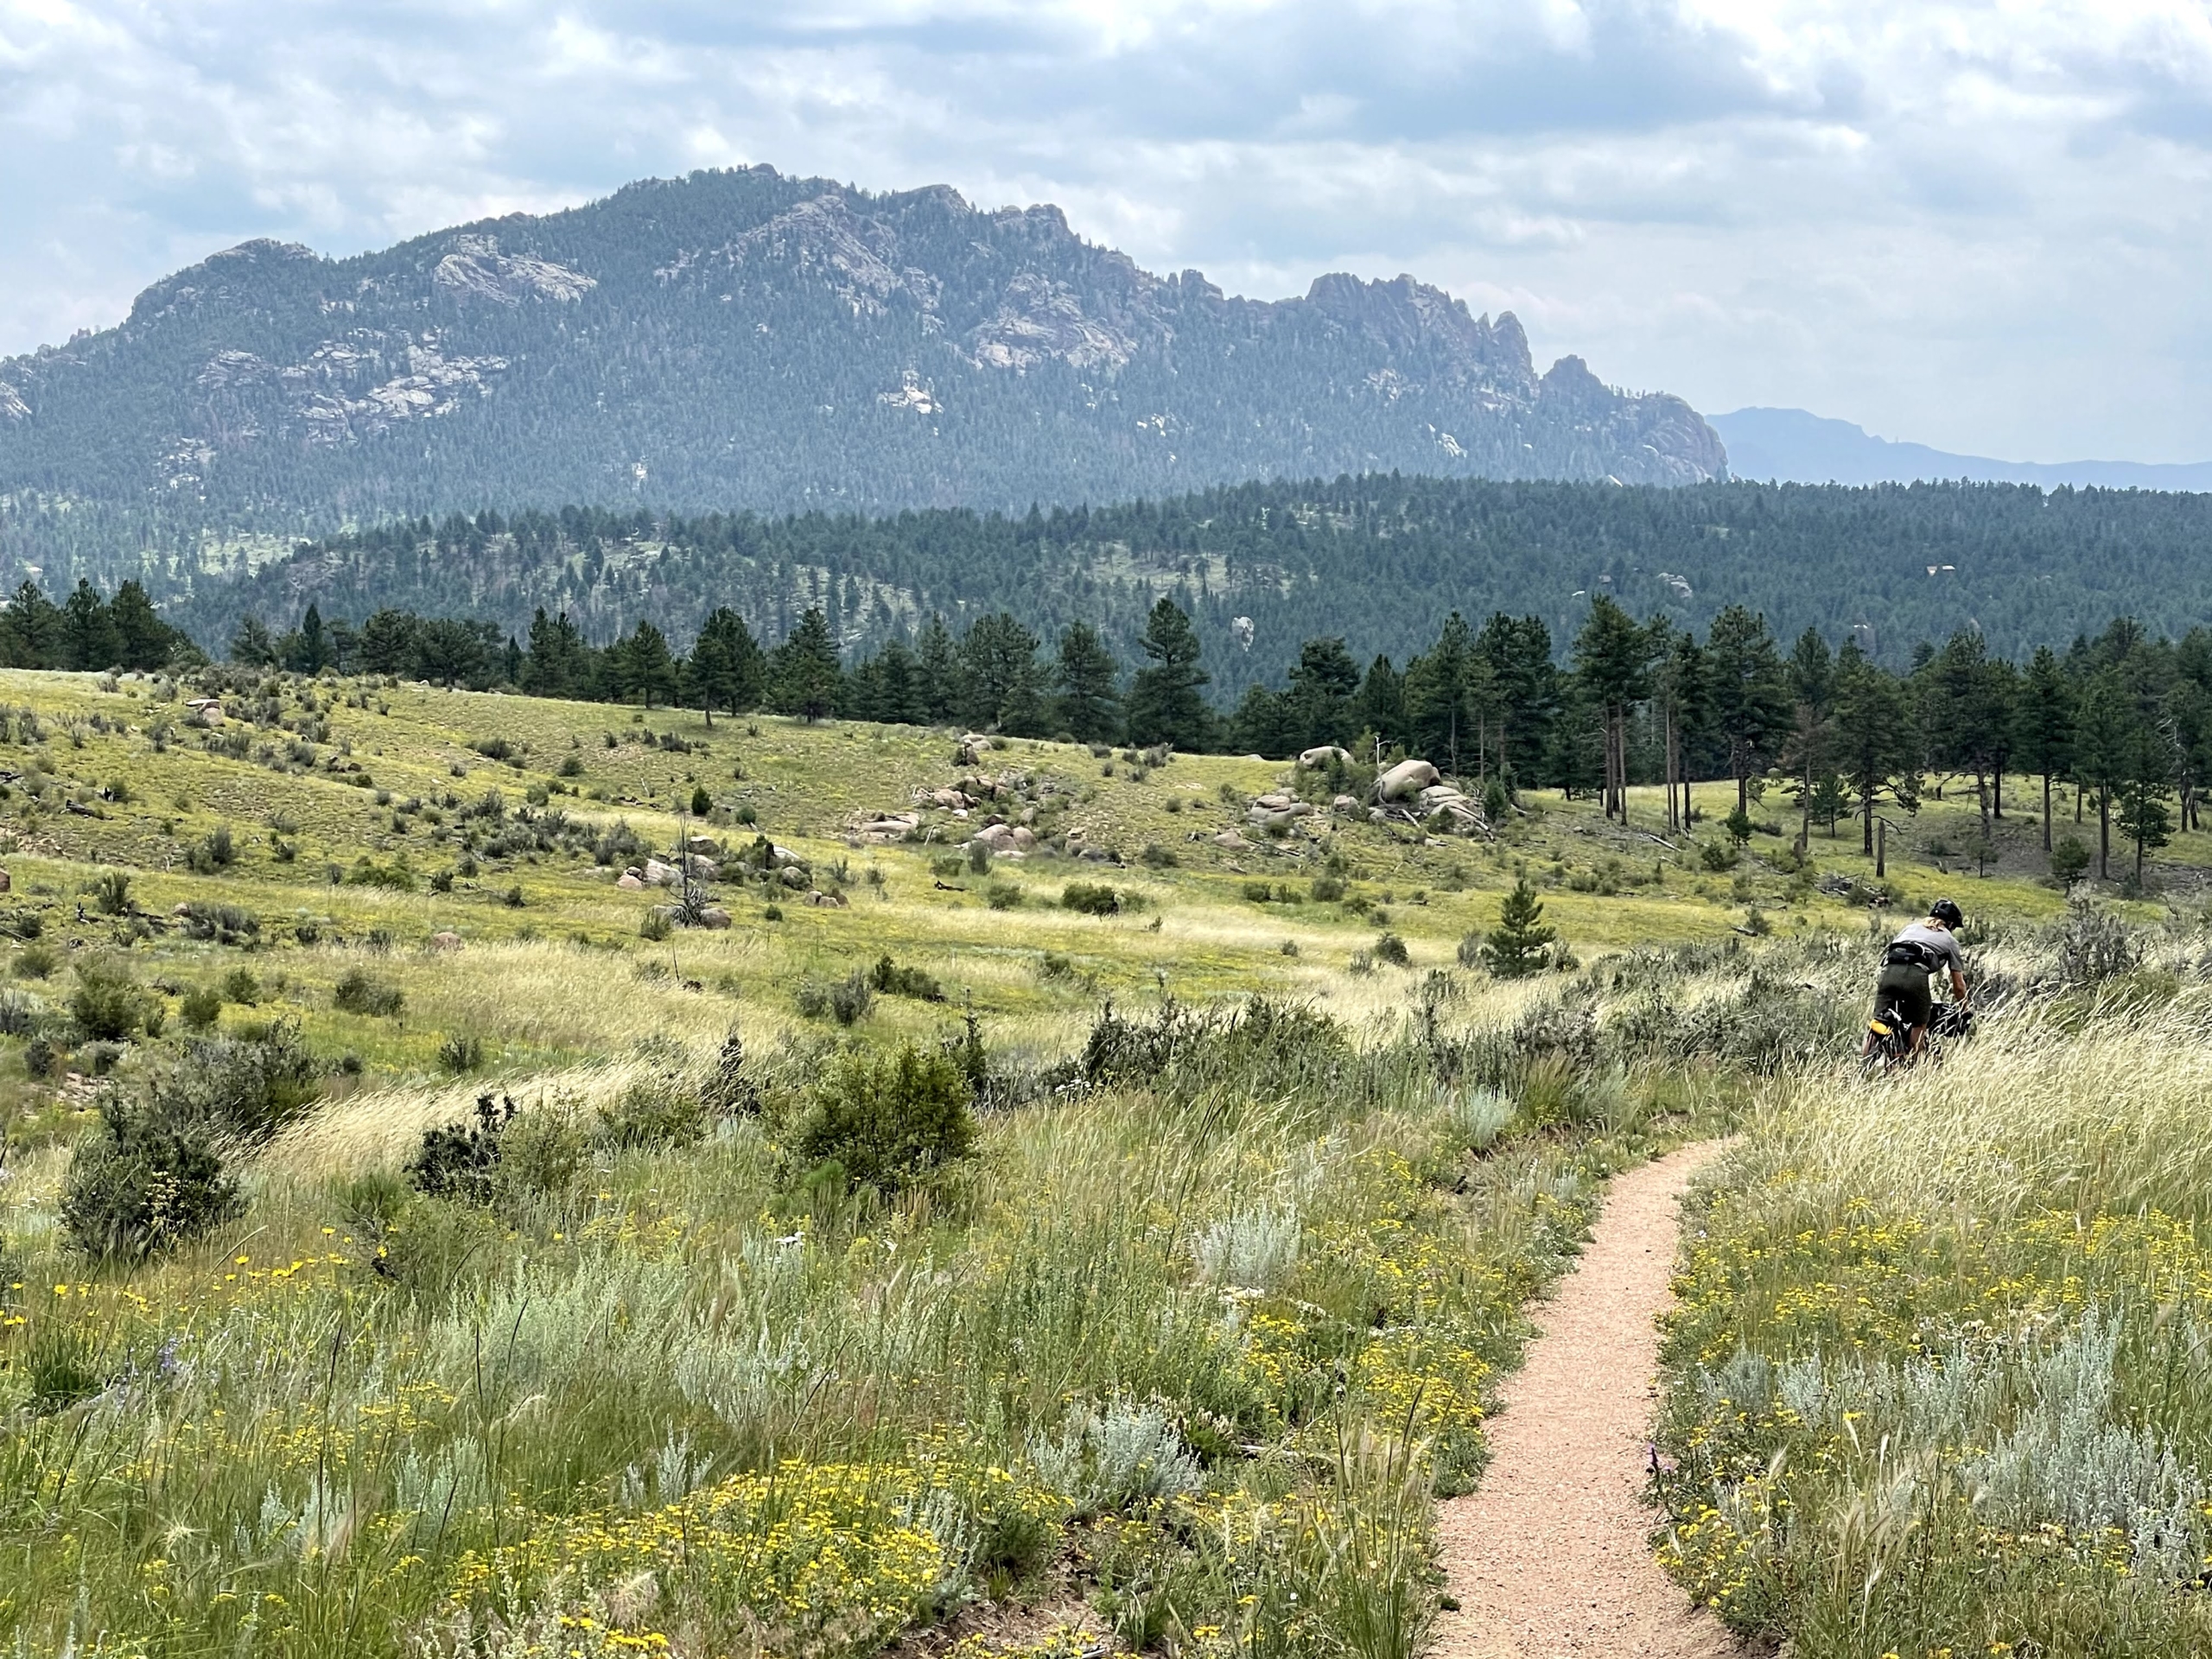


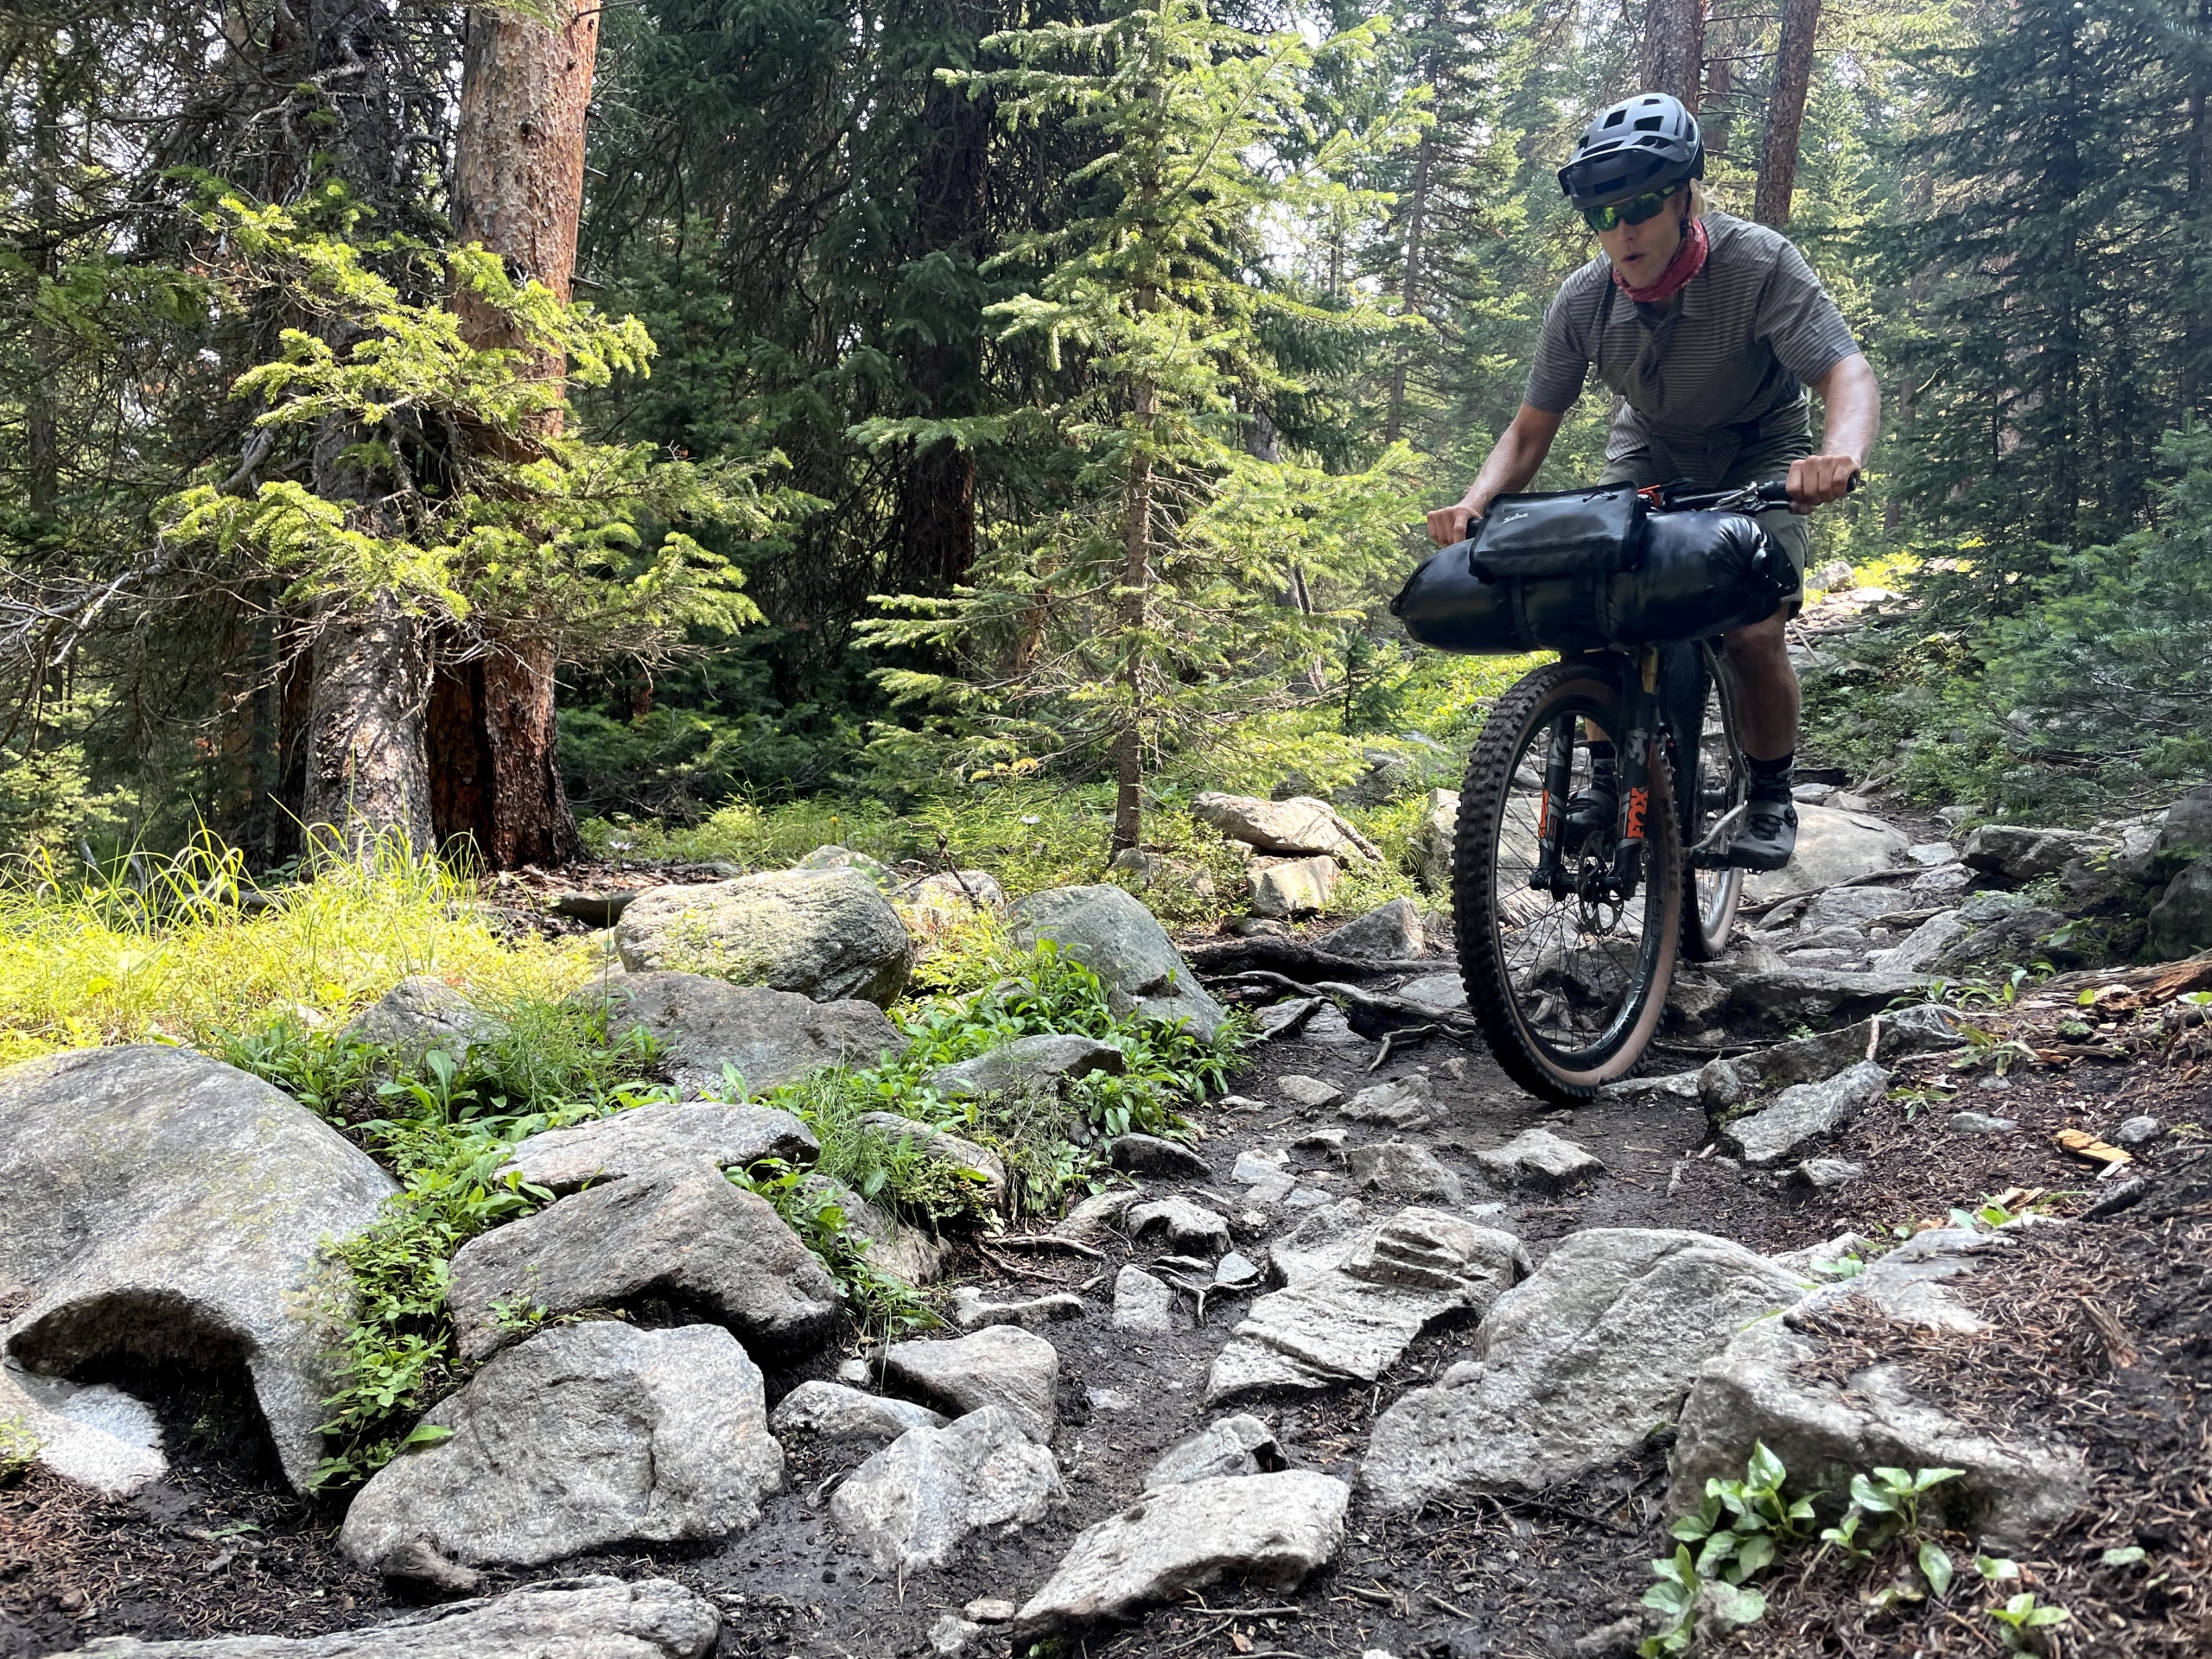
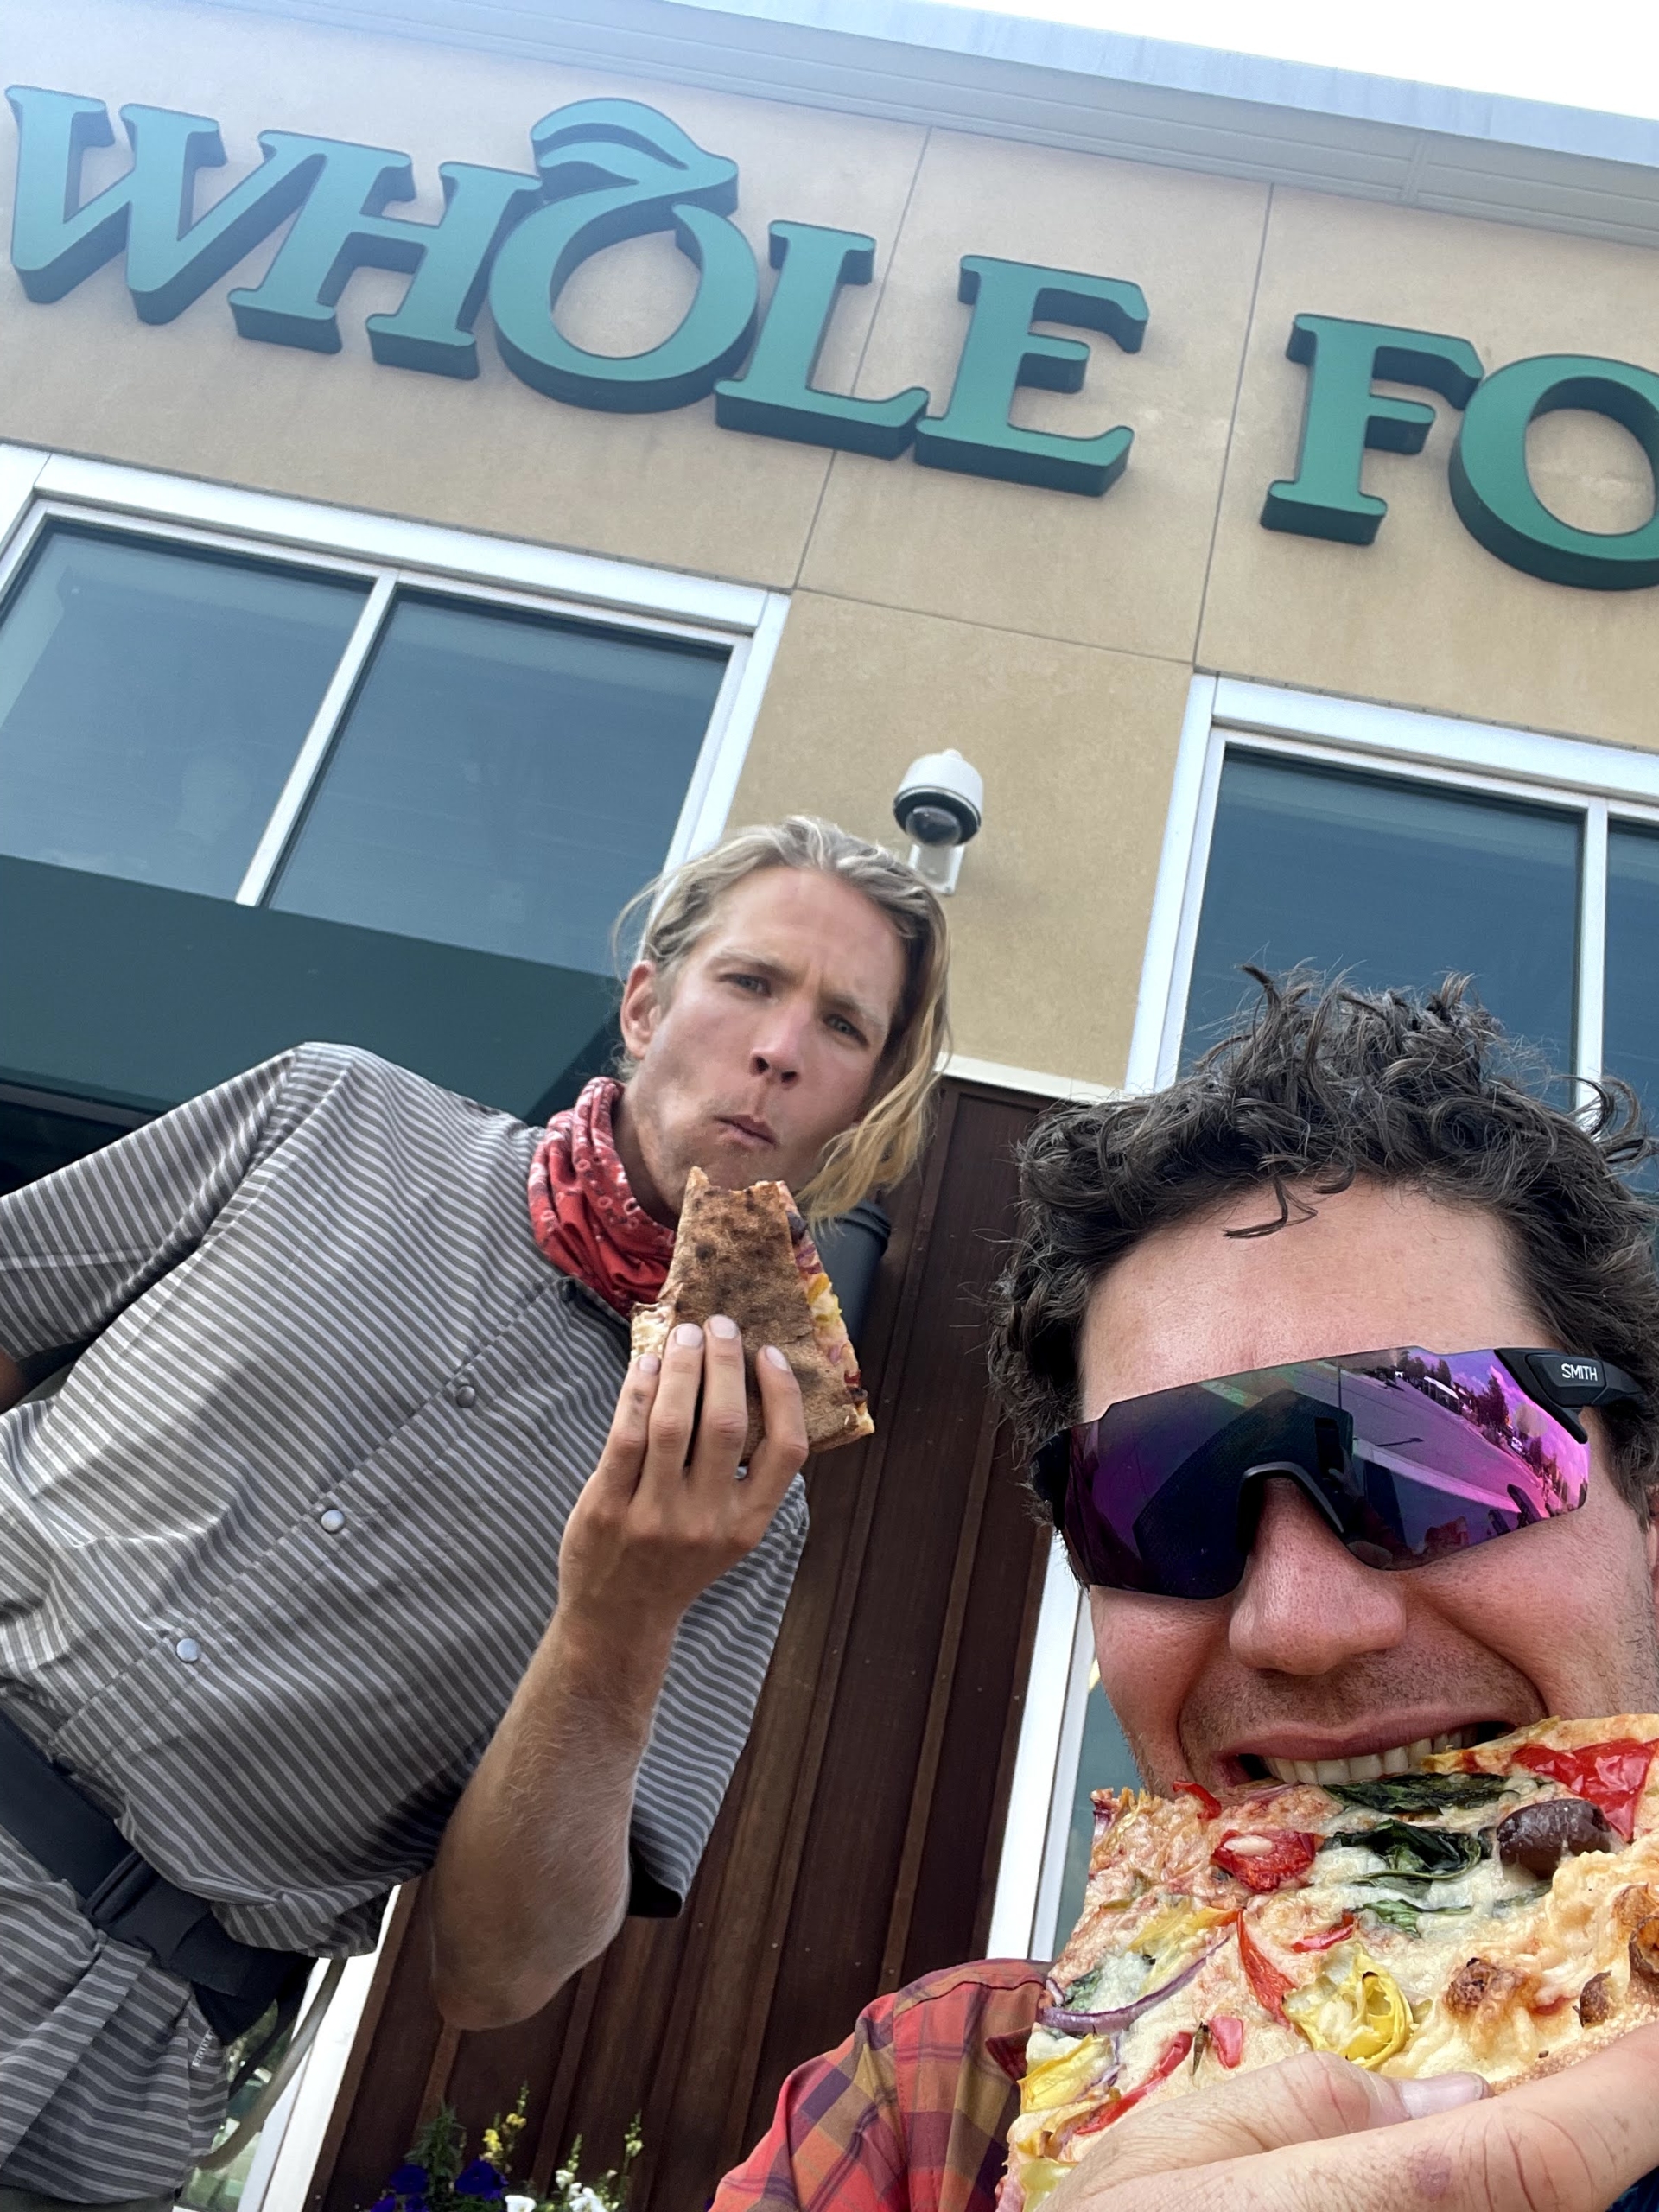

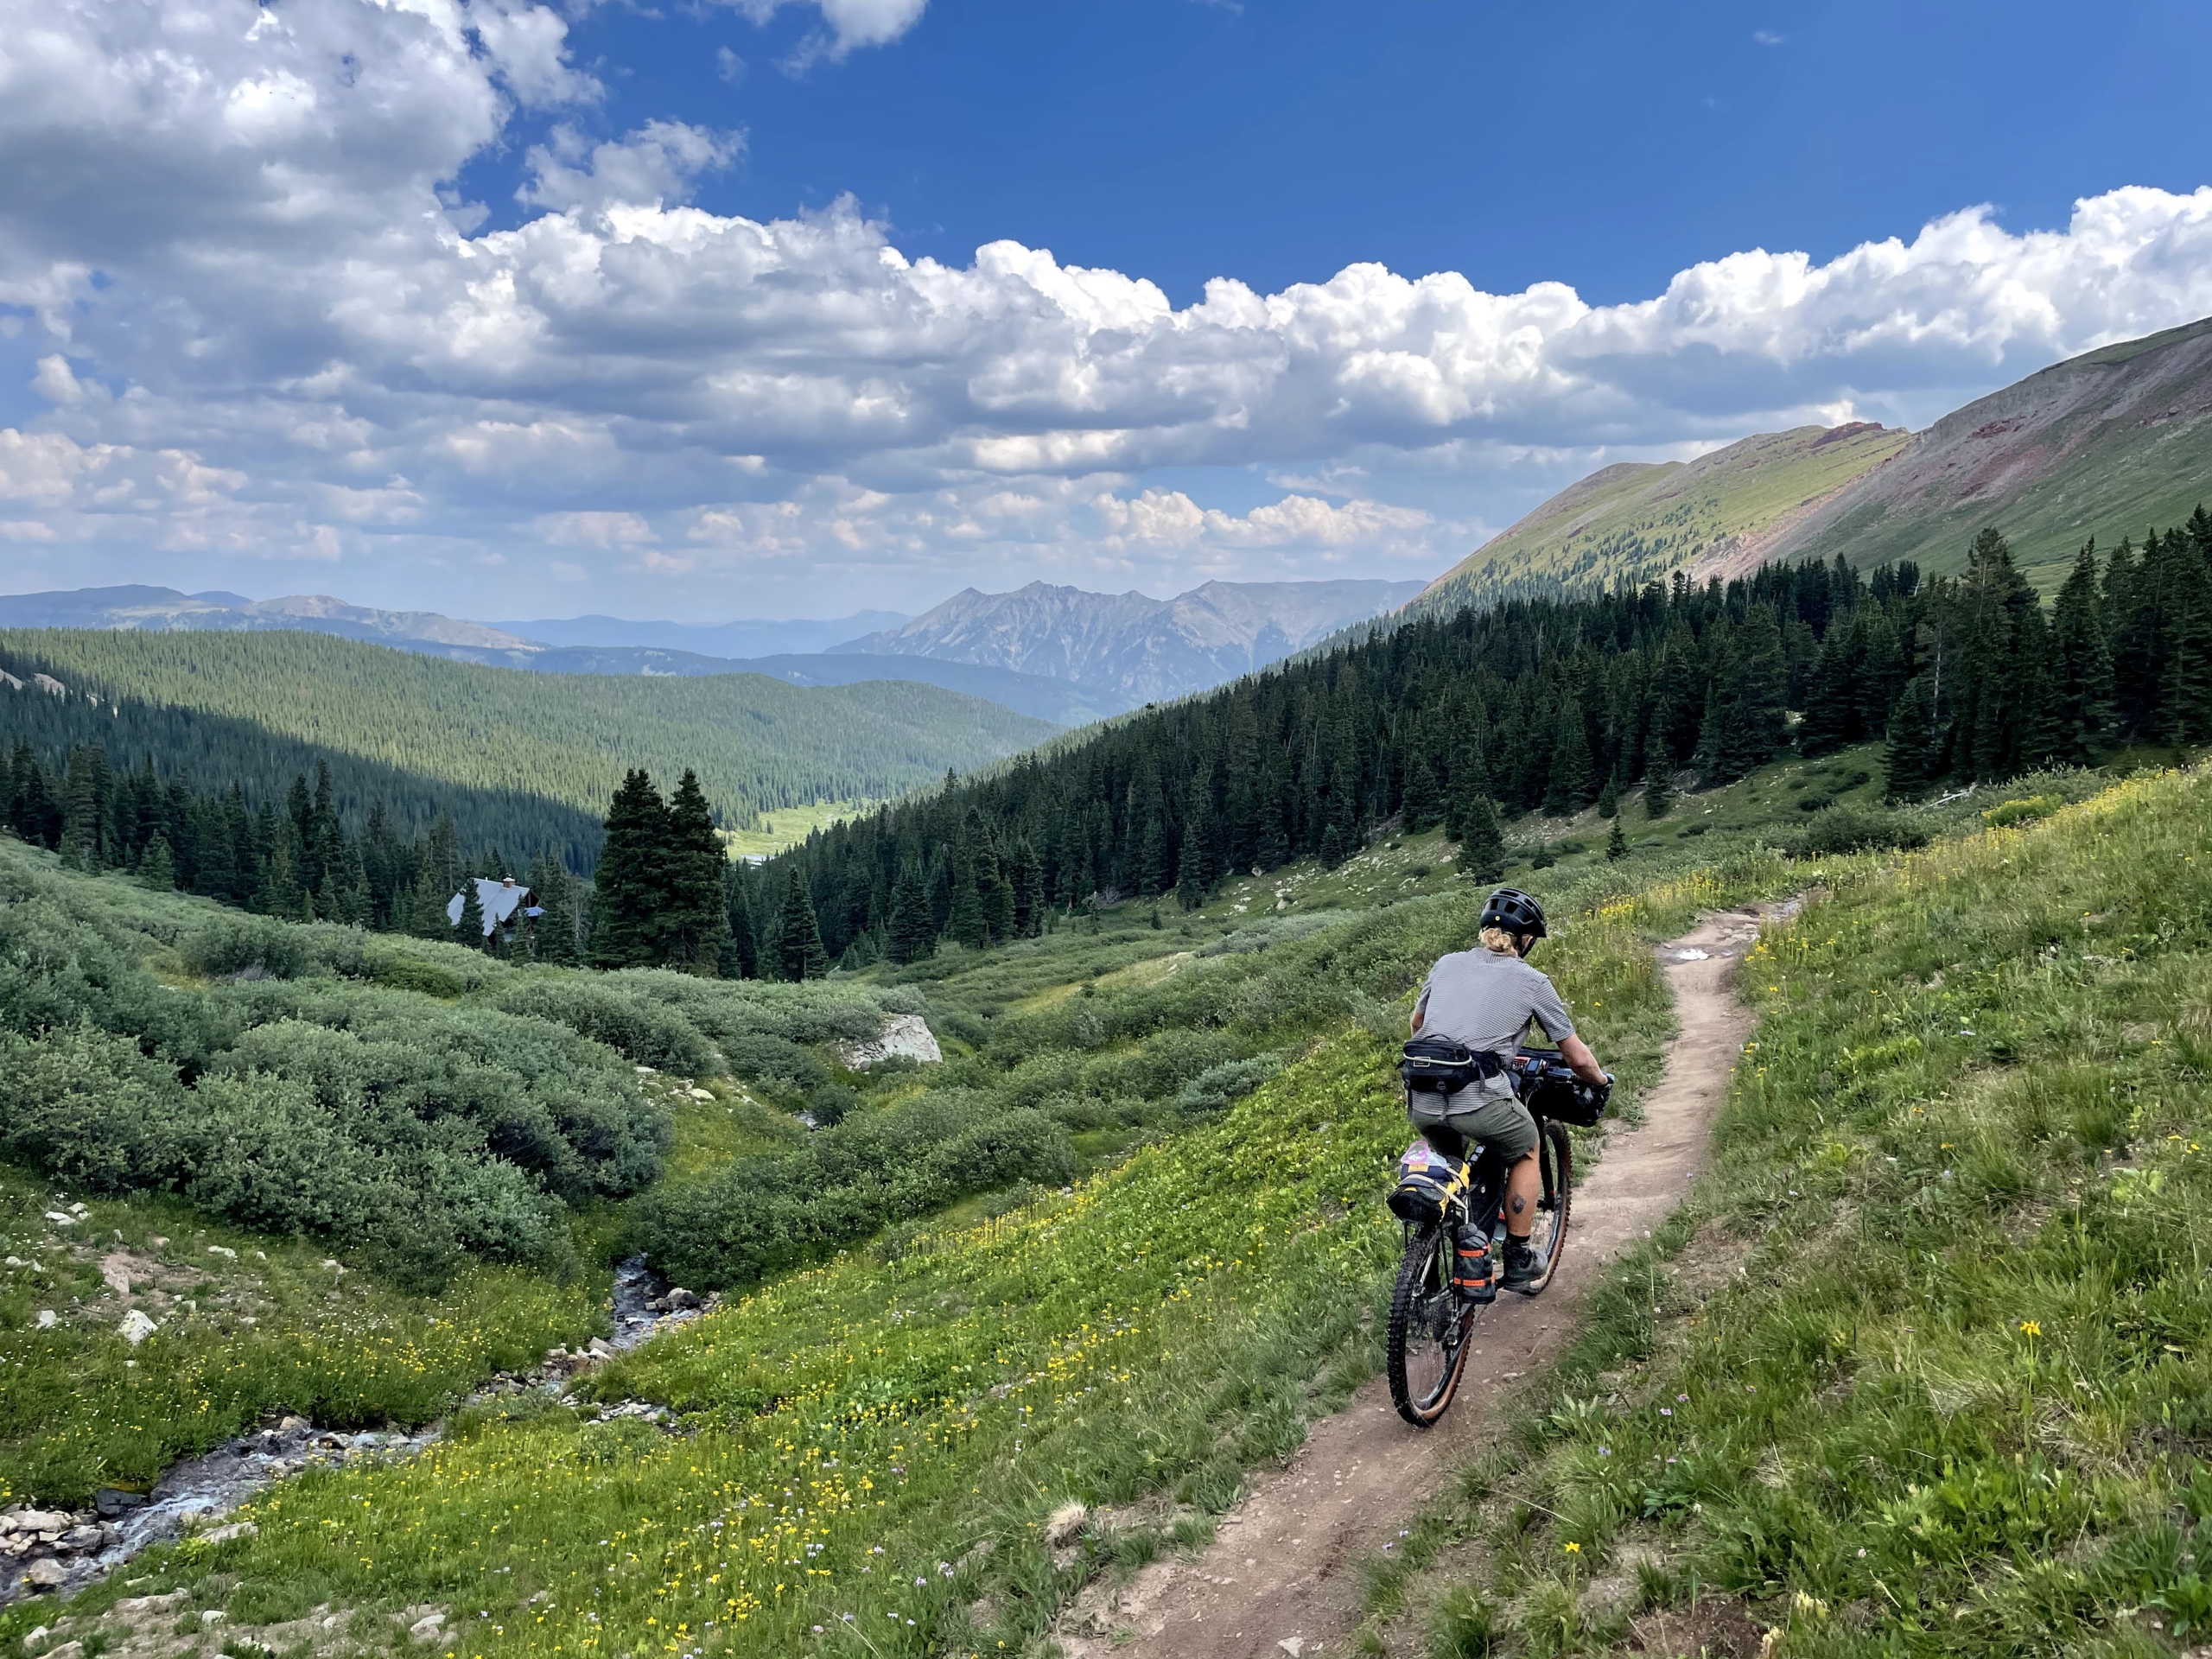
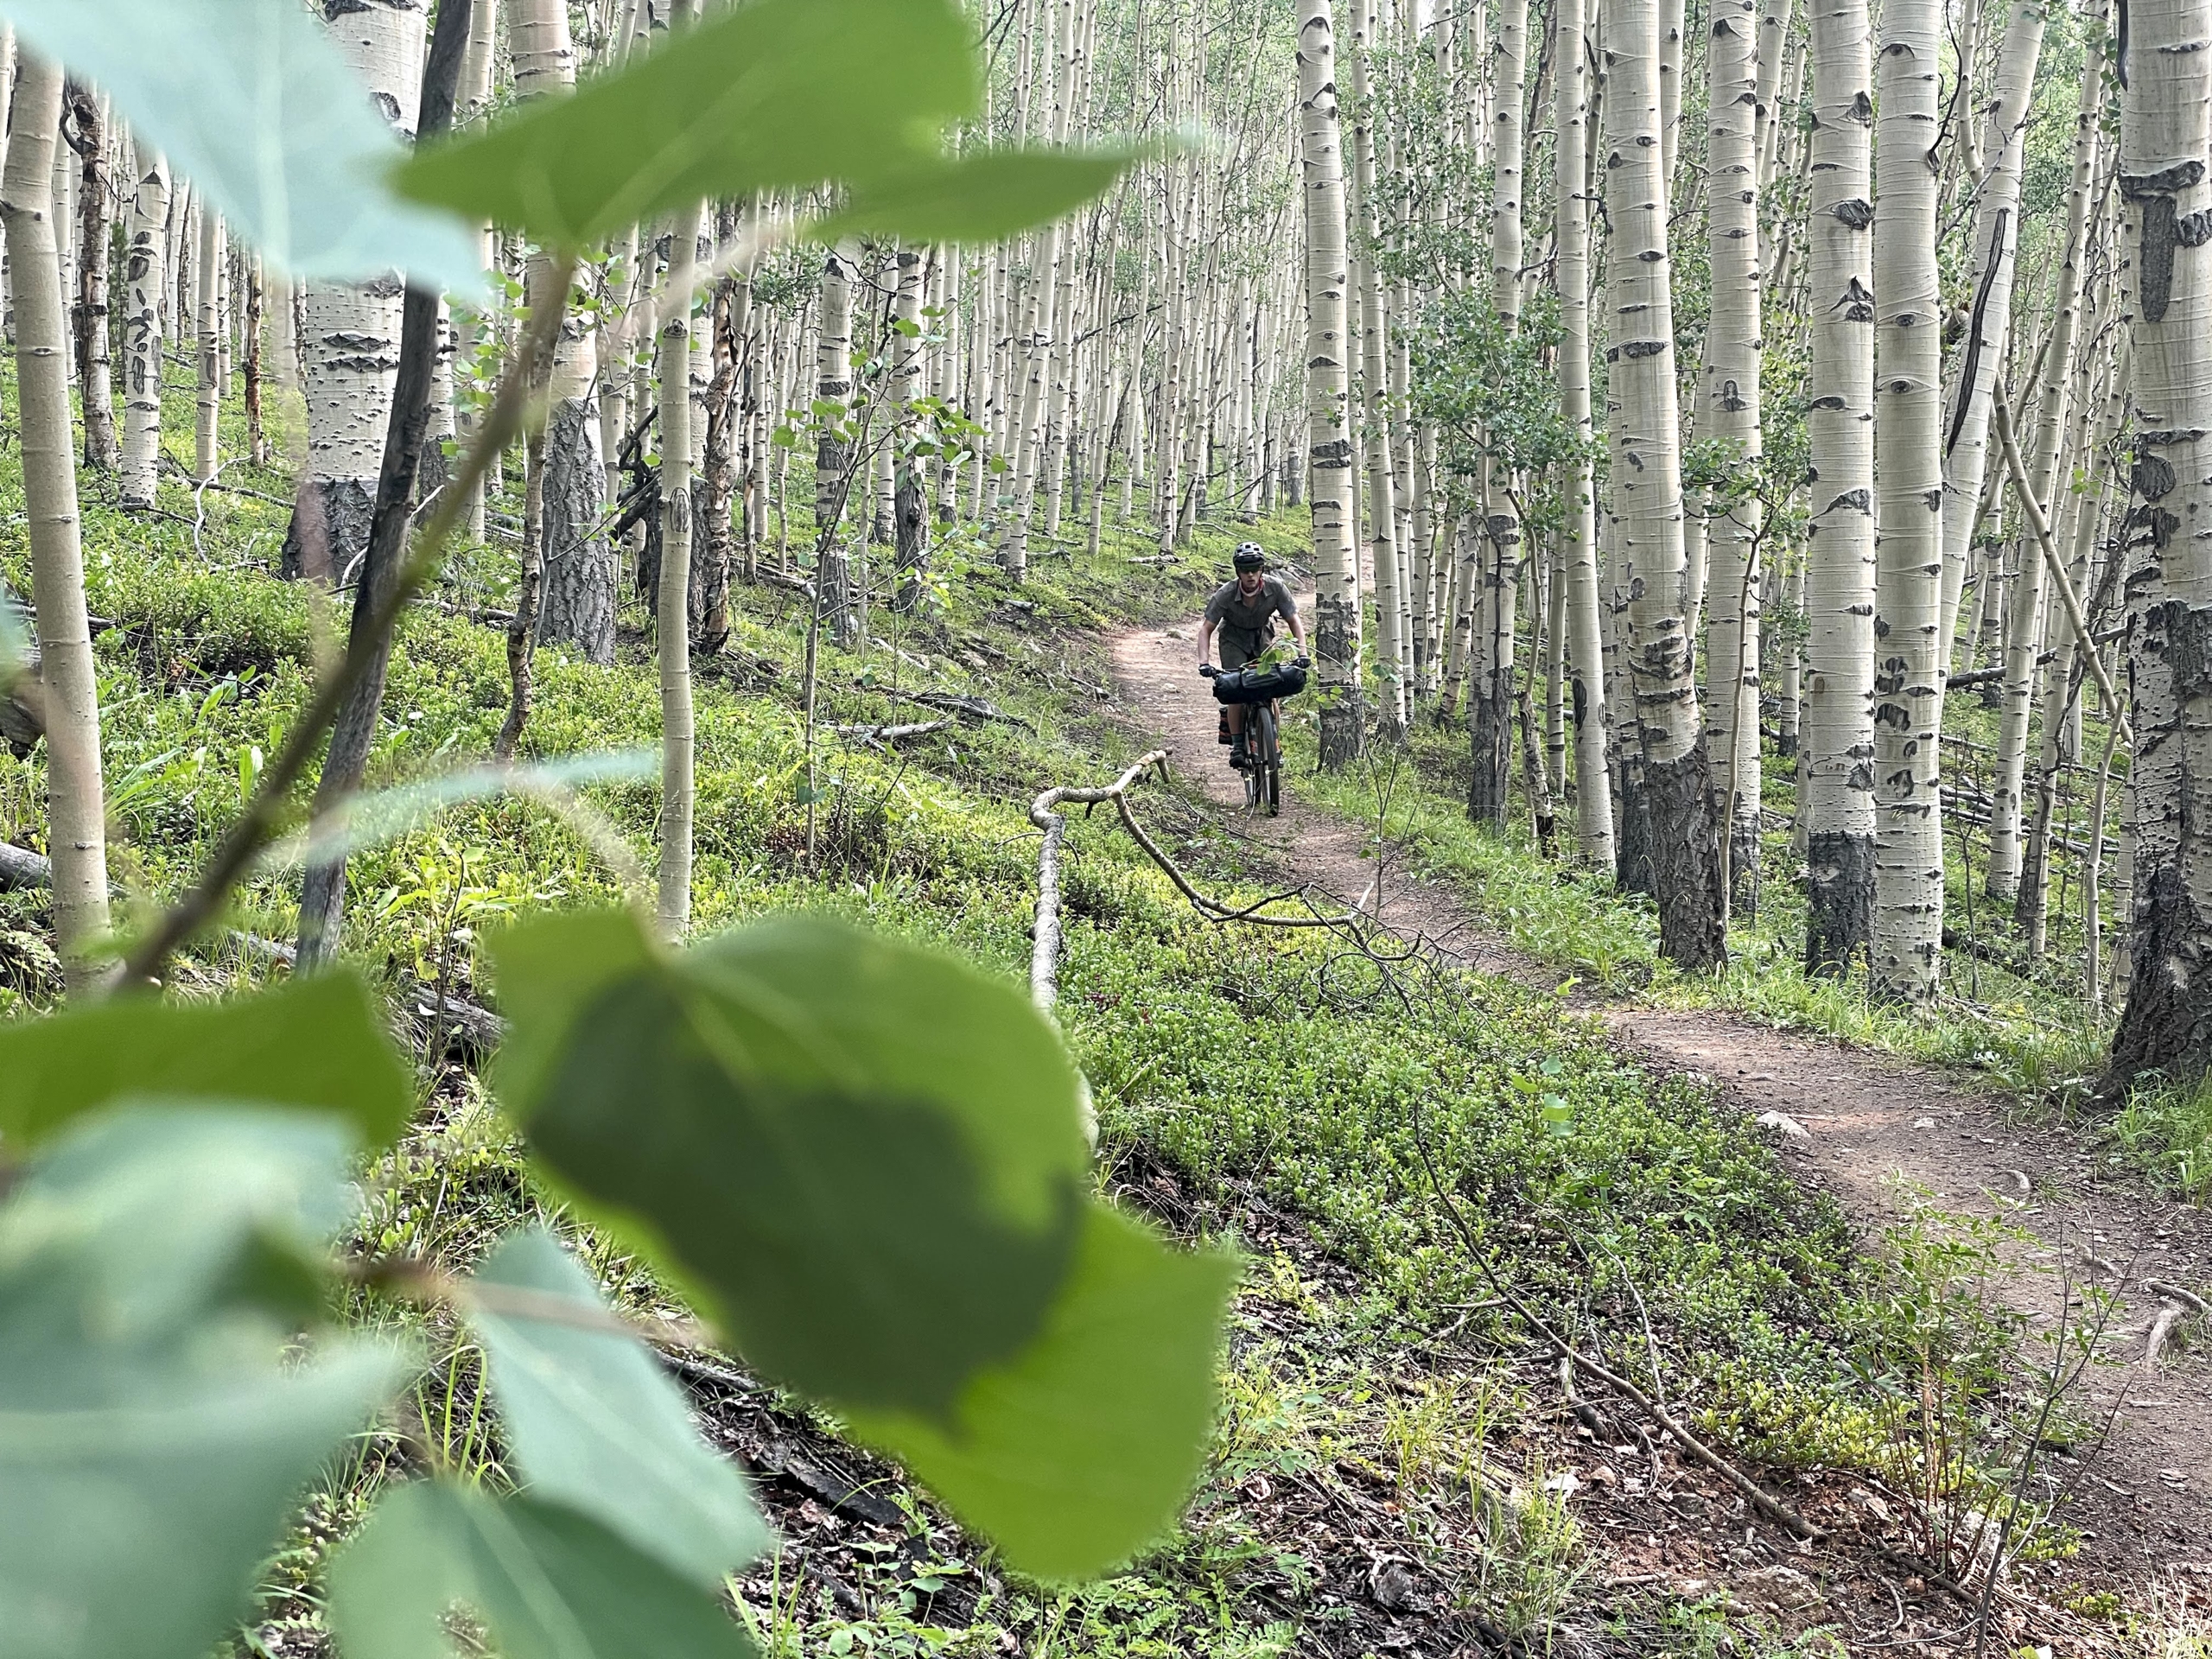
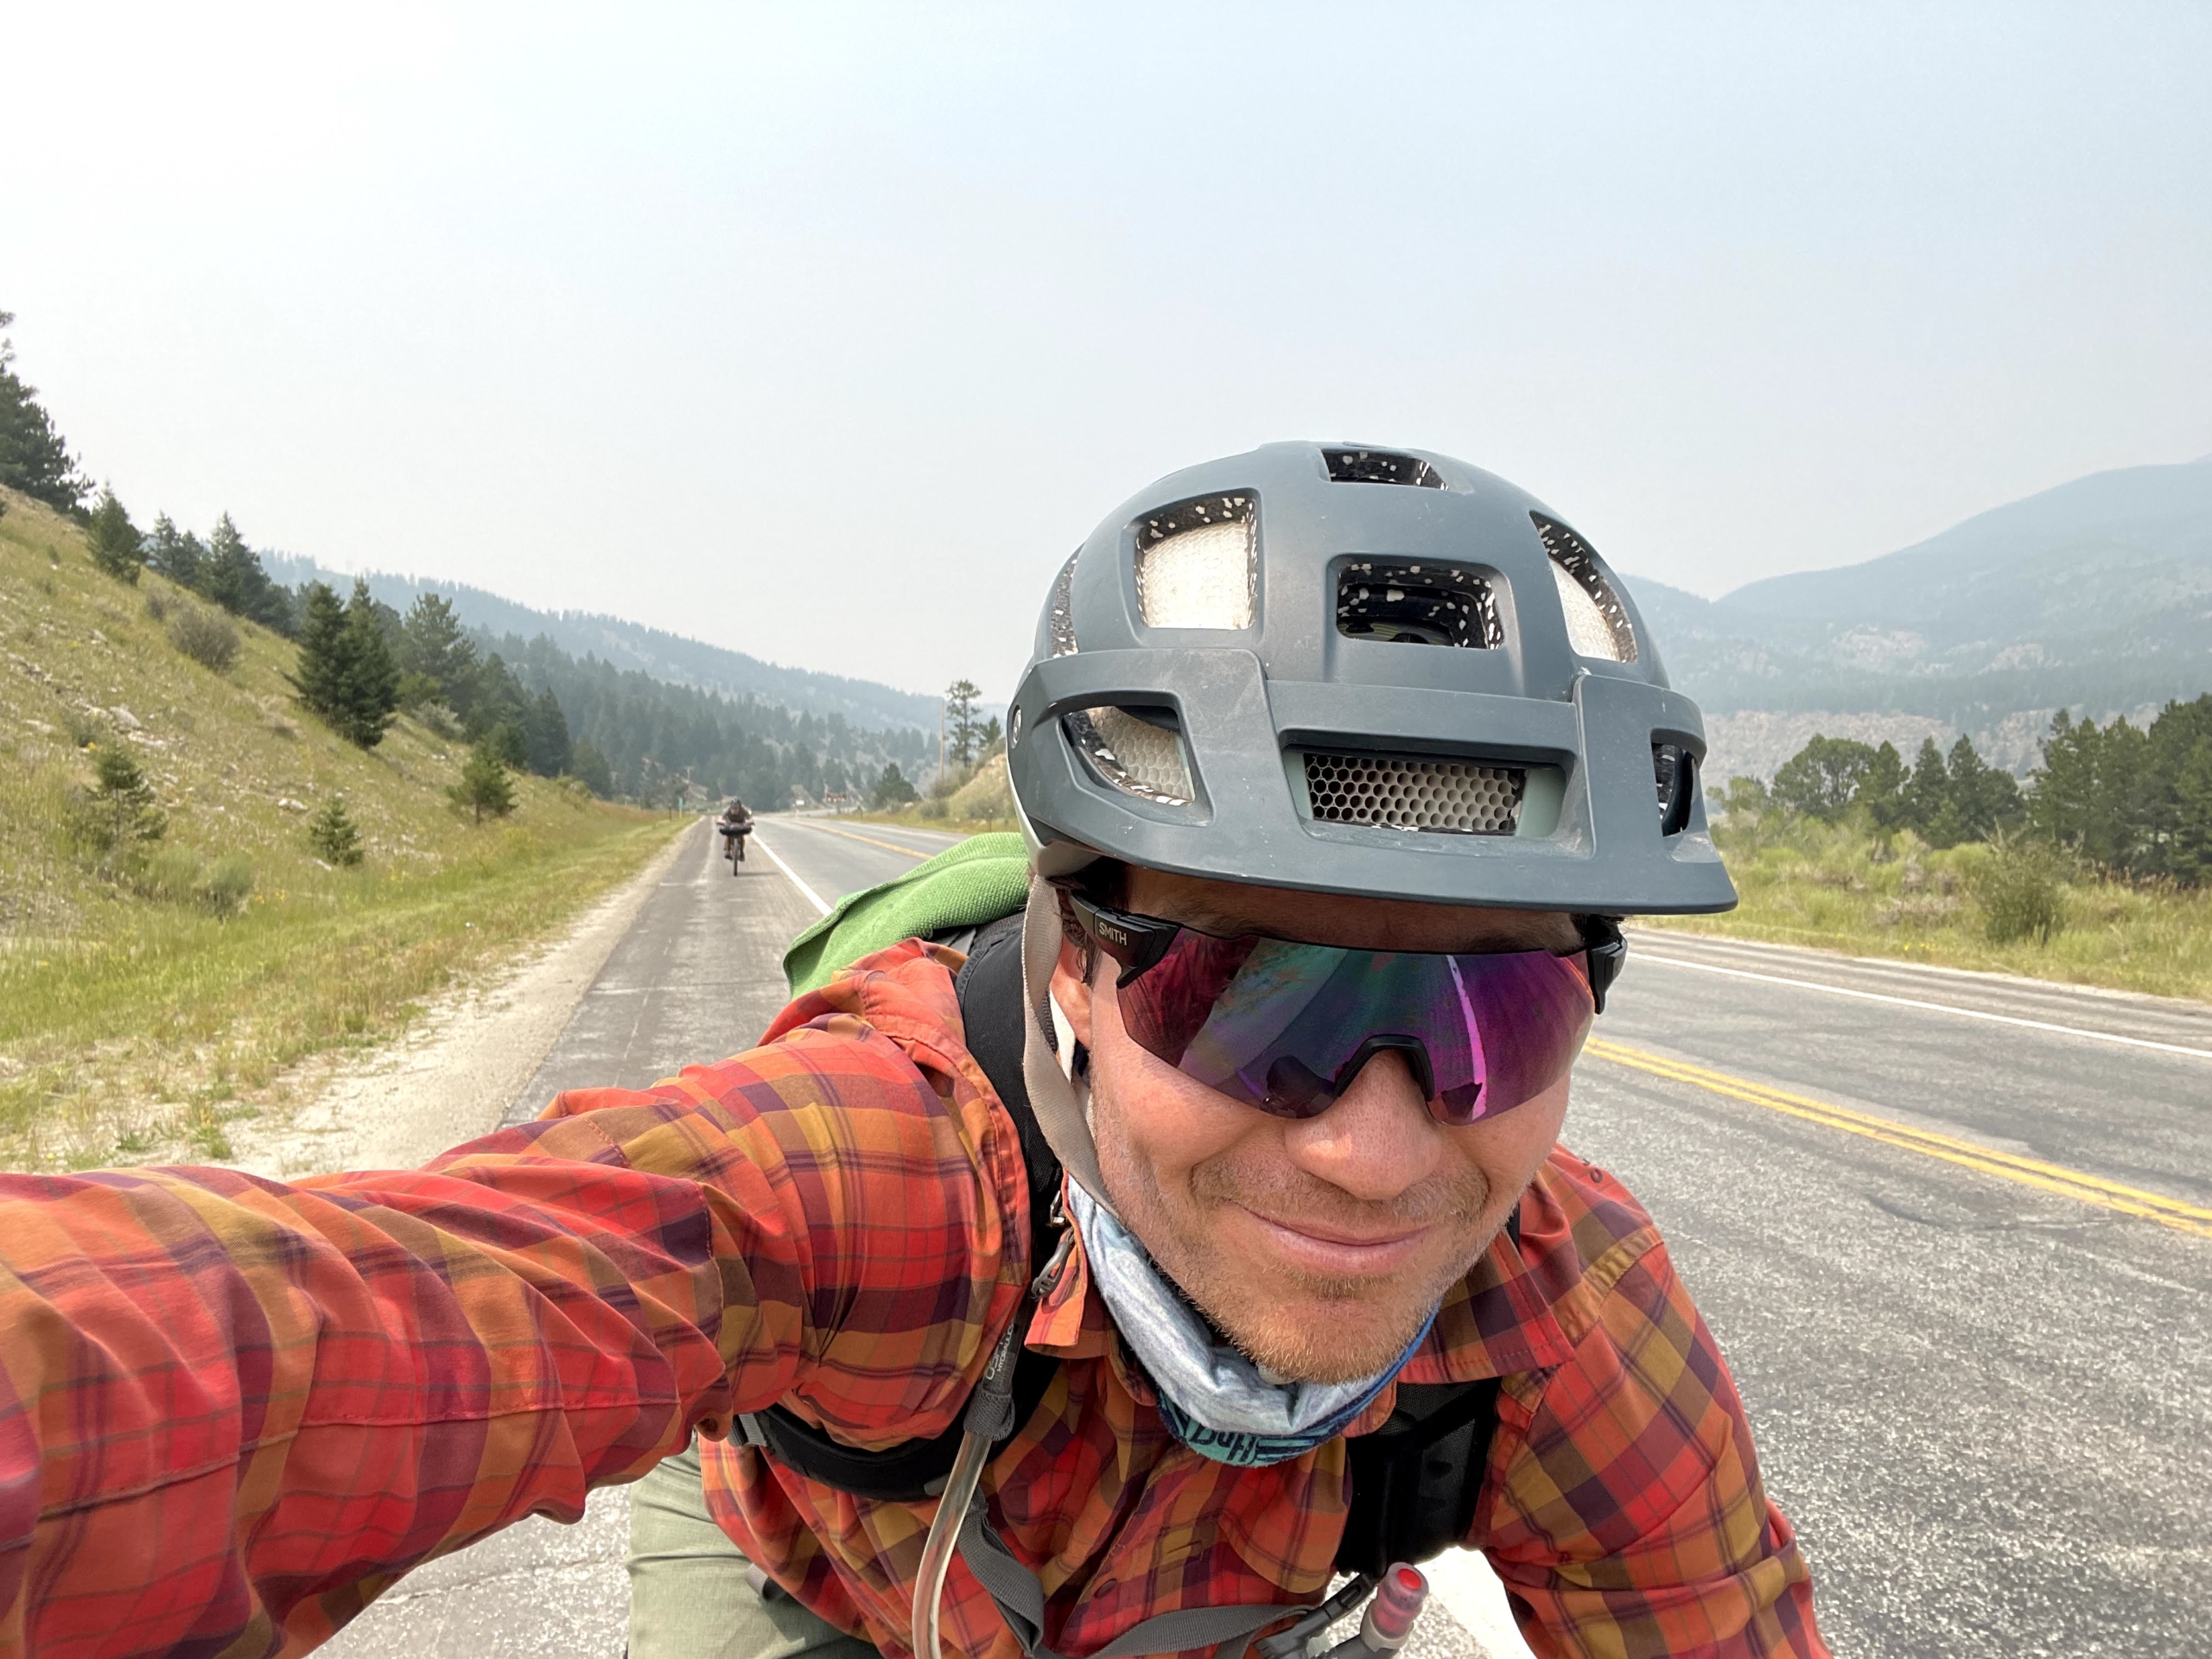
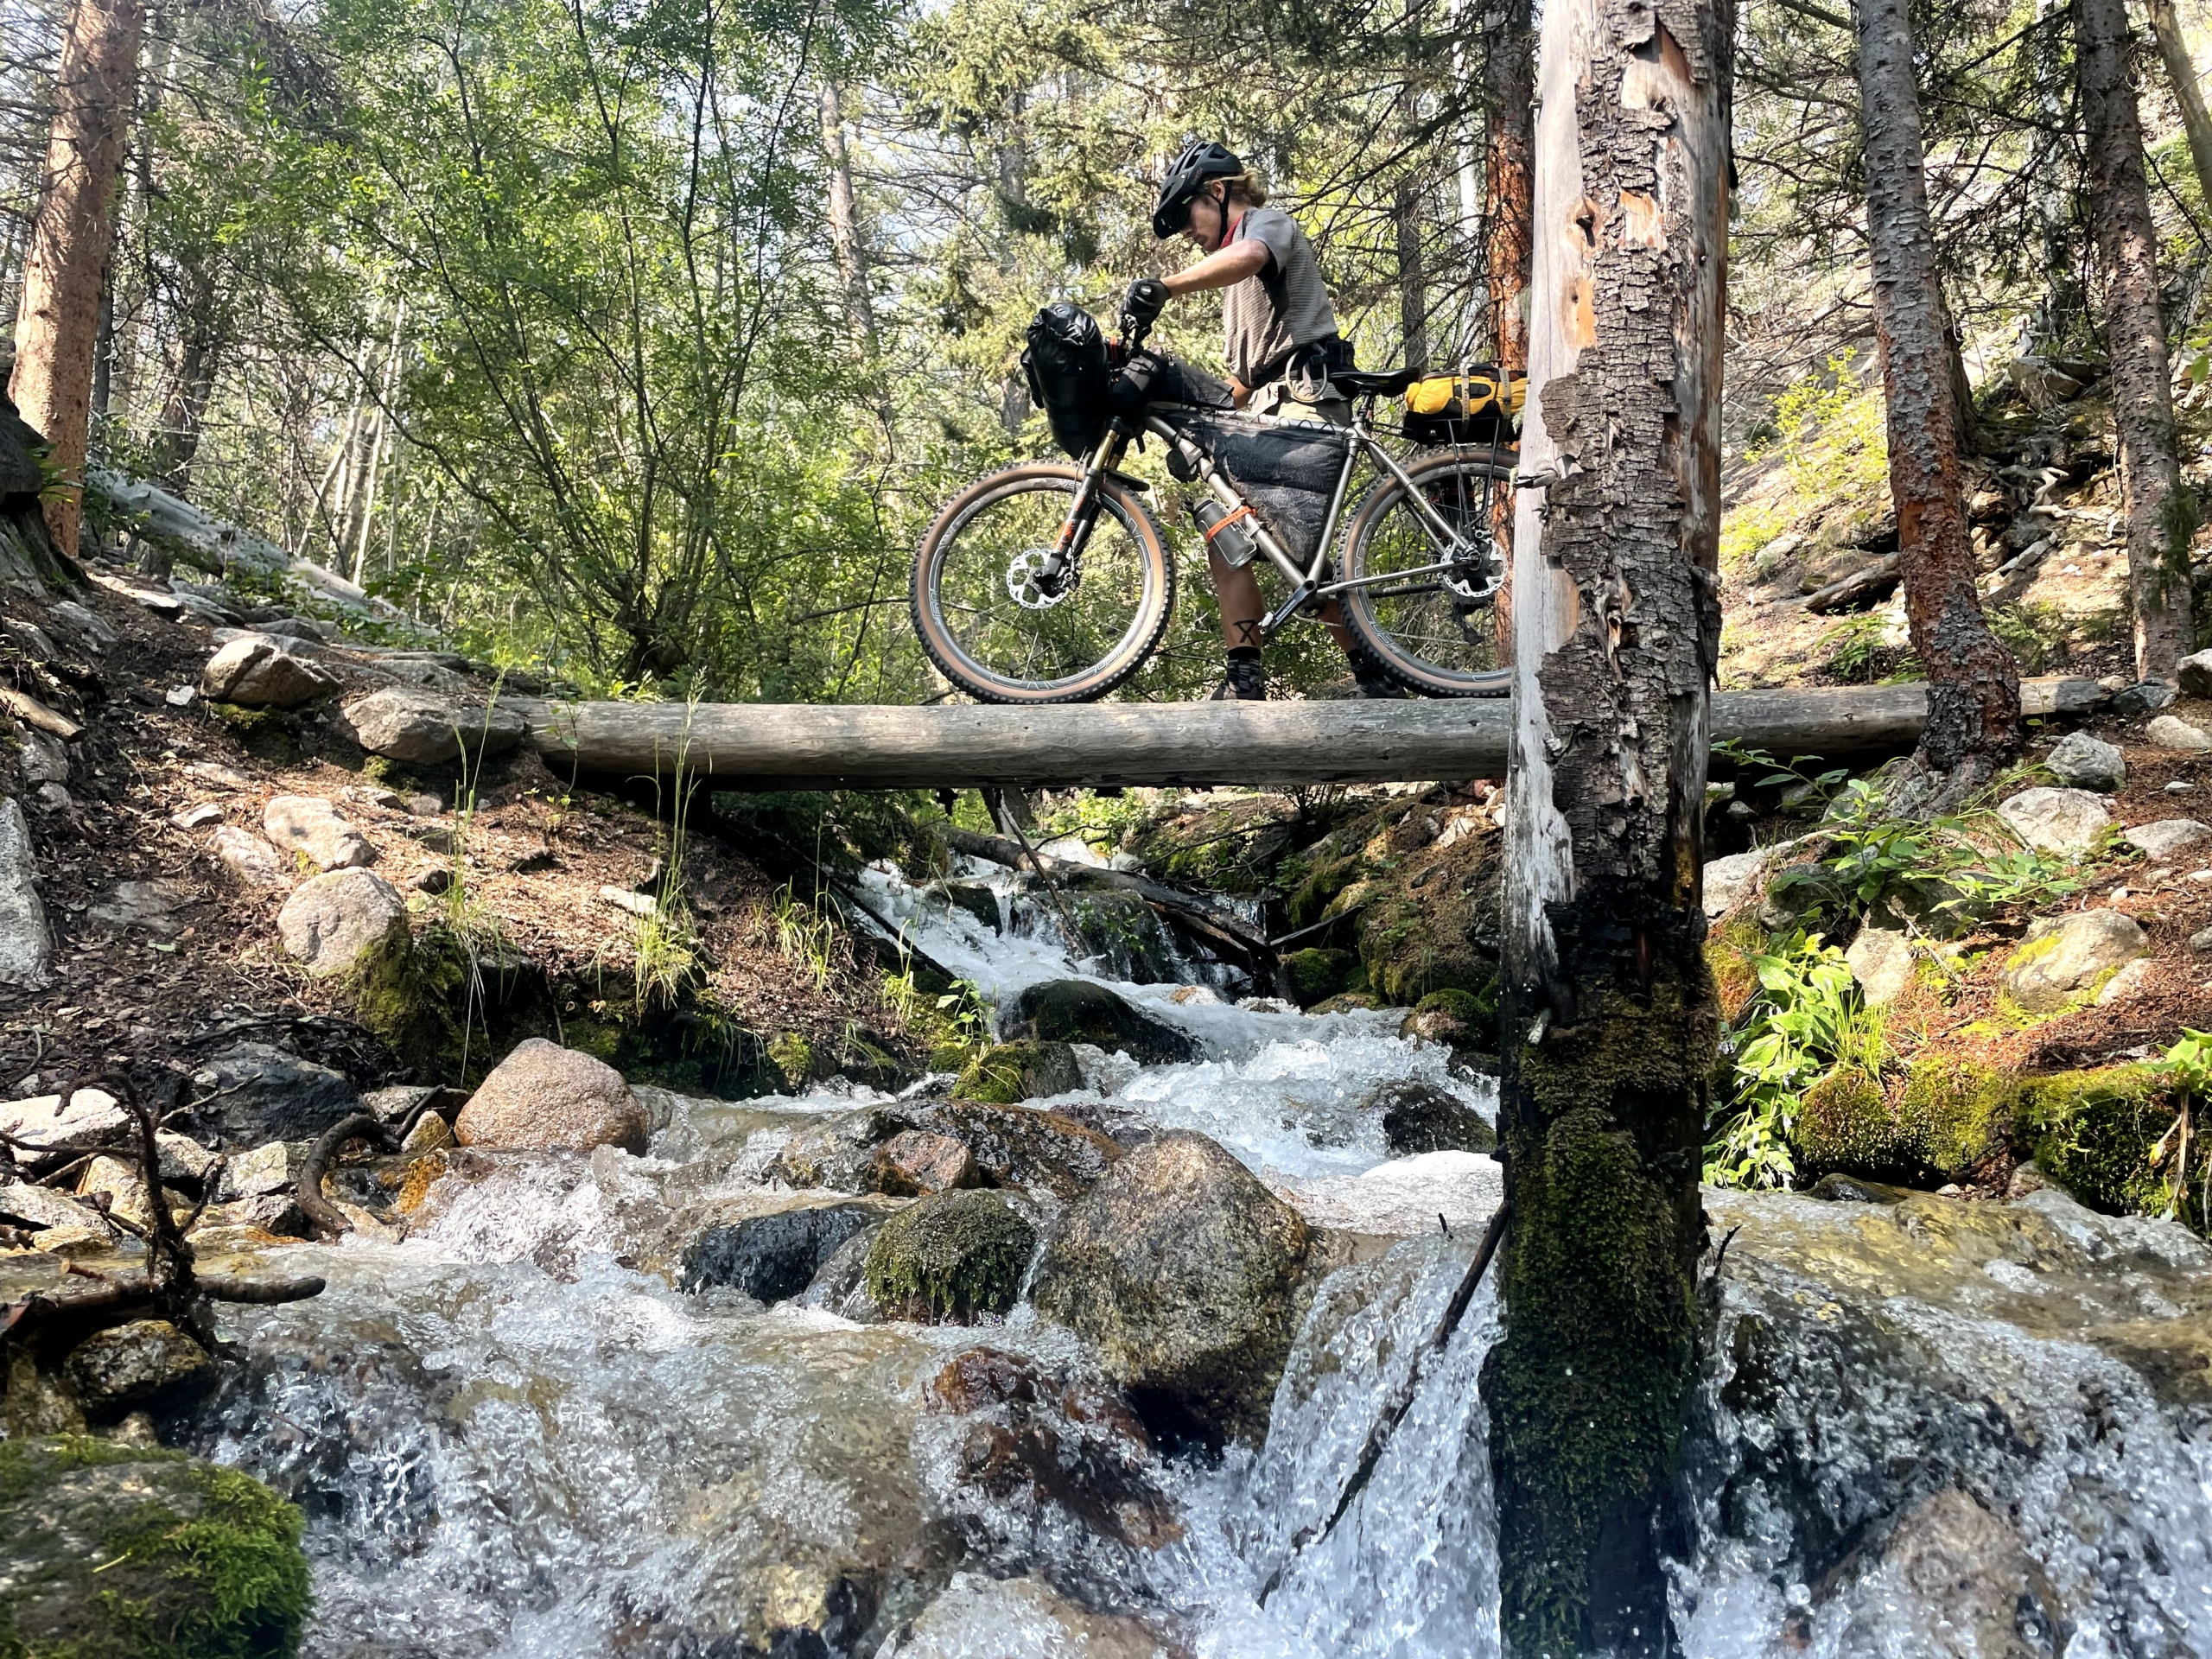
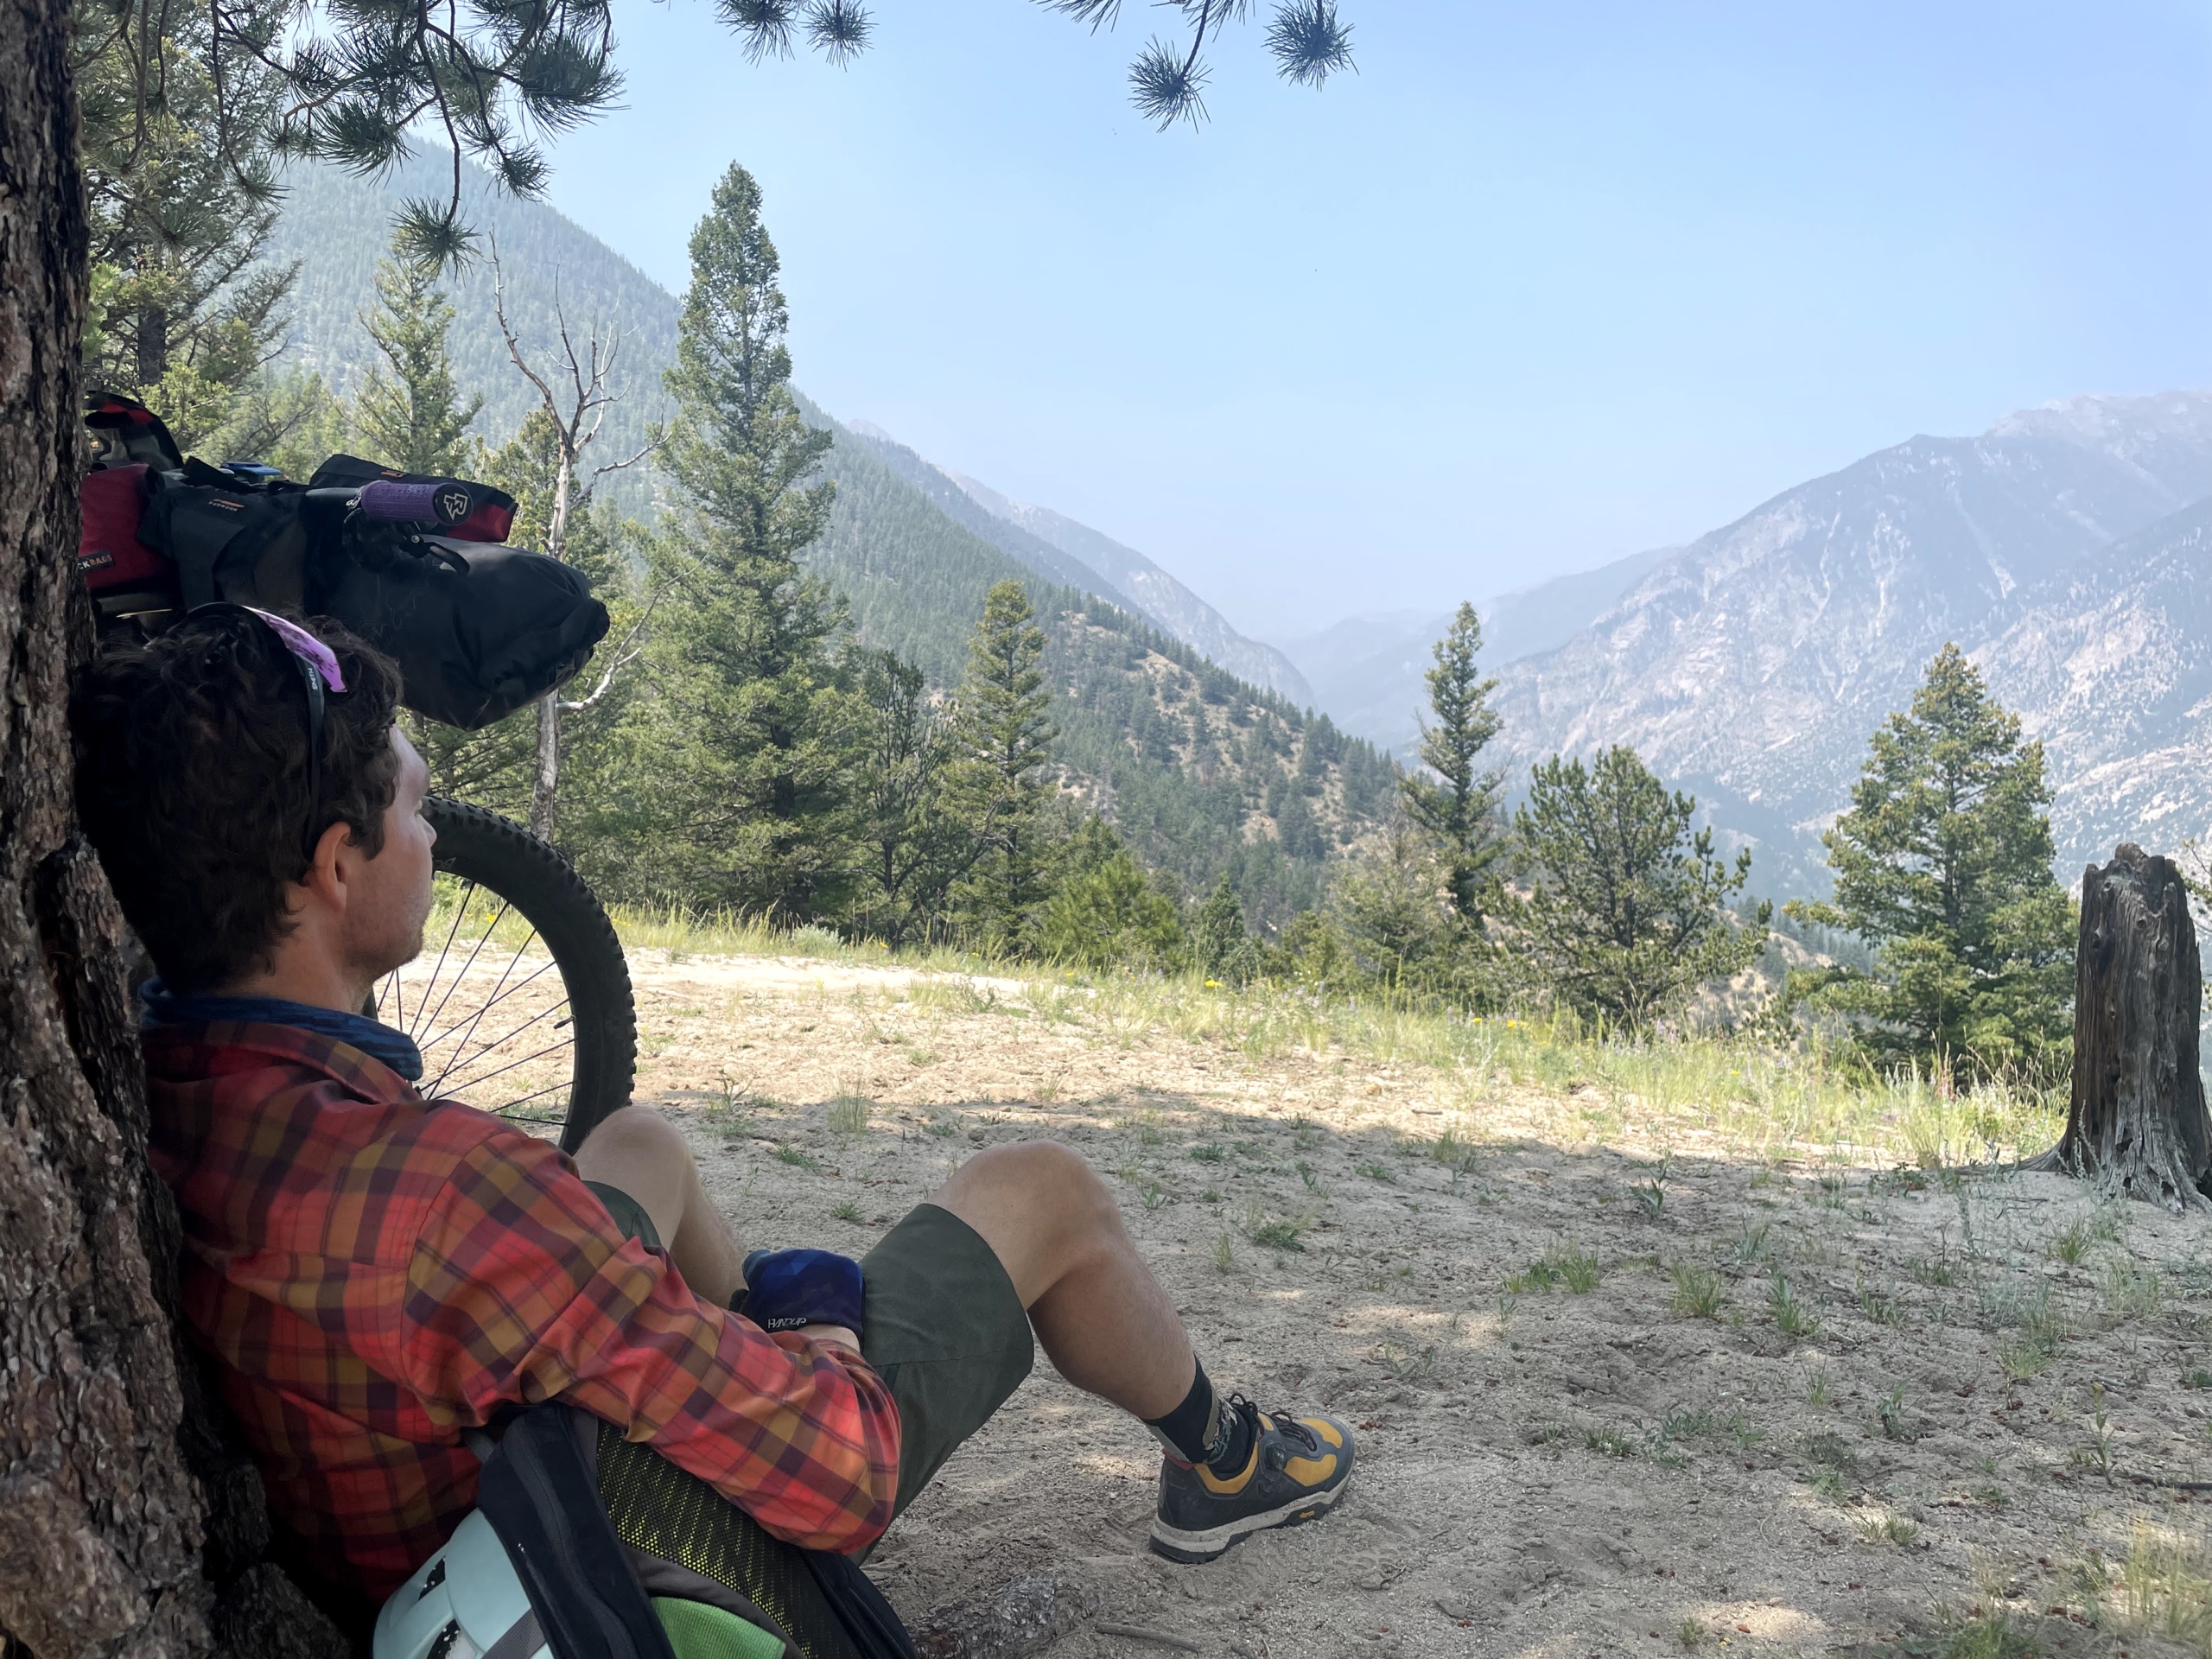


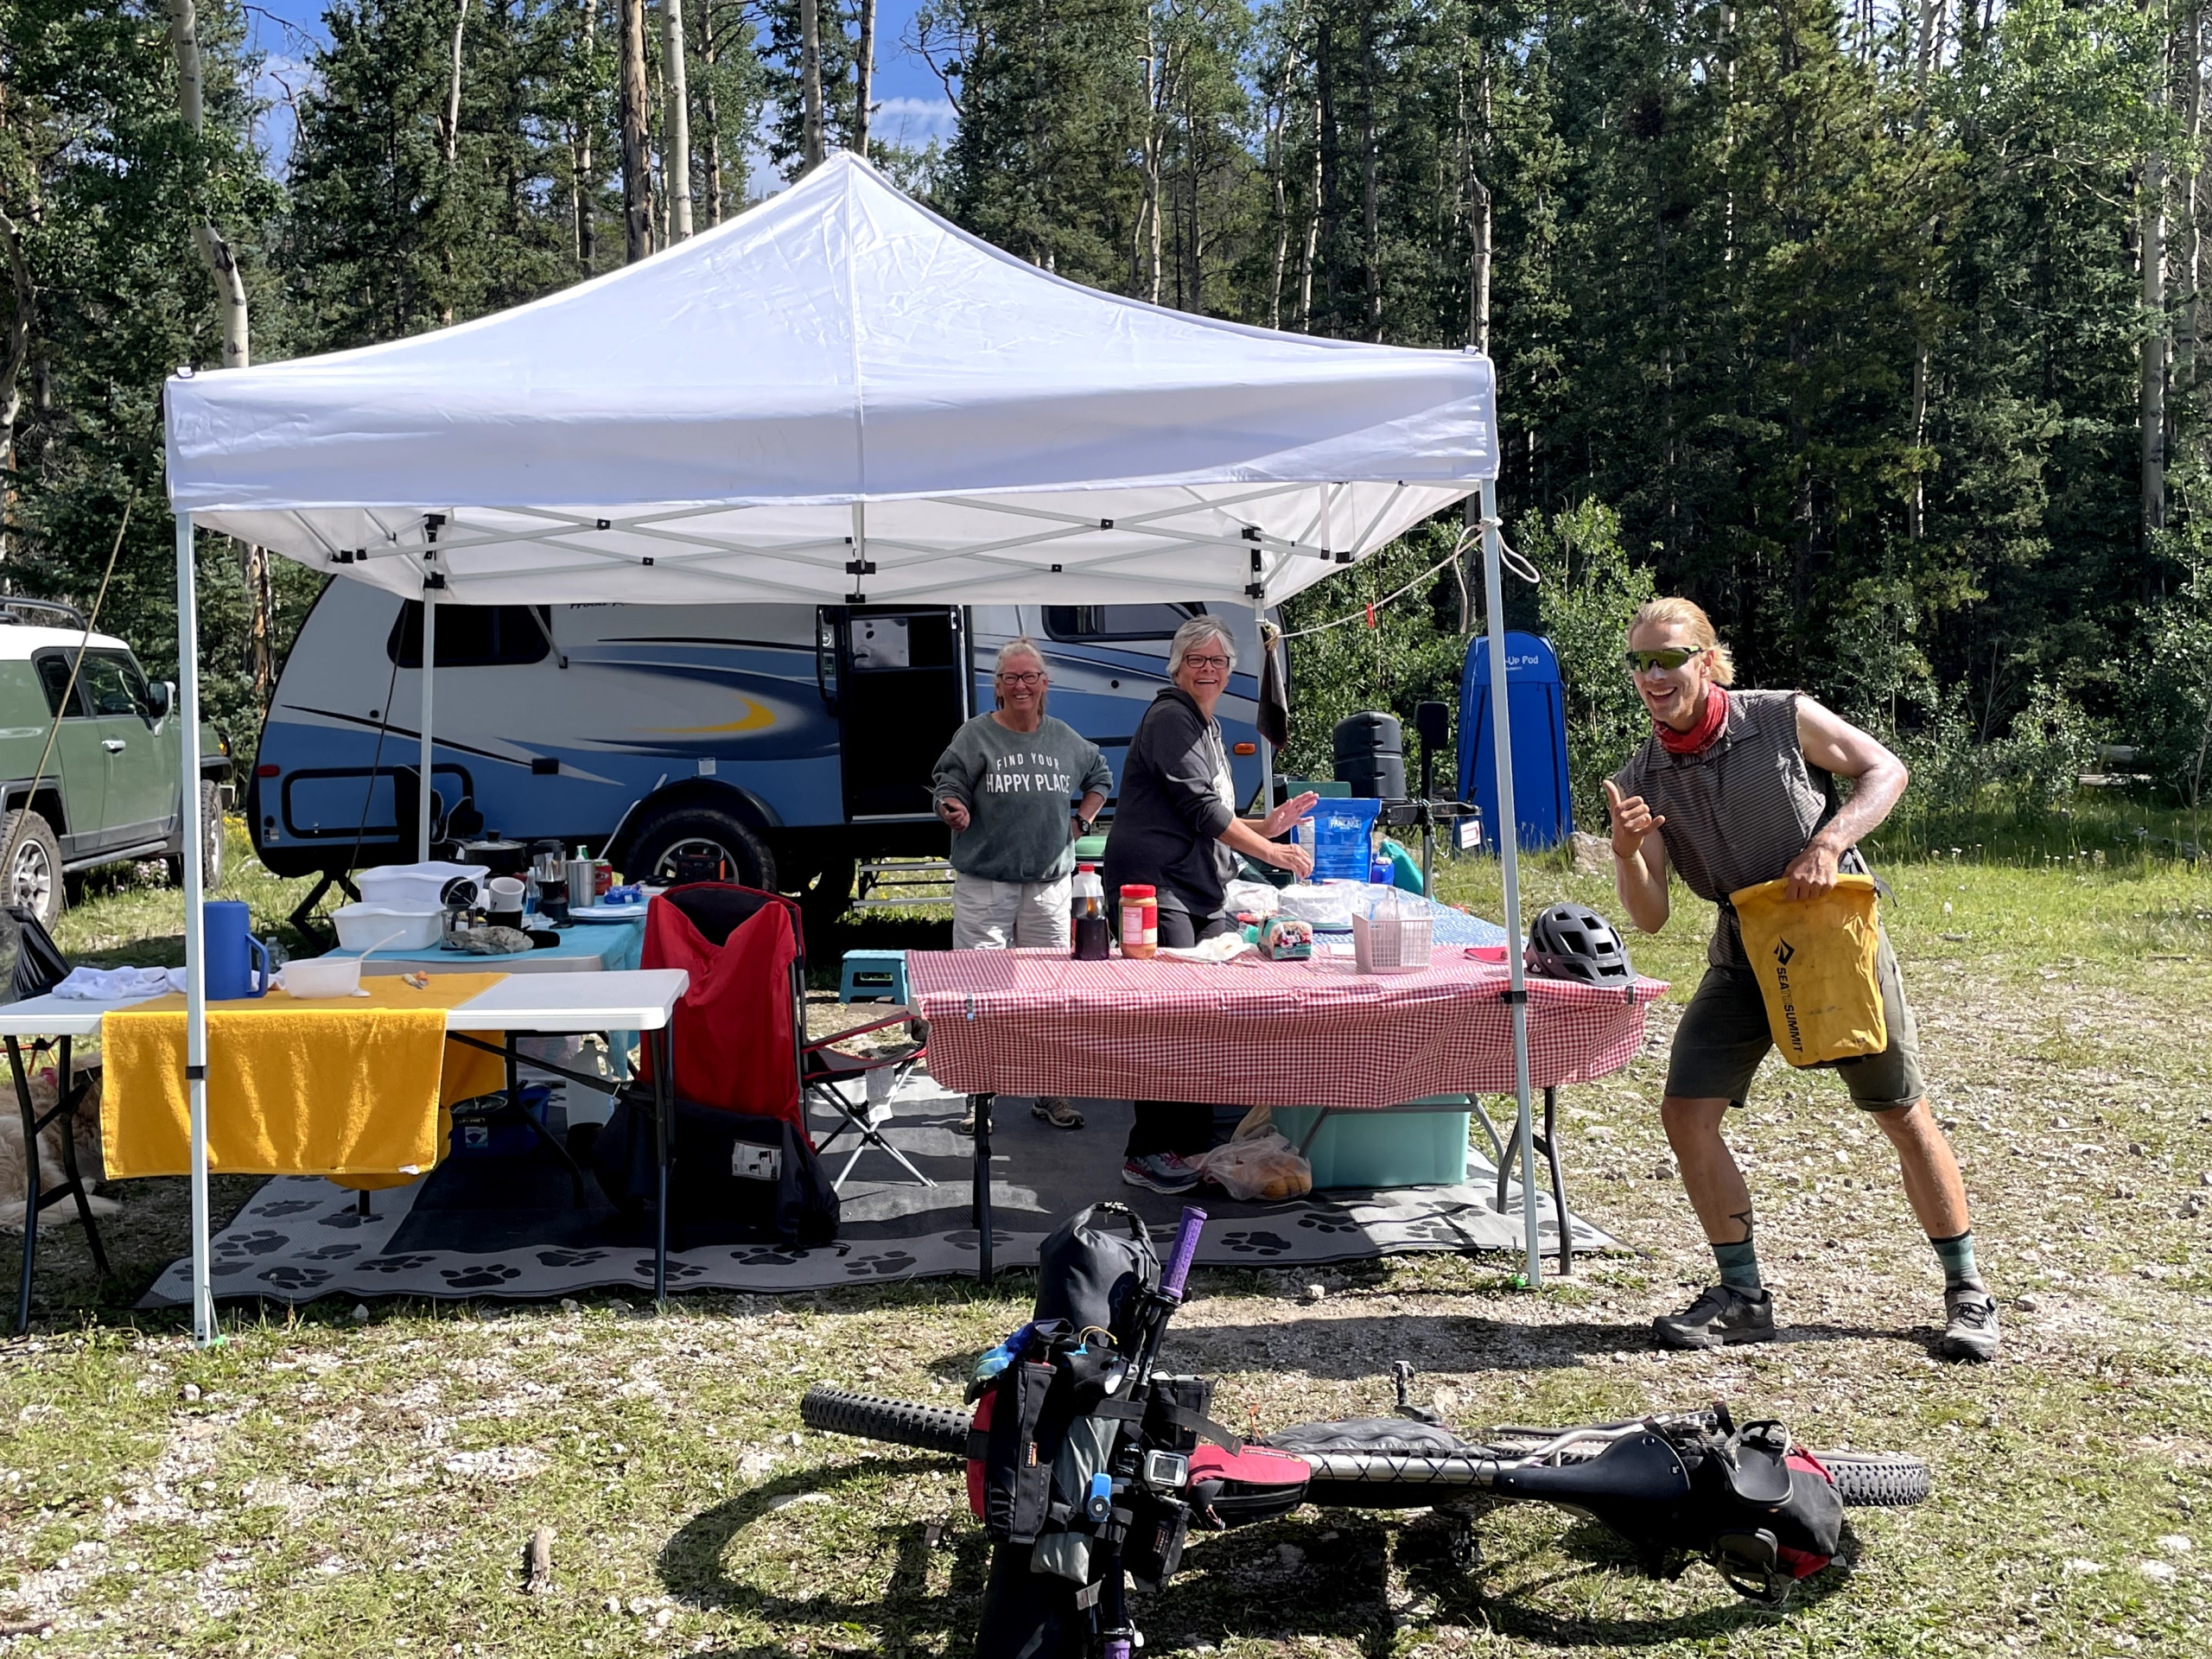

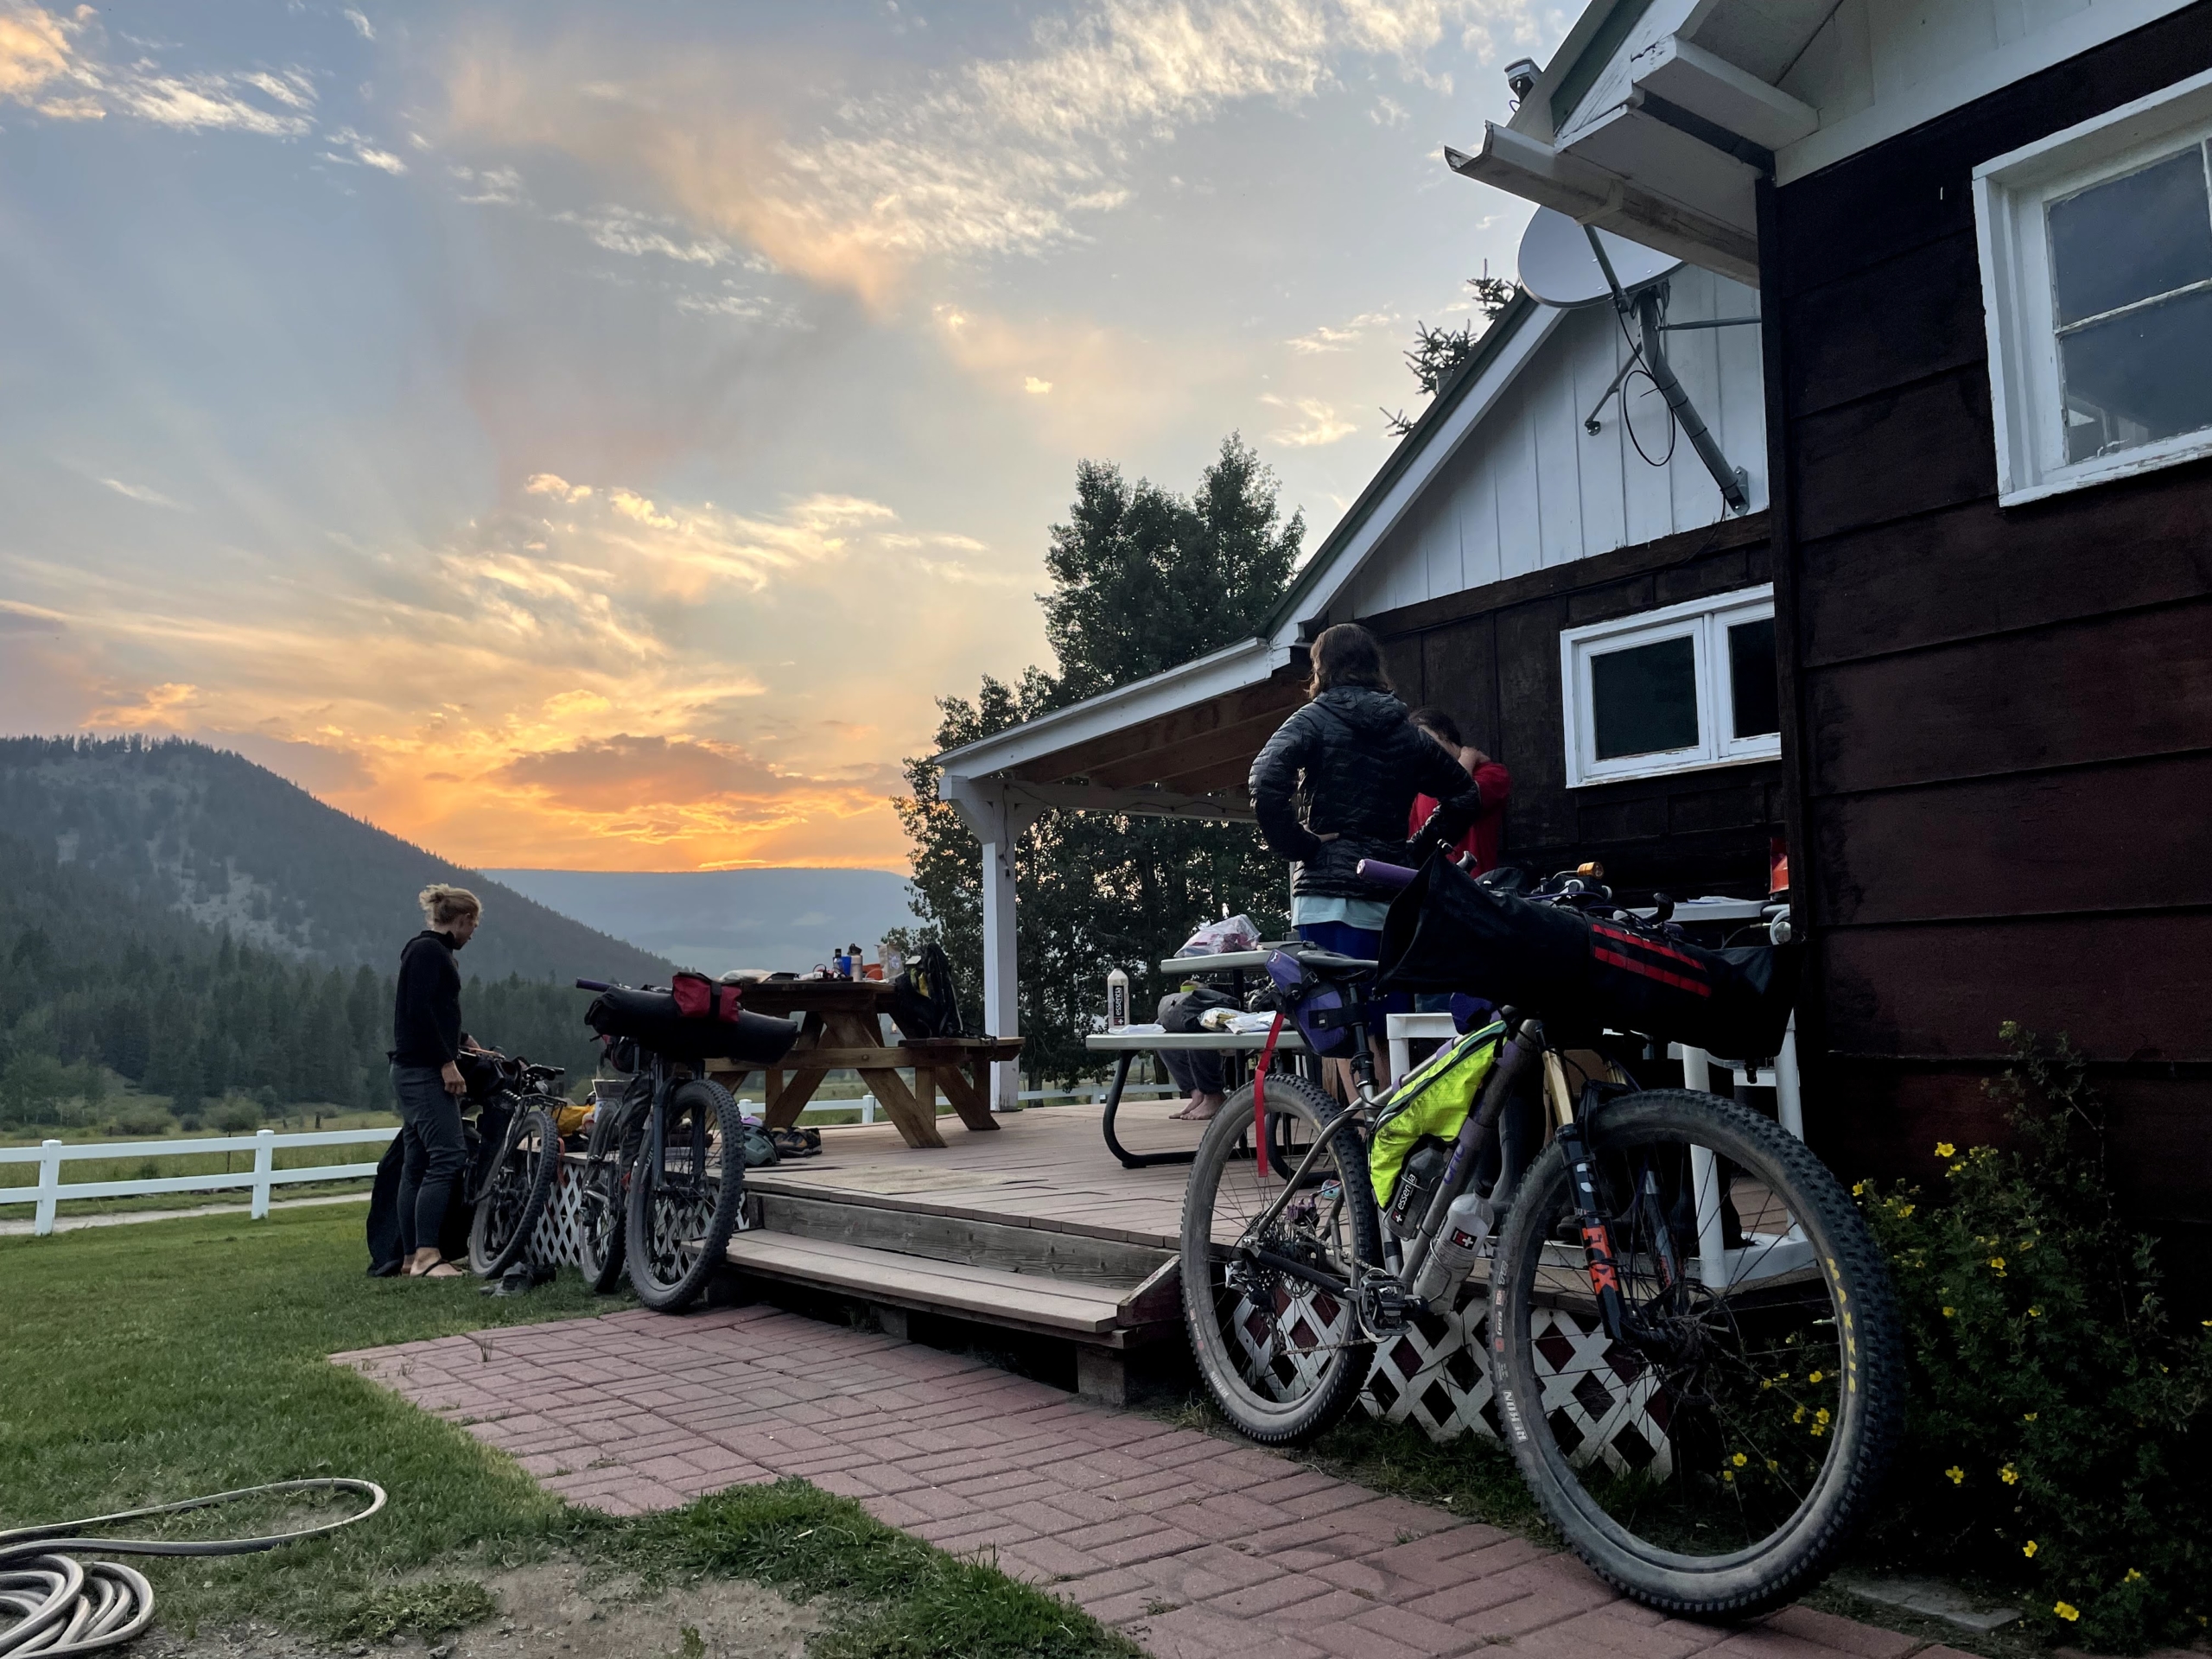
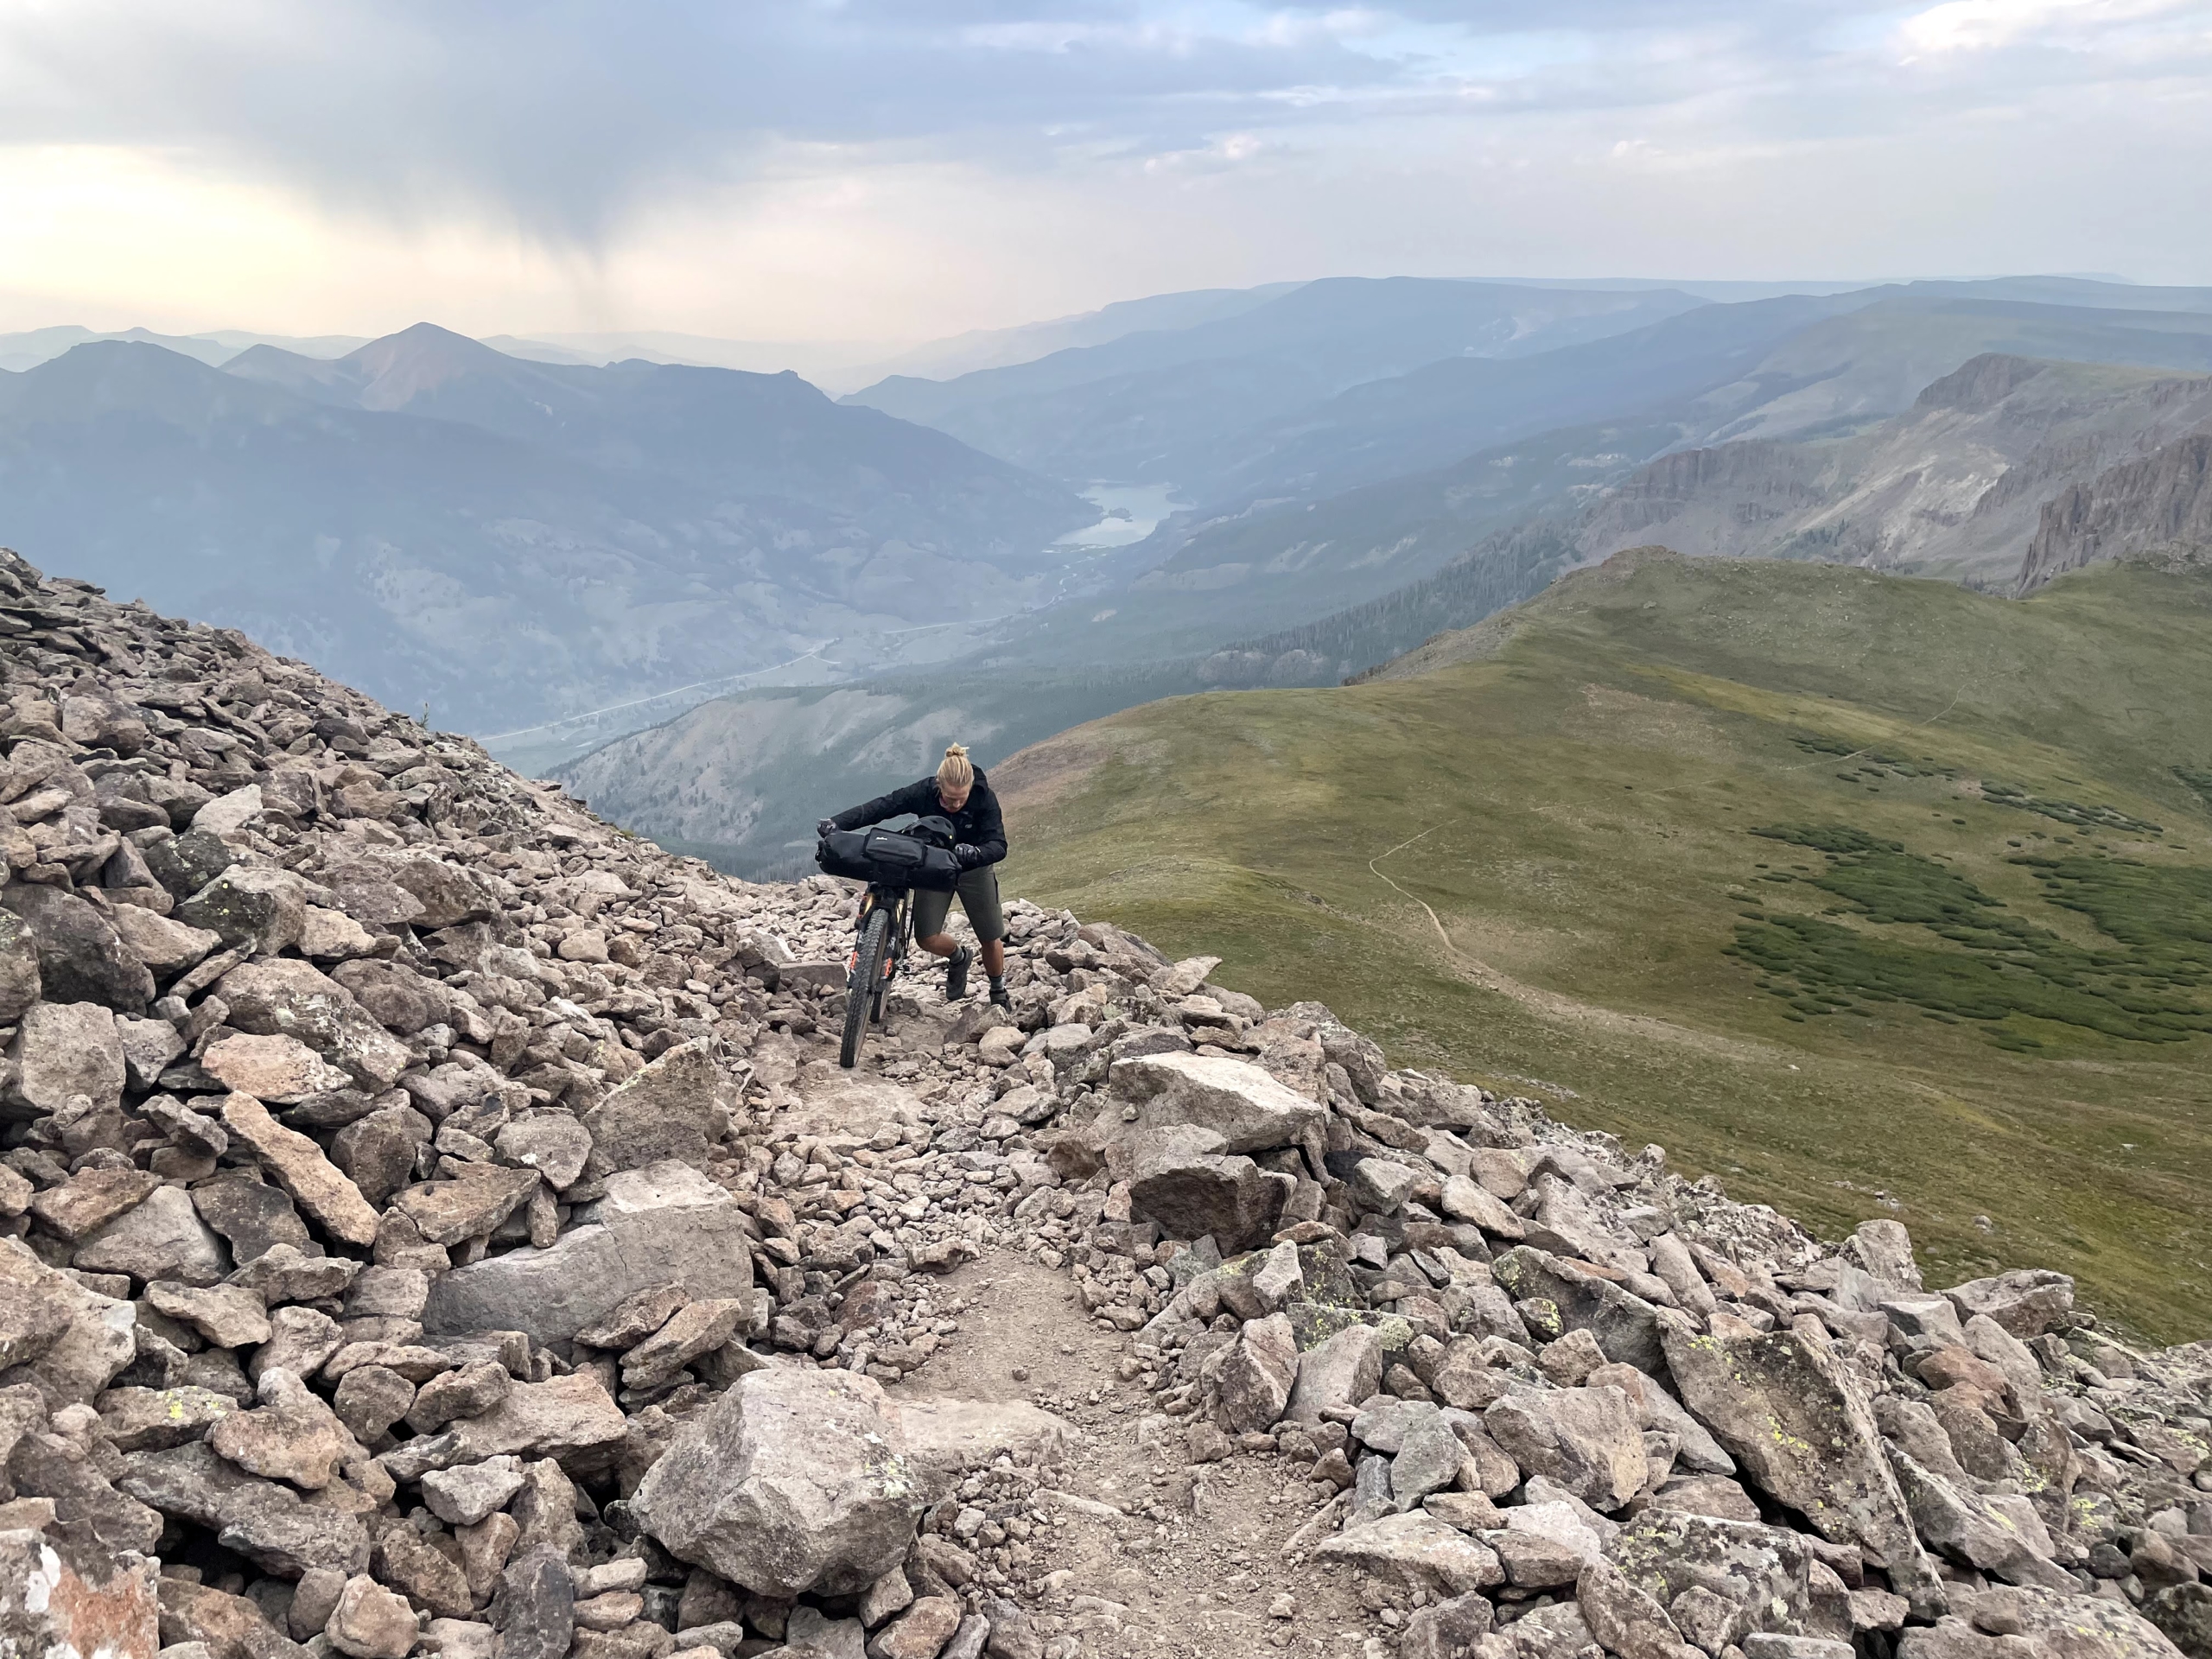
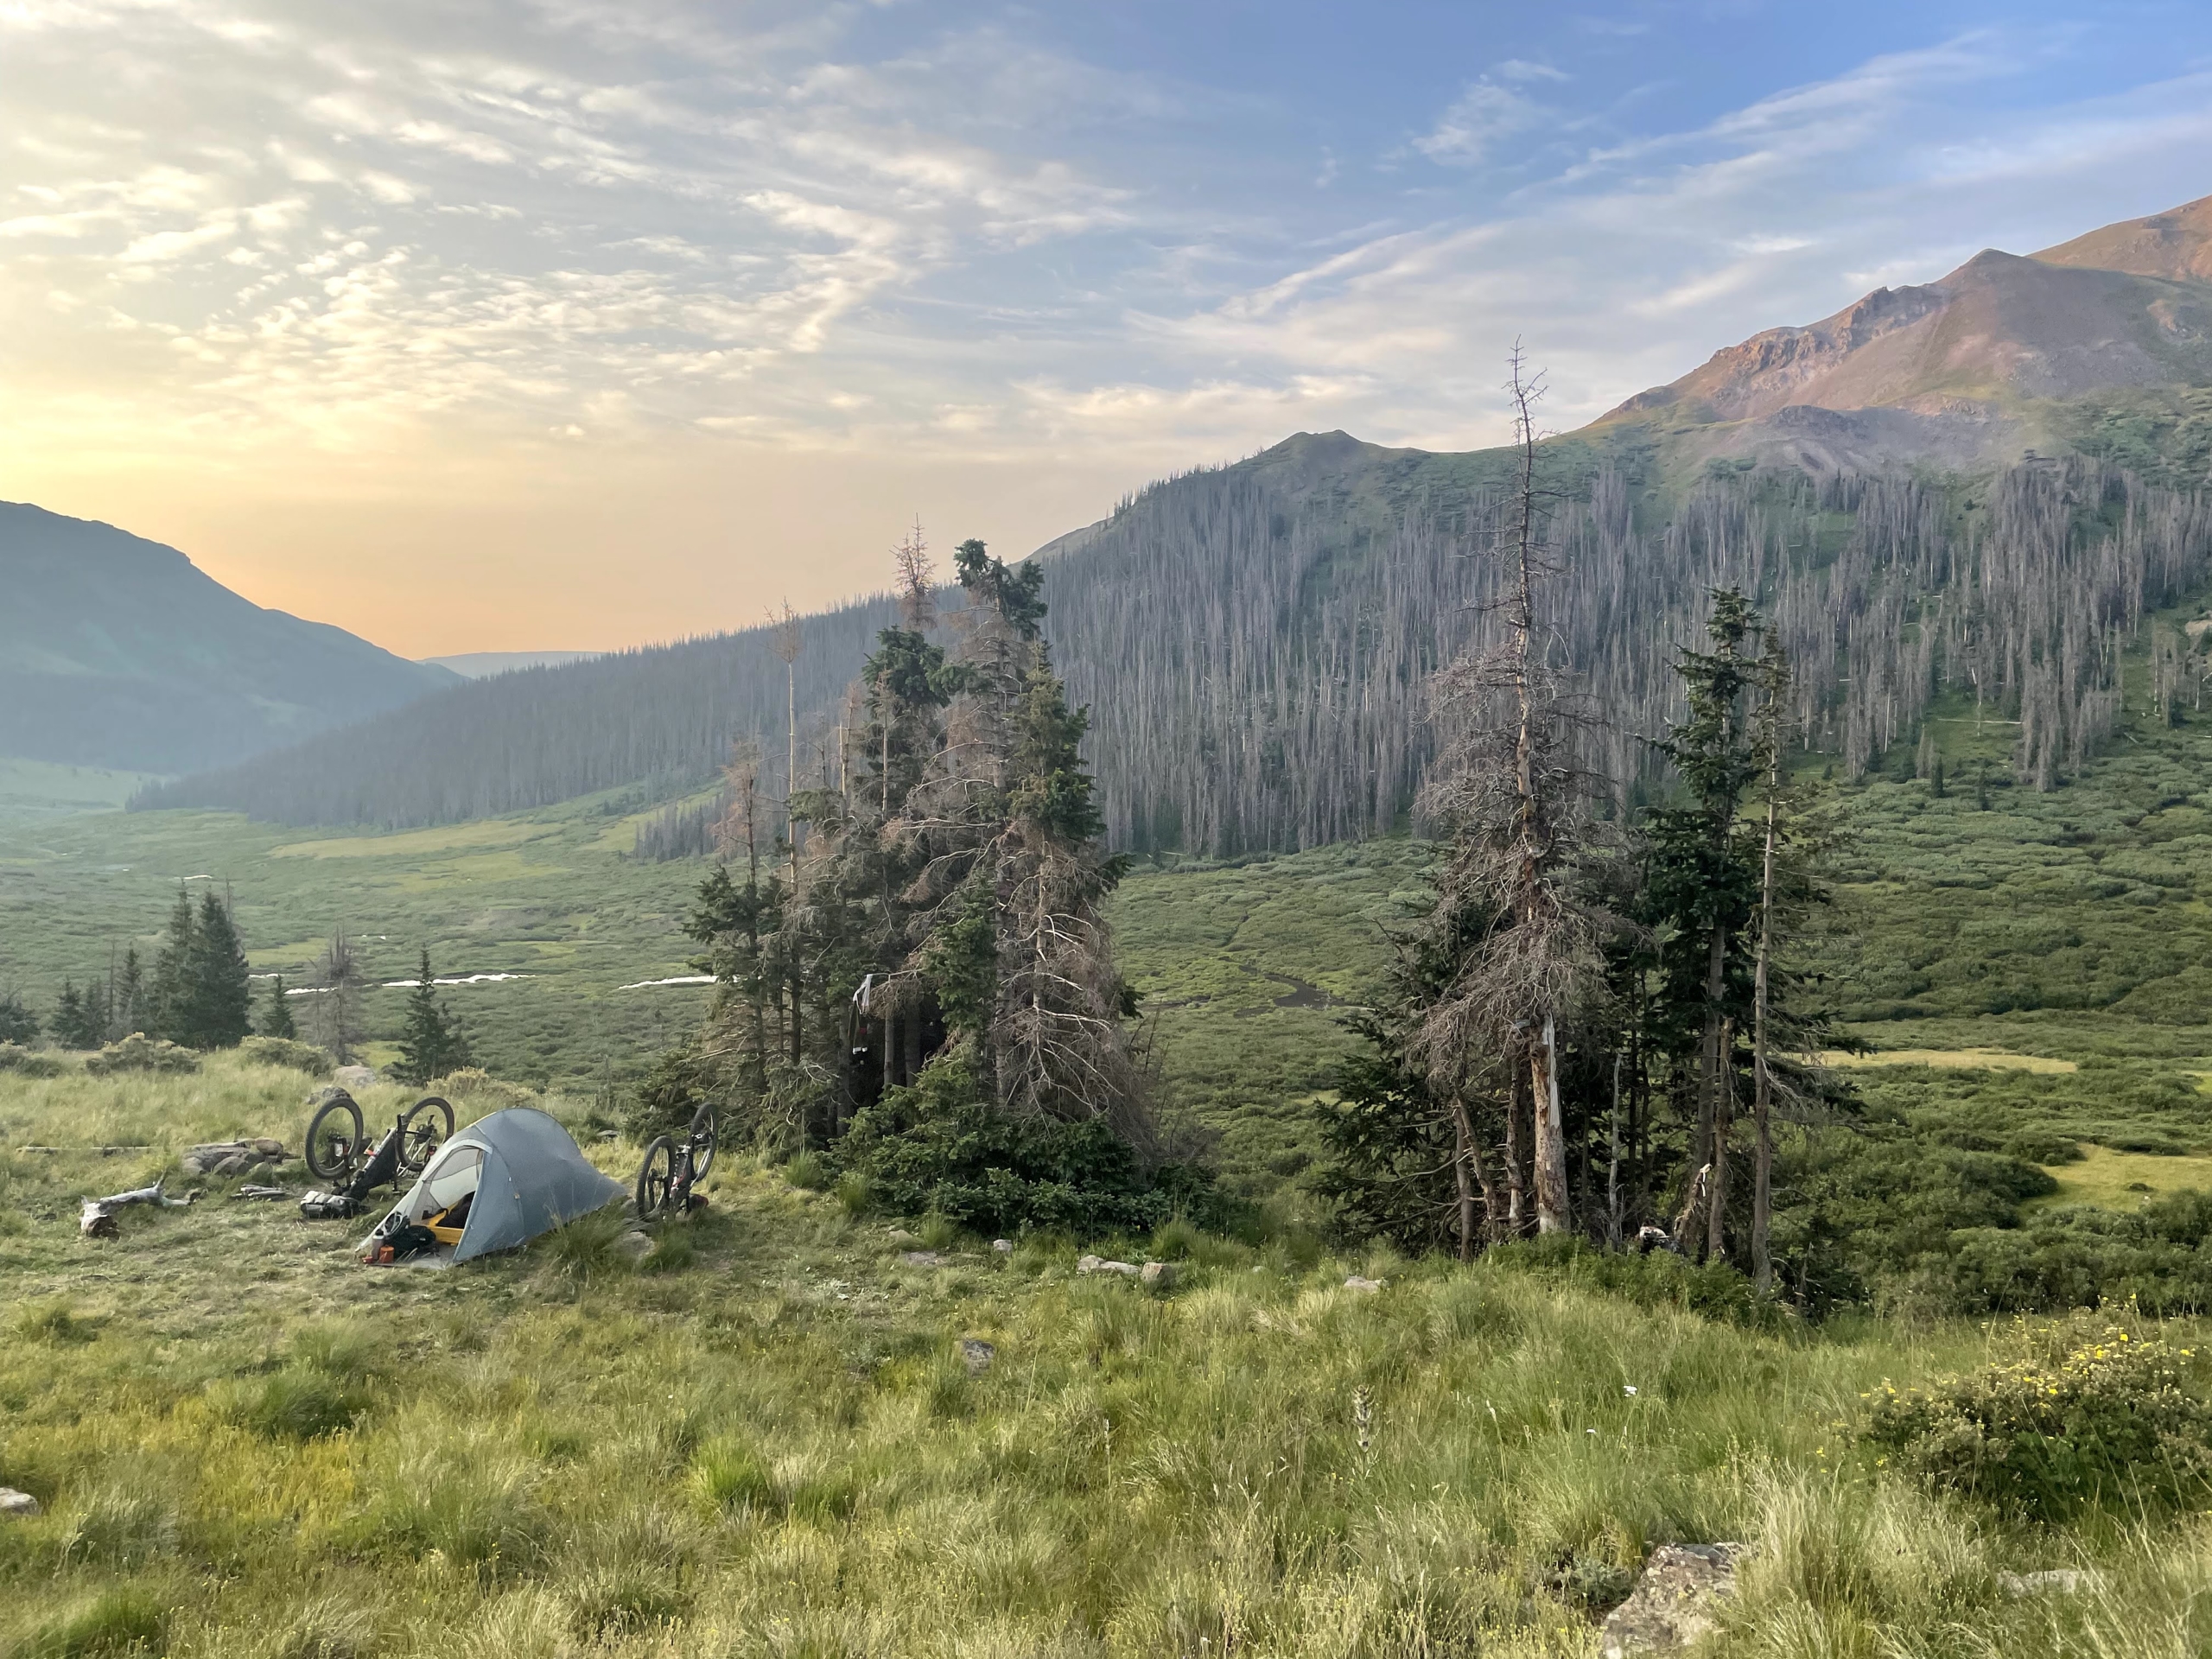
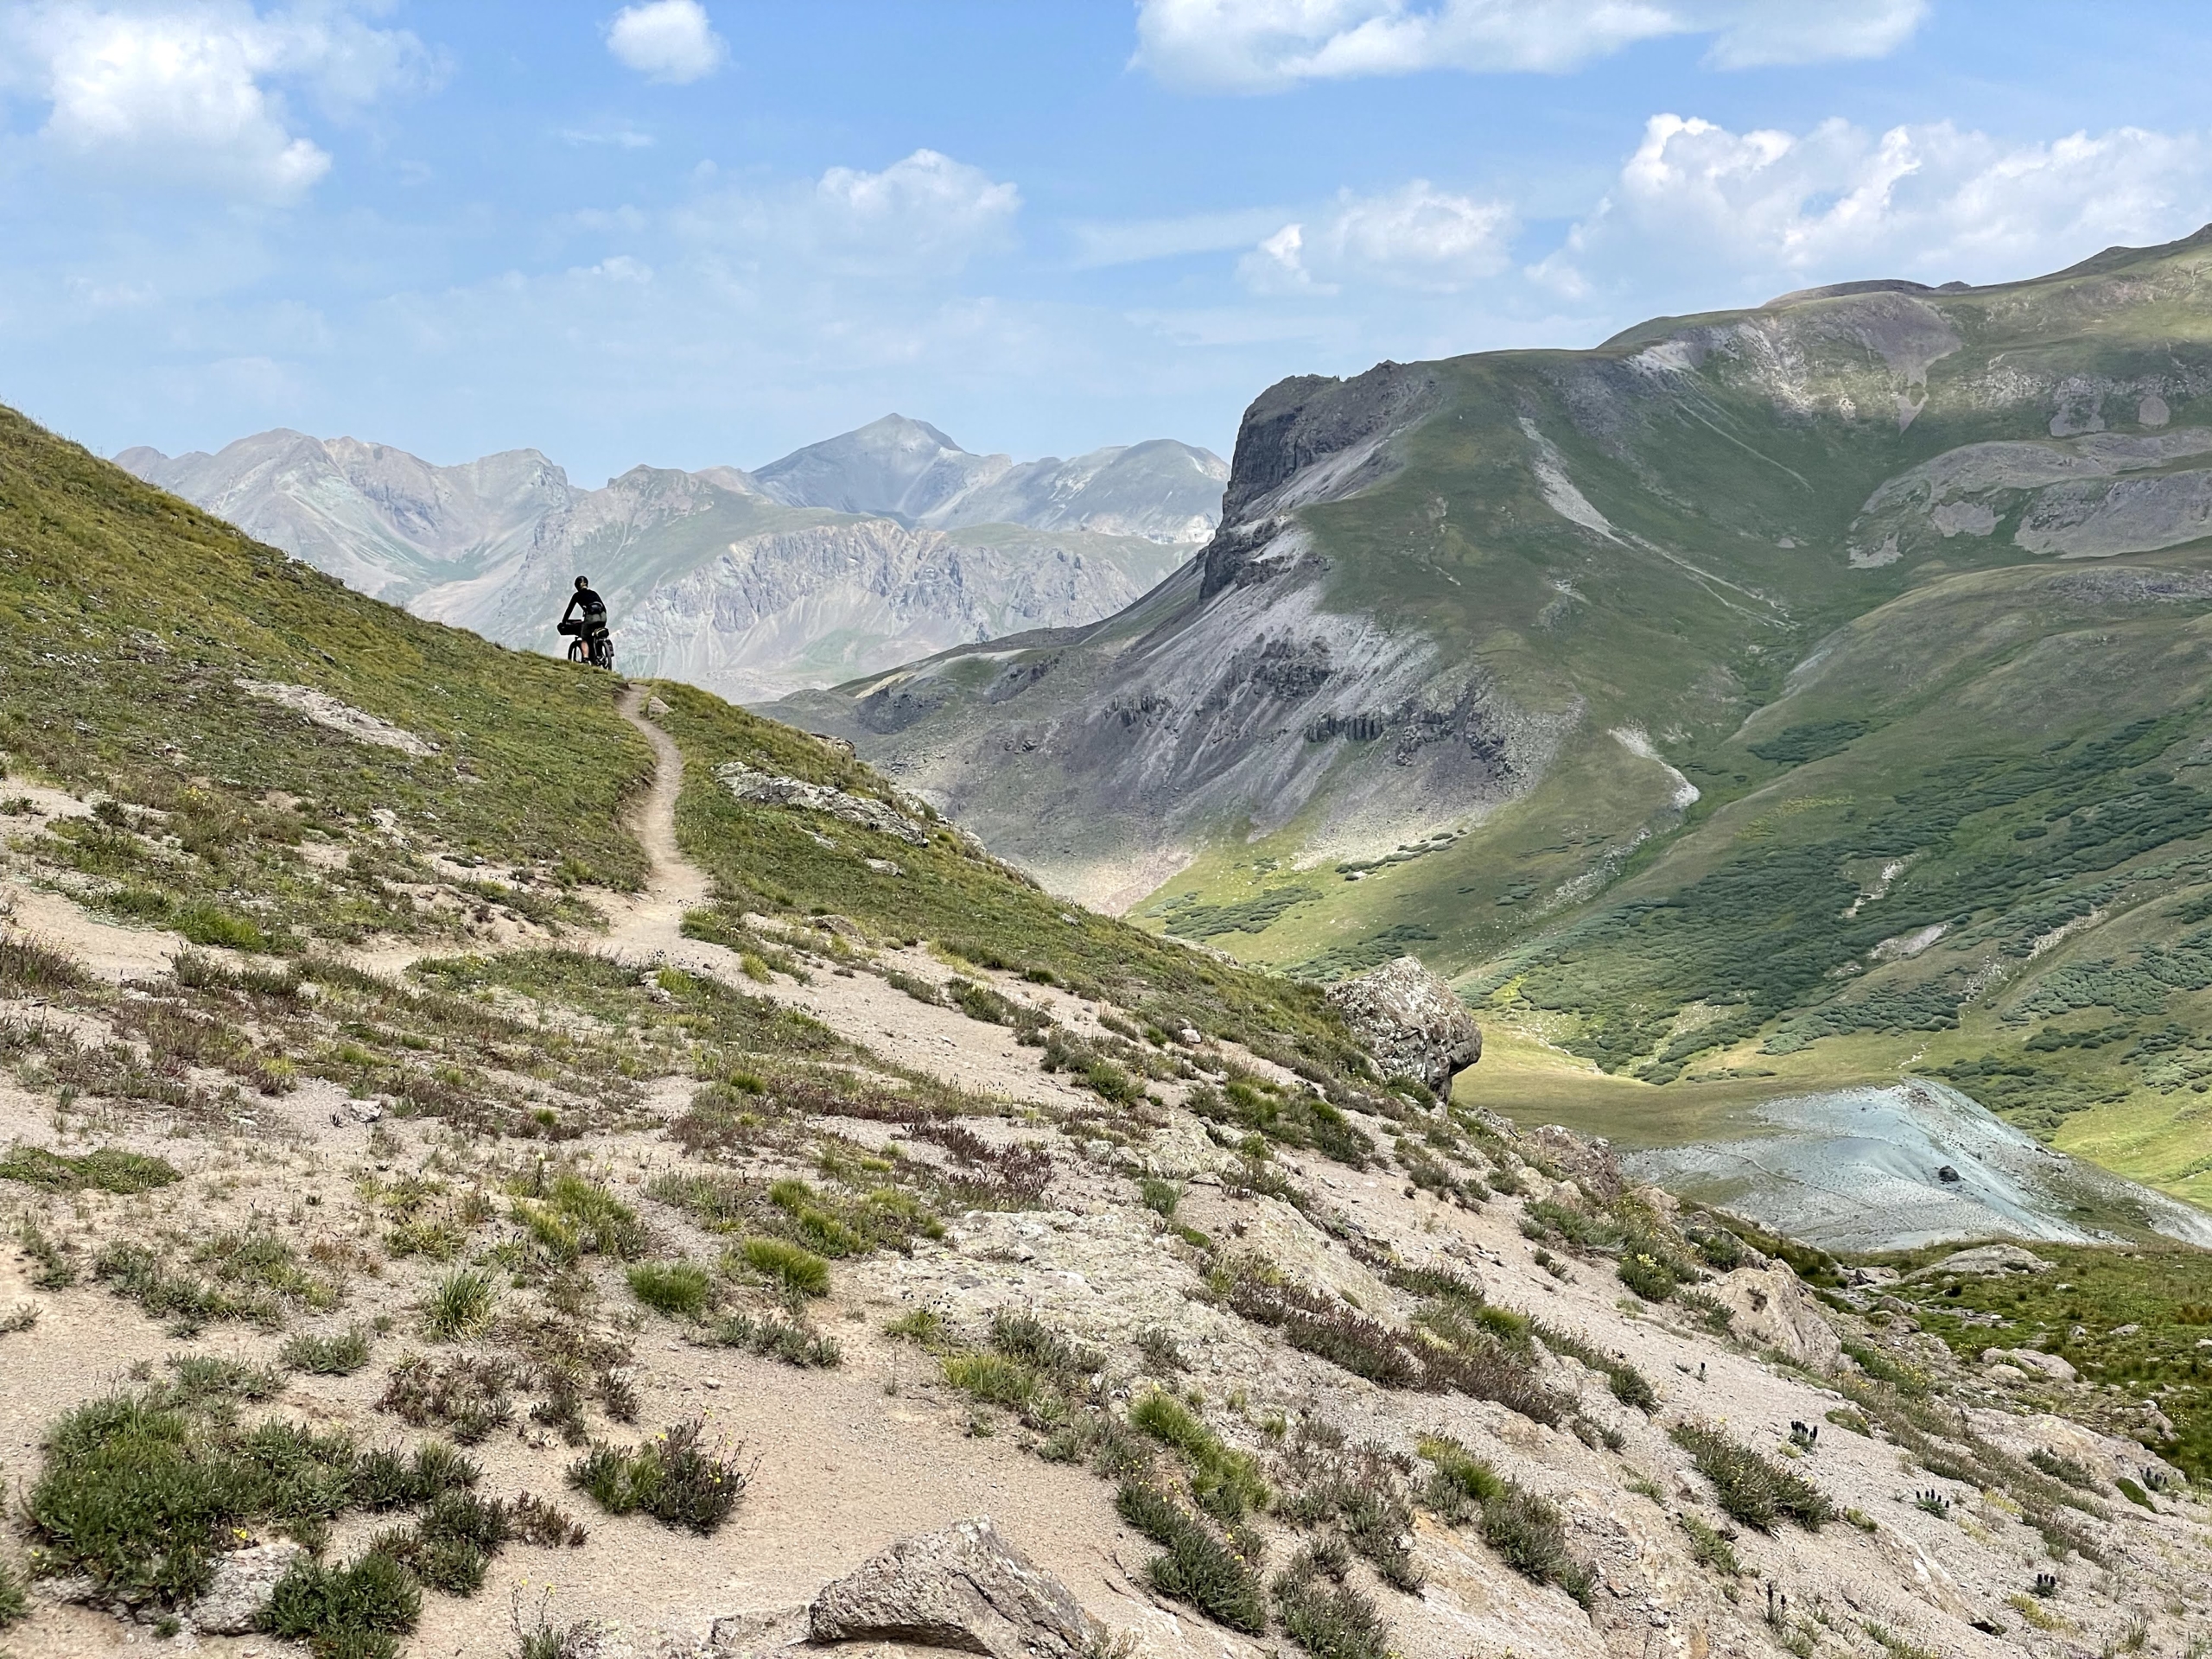
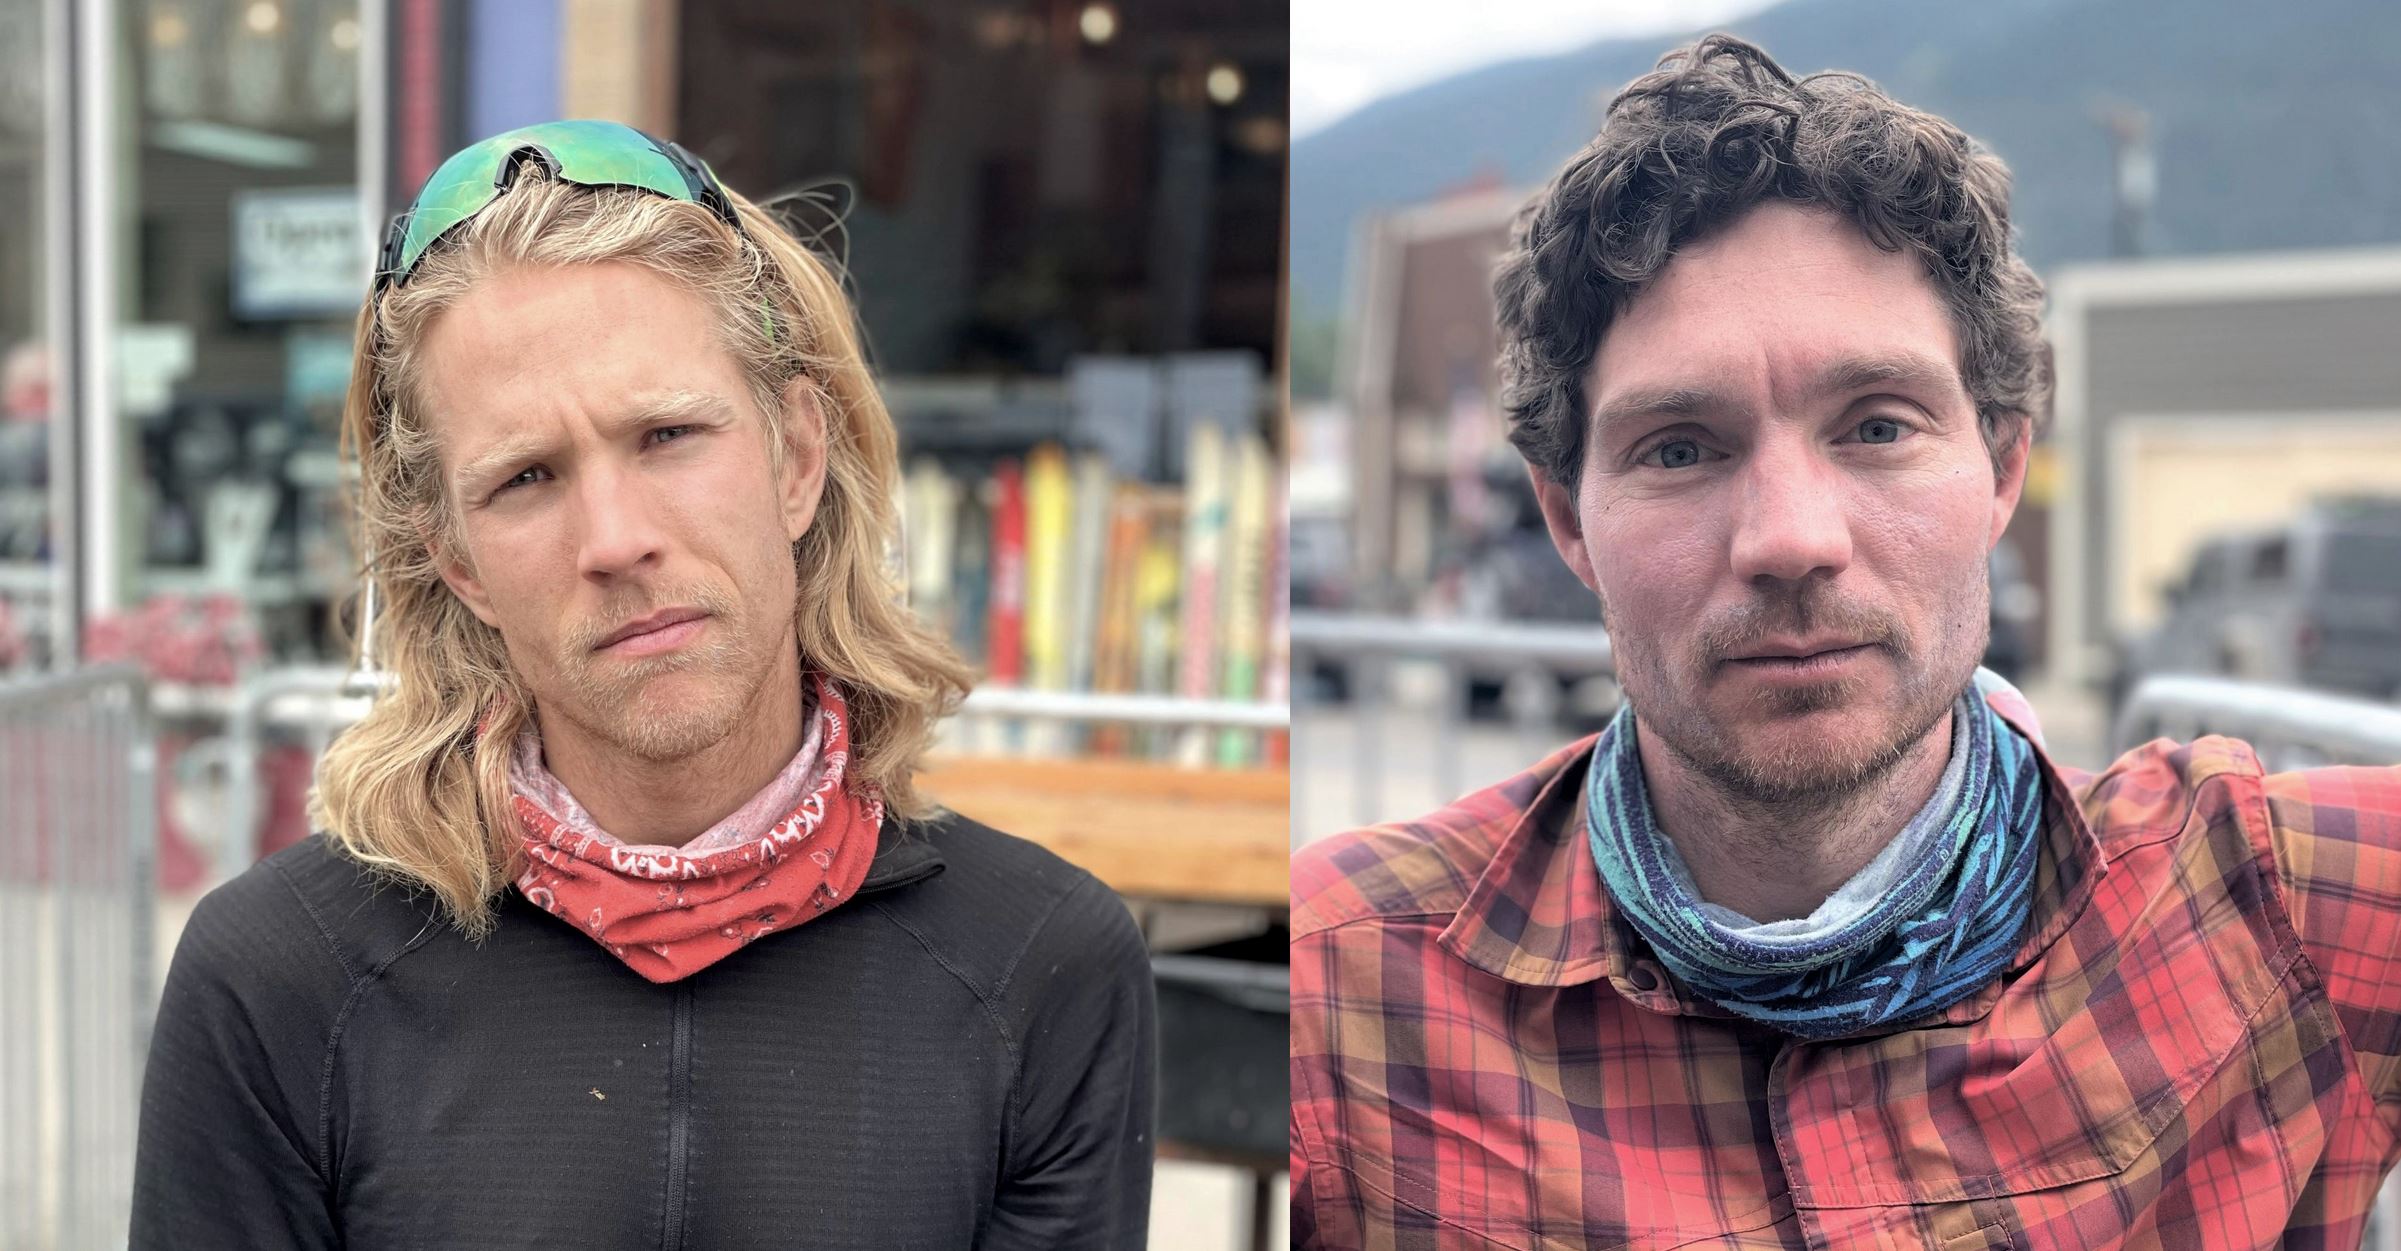
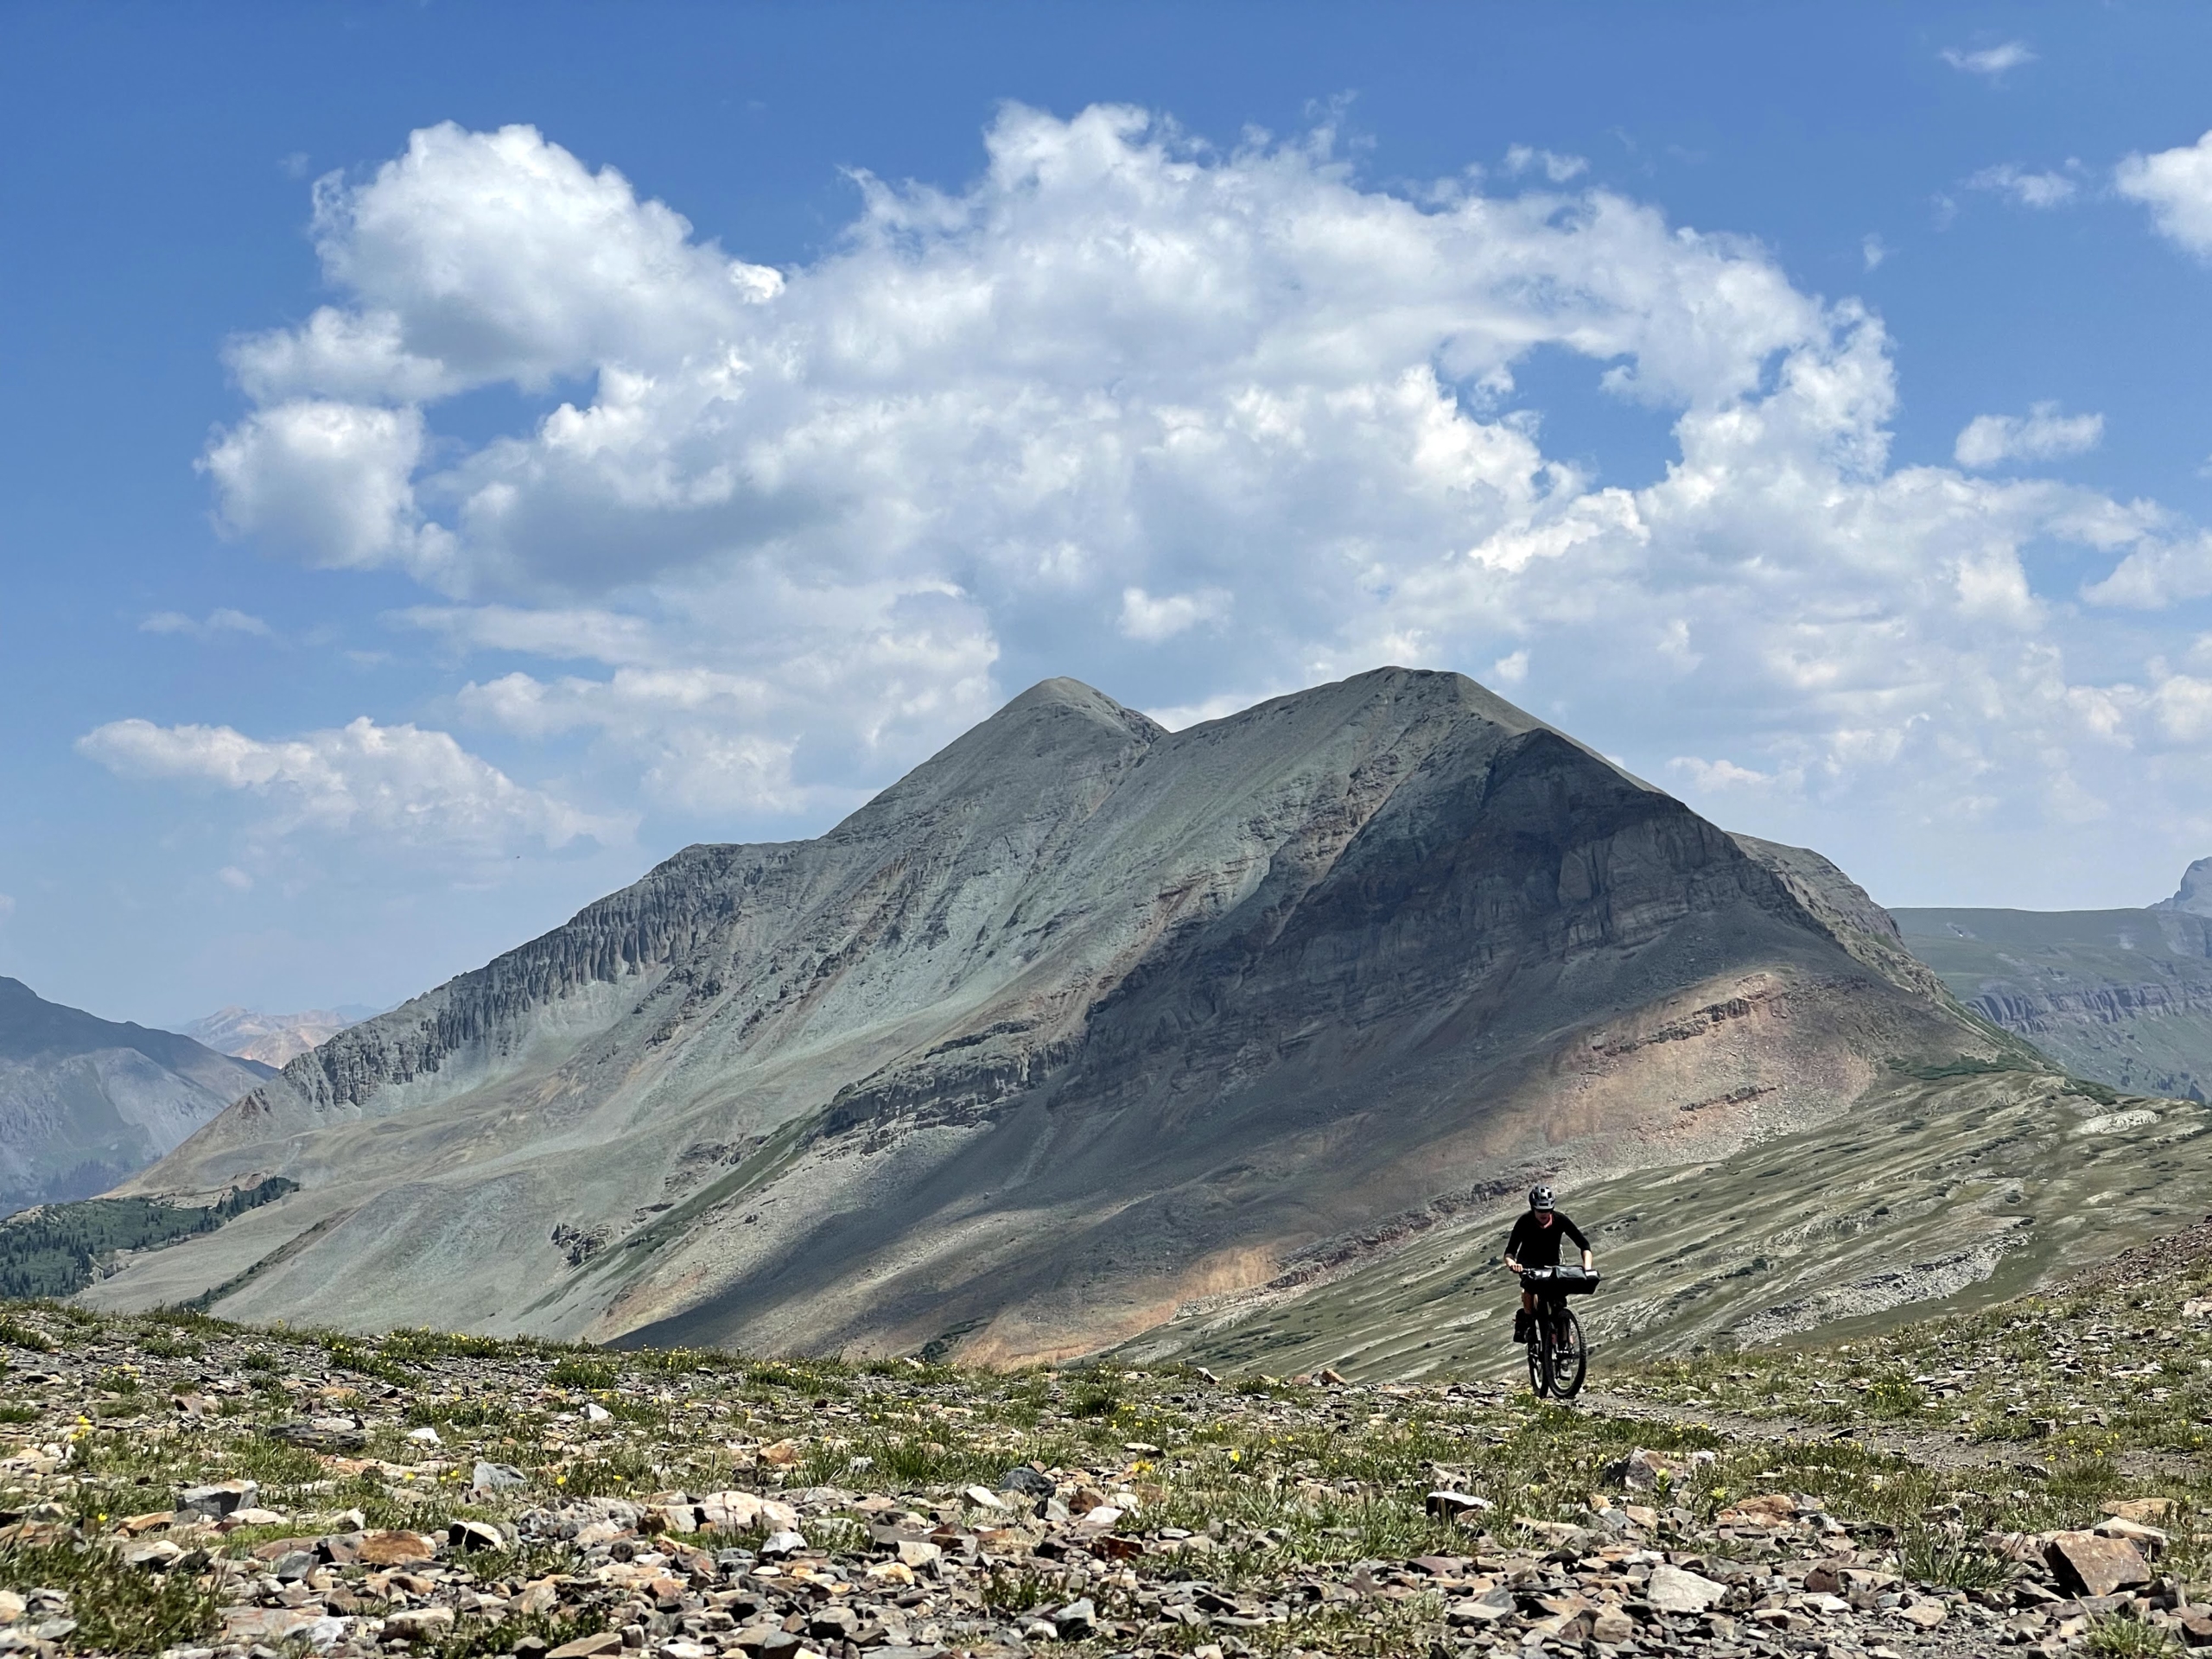

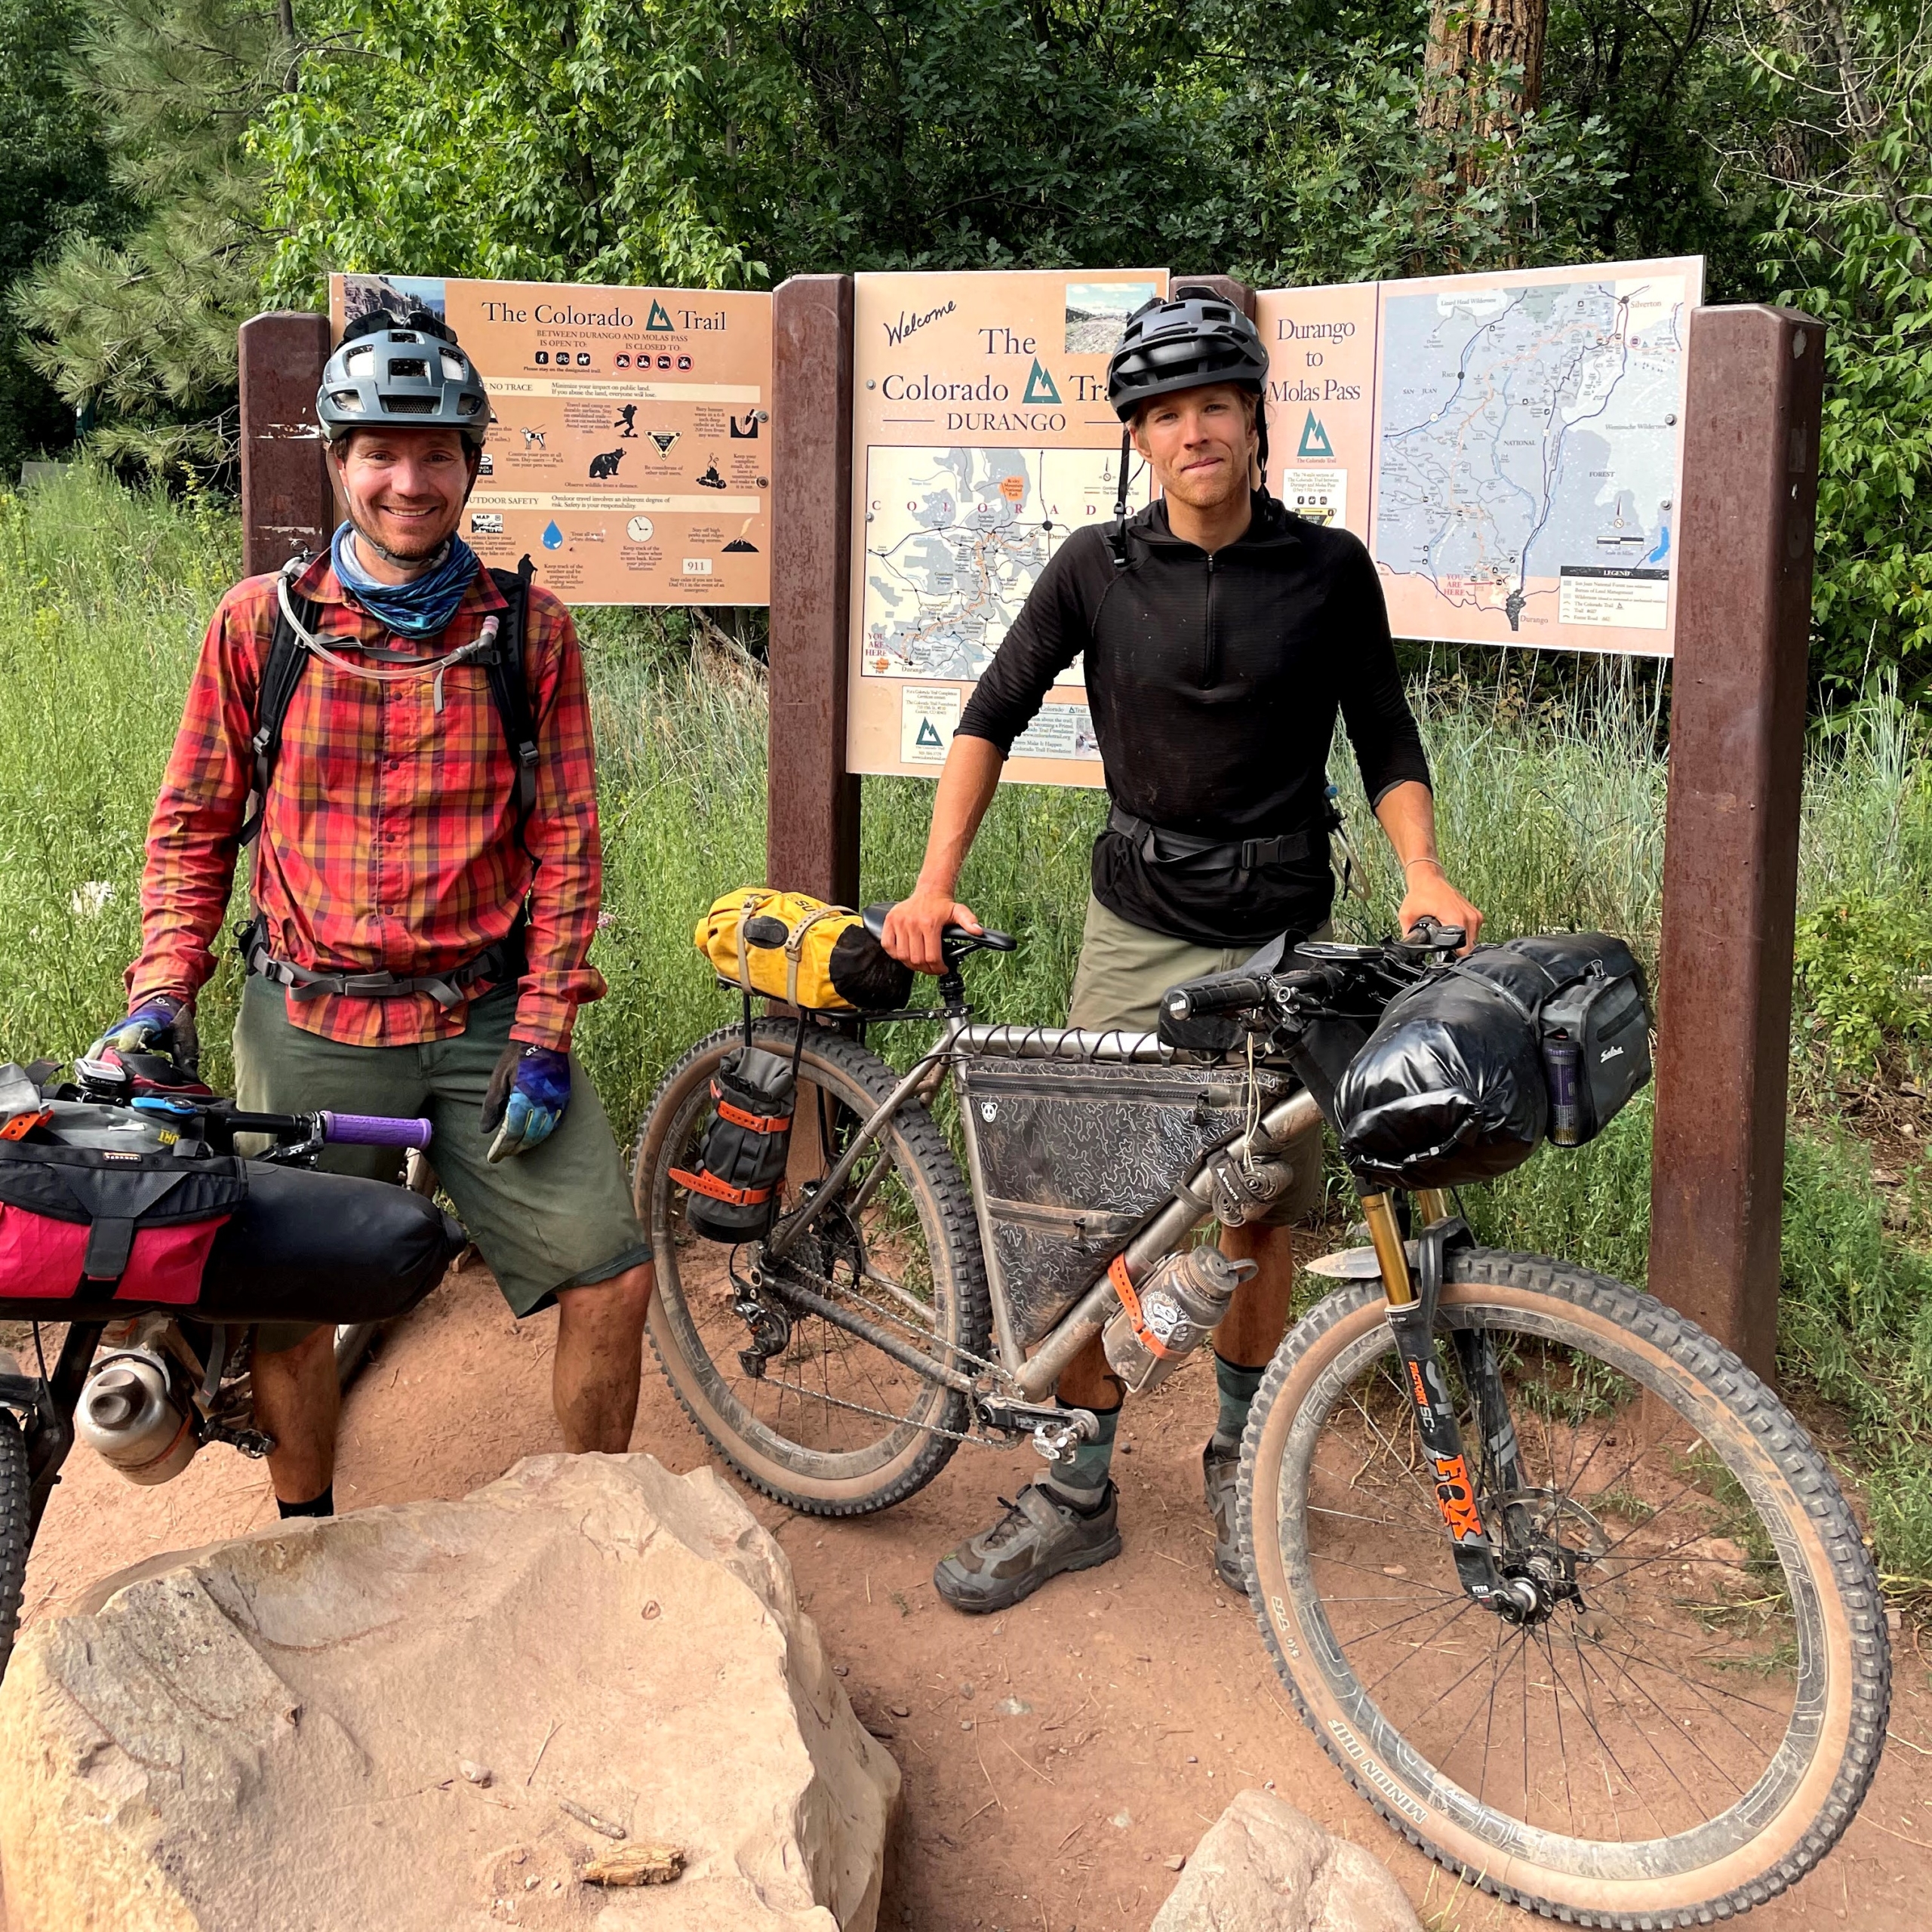

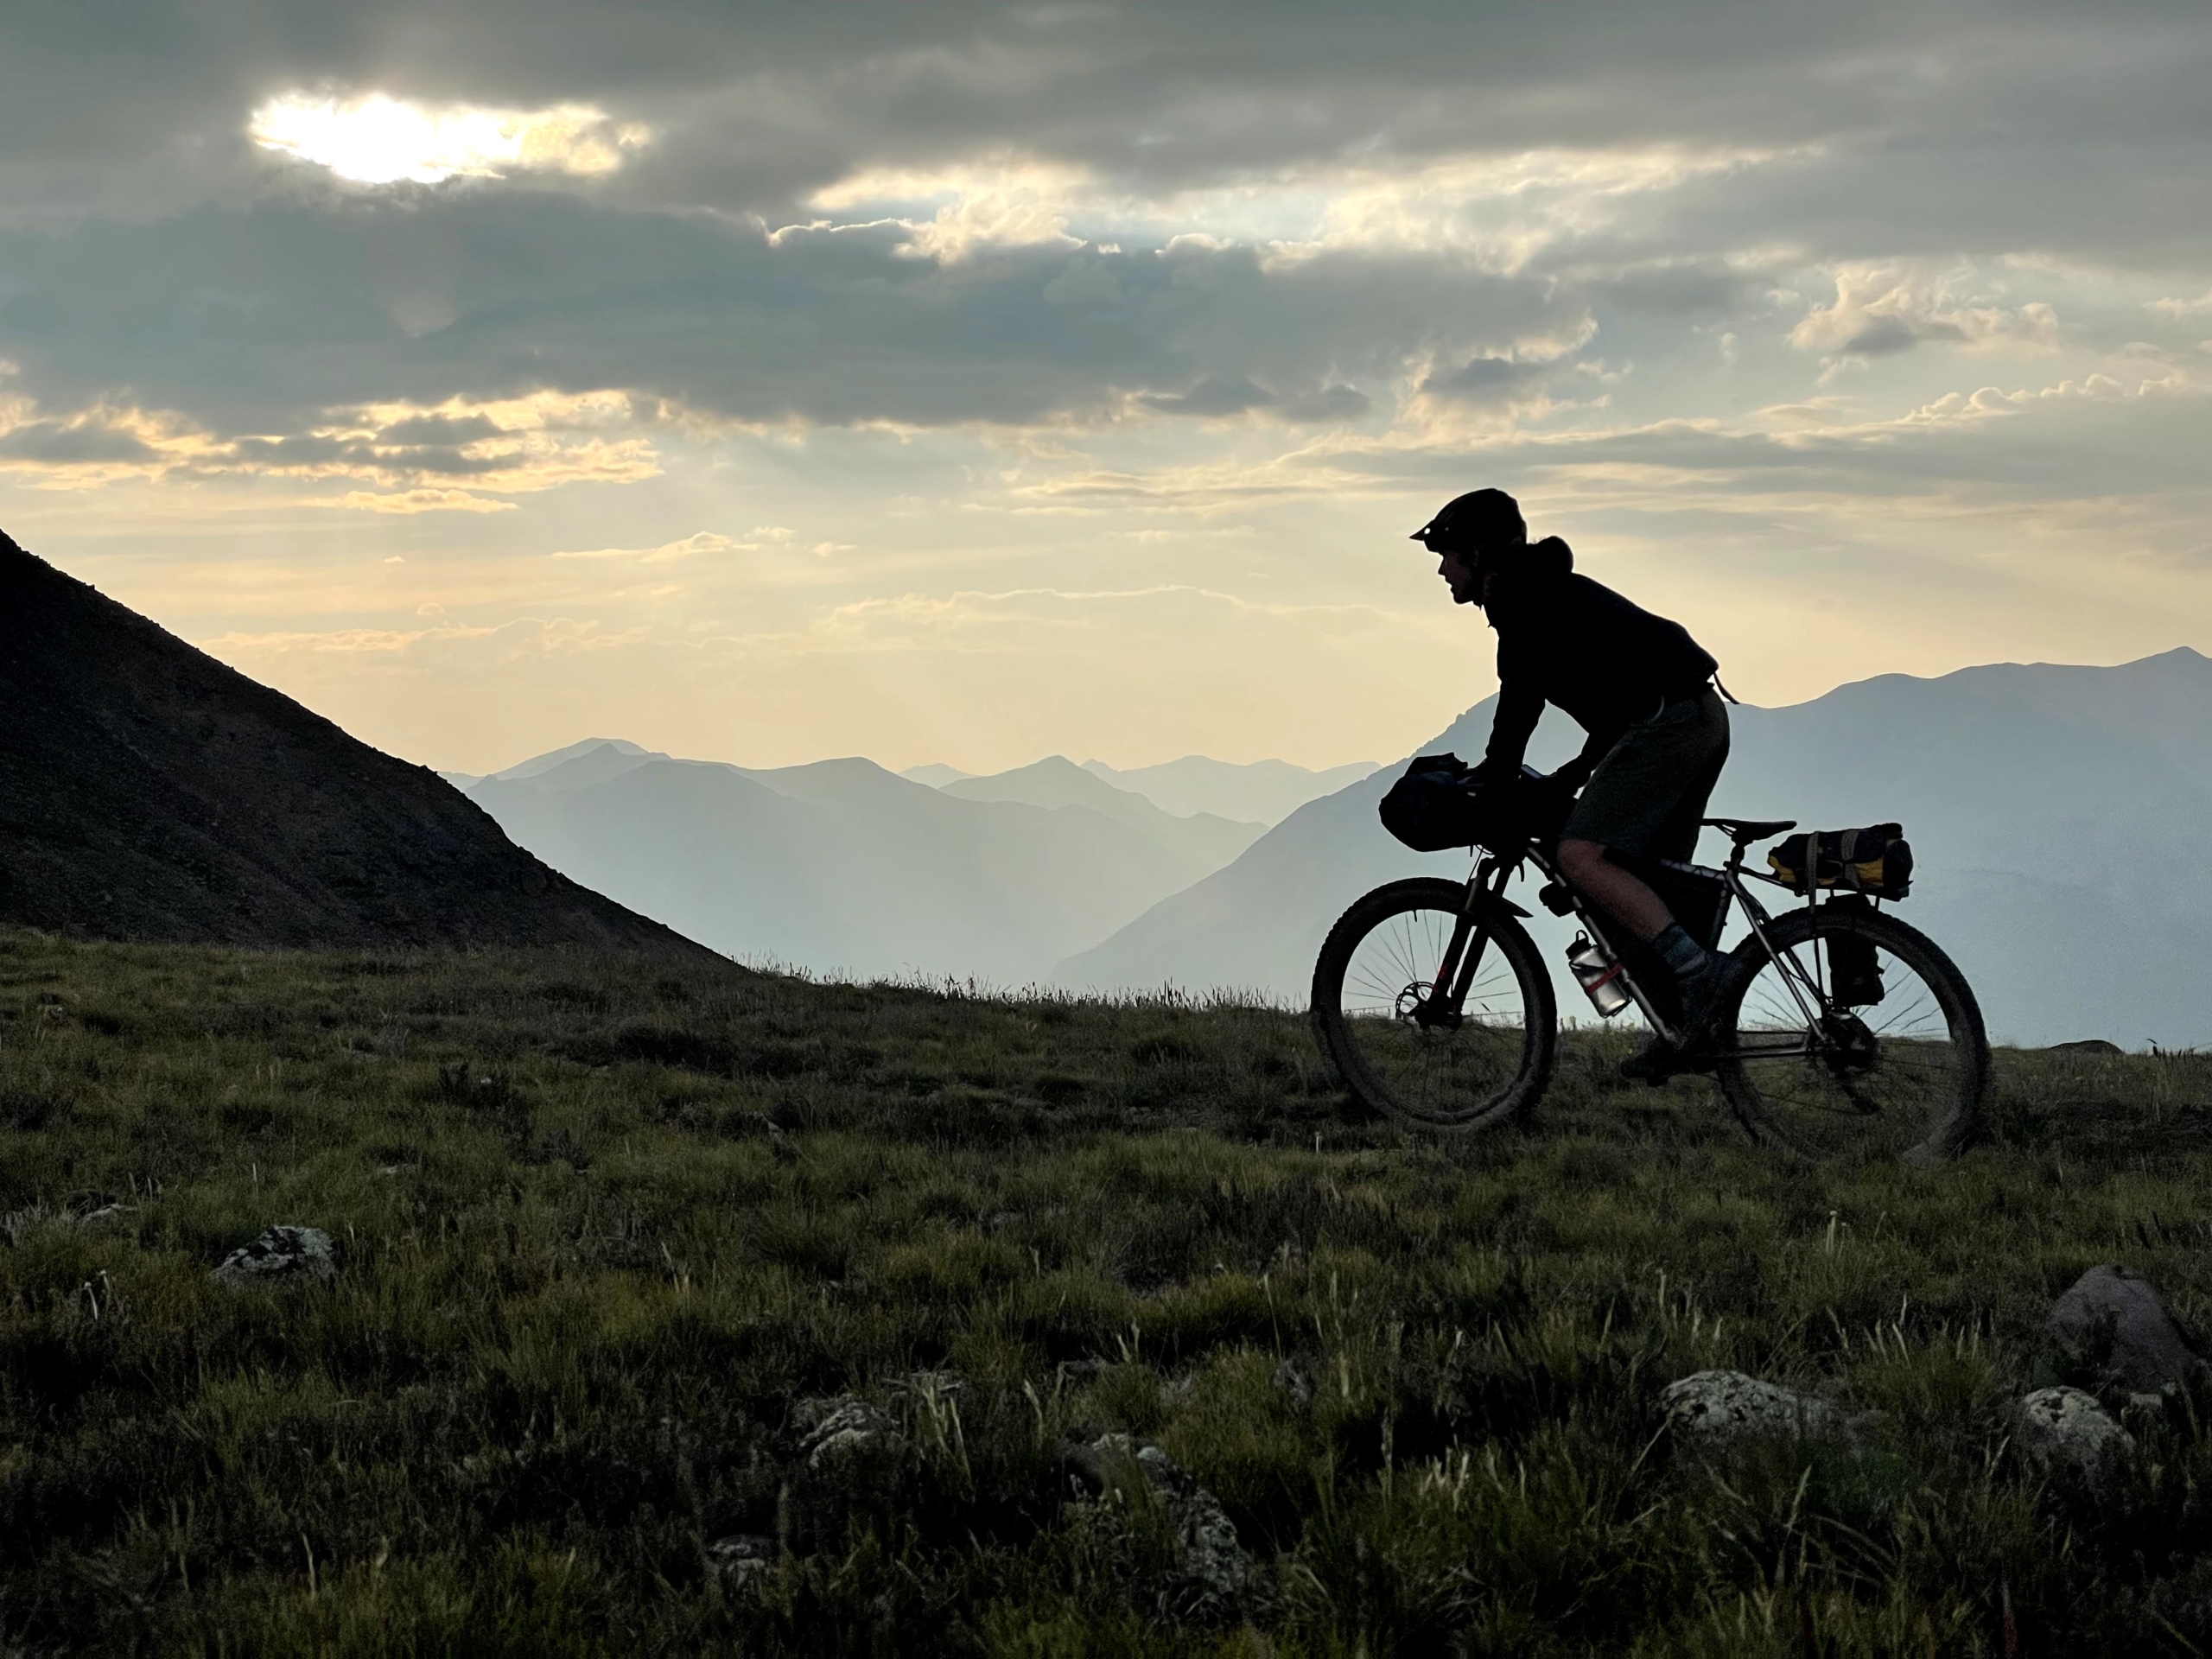


")


")